Advertisement
If you have a new account but are having problems posting or verifying your account, please email us on hello@boards.ie for help. Thanks :)
Hello all! Please ensure that you are posting a new thread or question in the appropriate forum. The Feedback forum is overwhelmed with questions that are having to be moved elsewhere. If you need help to verify your account contact hello@boards.ie
Please note that it is not permitted to have referral links posted in your signature. Keep these links contained in the appropriate forum. Thank you.

https://www.boards.ie/discussion/2055940817/signature-rules
Hi all! We have been experiencing an issue on site where threads have been missing the latest postings. The platform host Vanilla are working on this issue. A workaround that has been used by some is to navigate back from 1 to 10+ pages to re-sync the thread and this will then show the latest posts. Thanks, Mike.
Hi there,
There is an issue with role permissions that is being worked on at the moment.
If you are having trouble with access or permissions on regional forums please post here to get access: https://www.boards.ie/discussion/2058365403/you-do-not-have-permission-for-that#latest

Today I did something to my car (volume 2)

1185186188190191197

Comments

  • Registered Users, Registered Users 2 Posts: 6,256 ✭✭✭Ubbquittious


    mk7r wrote: »
    Hope you have a new one to go on, second hand arent worth the time it takes to fit them


    I have feck all yet. Was going to get it refurbished but might buy one from Poland instead


  • Registered Users, Registered Users 2 Posts: 784 ✭✭✭mk7r


    I have feck all yet. Was going to get it refurbished but might buy one from Poland instead

    JPRuth has them in stock in Kilkenny


  • Registered Users, Registered Users 2 Posts: 73,477 ✭✭✭✭colm_mcm


    New badges today. Straightforward enough job once you measure the position of the old ones
    Dental floss to take the old ones off
    Tar and glue remover to soften the glue
    Microfibre to unstick it

    3-B33-DEC1-7993-4117-90-A7-651950-CDF9-D5.jpg


  • Registered Users Posts: 3,381 ✭✭✭vintagevrs


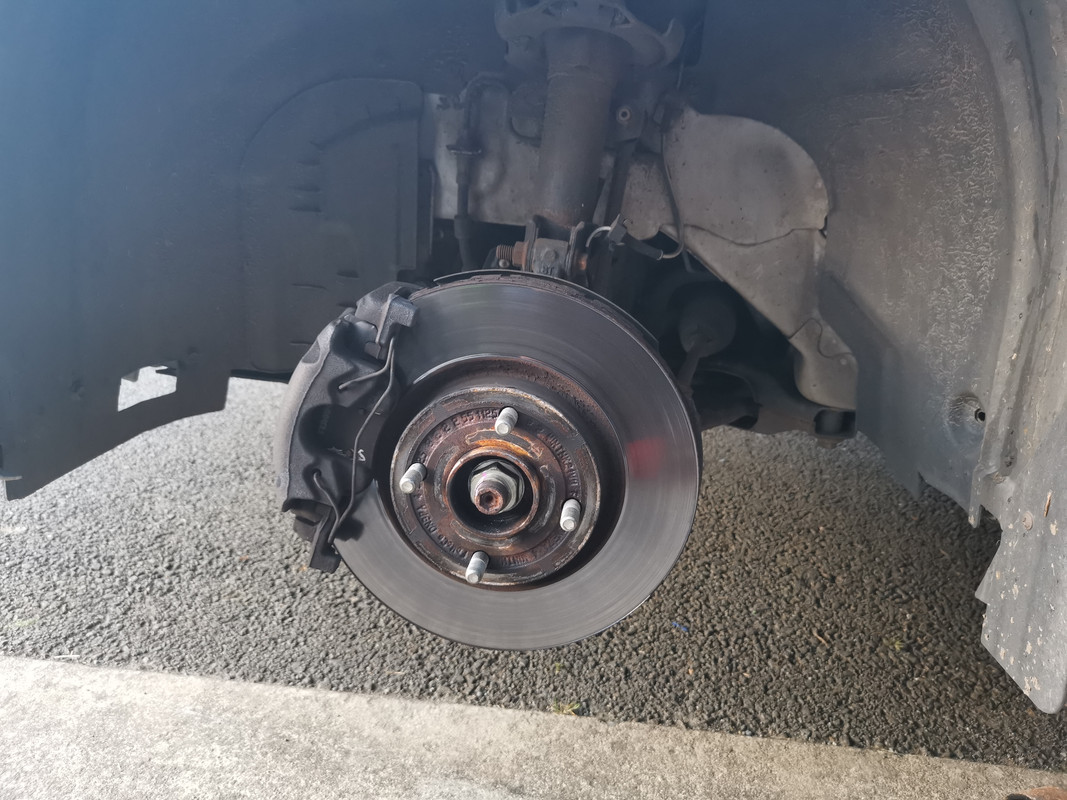
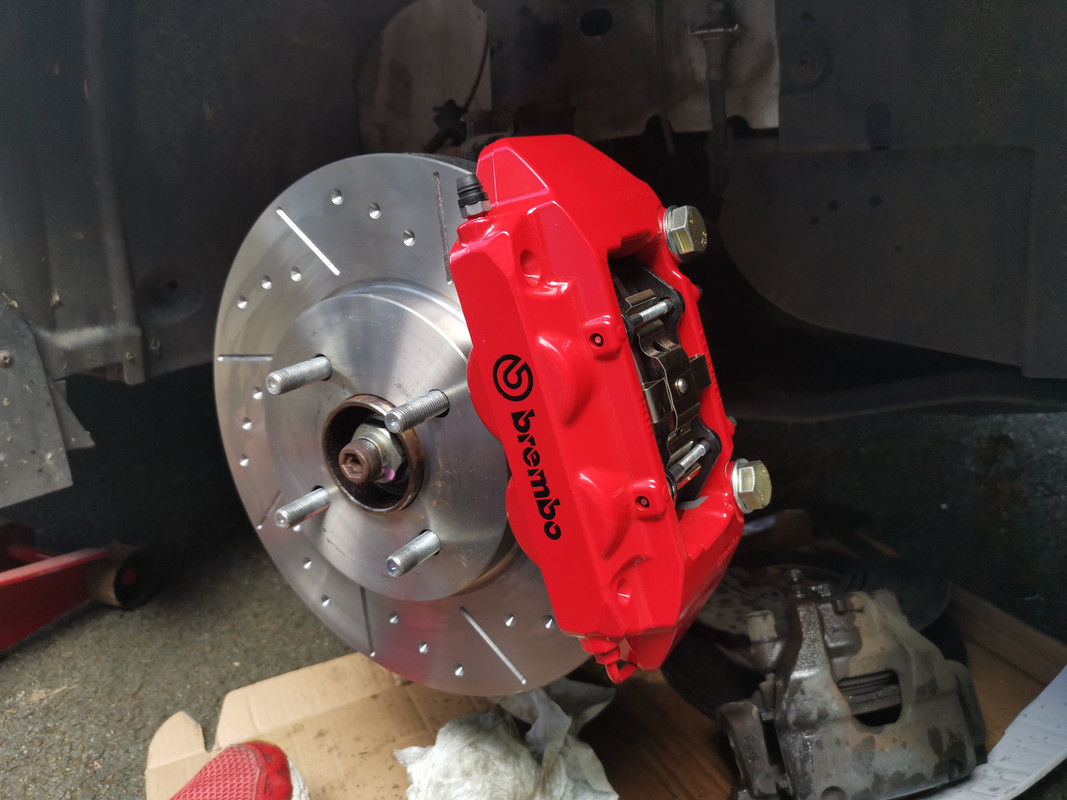
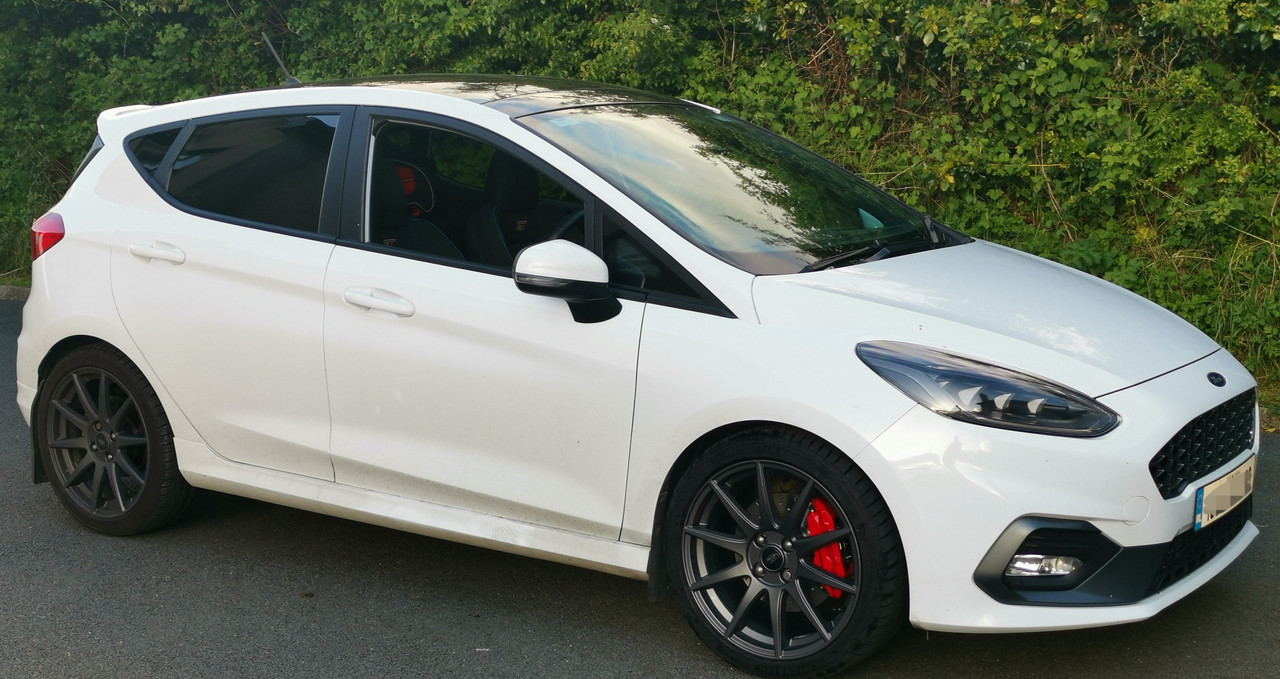
    I recently noticed absolutely nothing wrong with my brakes, they were working perfectly. So I set out to replace them :S


    Before:
    IMG-20210525-202520.jpg
    IMG-20210525-201859.jpg

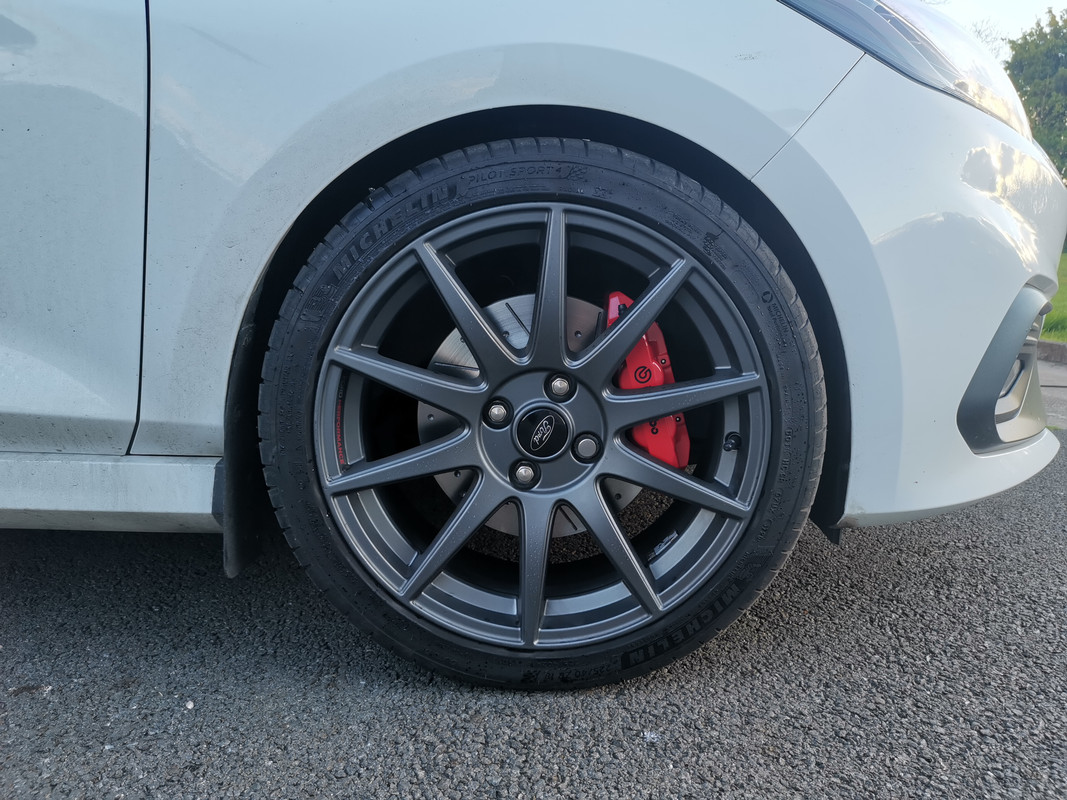
    And now:
    IMG-20210525-134335.jpg
    IMG-20210525-201909.jpg
    IMG-20210525-201437-edit-45442207075877.jpg


  • Registered Users, Registered Users 2 Posts: 2,699 ✭✭✭advertsfox


    Amazing difference. What's the cost like to do all 4 corners?


  • Registered Users, Registered Users 2 Posts: 2,618 ✭✭✭ILikeBoats


    Very cool vintage.
    On a scale of 1 to 10, how difficult?


  • Registered Users Posts: 3,381 ✭✭✭vintagevrs


    advertsfox wrote: »
    Amazing difference. What's the cost like to do all 4 corners?

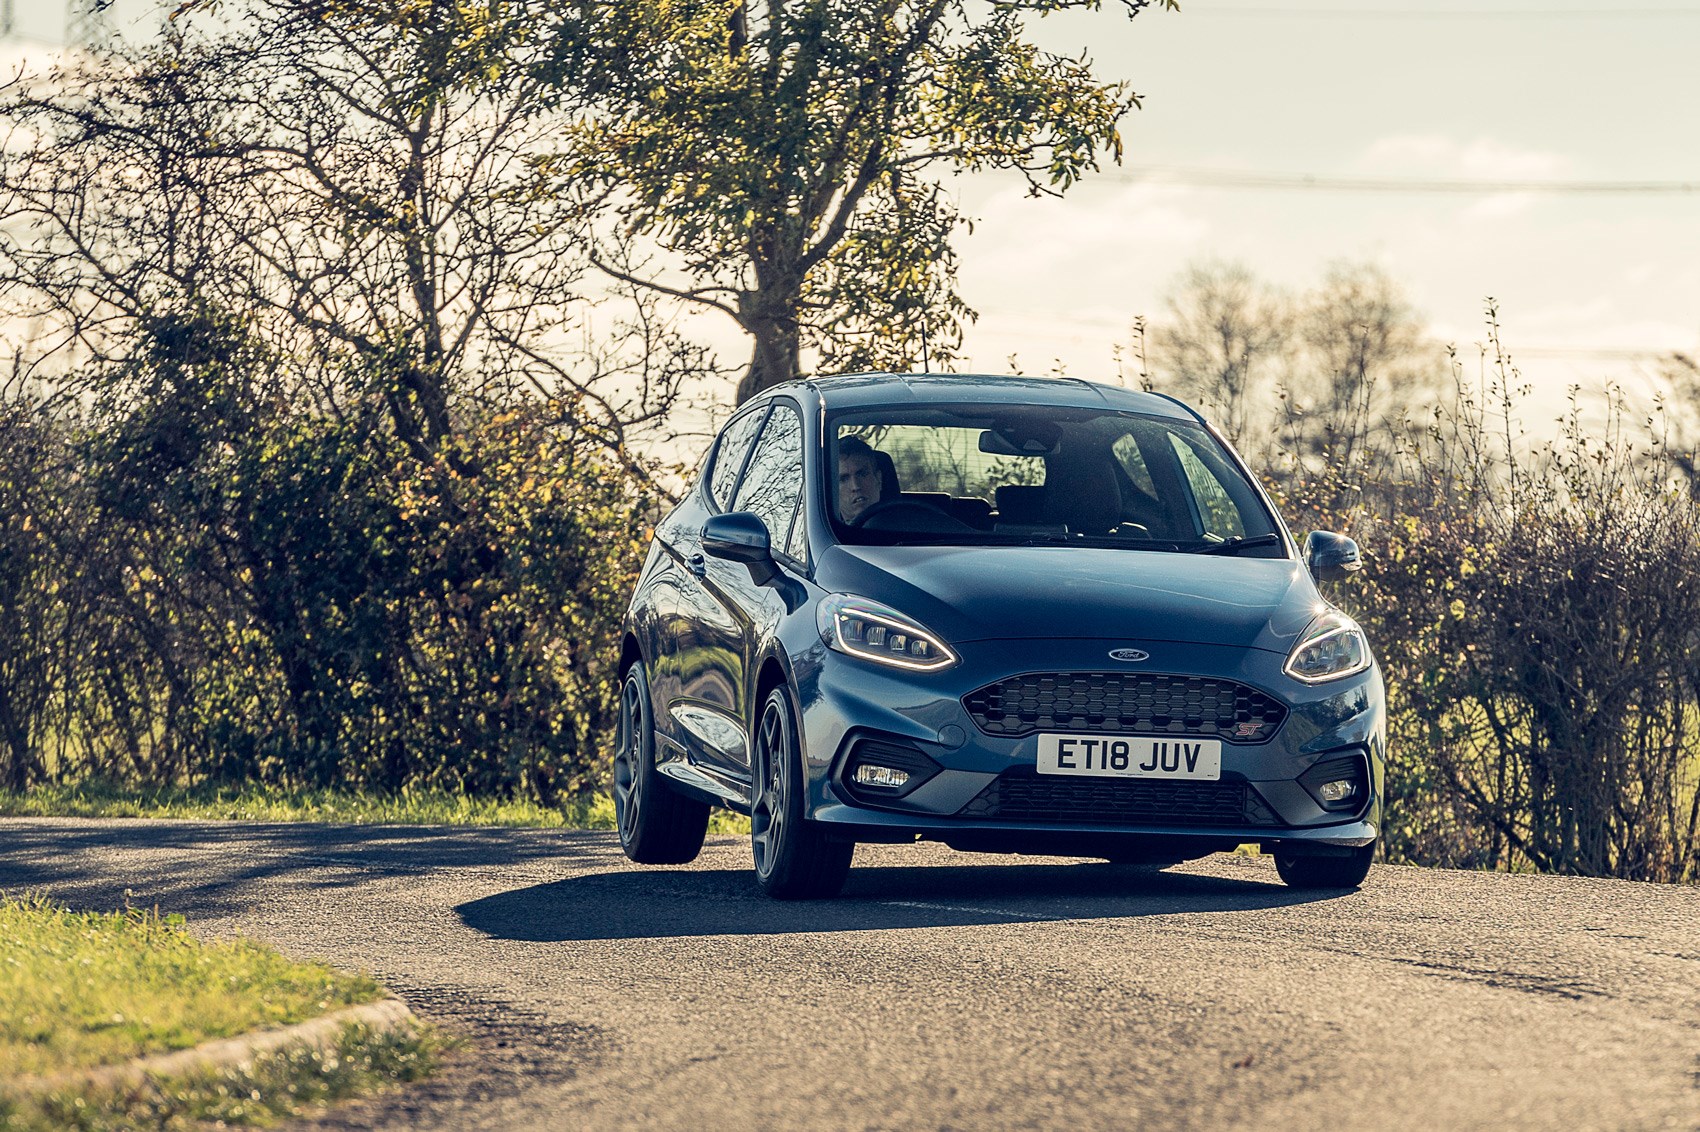
    I only did the fronts, will prob leave the back alone after reading a lot about issues that over braking the rear can cause. The rears don't really do any work on this car to be honest :)

    fiestast_longterm_101.jpg

    Cost wise, new brembo calipers, pads, st170 discs, adapters, spacers, fluid and various other small bits....I haven't actually added it up. I'd guess maybe 700 euro, if not a bit less.
    ILikeBoats wrote: »
    Very cool vintage.
    On a scale of 1 to 10, how difficult?

    Cheers. The tricky part was prob doing the homework on what exactly was needed. This is the first mk8 that has this set up so some learning along the way. The actual work is pretty straightforward for the most part. No different really to a brake change with OEM parts and fluid flush.


  • Registered Users, Registered Users 2 Posts: 2,704 ✭✭✭Cheensbo


    Were the adaptors off the shelf or did you get them made up?


  • Registered Users Posts: 3,381 ✭✭✭vintagevrs


    Cheensbo wrote: »
    Were the adaptors off the shelf or did you get them made up?

    There's a fella in the UK that does them for the previous generation st, so bought them from him. £130.


  • Advertisement
  • Registered Users, Registered Users 2 Posts: 2,704 ✭✭✭Cheensbo


    vintagevrs wrote: »
    There's a fella in the UK that does them for the previous generation st, so bought them from him. £130.

    Ah i see, trying to find somewhere in Ireland who will make a set, no joy so!


  • Registered Users Posts: 3,381 ✭✭✭vintagevrs


    I called to a local place who said they could do it if the had the car and caliper for a day. That was in letterkenny though so may be no use. That was before I found this fella who does them. What are you looking to do?


  • Registered Users, Registered Users 2 Posts: 2,704 ✭✭✭Cheensbo


    vintagevrs wrote: »
    I called to a local place who said they could do it if the had the car and caliper for a day. That was in letterkenny though so may be no use. That was before I found this fella who does them. What are you looking to do?

    I have brackets that I bought from russia to fit bigger calipers on my caldina, I was hoping to get them replicated but noone has been willing to take it on - a friend got some made but the crowd who made them fabricated them from some form of cheese instead of steel and ignored the given dimensions.


  • Registered Users Posts: 3,381 ✭✭✭vintagevrs


    Problem is to make it worth while they need to be selling a load of them, as all the work is in the design I expect.


  • Registered Users, Registered Users 2 Posts: 2,704 ✭✭✭Cheensbo


    vintagevrs wrote: »
    Problem is to make it worth while they need to be selling a load of them, as all the work is in the design I expect.

    I have a 3d drawing of it so could probably have an NC file or similar created for it, I need to do more on it but gone lazy because I have my own sorted already :pac:


  • Registered Users Posts: 3,381 ✭✭✭vintagevrs


    Ah only reading your post right now, sure you're sorted so happy days. Thought you got calipers from Russia but needed the brackets made...


  • Advertisement
  • Registered Users, Registered Users 2 Posts: 2,704 ✭✭✭Cheensbo


    vintagevrs wrote: »
    Ah only reading your post right now, sure you're sorted so happy days. Thought you got calipers from Russia but needed the brackets made...

    Ah no bother, mine are done alright but I was hoping to be able to return a few favours that I owe by helping them get reasonably cheap brake upgrades.


  • Registered Users Posts: 143 ✭✭Thedarkb


    Accidentally overtightened a flare nut and pulled the flare off the end of my brake pipe. Time to go begging at the local garage.


  • Registered Users, Registered Users 2 Posts: 1,180 ✭✭✭BlakeS94


    Thedarkb wrote: »
    Accidentally overtightened a flare nut and pulled the flare off the end of my brake pipe. Time to go begging at the local garage.

    I suppose you took the title "today I did something to my car" literally. Ears down and tail between the legs


  • Registered Users Posts: 143 ✭✭Thedarkb


    BlakeS94 wrote: »
    I suppose you took the title "today I did something to my car" literally. Ears down and tail between the legs

    The local garage loaned me a flare tool and it's sorted now.


  • Registered Users, Registered Users 2 Posts: 6,874 ✭✭✭zg3409


    555582.jpg

    555581.jpg


  • Advertisement
  • Moderators, Sports Moderators Posts: 28,623 Mod ✭✭✭✭Cass


    Brake pad wear warning light came on yesterday, out of the blue. Checked fluid level and it was good, then checked the pads and still brand new (having changed all four calipers, brake fluid, pads and handbrake cable in the last 2 months I assumed as much but just wanted to be sure). So assumed it was the sensor itself. Realised I haven't changed it, ever. New one got and replaced. So hopefully will sort it out.

    Took the opportunity to drop the bumper and remove the headlights to replace some of the angel eye bulbs that have been gone for a couple of weeks. Got that done and all good. Then, with the bumper off I decided the time had come to tackle a job I've been putting off for some time. Bumper respray.

    Not done, but started.

    Lately the bumper has been looking very poorly and it seems to "foul" easier than other cars I've owned. Today I found out why. At some point someone must have decided to spray the bumper to cover up stone chips, but whomever done the "respray" needs a kick to the trixie trollox. The lazy so and so seems to have just scuffed the original paint and then primed, painted and lacquered over it, and not sanded back.

    Layers upon layers of primer, lacquer, paint. Got so bad that after 2 hours of sanding I was not even down through the "new" stuff. So time for drastic action. Nitromors.

    Slathered the bumper in it, waited 10 minutes, it was working so gave it another coating. Waited another 45 minutes and got to scrapping (plastic scrapper so as not to damage bumper, but needed metal ones for some parts). Took about 2 - 2.5 hours but got all the heavy stuff off. Then sanded some areas and the remaining pieces of paint came off easily. Got tired, and dark, so after about 5 hours I called it a day. Will finish sanding tomorrow check for any defects, then lay down the primer coats. Will leave the painting for the weekend, with top coat layers Monday through Wednesday. So will update as I get a little further on.

    556091.jpg

    556092.jpg

    556093.jpg
    Forum Charter - Useful Information - Photo thread: Hardware - Ranges by County - Hunting Laws/Important threads - Upcoming Events - RFDs by County

    If you see a problem post use the report post function. Click on the three dots on the post, select "FLAG" & let a Moderator deal with it.

    Moderators - Cass otmmyboy2 , CatMod - Shamboc , Admins - Beasty , mickeroo


  • Registered Users, Registered Users 2 Posts: 2,716 ✭✭✭wandererz


    zg3409 wrote: »
    555582.jpg

    555581.jpg

    What in the world?

    Weird oil drain valve?


  • Moderators, Sports Moderators Posts: 28,623 Mod ✭✭✭✭Cass


    All sanded down (have one or two fiddly spots I need to address with a dremel and sanding head), washed, dried, ready for tack wipe then primer, tomorrow.

    Was slogging away then realised I bought an orbital sander last year for this very purpose. Found it, and hello easy street. Cut the sanding process down by at least 60%.

    Once that was done then it was onto hand sanding with 400 grit, 800 grit, 1200 grit, 1500 grit and finally 2000. Alternating directions to eliminate any scratches left by the initial sanding.

    My first time doing something this large so its trial and error, but going well enough. The painting will be the real test.


    556210.jpg
    Forum Charter - Useful Information - Photo thread: Hardware - Ranges by County - Hunting Laws/Important threads - Upcoming Events - RFDs by County

    If you see a problem post use the report post function. Click on the three dots on the post, select "FLAG" & let a Moderator deal with it.

    Moderators - Cass otmmyboy2 , CatMod - Shamboc , Admins - Beasty , mickeroo


  • Registered Users, Registered Users 2 Posts: 14,309 ✭✭✭✭wotzgoingon


    Nice little shed you have there. Full of hand tools.


  • Moderators, Sports Moderators Posts: 28,623 Mod ✭✭✭✭Cass


    Thanks. Over 50 years of stuff covering every square inch of all three walls. Each time I move house I got a bigger garage yet I still manage to fill them, given time. Make me wonder how I managed with the 8x4 shed I started off with.
    Forum Charter - Useful Information - Photo thread: Hardware - Ranges by County - Hunting Laws/Important threads - Upcoming Events - RFDs by County

    If you see a problem post use the report post function. Click on the three dots on the post, select "FLAG" & let a Moderator deal with it.

    Moderators - Cass otmmyboy2 , CatMod - Shamboc , Admins - Beasty , mickeroo


  • Registered Users, Registered Users 2 Posts: 784 ✭✭✭mk7r


    Cass wrote: »
    All sanded down (have one or two fiddly spots I need to address with a dremel and sanding head), washed, dried, ready for tack wipe then primer, tomorrow.

    Was slogging away then realised I bought an orbital sander last year for this very purpose. Found it, and hello easy street. Cut the sanding process down by at least 60%.

    Once that was done then it was onto hand sanding with 400 grit, 800 grit, 1200 grit, 1500 grit and finally 2000. Alternating directions to eliminate any scratches left by the initial sanding.

    My first time doing something this large so its trial and error, but going well enough. The painting will be the real test.


    556210.jpg

    You don't want to be sanding any more than 400 grit before you prime, the primer needs a key to stick to.


  • Registered Users, Registered Users 2 Posts: 4,097 ✭✭✭johndaman66


    mk7r wrote: »
    You don't want to be sanding any more than 400 grit before you prime, the primer needs a key to stick to.
    Top of my head from doing my own little bit of painting some time back I was thinking going as high as 2,000 grit was not the way to go. Was thinking 400 was too low but after a quick Google your fairly on the money!... 320 to 360 grit is whats recommended.


  • Moderators, Sports Moderators Posts: 28,623 Mod ✭✭✭✭Cass


    mk7r wrote: »
    You don't want to be sanding any more than 400 grit before you prime, the primer needs a key to stick to.

    You're spot on.

    At the stage the bumper was in, pictured above, I was repairing defects. That continued on for a day or two until I had any defects filled, sanded and repaired (not pictured).

    I was worried I had made the bumper "too smooth" so done a check online and got the same information you're giving. So I spent some of yesterday keying the entire bumper with 320 grit sandpaper to "roughen" the finish as it was "too smooth", then washed it, dried it, quick tack cloth wipe (will repeat before priming) and left it ready for priming.

    Only problem I have now is my face mask is out of filters so have to wait till Monday to get replacements before I start laying down primer, paint and top coat.

    As said above its a learning experience (my only experience to date was touch ups or small areas like wing mirror backs) so any other advice is greatly welcomed.
    Forum Charter - Useful Information - Photo thread: Hardware - Ranges by County - Hunting Laws/Important threads - Upcoming Events - RFDs by County

    If you see a problem post use the report post function. Click on the three dots on the post, select "FLAG" & let a Moderator deal with it.

    Moderators - Cass otmmyboy2 , CatMod - Shamboc , Admins - Beasty , mickeroo


  • Registered Users, Registered Users 2 Posts: 6,256 ✭✭✭Ubbquittious


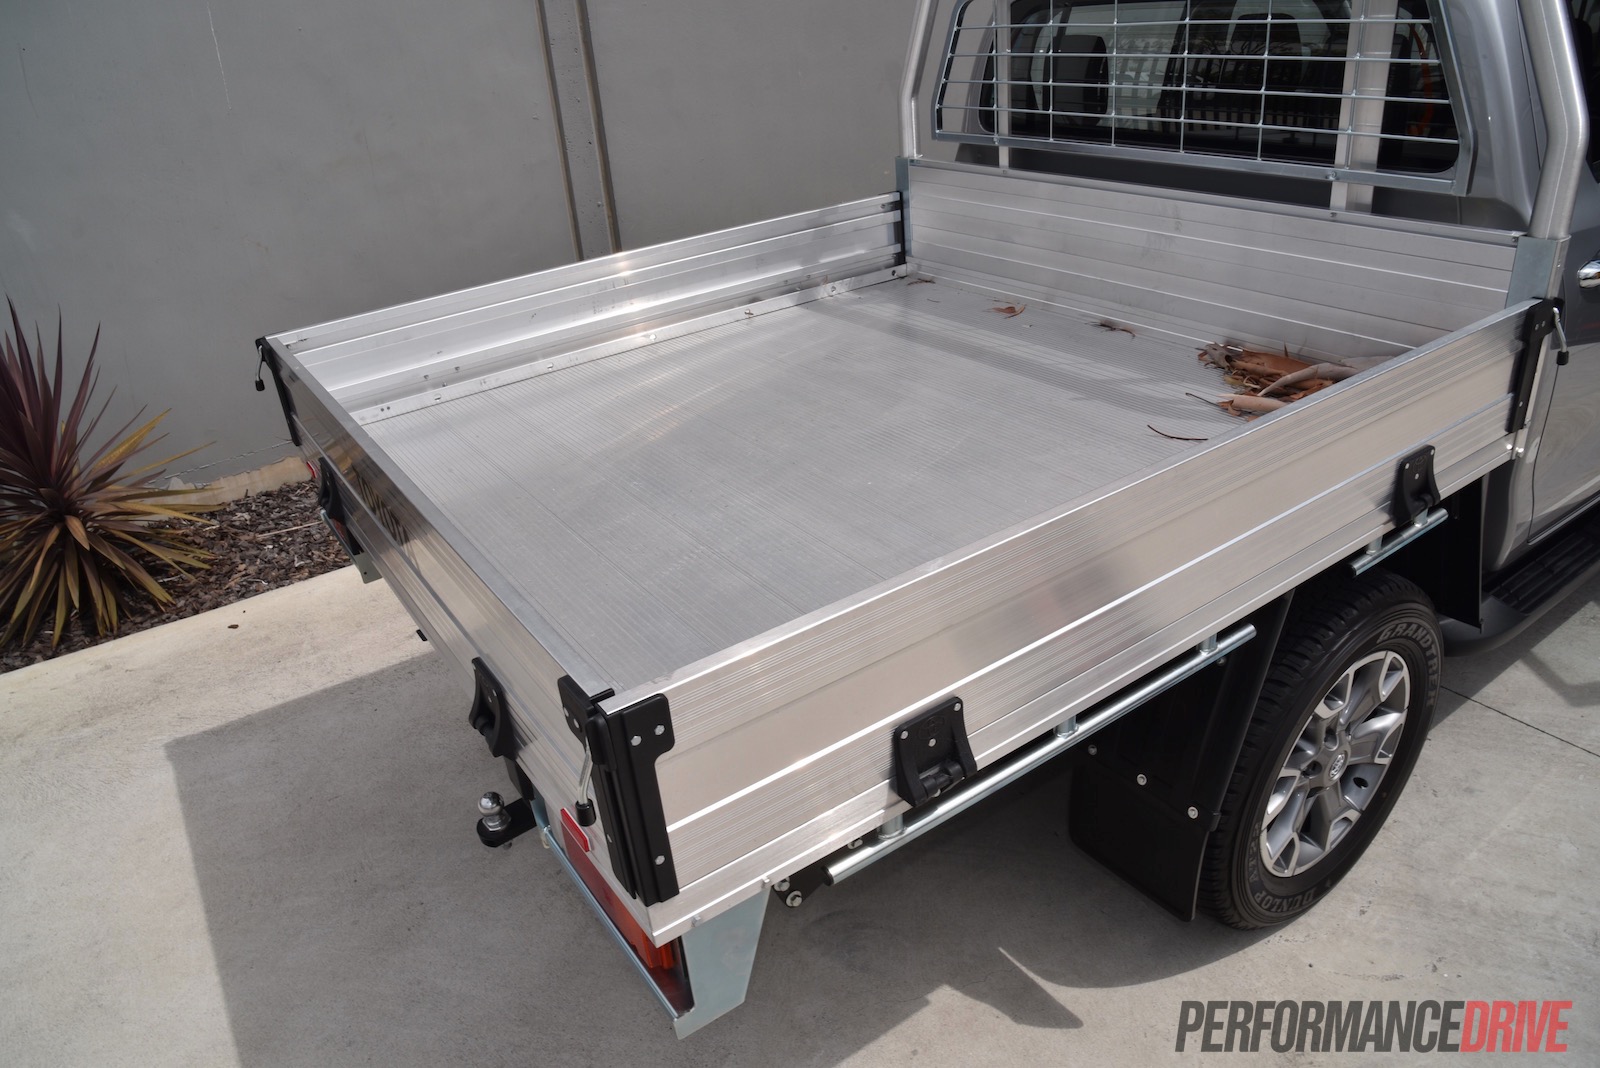
    Spent a good while coming up with this design, still not perfect but should hopefully be better than the two I made sh1t of


    556464.png


    This is the part in case anyone is wondering https://duckduckgo.com/?t=ffsb&q=PZQ84AP545&iax=images&ia=images


  • Registered Users, Registered Users 2 Posts: 14,309 ✭✭✭✭wotzgoingon


    What is it?


  • Advertisement
  • Registered Users, Registered Users 2 Posts: 6,256 ✭✭✭Ubbquittious


    What is it?


    Top part of the hinge for one of these


    2016-Toyota-HiLux-SR-genuine-tray.jpg


  • Registered Users, Registered Users 2 Posts: 6,256 ✭✭✭Ubbquittious


    Not a complete success, bolt holes bit too small but still usable I think


    556469.jpeg


  • Registered Users, Registered Users 2 Posts: 6,248 ✭✭✭Rowley Birkin QC


    Got hit last week at the recycling center. All very calm, exchanged details and got the car repaired today. Delighted with the result. Carcraft also touched up a few stonechips around the bonnet and front bumper, will probably need more attention at some stage. :)

    IMG-20210604-101842.jpg

    after.jpg

    Last weekend she also got:
    • 2 new front tyres
    • Service
    • New brake juice
    • Sump gasket replacement
    • A fix for an annoying issue where DS mode or flappy paddles didn't work due to a broken wire
    • Tax :rolleyes:

    Car is at about 151,000 km and driving brilliantly. I keep looking at newer cars but can't bring myself to spend the money when this is going well. Alloys need a refurb but that's on the longer finger. It'll end up living in a shed eventually.


  • Registered Users, Registered Users 2 Posts: 1,180 ✭✭✭BlakeS94


    Forgot to take photos, but I recently purchased a mk4 mondeo, few new bits for it. Replaced wipers front and back, and put on wind deflectors all around, also changed power steering fluid and changed interior halogens and license plate bulbs to LEDs

    Will be giving it a machine polish I'll update with before and after

    I'll be doing a couple more things and I'll add some photos then. Boot struts and front strut conversion kit from that manky rod should be next, then after that is a short throw quick shifter (the type you put onto the steering linkage pivots ball socket) will be getting rear windows 20% tinted I'll add a before and after. Then Address an issue with a vacuum control valve and finally to top it off, new centre wheel caps!


  • Moderators, Sports Moderators Posts: 28,623 Mod ✭✭✭✭Cass


    BlakeS94 wrote: »
    Forgot to take photos, but I recently purchased a mk4 mondeo, !
    Welcome to the club, from one newbie to another. :D

    556783.jpg
    new centre wheel caps
    Need them myself.
    Forum Charter - Useful Information - Photo thread: Hardware - Ranges by County - Hunting Laws/Important threads - Upcoming Events - RFDs by County

    If you see a problem post use the report post function. Click on the three dots on the post, select "FLAG" & let a Moderator deal with it.

    Moderators - Cass otmmyboy2 , CatMod - Shamboc , Admins - Beasty , mickeroo


  • Moderators, Sports Moderators Posts: 28,623 Mod ✭✭✭✭Cass


    Cass wrote:
    Sanded
    556210.jpg

    Got the final coat of clear on her today. Just have to wait for it all to "settle".

    Overall I'm happy enough with the outcome. It could have been better, but I learned a few things and the end result is 100 times better than the poo show i had before.

    I made some rookie mistake, because I'm a rookie, but I also had to fight a loosing battle given my location. I blocked off the garage, and while I done my best, dust and other particulates were always going to be a problem and perhaps some still got in. Luckily it was minimal and while I've yet to take it into daylight it seems it landed when primer, paint, and clearcoat was dry (to the touch) so 99% seemed to wipe off without any issues.

    Mistakes I made:
    • Could have better prepared the area I blocked off to make it more "air secure/tight".
    • Not checking the weather in advance (the last two clear coats were tacky after 30 minutes due to drop in temp, rise in humidity, but easily solved with garage heater being left on)
    • Missed one or two spots (almost unnoticeable) when sanding the primer. Luckily the clear plastic primer was fairly smooth, but it doesn't half show up through the black paint when you know where to look. Others that checked couldn't see them.
    • Should have given more care to the number plate area. It's going to be covered but given how well the rest came out I realise I rubbed my backside against that particular area.

    Still the whole job has taken 7 days (9 if you allow for me leaving the bumper to fully cure over the weekend). Mostly a few hours each evening. If I were to do it again I'd dedicate a (long) weekend to it (allowing for drying overnight) and try cut that to 4 days.

    Total cost was €128.
    Primer - €28 (1ltr tin and have 500ml left)
    Paint - €48 (500ml colour code matched)
    Clearcoat & hardener - €42 (1ltr & 500ml tins of which 700ml & 350ml remain)

    All other items I already had so not bad considering local quotes started at €320 and went Northwards from there.


    Didn't get a picture of it primed.


    Paint only:

    556784.jpg

    556785.jpg

    Clearcoated/Finished:

    556786.jpg

    556787.jpg

    556788.jpg
    Forum Charter - Useful Information - Photo thread: Hardware - Ranges by County - Hunting Laws/Important threads - Upcoming Events - RFDs by County

    If you see a problem post use the report post function. Click on the three dots on the post, select "FLAG" & let a Moderator deal with it.

    Moderators - Cass otmmyboy2 , CatMod - Shamboc , Admins - Beasty , mickeroo


  • Registered Users, Registered Users 2 Posts: 1,180 ✭✭✭BlakeS94


    Cass wrote: »
    Welcome to the club, from one newbie to another. :D

    556783.jpg


    Need them myself.

    Mines the same colour so I got black ford centre caps. Also that bonnet strut conversion kit makes such a difference. I think all mondeos have the rod to hold up up hood. Quite like the car it drives very well for an 11 year old car, much better than my 13 i40 I had previously, feels better built and no rattles or anything. I forgot to add to my list I must bleed the clutch slave cylinder because I've got a soft pedal with slow return


  • Registered Users, Registered Users 2 Posts: 2,005 ✭✭✭veetwin


    Changed the oil, oil filter, air filter and pollen filter on my 2013 Discovery. 20 minute job thanks to a Sealey vacuum pump. Main dealer wanted €600+. Indy would be close to €450. Best consumables (Man and Bosch filters, Castrol Oil) circa €100 from micksgarage.ie


  • Registered Users, Registered Users 2 Posts: 1,180 ✭✭✭BlakeS94


    Put a short quick shifter on my mondeo 2010, noticeable difference in length of stroke when changing gears, small simple design took 10 minutes to install, very happy with it, DarkIceDesigns on Ebay if anyone wants to try them out


  • Advertisement
  • Registered Users, Registered Users 2 Posts: 1,180 ✭✭✭BlakeS94


    Before and after


  • Registered Users, Registered Users 2 Posts: 1,180 ✭✭✭BlakeS94


    Also did bonnet conversion kit, turned out well, the struts raise the bonnet so much higher and once its halfway open it just flings up. Good quality and easy to follow instructions


  • Moderators, Sports Moderators Posts: 28,623 Mod ✭✭✭✭Cass


    Loving the bonnet struts. Cannot count the amount of times I've smacked my head of the bonnet because of how low it sits. May have to invest in a set.
    Forum Charter - Useful Information - Photo thread: Hardware - Ranges by County - Hunting Laws/Important threads - Upcoming Events - RFDs by County

    If you see a problem post use the report post function. Click on the three dots on the post, select "FLAG" & let a Moderator deal with it.

    Moderators - Cass otmmyboy2 , CatMod - Shamboc , Admins - Beasty , mickeroo


  • Registered Users, Registered Users 2 Posts: 1,180 ✭✭✭BlakeS94


    Cass wrote: »
    Loving the bonnet struts. Cannot count the amount of times I've smacked my head of the bonnet because of how low it sits. May have to invest in a set.

    Cost €70 but well worth it. Only little issue is they tend to crush down on the weatherproof seal going across the firewall when the bonnet is closed


  • Registered Users, Registered Users 2 Posts: 4,174 ✭✭✭Top Dog


    BlakeS94 wrote: »
    Cost €70 but well worth it. Only little issue is they tend to crush down on the weatherproof seal going across the firewall when the bonnet is closed
    €70?! :eek: I got the individual bits to do the same job on a Skoda off Amazon for less than €35 including shipping.


  • Registered Users, Registered Users 2 Posts: 1,180 ✭✭✭BlakeS94


    Top Dog wrote: »
    €70?! :eek: I got the individual bits to do the same job on a Skoda off Amazon for less than €35 including shipping.

    Sure look, you pay for convenience, all in the one package, and in fairness, they gave me a bag of sweets aswell.


  • Advertisement
  • Registered Users, Registered Users 2 Posts: 4,174 ✭✭✭Top Dog


    BlakeS94 wrote: »
    Sure look, you pay for convenience, all in the one package, and in fairness, they gave me a bag of sweets aswell.
    Ah. I got no sweets :(:o:D


  • Registered Users, Registered Users 2 Posts: 6,874 ✭✭✭zg3409


    wandererz wrote: »
    What in the world?

    Weird oil drain valve?

    It was meant to be a bit of a teaser. Yes oil drain valve. It's specifically designed as such and you need to press in tap while turning so unlikely to ever open by accident. Also area is protected by plastic engine cover so should not get too rusty nor bashed. I do intend putting Vaseline on exposed parts.

    Oil filter is under engine so bottom cover needs to come off during servicing, but sump plug points to rear or car, so oil squirts out sideways.If it pointed down the valve would stick out too low.

    Anyway not my car, 162 2L diesel Tiguan, new body, this is the part

    ca09135
    M14 1.5

    Search eBay for
    Truck Brass Quick Oil Drain Valve M14-1.5 Threads
    About 10 euro. I have one of the quick oil hose suckers but I don't like to use it on low mileage cars, rather extra in between services. I'll keep an eye on it over time, also dropped spanner into used oil bucket

    557496.jpg


  • Registered Users, Registered Users 2 Posts: 14,721 ✭✭✭✭CianRyan


    Man, nah.
    Is a spanner or rachet really that much work that you'd build in a weak point?
    You have to take the covers off anyway.
    Nope.


  • Registered Users, Registered Users 2 Posts: 73,477 ✭✭✭✭colm_mcm


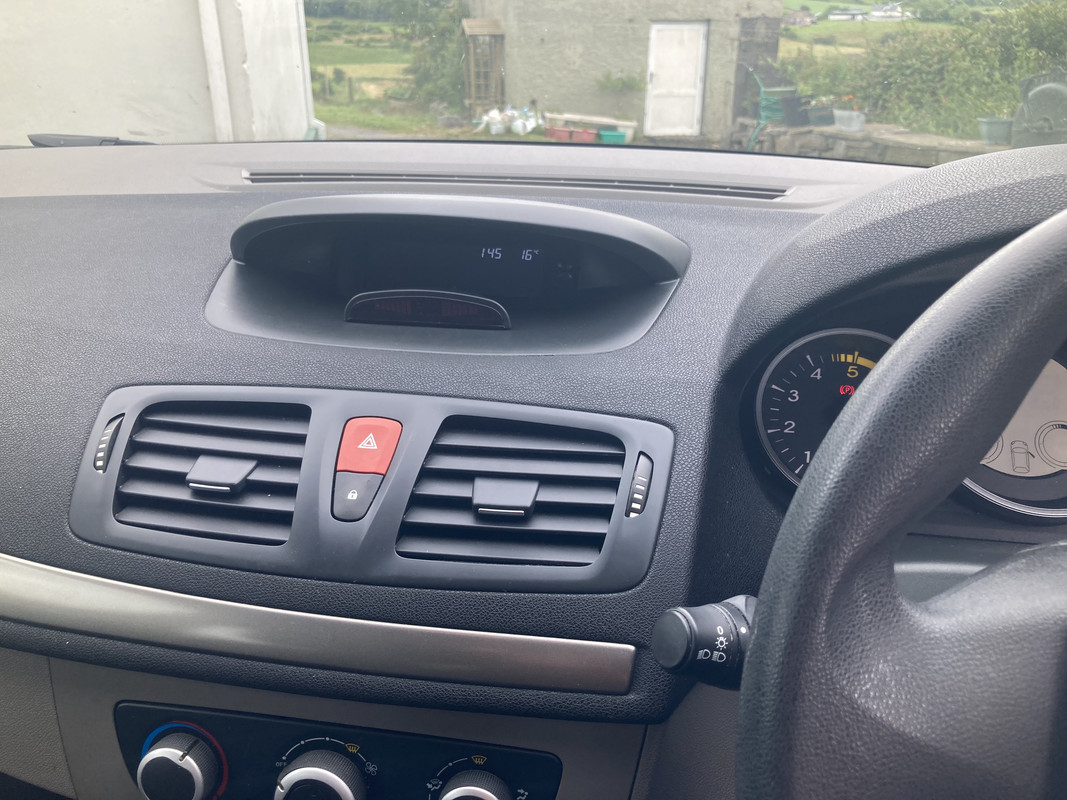
    Not my own car, and not today, but here’s the mother’s Megane and the sensors I put on it.

    Hardest part was routing the cable down through the dashboard from the centre display. Could have done it much simpler but wanted the sensor display to not look too out of place on the dash.

    Didn’t bother colour coding the sensors as it’s a totally base model anyway.

    Must note that these Meganes are a pain to work on. I retrofitted OE type reverse camera to my Skoda in 1/4 the time this took.
    This set comes with front sensors, which I have put on the long finger as access to the firewall is so bad in the engine bay, and there doesn’t seem to be any ignition lives in the traditional sense on this car. Everything stays powered up for 5 minutes - which isn’t ideal with front sensors.

    6-CC4367-E-9-C45-45-CF-A3-C2-300-BF516-BA99.jpg

    F0-CFEB16-C7-F5-44-EB-9-ADF-BE46-E3602-DBE.jpg


  • Registered Users, Registered Users 2 Posts: 1,277 ✭✭✭MrCostington


    colm_mcm wrote: »
    but wanted the sensor display to not look too out of place on the dash


    Well, you definitely did a good job there, I first looked at the pic and was wondering why you posted it, didn't see the display!


  • Advertisement
Advertisement