Advertisement
If you have a new account but are having problems posting or verifying your account, please email us on hello@boards.ie for help. Thanks :)
Hello all! Please ensure that you are posting a new thread or question in the appropriate forum. The Feedback forum is overwhelmed with questions that are having to be moved elsewhere. If you need help to verify your account contact hello@boards.ie
Hi all,
Vanilla are planning an update to the site on April 24th (next Wednesday). It is a major PHP8 update which is expected to boost performance across the site. The site will be down from 7pm and it is expected to take about an hour to complete. We appreciate your patience during the update.
Thanks all.

A Lean-To Tale (with pics & maybe vids)

123578

Comments

  • Registered Users Posts: 2,182 ✭✭✭alexlyons


    Great update as always dnme! I know what you mean about those runners making the job solid, it's a great feeling! Not long now until it's a shelter, it's regally coming together. Well done as always


  • Registered Users Posts: 2,921 ✭✭✭2 stroke


    dnme wrote: »
    BTW

    Seeing as I'm on a forum, there might be people from the trade etc knocking around. I was wondering if anyone can advise or get a trade deal on pvc roof sheets? Is anyone in the trade watching, or perhaps knows anyone in the trade? It's expensive stuff and I'll take any help I can get.

    A friend passed me this link, I havn't contacted them myself yet, but your project is advancing much faster than mine. http://www.celuplast.com
    Also ploughing match is on this week, might be a good place to talk to agricultural suppliers.


  • Registered Users Posts: 3,411 ✭✭✭dnme


    Some questions if anyone can help....

    When laying the pvc sheets, where do I start? Will I start at the L over the back door or the other end (outer end)? I have a feeling the house is not square so I will have a taper to cut in opne of the sheets lengthways.

    I will have 4 runners. How many fixing screws should I use at each runner per sheet (crossing a 2ft span)?

    Should the last fixing screw go through the overlap between the sheet and its previous neighbour?

    Many thanks


  • Registered Users Posts: 3,361 ✭✭✭YouTookMyName


    dnme wrote: »
    When laying the pvc sheets, where do I start? Will I start at the L over the back door or the other end (outer end)? I have a feeling the house is not square so I will have a taper to cut in opne of the sheets lengthways.

    I will have 4 runners. How many fixing screws should I use at each runner per sheet (crossing a 2ft span)?

    Should the last fixing screw go through the overlap between the sheet and its previous neighbour?

    Many thanks

    Start over the door and work your way out to the gable.

    3 screws in each sheet and 1 on the joints.


  • Registered Users Posts: 28,403 ✭✭✭✭vicwatson


    Might be worth taking a few mins to put them up there (a dry run so to speak) so as you get a notion for it and see how square or not the house is. That said one will need a calm day to do this - sadly lacking in Ireland as you can atest !!!:)


  • Advertisement
  • Registered Users Posts: 3,411 ✭✭✭dnme


    How would you solve this?

    175044.jpg


  • Registered Users Posts: 28,403 ✭✭✭✭vicwatson


    Screw a piece of timber up into the fascia (underside) to bulk out the space so your piece of timber can then be screwed into that piece.

    Does it have to go above the grey door surround?


  • Registered Users Posts: 3,411 ✭✭✭dnme


    vicwatson wrote: »
    Screw a piece of timber up into the fascia (underside) to bulk out the space so your piece of timber can then be screwed into that piece.

    Does it have to go above the grey door surround?


    The gap to the facia underside is bigger than image indicates (8cm) so a bridge block may not be an option. I was wondering if I could use strapping to hang the runner out of the facia?


  • Registered Users Posts: 3,411 ✭✭✭dnme


    3 screws in each sheet and 1 on the joints.


    Just to be clear, do you mean 4 screws across the sheet, the last one on the overlap? 4 runners each x 4 screws = 16 screws per sheet. Yes?


  • Registered Users Posts: 28,403 ✭✭✭✭vicwatson


    Hows about using the likes of this, or something similar ??

    http://www.esska-tech.co.uk/esska_eng_s/perforated_tape_tape_length_10_m_galvani.html

    Or how about an "L" bracket under the timber and into the wall with a rawl plug ?

    Likes of this -

    http://www.sabrefix.co.uk/products_ancillary_view.php?id=12

    Or this (or something like it) -

    http://www.sabrefix.co.uk/products_timbertotimber_view.php?id=1

    http://www.sabrefix.co.uk/products_timbertotimber_view.php?id=10


  • Advertisement
  • Registered Users Posts: 519 ✭✭✭harry21


    dnme wrote: »
    How would you solve this?

    Have you another longer 6*2 by any chance?

    I would use a longer 6*2 and extened the extra foot or so (at least). You will need to rebate for the reveal and cut over for the corner of the door. I thing its the neatest solution.

    The easiest is a wall hanger. If you use a strap, won't you have to cut a hole in the perspex sheeting?


  • Registered Users Posts: 1,167 ✭✭✭TopTec


    Presumably you are not looking to attach that runner to any wall plate, only to secure it to the house?

    If that is the case I would go with VicWatsons idea - bulk out the space above with similar width stock, screwed and glued to the top of the runner under the eave.

    From a neatness viewpoint you could then plane the underside of the runner upwards at an angle that finishes above the door frame. If you extend the insert slightly so that it touches the house you could used a couple of angle brackets and fix it to the wall.

    It does need to finish above the painted frame otherwise it will look odd and will be the first place we all look when you have your launch party. :D:D:D:D:D

    TT


  • Registered Users Posts: 3,411 ✭✭✭dnme


    Ive strapped it up to the facia and soffet. Looks ugly but its secure.


  • Registered Users Posts: 3,361 ✭✭✭YouTookMyName


    dnme wrote: »
    Just to be clear, do you mean 4 screws across the sheet, the last one on the overlap? 4 runners each x 4 screws = 16 screws per sheet. Yes?

    Yep.


  • Registered Users Posts: 3,411 ✭✭✭dnme


    Got the sheets sorted from Reynolds in Carrick on Shannon. Managed to get a 5% discount too. I'll collect them tomorrow or Wednesday.

    Tell me, fitting these, is it much of a reach across their width? I presume I fit them by screwing down their length rather than across as per the images?

    #1 175112.jpg #2 175113.jpg


    The reason I ask, is that at each fixing, I need access to under the pvc sheet to place the stand-off (see image) #3) and I imagine that the sheet will flex up (allowing this access) far easier along its length than across it.

    #3 41tpyA5HgHL._SL500_AA300_.jpg

    Also, do I need to pre-drill? and do I need to oversize the hole for expansion ?


  • Registered Users Posts: 28,403 ✭✭✭✭vicwatson


    Got the sheets sorted from Reynolds in Carrick on Shannon. Managed to get a 5% discount too.

    Nice 1

    Can you post a pic of the type of sheets you ordered please?

    Cheers


  • Registered Users Posts: 3,411 ✭✭✭dnme


    vicwatson wrote: »
    Nice 1

    Can you post a pic of the type of sheets you ordered please?

    Cheers

    10ft pvc corrugated.

    Can anyone answer my questions in post #136. Many thanks


  • Registered Users Posts: 1,257 ✭✭✭Pete67


    This might be useful?


  • Registered Users Posts: 1,167 ✭✭✭TopTec


    dnme, The only time I used these sheets I recall them being more flexible widthways. Therefore it makes sense to fix the first corrigation along its length then the next corrigation and so on.

    Your last fixing of one sheet will be over the top of the next sheet. So your Fig 1 would be your first line, then four corrigations along and so on.

    It still helps having tiny fingers and more arms than an octopus but this is one of those jobs that you will find your own way of fitting.


  • Closed Accounts Posts: 18,066 ✭✭✭✭Happyman42


    On a fall like dnme's is it still the case that you should only screw through the high part of the corrugation?

    Great thread btw dnme!


  • Advertisement
  • Registered Users Posts: 28,403 ✭✭✭✭vicwatson


  • Registered Users Posts: 3,411 ✭✭✭dnme


    Pete67 wrote: »
    This might be useful?


    That tells me to drill the holes 8mm to 10mm. That seems massive to me, the shaft of my fitting screws is 4mm. Do I really need 6mm left for expansion ? I'm just wondering if anyone here has actually used these sheets before? How'd you do it? Here's what I'm thinking......

    -Place the sheet.
    -Mark my drill points
    -Take down sheet, turn it upside down and drill all holes 2mm bigger than screws.
    -Maybe thread each screw / standoff through each hole while its still on the bench, adding a blob of silicone sealant to each fixing.
    -Put sheet back up, screw fixings down.

    How does that sound?
    I wanna get this reasonably right from the start. I cannot afford a "learning curve" with this job. Stuff is too expensive.


  • Registered Users Posts: 28,403 ✭✭✭✭vicwatson


    Take down sheet, turn it upside down and drill all holes 2mm bigger than screws

    I think this will be quite adequate.


  • Registered Users Posts: 2,182 ✭✭✭alexlyons


    dnme wrote: »
    Here's what I'm thinking......

    -Place the sheet.
    -Mark my drill points
    -Take down sheet, turn it upside down and drill all holes 2mm bigger than screws.
    -Maybe thread each screw / standoff through each hole while its still on the bench, adding a blob of silicone sealant to each fixing.
    -Put sheet back up, screw fixings down.

    How does that sound?
    I wanna get this reasonably right from the start. I cannot afford a "learning curve" with this job. Stuff is too expensive.

    I don't have much experience with this stuff, but if it was me that sounds about right and even if its not the text book way to do it, I can see zero reason why it shouldn't work. Definitely do the screws in the order you said, go length ways first, so much easier. I know its not much, but its a second brain telling you that it seems right!


  • Registered Users Posts: 3,411 ✭✭✭dnme


    Day 10

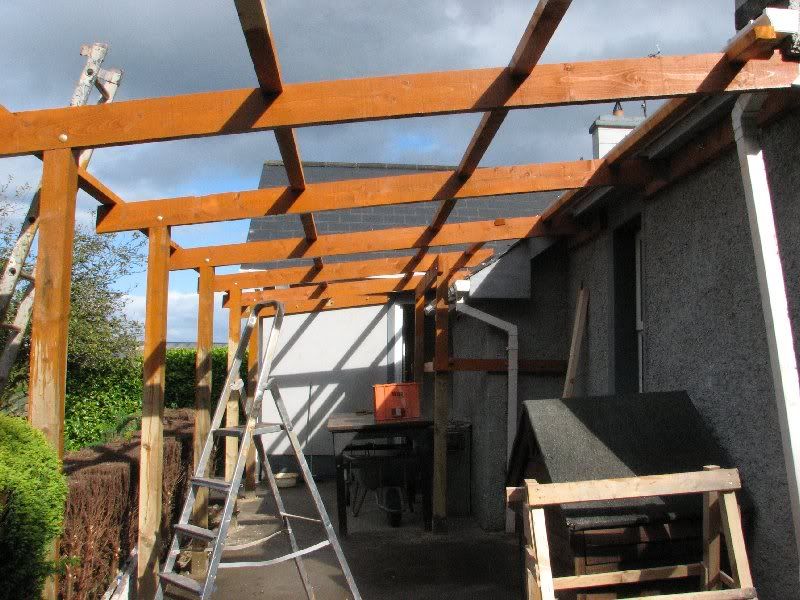
    This day last week was hurricane whatzizname, so that means I would have started the construction part of this project last Tuesday. Well it's up and waiting the pvc sheet. That took exactly one week. That's not bad going I reckon, although I did suffer the consequences by enduring all kinds of weather, the sort of stuff normal decent human beings would down tools for and retire indoors.

    I drove down to Carrick this evening to collect the sheets. I have an old Corolla liftback. The boot is massive and the rear seats fold down so I thought I might get away with it. No such luck. They would not comfortably fit without the possibility of doing some damage so I had to ask for the sheets to be delivered. Another 20 dam quid. Hopefully I'll have em tomorrow.

    In the mean time I have been slapping on the wood preservative. I started out with what I presume was a water based product, Cuprinol Ultimate. But yesterday in Carrick they had more Cuprinol garden wood preservative on special offer so I took away a tin of that as I had just run out of the first. Second tin is oil based it seems, so I am slapping on oil based over water based. Sod it, I don't care. I'm just drenching the timber and it seems to be adhering well. My god, painting those beams - especially the undersides is a messy job. I have preservative all over the place at this stage.

    Anyhow, a picture tells a better story I guess.


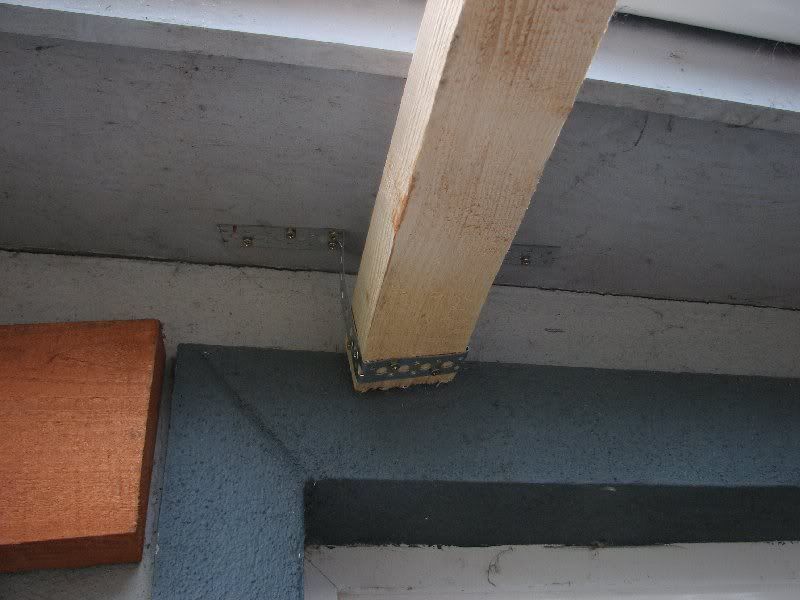
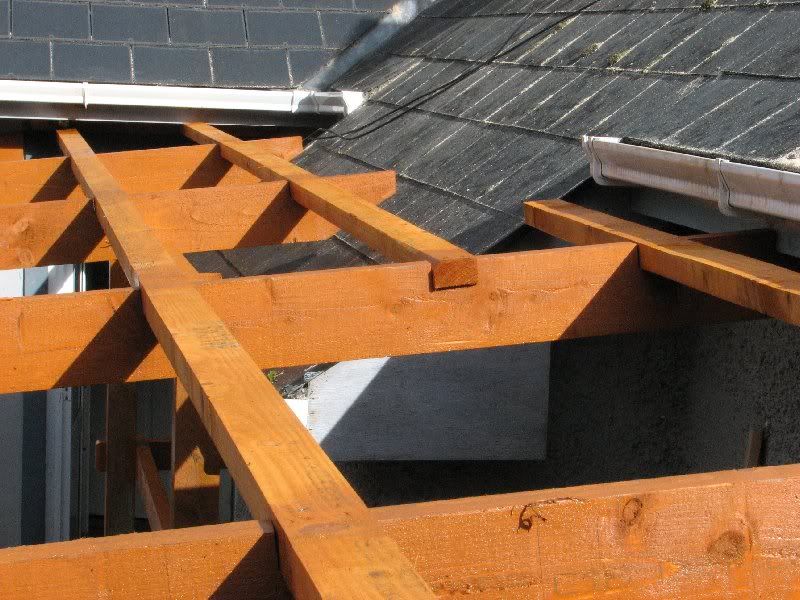
    When I left you yesterday, I was wondering how to terminate these runners over the door. I went with strapping but it looked awful and there was serious lateral play in the fixing.
    Img_7901.jpg


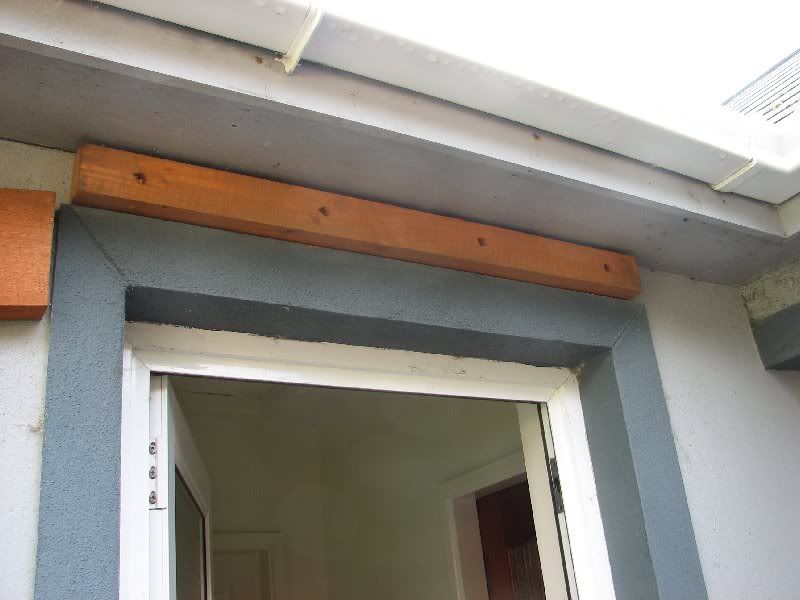
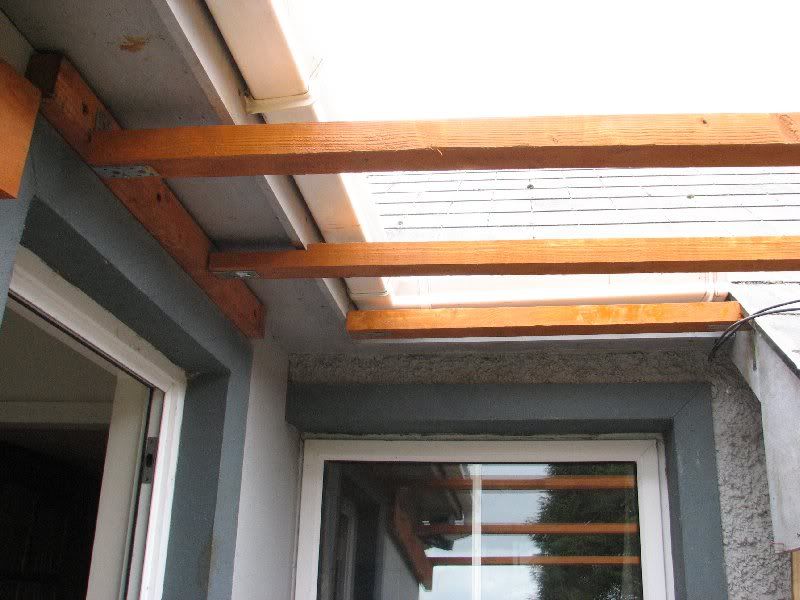
    So this morning, I undid the strap, put up a ripped down piece of timber with 4 80mm wood screws countersunk 20mm into the wood, with washers.
    Img_7904.jpg


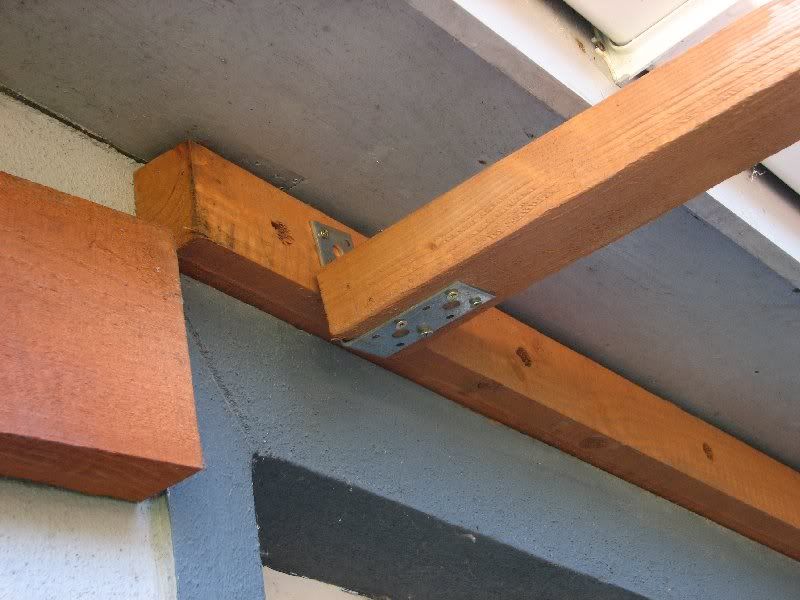
    This allowed me to use strong L brackets. Looks "slightly" better.
    Img_7908.jpg


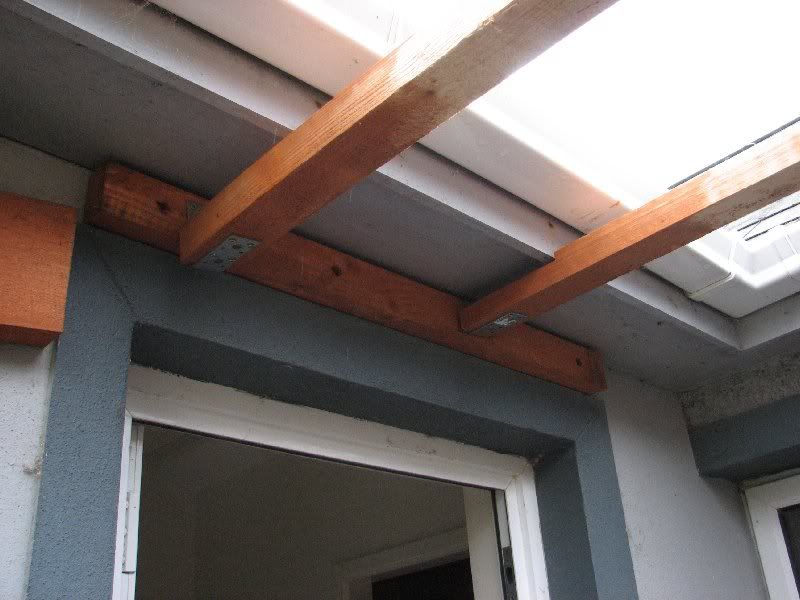
    The two runners terminated.
    Img_7913.jpg


    Here you can see those same two runners from the other end.
    Img_7917.jpg


    Third small runner installed to the facia amd soffit with L brackets. Not hugely strong, but it has no load to take. It's job is just keep the end of the pvc sheet secure.
    Img_7921.jpg


    Slapping on preservative. Messy messy job, it's as thin as water. It spills and splashes all over the shop. I have basin of hot soapy water and a scrubbing brush ready for when it drips on the walls.
    Img_7915.jpg


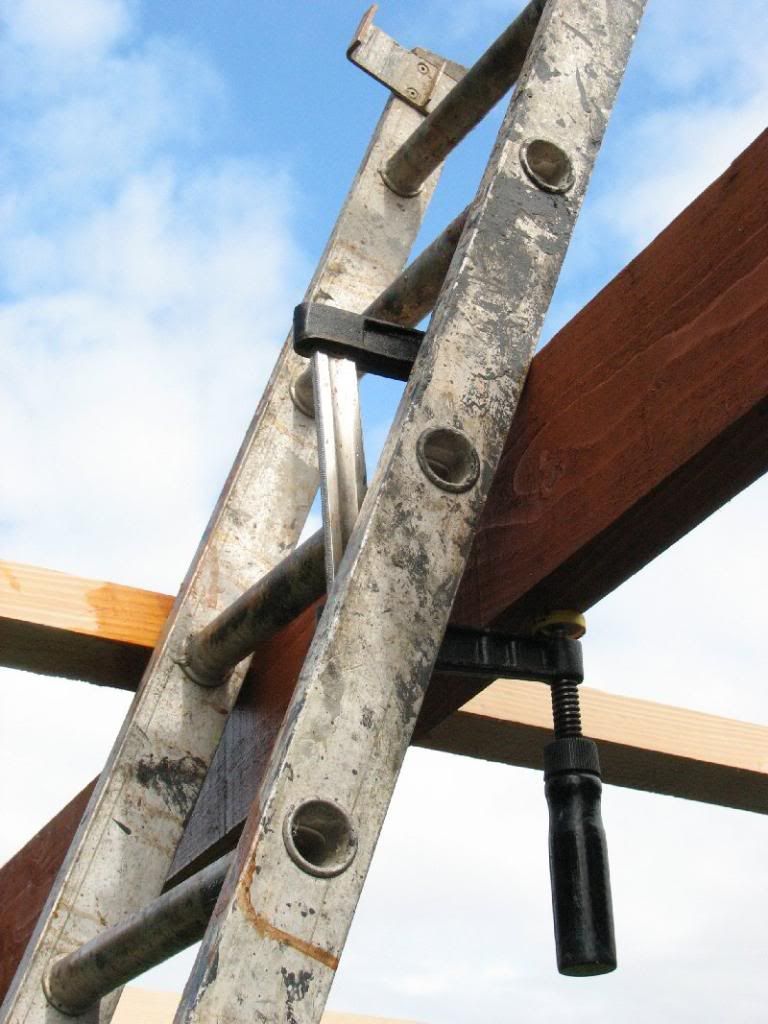
    I'll take any help with the ladder I can get.
    Img_7914.jpg


  • Registered Users Posts: 28,403 ✭✭✭✭vicwatson


    hurricane whatzizname

    Katja !!!

    Looks brilliant, really great job. You won't know yourself tucked in under there while it's p*****g rain outside :D

    To hell with you rain, hell I say !:D:D


    Three things -

    What did you do with the light fitting?

    Are you still putting up florescent tubing from that outlet?

    And a suggestion, if, when you get your boat in, you could possibly use your tarp and pin it to the sides of the structure to prevent wind blown rain in on top of you


  • Registered Users Posts: 714 ✭✭✭ValerieR


    You will soon need a rocking chair to put under this lean-to ... :)

    Nice job & updates ... Thanks.

    ValerieR


  • Registered Users Posts: 3,411 ✭✭✭dnme


    vicwatson wrote: »
    Katja !!!

    Looks brilliant, really great job. You won't know yourself tucked in under there while it's p*****g rain outside :D

    To hell with you rain, hell I say !:D:D


    Three things -

    What did you do with the light fitting?

    Are you still putting up florescent tubing from that outlet?

    And a suggestion, if, when you get your boat in, you could possibly use your tarp and pin it to the sides of the structure to prevent wind blown rain in on top of you


    Light fitting? oh god yeah. Good man, I totally forgot. I'll have to take it down tomorrow and just terminate the cable to a junction box. I'll go with a fluorescent tube or two.

    Re-tarps, way ahead of you:)


  • Closed Accounts Posts: 303 ✭✭Gingersnaps


    Well done. It's looking really good. You won't know yourself when it's finished.:)


  • Advertisement
  • Registered Users Posts: 348 ✭✭Gerard93


    Great job, you made great progress, Thanks for the indepth posts, pics & vids, tuning in daily icon10.gif


Advertisement