Advertisement
If you have a new account but are having problems posting or verifying your account, please email us on hello@boards.ie for help. Thanks :)
Hello all! Please ensure that you are posting a new thread or question in the appropriate forum. The Feedback forum is overwhelmed with questions that are having to be moved elsewhere. If you need help to verify your account contact hello@boards.ie
Please note that it is not permitted to have referral links posted in your signature. Keep these links contained in the appropriate forum. Thank you.

https://www.boards.ie/discussion/2055940817/signature-rules
Hi all,
Vanilla are planning an update to the site on April 24th (next Wednesday). It is a major PHP8 update which is expected to boost performance across the site. The site will be down from 7pm and it is expected to take about an hour to complete. We appreciate your patience during the update.
Thanks all.

1967 VW Variant.

Options
1131416181930

Comments

  • Registered Users Posts: 1,111 ✭✭✭wildwillow


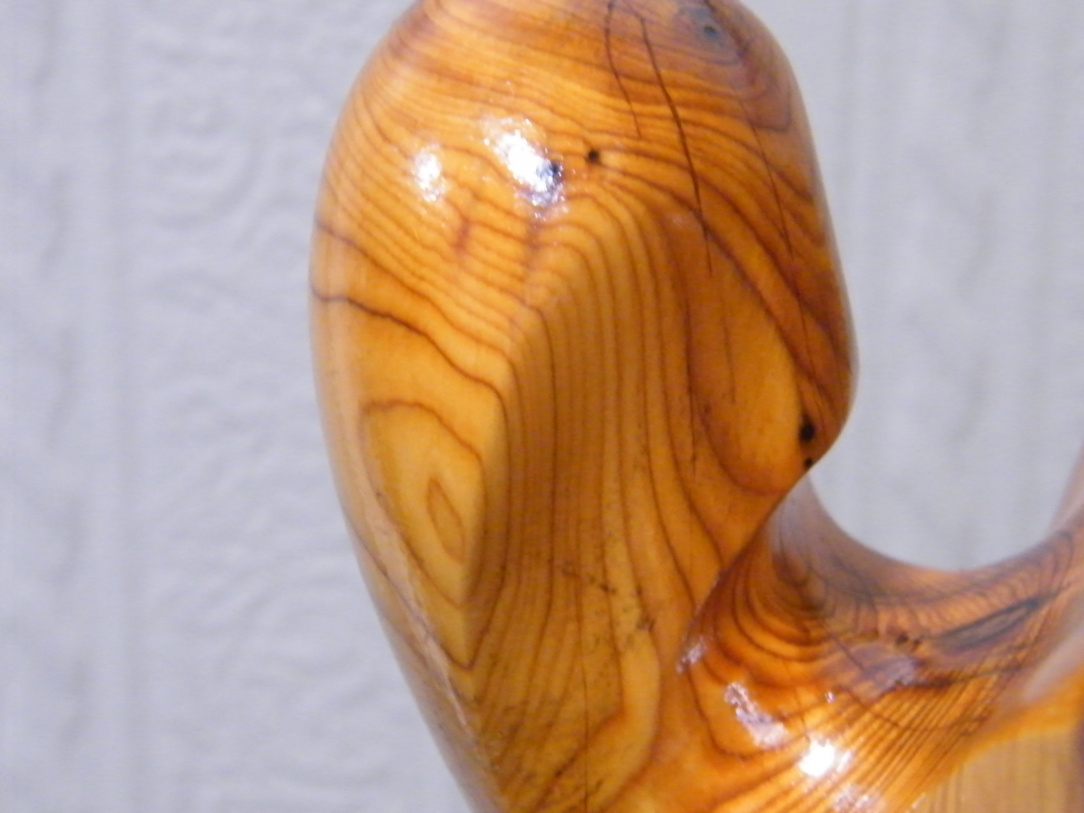
    I’m always intrigued at how some people can transfer their art to different materials. Your sculpture is divine. Enjoy the wedding and I hope they appreciate your talent.

    I wouldn’t be a fan of the previous car sculpted from expanding foam.


  • Moderators, Home & Garden Moderators Posts: 5,057 Mod ✭✭✭✭kadman


    I think Yew is such a spectacular timber that it looks great just polished up, thats why abstract forms in yew appeal to me. It relies as much on the beauty of the material in its figurative gran pattern, as it does on the sculpted form..


    I suppose this means that I get back to more metal bashing now😁


  • Registered Users Posts: 33,880 ✭✭✭✭Hotblack Desiato


    I can tell what it is, so it's not really abstract 😁

    It's beautiful and something they will treasure forever.

    Life ain't always empty.


  • Moderators, Home & Garden Moderators Posts: 5,057 Mod ✭✭✭✭kadman


    True, but thats a whole other thread😀


  • Registered Users Posts: 1,244 ✭✭✭MrCostington


    Fantastic work with the sculpture! and as always with the car too.


  • Advertisement
  • Moderators, Home & Garden Moderators Posts: 5,057 Mod ✭✭✭✭kadman


    True, but thats a whole other thread


    I'm always amazed at the beauty of yew timber for such a project. It has a spectacular grain pattern that really comes through with the right polish, and elbow grease.


  • Registered Users Posts: 763 ✭✭✭alfa beta


  • Moderators, Home & Garden Moderators Posts: 5,057 Mod ✭✭✭✭kadman


    He is not into classic cars.........I dont know where i went wrong🤣


  • Moderators, Home & Garden Moderators Posts: 5,057 Mod ✭✭✭✭kadman


    So with all the sculpture out of the way, and a new kitchen for the missus, ( keeps her off me back ha,ha,)

    Back to the variant next week.....finally, to get the front end tidied up and welded.Hooray.


  • Moderators, Home & Garden Moderators Posts: 5,057 Mod ✭✭✭✭kadman


    Well back on track. I checked and double check that my new side panels were up to the task. So I took off the wings to get better access for welding. I was greeted with a rather dismal looking wheelhouse panel. Its not what I expected as the wings are still rock solid.

    The panels are peppered with rust holes completely. So trying to fill these rust holes is a pure waste of time, as I would end up burning the panel completely to oblivion. So I put on the thinking cap over a cuppa and a break.


    Reminds me of starry, starry night..he,he.

    Only real solution is a replacement panel, problem is they are unavailable. And if they were, its a 1000 euro a side. Not gonna happen.

    So its panel making time....again. Not my choice but i have no choice unfortunately. Panel is to big to make in one go for me with damaged shoulders, so I will have to make it in a couple of pieces. I wasn't expecting this, but if i want the car driving its what has to happen


  • Advertisement
  • Moderators, Home & Garden Moderators Posts: 5,057 Mod ✭✭✭✭kadman


    THis is the total wheelhouse panel needed each side. If it was available which its currently not. Cost 550 euro plus 250 shipping. So 800 in total, so realistically thats not going to happen.So i need to get the mig tuned up and good to go.


  • Registered Users Posts: 8,268 ✭✭✭jmreire


    When I was working on them, they were called inner valances, and your ones are still holding their shape pretty well, so I guess with your metal working skills, you'll get it sorted just fine. The MIG is your friend. Good Luck, and keep the updates coming, OK? Thanks.


  • Moderators, Home & Garden Moderators Posts: 5,057 Mod ✭✭✭✭kadman


    Plan is to make the top half panel form just above the wing bolt holes, down to the petrol filler hole centreline on the right, parallel to the top edge of the panel and over to the centreline of the small hole on the left. There or there abouts.

    The top edge will just be to the top edge of the panel, but I will cut below top edge of existing, and put a rebated edge on the new panel about 6 mm wide. This allows me to proved a supporting 6mm lapped edge along the cut body just below the bonnet edge.

    THis allows me place the lap on the inside of the cut edge, and gives me a flush face on the inner face of the new panel. Then when I am welding it will be directed onto the new metal as opposed to blasting any more holes in possibly weaker existing metal.


    Thats the plan, but we all know how that can go pear shaped.


  • Moderators, Home & Garden Moderators Posts: 5,057 Mod ✭✭✭✭kadman


    There shape is not bad, but when i get through cleaning and prepping them for welding, I dont think they would hold up to well to the heat. I think the mig would make short work of the, and the mig doesn't like the minutest bit of rust as you know. Yeah I have heard them called valances, wheelhouse panel seem s to be the new one. I dont care what they are called, i just wish i had 2 nos, ha,ha.


  • Registered Users Posts: 8,268 ✭✭✭jmreire


    Yes, it looks pretty firm where the wing bolts on. That was what I meant when I said that it was holding it's shape pretty well. If it was a Beetle, than I'd say that there are still new old stock valances to be got, but for the Variant?, not so much I guess. ( unfortunately }


  • Moderators, Home & Garden Moderators Posts: 5,057 Mod ✭✭✭✭kadman


    Yeah loads of stuff for the beetles and campers, but the type 3 stuff is thin on the ground.


  • Moderators, Home & Garden Moderators Posts: 5,057 Mod ✭✭✭✭kadman


    Just marked out the template to put me in the ball park for cutting. And when i have rough cut it, i will drill the wing bolt holes, and then bolt the cut metal to the body and it will stabilize it for me when I am trimming the lower parts of the new metal for fitting.

    Apologies for the poor pics but " goddammit Jim, I'm a car doctor, not a photographer"🤣


  • Moderators, Home & Garden Moderators Posts: 5,057 Mod ✭✭✭✭kadman


    I decided to go with clicker pins to hold the panel in place for marking/cutting/bending and fettling.

    It places the panel in the identical position everytime to minimise errors in lining up. Plus its handier than messing with panel vice grips. They work by expanding in the drilled hole when the pliers is off them. They are spring loaded to clamp when they are at rest so to speak.Naturally enough this metal panel will be the new template in its flat state to use to mark out a cutting template for the other side..


  • Registered Users Posts: 8,268 ✭✭✭jmreire


  • Registered Users Posts: 2,341 ✭✭✭jippo nolan


    Those clicker pins are used to hold aircraft skins together while riveting!


  • Advertisement
  • Moderators, Home & Garden Moderators Posts: 5,057 Mod ✭✭✭✭kadman


    Good days work done today. I marked and make the paper templates, cut out the metal panel oversize. Then clicker pinned it to the body, and took a few more measurements. Then i cut the panel to suit, a bit of trimming here and there. Then went over to the plannishing hammer, and worked the profile as best I could, considering I didn't have a wheel to finish the final smoothing, but its ok.


    I then re positioned the panel to a slightly higher position, marked it for trimming , and this is where we are after a few hours.


  • Moderators, Home & Garden Moderators Posts: 5,057 Mod ✭✭✭✭kadman


    Wouldn't you think they would put in an old spot weld or two, rivets me arse, at least I am fully welding🤣🤣


  • Registered Users Posts: 2,341 ✭✭✭jippo nolan


  • Moderators, Home & Garden Moderators Posts: 5,057 Mod ✭✭✭✭kadman


  • Registered Users Posts: 6,389 ✭✭✭jonski


    You should be putting this up on Youtube . It's ridiculous expecting someone of my limited intelligence to visualise what you are doing :)


  • Registered Users Posts: 8,268 ✭✭✭jmreire


    Back in the day, I remember oxy/acty gas welding Aluminum. Never tried spot welding though, but I don't see why not. The main difference between gas welding metals steel, iron etc and aluminum is that you can see the weld pool forming in steel etc, but it happens very quickly with aluminum, and you have to know how to judge it.


  • Moderators, Home & Garden Moderators Posts: 5,057 Mod ✭✭✭✭kadman


    With the fine weather recently, the weekend was a great opportunity to take out the &" fastback to knock the cobwebs off if for a few runs. Only kept to a local area just to see how it would wake up after its winter slumber. I noticed going up one hill that I was lacking a small bit of power, and put it down to driving up the hill in too high a gear at the start. And carried on me way. All good no frights of any description..

    It was time for an oil change and I did that and took it for a spin. I noticed that on the journey at55 km an hour there was some vibration at the wheel. So drove home at 4o km which had no vibration at all. Inspected the front right wheel off the ground, and it was locked solid. So a seized caliper was probably the issue.


    Stripped it down and re polished the pistons which were locked into the caliper. Cleaned the caliper, and covered the seals, and the inner caliper in rubber grease, re assembled, bled the caliper. Job done


  • Registered Users Posts: 8,268 ✭✭✭jmreire


    And that solved your problem ? I imagine that the disc would have gotten fairly hot with a sticking brake caliper...was the disc itself scored? But anyway always very satisfying after discovering a problem, being able to identify it and then fixing it.


  • Moderators, Home & Garden Moderators Posts: 5,057 Mod ✭✭✭✭kadman


    Luckily enough I am well in tune with the way my classics run. And i know the instant there is a slight change in its overall handling. I had an inkling very recently that the right hand caliper was not fully releasing as quick as the left hand one, all the tell tale signs were spotted a few weeks ago. Slight pull to the right on braking , which I was hoping would return to normal after a bit of driving.

    But it switched to a pull to the left, hinting at it now being fully ceased and non operational. I was careful enough to drive sedately while all this was going on, so there was no overheating of the new discs i put on last year. As a matter of fact, I always check the heat from all the wheels when i return from a journey. Its the quickest way to pinpoint any wheel that is heating beyond the rest of them.


    On any of the classic vw I have i always renew the brake drums, discs, pads and shoes as quick as possible.

    Problem with the type 3's is the lack of availability of new calipers. Cant be got, so rebuilding is the only option... And all the reference manuals I have for the vw's suggests fitting pistons dry, which i did. I#ve since found new data which suggests lubricating all the caliper parts during rebuild with Red rubber grease which is designed for brake caliper rebuilds.

    So i did that this time round. Its not a big deal as the calipers are easily removed.


  • Advertisement
  • Registered Users Posts: 8,268 ✭✭✭jmreire


    Yes, thats an old trick, after a drive, just put your hand on the wheels and see if any are hot to the touch. On the Beetles, it was very easy to over tighten the brake shoes against the drums,,,,the standard was tighten the adjuster until the wheel locked, then slacken off the adjuster 4 notches'. But sometimes, they were not backed off enough, and in extreme cases, could seize up, stopping the wheel completely. strange ( but lucky too, for you) The calipers as a unit were unavailable,,,,,but the pistons and seal's were. I guess that the same piston sizes are shared between different caliper manufacturers? Far as I remember, we always used a heat resistance grease to lubricate them too.


Advertisement