Advertisement
If you have a new account but are having problems posting or verifying your account, please email us on hello@boards.ie for help. Thanks :)
Hello all! Please ensure that you are posting a new thread or question in the appropriate forum. The Feedback forum is overwhelmed with questions that are having to be moved elsewhere. If you need help to verify your account contact hello@boards.ie
Please note that it is not permitted to have referral links posted in your signature. Keep these links contained in the appropriate forum. Thank you.

https://www.boards.ie/discussion/2055940817/signature-rules
Hi all,
Vanilla are planning an update to the site on April 24th (next Wednesday). It is a major PHP8 update which is expected to boost performance across the site. The site will be down from 7pm and it is expected to take about an hour to complete. We appreciate your patience during the update.
Thanks all.

Today I did something to my car (volume 2)

Options
1312313315317318326

Comments

  • Registered Users Posts: 2,525 ✭✭✭wandererz


    Open with Chrome.

    Long press on the image above and select "search with Google Lens"


  • Registered Users Posts: 9,919 ✭✭✭dodzy


    BMW F10 M Sport. Issue with vibration under braking. Changed front discs and pads. APEC brand. Installed. Problem gone. 5k miles and problem returned. Changed discs again (got refund on previous set) and went for Brembo. 5k miles and problem returned. All indications point to using OEM as an absolute fix.

    2nd issue- the ZF8 box in these cars are just superb but lately I’d been experiencing rough gear changes, most notably from 5th to 6th. No issue once warm but definitely something up so….


    Bought a ZF service kit for €260 and OEM discs for €350 and got to work.

    Up she goes to give enough room to work. Level obviously.

    Please ensure when doing this that you can crack the filler plug (8mm hex key) before proceeding. Open plastic filler plug (larger hex) and drain. Supposed to hold approx 6ltrs but only 3 came out of mine. Once empty, crack the 13 x T40s and discard as new set come with kit, including new filler plug.

    How this all works to provide buttery smooth changes is just mind boggling.


    new pan installed, tighten to torque spec and in a alternating manner.

    Purchased a syringe to fill. Worked like a dream. Put in enough until fluid starts trickling out. Then cap off and start car. Run through all gears manually with foot planted on brake. Just a quick P/N/R/D/1-8 flick through. Then leave running until temp is 40-50C. Ista will tell you but I just used an IR gun on the thin part of the sump. Running time from cold to 40C approx 12mins.

    open plug and fill again. My first fill took 3ltrs and 2nd fill took an extra 1ltr.

    again, once fluid trickles, you’re done.

    that’s it, very straight forward.

    in between waiting for temp to come up…..

    fitted these bad boys. Just for anyone flipping discs on this car, the actual brake pad carrier just has to be removed. 2 x torx bolts removed from each wheel side, release the carrier, open brake fluid reservoir, compress piston back home, refit. Very handy job.

    Happy to report gear change is super slick once again. On the brake vibration, well, only time will tell 🙏🏼


  • Registered Users Posts: 1,989 ✭✭✭Slideways


    I would be very surprised if two sets of discs warped. Did you check the run out on them? Is your back brakes working?


    Did you clean the face of the hub fully before putting the disc on?


  • Registered Users Posts: 9,919 ✭✭✭dodzy


    I know, me too, but….it’s pretty common on the web; many identical issues. Mating faces perfectly clean (wire brush adapter on drill) and rears are fine.


  • Registered Users Posts: 1,302 ✭✭✭Harcrid


    Yeah its well known on the F10's and OEM discs are the way to go. I had the same issue when I replaced with Brembo discs and ended swapping for OEM 12 months later.


  • Advertisement
  • Registered Users Posts: 2,490 ✭✭✭Titzon Toast


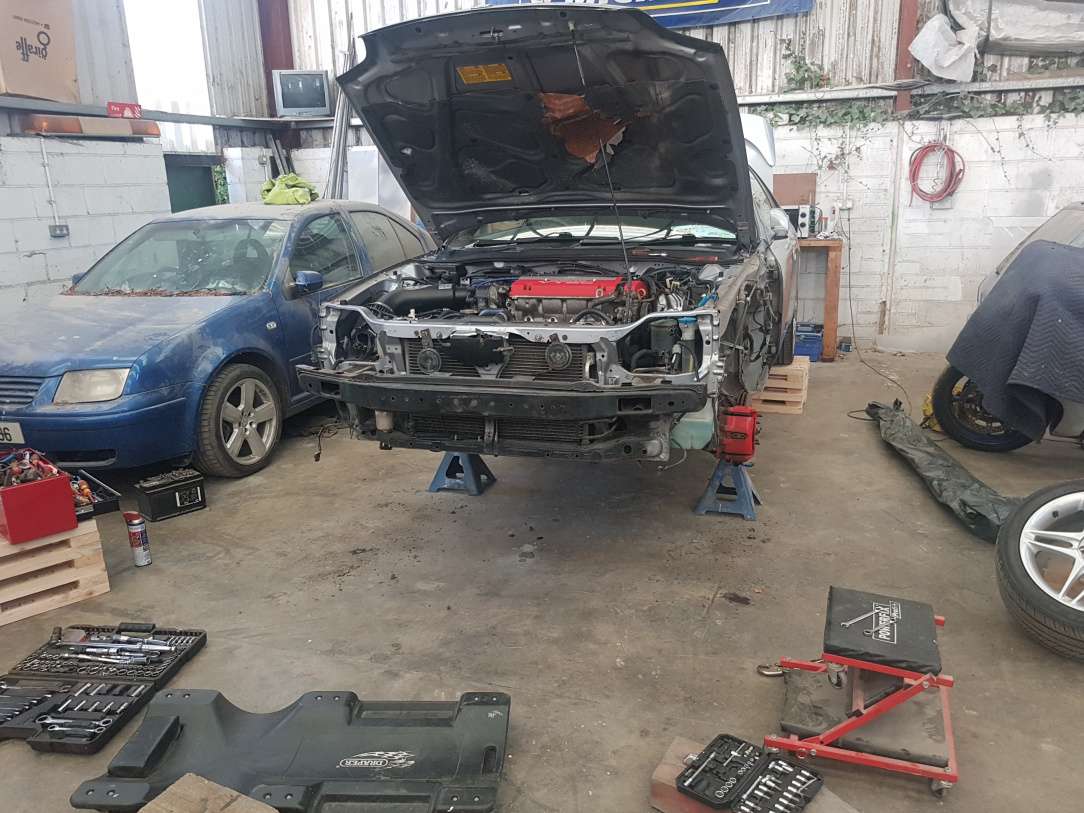
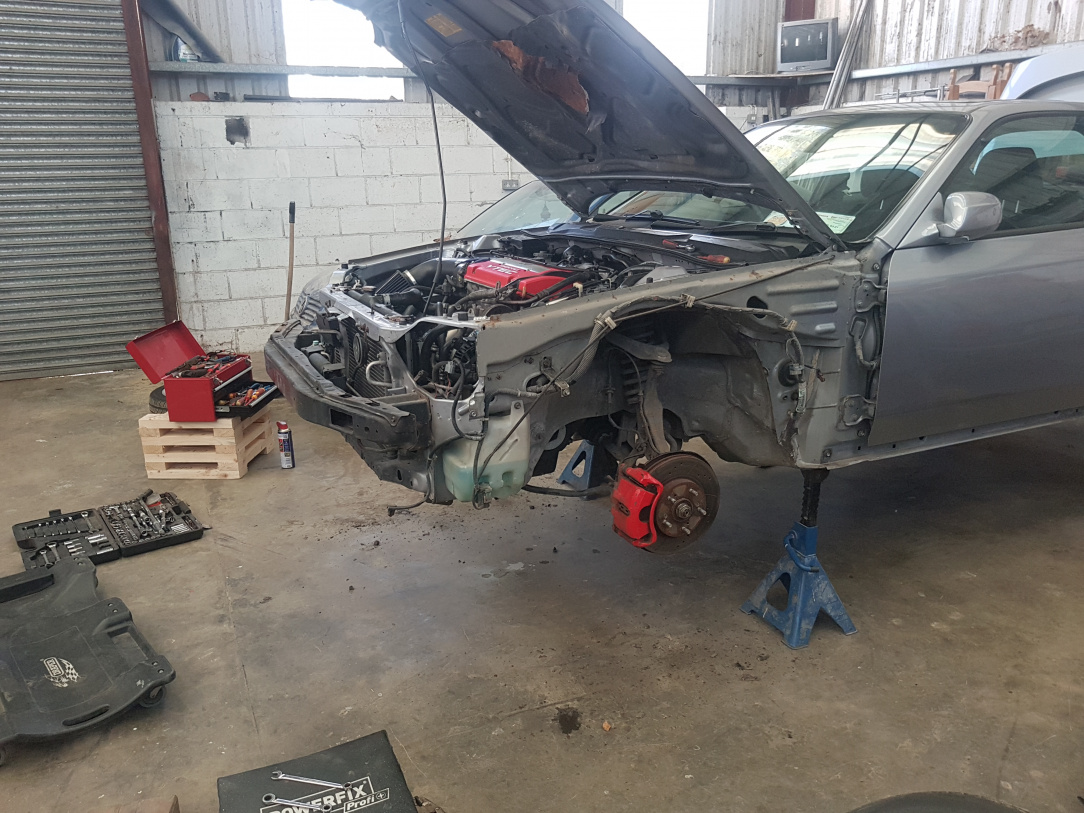
    I got my spot back in my old garage last week, I've just started taking my Prelude apart to fix some rust and WaxOyl it all before it gets too late.

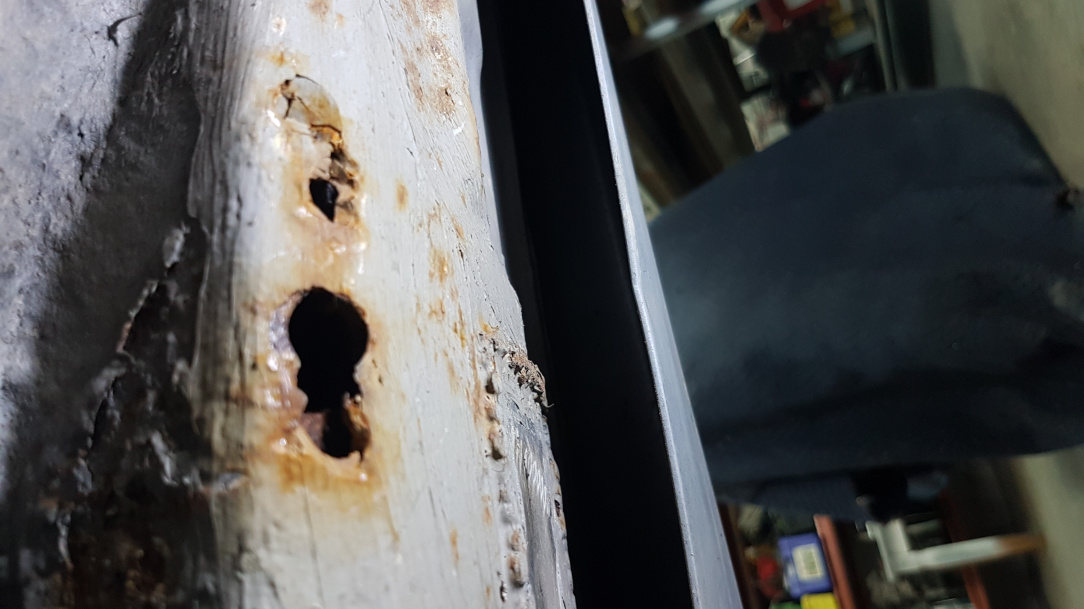
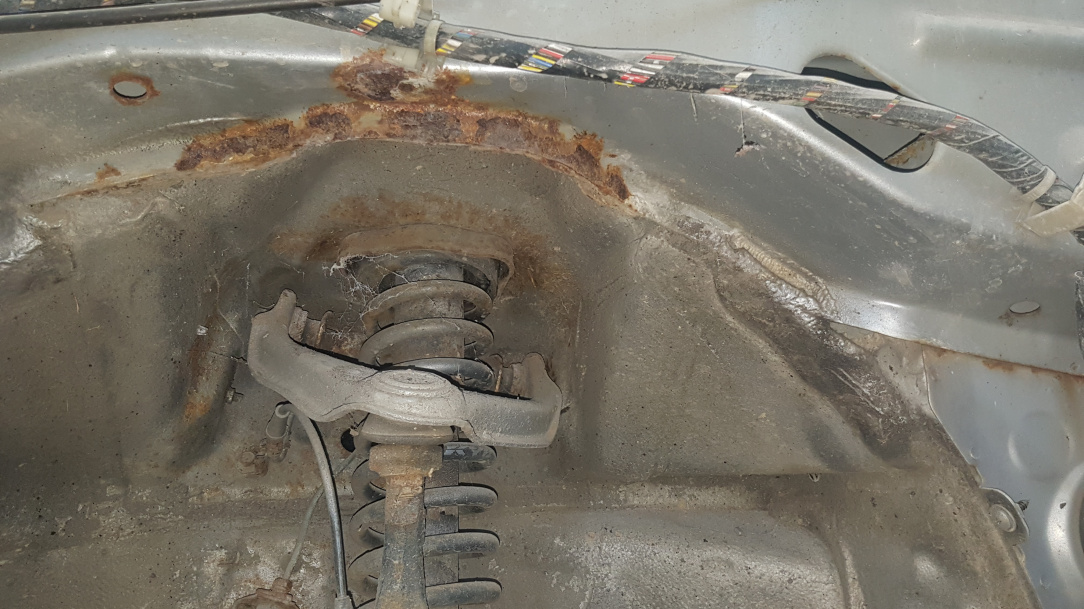
    It's actually not too bad at all for a 90's Jap car that spent it's first few years on the Atlantic coast.

    After all that work is done I've a heap of new bits to go into in over the winter. A new clutch, some Type -r seats, a full intake manifold and throttle body from an Accord Type r and a Hondata ECU.


    Here are some of the bad bits!


    I've bought a welder and I just need to learn how to use it. I'm gonna practise on loads of scrap bits first.


  • Registered Users Posts: 73,382 ✭✭✭✭colm_mcm


    So I recently upgraded my MIB1 Amundsen 5.8”system

    to a MIB 2.5 Columbus 8” system, this gives Android Auto/Apple CarPlay, better maps, quicker operation, better resolution on backup camera etc.

    The big drawback was having to use the cable for CarPlay, I had retrofitted wireless charging earlier in the year too, which was effectively rendered useless by having to use a cable. I didn’t like having to plug in/out all the time, or forgetting to bring my phone with me.

    Picked this up on Black Friday, it plugs into the USB and used Wi-Fi and Bluetooth to replace the cable and make the system wireless.

    This is the standard installation on an Octavia

    Feck that. So I whipped the screen and climate panel out

    Removed the green MIB2 USB connection from the fascia

    Swapped it for the old white MIB1 USB to fill the gap (I’ll look into getting this powered for charging stuff down the road)

    added some foam tape to the unit and wedged it into a handy recess behind the screen

    So now have wireless charging and CarPlay


  • Registered Users Posts: 2,490 ✭✭✭Titzon Toast


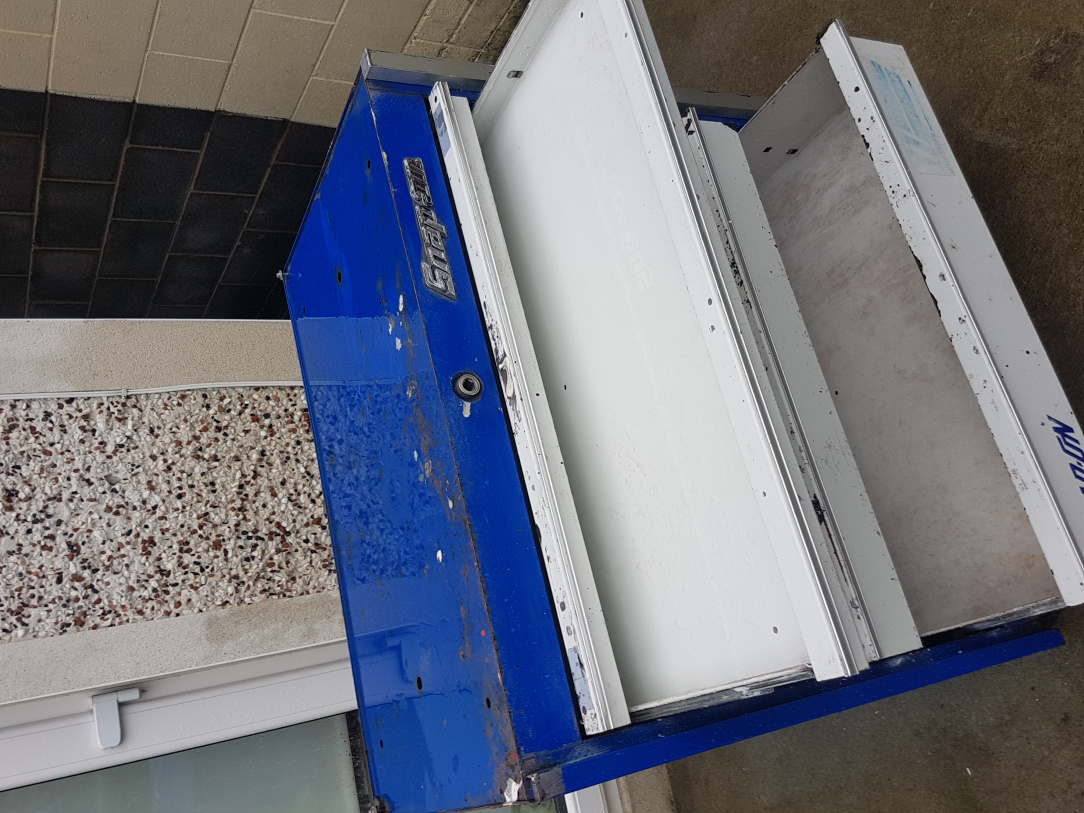
    I was about to spend 300 quid on a tool box and my friend gave me this one for nothing. I couldn't believe it, I never thought I'd ever own a Snap On toolbox.

    I spent a few hours scrubbing it and greased up the drawers and the wheels.

    Can't wait to fill it up now.


    Sorry for the sideways pictures! I couldn't figure out how to rotate them on my phone.


  • Registered Users Posts: 985 ✭✭✭BlakeS94


    Nice job, I'm in the market for a tool cabinet myself but they're expensive, I've resorted to looking for better quality but 2nd hand ones and I'll do the same as what you've done and clean them up


  • Registered Users Posts: 2,490 ✭✭✭Titzon Toast


  • Advertisement
  • Registered Users Posts: 8,571 ✭✭✭PsychoPete


    I paid around 5k for my snap on tool chest, it's the one thing I regret buying because I also had the 600 piece teng chest. I sold the both of them and bought the 1000 piece teng chest as I only do that kind work on the side. The US Pro boxes look like decent value for money, 13 drawer chest is only around 250


  • Registered Users Posts: 720 ✭✭✭Detritus70


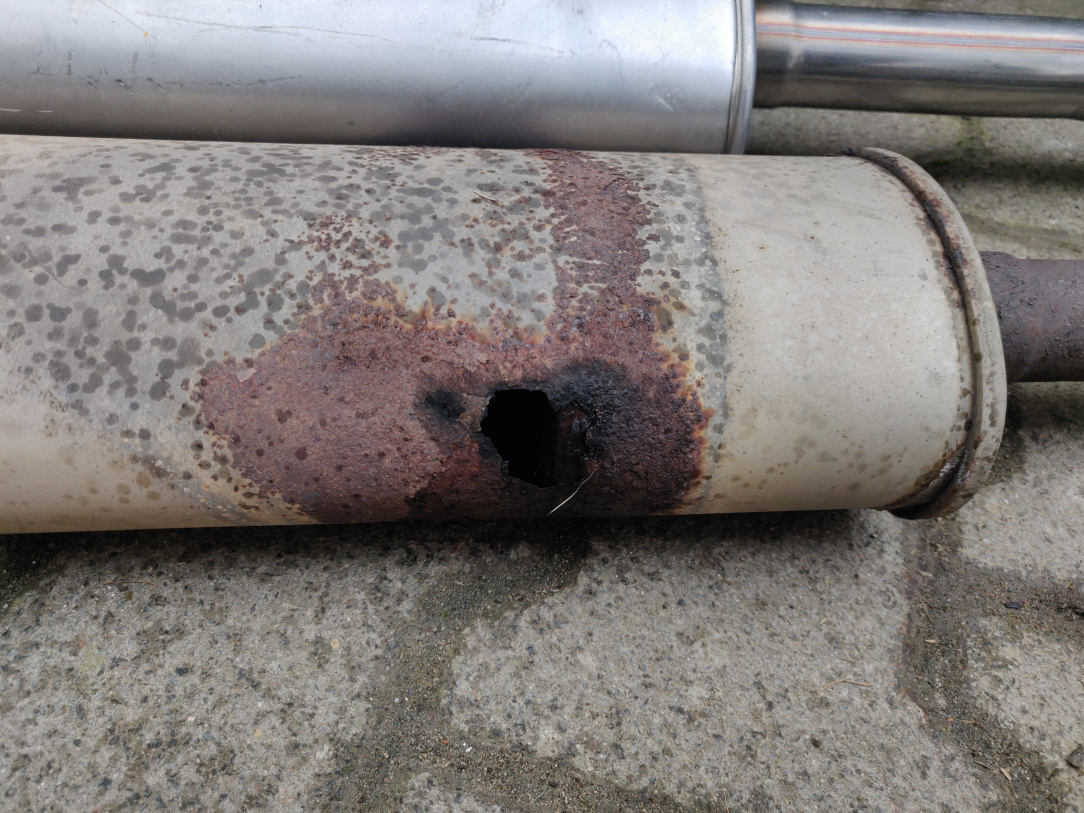
    Dacia Duster needed an exhaust. Went relatively easy, except there was only a flared bit at the front and at the back I needed a connective pipe.

    I'll miss the "sporty" sound. 😜

    Remember the old Duster thread where some car dealers angrily stated that they would all crumble to dust within 5 years and have a resale value of zero? This is a 2010 and so far zero rust or technical issues. This model still goes for between €5-7k in Germany.


  • Registered Users Posts: 2,490 ✭✭✭Titzon Toast


    There's one going for €140k on Adverts!


  • Registered Users Posts: 720 ✭✭✭Detritus70


  • Registered Users Posts: 985 ✭✭✭BlakeS94


    My soul hurts..

    Went out today to do the rear anti roll bar bushes and links on my car. I've had the parts for a while but never got around to it untill today.

    Well...

    All 4 anti roll bar bracket bolts had rounded heads, they were seized, and also damaged threads. I had purchased an Erbauer rounded bolt removal socket set from Screwfix a few months ago and threw them into the toolbox and forgot about them. Thank god I remembered today, they are amazing when you need them, a good hammering onto the bolt and it never lost any grip and brought the bolts all the way out with some help from penetrating oil. But they were still quite stiff. I'll have to run a tap through the bolt holes.

    Onto the links, all rusted stubborn nuts along with free spinning threads with rounded spindles so I couldn't put a hex in them and no flat at the back for a spanner, ended up having to hammer the 5mm hex pretty much the entire length of the spindle before it caught and I could remove them.

    Got the Anti roll bar off, and the bushes themselves were seized onto the bar. At this point I had enough and after 3 hours I tossed the bar into the shed and will leave it for a few days. Can't get new bracket bolts from Ford untill Wednesday anyway.

    Oh the joys.

    I would highly recommend those Erbauer bolt removal sockets.


  • Moderators, Sports Moderators Posts: 28,456 Mod ✭✭✭✭Cass


    Had the exact same problem with mine. I mine indentical. Same bolts seized (managed to get one out but the other three required a bolt removal socket like yours). I was lucky that the nuts off the drop links did give way with a liberal soaking of pentrating fluid every three hours for a day, but were badly rusted to the point of crumbling when I tried to use a socket.

    The bolts from Ford, iirc, were €22 for the four. They'll only be gotten from Ford, or so the local motor factors told me and they can usually get anything.

    Just a tip, check the wishbone arm, the one that holds the spring. They tend to rust and if original they may also crack, leading to breaking. I only copped mine because the tracking was off and the bolt to adjust the camber had to be cut off. When I was inspecting the arm I seen the crack so ended up replacing both those too. Along with springs, shocks, drop links, ARBs, wheel bearings, and the bolts. Basically a new complete back end.

    Forum Charter - Useful Information - Photo thread: Hardware - Ranges by County - Hunting Laws/Important threads - Upcoming Events - RFDs by County

    If you see a problem post use the report post function. Click on the three dots on the post, select "FLAG" & let a Moderator deal with it.

    Moderators - Cass otmmyboy2 , CatMod - Shamboc , Admins - Beasty , mickeroo


  • Registered Users Posts: 985 ✭✭✭BlakeS94


    That work today was the most heartbreaking I've went through to date, even as the bolts were loosening out they were very tight so the threads are f@cked. To be honest I've never used a tap. Is it straightforward just once I get the right size for the bolts holes Which I'll be able to from the new bolts I get from Ford.

    Didn't throw my eye to the wishbones but didn't see much they just have some surface rust on them.

    The bolts cost me €15 for 4 of them from Ford on the Ballysimon Road in Limerick.

    Any tips for removing the bushes to the bar? I have the bar removed but they are welded onto it. Hopefully be easy to get the new bushes on as I'll just stand on them with the bar on the ground.


  • Moderators, Sports Moderators Posts: 28,456 Mod ✭✭✭✭Cass


    That work today was the most heartbreaking I've went through to date, even as the bolts were loosening out they were very tight so the threads are f@cked.

    I won't say they're not, but hold off on the tap as when I got mine out they were tight and the new ones going in were just as tight. The anti-roll bar exerts a good deal of force meaning the bolts are working hard even going back in. When I got mine out I oiled the threads (of the hole) liberally and used a circular wire brush on a drill to scrub the inside while oiling well. I then used a coppper grease at the mouth so the bolts would bring it "with them" as they tightened. I gave a full turn in then a quarter back for the first bit to make sure I wasn't cross threading (hard to describe but you'll know if they're cross threaded as soon as you start by feel). Throughout they were tight and once I got about half way in I ran it home with the air gun then torqued them off. Cannot remember the torque setting, I'll see if I can find my list of torque settings.

     To be honest I've never used a tap. Is it straightforward just once I get the right size for the bolts holes Which I'll be able to from the new bolts I get from Ford.

    The bolts are M10 iirc. So 10mm with a pitch thread of 1.5 usually. The tap should be easy as you're only clearing/cleaning rather than actually cutting. Just clean it well, oil liberally, go in a half turn, back a quarter and take your time, because as said you're only clearing/cleaning not cutting.

    Didn't throw my eye to the wishbones but didn't see much they just have some surface rust on them.

    Just something to check as you're under it.

    The bolts cost me €15 for 4 of them from Ford on the Ballysimon Road in Limerick.

    Balls, mine cost an extra €7. I was robbed, robbed I tell ya. 😁

    Any tips for removing the bushes to the bar? I have the bar removed but they are welded onto it. Hopefully be easy to get the new bushes on as I'll just stand on them with the bar on the ground.

    Prise a flat head screw driver, or similar, between the clamp and the bush. You need the "arched" housing off before the bush will move, but the bush is split and will only come apart when the clamp is off. So prise the clamp off, then pul the bush apart and it'll come off.

    If, and it shouldn't come to this, you cannot for love nor money get the clamp off, then grease the crap out of the anti-roll bar from the bush to the end and slide it along. This will be labor intensive and should be unnecessary if you get the clamp off.

    Once off, the clamp, sand the inside and outside with wire brush and sandpaper and perhaps consider painting it with zine primer and a fresh coat of paint before installing new bushed. Just make sure to mark/measure the spot where the bushes go to make for easier re-installation.

    Post edited by Cass on
    Forum Charter - Useful Information - Photo thread: Hardware - Ranges by County - Hunting Laws/Important threads - Upcoming Events - RFDs by County

    If you see a problem post use the report post function. Click on the three dots on the post, select "FLAG" & let a Moderator deal with it.

    Moderators - Cass otmmyboy2 , CatMod - Shamboc , Admins - Beasty , mickeroo


  • Registered Users Posts: 985 ✭✭✭BlakeS94


    The bolts themselves have threads ripped off which is why I think running a tap through will help, I sprayed a lot of penetrating oil in the internal threads after I removed the bolts to clean it out a bit.

    I plan on using copper grease but don't have anything to clean the inside of the bolt holes.

    I have a Haynes manual for the torque values but thank you anyway. Yeah the bolts are M10x1.5 and they're 25mm length.

    I did check the welds on those exhaust hangers from before,nice and strong. I'll check out the control Arms when I'm back underneath.

    I'll manage to get the bushes off with your advice, I've done this job before on a different car and all the brackets needed were some brake clean and a hand scrub with wire wool.

    Hope it's plain sailing from here on


  • Moderators, Sports Moderators Posts: 28,456 Mod ✭✭✭✭Cass


    Don't mind my "advice" on painting, its just me. I stripped, primed, painted the anti-roll bar on mine, as well as the clamps and other areas while I had them off. Like things to be shiney and new looking.


    As for the bolts, they don't look overly bad from the pictures above. The usual dirt, crap, rust and over a decades worth of grime worked in, but the threads are not only there and visible but seem decent. The blue thread locker will make removal a little tougher not to mention initial breaking of them. I reckon a good cleaning, even with the correct tap will work a treat.

    Post edited by Cass on
    Forum Charter - Useful Information - Photo thread: Hardware - Ranges by County - Hunting Laws/Important threads - Upcoming Events - RFDs by County

    If you see a problem post use the report post function. Click on the three dots on the post, select "FLAG" & let a Moderator deal with it.

    Moderators - Cass otmmyboy2 , CatMod - Shamboc , Admins - Beasty , mickeroo


  • Advertisement
  • Registered Users Posts: 985 ✭✭✭BlakeS94


    I'd like to clean up the anti roll bar as it's missing paint and flaking but the structure of it is still solid, I'd hate for an NCT fail on a flakey anti roll bar.

    I don't know if it came through on the photo well but there is some bright metallic threaded bits on each bolt where it's stripped a bit, I could see it ripping off like swarf when removing. Might run the dye through them and use for backup because I have the new ones paid for already

    Post edited by BlakeS94 on


  • Moderators, Sports Moderators Posts: 28,456 Mod ✭✭✭✭Cass


    For €15 it makes sense to change them, no question. They just don't appear to be too bad. Mine looked pretty much the same bar the mangled head of the bolt while trying to get them out.

    Forum Charter - Useful Information - Photo thread: Hardware - Ranges by County - Hunting Laws/Important threads - Upcoming Events - RFDs by County

    If you see a problem post use the report post function. Click on the three dots on the post, select "FLAG" & let a Moderator deal with it.

    Moderators - Cass otmmyboy2 , CatMod - Shamboc , Admins - Beasty , mickeroo


  • Registered Users Posts: 1,805 ✭✭✭passatman86


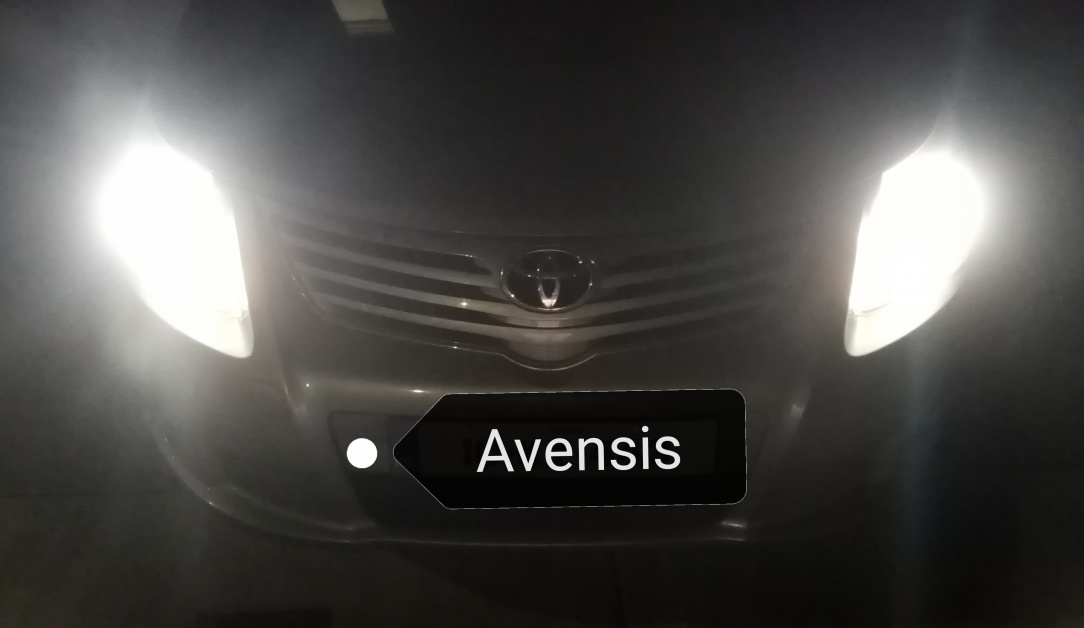
    Had led's in my avensis the last 3 years. Passed nct every time as i have projector headlamps. I suppose 3 years was a good run - but last week drivers side got dull. So replaced leds with standard h11 but they are called "5k whiter" . So will see how i find them - not as bright to the leds id say but hopefully decent enough. 15 minute job and not that cold outside as expected lol...

    Dull driver's side led, perfect passenger

    5k whiter new bulb drivers side. Led passenger

    Both sides new 5k whiter h11 bulbs

    At least the alignment looks good, ok brightness

    Post edited by passatman86 on


  • Registered Users Posts: 985 ✭✭✭BlakeS94


    Okay, I think what I'll do is clean the threads of the old bolts with a dye, and run them up and down the bolt holes with loads of oil hopefully will clean it up, that way I don't have to worry about messing up the tapping.

    None of the heads fit a 13mm, and they're all even more out of shape due to that bolt removal socket, which again I highly recommend, no damage to the socket at all I think its coated in something.

    Thanks once again for your help Cass I'll update when the job is done


  • Registered Users Posts: 985 ✭✭✭BlakeS94


    I give up, for the life of me I cannot get the bushing brackets over the bushings to start them with the bolts, out there all evening, tried everything I could think of, they're not going on, so I give up, I'll pay somebody else for that stress and I am never ever ever going near anything got to do with anti roll bar bushings again.

    Completely lost my temper with it I think I've sprained my wrist and knuckles from punching whatever was close to me on the car, never have I had such heartache with a job. Makes me want to give up on automotive DIY.

    I tried using different kinds of jacks, I tried using different sized pry bars, I tried using a helpers foot to press on the bracket while I thread the bolts, I tried different angles,I tried longer bolts, I tried lining up the bolt holes with a screwdriver, I tried vice grips, absolutely nothing even came close to working. It was either no where near threading the bolt or the bolt holes weren't lined up.

    I double checked that they are the right parts and they are. My body is in bits over it. So im going to bed quite disheartened tonight. *sigh*


  • Registered Users Posts: 1,805 ✭✭✭passatman86


  • Moderators, Sports Moderators Posts: 28,456 Mod ✭✭✭✭Cass


    First off, I feel your pain. I had a time of it too and used various different languages to express my annoyance. Anyone that came near me got an earful, not from anything they done, but out off my own frustrations.

    You say you have the right parts, just check that. My first attempt ended with disappointment but I got renewed hope when I realised I was trying the front bushing on the rear. As the front ARB is bigger and longer than the rear ARB, the clamp simply "slide" off the bushing meaning my attempts to hold it in place were not only futile, but would have ended in my taking it off.

    I only mention this because, exactly like you described above, I had the exact same problem in that the clamp kept coming off, of its own accord, and due to the bushing being about 1/4"+ longer than the rear this "discrepancy" meant the bolts could not seat enough to make contact with the threads so I couldn't get the bolts started.

    An easy way to check the bushing is the right one is to take the bushing off the bar completely. Place the clamp over the bushing and push the clamp fully down. The bushing should fit into the clamp with the "bottom" of the bushing perfectly aligned with the flattened end of the clamp. If the bushing is fully seated in the clamp, and be sure of this, but is protruding past the clamp base then its the wrong one.

    If you have the right one, or found its the wrong one and replaced it with the correct one, then the job will be awkward but doable. Attach the droplinks first but DO NOT fully tighened everything. The droplinks will help hold the anti roll bar somewhat in place while you simply manoeuvre the bar into position and align the bushing.

    Picture you are under the car with your feet towards the engine. Your looking directly up at the sway bar and ARBs. At this point you have the ARB on the roll bar and the clamp on the ARB. IOW all ready to be presented to the car. I start, remembering my orientation of feet towards the engine and head pointing out the back, with the top bolt. "Tilt" the bushing and clamp (as one), place a knee against the anti roll bar and push up, and then align (as best you can) the "top" bolt hole with the clamp. Have the bolt in hand ready to start it and a socket drive at hand ready to use it. There shouldn't be too much hassle getting one bolt lined up and started, hence why I said to check the part is actually correct, so you can get one side of the clamp started with a bolt. Once its started don't run it home, and don't only run it in a thread or two and risk stripping your new bolts. A couple of turns of the bolt is needed, hence having the socket drive to hand. Just enough to start the bolt and hold it in place.

    Next bit is to force the other side of the clamp into place. The method I used was to get a vice grip/mole grip and basically pull the clamp into position with it. Doesn't have to be all the way just enough to get the bolt started without killing yourself trying to hold the anti roll bar, clamp/bushing, and bolt all in place.

    I didn't run both bolts home just enough to stop them coming out or doing damage. I then moved to the other side and repeated the process. Once I had all four in place I ran them home.


    I feel it important to repeat that the right size bushing will go home with a little work, but nothing along the lines of what you described. I had the exact same experience, but as said above figured out I was using the wrong bush. Even using a 20mm bush on a 18mm bar will cause this so if the bushing is a rear one, but th wrong diameter hole (in the bushing) you will have the same size. The way to avoid this is to use the chassis number to find the right part. When I got mine the guy in Ford gave me the "standard ones which didn't fit. When I gave him the chassis number (by usnig the reg) he found out the Titanium X Sport have their own bushing that no other model uses. They look identical but the proper bushings went on so much easier there was obviously something different that I couldn't see that was causing my initial problems.


    You're hardly around the midlands? If so I might be close enough to drop over/around if you need/want the help.

    Forum Charter - Useful Information - Photo thread: Hardware - Ranges by County - Hunting Laws/Important threads - Upcoming Events - RFDs by County

    If you see a problem post use the report post function. Click on the three dots on the post, select "FLAG" & let a Moderator deal with it.

    Moderators - Cass otmmyboy2 , CatMod - Shamboc , Admins - Beasty , mickeroo


  • Registered Users Posts: 985 ✭✭✭BlakeS94


  • Registered Users Posts: 985 ✭✭✭BlakeS94


    The bushings that came off the car have this part number : 6G91-4A037-XCB. The bushings I got match up with this part number 1581670.

    I remember putting the bushing inside the bracket and it does fit but I don't think it was flush with the bottom of the bracket, it was protruding so bit. I might just get them from Ford to reduce any guess work. They're 18mm bushings. I've done bushings before and all I needed was a helpers foot the push the bracket over the bushing and that was it.

    I'm hoping they are wrong and I get stop beating myself up over it.

    I had the drop links attached loosely to hold the bar up, and cable ties around the middle to keep it in line with the bolt holes.

    I was also positioned the way you described.

    I'm 10 minutes away from Limerick City, I think I'll order the bushes off Ford and if they look different I'll chance fitting again. I could get one bolt started but when i tried bringing the bracket over the bushing the bolt hole was nowhere near in line.


  • Advertisement
  • Registered Users Posts: 2,490 ✭✭✭Titzon Toast


    It definitely sounds like they gave you the wrong parts.

    You know yourself, they shouldn't be that much hassle to fit. Sounds like you're fighting a losing battle!


Advertisement