Advertisement
If you have a new account but are having problems posting or verifying your account, please email us on hello@boards.ie for help. Thanks :)
Hello all! Please ensure that you are posting a new thread or question in the appropriate forum. The Feedback forum is overwhelmed with questions that are having to be moved elsewhere. If you need help to verify your account contact hello@boards.ie

chance of a lifetime "King's Ametyst"

Options
17810121321

Comments

  • Registered Users Posts: 20,039 ✭✭✭✭neris


    for cruising your better off with topping lift especially if short handed. saves faffing about with the halyard and the boom when you drop the main


  • Registered Users Posts: 680 ✭✭✭copper12


    Evening all
    I had all the time in the world to fit the bolts to the bow section
    This would tie the forestay as well but wouldn’t you know I left the top two bolts out
    I only spotted it when I went to paint that section
    Since there was no way I could fit true the opening I was tempted to leave it as it was
    But I found a way
    Grab a grandchild :p


  • Closed Accounts Posts: 5,108 ✭✭✭pedroeibar1


    As the great-aunt, a Cork woman, used to say about me when I was a small boy doing jobs for her - "You're as handy as a small pot!"


  • Registered Users Posts: 680 ✭✭✭copper12


    Evening all
    Since it’s been raining, I said I would post this.
    Do you remember I got four’ 12 volt’ 100ah’ lead acid batteries?
    Before Christmas; well’ I have been playing around with them for the last couple of weeks.
    They had no electrolyte left in them; as they were lying around for a couple of years.
    Since I got them for free, I decided to try and revive them; and since I had some gear lying around, most likely bought off the twins, over the years, I said I would give it a go.
    I added about a litre of distilled water to each battery.
    The highest reading from any of the batteries was 2 volts.
    I started off with a 12 volt trickle charger; 12 volt inverter ‘one that you plug into the cigarette lighter, and the 24 volt inverter that fell of the back of a truck .
    Any way’ to make a long storey even longer, I had to use a slave battery, and got one of the batteries to accept a charge, when I got this battery up to 12.5 volts, I modified the 12 volt inverter, basically took off the lighter socket, and fitted two crocodile clips, then used this battery to charge the next battery.
    In order to try and rejuvenate the batteries, you have to keep charging, and discharging, them.
    I finally got them all to accept a charge, then went stone mad; and bought a proper charger.
    One that has a fast and a trickle charge
    So the way I have it set up now, is that I join two batteries, to give me 24 volts, and use the 24 volt inverter, to fast charge the other two batteries, true the fast charger, also connected is a desulfator.
    There is a marked improvement in there performance in the last week or so
    I will keep playing around with them for the next couple of weeks.
    Who knows; I might get them up and running yet.:D
    I have also been messing about with the air intakes.
    I have them soaking in a potassium hydroxide solution at the minute; trying to strip off the paint and layers of silicone added over the years


  • Closed Accounts Posts: 481 ✭✭Deenie123


    Copper, you've an incredibly wide skill-set! Is it all self-taught/learned by osmosis or did you work at something handy?


  • Advertisement
  • Registered Users Posts: 680 ✭✭✭copper12


    Since I did not learn to read or Wright; until I was over thirty; and being dyslexic most of it is from osmoses’
    The last twenty years books and the net.


  • Registered Users Posts: 680 ✭✭✭copper12


    Evening all
    Have one guess ahh go on its raining again
    I have been doing some work on the air intakes.
    I needed to make two new bases.
    So a visit to the local scrap yard’ provided me, with the top off an old copper tank’ so old it was riveted together’ the copper from this tank’ is twice the thickness than the copper’ from a more modern tank.
    So with a metal cutters; file’ and sand paper’ I set about making th ebases’ below are the results
    I still have to either solder or braze them together.
    I have removed the paint; and it revelled some splits and cracks.
    Also the chrome is cracked and missing from a lot of places.
    The base is copper’ the upright is brass’ and the dome is copper.
    So options’
    Either get them re chromed so they look new.
    Get some new one’s and try and make them look old .
    Or repair the originals; and get them looking the best I can, remove the old chrome’ and leave them as they are.
    Photo0909.jpg

    Photo0910.jpg

    Photo0911.jpg


  • Registered Users Posts: 680 ✭✭✭copper12


    a few more


  • Moderators, Motoring & Transport Moderators, Sports Moderators Posts: 6,323 Mod ✭✭✭✭fergal.b


    Good job, I think I would leave them as they are and just polish them up there is nowhere in Ireland that can do hard rechroming so you would have to send them to the UK and it's not cheep :eek: It might be worth looking on ebay to see if you can pick up some good secondhand ones.


    .


  • Registered Users Posts: 680 ✭✭✭copper12


    Evening all
    I got a bit of work done today .
    I had me lunch at half seven, so I could get a good run at the day.:D
    I have the toe rail almost finished bar the shouting.
    The traveller still needs to be fitted; but most likely’ I will leave it for a while’ since it’s brass’ it might get damaged .
    I recycled some copper nails’ that were originally used for the ribs’ I knew I would find a use for them.
    I also finished the transom; I was not sure what king of finish I wanted; I was going to run the toe rail along the top, but decided after looking at some photos to leave it out.


  • Advertisement
  • Registered Users Posts: 680 ✭✭✭copper12


    one or two more of the transom


  • Registered Users Posts: 680 ✭✭✭copper12


    Evening all
    I have been tinkering away the last couple of days.
    Namely the transom’ toe rail’ and the air intakes.
    I will leave the final sanding of the toe rail’ until the weather improves.
    I gave the transom a coat of my varnish mixture.
    To seal the new pieces of oak.
    And repaired the air intakes, I soldered them and cleaned them up.
    Since they were badly pitted; and cracked and in a few places,
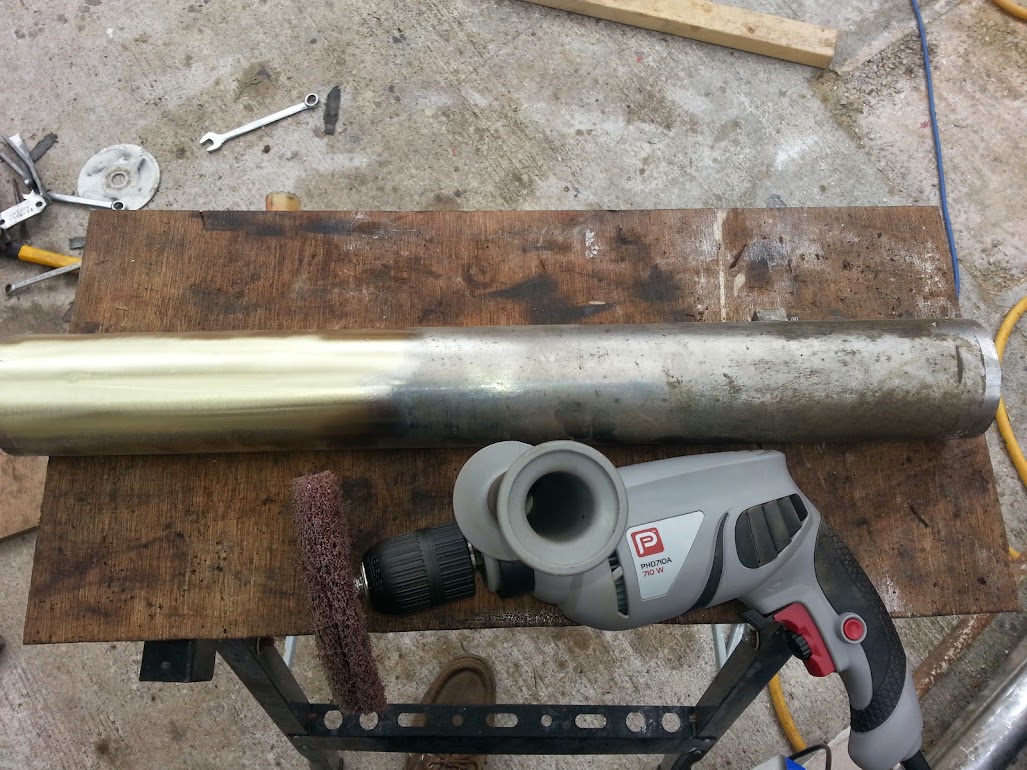
    I repaired the cracks as best I could, and Polished them up; I tried a few different types of polishing teknec’ very fine sand paper; brillow pad’ bead soda’ lime juice’ and vinegar’ none worked to my satisfaction.
    So I asked myself what exactly I was trying to achieve.
    Clean the tarnish off and remove the pitted surface.
    So I needed something’ that would remove these deposits’ but not damage the surface any more than necessary.
    So I came up with a system that worked for me.
    It consist of; Portland cement’ linseed oil’ and water’ and some clothes.
    About an hours work for the polishing once I had a system.
    Below are the results


  • Moderators, Motoring & Transport Moderators, Sports Moderators Posts: 6,323 Mod ✭✭✭✭fergal.b


    If you wanted you could scratch the inside of the vent to see if it's copper or brass if it is you can remove the old chrome with one of these and then polish it up.

    20140602_160508.jpg


  • Registered Users Posts: 680 ✭✭✭copper12


    The air intakes are made up of copper, bronze, and brass,
    I will most likely paint the inside of the domes


  • Registered Users Posts: 680 ✭✭✭copper12


    Evening all
    It’s unlikely, that I will get any work done to the topside of the boat, in the next couple of days, so I thought I would post a few lines.
    The young lad has almost finished the forward hatch.
    In fairness to the lad’ he can only spend a couple of hours every couple of days’ working on it, I am satisfied with the progress so far.
    It’s made up with 30mm x170mm teak; there quite a few photos’ I will try and upload them in some order .

    He just needs to make the hatch door and then I will decide’ on how I am going to finish the top’ after that I will give it a coat of varnish


  • Registered Users Posts: 680 ✭✭✭copper12


    a few more


  • Registered Users Posts: 680 ✭✭✭copper12


    one more


  • Registered Users Posts: 680 ✭✭✭copper12


    Evening all
    Its weather has been to cold lately, so there not a lot being done on the boat.
    The lad has gone back down under,:o so it was left to me to try and finish the forward hatch. :confused:
    All that’s left for me to do is the finish; I still have to cut out a skylight, and fit hinges, and the air intakes.
    I should have it caulked and the bungs done by the weekend weather permitting
    :)


  • Registered Users Posts: 680 ✭✭✭copper12


    Almost finished the forward hatch
    I will leave the rest for a while and concentrate on the inside
    I might give it another few coats of varnish every now and then


  • Registered Users Posts: 680 ✭✭✭copper12


    Evening all
    I am still tipping away
    In between the showers’ I am filling the seams with putty.
    I have about half done’ I will need to do a bit of sanding’ before I can do more.
    Depending on the weather’ I might get some of it done the weekend.
    I have also cleaned up some of the original wood cabinets; for the forward’ and rear cabin.
    They turned well for fifty year old wood.
    I have given them a coat of; 25%white sprit 70% varnish 5% boiled linseed oil.
    This should raise the grain ready for a light sanding.
    I will give them a couple of coats before I fit them.


  • Advertisement
  • Registered Users Posts: 680 ✭✭✭copper12


    Evening all
    The furniture turned out well; I have given it a few coats of varnish.
    I am still shovelling putty’ into the seams’ and fitting a few Dutchman’s .
    On one side of the boat you’d get a tan; and on the other frostbite. :p


  • Closed Accounts Posts: 5,108 ✭✭✭pedroeibar1


    I love the grain and the chamfered edges.:) One tip – hoover up as much as you can while you go, the shavings/dust will go into the most awkward places, are hard to collect and can cause a bilge pump to clog.


  • Registered Users Posts: 3,963 ✭✭✭spaceHopper


    What is in the first picture?


  • Registered Users Posts: 680 ✭✭✭copper12


    As far as I know this kind of repair is called a Dutchman
    It could be something to do with slippers I mean clogs:D


  • Registered Users Posts: 3,963 ✭✭✭spaceHopper


    Is it their equivalent of finger in a hole to stop the leak?


  • Registered Users Posts: 680 ✭✭✭copper12


    Evening all
    I have finished the caulking and filling the seems with putty; bar where the boat leans on its supports.
    I can attend to these areas’ when I go to sand the hull; I can lower one’ at time’ fill, then sand’ and raise the foot again.
    I also took off one of the spreader bases, as one had broken’ where it was bolted true’ they are made up of 25mm solid aluminium rod; a visit to the scrap yard, produced a meter length, for a tenner.
    So I will probably replace both spreader bases, with the new rod’ see attached photo.
    Since I was going on a spending spree, I bought a lowrance system’ global map 3000mt’ and a LCX-18c for €250, then went completely crazy,:eek: and bought a 4hp mariner, old but hardly used, €450’ I need to service it; and replace one little hose, and it will be up and running.
    Is there anyone out there’ that has used these lowrance systems, I will figure out how to use them eventually. I have all the PDF manuals
    The information that I am looking for?
    Can I set them up’ as to have one master’ and one slave?
    I.e. one to receive all the data’ from the fish finding sonar and the GPS receiver.
    Then pass it on to the other.
    I think it can be done.
    Anyone tried this?


  • Registered Users Posts: 680 ✭✭✭copper12


    Evening all
    I finally finished fitting the forward mahogany pieces.
    They went back without to much bother.
    There’s a bit of tidying up to do yet’ but everything looks ok.
    I also dismantled one of the broken spreaders.
    I had to set a bend’ in the aluminium rod’ to match, the old one’ that had broken.
    Plan A B and C didn’t work, by plan E; I thought I was on to something, and finally settled for plan F.
    Three pieces of hardwood’ a clamp’ and a blow torch’ to heat the rod to aide bending.
    I managed to get two bends’ one for either spreader
    In one of the photos. you can see the three rods. The old one is on top; with the other two beneath.
    I just need to drill some holes’ and see if I can get them to fit.


  • Registered Users Posts: 680 ✭✭✭copper12


    Evening all
    Hope you are all well
    I have the flu’ anyone want it let me know. :P
    I got a little bit done over the week’ I decided to fit the air intakes’ so that there would be some ventilation for the forward section.
    The turned out well; I am very happy with the repair.
    I also got a bargain off the web; a bucket of old stuff’ there’s a bit of everything in there’ 100€’ some of you might have seen it on done deal.
    Most importantly’ there was two Barlow Australia 16 winches in the lot.
    I have taken them apart’ and serviced them, they now look as good as new.
    At the moment’ in between the aches and pains, I am sanding the laths for the cabins, fifty years of varnish’ doesn’t come off easily’ but I am getting there.


  • Registered Users Posts: 680 ✭✭✭copper12


    a few more


  • Advertisement
  • Registered Users Posts: 680 ✭✭✭copper12


    Evening all
    Did you ever have one of those weeks’ when you seem to be working non stop’ but have very little to show for it’ well this week seems like one.
    I have been concentrating on the rear cabin.
    Sanding and doing some repairs. there still a lot to do in this section. it’s the small fiddly bits’ that would do your head in. and takes the longest to do.
    I have been in and out of that boat; more times, than your man’ in fifty shades of gray. :eek:
    There were 12 laths on either side; I have only fit10, there are still two to be fitted at the top
    that will give me four to play with, as I am sure I broke a couple’ when removing them from the other sections, and these are the longest laths, so I can cut them to fit.


Advertisement