Advertisement
If you have a new account but are having problems posting or verifying your account, please email us on hello@boards.ie for help. Thanks :)
Hello all! Please ensure that you are posting a new thread or question in the appropriate forum. The Feedback forum is overwhelmed with questions that are having to be moved elsewhere. If you need help to verify your account contact hello@boards.ie

Shed build - help

Options
1235711

Comments

  • Registered Users Posts: 33,692 ✭✭✭✭listermint


    Frustration and satisfaction in equal measure I'm sure.


    Solid work!


  • Registered Users Posts: 31,015 ✭✭✭✭Lumen


    Steve wrote: »
    I feel your pain with trying to keep the rain out.

    3 years ago I started my shed this time of year and no sooner was the timber delivered, it pi$$ed rain every day for 3 months.

    Try keep it dry, it will swell more than you think and when it dries again and settles to a 'normal' state then cracks can appear.

    The framing timber has been under cover before and during the build but would be fine with a bit of rain, however the constant fear of getting the OSB and woodfibre/hemp floor wet is slightly wearing.

    I'm been quite lucky with the weather so far, but looking forward to getting a proper roof on it!

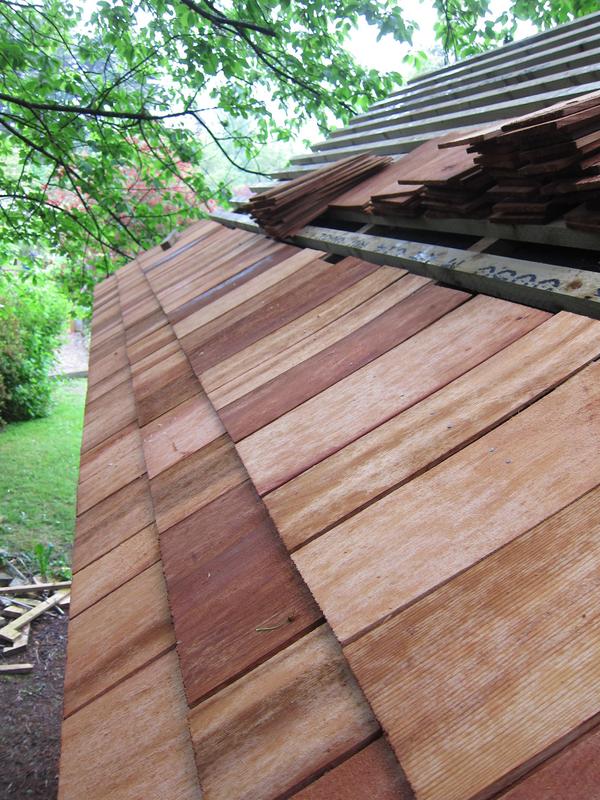
    I was down at MDS/woodcomponents.ie today picking up the header and had a look at their collection of cladding profiles. All quite impressive. I think I'm going for "rainscreen profile" Siberian larch cladding on the walls and cedar shingles for the roof rather than slate. They also do bevelled battens which will be handy to prolong the life of the horizontal elements of the cladding support.


  • Registered Users Posts: 7,857 ✭✭✭Rows Grower


    Good night John Boy.

    "Very soon we are going to Mars. You wouldn't have been going to Mars if my opponent won, that I can tell you. You wouldn't even be thinking about it."

    Donald Trump, March 13th 2018.


  • Moderators, Category Moderators, Entertainment Moderators, Sports Moderators Posts: 22,584 CMod ✭✭✭✭Steve


    Lumen wrote: »
    The framing timber has been under cover before and during the build but would be fine with a bit of rain, however the constant fear of getting the OSB and woodfibre/hemp floor wet is slightly wearing.

    I'm been quite lucky with the weather so far, but looking forward to getting a proper roof on it!

    I was down at MDS/woodcomponents.ie today picking up the header and had a look at their collection of cladding profiles. All quite impressive. I think I'm going for "rainscreen profile" Siberian larch cladding on the walls and cedar shingles for the roof rather than slate. They also do bevelled battens which will be handy to prolong the life of the horizontal elements of the cladding support.
    I'll see if I can dig up some pics.

    I used 18mm t&g covered in an underlay covered in bitumen shingle tiles.


    Beneath that, I have 50mm hard rockwool insulation, 20mm foil covered pipe insulation roll sealed on the seams and 6mm decorative t&g on the inside. Have had no condensation or issues in the last 3 years.


  • Registered Users Posts: 51 ✭✭penno


    Love this thread xx


  • Advertisement
  • Registered Users Posts: 31,015 ✭✭✭✭Lumen


    Cut the king post in a hurry as I'd persuaded wife to help raise the wall before going to work. 47mm too short, forgot about the second top plate. Fffff. Raised the back wall anyway. Nailed, fiddled and fettled until everything was straight.

    Glued an extra slice to the king post. Glue joints are stronger than wood, right? Newgrange, pyramids, etc. Be grand.

    Tidied up.

    Planed the queen posts and headers for the front wall.

    I've inset the king post from the studs 25mm so that even if I add internal cladding, I'll still be able to see the "post and beam" structure. Looks nice. Will do the same for the front wall.

    https://imgur.com/a/05ExnXK

    jg_OIk_Xv.jpg

    gd_Rg_WA4.jpg

    5_Jar_HVk.jpg


  • Registered Users Posts: 443 ✭✭Zebbedee


    Lumen wrote: »

    Goodnight Elizabeth.
    Goodnight John Boy.
    Goodnight Shed.
    GOODNIGHT SHED.
    <barely audible rustling of polythene sheeting>


    Noting with interest that this project is no longer inanimate.
    It lives... It breathes... :D


    You don't think perhaps you've become a tad 'obsessed' with it? ;)


  • Registered Users Posts: 31,015 ✭✭✭✭Lumen


    Obsession is necessary!

    Fourth wall!

    20180915_141344.jpg?dl=1


  • Registered Users Posts: 443 ✭✭Zebbedee


    Lumen wrote: »
    Obsession is necessary!

    Fourth wall!


    It's certainly driving this project forward.
    Well done, keep it up!


  • Registered Users Posts: 31,015 ✭✭✭✭Lumen


    Spent all morning fixing problems from yesterday's wall raising. The biggest problem was that there was a ~2mm gap between the top of one queen post/door jamb and the header, and it would be bothering me until the end of time, so after arsing around with a power plane and hitting it repeatedly with various hammers, I eventually just ripped and replaced the stud. Which is quite tricky when it's nailed up through a bottom plate, two top plates and attached to a queen post.

    This is how it goes, two steps forward, one step back...

    Anyway, gaps and wall straightness are all good now, more or less....

    7_SNx_ZYO.jpg


  • Advertisement
  • Registered Users Posts: 31,015 ✭✭✭✭Lumen


    Well that went better than expected.

    Installed the overshooting second top plate, glued and screwed the minor king post, raised the two beam members to just below their final position ready for gluing and bolting together in place, walked the wall to cut a few overhanging branches, tarped and sheeted the exterior ready for the rain.

    I'm glad I used nice chunky TR26 (47 x 147) studs cos there was a lot of load on them during the beam raising.

    Will take a few days off to catch up on work.

    p_QUo_OF2.jpg

    Bhl_WCsw.jpg

    p_Y8_NB6s.jpg

    ORJ2a7_X.jpg

    CP7_Jpwj.jpg

    sf_OKp_WQ.jpg

    UHMQYie.jpg

    7_V3z_HZZ.jpg

    Ioq9zi_E.jpg

    3n_BIUo_S.jpg

    v0_XLu_Z3.jpg


  • Registered Users Posts: 159 ✭✭prosaic


    The tent will get tested over the next 24 hours.


  • Registered Users Posts: 31,015 ✭✭✭✭Lumen


    prosaic wrote: »
    The tent will get tested over the next 24 hours.
    Yeah. I was thinking about this over lunch. Which is painful, cos Shed and I are supposed to be on a break.

    The beam is currently not very secure. I mean, it's fine with gravity, but it's just sitting there in two pieces held together with some straps. And there are no rafters. And Baunativ screwed up dispatch of my massive Spax order, so the front queen post/header arrangement is held together with a couple of deck screws.

    What it needs is to be raised, glued, bolted and braced with four rafters.

    But I'm not sure I can be bothered. Everything hurts.

    Be grand.

    I just need to make sure the wind can blow through and then cover the floor with cotton painting sheets for any driven rain.


  • Registered Users Posts: 2,789 ✭✭✭slavetothegrind


    fingers crossed weather won't be too bad!

    Enjoying thread thanks!


  • Posts: 3,637 ✭✭✭ [Deleted User]


    A couple of rolls of duct tape could be a worthwhile purchase if you have time. Tape up the edges of your tarps.


  • Registered Users Posts: 159 ✭✭prosaic


    Hope it all held up ok


  • Registered Users Posts: 2,789 ✭✭✭slavetothegrind


    hope so too, i had a tree down. No damage luckily.


  • Registered Users Posts: 31,015 ✭✭✭✭Lumen


    It's still standing, yeah, yeah, yeah. :pac:

    HBb_BWj_Gh.jpg


  • Registered Users Posts: 31,015 ✭✭✭✭Lumen


    One corner of the floor did get wet when an unsecured corner of the roof tarp folded back in the wind, but it seems to have dried out since. That's what I get for tarping in the dark.


  • Registered Users Posts: 159 ✭✭prosaic


    Sail on to calmer waters!


  • Advertisement
  • Registered Users Posts: 31,015 ✭✭✭✭Lumen


    A steady day today after a bit of a break.

    Raised the two-piece beam to its final position. Decided not to bother gluing it, coach screws in the gaps between the rafters will do. Put a couple of big Spax screws into each end. Nobody died.

    Cut and attached about 8 rafters. Slow work. Slight differences in ridge-stud distance, maybe 5-10mm over the length of the shed, mean that each rafter needs to be individually trimmed to satisfactorily close all the gaps.

    The structural ridge beam combined with a vaulted ceiling in which I want no visible fixings makes rafter-beam attachment tricky. I ended up fixing the lower end with a 200mm Spax screw and a 6 inch nail, and then the upper end with a counterbored 180mm M10 stainless coach screw. Normal screws don't do well in shear, and nails can bend, so whilst the coach screws are a bit of work the result feels very strong. I'm somewhat hedging my bets by using three types of fastener.

    The counterboring is normally neater but this is at a funny angle and will be covered by OSB anyway.

    https://imgur.com/a/Q4RSPEU

    N7_Ym_Yc6.jpg

    6ve7sox.jpg

    i9_RBNS9.jpg

    z_J7_Kyq9.jpg


  • Closed Accounts Posts: 9,764 ✭✭✭my3cents


  • Registered Users Posts: 31,015 ✭✭✭✭Lumen


    my3cents wrote: »

    I have a straight jig but not one of those pocket hole things. I wasn't sure which range of angles they did.

    So I made up my own jig out of a bit of scrap, works well enough.


  • Closed Accounts Posts: 9,764 ✭✭✭my3cents


    Lumen wrote: »
    I have a straight jig but not one of those pocket hole things. I wasn't sure which range of angles they did.

    So I made up my own jig out of a bit of scrap, works well enough.

    The kregg system is ridiculously expensive but it does work. The HD one is handy for wall framing. The smaller jigs are adjustable for the thickness of the timber the HD one if for timber thats at least an inch and a half thick.


  • Registered Users Posts: 33,692 ✭✭✭✭listermint


    my3cents wrote: »

    Have a kregg, love it.


  • Registered Users Posts: 31,015 ✭✭✭✭Lumen


    Rafters finished. Bit of a PITA, massive time suck. Whereas on the rest of the framing 1mm or so either way is unnoticeable, on the rafter cuts the slightest gap looks awful, and each rafter needed to be ever so slightly different from the one before due to accumulation of previous tiny errors, twists in the timber or the flapping of a butterfly's wings in Beijing.

    I switched back and forth between the mitre and the plunge saw, and was never very confident with either. So if I never see another rafter it'll be too soon. :D

    Also got a few sheets of OSB up on the roof, fun easy job. Am painting them first with vapour permeable clay paint as they'll be exposed on the inside. No pics as it was dark when I stopped. Again!

    Getting there...

    2s_XM9yy.jpg


  • Registered Users Posts: 443 ✭✭Zebbedee


    Well done.
    That's the hard bit over with.
    On to the fun and fast end of it now.


  • Registered Users Posts: 31,015 ✭✭✭✭Lumen


    Nearly finished the sheeting. Just the front wall and the top of the back gable to do. It's been easy but time consuming.

    Paint, cut, clamp, screw, tape, repeat.

    I have a workshop, temporarily.

    A couple of visible joins (5mm expansion gaps) in the painted OSB along the roof. What to fill with? Tec 7?

    Need to buy the rest of the insulation now. Road trip!

    Shed.png

    I might put fixed glazing all across this wall, behind the studs. Maybe a narrow door. Later though, need to get it winterproofed first.

    jib_Syu0.jpg


  • Registered Users Posts: 7,857 ✭✭✭Rows Grower


    Looks majestic, fair play Lumen.

    "Very soon we are going to Mars. You wouldn't have been going to Mars if my opponent won, that I can tell you. You wouldn't even be thinking about it."

    Donald Trump, March 13th 2018.


  • Advertisement
  • Registered Users Posts: 31,015 ✭✭✭✭Lumen


    So, another week on. Where does the time go? EVERYWHERE!

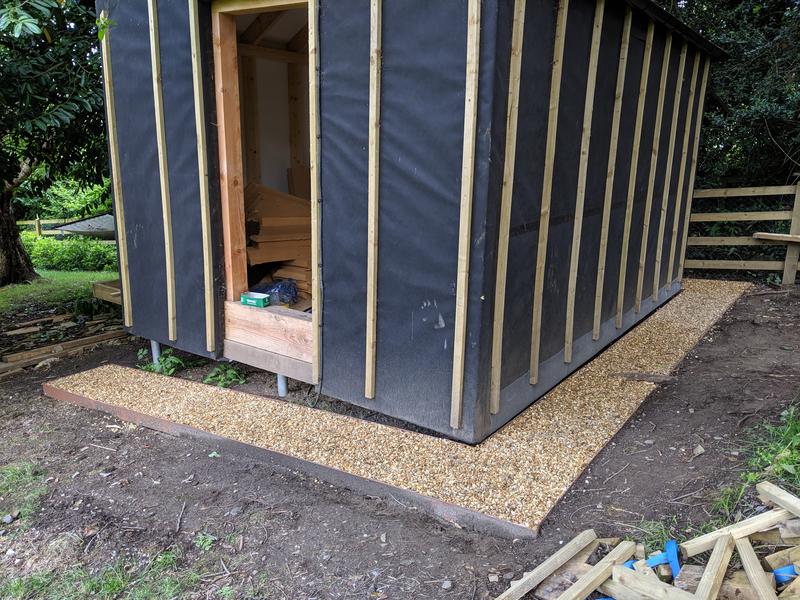
    I finished the sheeting, taped it all up, fiddled around, then started the insulation.

    It's nice stuff to work with this woodfibre board. After I had the first wall up I thought I'd better read the writing on the side that says...squint...."outside". Ah right, so that bottom layer is the wrong way round. Does it matter? No idea. Do it again!

    Underestimated the amount of insulation I needed so I cut some T&G into the offcuts by hand.

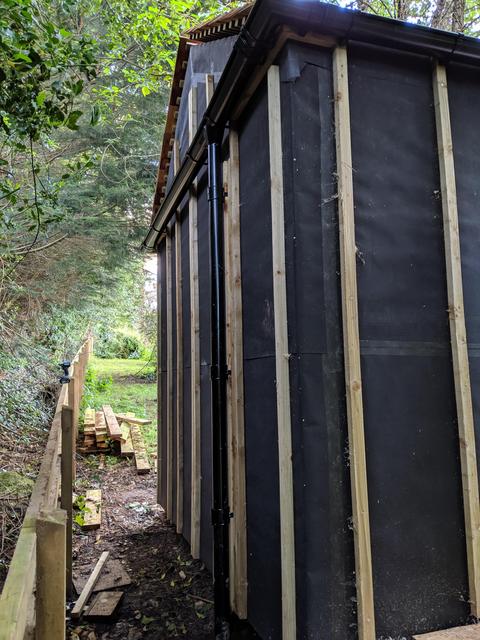
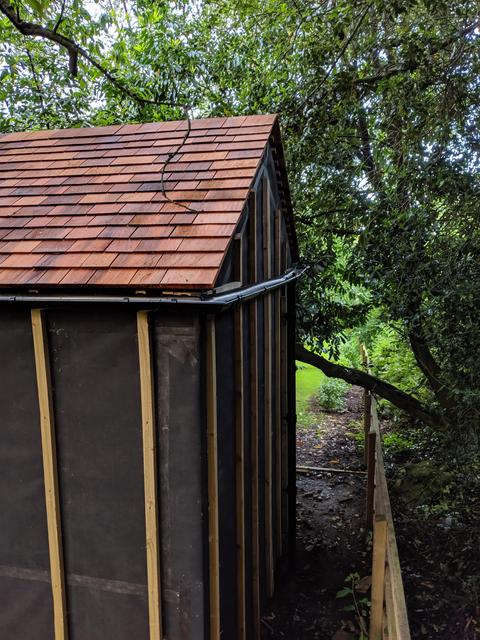
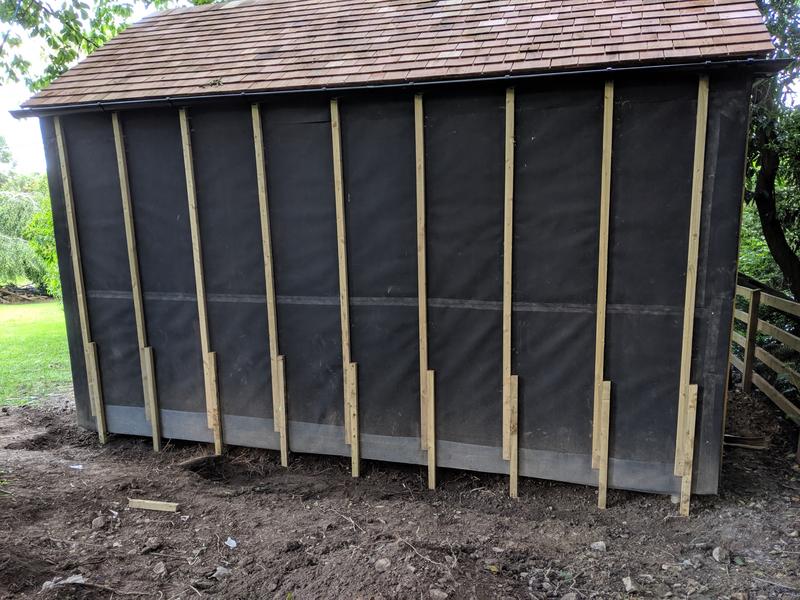
    The membrane was tricky to get right on my own, and then I had to figure out how to hit the centre of each of 18 studs blind with a screw through ~130mm of batten, membrane, insulation and OSB. Laser measuring thing came in handy for that. Only missed one!

    Seriously though, the time goes so fast. Each layer of each wall seems to take a day. And there are a lot of layers.

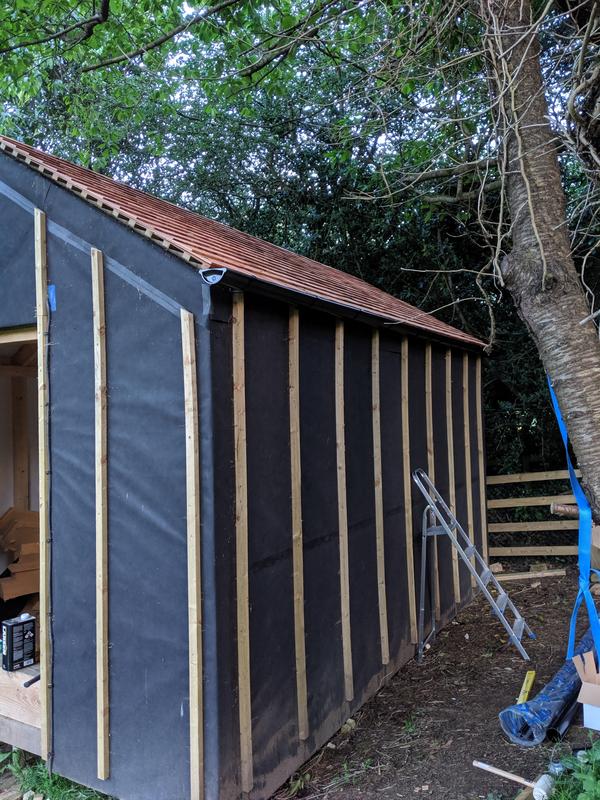
    Anyway, both side walls are done so with the tarp on top the rain isn't causing any problems.

    It'll be all over by Christmas!

    Hand-cut tongue
    ywBdgGh.jpg

    Bevelled edges to go under the roof
    SipUwFC.jpg

    How to position 5x3m of flappy membrane on a wall solo with no fixings? I'm still not sure how I managed that.
    KQQLenk.jpg

    Battens just have one screw each, to allow fettling
    2qucnso.jpg

    These will be cut and mitred later
    cMdKpKO.jpg

    Membrane trimmed around cantilevered joists protrusions
    APeXYzj.jpg

    ....and this is what it looks like now, except I've tidied up the front a bit since this pic, removing those sticky out bits at the top corners
    1Cf5Ex2.jpg


Advertisement