Advertisement
If you have a new account but are having problems posting or verifying your account, please email us on hello@boards.ie for help. Thanks :)
Hello all! Please ensure that you are posting a new thread or question in the appropriate forum. The Feedback forum is overwhelmed with questions that are having to be moved elsewhere. If you need help to verify your account contact hello@boards.ie
Hi all! We have been experiencing an issue on site where threads have been missing the latest postings. The platform host Vanilla are working on this issue. A workaround that has been used by some is to navigate back from 1 to 10+ pages to re-sync the thread and this will then show the latest posts. Thanks, Mike.
Hi there,
There is an issue with role permissions that is being worked on at the moment.
If you are having trouble with access or permissions on regional forums please post here to get access: https://www.boards.ie/discussion/2058365403/you-do-not-have-permission-for-that#latest

Spitfire Total Rebuild!

1246710

Comments

  • Registered Users, Registered Users 2 Posts: 314 ✭✭Darraghmh91.


    The car is really takin good shape its actully starting to look like a car now which is id imagine a good morale boost for you
    Again as iv said in previous posts super work man fair play
    Your doing it slow but correct which is the best way in the end .. this will be a car to hand down to the kids in the future


  • Registered Users, Registered Users 2 Posts: 4,506 ✭✭✭SpitfireIV


    The car is really takin good shape its actully starting to look like a car now which is id imagine a good morale boost for you
    Again as iv said in previous posts super work man fair play
    Your doing it slow but correct which is the best way in the end .. this will be a car to hand down to the kids in the future

    Takin' my time alright, between work and other commitments I dont get to put a whole lot of time in, but, I'm in no rush, getting it done right as you say, cheers! :)


    Well, I've been tipping away at it over the past little while. The biggest job tackled wasnt even on the car, it was the poly tunnel which you may remember failed and collapsed on me during some strong winds several weeks back!!

    Thats been sorted like so....

    10941438_10155101740565591_5522308766533269629_n.jpg?oh=88b2bc663b0afc53b42fbc1b8e93cf4a&oe=55888EDE
    ^ From this.


    10981607_10155230650690591_4496894553716963660_n.jpg?oh=1f3cbfa4c28b8a8034e59b9a76985ac8&oe=5580B651&__gda__=1438089774_6f2d5892d89ec28f53e92be3079c57b7
    ^ To this.....

    10537104_10155238186970591_5202434557409994708_n.jpg?oh=6faa292e5d461b28e55087187f626175&oe=557EB8E4&__gda__=1434407689_452f35a63a63e1803059325d9fdacc8d
    ^ And finally this. I reformed the old metal loops and slipped them into some inch and a quarter poly pipe. Drove scaffold pipes into the ground and slipped the ends of the plastic tubes into these. Braced the loops with the reused metal tubing, tec-screwed on galvanise sheeting before reapplying the poly cover; pulling tight and fixing to the galvanise with lats.

    It shant be going anywhere for a while and feels substancially stronger than the previous 'thing'. Next step is to lay down a layer of pallets on the ground and timber sheeting on top, should suffice as a spray booth then.


    So, back to the car. Little jobs like these needed attention....

    11046839_10155225366765591_4229748378977122394_n.jpg?oh=2ed306fcdc071517abf45e46ed300e28&oe=5571C4EB
    ^ A previous door repair by myself that I hadnt cleaned up yet, but, there was no point as the curve didnt really match the wing. So, chop it out and try again!


    11043040_10155225368250591_1270846410579984386_n.jpg?oh=30866dedb757ede0c1e1dfa1f5d473d1&oe=558409A1
    ^ New section with plenty of meat on it chopped, bent and ready to be fitted.


    11045359_10155225370280591_1862280929947113351_n.jpg?oh=f846acb01200e19c36aaa9eb082e5dfc&oe=557D7339
    ^ Tacked in and the excess chopped, ready to be folded over.


    11054409_10155238696125591_121581886659057238_n.jpg?oh=4cba4043d3899ad03b8144b223ac5938&oe=557962A6
    ^ Another bit of attention should see her right, but, looking much better already!


    Removed the bottom brace from both doors (finally) and discover a patch of rust on the lower A post that was unsettling me, so, decided to tackle it.

    10929921_10155259227425591_2161560443947264493_n.jpg?oh=70acf223c61eb2f1a6c4addf1b34f739&oe=557DA468&__gda__=1433828669_58477d9c2d7c6e5b5a13f653f3861a6a
    ^ Bad stuff cut away and next the area was to be cleaned down with a wire brush before....


    1503947_10155259227850591_6240388192950155789_n.jpg?oh=d02ea8545920986dc8d113923da11b06&oe=5583E17F&__gda__=1433679936_6a7ff704c33eb612056f90bcffb85877
    ^....a new patch was beat into shape and applied. Took a bloody long time to get right. Seems its always the small fiddly jobs that are the most time consuming, there was a similar, but smaller repair to do on the driver side also. But, I'm happy I got it done and done right!


    11012587_10155259228115591_593819555732754287_n.jpg?oh=baedc942cc7681df89835c26d008a0e4&oe=55842F90
    ^ With the repairs done the inside was rust primed then I lashed tec-7 into the seams; very hard to access and get your fingers through the small window, hence the mess :rolleyes:


  • Registered Users, Registered Users 2 Posts: 4,506 ✭✭✭SpitfireIV


    Then onto very important issues indeed.


    Styling and color choice! :cool:


    As you may remember I modified the rear end of the car; different lights, dropped the number plate lower and split the bumper, well, these came in the post last week (as well as a complete poly bush kit).....


    10402063_10155251028585591_4034209210004636074_n.jpg?oh=3df41258023eaeb13ee7812014af0345&oe=55757DF1&__gda__=1433904359_32d2bfa7b9c785906d2f4fd250540dd9
    ^ As seen on Heralds, TR3's, 4's, Spit 1,2 and 3's etc but never on a 70's MkIV, until now.....

    10440991_10155254755925591_654716310202232795_n.jpg?oh=eb895ad912caca9a4ff74be13f0a4610&oe=557BE75E
    ^ I think they look good! :cool:


    Now, color! Big decision to be made. Its getting near the stage where color will be introduced. The underside is ready to be stonechipped and top coated, as well as the interior. I need to get cracking on the chassis too, that will be body color, so, once thats painted and reassembled, the tub can be dropped on and then its onwards and upwards from there.

    The original color of the car was no 66 'Valencia Blue', a very rare color for a MkIV, been used only between 1968 - '71 (mine is a 71). Thats quite cool thats its rare and unique, but, its kind of a 'marmite color', you either love it or loathe it, unfortunately I tend to bounce back and forth between the two.

    11058435_10155262479215591_5919706772893171704_o.jpg
    ^ GT6 Mk3 in valencia. Not so bad eh?! I also plan on doing the rear light panel in black like this to help the lights and lettering stand out that bit more.

    11043339_10155243049505591_1264189107943197945_o.jpgTR3 in Valencia.


    My car is a blank canvas, original color would be nice and certainly period, even if this green blue is very 60's! I could be justified in claining that theres even mish mash of parts gone into the car and new panels that there's very little of the original car body left! So, with all this in mind and hundreds, thousands, hell, even hundreds of thousands of color shades to choose from, I chose..............


    Color no66, Valencia Blue! :pac::pac:

    10930196_10155262567825591_65330232487526094_n.jpg?oh=b5319619c0e7db6c9d63c5de55d37e5a&oe=55B86455
    ^ Sample cut from a section of scrap car.


    Valencia it is, love it or hate it. So the plan is to hit Vinny Byrnes in Dublin later in the week and pick up everything I need in one fowl swoop. The paint code is availible in 2pak, but I'm gonna go down the cellulose route as an ameteur, so, hopefully armed with a few samples I should be able to get a match in paint, as well as primer, thinners, spray gun, mask, panel wipe, measuring cups, filters, tape etc etc etc.......


  • Registered Users, Registered Users 2 Posts: 1,863 ✭✭✭dball


    I like the colour - good choice


  • Closed Accounts Posts: 891 ✭✭✭Falcon L


    +1 on the colour. Period colours are always best, in my opinion.

    Matt black on the back panel is also period. I used to do it on my cars at the time. :D


  • Advertisement
  • Registered Users, Registered Users 2 Posts: 4,358 ✭✭✭kev1.3s


    +1 on the colour, as you said there is 100's of thousands of colour choices and if you were to overthink it but that colour is nice and even tho you say it's an original colour it looks quite different.


  • Registered Users, Registered Users 2 Posts: 4,506 ✭✭✭SpitfireIV


    Cheers guys! :o


    I'd like to say I was flying along but unfortunatly I had a bit of a set back, nothing major, but still, a bit of a headache; my own rookie mistake.


    Anyway, so, like I may have mentioned the plan was to treat the underside of the car with UPOL Gravitex; a stonechip protective layer. Back in early Jan I had stripped back the underside of the crud and junk, de-rusted with Bilt Hamber Deox Gel and after this applied Hydrate 80 (a chemical rust convertor and barrier......supposedly, I'll get back to that.)

    Over this I applied two coats of an oil based rust primer 'Lowe', seam sealing between the two coats. So, fast forward to last week and I'm prepping to apply the stonechip, scuffed up the paint, cleaned and wiped it down, on with the schultz gun and away I go, getting a nice lite coating on, let it flash off, about 20/30 mins and went on with another coat. Went on grand and the underside was looking really well.

    But then, a little while later little wrinkles appears which soon turned to blisters which soon after was a mess, so much so I could peel off the stonechip and the Lowe rust primer as one, back to the black layer of Hydrate 80!!

    Rookie mistake: Oil based paint and a cellulose, solvent heavy stonechip just dont get along! Valuable lesson learned. Had to get as much of the soggy, solventy mush off before it set again; dishearening! :(

    11059391_10155279845470591_6691554897967381816_n.jpg?oh=874ee33920481991f90e959072f54952&oe=557D1241&__gda__=1437416510_89ab4507bf70e6ca408e63878fb0caca


    So, off it all had to come, the black layer of Hydrate 80 and all!! Which, to be dissapointment seemed to have very light areas of fresh orage rust under it in patches!! This stuff is supposed to kill, convert and prevent rust, but I was seeing evidence of fresh stuff under it after only a few months!!! :confused: Even after the underside was treated with rust remover and wirebrushing, hmmm.

    10329150_10155281283935591_3781165070669242498_n.jpg?oh=609dd9e5fa50bf2303697ff0550fe944&oe=55AB37B0&__gda__=1438467332_0801bd179c81df14648c2400c4434836


    So, next plan of action is to hit the underside, after its cleaned back to bare metal once more, with a layer of epoxy primer, seam sealing will be done with tiger seal and then another shot at the gravitex. Epoxy primer is supposed to be the ideal rust barrier and as it sets harder than the stonechip there shouldnt be any issues.


    However, next problem, if you remember a few posts back, the inside was treated in a similar method to the underside! :( Problem perhaps? It was either a case of try and put a barrier over the oil based primer or strip it all back once more and strart from scratch; I choose the former....


    So, took a trip to Vinny Byrnes in Dublin and picked up my supplies including 5lts of Valencia Blue :D

    17826_10155291084330591_2029058835837402117_n.jpg?oh=38e3e999d4e998611c30814e90960a6d&oe=55712CDD&__gda__=1433514310_d8cc4307b9e784ccdafb16d83a18a111

    Also picked up the epoxy primer for the underside and barcoat for the interior. Thinners, panel wipe, high build 1k primer and LVLP spray gun and some other bits a bobs.


    The set back at any other time would truely have been a killer, but the fact that I have all the paint material is a little bit of light at the end of the tunnel. Sure, it'll be a paint stripping the underside back, but, it has to be done and done right this time round!! :o:o


  • Closed Accounts Posts: 891 ✭✭✭Falcon L


    Probably a blessing in disguise. If the rust was returning and you didn't know it was there, well... At least you found out there was a problem before it turned up as rust holes! :eek:


  • Registered Users, Registered Users 2 Posts: 314 ✭✭Darraghmh91.


    That was a bit of a bummer man but atleast it happened now instead of when the car was all put back as 1 piece
    Great work tho and a lesson you won't make again you were rightists strip it all down and do it all again itl all pay off in the end
    I'd love to see this car some time it's a very enjoyable build


  • Registered Users, Registered Users 2 Posts: 1,258 ✭✭✭sogood


    Thanks for the heads up on the paint issue. I have been reading a bit lately about spray painting/pepping etc. and came across a similar point, regarding the use of different types of paint/primers and their different chemical structures. It has also been pointed out that using "matching" materials, but from different manufacturers can also lead to similar consequences.

    Thanks again for the post and enjoying your work.


  • Advertisement
  • Registered Users, Registered Users 2 Posts: 4,506 ✭✭✭SpitfireIV


    Wow, been a while since I posted. I'd love to say I've been so busy doing work on the car and that I'm well advanced in the project but, thats not the case! :cool:

    Still though, getting a few bits done, like so:


    11081290_10155424192535591_2426891611538389396_n.jpg?oh=f2195dbae67384a32470e8c006fd24e2&oe=55DF62BA&__gda__=1436287711_819a6860ea4553cf481b52e00d9098f3
    ^ Underside is cleaned back to bare shiney metal after my little disaster as highlighted in my post above.

    10424286_10155424192870591_8085109216561892587_n.jpg?oh=fd84d5cedac0aa0889e82ba837f875b3&oe=5599AF36&__gda__=1440904531_3b2c86c90d744ea97a948cd19a44304f
    11164671_10155424192700591_4565385830092688475_n.jpg?oh=61375ad062d5d2c6fe5729327a1e0f9f&oe=55A22535
    ^ Bit of a final sanding and she'll be ready for treating again. The plan is to apply a 2k epoxy primer, then seam seal with Tiger Seal, over this will go the stonechip and finally the base coat.


    Then it was time to give the bootlid some love:

    10410934_10155424191375591_8800884959895689575_n.jpg?oh=98d0a9028599cf57eeef17e503b516ad&oe=55D4B6F1
    ^ Rust along the seam and lower edge of the lid.

    11178245_10155424191530591_3414930240160697314_n.jpg?oh=e608048476494411c798e4496a883da6&oe=55DEF319
    ^ Holes through the skin in the upper left corner. All in all its not the worst bootlid ever, certainly better than the original which was rotten through!

    Bit of work is needed.....

    11164808_10155424191670591_7992613945738055393_n.jpg?oh=2eea3d6d83533233bf47a8573615efed&oe=55E47A6E&__gda__=1439566395_dd9771e5a26334cba144cc076943ca82
    ^ The bad stuff being cut and peeled away.


    10985217_10155424191775591_2783080756967971972_n.jpg?oh=6215ea427036575117c913a8209f30ae&oe=5597D4DA&__gda__=1436315557_cbc64de1cdf91a48e44339f270f194cb
    ^ Newly exposed metal cleaned up and ready to be rust primed.


    11164838_10155424191895591_3413455954334434286_n.jpg?oh=a8a4d6769b9c64b0609700af1700cdae&oe=55DD7928&__gda__=1440461293_9b32dfea19c2699909442dd01a5c2e5b
    ^ Replacement section cut and folded. The slits down the side are to allow it to be subtly bent to the curve of the bootlid.


    11156125_10155424192065591_1046890073983603699_n.jpg?oh=495f39c09267688f69e94c9821246c21&oe=55DC7627
    ^ Tacked in place.


    11160572_10155424192210591_1056420696242927737_n.jpg?oh=273e7d6cce74b8aa7566f32963a67166&oe=559BDE92
    ^ Paint removed and rust spots treated with rust remover before being wrapped up in cling film to allow it to do its magic.


    10425894_10155424192340591_831417476592388538_n.jpg?oh=7513ce7024841c4c1dd0241c614fbace&oe=55DFFC7C&__gda__=1441082924_33779167f7f1368a66269e7beed7aabd
    ^ New section seam welded and ground down. There is a rather low section in the upper left corner and other nicks and knocks as indicated by the black marks. Its gonna take a bit of work still to bet it straight and presentable!


  • Registered Users, Registered Users 2 Posts: 4,506 ✭✭✭SpitfireIV


    After that it was back to the poly-tunnel...


    11156318_10155379023490591_4898102907370169017_n.jpg?oh=763814a90cc1d6de55f8c34ef803aa17&oe=55D855E2&__gda__=1440883542_21d7fe3934b210642a79847e6a62452a
    ^ Barrier laid out and then....


    11112940_10155379023705591_7916536454039755775_n.jpg?oh=20536605d06b78460cbccf943fdfa4b1&oe=55997FDC
    ^....pallets laid on top. Plan is to eventually get some sheeting, light stuff would do, 1/4 inch ply or whatever and lay it on top of the pallets.


    11133738_10155379023855591_916459295390701977_n.jpg?oh=a6c7d2ea4695a5e5fca12f21445fb943&oe=55A371DD&__gda__=1441003492_e81e84978fac344f6102a380f0df6adb
    ^ All the junk back in! The chassis pictured I had planned on using, it seemed a good clean one that I assumed had been well prepared and painted and just needed a scuff up before being reprimed/painted in my valencia color, but, on closer inspection I found this.......


    22000_10155378256075591_5321415481798652014_n.jpg?oh=135932e6f6c07b4e70e704a6f94631fa&oe=55DD3945
    ^ A. rust was coming through in places and with a bit of a scrape found that the paint was applied directly over the metal, no primer was used! Bugger.

    Still, like I said, on closer inspection it wasnt as clean as I thought, the paint job was a bit shoddy. I removed the gearbox mounting plate and found it was left in place when the chassis was being painted and there was a layer of dirt, grit and tiny bits of broken glass under it!!

    So, how can this problem be fixed? One thing is for certain, I'd have to avail of a sandblasters services.

    But that leaves me with two options:

    1. Sandblast this orange chassis, use it and sell off the original, not so pretty, in need of cleaning up chassis.

    or

    2. Sandblast the original chassis which is remarkably sound and use that, put the orange one back together and sell that on. After all, it is a bit more presentable, if not useable in its current state.


    I'm gonna go with option 2!


    So, the old, original chassis that I had used to rebuild the body tub on was hauled out for inspection and repair. There was just one bit of work needed doing, under one of the outriggers some rust had broke through.


    11174849_10155424193030591_994877806331923577_n.jpg?oh=00508938c9612184d817bfc0edde60c0&oe=55CE674D&__gda__=1440607271_1ad2fdd377d5c408052e74bab970d6f3
    ^ Bad stuff cut away which involved cutting through the outrigger and the chassis rail.


    10985373_10155424193200591_681386168852719950_n.jpg?oh=f7eb7664775148a0009d813d39e67e93&oe=559C3CAF
    ^ Patch applied to the chassis rail and the weld flattened. Next another patch would be applied on top for the outrigger.


    And that folks, is me up to date! :)


  • Registered Users, Registered Users 2 Posts: 540 ✭✭✭biketard


    Loving this thread, CroppyBoy1798. Thanks for posting it.


  • Registered Users, Registered Users 2 Posts: 4,506 ✭✭✭SpitfireIV


    biketard wrote: »
    Loving this thread, CroppyBoy1798. Thanks for posting it.

    Cheers biketard, glad youre enjoying it :)


    Not much else happening since, was at the Durrow show and picked up a set of stainless trim/vanity rings for the wheels.

    I've had the tires knocked off the rims ready to be sandblasted so curiosity got the better of me; rooted out some old black gloss and slapped some on one of the wheels (dont worry, its not the final product, they'll be blasted and sprayed)


    1509687_10155416140980591_2051241756356665077_n.jpg?oh=5d10b28e9df3959da3365926058b607b&oe=55D09532

    11138495_10155416141455591_5615573271767631731_n.jpg?oh=db26323e7bd3fcf668c3cefadcc5904a&oe=559A8583


    Think I'm gonna go with black. The rear light panel I plan to so black with the chrome trim, so I thought it'd tie in nice with the wheels which will be black with chrome trim.

    We'll see :cool:


  • Registered Users, Registered Users 2 Posts: 4,506 ✭✭✭SpitfireIV


    Bit more progress to report! :)


    After what seemed like an exhausting eternity scraping, cleaning and sanding the underside back to bare metal after my little....mishap(?) I finally got to apply the epoxy primer, two coats of.


    11164689_10155472222485591_2063276585967686567_n.jpg?oh=f8fab1371e11132abaf7c57d378bc1ad&oe=55C376A3
    ^ Shiney underside. For the finale it was roughed up with 80 grit real well, cleaned, wiped down and then the 2K epoxy primer came out.


    11038870_10155471909440591_5738624342253906514_n.jpg?oh=2a88c10199fa0d4a4cfe60cf410cedb0&oe=55D5416A

    11150948_10155471910110591_8157249834005834508_n.jpg?oh=206ba35812195decbcb86162d8627eea&oe=55C6218C&__gda__=1438568691_30cfa90be8984876c6bc0c9d630a72b1

    11182357_10155471911625591_434534351101469871_n.jpg?oh=3d0ac7cccc7f16ae68602844dd581472&oe=55C147E8
    ^ Looking all clean and fresh!! Delighted :D


    Working within a tight timeframe now as I want to get the successive layers on without the particular time windows. So next it'll be seam sealed and then time to try the gravitex stonechip once more *fingers crossed* and hopefully by the weekend I might even get the color on the underside! :o


  • Registered Users, Registered Users 2 Posts: 4,358 ✭✭✭kev1.3s


    Looks pretty good, can't wait to see some colour.


  • Registered Users, Registered Users 2 Posts: 4,506 ✭✭✭SpitfireIV


    kev1.3s wrote: »
    Looks pretty good, can't wait to see some colour.

    You and me both! :D Cheers.


    Well, she's all wrapped up now, after being seam sealed yesterday evening. With any luck I'll get the stonechip on later today. I made sure and tried a couple of test patches first to be sure there was no reactions! One heavy and thick, the other light. Think the best plan of action is to give a dusting first, let that flash and then go on with a proper coat, although I've been assured that the epoxy can handle the solvent heavy gravitex. Lets hope so....


    11245475_10155475566410591_6100509798703784418_n.jpg?oh=880b65cb266ffd70eaf6b6c4b148244f&oe=55C7F10F
    ^ In hindsight, I probably should have put a new patch in the near arch, sticks out like a sore thumb now, it was an old patch that was solid so I left it be.

    11238731_10155475566625591_519772210861240450_n.jpg?oh=30f9eef91ca0f2473a9c03295da32f65&oe=55C894FC&__gda__=1438743237_e708dc05865fc34ae9e7a6a2c80e5e95
    ^ Test patches; so far so good!


  • Registered Users, Registered Users 2 Posts: 1,258 ✭✭✭sogood


    Still very impressed with your work and dedication. A question that you might be able to answer or me is, when you cut out some rust, weld in a new panel and grind it down etc. what do you use to seal/protect the bare metal before you get around to filling and painting?

    Given that I would tend to do all such main repairs first, with the finishing further down the line, would a simple "red lead" rust primer liberally hand painted on, be good enough for a temporary seal. I know different paints have very specific undercoats and primers and assume that the red lead would be mostly removed prior to filling etc.

    The reason behind this query is the problem I've had in the past, when doing small simple repairs, and found that some time later, after filling, priming, painting etc, small signs of rust have appeared, coming back through the repair from underneath.

    Or would you recommend a sealant that could be worked on top of when it comes to filling etc.

    As usual, keep up the great work and any thoughts much appreciated.


  • Registered Users, Registered Users 2 Posts: 4,506 ✭✭✭SpitfireIV


    sogood wrote: »
    Still very impressed with your work and dedication. A question that you might be able to answer or me is, when you cut out some rust, weld in a new panel and grind it down etc. what do you use to seal/protect the bare metal before you get around to filling and painting?

    Given that I would tend to do all such main repairs first, with the finishing further down the line, would a simple "red lead" rust primer liberally hand painted on, be good enough for a temporary seal. I know different paints have very specific undercoats and primers and assume that the red lead would be mostly removed prior to filling etc.

    The reason behind this query is the problem I've had in the past, when doing small simple repairs, and found that some time later, after filling, priming, painting etc, small signs of rust have appeared, coming back through the repair from underneath.

    Or would you recommend a sealant that could be worked on top of when it comes to filling etc.

    As usual, keep up the great work and any thoughts much appreciated.


    Hi SoGood, glad you're enjoying the build! :) I dont think I'll be of much help, seems that with this project I've learned a lot of things after doing it the wrong way, hah. If I were to do it again I'd probably have applied a weld through primer over repairs, thus if any got into any little crevices or cracks it'd be no harm really. I was using LOWE rust primer (perhaps similar to the 'red lead'?) this was an oil based paint, which I thinned a little and sprayed over the bare metal knowing I'd be sanding/cleaning it back eventually. In some areas I simply used a cheap can of aerosol that did the job.

    The tub has been in my not so ideal or dry shed since December for the most part back to bare metal and I've had very very little rust appear, any that has I just gave a bit of a rub to clean it back.


  • Registered Users, Registered Users 2 Posts: 4,506 ✭✭✭SpitfireIV


    Well, a nice update to share! Turned a corner in the project for sure with the edition of color!! :D

    Thursday evening after the stonechip test patches showed no ill effects the underside was rubbed down with a scotchbrite pad, cleaned with panel wipe and then it was out with the Gravitex (three bottles of) which were dunked in a bucket of hot water to soften it up.

    Really happy with how things are going, but, as always, the pictures will do the talking........


    11233553_10155482050345591_1764545900446194566_n.jpg?oh=c7c2df2c853930de56837e86f700be07&oe=55D33D5E&__gda__=1438579211_0936018aef4508c091e1a9b1cef48a85
    ^ Dusted on a coat of stonechip, still apprehensive of reactions or general badness.....let it flash off, all seemed good, so, on with the proper coats :D


    11233563_10155482059760591_2902539344416993566_n.jpg?oh=2a33f75a1b2220e584e9f83b23f46e72&oe=55D6B6FF&__gda__=1440019098_ee6cfa088939feaaafaddb31b79796b1
    ^ Went on pretty well, only had three one litre bottles and as the stuff comes out of the gun quite thick and fast thse werent long about dissapearing. But, I just scraped by.


    11072812_10155482068575591_2641603562433878922_n.jpg?oh=1b8144dcfaaa1e7efa9f30ecaef5a54a&oe=55CBE298&__gda__=1439566012_a815953c309355a39727fbf9c76924b8
    ^ Finish wasnt too bad at all, little bit dry in areas, but, satisfactory.

    Now the waiting, would it react? Would blisters appear?!! I knew they wouldnt, but still at the back of my mind I feared a little, but, I had no reason to, all was good and it flashed off and cured *phew* :o


    Fast forward three evenings later, the stonechip was cured and still within the recoat window without having to scuff it up and it was out with the new LVLP spray gun, the paint (Valencia Blue) and thinners, two hours later and 5 or so coats and we have something that looks like this.......


    11164647_10155495621880591_3012071725206010683_n.jpg?oh=4130ed8e773a5c4343896bcc2adfe55a&oe=560A1E88

    10988324_10155495622300591_56858683682423689_n.jpg?oh=1972a0af395bfc5b819d0be64d841d75&oe=560C8488&__gda__=1439954914_e8e287cede482fbcb25fbc3fb81e06df

    11261817_10155495881085591_1904195264177696222_n.jpg?oh=ce2ed29145a5354a2bf5f0bf6e33ee75&oe=55D2BB56\

    Its an odd color, looks very blue in the pictures but looks more green in person, how it'll look in natural light I look forward to seeing! :)


    Delighted :o


  • Advertisement
  • Registered Users, Registered Users 2 Posts: 540 ✭✭✭biketard


    Awesome. Looks fantastic.


  • Registered Users, Registered Users 2 Posts: 1,258 ✭✭✭sogood


    Many thanks for your response regarding "recurring rust". And major kudos to you as usual. Seeing colour going on to your project has to be very gratifying and represents a major turning point.

    I was thinking about the rust issue and it occurred to me that in the past, whenever I used filler with wet and dry paper, I always tended to sand it "wet" as it seemed to be easier and gave a smoother finish.

    However, this must surely lead to the filler absorbing a certain amount of water, which is then trapped inside, when paint is applied. The result? Rust!

    So maybe my problem wasn't so much to do with the initial metal repair rusting, but to my approach to the filling?

    Either way, I will be rubbing down "dry" in the future. And as usual, keep up the great work, truly inspirational!


  • Registered Users, Registered Users 2 Posts: 4,506 ✭✭✭SpitfireIV


    Cheers guys! :-)

    I'd never wet sand filler, it is porous, as too is filler primer. A car left for long enough in primer can develop issues, that is if its not sealed with an epoxy underneath.


    A popular method used a lot in the states and seems to be gaining here is, once the car is stripped back to bare metal it is totally epoxy primed, regardless of work that needs to be done or filler that may need to be applied. Any filling is done over the epoxy and if the layer of epoxy is broken through you simply reapply sealing in repairs and filler alike.


  • Registered Users, Registered Users 2 Posts: 4,506 ✭✭✭SpitfireIV


    Been busy! :P


    Over the weekend the inside of the car seen a dramatic change, from the patchy look of rust primer and epoxy primer to bar coat, then primer to color.

    Took a number of hours just to get it scuffed up, cleaned down, wiped off, wrapped up and good for spraying, but, it was all worth it.....


    11060024_10155555433370591_8915354875001654294_n.jpg?oh=79c775af33ad15b649fdcd2bfaa9f87e&oe=5602CD1F

    11216258_10155555433620591_310011151981542573_n.jpg?oh=d0ccb3e57e4f05f036cc05bc96c7c66b&oe=5608308F
    ^Inside got a light dusting of bar coat to seal in a rust primer that I had used, I had a reaction with the underside previously (earlier in the thread) and didnt want to chance that happening again! Let that sit overnight to make sure there was no reactions or ill effects and thankfully there wasnt. This was sprayed with a 1.4 suction gun.


    10494653_10155555434235591_2566527923831388520_n.jpg?oh=2171570050d5c40a804d07ce0eceae4e&oe=55F3CE19

    11209517_10155555433885591_303516191777345232_n.jpg?oh=9189700f261c83edfd52dd9aaec98328&oe=55C03DD6

    ^ Sunday morning and the high build goes on. Light dusting at first then full coats. This went on with a 1.8 gravity gun.


    11049508_10155555434365591_1798247127830436414_n.jpg?oh=0c28de85e73bac6f080bad474d9e9f3f&oe=55C00622

    11351161_10155555434700591_8441515540121462281_n.jpg?oh=adf8db42650fdecab2b6a02255e91b75&oe=55C4966C

    11017233_10155555435145591_3144063622043553564_n.jpg?oh=cc69618ba56deb4f0ca9fedecf4e363e&oe=560118D8

    11267221_10155555435455591_2518073581516320649_n.jpg?oh=d50f06a36fbe926890d443f985df7b05&oe=55C96AEF
    ^ Then after letting the primer sit for an hour or so it was on with the color!! :D

    This was applied with a 1.4 LVLP gun which I'm finding very hard to set up correctly and feed right! I'm not getting as 'wet' a coat as I'd like, cant understand why. So although it looks nice I'm not overly happy with it, tis grand, but a bit orange peely and dry in place :rolleyes: But, not to worry, eventually it'll be covered in carpet and rarely if ever seen!! hah.


    So in between all the painting I put together a trial electrolysis tub and popped a few parts in to cook. Its basically a means of using a low current from a battery charger to chemically remove rust without all the mess and hassle of grinding, wire brushing etc. Simply pop in the bits you want to clean and let them stew while you get on with the rest of your work.....

    11265252_10155553442735591_9081120369205376096_n.jpg?oh=ee76729ef0919adaf20fa4745229b825&oe=56088D4B
    ^ Ummm ummmmmmm.....looking good!


    11146618_10155553449970591_6613406946659891990_n.jpg?oh=77652996ae4f561374b854cf986cea90&oe=56093467
    ^ Comparison, after about 12 hours in the tank. Results speak for themselves! :)


  • Registered Users, Registered Users 2 Posts: 314 ✭✭Darraghmh91.


    They are shocking results from the rust remover
    I'd love to put my wheels in there and just strip them off to bare metal and spray straight up
    Super work tho it's taking great shape now and starting to look like a whole car instead of bits of rusty metal on the floor ha
    Great work


  • Registered Users, Registered Users 2 Posts: 4,506 ✭✭✭SpitfireIV


    They are shocking results from the rust remover
    I'd love to put my wheels in there and just strip them off to bare metal and spray straight up
    Super work tho it's taking great shape now and starting to look like a whole car instead of bits of rusty metal on the floor ha
    Great work

    Cheers! :) The electrolysis tub is handy to make up, all you need is a plastic tub, some scrap metal, a battery charger, water and some soda crystals (can be bought in Tesco!) and let it do its magic! ;)


    Project is still ongoing, slowly at times, but still going never the less. Have since removed the hardtop from the tub so the window frame can be prepped for spraying. The plan is to spray the outside of the tub with epoxy primer, there by sealing it against rust. Any filling that needs to be done can be applied over the epoxy, before being sealed again with another coat of epoxy and then onto high build and color.


    11393011_10155630769490591_3990412958001370138_n.jpg?oh=8a528c5be94ecdb6b86f77d3f5639a46&oe=56350BED
    ^ Dropped the chassis and rims off at the blasters over the weekend so I hope to get those back in a day or two. With the chassis blasted and prepped it'll just be a case of painting and rebuilding.


    10537427_10155578236790591_8778373595035933937_n.jpg?oh=1674c041eec8a7318c56223e8eb51cd8&oe=55EAA889&__gda__=1442907868_8ff2493dff761652eab7a2a6a5416c44
    The electrolysis pot is still cooking away and making great work of removing rust and saving me time and effort! A few air vents and vent opening trims that'd be a pain to sand/wirewheel. No hassle...........


    11011633_10155578241435591_6146844006309981428_n.jpg?oh=26afee129c4b8512758e2fd968ef0403&oe=55F9722F
    ^ After 24 hours in the pot :D


  • Registered Users, Registered Users 2 Posts: 4,506 ✭✭✭SpitfireIV


    Little update.....

    Got the chassis blasted at last so it's all go on that end of things then.


    1797533_10155646005425591_6991053100369966865_n.jpg?oh=932a62fef920bb14dc67bb7fdbb06b69&oe=56349319
    ^ Back from th blasters. I opted for a regular ol' sand blast as opposed to media or soda blasting and got the blaster to spray a zinc primer on it for me.


    11425083_10155646006615591_6321993690687169615_n.jpg?oh=d2923729d590770f8dbaba4ee8bb2c88&oe=55F2F37B
    Got the rims blasted and primed too. Now, just have to figure out what rims to use! Hmmmm :P


    21008_10155666967175591_8091931724057884777_n.jpg?oh=79ea7ef066a900599fdda684f7d6f0f9&oe=56289913
    ^ After leaving it sit for a couple of days I sprayed it with Tetrosyl Chassis Black. I was divided on whether to go black or go body color (as it would have originally been) but, as you can see opted for the black instead. This paint is a special chassis paint, so will be hard wearing and rust protecting. It's oil based so spraying cellulose color over it would have caused an issue.

    11403243_10155666975365591_1239940695069209_n.jpg?oh=f8e0f9f5a670bdd51d7c7db1883839aa&oe=55FAF9AB
    ^ Turrets and some of the drums got a blast too. The paint is easy enough to spray once thinned down 5-10% with white spirits. Two coats are needed if spraying and it has a nice gloss to it.

    The rims I feel need a little more work before painting, a good sanding and a coat or two of high build to remove little nicks and scratches before spraying black also.


  • Registered Users, Registered Users 2 Posts: 4,944 ✭✭✭Bigus


    The auld poly tunnel is effective enough in summer !


  • Registered Users, Registered Users 2 Posts: 4,506 ✭✭✭SpitfireIV


    Bigus wrote: »
    The auld poly tunnel is effective enough in summer !

    It is indeed! :) Does get a bit hot, but with the door open its just nice. It's spacious enough, clean, dry and warm; perfect!

    Flipped the chassis over since and gave it another shot of paint. As well as another few odds and ends. You'll notice three drums, well, I'll only be using two but figured it'd be no harm to paint the third, would have painted the forth but its still attached to the hub via a very stubborn screw!


    Lots more suspension odds and ends to clean and paint up as well as tackling the differential and the rear swing/leaf spring.....


    10408011_10155670828250591_8990868260772526924_n.jpg?oh=4e4b2fd48577c3e1f308052ed11b554c&oe=55E84252


  • Advertisement
  • Registered Users, Registered Users 2 Posts: 4,506 ✭✭✭SpitfireIV


    After accumulating a heck of a lot of part the last number of weeks it was tuime to clean them up and spray em!


    11015399_10155723654320591_7234512689028209913_n.jpg?oh=d822c71a0dc780296d313f8c89b6f7aa&oe=56216C49

    11221363_10155723654445591_4883967424734957060_n.jpg?oh=ac40f344d77aaf36d054f07e4784ae18&oe=56248F00

    ^ The parts have all spent some time in the electrolysis tank to remove paint and rust. Now, due to the lenght of time some of them have been out of the tank they aquired a bit of surface rust, this was cleaned off with a scotchbrite and then they were all sprayed with two coats of chassis black, the chassis frame got three coats top and bottom.


    11221825_10155728148025591_4568158848647166857_n.jpg?oh=beff39b1bbaf717b10bc939046df9cf5&oe=562EC996

    11540932_10155728148270591_5165071751237573513_n.jpg?oh=a44ddca8d4f150853e84d0318a220e14&oe=5631C382

    ^ As you might imagine its been bloody warm in the poly tunnel the past few days, but, no harm, helps with the drying process. Now that all that lot is done I'll leave it for a week or two to set hard and then I can gradually start building up the suspension and fitting the new poly bush set I got.


    The back end however is gonna be more problematic, ie the differential! :(

    10422142_10155705160815591_6895494446702815183_n.jpg?oh=8998bbb00de4c37942746ed4c4511de9&oe=561E6735
    ^ This one I had hoped to use, the bearings seemed nice and tight, no slack and good preload. Figured I'd just get away with a new seal kit, €18 there or there abouts. On closer inspection the case was cracked with the leaf spring attaches and upon opening it up found a lot of brown gunk and oil inside.......water had got into it as some stage! After washing it out with kerosene the bearings were a little slack. Bugger.


    Diff number 2? The original one from the car. Well, without opening this one it was clear it needed a full rebuild (bearings & seals).


    11535790_10155705161265591_1195605360226567196_n.jpg?oh=1a58d786d5067ec2e15cc19ad4ef3f1f&oe=561F43E9
    ^ Thankfully on opening this one up there was no water present. But, like I said, it was need total stripping and rebuilding. Full rebuild kit is about €130/€140 euro, bugger again, but, I guess its worth doing and doing right.


    And now for something a little different.........


    10374508_10155722699230591_462926535099546491_n.jpg?oh=3b95e80f000c9d126021b09420b5c44e&oe=5615DB74
    ^ Picked up a 'retro'? or vintage sewing machine, good ol' heavy solid one to try and repair some of the seat covers, interior trim, try make a new head lining for the hardtop and add edging to the carpet.........all when the time comes of course, which may be in the long distant future! :P


  • Registered Users, Registered Users 2 Posts: 4,506 ✭✭✭SpitfireIV


    Not all that much to report these days guys. Still at the monotonous task of cleaning parts and sorting out whats what for the chassis rebuild. It's all fine and good getting the big parts sorted, cleaned and painted but at this stage its the small things that can stall progress; wrong sized bolt, shims, gaiters, seals etc.

    Waiting on an order of parts which *hopefully* should see me get the chassis rebuild started. The diff is gonna need to be rebuilt; havent even looked into what bearings or shims I need for that yet.....nightmare :cool:


    Anyway, just been doing this kinda stuff......


    11737881_10155791105325591_1059217408590488319_n.jpg?oh=263f9724c9448125424a844d79fdc163&oe=561AD034
    ^ Shims were put in the electrolysis tank, cleaned and then given a few blasts of rust primer.


    11029905_10155791105755591_4771960142389851730_n.jpg?oh=b7207ab2bf2d2c6db69c45b539c0ed63&oe=561C592A
    ^ Just a selection of some of the many bolts, all given the electrolysis treatment, soaked in vinegar and then cleaned and oiled. All inspected and any found to be remotely questionable were tossed. The rest will have the threads cleaned up with a die and then they'll have to be sorted according to size and lenght.....each one has a job to do!


    When I tell people I know every single nut and bolt in this car......it wont be a lie! :o:pac:


  • Closed Accounts Posts: 891 ✭✭✭Falcon L


    Great work.. It's a labour of love, isn't it? :o


  • Registered Users, Registered Users 2 Posts: 4,506 ✭✭✭SpitfireIV


    Falcon L wrote: »
    Great work.. It's a labour of love, isn't it? :o

    Yes! :P

    Just have to keep the end goal in mind.


  • Registered Users, Registered Users 2 Posts: 24,268 ✭✭✭✭Sleepy


    You're doing a great job of this. Fantastic thread to read and looking forward to seeing the finished car! Do you plan to show the end result at Classic Car events?


  • Registered Users, Registered Users 2 Posts: 540 ✭✭✭biketard


    I admire your attention to detail. A lot of people would be tempted to just stick parts back on that seem "good enough" and then pay for it a couple of years later when the rust spreads.


  • Advertisement
  • Registered Users, Registered Users 2 Posts: 4,506 ✭✭✭SpitfireIV


    Sleepy wrote: »
    You're doing a great job of this. Fantastic thread to read and looking forward to seeing the finished car! Do you plan to show the end result at Classic Car events?

    Cheers. I'll probably join the Carlow Vintage Club alright and bring it to shows alright, but I hope to drive it a lot in between too :D
    biketard wrote: »
    I admire your attention to detail. A lot of people would be tempted to just stick parts back on that seem "good enough" and then pay for it a couple of years later when the rust spreads.

    Thanks, sometimes I wonder why I'm going to all this bother but then I figure that I might as well while its in pieces; bit of extra effort now might save a lot in years to come.


    Updates........


    Well, got another lot of bits cleaned, sorted and ready for painting or to go back onto the chassis. Spent a couple of hours alone just sorting about 500 nuts, bolts and washers into various labeled bags; very handy when it comes to the rebuild, follow the diagrams and go to the bag with the appropriate nut or bolt, no rooting about or measuring.


    11701183_10155815707395591_8840903829116713297_n.jpg?oh=c785f166864d9c18af97d9f448352be3&oe=565BAE22
    ^ Some previously painted bits that are good to go! (Plus an annoying dog that kept prompting me to throw a pine cone for him!)


    11060313_10155815707705591_7333136778968720300_n.jpg?oh=6b4671dd7b4cd6aa60727d975ad15e14&oe=5652EE2A
    ^ Some bits cleaned up, lined up and ready to be shot.........with a spraygun. (Dog still waiting)


    11750737_10155815707995591_6858202952458322455_n.jpg?oh=89b419a3d66745e53afde72f7ccffeb3&oe=565022AD
    ^ Hung out to dry!


    11781675_10155815708455591_5040399215031527756_n.jpg?oh=49bceaa41398beb4586affb23b2988cb&oe=564BE830
    ^ An imperial tap and die set is a MUST for cleaning up old threads prior to reassembly (I like that word REASSEMBLY :D )


    11695970_10155815708670591_8970467911468819140_n.jpg?oh=a9d4e5aff1edb571d26cb3acf24a700f&oe=563BF426
    ^ Front turrets back on as well as the upper and lower wishbones, its starting to come back together.


    11705313_10155815708825591_3635986746377097339_n.jpg?oh=a00a50384a60358333eb4fc0c799ec73&oe=564AD5AD
    ^ Hopefully within the next few days I'll be able to stick on the parts I've recently painted, that'll get the front end built up anyway. The rear leaf spring, thats currently in the electrolysis pot derusting and the differental, well, thats still a work in progress.....


    Sometimes, when its getting a bit monotonous its nice to remind myself at how far I've come....

    11794109_10155815206660591_6209841391054281625_o.jpg
    10410883_10155815206750591_4316436669283864519_n.jpg?oh=aad1f0541d399df8fa7507f3f865b8e4&oe=563D8112

    :)


  • Registered Users, Registered Users 2 Posts: 540 ✭✭✭biketard


    Looking great!


  • Closed Accounts Posts: 891 ✭✭✭Falcon L


    That before and after shot is what it's all about. In the end, you'll have a car that's better than it was when new. :)


  • Registered Users, Registered Users 2 Posts: 4,506 ✭✭✭SpitfireIV


    Bits and pieces be going back together.......


    11826020_10155849433445591_1025519098523431292_n.jpg?oh=e6ed04ea3f3d2a4c9f201d475024e4ac&oe=5639B443
    ^ Newly painted springs and shocks being compressor in a home made spring compressor, made from two pipe flanges and threaded bar. Worked a treat and didnt feel as if I was taking my life in my hands using it as there's considerable pressure in the springs!


    11222054_10155849434630591_8472562264103196852_n.jpg?oh=a1612912bcb3ece29c0e8f1bcd214ae8&oe=564FE234
    ^ New poly bushes in and securing nuts in place.


    11813281_10155849435890591_6314499999130036448_n.jpg?oh=4cf7fb30b2a8b930fb5460b1749e480a&oe=563D99A5
    ^ Two nice an' shiney struts. Gets a thumbs up from me! :)


    Then, with those done it was time to build up the front and rear vertical links.....


    11800232_10155849453215591_7901658250837201182_n.jpg?oh=c9b65235b4ec54ba1e57088e6b552a7f&oe=564FD08D
    ^ New trunnion bushes ready to go into rear half shaft.


    11141160_10155849453685591_5700320510632021852_n.jpg?oh=2c33bad35b99d00a01b9d3210bdca22e&oe=563CA8E3
    ^ Spreading the top end of the vertical link to fit the half shaft in place.


    11796350_10155849454085591_4775163962007259228_n.jpg?oh=8200c8a80916939b0f261253c4d812f9&oe=563F3E9C
    ^ Base of the front vertical link; a rather crude turning system called a trunnion which is basically a threaded bar that screws into a brass housing, when you turn the wheel left or right the vertical link rotates on the threads. A ball joint would have been an easier method, but, some of the logic behind British Leyland design is not to be questioned! :rolleyes:

    11817076_10155849454900591_6101224189799427376_n.jpg?oh=cdddd7461d29e74cecb97dbf3ddb5189&oe=5655EACD
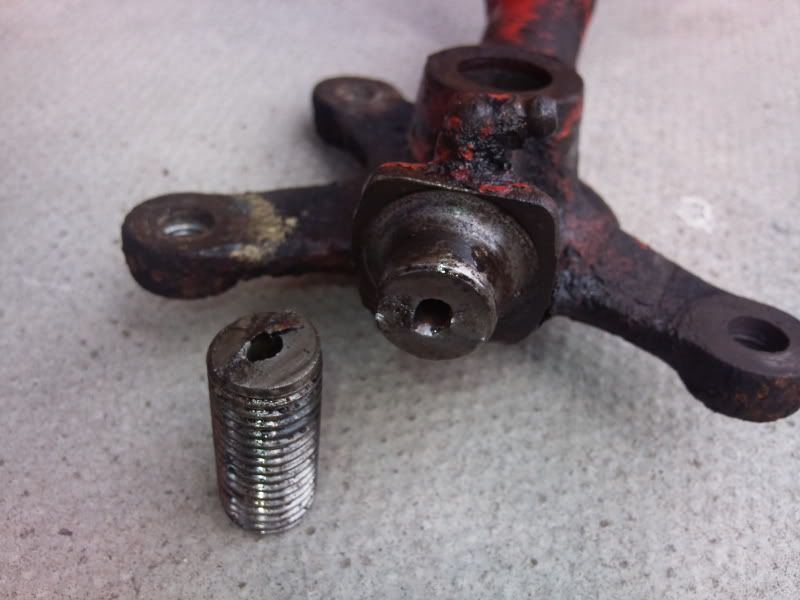
    ^ Here you can see the brass trunnion screwed into place. The trunnions have to be oiled regularly; they're a known weak spot which can, and do, fail due to poor maintenance. Its reckoned using grease instead of the recommended oil can lead to failure of the threaded section and leave your Spitty looking something like this......


    Photo493.jpg
    Photo496.jpg
    (Images taken from: http://club.triumph.org.uk/cgi-bin/forum10/Blah.pl?m-1341850452/)


  • Registered Users, Registered Users 2 Posts: 4,506 ✭✭✭SpitfireIV


    Another few pics to keep you going......

    Been away for a few days last week so had to put Spitty aside :o But before I went a few bits got reassembled.

    11202102_10155866870995591_1697836881692406300_n.jpg?oh=2ab0a902c69ab3cb647b9e02ec2a4408&oe=5644779B

    11824923_10155866870710591_6222392953987598762_n.jpg?oh=e675ef57e27c150bb6856807553a8dfa&oe=563DDF64

    11831737_10155866871765591_8952395728954281349_n.jpg?oh=a3146cf2ba55ccfc7120b64728b4e430&oe=56723064

    11058224_10155866871305591_4853284953314240006_n.jpg?oh=fbf24198c37eed089ecdd70c73b3c8e8&oe=564533F3

    So, apart from a set of drop links and the front hubs & discs (painted and ready to be fitted) the front end is built up and torqued up. Theres an argument that its best to torque up all the bolts when the car is on the ground under its own weight, but, I cant see what difference it'll make, they'll all be checked again near completion, but for now they've been given a red mark to show they've been torqued as per the specs. Copper ease was also used on any bolts that would be going through the metal sleeves in bushings to hopefully prevent rust and stop the two components sticking to each other. Before I can get the back end built up I'll have to get the differential sorted! Leaf spring has been repainted and ready for reassembly with new bushes.


    Also, went to visit the Carlow Vintage & Classic Show on Sunday last, was really surprised to see so many Spitfires at it! (Ok, they werent plentiful, but still, a few new ones that I hadnt seen at shows in the past couple of years). Gave me a great boost and a new deadline, August 2015, I want my finished car at this show!!

    11825793_10155870109415591_2234004128147842757_n.jpg?oh=c07b14424dfe518d486d2315cf91ec81&oe=56760B2C

    11825840_10155870105650591_5666085234678733899_n.jpg?oh=92edc857754664f69e1706cb075fca89&oe=56741C49

    11013582_10155870105260591_7754185857680548931_n.jpg?oh=65b39b5f540d7d299f79a9114496c1ea&oe=5635FDC6

    11828572_10155870103900591_4169909447603715542_n.jpg?oh=c7b3333a4a367e990d7df1b8c283337f&oe=5643C1ED

    11811375_10155870104275591_2158915053082695858_n.jpg?oh=05c9053ebdfcf278df096ee88ca7bb0a&oe=567945E4

    11873434_10155870101495591_4213916862226058886_n.jpg?oh=e8ba611c42aa0a8521ce062e98e9d157&oe=567B778B


    :)


  • Advertisement
  • Closed Accounts Posts: 891 ✭✭✭Falcon L


    I think you'd better allow another year. August 2015 doesn't give you much time. :P

    Looking great! I see a car coming together, not just a pile of parts. Great job and I'm totally jealous. :(


  • Registered Users, Registered Users 2 Posts: 4,506 ✭✭✭SpitfireIV


    Falcon L wrote: »
    I think you'd better allow another year. August 2015 doesn't give you much time. :P

    Looking great! I see a car coming together, not just a pile of parts. Great job and I'm totally jealous. :(

    Ah yes, lets aim for August 2016 far more realistic deadline :P

    Thankfully, as you probably know all the major work is done on the tub, underside and inside finished and painted, just have to finish the outside, so, once the chassis is finished and the tub is dropped on then it'll really get exciting! :D

    Bonnet needs a lot of work still though :p


  • Registered Users, Registered Users 2 Posts: 1,003 ✭✭✭Zoo4m8


    I really enjoy this thread, you are showing in great detail what can be done with a bit of application and common sense. I wonder would you think seriously when you are finished of compiling what you have posted on this forum and maybe having it published in some way as a handy reference for others at the same game and not necessarily restoring a Spitfire as your info could be applied to almost any resto, just my two cents!
    My TR7 ( eventually to be a Tr8) shell is at the body shop since Jan. I did the owner a large favour a while ago and as there was no return happening we agreed this was the best way to resolve it.. There have been a couple of 'frank exchanges of views' but at last progress is being made :D
    Anyway while all this has been going on I've been working on other bits and your electrolysis bucket has been useful!
    I'm looking forward to you tackling the diff, I'm changing the ratio in mine and want to let you make the mistakes first!
    Anyway I'm rattling on ..keep up the good work.


  • Registered Users, Registered Users 2 Posts: 4,506 ✭✭✭SpitfireIV


    Zoo4m8 wrote: »
    I really enjoy this thread, you are showing in great detail what can be done with a bit of application and common sense. I wonder would you think seriously when you are finished of compiling what you have posted on this forum and maybe having it published in some way as a handy reference for others at the same game and not necessarily restoring a Spitfire as your info could be applied to almost any resto, just my two cents!
    My TR7 ( eventually to be a Tr8) shell is at the body shop since Jan. I did the owner a large favour a while ago and as there was no return happening we agreed this was the best way to resolve it.. There have been a couple of 'frank exchanges of views' but at last progress is being made :D
    Anyway while all this has been going on I've been working on other bits and your electrolysis bucket has been useful!
    I'm looking forward to you tackling the diff, I'm changing the ratio in mine and want to let you make the mistakes first!
    Anyway I'm rattling on ..keep up the good work.

    Glad your enjoying the thread and getting some benefit from it! :) I do plan on compiling pics at the end of the project into a couple of photo booklets to stick in the back of the car and show interested people or bring along to shows, as for compiling a publication, well.....that sounds like a lot of hard work, but, we'll see ;)

    Hah, cheers with regard your confidence with me tackling the diff :P It's a pain to have to pull it asunder, but, it's gotta be done. Needless to say there will be updates and pics!


    In other news I made a few new purchases over the past few days. Firstly had a package arrive from Paddocks in the UK with lots of shiney and new rubbery rebuild kits for the master cylinders, calipers, rear brake cylinders etc.


    11870795_10155914446775591_5353637099404038642_n.jpg?oh=5591c13e0f46f2f11e6b59e44f5cb3e6&oe=56770682
    ^ Still cleaning rust and dirt from the diff, have yet to push the pinnion out.


    11888046_10155919230760591_6661086675037944402_n.jpg?oh=94e1e0cbce144fa39a0d6cced82b2619&oe=563C429E
    ^ Split the brake calipers as two of the pistons were proving difficult to remove. Have full rebuild kits so after a good clean they'll be good as new.


    Then we have this....

    11902281_10155919217995591_6551087170273684729_n.jpg?oh=4e0a1b4afba23f4613583179db6bfbda&oe=567B2E06
    11891125_10155919218125591_2773374086791201454_n.jpg?oh=ba05bc2ac0115628bb7da22203ab34b2&oe=5638DF1E
    11902442_10155919218235591_8380178031795461984_n.jpg?oh=1974a1744d089ff636d1b1847aaf148f&oe=567A75AE
    ^ Interesting! :confused: The threads in the brake caliper for the bleed nipple must have stripped so someone has drilled out the hole larger, re-tapped, dropped in a ball bearing and a larget bolt. Suppose it'll do the job, but, an interesting fix!

    Apart from that the other other thing was popping the pistons out of the clutch master cylinders, have two of 'em, came out easy enough with a bit of pressure on an hydraulic hand pump, the brake master cylinders though, even with upward of 70psi they werent budging, stuck solid!!

    So, I picked up a good second hand one! :D


    Onto more exciting news now. I reckon I've shaved weeks, if not months off the build with these two recent acquisitions!! Scored a grp GT6 bonnet and a really clean and straight bootlid! Missed out on a really clean, almost new mohair hood (still kicking myself over that one) but, none the less, very happy with the purchase, like I say, it's gonna knock a LOT of time off the build as both the bonnet and bootlid I had needed a lot of attention.

    11866314_10155927465940591_8830148525858204503_n.jpg?oh=70176466bae2c75a6d30fd91ca7f434c&oe=5676C93A
    ^ Nice shade of magenta!

    11949366_10155937532455591_8324739431028805502_n.jpg?oh=907560ca297e017fa5ac01bb73bd15e9&oe=56822A73
    ^ Even came fitted with a nice shiney lock! Score.


  • Registered Users Posts: 2 yorkebar


    Finally registered on the forum so i could comment on your amazing build, and i dare say that you're chassis completely puts mine to shame, it's come up lovely! and the shocks are basically brand new. considering what you started with this is a massive achievement that you should be truly proud of.


  • Registered Users, Registered Users 2 Posts: 4,506 ✭✭✭SpitfireIV


    yorkebar wrote: »
    Finally registered on the forum so i could comment on your amazing build, and i dare say that you're chassis completely puts mine to shame, it's come up lovely! and the shocks are basically brand new. considering what you started with this is a massive achievement that you should be truly proud of.

    Cheers mate and thanks too for going to the hassle of setting up an account on here! :) Stay tuned! :D


  • Registered Users, Registered Users 2 Posts: 4,506 ✭✭✭SpitfireIV


    Was looking back over some old pics (March/April 2014 perhaps) to compare with how things look now....


    11951700_10155962320605591_4256150157463323248_o.jpg
    ^ Car was still split in two. Sills needed to come off on both sides and be reposistioned. New mid sills fabricated for both sides, new inner side made for passenger side. New boot floor and rear valance to go in as well as dozens of other major and minor repairs. Ah yeah, I had it all ahead of me!


    11990611_10155962315785591_5173201551827690729_n.jpg?oh=72abb7c725730443248ceff7d23e929a&oe=566A2581
    ^ Looking a bit fresher! Bulk head came up really well after a few applications of Bilth Hamber deox gel and many hours wire brushing. Underside epoxy primer, stone chipped and colored. Inside primed and colored. Bulkhead epoxy primed so far. The rest of the exterior will be epoxy primed before filling.


    11062344_10155963048765591_6026517165389026458_n.jpg?oh=9bc882afaa0039f81f825f8a2573a3f4&oe=5667E6FD
    ^ Rebuilt the original leaf spring and have it reassembled with new bolts, poly bushes and rubber buttons between the leafs.

    11951783_10155963049205591_1339732585744033654_n.jpg?oh=0872261d014333bae236595ff854632a&oe=5670E3AA
    ^ The buttons seperate the leafs and reduce the surface area thereby preventing metal cutting into metal, thus, making the movement smoother.

    11947521_10155963667810591_9159254054712948210_n.jpg?oh=fc0c0614fafb4e415284f6e13dacd004&oe=5679AEFF
    ^ Prior to reassembly they had done a stint in the electrolysis tank. Cleaned up really well!

    I'll give the whole lot another blast or two of black before refitting.


  • Registered Users, Registered Users 2 Posts: 4,506 ✭✭✭SpitfireIV


    Nothing much to report I'm afraid. Picked up all the hardware for the diff rebuild, including:

    - Output shaft bearings x2
    - Diff carrier bearings x2
    - Pinion bearings x2
    - Pinion oil seal x1
    - Output shaft oil seals x2
    - Case gasket x1

    12002272_10155999003625591_2040624033288113345_n.jpg?oh=57bdaa4efc3141cf8ca91d23df1c571f&oe=5666C1DD


    Getting the diff back together is gonna be a tedious job, lots of measurements to be taking, so its out with the dial guage, calipers, feeler guages etc........this could be interesting.


  • Registered Users, Registered Users 2 Posts: 4,506 ✭✭✭SpitfireIV


    Diff rebuild has got underway and actually was not as bad as I thought it would be. With a little help from someone more knowledgeable than I, a good service manual, some youtube vids, time and patience the outcome has been good.

    Now, as they say, time for the science bit........


    12009567_10156010019945591_2977065201759502858_n.jpg?oh=2c7cc65377c2769f9881a57de84071f2&oe=566FDB3A
    There was a lot of play in the sun gear in the carrier, this play was due to the cupped trust washers behind the planet gears being worn. The original was .035", but, when measured they were approx .032". As replacements are not easily availible we rooted out some brass with an approx thickness of .035 and set about forming some new shims.


    12011140_10156012988750591_2264878458694841562_n.jpg?oh=7d7f9622739e7c0f0ede9017aadde5a8&oe=56627CE9
    Planet and sun gears with their shims. The cupped trust washers are the diy shims along with the original I'm holding. They polished up well!


    11993291_10156012989330591_6487204125913866229_n.jpg?oh=18baefcd8226fa90eb90a2ad4baec561&oe=56706423
    New head bearing pressed onto pinion along with new bearings on carrier.


    11990670_10156012989060591_5459629295603959221_n.jpg?oh=115264daa4c856129bcd54ba9bb8b866&oe=566D8068
    Planet and sun gears back in the carrier with shims fitted. Very little play now and engineers blue applied to some of the teeth show a good mesh. Happy!


    12006228_10156012989175591_5137049370844962918_n.jpg?oh=5e73ea0904681c965f1105fab5cfbc18&oe=56A97FC4
    Pinion head bearing outer race pressed into the front casing.


    12019952_10156012989440591_3606035191880322436_n.jpg?oh=764cceffe300ce939c28263ca46c611d&oe=569BA509
    New pinion tail bearing race pressed in.


    12032074_10156012989600591_1415862677936886981_n.jpg?oh=4aec09ee4e666dd60f0d18c548898d75&oe=56A00F6C
    Pinion inserted, without oil seal in place and being torqued up to spec. Mounting plate also fitted.


    12003900_10156012989810591_4658607246615368234_n.jpg?oh=e17a889816016ac6d0f74da9cbebcb88&oe=56A755F6
    Carrier assembly in place, yet to calculate the float, although I have the original shim packs from each side.


  • Registered Users, Registered Users 2 Posts: 4,506 ✭✭✭SpitfireIV


    Diff rebuild continued.....

    Lot of measuring, shimming, assembling, checking, disassembling, measuring, shimming, assembling, rechecking.....etc etc, you get the idea


    12004782_10156017699710591_4260825669385876281_n.jpg?oh=a966b79df3bdaada5857d159adb91b0c&oe=569BBFCC
    Pinion was removed from yesterday and reshimmed to add preload as it was spinning free. Preload should be in the region of 12 to 14lbs. Check out the crude measuring system in the absence of anything more scientifical tongue emoticon. A graduated bar with a 2lb weight suspended from it.

    Holding 8lb well here.


    11996901_10156017699860591_4037896589721111198_n.jpg?oh=6e92329c4bf1017c0953d7ef2e30a153&oe=56AA3CDE
    Holding onto approx 11lbs here. Specified preload is 12 to 14lbs, but given the makeshift nature of the setup and the fact the preload feels good, I'm happy enough.


    12004932_10156017700055591_3766201514398411216_n.jpg?oh=1dfbd8c94f86407179888daf010eff60&oe=566FEE59
    Had to make up a jig to hold the dial guage in place to check the back lash on the crown wheel.


    11025962_10156017700315591_2880046317861937181_n.jpg?oh=b085f43e91e436d56ffd5c20b0d98fa4&oe=569F4798
    Backlash being checked again, it requires a lot of patience moving various thickness shims from side to side to hit that magic number....


    10421464_10156017700490591_2534014531764840140_n.jpg?oh=0f958785fb7f9e9ba4e33983822886b3&oe=56A6E80C
    ....Bingo! Dial reads .12mm backlash which is equal to .0045" ish, required backlash is specified as being between .004 and .006".......I'm happy with this!


    12036631_10156017700675591_8113660632312040624_n.jpg?oh=c4c2611a1e22c49281f49023bc734f2e&oe=56672C35
    12006246_10156017701000591_957356707287555101_n.jpg?oh=b9eb037f43512bfdcc6d723b6d7ad4ae&oe=565D92C2
    Engineers blue on the crownwheel teeth shows a good pattern.


    11836788_10156017701185591_9166493661400913931_n.jpg?oh=3b63e3d299e9aa02fa881296b99593a7&oe=56664FC3
    As to are the markings on the pinion gear.


    12002220_10156017701480591_4617368763876439974_n.jpg?oh=15ee5a2062cf25eada14cee8b1390e68&oe=569ED870
    Pulling the bearing from the output shaft, puller might be overkill, but it does the job.


    12032271_10156017701760591_7259510320484730816_n.jpg?oh=53306b1a9ed38db46d257cd5a4849764&oe=5669DE7D
    Checking the trueness of the crownwheel.


    11988724_10156017702130591_6555557701430557450_n.jpg?oh=a906393825736d38d2118cb628304958&oe=5667471A
    United colors! :D The whole lot will be painted black eventually.


    All that remains now is to fit the pinion oil seal, press on the bearings to the output shaft and fit new oil seals, then on with the gasket and close her up! ;)


  • Advertisement
Advertisement