Advertisement
If you have a new account but are having problems posting or verifying your account, please email us on hello@boards.ie for help. Thanks :)
Hello all! Please ensure that you are posting a new thread or question in the appropriate forum. The Feedback forum is overwhelmed with questions that are having to be moved elsewhere. If you need help to verify your account contact hello@boards.ie

The beginning of a new boat.

Options
  • 10-03-2012 8:16pm
    #1
    Registered Users Posts: 311 ✭✭


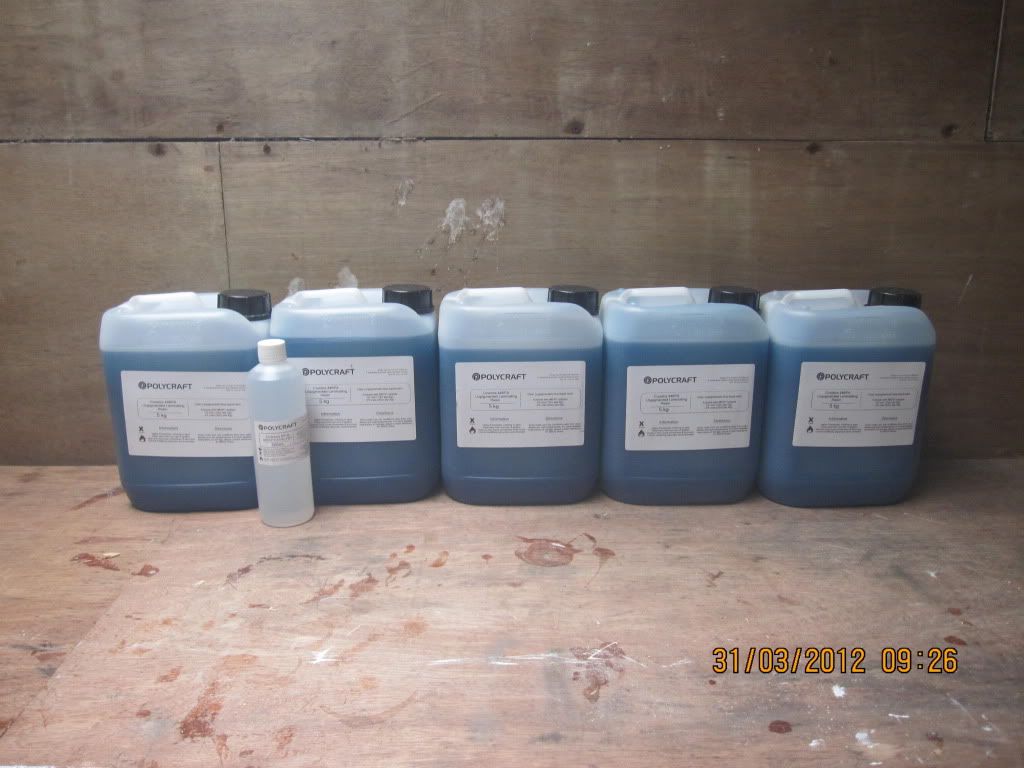
    Hi all, got all the stuff i need hopefully to finish my first boat.
    I came across a couple of chips on the mould, so i got some filler and wet sanded the inperfections.
    Mixed up the filler putty with hardener and pushed it into the small chip.
    Once the filler had hardened i wet sanded it with some 100 grit sand paper moving up to 160 grit.
    Cleaned it off using some acetone, and applied some get coat which i then covered with some duck tape, this was done so the gelcoat would cure (no air getting to the gel coat.)

    Using the duck tape was not a good idea because the tape stuck to the gel coat when i peeled the tape off some of the tape stuck to the gel coat.
    Just found out i should have used a playing card as it has a waxy effect to them which would make them come off the gel coat in perfect condition.

    I also used some ply wood as a template for the gunnels, which i will use a tecnique called lofting to take the curve from the ply and transfer it to the 1" ply that will be apart of the gunnel.
    Its not really needed the way im doing it, but its good practice for me, if i ever wanted to build a wooden boat


«134

Comments

  • Registered Users Posts: 311 ✭✭whacker1982


    After i had taken the duck tape out i began to wet sand all of the gel coat off except where the inperfections were using the same sanding grit paper. cleaned it off with acetone.
    Really happy with the results came out really well once i had corrected my error :rolleyes:

    Now i hit the fiberglass pulled out the 300gpsm chopped strand and layed it out on the mould this part can be a little fustrating because its not gonna just lye in the mould like a dream. A lot of pulling a tuggin to get out the creases.
    Also i never cut the fiberlgass with a stanley knife because you would see the straight line in the finished product. Instead i feathered the glass just by ripping it with my hands. When it comes to laying up the resin it will gel together and no signs of lines. (gloves were worn)

    Now ive my first layer of fiberglass ready to go.
    I think im just gonna do this one first when the time comes because ive 5 layers to do including this one and its an uneven number.
    Ill be doing two at time after that.

    I took the fiberglass off the mould turned it upside down and gave her a few bangs with a rubber hammer just to get the odd bits of strand that would have broken away for the fiberglass. ( I JUST CALLED MY MOULD A HER)

    Next i got some warm soapy water and cleaned the inside of the mould from top to bottom. Ill be doing it again a day or two before my first lay up, for fear some dust might have landed in the mould.

    Thats as far as i got so far its perfect weather for lay up but with the inperfections and work there is no way i could manage to get the first layer done this weekend.
    Hopefully now with the long weekend coming up ill be able to lay down a layer or even more.

    Oh yea, im trying to get my pictures up so you dont have to click on a link, so just say when you click on my thread you see the pictures straight away, instead of having to click on a link.
    Any help on this please so i can make my thread more easy to follow. Thanks in advance.


  • Moderators, Motoring & Transport Moderators, Sports Moderators Posts: 6,320 Mod ✭✭✭✭fergal.b


    Did you not put on the gelcoat first.


  • Registered Users Posts: 311 ✭✭whacker1982


    No not yet, i just wanted to cut the fiberglass to the shape of the boat i took it off again and put it to one side. No waxing or gel coat till next week. Just getting the prep all ready.


  • Moderators, Motoring & Transport Moderators, Sports Moderators Posts: 6,320 Mod ✭✭✭✭fergal.b


    A good thinking, you should make templates when you have the perfect size figured out then you can lay it out on the fiberglass and work out the best way to cut it with the least amount of waste form a roll.

    As for photos I just upload to http://photobucket.com/ then just copy the link and paste in in your post.

    Keep up the good work and don't get too sticky :D

    .


  • Registered Users Posts: 605 ✭✭✭breghall


    nice thread Whacker,I'll be following your progress....Your clothes and floor will never be the same again :D


  • Advertisement
  • Registered Users Posts: 125 ✭✭Jack_regan


    Glad to see you've made a start on the boat. Who did you get the fibreglass materials off in the end? Sure your all set up now, won't be long now till your easing the first boat out of the mould. Good luck with the project and watch out for the fumes- keep that door open!:D:D

    I use www.flickr.com to post photo's on boards. Once you have signed up for an account and uploaded your photo's you click on the "share" button and that will give you the HTML/BBCode that you need to link from your thread. It takes a little getting used to but sure just give it a go, you'll work it out eventually.

    This next section is taken from the Newbies and FAQ thread under "sys" on top of page.

    "10. How can I insert pictures in my posts?
    This is also very easy to do, and very similar to number 9 above:
    You don't have to have anything written in the Message box to embed a picture. Text can be entered before or after you insert a picture into your post
    Click the little square yellow box with tony mountains in the foreground. It looks like this:
    In the box that says "Please enter the URL of your image:", paste in the URL of the picture you want to embed in your post, and click OK"


  • Registered Users Posts: 311 ✭✭whacker1982


    cheers jack got them off mbfg.co.uk thanks for that. very cheap, good quality stuff. superman could not have delivered them faster.


  • Registered Users Posts: 125 ✭✭Jack_regan


    Ah yeh they have a good service all right. I thought I recognised that filler as the same one that I got but they must have changed there supplier for the resin etc. or else they just have different labels. The labels on the containers I've always got off them have said mbfg.co.uk on them. (I got the last stuff six months ago) Anyway I'm sure it will work fine.

    Also good advice from fergal there about making the templates, that will save a lot of time in the long run. Have you enough mould release there, I've never used it before so I wouldn't know, I suppose you put on a very thin coat of it?


  • Registered Users Posts: 311 ✭✭whacker1982


    i reckon i do ive done the transom now three times just to see the effect of it. And it didnt put a dent on the tin. gonna wax it eight times im pretty confident ill have enough.


  • Closed Accounts Posts: 1,270 ✭✭✭tin79


    It will be very interesting to follow. How much are you thinking of asking for them?

    Would it be an option to go a choice of fit out to suit angling, hunting etc?


  • Advertisement
  • Registered Users Posts: 311 ✭✭whacker1982


    thanks tin 79, yea that idea has popped into my head a few times but since this is the first time ive done anything like this ill just be happy with the first one or two coming out the way they should. After i get the hang of it i might fit them out for fishing, shooting, its a good idea tin 79.
    The boat will fit on a roof rack also so that illeminates a trailer.

    As for the price i cant say yet. im keeping all reciepts for the cost to build one, then ill ad on labour.
    I have no intention of ripping people off, the way i look at is the more people with a boat the merrier.


  • Moderators, Motoring & Transport Moderators, Sports Moderators Posts: 6,320 Mod ✭✭✭✭fergal.b


    Do you know if your epoxy is non amine blush I am using west system at the moment and find the blush very annoying so would be interested to hear how you get on with yours.
    Cheers.


  • Registered Users Posts: 311 ✭✭whacker1982


    Not a bother fergal, havent used it yet, but ill take a look tomorrow to see who makes it and is it non amine blush or amine blush.


  • Closed Accounts Posts: 1,270 ✭✭✭tin79


    Let me know of the price when you do start knocking them out. I might be interested in one with no seats that I can customise myself if thats an option (and my birthday is not too far away :) )

    You can never have too many boats!


  • Registered Users Posts: 311 ✭✭whacker1982


    tin 79, yea thats no problem, when ive completed the first one ill post up some pictures of the finished product. or if you like you can come down to have a look at it personally, might be easier to make a decision. all up to you.


  • Registered Users Posts: 311 ✭✭whacker1982


    ok well im back again after a few weeks, where to start now? well the first week was too wet to do any work to the mould due to too much humidity in the air. what i was looking for was 60% humidity in the air and not too much over this.
    this is because if there is too much water in the air it will get trapped between the mould and gel coat, which will cause osmosis.
    what happens then is the gel coat will blister and it just gives off not a nice look. this will happen also with the resin and fiberglass mixed.
    i went and bough a nice second hand humidifier too take the water out of the air. did the job nicely, and was suprised on how much water is achually in the air. right enough about that.

    got doing my waxing, i gave it seven coats of releasing wax, and my god this was annoying and exciting at the same time, was happy to be getting a start on the boat.
    put on the first layer and waited ten minutes for the wax to dry to a haze, then polished it off after waiting half an hour, minimum! this process was repeated 6 more times. a very sore arm!

    once i had done this i then mixed up my gel coat getting really giddy at this stage! painted the hole mould with my first layer then let it sit for ten hours came back and did it for the second and final time, there is some bang off this stuff so a mask is a must.


    IMG_0542.jpg

    once another ten hours has passed i was ready for the first coat of 350gsm chopped strand, layed it all down on the mould mixed up a batch of resin and started rolling in the resin.
    [IMG][/img]IMG_0543.jpg

    once all the resin had been applied to the fiberglass, what i did next was come along with a brissle roller and rolled the glass to take any trapped air out of the mix, there seemed to be a few in the usual place like the corners and the keel and stem area, any areas of fiberlgass sticking up i just dabbed it down with a paint brush. oh this stuff stinks too so a mask is a must again. and boiler suit, fiberglass itches and pinches like mad, i mean it gets everywhere, and stays everywhere for days!

    humidifier was ticking away all the time while i was doing this, weather was not great outside but at least the humidity was down.

    so sunday at long last the resin had hardened, next job was to wet sand it down i used grit 100 which seemed to do it fine, it got rid of all the odd glass fiber sticking up and gave it a really nice smooth finish. so out with the acetone and cleaned it up with a clean cloth. this stuff is more powerful then the last two i mentioned above. but it dose some job in cleaning up the glass. well impressed. so far so good.:)

    [IMG][/img]IMG_0544.jpg


  • Moderators, Motoring & Transport Moderators, Sports Moderators Posts: 6,320 Mod ✭✭✭✭fergal.b


    Looking good, best of luck with the first mold release you will have to get a few beers in for that.:D


  • Registered Users Posts: 311 ✭✭whacker1982


    cheers fergal, beer o clock in a few weeks all going well.


  • Registered Users Posts: 311 ✭✭whacker1982


    back again, finally a weekend off work can really get cracking on this project of mine.
    i went and cut out the shape for the port side of the mould using the 450gs mat, and the same for the starboard side, popped open my polyester resin and starting putting down the second layer (first layer of 450gs mat)
    not paying attention to what polyester resin i had left, i only had enough to do the port side, the 450gs absorbs the resin alot more then i had though. :eek:

    waited till the port side had dried and did the norm wet sanded it down and cleaned it off with acetone, followed by the hoover.

    then the good man at dpd had arrived with my resin enough to do the job i reckon.
    IMG_0547.jpg

    back in business again:)
    put back on the starboard side chopped strand and started the lay up process .
    IMG_0549.jpg

    first layer of 450gs chopped strand mat down. 3 to go.
    IMG_0545.jpg
    made up a template for the transom this was the best of many failed attempts. ill keep this maybe to one side of another boat. think i could do it better, but ill hold onto it just in case.
    IMG_0546.jpg

    layed down the second layer of 450gs mat, remember that one side is still wet and the other is dried and sanded, the dried side took a nice bit of resin, talking 3 litres, it is thirsty mat but what i found was on the wet side it stuck like glue to the wet side, a bit of thugging and pulling and a couple of f%$£s of course but when it was layed in right it soaked up the first layers 450gs resin really well, was really happy with this, and it only used 1 &1/2 liters of resin this is key im thinking. big savings here ill be doing this for the last two layers, must faster and saves on resin which aint cheap.
    i forgot to take a picture of the second lay up to show how it soaked up the first layers resin.
    i was destroyed in resin and strands of fiberglass so the camera would have prob been destroyed anyway. ( running low on rubber gloves)

    ok so popped in the 1/2 inch transom clamped in up and braced it up hopefully when the resin cures it will stick to the aft of the mould.
    i changed the size of the transom from 1 inch to 1/2 inch didnt really think it would need a full inch of plywood. 1/2 inch plenty of strength for a 10ft boat.
    IMG_0551.jpg

    i was going to cover the transom in epoxy for added strength but i was not too sure how it would react with the polyester resin, so i did a bit of searching on google and it did say that you can epoxy over polyester, but not polyester over epoxy, got a little unsure here so i contacted my suppliers and they said that it would not bond properly no matter which way it was done.

    also the two weights that are sitting on the starboard side of the hull, there was trapped air in these two places and for the love of it i could not get them out with the brissel brush so i popped two weights on the bubbles and they popped, i hope.
    so far so good any way people.;)


  • Moderators, Motoring & Transport Moderators, Sports Moderators Posts: 6,320 Mod ✭✭✭✭fergal.b


    Looking good but I would definitely double on the transom thickness there is a lot of stress caused by the outboard even a small one and I think that 1/2 inch will just flex and brake up. The standard I work with is under 5.5 hp 1-1/4" to 1-3/4" and 5.5 hp to 16 hp 1-3/8" to 1-3/4" Better safe than sorry.


  • Advertisement
  • Registered Users Posts: 125 ✭✭Jack_regan


    Coming along nicely, keep up the good work!


  • Registered Users Posts: 311 ✭✭whacker1982


    came home early from work today so started getting ready for the gunnels of the boat. got a length of 3x2 timber and chopped lots of pieces 3x3x2. i soaked the timber in resin for soakege only did it the once, prob be better to have done it the second time, it soaks it up pretty fast.
    these little blocks will be covered in fiberglass so i need them to stick.

    IMG_0553.jpg

    next job was to chop up some fiberglass into little over sized squares, these will go between the boat and the blocks of timber.
    i spaced the timber blocks out 8 inches apart, still retaining the curve of the boat.

    ran out of clamps!
    IMG_0552.jpg

    you may notice that i removed the half inch transom. i took fergals advice and have ordered a sheet of 1 inch ply, also the planks for the seats. need to shoot to limerick to get some white oak for the keel and stem,
    all timber now for a while


  • Moderators, Motoring & Transport Moderators, Sports Moderators Posts: 6,320 Mod ✭✭✭✭fergal.b


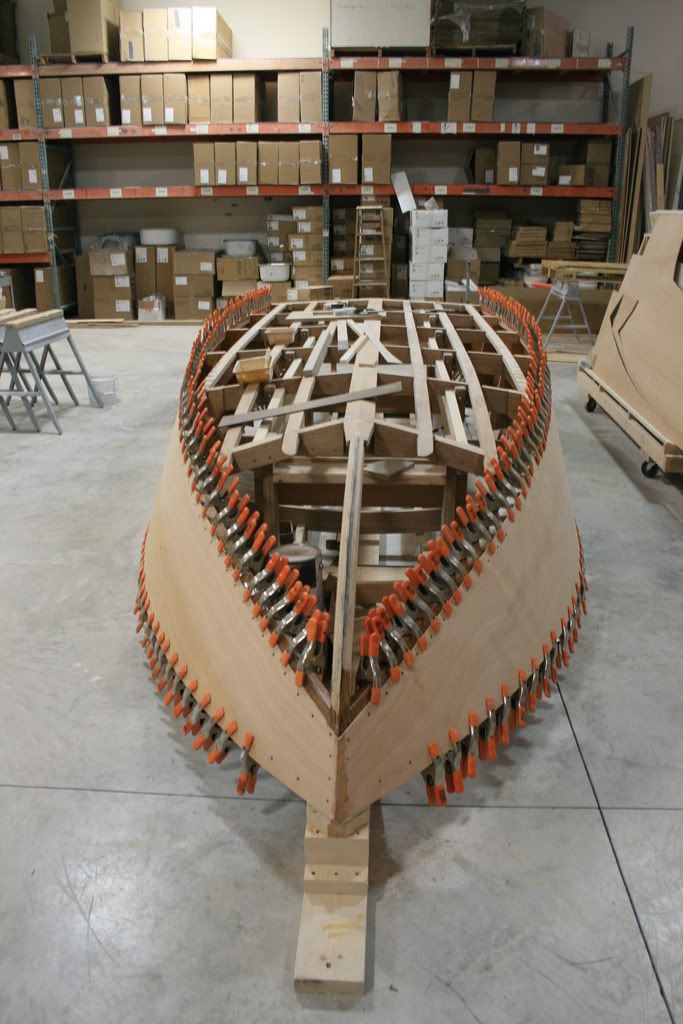
    If there is one thing I have learned in boatbuilding it's you can never have enough clamps :D


    IMG_1909.jpg


  • Registered Users Posts: 311 ✭✭whacker1982


    ha ha my god, there is just too many to count. :D


  • Registered Users Posts: 605 ✭✭✭breghall


    keep up the good work Whacker, glad you took Fergals advice on the transom, it's good to know that there are people on here who are willing to show their work and take advice and learn from it.... nice thread, i like the updates.


  • Registered Users Posts: 311 ✭✭whacker1982


    thanks breghall, its all a learning process. ill take all the advice i can get. nice to hear your enjoying this thread.


  • Registered Users Posts: 125 ✭✭Jack_regan


    Thumbs up from me to on the thread too, really interesting to see the boat building process throughout all it's various stages. I was going to say, that you have a lot of clamps there until I saw the picture posted by Fergal, that's extreme clamping!

    Good Luck with the rest of the build.:)


  • Registered Users Posts: 311 ✭✭whacker1982


    started work on the stringers, simple piece of 2x1 timber cut to size and planed down to suit the stringers in the moulds. IMG_0554.jpg
    after planing
    IMG_0555.jpg

    got cracking on the seat supports after this, again just a 2x1 piece of timber which were planed to size, i got 9inch timber planking which will be the seats, i made to supports an inch and a half over size. just to make things a little fancy looking
    IMG_0557.jpg
    popped these fellows into a bucket of water leave them soak for a few days before steam bending them. have to do this for the center and bow of the boat, because of the curve getting narrower towards the bow. (Q is there a name for the center of a boat?)
    IMG_0559.jpg

    went at the blocks on the starboard side of the boat, same again cut a square of fiberglass and some resin and clamped them together.

    once these had cured i cut five squares of glass for each individual side of the timber block, and these were attached to the blocks. after this was done i cut out 14x2 inch strips of 450gpm glass to go in between each block and run up the side of both blocks and make my way up the boat. this process will be done once more in total two times this way.
    the gunnels will need to be strong as there will be alot of bumping, pushing and pulling done on this side of the boat. so i need to make these little fellows tough.
    IMG_0560.jpg
    it looks messy i know but it will be sanded smoothe once it has cured.


  • Registered Users Posts: 311 ✭✭whacker1982


    here how it looks so far. i took this picture before i went at the blocks with fiberglass. i also put in the one inch transom.
    i still have to glass in the port side stringer of the boat.
    IMG_0558.jpg


  • Advertisement
  • Moderators, Motoring & Transport Moderators, Sports Moderators Posts: 6,320 Mod ✭✭✭✭fergal.b


    Looking good, how thick it the timber you have to bend for the stem ? would it be easier to make it with laminated 1/2" strips and bend them into shape while the epoxy between the strips is still wet and clamp it to a mock up of the shape you need or another way is to cut the shape out of plywood and laminate it to the thickness you need. Just a thought :)

    The central part of a boat is called amidship the wooden strip down the middle is the center keel and at the bow it's the stem.


Advertisement