Advertisement
If you have a new account but are having problems posting or verifying your account, please email us on hello@boards.ie for help. Thanks :)
Hello all! Please ensure that you are posting a new thread or question in the appropriate forum. The Feedback forum is overwhelmed with questions that are having to be moved elsewhere. If you need help to verify your account contact hello@boards.ie

BBQ Hut/Shelter

Options
124

Comments

  • Registered Users Posts: 31,015 ✭✭✭✭Lumen


    oleras wrote: »
    Should i go for the M8 ? WRT lenght, post is 90 and beam is 44, so have to cover at least 135mm, could probably go for the 150mm and no trimming required ?

    Is the length from the top of the cap or the bottom ?

    You need to leave enough space for the nut and washer, so I'd stick with 160mm to be safe.

    M10 is great but I assume you have a 10mm drill bit to make the holes?


  • Registered Users Posts: 2,721 ✭✭✭oleras


    Lumen wrote: »
    You need to leave enough space for the nut and washer, so I'd stick with 160mm to be safe.

    M10 is great but I assume you have a 10mm drill bit to make the holes?

    Sure do.


  • Registered Users Posts: 2,721 ✭✭✭oleras


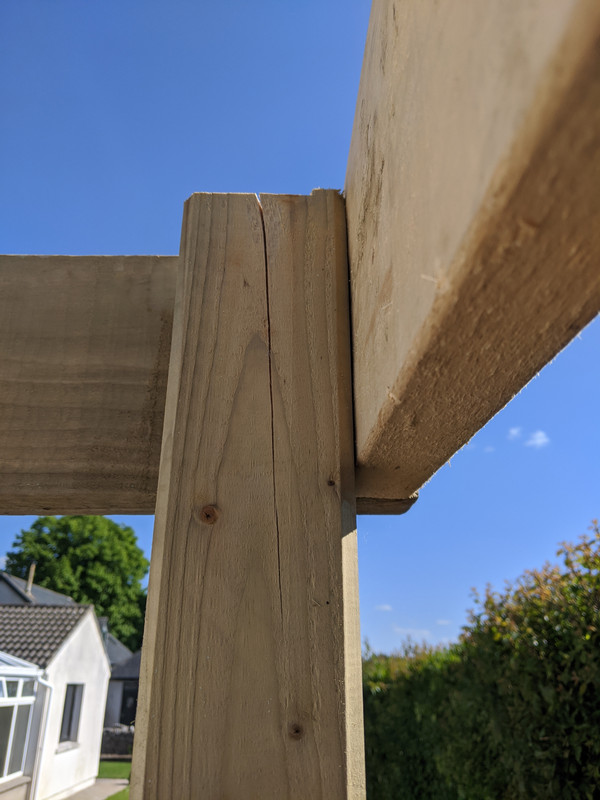
    Admiring my handy work today and noticed this...:mad:

    IMG-20200514-170730.jpg

    Somehow the screws seem to have split one of the posts, i didnt predrill, didnt think there would be a need, used 100mm wood screws.

    Its a good thing i will be through bolting them.

    Should i replace this one, even flip it over and have that end in the base clamped or will it be ok ?

    Was it my fault or the wood ?


  • Registered Users Posts: 39,079 ✭✭✭✭Mellor


    I would have drilled a pilot hole for the 100mm screws.
    It's probably ok as you are bolting through. I wouldn't flip as you want the strength at the base.
    Maybe have a look from the top, to the the extent/width the entire crack. If it's wide enough a bit of waterproof wood glue poured down from top wouldn't hurt.

    Drill and bolt the M8/M10s, filled crack with glue, remove offending screw, tighten bolts and clean glue from face.


  • Registered Users Posts: 2,721 ✭✭✭oleras


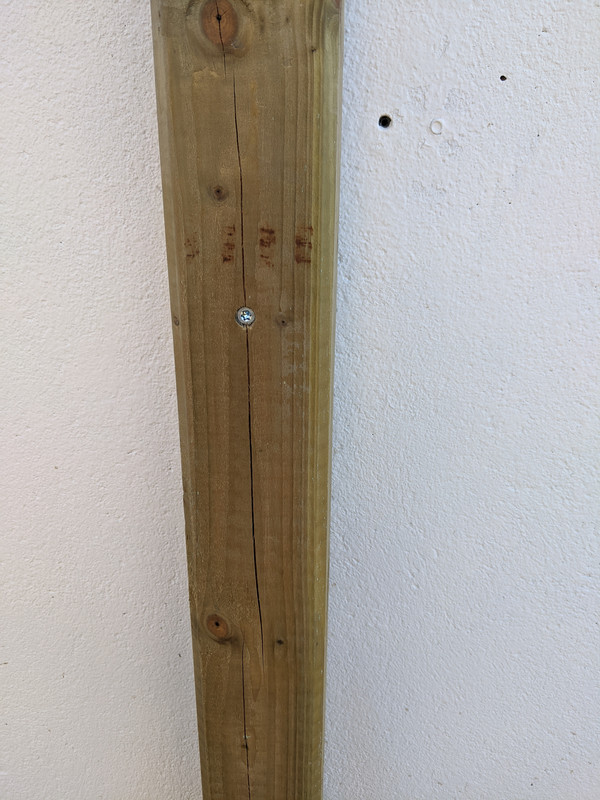
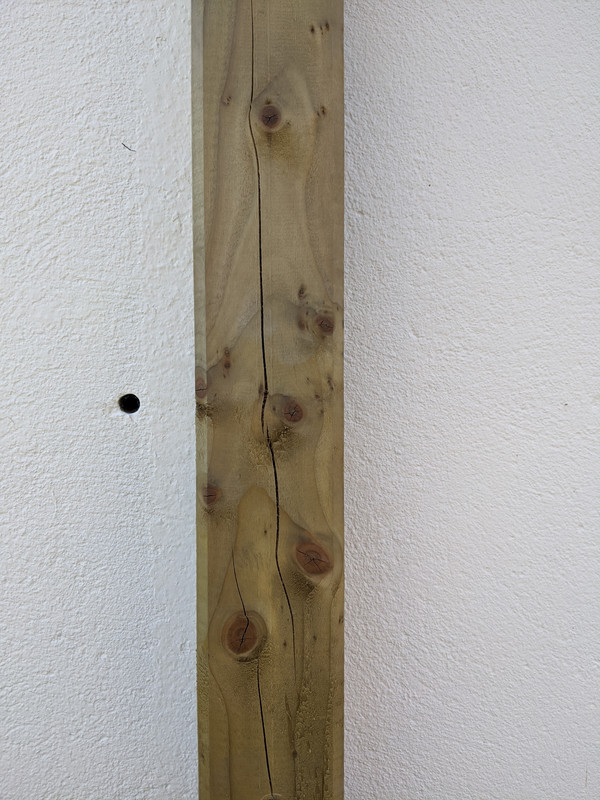
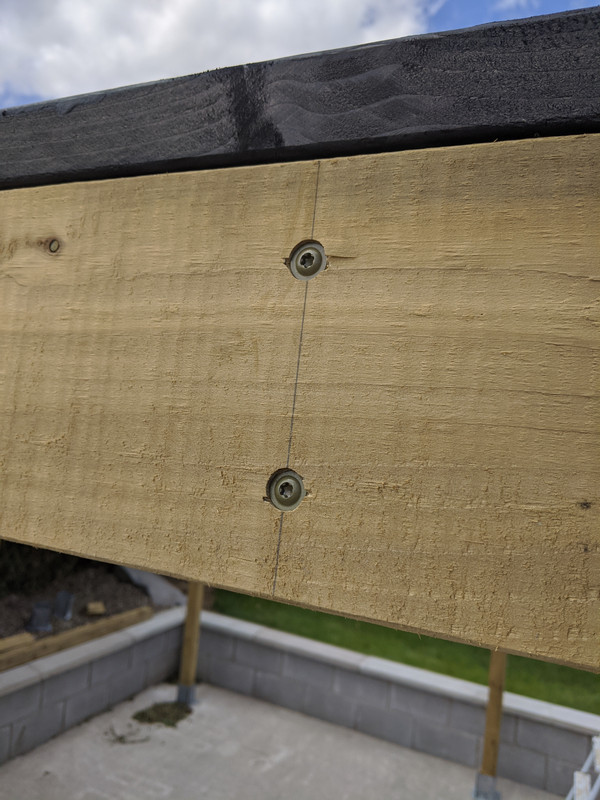
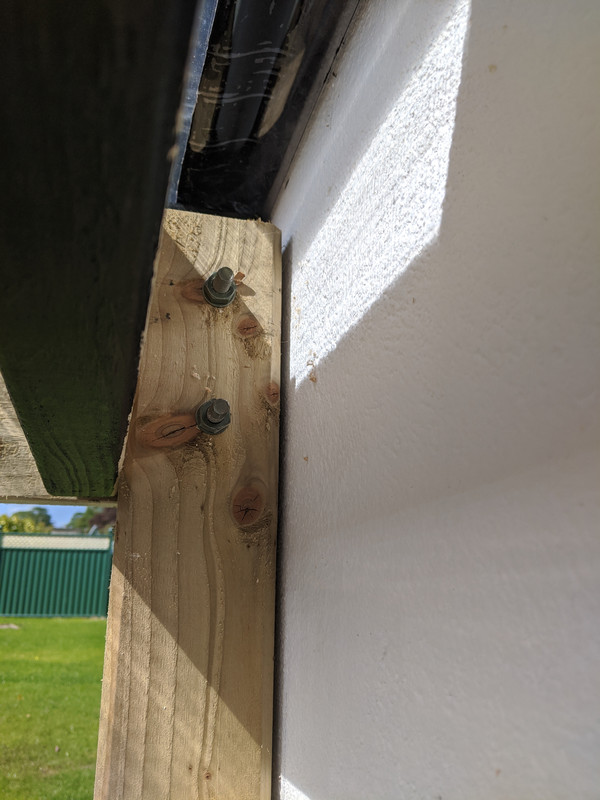
    Came home from work this morning to check the other posts as i had read that it was common enough for preserved wood to split.

    These posts i had predrilled as i was using concrete screws to attach to the gable.

    IMG-20200515-074837.jpg

    IMG-20200515-074757.jpg

    IMG-20200515-074753.jpg

    The general consensus seems to be it is what it is.

    Is this common ? Should i complain to the timber yard ?


  • Advertisement
  • Registered Users Posts: 33,692 ✭✭✭✭listermint


    Most likely they aren't seasoned enough and the hot weather and constant sunshine is accelerating the moisture loss.

    Personally I don't think it's a concern.


  • Registered Users Posts: 31,015 ✭✭✭✭Lumen


    It's normal for wood to crack a little along the grain.

    Generally it's not a problem in something like a post or beam because you're relying on the wood's resistance to tension, compression or bending, none of which are affected by cracks unless they run the whole length and depth.

    I doubt that crack is going to widen enough for the post to pull away from the wall - there won't be enough force in that direction.

    Did you countersink the pilot holes?


  • Registered Users Posts: 3,607 ✭✭✭chooseusername


    oleras wrote: »
    Admiring my handy work today and noticed this...:mad:

    IMG-20200514-170730.jpg

    Somehow the screws seem to have split one of the posts, i didnt predrill, didnt think there would be a need, used 100mm wood screws.

    Its a good thing i will be through bolting them.

    Should i replace this one, even flip it over and have that end in the base clamped or will it be ok ?

    Was it my fault or the wood ?
    Glue as said, then bolt across the crack first,
    maybe 2 m8 s in load bearing beam (the one with the joist hangers) avoiding the split.
    Square the frame before drilling holes.
    edit; remove offending screw first


  • Registered Users Posts: 2,367 ✭✭✭jack of all


    Mightn't be a bad idea to coat the end grain (top of posts in particular) with a bit of water based paint (acrylic satinwood maybe) to prevent over rapid drying out in this weather and longterm should prevent moisture ingress, maybe?


  • Registered Users Posts: 4,366 ✭✭✭beggars_bush


    Will make a great space for drying clothes


  • Advertisement
  • Registered Users Posts: 39,079 ✭✭✭✭Mellor


    Will make a great space for drying clothes

    The missus might not appreciate the smell of smoke :pac:


  • Registered Users Posts: 2,721 ✭✭✭oleras


    Eventually got the fixings i ordered Saturday, 24hr delivery me arse.

    I can see how these may improve structural integrity alright !

    IMG-20200523-183422.jpg

    IMG-20200524-151942.jpg

    IMG-20200524-152900.jpg

    IMG-20200524-201828.jpg

    IMG-20200524-155858.jpg

    A tad better than the 100mm wood screws i was using !


  • Registered Users Posts: 2,721 ✭✭✭oleras


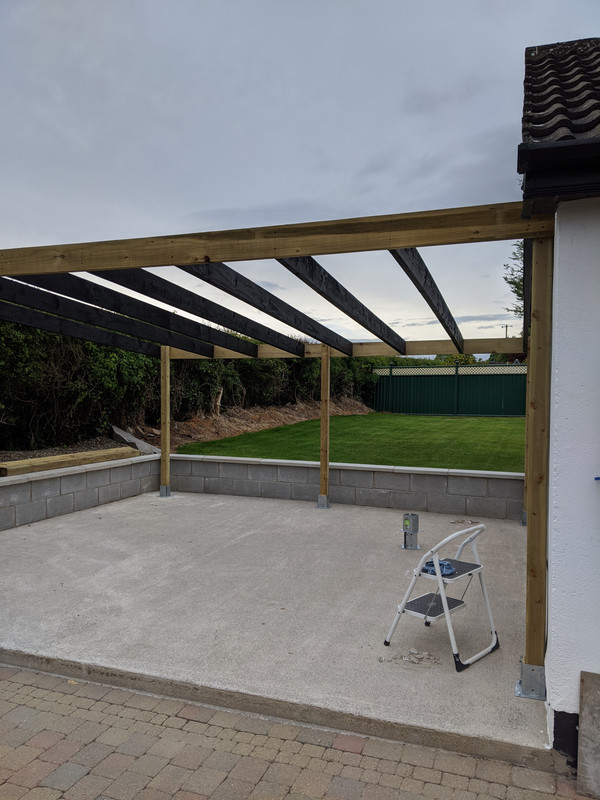
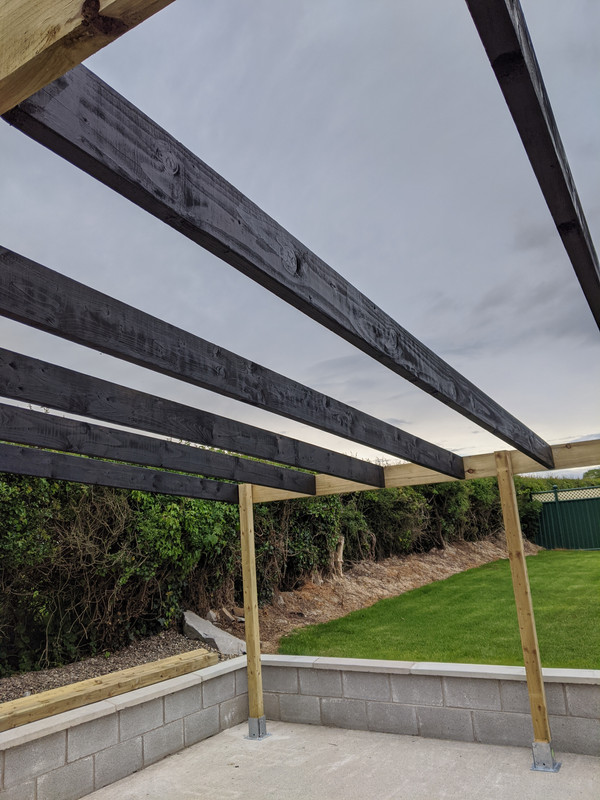
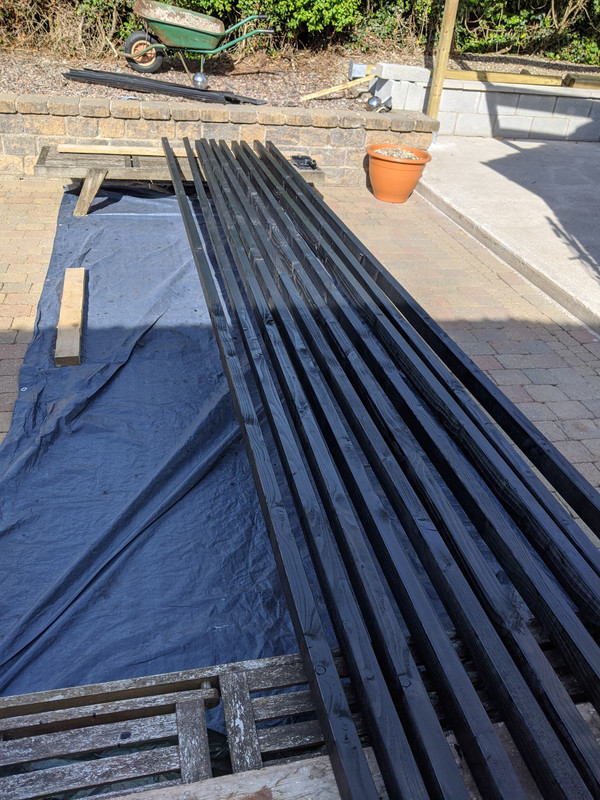
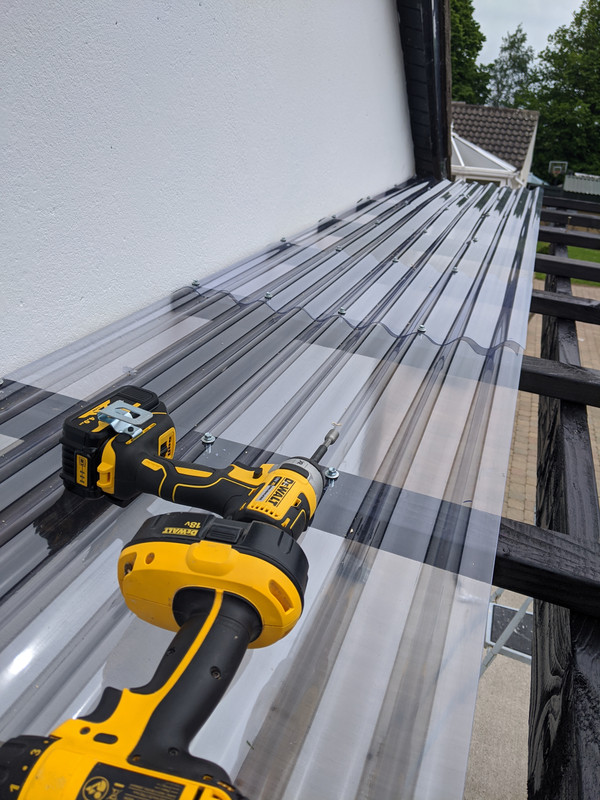
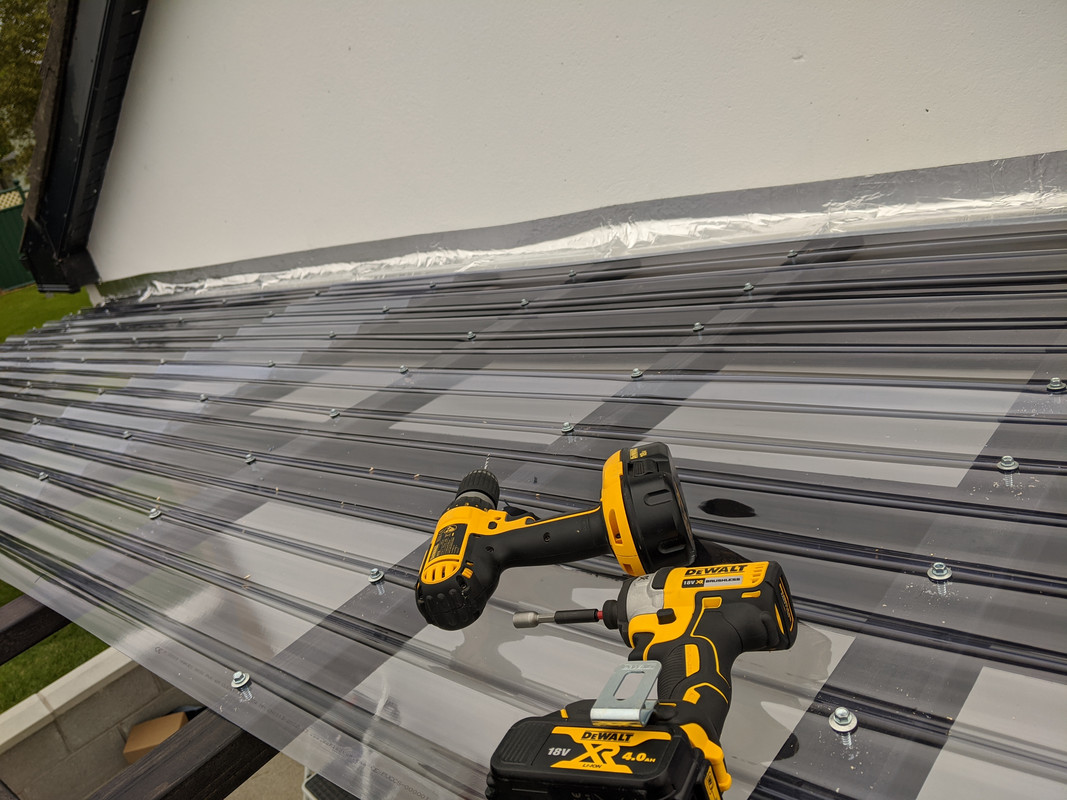
    I stained the joists and purlins last week and started the roof also.

    IMG-20200517-185757.jpg

    IMG-20200517-185804.jpg

    IMG-20200517-185818.jpg

    IMG-20200520-090608.jpg

    IMG-20200520-194711.jpg

    Bondex ebony was the colour i think.

    Then onto sheeting and Flashing, the flash band had me concerned, very few tutorials on youtube but in the end was not as bad as i had expected, could be better like most stuff, but im happy enough with it.

    IMG-20200521-145602.jpg

    IMG-20200521-172957.jpg

    Half the sheets up this evening,

    IMG-20200524-203229.jpg

    Certainly not sparing the screws !

    IMG-20200524-193417.jpg


  • Hosted Moderators Posts: 23,063 ✭✭✭✭beertons


    Beautiful.


  • Registered Users Posts: 33,692 ✭✭✭✭listermint


    Should collect the water of the back into a gutter into ab water butt for the lawn.


  • Registered Users Posts: 9,677 ✭✭✭2nd Row Donkey


    Great photos, are you a photographer?


  • Registered Users Posts: 2,367 ✭✭✭jack of all


    Good job, looks very well and the photos are very good also- too good for this thread! The amount of new threads that are started in this forum with no photos or photos so badly taken as to be useless is always a source of amusement for me. You'll get plenty of use out of that this summer, well wear!


  • Closed Accounts Posts: 4,007 ✭✭✭s7ryf3925pivug


    Afaik, you need planning permission for a permanent shelter like that if the total area of it along with your detached garage and any sheds or greenhouses etc is greater than 25 square metres.

    [We would do something along the same lines on our patio were it not for that, so I'd be quite happy to be found to be wrong on this.]


  • Registered Users Posts: 27,073 ✭✭✭✭GreeBo


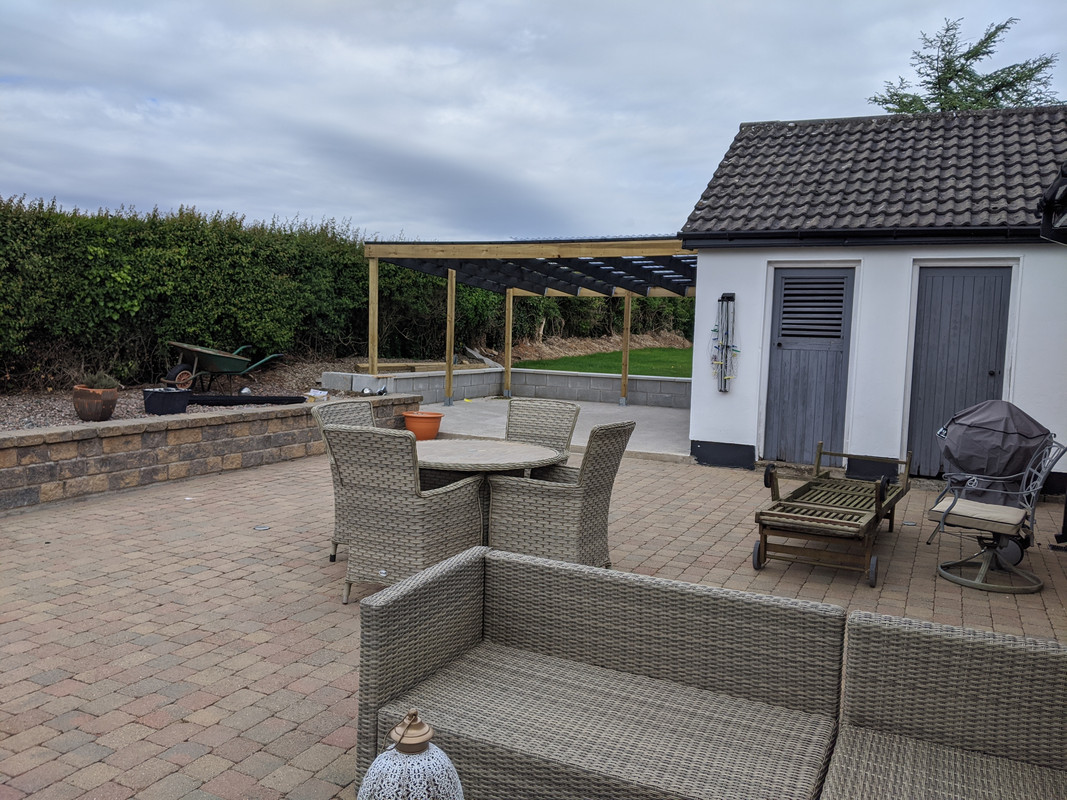
    Looks great..I'm almost afraid to ask, but which way is the fall on the roof?

    Normally I'd expect it to be away from the house, hence afraid to ask! :o


  • Registered Users Posts: 33,692 ✭✭✭✭listermint


    GreeBo wrote: »
    Looks great..I'm almost afraid to ask, but which way is the fall on the roof?

    Normally I'd expect it to be away from the house, hence afraid to ask! :o

    You see there is really clear pictures.... right ??


  • Advertisement
  • Posts: 7,499 ✭✭✭ [Deleted User]


    Looks like a good place to wash/service the car too!


  • Closed Accounts Posts: 436 ✭✭g6fdyotp5nj2l7


    GreeBo wrote:
    Looks great..I'm almost afraid to ask, but which way is the fall on the roof?

    Have you not looked at the photos :-)
    Well done OP looks great


  • Registered Users Posts: 27,073 ✭✭✭✭GreeBo


    Have you not looked at the photos :-)
    Well done OP looks great

    I did, but it wasnt clear if that last photo is camera angle or slope of roof.


  • Registered Users Posts: 39,079 ✭✭✭✭Mellor


    Afaik, you need planning permission for a permanent shelter like that if the total area of it along with your detached garage and any sheds or greenhouses etc is greater than 25 square metres.

    That is incorrect


  • Registered Users Posts: 39,079 ✭✭✭✭Mellor


    GreeBo wrote: »
    I did, but it wasnt clear if that last photo is camera angle or slope of roof.

    The fall in the direct of the joists. Parallel to the house.


  • Registered Users Posts: 27,073 ✭✭✭✭GreeBo


    Mellor wrote: »
    The fall in the direct of the joists. Parallel to the house.

    OP any reason you went with this fall rather than away from the house?
    Easier to flash I guess?


  • Registered Users Posts: 2,721 ✭✭✭oleras


    GreeBo wrote: »
    OP any reason you went with this fall rather than away from the house?
    Easier to flash I guess?

    Purely aesthetics, wanted to keep the lines from the garage, thats what its attached to, this is the view from the back door and where we would sit outside.

    Fall is to the rear, gutter will catch the rainwater.

    IMG-20200525-120211.jpg


  • Registered Users Posts: 2,721 ✭✭✭oleras


    Great photos, are you a photographer?

    Thanks ! No, afraid not.


  • Registered Users Posts: 27,073 ✭✭✭✭GreeBo


    oleras wrote: »
    Purely aesthetics, wanted to keep the lines from the garage, thats what its attached to, this is the view from the back door and where we would sit outside.

    Fall is to the rear, gutter will catch the rainwater.
    Bah, aesthetics!!
    What sort of guntherer do you call yourself! :D

    Looks well and makes sense to have the lines as you have them.

    Are you going to put anything on the front of the roof to stop rain blowing up and over?


  • Advertisement
  • Registered Users Posts: 2,721 ✭✭✭oleras


    GreeBo wrote: »
    Bah, aesthetics!!
    What sort of guntherer do you call yourself! :D

    Looks well and makes sense to have the lines as you have them.

    Are you going to put anything on the front of the roof to stop rain blowing up and over?

    Not 100% concerned with water ingress, to an extent, obvs dont want it p1ssing down the gable of the garage wall.

    When the roof is finished I still have to clad the rear and the left hand side in shiplap, i may stop 300mm short of the top on the rear and put some lattice type trellis or frame mosquito netting simply for airflow.

    Half thinking of putting a sliding type barn door to the front if i do enclose it, part security and part to stop debris blowing in and getting trapped in corners,


Advertisement