Advertisement
If you have a new account but are having problems posting or verifying your account, please email us on hello@boards.ie for help. Thanks :)
Hello all! Please ensure that you are posting a new thread or question in the appropriate forum. The Feedback forum is overwhelmed with questions that are having to be moved elsewhere. If you need help to verify your account contact hello@boards.ie
Please note that it is not permitted to have referral links posted in your signature. Keep these links contained in the appropriate forum. Thank you.

https://www.boards.ie/discussion/2055940817/signature-rules
Hi all! We have been experiencing an issue on site where threads have been missing the latest postings. The platform host Vanilla are working on this issue. A workaround that has been used by some is to navigate back from 1 to 10+ pages to re-sync the thread and this will then show the latest posts. Thanks, Mike.
Hi there,
There is an issue with role permissions that is being worked on at the moment.
If you are having trouble with access or permissions on regional forums please post here to get access: https://www.boards.ie/discussion/2058365403/you-do-not-have-permission-for-that#latest

Today I did something to my car (volume 2)

1191193195196197

Comments

  • Registered Users, Registered Users 2 Posts: 2,713 ✭✭✭wandererz


    It's a solid brass valve that screws into your oil drain instead of the nut.

    It has a strong spring loaded lever that has to be pushed up and to the side to release. No chance of accidentally coming loose.

    Flip open, wait for oil to drain, flip closed. Job done.

    This is it in the open position.


  • Registered Users, Registered Users 2 Posts: 2,030 ✭✭✭Slideways


    Ah right. I can see the appeal but wouldn’t be for me.


    My latest car has a plastic sump with no drain bung, what a stupid fûcking idea that is


  • Registered Users, Registered Users 2 Posts: 2,528 ✭✭✭Titzon Toast


    @wandererz

    Give us a look at the car please!


  • Registered Users, Registered Users 2 Posts: 1,277 ✭✭✭MrCostington


    I did something not to my car, but for working on it. Been looking out for a cheap stand/tripod to hold my work light at a height. Plus, I've been looking for a bit of steel tube to extent the handle of my jack as it's very short for reaching in under the diff jacking point. Spotted a clothes rack in Lidl for €15 and an opportunity to kill two birds, with one clothes rack:)

    It's worked out better than expected and lots of handy tubing left over too. I got mine in East Wall but they didn't have them in other branches I checked.


  • Registered Users, Registered Users 2 Posts: 9,290 ✭✭✭tanko


    Is it ok to put 205/55/16 wheels on a car that has 195/65/15 on it at the moment?


  • Advertisement
  • Registered Users, Registered Users 2 Posts: 2,528 ✭✭✭Titzon Toast


    Fire one on the front and have a good check. It's a slightly taller and wider but with a slightly lower profile tyre.

    Turn it to full lock in both directions.


  • Registered Users, Registered Users 2 Posts: 2,713 ✭✭✭wandererz


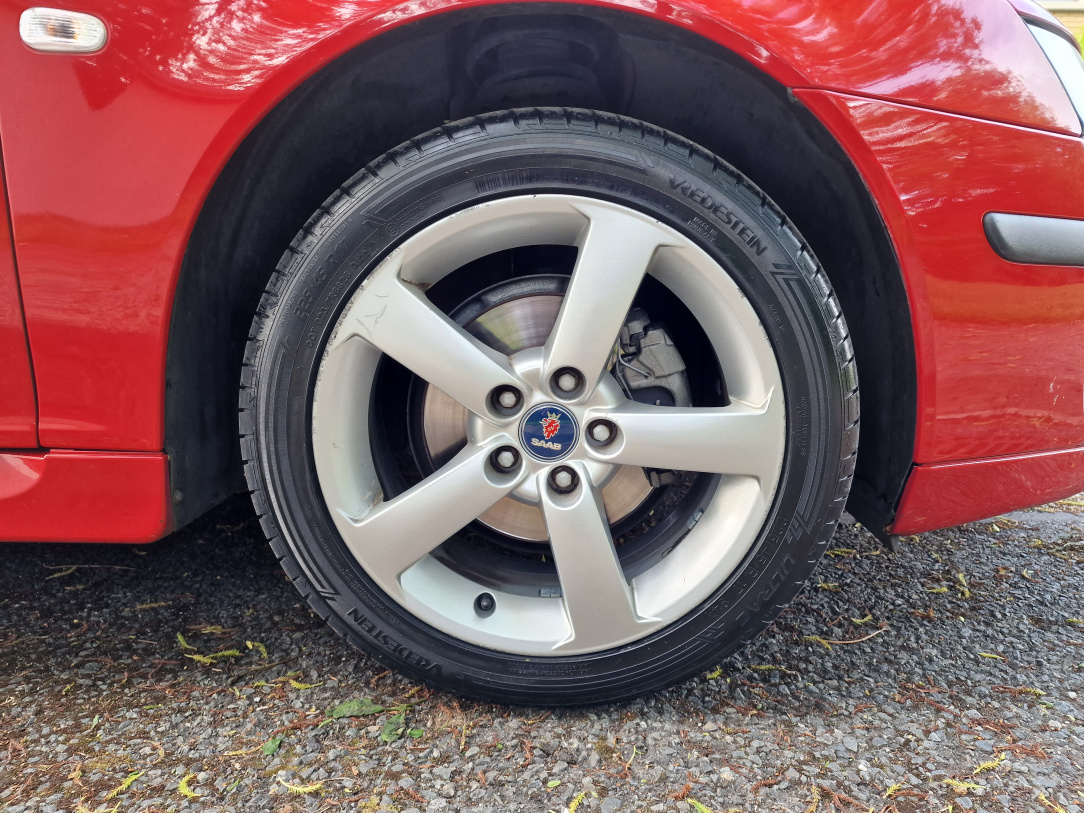
    Here ya go. All shined up, just in time for todays rain.

    81,087 km


  • Registered Users, Registered Users 2 Posts: 2,713 ✭✭✭wandererz


    New Brembo pads.

    Painted calipers.

    New Saab wheel badges.

    New Vredestein 225/45/17's on the front.


  • Registered Users, Registered Users 2 Posts: 2,713 ✭✭✭wandererz


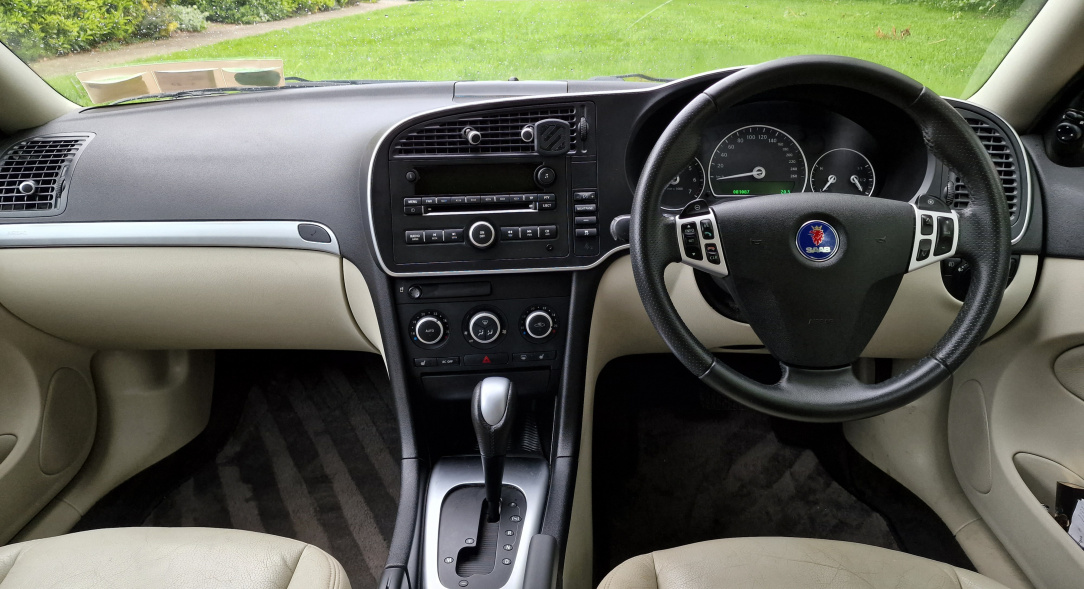
    Dash needed some cleaning.

    As good as new now.

    Wife's response to the pictures of my handiwork projected on the TV:

    "Is that MY car? No.... It isn't!!"


    Light APC solution on the dash & steering wheel. Followed by McGuires Ultimate Interior Detailer.

    Post edited by wandererz on


  • Registered Users, Registered Users 2 Posts: 2,713 ✭✭✭wandererz


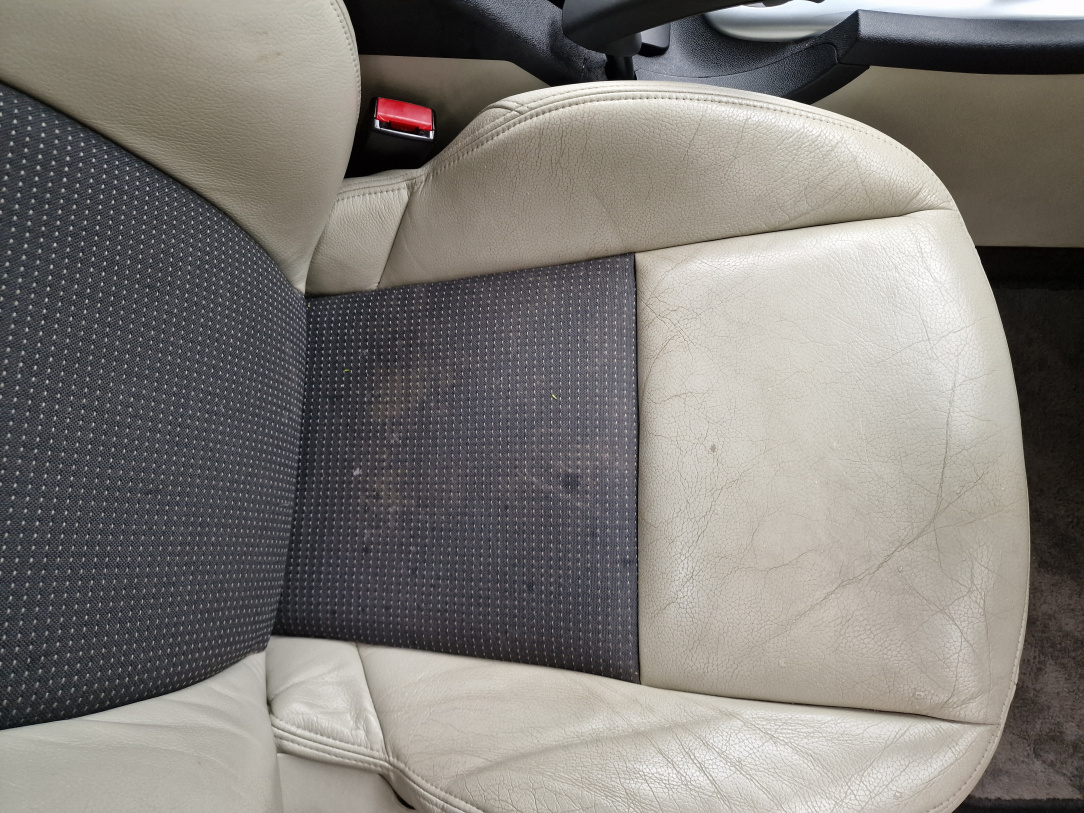
    Leather on the seats needed a bit of attention.


    After:

    Ran out of light. Will do the fabric tomorrow.

    Used CarPro Interior (leather & interior) cleaner on the leather.

    Will do another pass tomorrow and then finish off with some GTechniq Leather Sealant.


  • Advertisement
  • Registered Users, Registered Users 2 Posts: 2,528 ✭✭✭Titzon Toast


    She looks spotless, fair play. They're fairly rare these days, unfortunately.

    Best of luck with it.


  • Registered Users, Registered Users 2 Posts: 2,713 ✭✭✭wandererz


    Thanks.

    81,000 km / 50,000 miles.

    Probably the lowest milage one in Ireland. Certainly for its age.

    Heated seats, tiptronic, flappy paddle gears.

    Drives like a dream.

    I only use Liqui Moly oil and Ceratec engine lubricant. So hopefully it keeps going.

    Only problems have been regular headlamp bulb changes. The left side blew yesterday simply because I looked at it! Other than that, broken engine mount, broken spring and seized Caliper.

    One previous owner who lived in D4 and traded it in at Audi Ballsbridge at 8,000km.

    Rear seats looked like they had never been sat in.


  • Registered Users, Registered Users 2 Posts: 646 ✭✭✭v240gltse


    @wandererz. well done on keeping a nice looking Saab going.


  • Registered Users, Registered Users 2 Posts: 4,865 ✭✭✭fancy pigeon


    It's been flat out...


    Last week was Mrs Pigeons 520d. It sprang an irritating leak and with the temp going bananas at times I got a new stat (and housing) along with this sh*tty coolant pipe (€25 from BMW)

    It's a manifold off job to remove said pipe


    The pipe had split internally and wouldn't be copped from the outside. Manifold was easy to remove. Cleaning it out wasn't


    As some of you may know I used to set fire to the manifolds to clean them properly. Couldn't do that so well here!


    New coolant and all back together, the car is much quieter and easier on weasels


    Moving to Saturday, decided to start at the back of the E34 and work my way to the front, planning for the jacking points. Had to have a rethink when I scrubbed the boot!


    During this it pissed rain on me, so decided to have a look at a friends Passat that was wouldn't start. I'd been at it before, testing the fuel pump, checking lines etc (drove in after a return line sh*t itself and never started again). I then decided to try the cheap solution; fuel filter. Could have kicked myself, the old filter may as well have been made of lead. Fired right up


    Cleared any codes it had and after a short drive the remaining faults went away (power steering etc)


    Have more planned over the next few weeks, focusing on the E34 mainly as it has an upcoming event next year. Have a clutch change planned for the Volvo too, complete with solid flywheel and D5 gearbox (if you ask nicely I'll tell you what clutch I've bought to get this all to work!) and I may exchange the turbo for my own homebrew setup if I have the time...


  • Registered Users, Registered Users 2 Posts: 2,528 ✭✭✭Titzon Toast


    It's been absolute Bedlhem in my pal's workshop, I've been helping out there for nearly two weeks now trying to squeeze my yoke in.

    Tomorrow morning it's going into the paint booth and I'm hoping to bring it back down to my own place on Saturday morning.

    It looks like it's gonna end up being both doors, both rear quarters and the rear bumper getting sprayed now.


  • Registered Users, Registered Users 2 Posts: 2,528 ✭✭✭Titzon Toast


    Finally sprayed. Back to my place in the morning and straight back up onto axle stands so I can scrub all the crap off the bottom of it.

    The Lude life...


  • Registered Users, Registered Users 2 Posts: 2,713 ✭✭✭wandererz


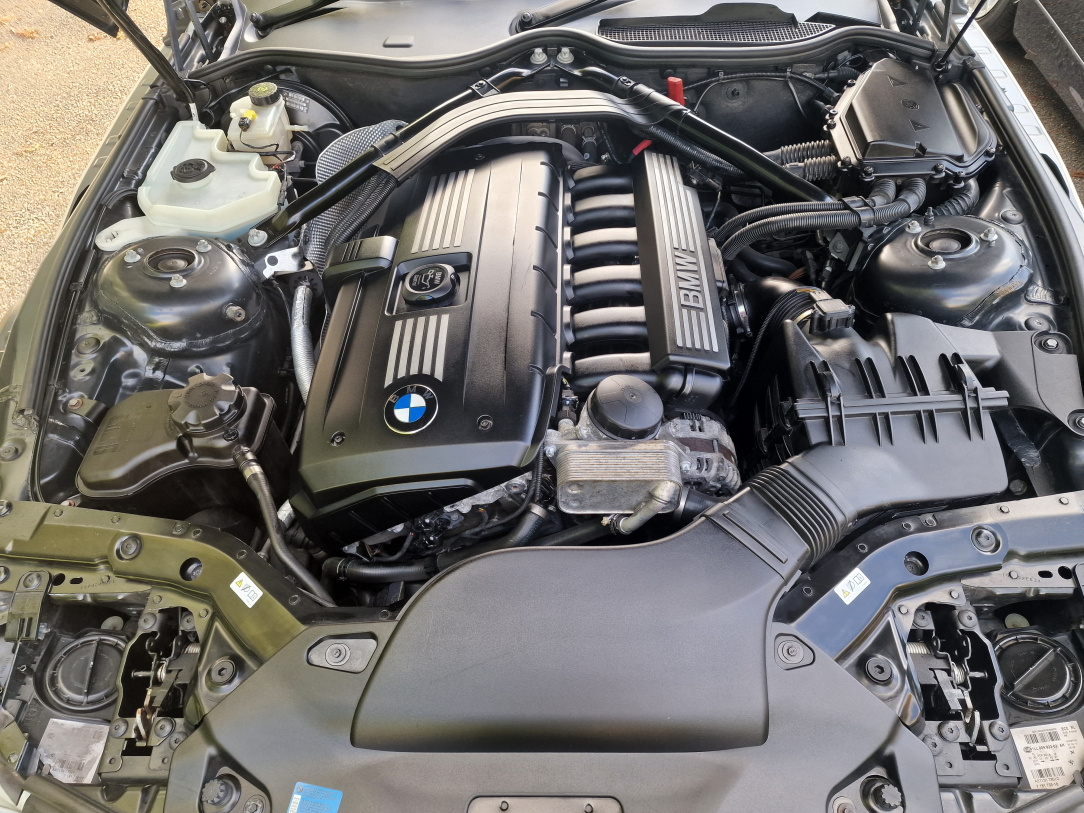
    Some engine bay detailing.


    Before


    After


  • Registered Users, Registered Users 2 Posts: 9,010 ✭✭✭PsychoPete


    Cleaning an engine bay is always so satisfying


  • Registered Users, Registered Users 2 Posts: 2,528 ✭✭✭Titzon Toast


    Finally got the car back to my spot this afternoon. I spent ages scrubbing the rear to get all crap off that had built up while it was in the panel beaters.

    I've a few new holes to drill tomorrow to get the side skirts back on and then I'm heading off for a long overdue spin, hopefully.


  • Registered Users, Registered Users 2 Posts: 14,309 ✭✭✭✭wotzgoingon


    That will be some spin. I'd say you will be grinning from ear to ear after being down for so long and the sun will be shining too.


  • Advertisement
  • Registered Users, Registered Users 2 Posts: 2,528 ✭✭✭Titzon Toast


    Fingers crossed anyway. I have to go easy on it for a few hundred miles to let the clutch and the belts break in properly.


  • Registered Users, Registered Users 2 Posts: 2,528 ✭✭✭Titzon Toast


    It's home, I'm heading off for a good spin.


  • Registered Users, Registered Users 2 Posts: 1,877 ✭✭✭passatman86


    Well done @Titzon Toast looks class


  • Registered Users, Registered Users 2 Posts: 6,873 ✭✭✭zg3409


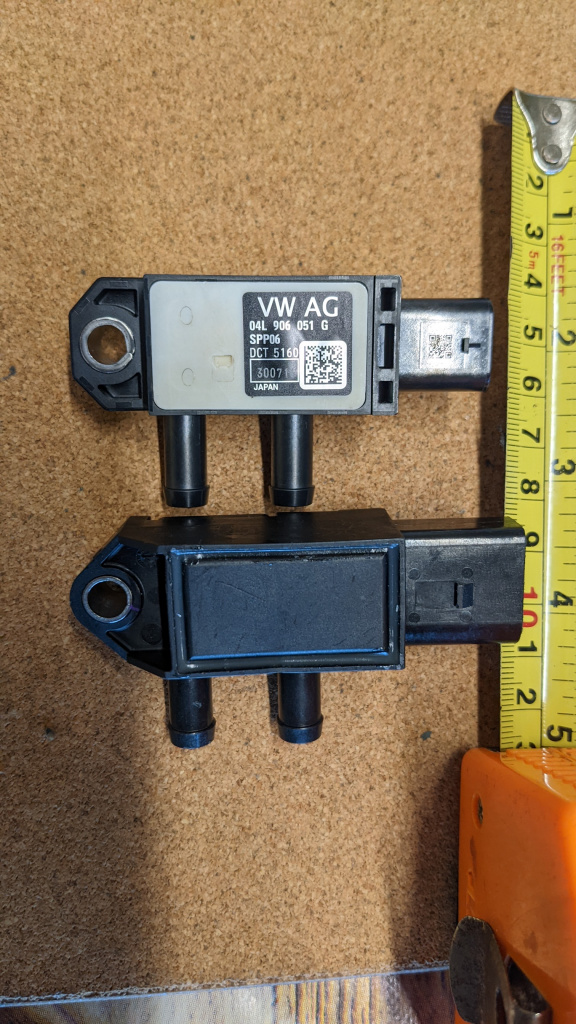
    VAG with error code and check engine light for differential pressure. Reset error, drive around 300km up and down M1 waiting for light to come again and it did. While driving I was monitoring DPF with phone app VAG DPF and ODB dongle. The phone app was showing no differential pressure change, and a second phone app, ODB 11 app also said no change. Car was low mileage so I presumed DPF was ok

    Watched loads of YouTube videos and read forums. Visually inspected the hoses and checked the part numbers.

    I decided to order an aftermarket sensor from local motor factors who got it same day. Went to fit it and electrical connector was different. Who knew an 04L906051 is different connector than 04L906051G. Panicked as old sensor was off, rang VW and paid 100 versus 60 for sensor but it fitted and was in stock straight away. Performed relearning reset to say sensor was replaced and 400km later light has not come back on.

    Fault fixed, I hope. When I asked dealer do they often go wrong, he hesitated and said well we do sell them...


  • Registered Users, Registered Users 2 Posts: 4,865 ✭✭✭fancy pigeon


    Clutch change over the weekend! Wasn't much fun

    Not many photos to depict the pain in the arse job that is the Volvo P2 clutch change. Thank goodness this wasn't AWD

    It's actually very straightforward in terms of what you have to do, just everything is awkward

    The main issue is the subframe needs to be out. The engine sits exclusively on the subframe. There isn't much room on top to hang a bar/pole to hold the engine...


    But I got there, a few hours later


    Now just to further annoy me, I had planned on using this very exquisite clutch. However, I'd got sent the wrong one! Just too much lateral play, I had visions of the splines being ripped to shreds while the car shook itself to death trying to take off. It's meant for an Evo 10 I think, which isn't what I bought


    Pity. It was going to take some power through it....


    Shoved in the solid flywheel and clutch (850R clutch for my 21 spline box). The box itself is very easy to remove, using 2 different sizes of bolt which are obvious. No alignment tool and it shot straight in, one take. New borg and beck concentric slave too (primed before it went in)


    In the process of reassembling one of the subframe collars went missing... So I got hold of one from a Santa Fe, pressed it to match the Volvo collar and reamed the centre out with a file. This cost me another hour!


    The subframe didn't want to line up with the car. The engine didn't want to line up with the subframe. The engine on subframe didn't want to line up with the mounts. The rack didn't want to twist the right way. The clips holding the various hoses are inaccessible. The brackets to be bolted down are very hard to access. The driveshaft snap ring didn't want to let the shaft seat in properly. Everything was just miserable!


    Still, I got it done, the next day (7am Sunday start). Changed the balljoionts while I was at it too as one was floppy. Had visions of shoving in another silencer, that went out the window very fast with the time gobbled up already! Just one mishap to sort, copped a strange collar near the pedals, turns out the steering column bearing popped out leaving the steering very notchy (see here) which I'll sort some evening (just need to pull it off completely and reseat the bearing)

    The clutch and magic goop I put in the gearbox have completely transformed the way the car drives mind you, for the better! Clutch is so nice now and the gears so slick. Apart from bedding the clutch in and enjoying the car, I have to keep the next plans under the radar for the moment!


  • Registered Users, Registered Users 2 Posts: 2,528 ✭✭✭Titzon Toast


    You have an outside ramp???


  • Registered Users, Registered Users 2 Posts: 4,865 ✭✭✭fancy pigeon


  • Registered Users, Registered Users 2 Posts: 2,528 ✭✭✭Titzon Toast


  • Registered Users, Registered Users 2 Posts: 2,030 ✭✭✭Slideways


    I see a few comments about bedding in a clutch. If you use a new pressure plate and your fly wheel doesn’t look like a vinyl record there should be no reason to bed one in.

    Once it releases fully and doesn’t slip it’s a done deal


  • Advertisement
  • Registered Users, Registered Users 2 Posts: 3,935 ✭✭✭Tazzimus


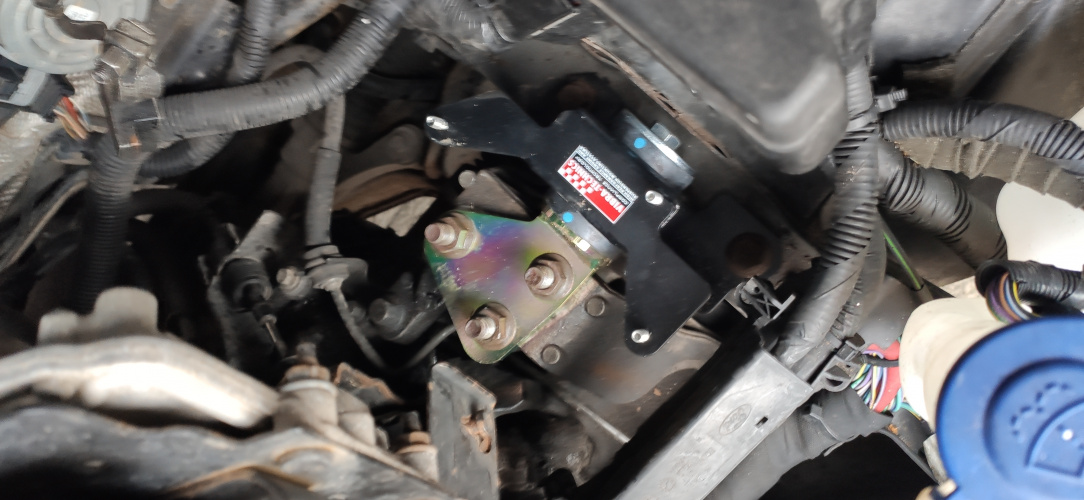
    Not so much today as yesterday. New engine mounts for the festy, old ones had a good amount of movement in them.

    The amount that has to come out to get at the gearbox one is a pain, I also took the opportunity to adjust the gear linkage while everything was out of the way, which seems to have sorted the car randomly popping out of second shifting down after I fitted a short shifter.

    Took it for a spin yesterday and felt solid all round.


  • Registered Users, Registered Users 2 Posts: 4,865 ✭✭✭fancy pigeon


    You could, but for my own sanity I'd rather err on the side of caution, especially with this one as I do not want to do this again in a hurry. Been at this too long to know when to tread carefully to avoid doing an awkward job all over again when its avoidable; in certain aspects I'm set in my ways. I've another clutch to do this weekend and a tractor in a few weeks and I'll be taking my precautions as always during testing. No skin off my back if people want to skip the bedding phase or take shortcuts


    Speaking of said Volvo, the steering issue where it would tighten after 90 degrees of rotation has been fixed during the week. Exactly as I described, the bearing wasn't sitting flush allowing additional lateral movement


    This is how it should look like normally


    Clean, re-grease, re-seat, re-install. Problem solved. Very simple and often overlooked when troubleshooting this issue. Installed new droplinks too


  • Registered Users, Registered Users 2 Posts: 4,865 ✭✭✭fancy pigeon


    Wasn't joking about the clutch change... Done in a shade over 3 hours. My mothers 2007 Fiat Panda


    2014 i30: general tidy up, rear pads changed. May or may not have had to resurface the disc in the process

    2012 Passat: rear spring replacement. Failed NCT for a broken spring. Big shout out to KilianManning for sorting me with a set of springs

    2003 Santa Fe: help isolate a brake fluid leak (wonkey copper washer at one of the calipers)


    Note: None of the aforementioned vehicles are mine, just happened to take up the Saturday on me!


  • Registered Users, Registered Users 2 Posts: 2,528 ✭✭✭Titzon Toast


    I grouped together most of the pictures of my rebuild from start to finish over a good few years.

    It was a completely stock one owner car with a fsh when I bought it. I had to leave it on my driveway for a year before I got a storage space for it, and that added to it's first ten plus years on the Atlantic coast didn't do it any favours. Rust had set in.

    It's been a long road to get to this point but from here on in it should be fun stuff only after so many years and Euro's of hard work!


  • Registered Users, Registered Users 2 Posts: 4,865 ✭✭✭fancy pigeon


    2007 Panda: Timing belt. Was cracked and the water pump squeaking, done in about an hour

    Misfire on coil bank a, stopped short of ripping out the loom to find the errant wire at fault (plenty of troubleshooting beforehand) replacement sourced today


    2012 520d: engine fan replacement. 10 minutes start to finish. Genuinely, it's that easy

    Water pump, not so much. And to add insult to injury, after getting to the water pump I have one for the older N47, so it doesn't fit!

    I'm not looking forward to doing this one again...


  • Registered Users, Registered Users 2 Posts: 4,865 ✭✭✭fancy pigeon


    I've been doing a lot more in the background, but this time my own stuff for a change!


    In between changing cab mounts as you may see in the background, I swapped my headlights as they were fuzzy and in typical E34 fashion the full beam cover was seized in situ (since I got the car and goodness knows how long they were stuck beforehand!)


    It's an easy, but fiddly process to remove the lamps. The set of lamps I've had for at least 15 years... Are different, naturally. From a 94 TU if anyone is wondering


    But it's all back together and working well. Just need a new switch inside and that's spot on. I hope


    I changed the parking shoes on the S60 but have no pics of it. The retaining springs are miserable to remove and Volvo in their infinite wisdom decided not to have the shoes adjustable so have a solid bar instead of an adjuster. But it's done now and ready for the test in that area anyway

    Annual service for the S60 too, with the company director supervising the operation. He's not impressed with the bullsh*t cone filter I put in as a stop gap but knows I have something else in mind...


    Takes 5.5 litres, or 5.8 quarts if you speak fluent freedom and bald eagle. At least he is more enthusiastic than last year... Which is in the same spot somehow!


  • Advertisement
  • Registered Users, Registered Users 2 Posts: 4,865 ✭✭✭fancy pigeon


    Serviced the work van (NV200) Straight forward apart from the fuel filter, which isn't the worst once you know how to remove the element (stick a bolt up it's arse and hammer the f*cker off your work bench or vice). The fuel filter had done 30k km and was jet black...!

    During servicing the van I got into an altercation with said van (involving it's oil filter and the bonnet) and rendered myself out of action for some of the heavier jobs I'd planned, however no rest for the wicked. The show must go on, so I decided to troubleshoot the weird elec issues on my E34 (thankfully only 2 for now)

    • Lights (dips) rarely working
    • Speedo pixel backlight staying on

    After reading up on both, both issues are due to soldering cracking over time. We'll start with the speedo. Due to the 3 spoke wheel I can remove this easily without any adjustment (of which there's no adjustment) or removing of the wheel. The very first time I removed this (a long time ago I must add) I noticed the 2 screw mounting points were broke along with one of the retaining tabs for the plugs missing. Not suspicious at all!


    Pull it apart. Looks like some muppet was here before, as 3 of the 4 white plug covers are missing

    Split the board from the cover. You need to remove the plug inserts from the outside along with 6 screws


    Due to time constraints I couldn't inspect the board or tear the pixel display apart where I wanted to, but gave the board a damn good scrub with contact cleaner. You might be able to see above just how much corrosion is on the board. Interestingly most of the components on the speedo board are from about mid 1987, guessing this board is from an E32 if that's the case (the speedo itself is 1989 in most places)

    Wallop it back into the car, the speedo is much clearer and not faded or flickering! But the original problem of the pixel display illuminated at all times still persists. I'll come back to it another day as it's a parasitic drain on the battery


    Moving onto the lights. The E34 uses an LKM (or light control module if you want in english)

    Pulled it out, opened it up and was pleasantly surprised at how simple the setup is with basic components, similar to the speedo


    Most of the trouble is with the relays (you can see them on the left near the connector block) and after looking at it through a magnifying glass I could indeed see cracks. Out with the soldering iron


    Result?


    One less thing to worry about. I hope the next update for this thing is a bit more interesting as I have accumulated parts for it over the years that are finally getting the opportunity to be fitted and it needs a bit of welding in the boot (surprisingly not the jacking points, as a lot of these were it's weak point) along with it's timing belt, and general service (have to check tappet clearances too)

    Then after tyres (ugh...) and an exhaust (I am in my f*ck making up one of my "specials" for this as I have enough welding to keep me busy for months, off to souhans it goes) it may have a chance at the NCT. Once it passes (rather if it passes, I'm being optimistic it doesn't produce a telephone book of advisories and defects) we'll freshen up the bodywork (well, mostly my father as he's the bodywork specialist of the 2 of us, I really need to learn more from him on this). Then I can finally rewire the radio, tidy up the interior a bit and see about getting it fully road legal. Too long in the making!

    Plates will get the bin in due time, only seems like yesterday I bought these in 2007...


  • Registered Users, Registered Users 2 Posts: 4,865 ✭✭✭fancy pigeon


    Time for some horsh*t welding!


    2 patches welded into the car last night. Only pics of one as the other was underneath and pitch black when I finished up


    Not much rust on the E34, few specs here and there. Have to inspect the jacking points properly at some stage (when the Land Cruiser has been finished; my fathers new daily, it's currently on the lift)


    This is my first time welding the actual body of a BMW, and not its diff... Cut out the rot


    Shape a piece to fit close to snug


    Make a f*ck of it because you're half asleep!


    It's not the worst, but the patch was very difficult to weld as the steel had gone flimsy and would burn in an instant, hence it looks sh*te in places before I got the hang of it; it will get tidied up the next time. The other part near the fuel tank was much easier as the steel was thicker and in better shape for most part


    It's coming back to life though. Next task will be to sort the physical locks and tumblers as these have been a problem since I got the car. If anyone can point me in the direction of which module may be causing my info display backlight to stay on permanently, that would be greatly appreciated


    Not sure if I'll be back to this later in the week, or Saturday at latest. I do need something to smoke about in though, the S60 is on lend this past 2 months (I miss it quite a lot) and the Z has all but stopped due to parts going walking and forgetting how to get home 🙄

    The NV200 is back breaking


  • Registered Users, Registered Users 2 Posts: 4,865 ✭✭✭fancy pigeon


    More weekend fun!

    2012 Passat: touch up as many marks as possible, with a touch up pen. Tedious

    1997 Landcruiser: Remove a rear shock. Original. From underneath. With no access through the cab Go on, try it yourself...

    S60: Finally got to sort the exhaust, well the back half of it anyway. I had a large Simons 3 inch oval silencer in situ (the car has a full 3 inch setup front to back, some of which I've made myself), which never really fitted right (a rushed job just to shut the car up!) so I bought another Simons silencer, but a fairly long one this time. All fitted back with alterations to mounting points/angles on the exhaust (this exhaust was intended for a V70 so has been made fit) and alterations to the exhaust itself leave the boo pipe sitting just right out the back, compared to what it was. This isn't for show at all, but a necessity. When I have more time I'll make up a more subtle tip

    It's made the car both louder and quieter at the same time!


  • Registered Users, Registered Users 2 Posts: 1,877 ✭✭✭passatman86


    Great posts @fancy pigeon. Your updates are always a good read


  • Registered Users, Registered Users 2 Posts: 2,528 ✭✭✭Titzon Toast


    Not today, but today I got it "finished" to go back on the road on the 1st of next month.

    I spent the last few weeks stripping the interior and some of the body panels to Waxoyl the whole car.

    I also scrubbed and steam cleaned the whole interior.

    After that I machine polished the exterior twice and put about 5 coats of ceramic coating onto it.

    I'm gonna tax it on the first of next month and have some fun before that b#####d Putin causes a nuclear armageddon!

    Does anyone know if C&C is on in Dundalk on the first Sunday of next month?


  • Advertisement
  • Registered Users, Registered Users 2 Posts: 1,877 ✭✭✭passatman86


    @Titzon Toast thats just perfection


  • Registered Users, Registered Users 2 Posts: 4,865 ✭✭✭fancy pigeon


    Oooft! That month went by very fast....


    I've been busy though not with motors entirely (redid the roof on my shed for example)


    Also helping my father out with his Land Cruiser and its recommissioning. A lot of cutting, shaping, fettling, welding, grinding, and of course, swearing


    I've had fun with the S60, constantly blowing it's boost pipe off in recent times. So I made one up from some tube lying about, made pie cuts and welded them all up (something like a 120 degree bend with a 90 degree twist, all done roughly but fitted perfectly)

    Took a bit of time but got it right. No pics as I was on a time constraint, but I'll try to remember for the next one


    I wasn't arsed paying money for a more up to date down pipe or for someone to make one up and charge me the privilege, so I made my own setup. Few teaser pics but I can say the car is much better all round now and most importantly quiet!


    Currently it's sitting on ramps as it's starter shat its solenoid and the wishbone bushes are a bit wonkey, so I'll be sorting those in due time


    E34 was a bit more interesting. I got to address, or rather get to the bottom of, an issue I had been told about since I bought the car. That's over 16 years ago...

    I was told that the drivers lock was disconnected after it went bananas and locked the previous owner out. After getting to almost remove the unit 9 years ago and getting stuck at the window runner, I attacked it again but this time with a drill and got the entire unit out. Looking at it, it's a very simple setup (very basic lock mechanism, very basic solenoid) so was scratching my head until I copped the handle itself was missing a small piece; the problem with these early die cast metal handles is they break easily. I have another one somewhere I'll fit in due time (both die cast and plastic which I'll do my best to avoid like the plague)


    I had destroyed the mount for the runner in the process, so chopped out the damaged bits and made up my own piece by cutting down a body washer and shaping it with a vice grips, then shortening the bolt to a custom length and shaving the head. Fits like a glove!


    A few days later I moved it to the yard. Then treated it to new plates. Pressed metal with standard font, no surrounds or screws if you must know

    I'm keeping the aerial as is, if you could call it an aerial...


    Then I realized I could practice welding some more!


    Other side is the same, I had planned to chop them out anyway and replace with fresh metal but this speeds things up a bit. I think I'll try the supermig at it this time, got great results welding the S60 exhaust with it, even if it is an absolute monster of a welder and probably too powerful for this application

    What happens here is the drains go straight to the front jack points and rot them from the inside out, so when you spot the rusty spots it's too late. I'll just make up my own points and jack the car elsewhere once this is repaired with a proper drain hole this time


    Stay tuned!


  • Registered Users, Registered Users 2 Posts: 6,873 ✭✭✭zg3409


    ,>Does anyone know if C&C is on in Dundalk on the first Sunday of next month?


    Yes 2 euro or £2 per car showing. Free for non show cars.

    Bray meeting and others.


  • Registered Users, Registered Users 2 Posts: 4,865 ✭✭✭fancy pigeon


    Last Saturdays prep (after I'd serviced an I30 van)


    Eliminate the rot on one side!


    Ended up the bottom of the wing was stink with rot, but otherwise fine elsewhere. So I'll fabricate a new bridging piece and build up the missing bits. This one I pulled from a hedge I'll use a reference


    And as I'd finished up (before I put the mangled white and blue wing on)


    Aiming to have the left side completed next Saturday. I'm being too ambitious again I think!


    The right side doesn't seem as bad, however I'll focus on its jacking point before anything else


  • Registered Users, Registered Users 2 Posts: 1,877 ✭✭✭passatman86


    @fancy pigeon any video of that new exhaust you fitted


  • Registered Users, Registered Users 2 Posts: 4,865 ✭✭✭fancy pigeon


    Not yet as it's still sitting on ramps awaiting it's starter! Hopefully I'll fit it this evening and I'll try get you a vid of it in action. It's just right; a subtle hum and only loud if you want it to be


  • Registered Users, Registered Users 2 Posts: 22,212 ✭✭✭✭ELM327


    Great to see that bimmer getting closer to being on the road!


  • Registered Users, Registered Users 2 Posts: 2,528 ✭✭✭Titzon Toast


    Passed my NCT test today for the first time in a couple of years.

    Threw my "test pipe" into it to celebrate. Sounds nice to finally have a full system installed.


  • Registered Users, Registered Users 2 Posts: 14,309 ✭✭✭✭wotzgoingon


    I had a Mivec a fair few years ago and took the cat out and I was sorry. Lost a tonne of low end torque. I'm sure it helped at the top end when at full acceleration but as I said it lost a tonne of low end torque.

    I was always thinking if you had a full exhaust with a bypass valve so when taking off you gain the low end torque but when you get going the valve opens and the exhaust gas exits out the side so you also gain the top end power.


  • Registered Users, Registered Users 2 Posts: 2,528 ✭✭✭Titzon Toast


    I only took it for a quick spin but I didn't notice any lose in power.

    That said, it's not a fart cannon exhaust on it. There should still be enough back pressure to keep things ticking along nicely.


  • Advertisement
Advertisement