Advertisement
If you have a new account but are having problems posting or verifying your account, please email us on hello@boards.ie for help. Thanks :)
Hello all! Please ensure that you are posting a new thread or question in the appropriate forum. The Feedback forum is overwhelmed with questions that are having to be moved elsewhere. If you need help to verify your account contact hello@boards.ie
Please note that it is not permitted to have referral links posted in your signature. Keep these links contained in the appropriate forum. Thank you.

https://www.boards.ie/discussion/2055940817/signature-rules
Hi all,
Vanilla are planning an update to the site on April 24th (next Wednesday). It is a major PHP8 update which is expected to boost performance across the site. The site will be down from 7pm and it is expected to take about an hour to complete. We appreciate your patience during the update.
Thanks all.

Rear ARB bushing size

Options
  • 29-10-2021 7:21pm
    #1
    Registered Users Posts: 985 ✭✭✭


    Hi all,

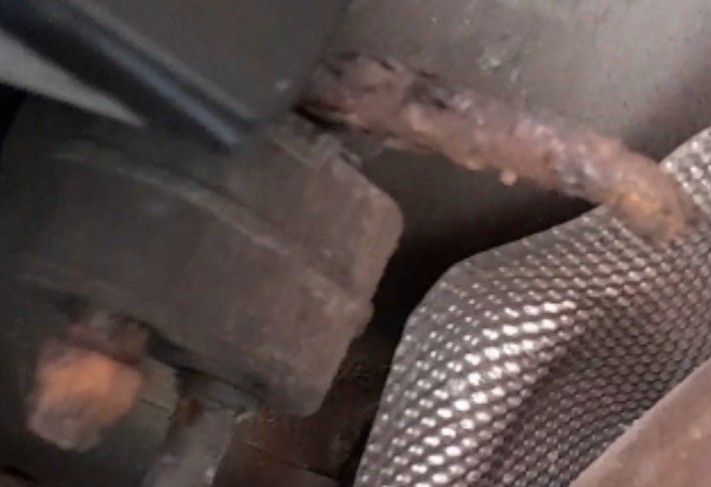
    Pulled the car out of the drive today and as soon as I left my estate and onto rough country roads, I heard a big clunking sound from the rear, it's quite loud. I've checked underneath and nothing looks badly worn, except the anti roll bar bushings. I've ordered replacements and bought links along with them as if I'm doing one I always do the other as a set. Got links for the front too, not a hope am I going near the front bushes.

    I went out and measured the ARB with the open end of a wrench and checked a few sizes, only one that fit around the ARB snug was a 21mm, thing is, I can't find any 21mm bushes. So I bought 22mm, will these still be okay? Next size down was 18mm, then 17mm. I measured right beside where the bushing sits on the bar.

    It's a 2010 mondeo 2.0tdci


Comments

  • Moderators, Sports Moderators Posts: 28,456 Mod ✭✭✭✭Cass


    It'll be the 18 (possibly the 17mm, but I'd stick with 18mm). I cannot say for definite which one is for your model, but mine took the 18mm with the "orange dot".

    Bear with me, a little long winded.

    Had the same problem with my 2009 TXS. Measured the roll bar with calipers and it read 20-something. Say 21mm. When I checked the only 20+ sizes were for the front. I bought a few sets, as they're cheap, and then tried checking them. The front ARBs won't work ont he rear for one simple reason, they sit taller than the rear ones. So regardless of the diameter of the hole, they sit, iirc, about 6mm higher than the rear ARBs so won't sit flush with the ARB housing and hence won't allow the bolts to start.

    Like you I though I needed 21mm so I got a 21mm drill bit, and bored out one of the rear sets (18mm) just to see. Put the ARB in and realised, after a short drive to check, that it was loose as sin. I wasn't expecting miracles and was never going to leave them in cause the drilling, even being careful, made a mess. However I wanted to check. Went to Ford and ordered the exact ones for the car thinking as its a TXS, and like most parts on it, it'll be "super-duper" hence expensive. Got a set of 18mm ones exactly like I'd bought except these had an orange dot. Even the Ford guy said he doesn't understand why Ford mark the TXS and EcoBoost with an orange as they seem the same as the standard ones.

    Back to the car and up on ramps with her. Had new bolts too as two of the four had seized and I used a bolt removal tool which wrecked them. I applied a little silicone grease, a tiny amount, to the inside of the housing and after running the ARB along the anti roll bar to the correct position I pushed the housing over the rubber, and the bar up against the car all at the same time. Took some fiddling and a bit of cursing, but got the four bolts started and then ran them home.

    If you've made it this far then well done. :D Moral of the story the 18s will work so I'd go with them.

    Look for part no. 5493

    https://ford.7zap.com/en/car/39/code.9p,1.28606,7.1276/0/1595/15822/69227/#5493

    Forum Charter - Useful Information - Photo thread: Hardware - Ranges by County - Hunting Laws/Important threads - Upcoming Events - RFDs by County

    If you see a problem post use the report post function. Click on the three dots on the post, select "FLAG" & let a Moderator deal with it.

    Moderators - Cass otmmyboy2 , CatMod - Shamboc , Admins - Beasty , mickeroo


  • Registered Users Posts: 985 ✭✭✭BlakeS94


    Thanks for going to the effort of explaining all that, I'll purchase the 18mm so, I don't understand how an 18mm ID would fit around the measured 21mm of the sway bar? The ones I bought did say for the front though, I may just pick up the right ones from my local ford along with new bolts too, I already have an extractor set, any idea of cost?


  • Moderators, Sports Moderators Posts: 28,456 Mod ✭✭✭✭Cass


    Welcome to my world, a few months back.

    I bought the 18s, and when they went onto the roll bar (before the housing went over it) they were a little open. IOW as you'd think they didn't close. Made getting the housing on a bit of a pig because as soon as I stopped holding the bush into the housing (all while on the roll bar) to kline up the bolts the bush would slide out of the housing.


    Was sure they'd never fit but they did. Once I got the first good squeeze of pushing the housing against the sub frame to try line the bolts up the bush closed. So it will close. In retrospect perhaps only doing one side at a time would have been easier but I removed both, and the bolts holding them in, as I was fixing the exhaust and doing all the rear bushes and drop links. Made lining up the roll bar a pita. This is where the grease comes into play and a second set of hands if you have them.


    The bushes from online suppliers were €8 for both. From Ford was €20. The bolts cost, iirc, around €20 but only Ford do them. 4 of them and they're 10mm.


    Just as a tip, if you're looking online and not sure if they're front or back, the front bushes are 48mm "tall". The rear are somewhere in the 40 to 42mm max.

    Forum Charter - Useful Information - Photo thread: Hardware - Ranges by County - Hunting Laws/Important threads - Upcoming Events - RFDs by County

    If you see a problem post use the report post function. Click on the three dots on the post, select "FLAG" & let a Moderator deal with it.

    Moderators - Cass otmmyboy2 , CatMod - Shamboc , Admins - Beasty , mickeroo


  • Registered Users Posts: 985 ✭✭✭BlakeS94


    Maybe it is the 18s, I just changed my order it hasn't been shipped yet, got Moog ones. It must the the 18mm so, I've had a hard time putting on bushings before on an i40 I owned, needed a spare pair of legs to push the brackets onto the bushing while I put the bolts in, they were a very tough type of material though, I've seen videos online of bushings on some cars where they just easily slip on and bracket easily goes over with no strain, I wish I had bushings like that. Seems I'm in for a bit of heartache so


  • Moderators, Sports Moderators Posts: 28,456 Mod ✭✭✭✭Cass


    To be fair the rear bushes are easily accessible, sit more towards the centre than most other cars I've worked on, and other than a little wrangling not the worst I've had to fit.


    I've an 04 Vectra too and the rear ones on that are not bad to do, yet the Mondeo was easier. With the Vectra you've to reach in over the trailing arm, there is no point of leverage to push the housing back down, and its side mounting. The Mondeo in comparison was easy enough. I reversed the car onto a set of ramps, went underneath (feet first) and the roll bar and bushes are right there facing slightly off straight down. Very accessible.

    If you do one side at a time the other side, along with the drop links, should provide enough "hold" to minimise fuss. I didn't do this as I took out the roll bar completely in order to change bushes, drop links, springs, suspension arms, wheel bearings, etc. Basically rebuild the rear end of the car.

    Forum Charter - Useful Information - Photo thread: Hardware - Ranges by County - Hunting Laws/Important threads - Upcoming Events - RFDs by County

    If you see a problem post use the report post function. Click on the three dots on the post, select "FLAG" & let a Moderator deal with it.

    Moderators - Cass otmmyboy2 , CatMod - Shamboc , Admins - Beasty , mickeroo


  • Advertisement
  • Registered Users Posts: 985 ✭✭✭BlakeS94


    Okay hopefully it goes well for me, I'm just doing the links aswell, I'll take your advice and start with the bushes, one at a time. Would the ramps not put tension on the bar as the suspension is compressed? I'll have it up on jacks with both wheels off, don't know if that makes a difference though


  • Moderators, Sports Moderators Posts: 28,456 Mod ✭✭✭✭Cass


    Possibly, but I was doing the exhaust at the time and while I was there I decided to do the rear suspension. Obviously I didn't do all the work on the ramps as the wheels had to come off for the bearings, but I done the ARBs while on the ramp. Maybe thats what made mine so awkward to keep in place.

    Jacks will be fine.

    Forum Charter - Useful Information - Photo thread: Hardware - Ranges by County - Hunting Laws/Important threads - Upcoming Events - RFDs by County

    If you see a problem post use the report post function. Click on the three dots on the post, select "FLAG" & let a Moderator deal with it.

    Moderators - Cass otmmyboy2 , CatMod - Shamboc , Admins - Beasty , mickeroo


  • Registered Users Posts: 985 ✭✭✭BlakeS94


    Okay, I feel like a complete idiot, while the bushings do look bad and in need of a change, they're not the cause of the knocking sound, i bounced on the passenger side corner of the boot. It's the exhaust backbox is loose, couldn't make out if its the actual weld on the exhaust that fits into the rubber mount is broken off, or the rubber itself is badly worn, but the exhaust backbox is flying about very loose when you bounce the car, hitting off the body of the car, which is making the noise.

    Any fix for this? I've seen clamps that go around the diameter of the exhaust and have a tube coming off them to fit into the rubber mount, would that work? Or just buy new mounts?


  • Registered Users Posts: 985 ✭✭✭BlakeS94


    Snapped clean off, the rearmost mount on the backbox and the one up from it.


  • Moderators, Sports Moderators Posts: 28,456 Mod ✭✭✭✭Cass


    Had that with mine hence the reason, as I said above, I went at the exahust. My entire back box fell off and when I checked off the 6 (or was it 7) hangers only two were in good nick. The rest were either rusted or already broken.

    I was fortunate in a sense. I had an old exhaust from my other car and I cut the hangers off it (including about 1.5 inch "patch" of exhaust so as I wasn't trying to weld the hanger directly) then welded them onto the Mondeo exhaust. Trying to re-use the old hangers is asking for trouble. If they're rotted off then even if you manage to get enough good material to weld them back on it'll be a countdown to when they fail again.

    The only solution most will give is to replace the exhaust, and while its the best option, its also the most expensive. You can fabricate new hangers, but they is intensive in terms of labour and welding exhaust is tricky given how thin it is and its proclivity to burn through. Or maybe thats just my crow s**t welding. 😁

    The problem you have is the location of the broken hanger. If it were around the pipe I'd suggest a clamp with bit of bar and simply rehang it, but as its on the box there is not permanent or good clamping point. The best, and not too expensive, solution is to buy a new back box, cut the old one off, then use epoxy and a pipe joiner (stepped ones I find are best) and reconnect the new back box to the pipe. It'll save you in the long run. I think a new back box is in the 90 to 120 mark. Dn't hold me to that though.


    My only other bit of "help" (I use that word loosely) if you don't want to go new, and cannot weld, and Frankly I'm embarrassed to even suggest any of the following is:

    • To use a metal epoxy. Prop the exhaust up using blocks to its proper position. Use the broken hanger, as clean as you can get it, and use the epoxy to "weld" it back in place. A piece of thin wire (like bull wire) can be used for extra strength, but the biggest issue is keeping the hanger in place/position while the epoxy sets which takes about 60 - 90 minutes to "go off" then 12 to 24 hours to fully cure.
    • Wrap the box with a metal strapping. Leave excess metal strapping and loop it through the rubber hanger and secure the strap back on itself with a nut/bolt.
    • Drill the very outside edge of the box, where the hanger was originally welded onto, and put a piece of bent threaded bar up through the hole and into the rubber hanger. Bolt the threaded bar on both sides of the box where you drilled it to keep it secure on the box and then hook the end of the threaded bar to avoid it slipping our of the rubber hanger. Alternatively you can place a nut, then large washer, and another nut on the end of the threaded bar to avoid it coming out of the rubber.

    Seriously though, bite the bullet and buy the new back box. String it up for the time being to get you out of a hole if needs be but go for the new box. Is she single or dual?

    Forum Charter - Useful Information - Photo thread: Hardware - Ranges by County - Hunting Laws/Important threads - Upcoming Events - RFDs by County

    If you see a problem post use the report post function. Click on the three dots on the post, select "FLAG" & let a Moderator deal with it.

    Moderators - Cass otmmyboy2 , CatMod - Shamboc , Admins - Beasty , mickeroo


  • Advertisement
  • Registered Users Posts: 985 ✭✭✭BlakeS94


    To be honest I only jacked up the left hand side and had a quick look, I saw those two broken ones and could see further up another 2 but they looked completely fine. Maybe just small spots of surface rust, I presume the other hangers are somewhere along the right hand side, the further broken one I could use the clamp and loop it into the exhaust mount again, after looking at the photos closer I don't think there would be much left with after cleaning them up, I saw a backbox with exhaust pipe that looked like it went long enough for where I need it, would just have to find the one for my car, could I just measure and cut the old exhaust, put some exhaust assembly paste and join the new exhaust section and backbox? I think I could handle that. It's just a single setup


  • Moderators, Sports Moderators Posts: 28,456 Mod ✭✭✭✭Cass


    Scrappy might be useful. Cheaper than new and you can cut as much as you like, then join.

    Forum Charter - Useful Information - Photo thread: Hardware - Ranges by County - Hunting Laws/Important threads - Upcoming Events - RFDs by County

    If you see a problem post use the report post function. Click on the three dots on the post, select "FLAG" & let a Moderator deal with it.

    Moderators - Cass otmmyboy2 , CatMod - Shamboc , Admins - Beasty , mickeroo


  • Registered Users Posts: 985 ✭✭✭BlakeS94


    I noticed the exhaust goes over the top of rear subframe, will that be an issue with any dismantling or assembly?


  • Moderators, Sports Moderators Posts: 28,456 Mod ✭✭✭✭Cass


    With a single exhaust, not so much. Mine is dual and the Y section sits across the subframe. I cut the pipe forward of the subframe, then realised I had to cut the other side (between the Y section and the back box) as the subframe would not allow the Y section to pass over it (to take it and back box off in one go, out the back). All it meant was an additional joint, so another tenner for a second connector.

    With a single pipe I'd imagine you'd manage to remove the entire lot as mine was just shy of making it, but don't hold me to that as I haven't worked on one (Mondeo with single).

    Forum Charter - Useful Information - Photo thread: Hardware - Ranges by County - Hunting Laws/Important threads - Upcoming Events - RFDs by County

    If you see a problem post use the report post function. Click on the three dots on the post, select "FLAG" & let a Moderator deal with it.

    Moderators - Cass otmmyboy2 , CatMod - Shamboc , Admins - Beasty , mickeroo


  • Registered Users Posts: 985 ✭✭✭BlakeS94


    There is a bit of clearance between the subframe and the exhaust, it's just how it curves and bends towards the middle of the car that I'm concerned about, id imagine it will be fine as I can twist and turn, it's only the exhaust itself I need to pull out the back there's no boxes where I need to cut after the backbox.


  • Moderators, Sports Moderators Posts: 28,456 Mod ✭✭✭✭Cass


    This is where I had the problem with mine. I had the car on ramps (while doing the exhaust). When I cut the exhaust and tried to get it from between the chssis and sub frame I couldn't. The Y section wouldn't go between the space and my problem was I had to drop the exhaust and twist/turn it as you mentioned, but due to the limited height of the car above the ground I couldn't drop the back enough to get th exhaust clear. I don't think I ever would have, it just wasn't going to fit.

    However If your one is a single and you jack it giving you more height than with just ramps alone it should work. Might be no harm to jack the car and check yourself. You will need to drop the back box to the ground and twist/turn it to manage the curve of the exhaust through the gap so allow as much clearance off the ground as you can with the jack(s).

    Forum Charter - Useful Information - Photo thread: Hardware - Ranges by County - Hunting Laws/Important threads - Upcoming Events - RFDs by County

    If you see a problem post use the report post function. Click on the three dots on the post, select "FLAG" & let a Moderator deal with it.

    Moderators - Cass otmmyboy2 , CatMod - Shamboc , Admins - Beasty , mickeroo


  • Registered Users Posts: 985 ✭✭✭BlakeS94


    Yes my plan is to almost max out the jack stands, I also have 5 tonne ramps so I'll use them underneath the wheels as an added safety precaution, I'll lift it up when I can and have a closer look to see what exactly I need, but I'd imagine if I'm replacing the backbox with a portion of the exhaust attached that would cover all the broken bits, any ideas of where I can find the correct parts? I've had a look but there seems to be many options when I enter my car details and the hanger on the backbox seems to be hanging a different direction than the photos I see of the new ones online


  • Registered Users Posts: 985 ✭✭✭BlakeS94


    I see that exhaust it says it fits my car, but states no assembly parts, would I just need a U-bolt and some of that epoxy? Only seems to be one mount welded on so I may need another U-bolt and I could secure the broken one further up the exhaust?


  • Moderators, Sports Moderators Posts: 28,456 Mod ✭✭✭✭Cass


    BlakeS94 - I see that exhaust it says it fits my car, but states no assembly parts, would I just need a U-bolt and some of that epoxy?

    U clamp and some exhaust putty. Smear it well around the existing part fo the exhaust pipe and slot it home into the new section. Have the U-Clamp already on/in place and when the two pieces are joined slide it down and tighened the two nuts. Make sure to tighten the nuts equally. Start with one and run it up so far on the threaded clamp by hand. Then run the other one up the same distance. Then give each nut the same amunt of turns while changing between one side and the other. Don't run one all the way up first and then the other as it'll give an uneven "grip" on the pipe and don't overtighten to the extent you start to crush the pipe.

    BlakeS94 - Only seems to be one mount welded on so I may need another U-bolt and I could secure the broken one further up the exhaust?

    There is a hanger at the back box, and another just at/after the subframe. Pretty much where the new back box joins to the old/existing pipe. Is this the other hanger that is broken on you? If so then an option for you, other than welding is something like this:


    Forum Charter - Useful Information - Photo thread: Hardware - Ranges by County - Hunting Laws/Important threads - Upcoming Events - RFDs by County

    If you see a problem post use the report post function. Click on the three dots on the post, select "FLAG" & let a Moderator deal with it.

    Moderators - Cass otmmyboy2 , CatMod - Shamboc , Admins - Beasty , mickeroo


  • Moderators, Sports Moderators Posts: 28,456 Mod ✭✭✭✭Cass


    BlakeS94 - any ideas of where I can find the correct parts?

    For these types of parts I tend to use my local motor factor. They're a big set up and if there are any problems its a short drive into them rather than the hassle and expense of sending something, bought online, back.

    I've had a look but there seems to be many options when I enter my car details and the hanger on the backbox seems to be hanging a different direction than the photos I see of the new ones online.

    That can be off putting but the more important part is, is the hanger in the right place on the exhaust/box. It doesn't matter too much whether the hanger points east or west when mounted so long as the mounting poistion on the box/exhaust is identical. In other words so long as the hanger goes through the rubber when mounted then it doesn't matter if its does so from the O/S or N/S or the way the original did.

    Forum Charter - Useful Information - Photo thread: Hardware - Ranges by County - Hunting Laws/Important threads - Upcoming Events - RFDs by County

    If you see a problem post use the report post function. Click on the three dots on the post, select "FLAG" & let a Moderator deal with it.

    Moderators - Cass otmmyboy2 , CatMod - Shamboc , Admins - Beasty , mickeroo


  • Advertisement
  • Moderators, Sports Moderators Posts: 28,456 Mod ✭✭✭✭Cass


    Excuse the MS paint skills. Below I've used a picture of an exhaust and changed the alignment of the hangers in the top pictures and the bottom pictures.


    In the top pictures the hangers are facing different directions but their position on the exhaust means they will still hang from the rubbers.

    In the bottom pictures I've changed the direction of the hangers, but at the base of the hanger, meaning the hanger now points a different direction but also will miss the rubber hanger.

    Unfortunately I cannot tell you whcih one will work without knowing where the new hanger on the new box will be, but judging from your pictures above the hanger on the rear right side of the back box faces towards the N/S wheel so the new box should either do the same or be fitted closer in on the back box, while facing towards the O/S wheel but still "covering" the same area where the rubber will be.

    If that makes any sense?


    Post edited by Cass on
    Forum Charter - Useful Information - Photo thread: Hardware - Ranges by County - Hunting Laws/Important threads - Upcoming Events - RFDs by County

    If you see a problem post use the report post function. Click on the three dots on the post, select "FLAG" & let a Moderator deal with it.

    Moderators - Cass otmmyboy2 , CatMod - Shamboc , Admins - Beasty , mickeroo


  • Registered Users Posts: 985 ✭✭✭BlakeS94


    I'll just get the backbox and I saw those clamps with the rod for the rubber mount I was thinking to get those to fix the other broken ones, I think that would suffice and all would be well, that's where the other broken one I saw is yeah, on the left side of the exhaust just after the subframe, maybe a motor factors would be ideal so, thanks so much for your help and going out of your way to explain things to me, if you ever need a spare pair of hands and you're around the limerick/ clare/tipp area I'd be happy to return the favour


  • Registered Users Posts: 985 ✭✭✭BlakeS94


    Would this be an option? As in would a backbox delete pass NCT, it wouldn't increase noise that much but would improve the tone (as much as you can on an old diesel). It would also be easier to handle and work with to install. I rang local motor factors and they quoted €180 for Klarius backbox.


  • Moderators, Sports Moderators Posts: 28,456 Mod ✭✭✭✭Cass


    The backbox is only a "silencer" (misnomer, but there it is one the less). The NCT set a level of 99db as the maximum. If the tester thinks its too loud they'll test the db of the exhaust and if it exceeds this they'll fail it. You can download a db meter on your phone or buy the actual meter and test it yourself if that is the route you wish to take.

    Other than that then a backbox delete should not be an issue once there are no leaks and as it does nothing in terms of emissions (thats what the CAT and DPF are for) so it'll have no impact in that sense.

    DON'T take my word for it, obviously, as I've never done a delete and never ran a car through the test without one. However I fail to see why they would fail a car, or more accurately what reason they could use as a cause for failure, if the back box is gone and the emissions/db are within the NCTs own limitations.

    Forum Charter - Useful Information - Photo thread: Hardware - Ranges by County - Hunting Laws/Important threads - Upcoming Events - RFDs by County

    If you see a problem post use the report post function. Click on the three dots on the post, select "FLAG" & let a Moderator deal with it.

    Moderators - Cass otmmyboy2 , CatMod - Shamboc , Admins - Beasty , mickeroo


  • Registered Users Posts: 985 ✭✭✭BlakeS94


    I lifted the car up just now and had a good look under from the backbox to the downpipe, the only two that are broken off are the one that is welded to the backbox at the very end, and one more just after the subframe, all the rest look in good shape, I removed the two broken ones and cleaned them up.

    I'll sand blast them tomorrow and see can I get someone to weld them back on, I know it's probably the least reliable way of doing it but what I need right now is the cheapest way I'm afraid, although I think any exhaust shop will tell me where to go if I just ask them to weld broken bits for me.

    The exhaust itself had no problems I looked over it with a flashlight and couldnt see any holes broken through any welds or the backbox itself, seems like such a waste to have to replace it over some hangers.

    Thoughts?


  • Moderators, Sports Moderators Posts: 28,456 Mod ✭✭✭✭Cass


    BlaksS94 - I know it's probably the least reliable way of doing it but what I need right now is the cheapest way I'm afraid

    I wouldn't be too concerned about how its repaired so long as its repaired. If the hangers can be cleaned up and welded on then so be it. I didn't replace anything on mine when I done them. I welded what needed welding and spent €30 on exhaust paste and a couple of connectors. Cheap solution but more importantly it worked.


    As I had the entire exhasut off I also sanded it, primed it with zinc based anti rust primer, and painted it with high temp (schultz type) paint. No signs of leaks and its hanging exactly where it should.

    Forum Charter - Useful Information - Photo thread: Hardware - Ranges by County - Hunting Laws/Important threads - Upcoming Events - RFDs by County

    If you see a problem post use the report post function. Click on the three dots on the post, select "FLAG" & let a Moderator deal with it.

    Moderators - Cass otmmyboy2 , CatMod - Shamboc , Admins - Beasty , mickeroo


  • Registered Users Posts: 985 ✭✭✭BlakeS94


    I cleaned them up as much as I could, I've sand blasted them but I want to give them some touch up paint to help them last as long as possible, do I need to use primer or will the blasted metal be enough to allow to paint stick?


  • Moderators, Sports Moderators Posts: 28,456 Mod ✭✭✭✭Cass


    Zinc primer. It has rust preventative qualities so give it a couple of coats of that (€10 from Halfords). Let it well harden (doesn't take too long) and then apply a few coats of paint and even (I do this) a couple of coats of clear coat.


    I'd do this once welded otherwise you may need to sand all that primer/paint/clear coat off to get a good ground if you do so before welding.

    Forum Charter - Useful Information - Photo thread: Hardware - Ranges by County - Hunting Laws/Important threads - Upcoming Events - RFDs by County

    If you see a problem post use the report post function. Click on the three dots on the post, select "FLAG" & let a Moderator deal with it.

    Moderators - Cass otmmyboy2 , CatMod - Shamboc , Admins - Beasty , mickeroo


  • Registered Users Posts: 985 ✭✭✭BlakeS94


    I've actually already put some primer on with a brush from a touch up paint kit I have, will sand it down and apply paint tomorrow and see how it is, if it needs to be partially ruined again to weld that's okay I'll do it again afterwards, I don't mind it not looking pretty I just want to protect it from rust for a while


  • Advertisement
  • Registered Users Posts: 985 ✭✭✭BlakeS94


    An update on this, I got a local mechanic to weld the two hangers onto the exhaust for me, the one on the exhaust itself welded on fine, the backbox hanger was a bit more difficult as its covered in galvanised material. But both welds seem to be holding up well, I live in an area with quite bumpy roads and all is well, no knocking. If it only lasts 6 months I'd be happy with that because it only cost me €20.


Advertisement