Advertisement
If you have a new account but are having problems posting or verifying your account, please email us on hello@boards.ie for help. Thanks :)
Hello all! Please ensure that you are posting a new thread or question in the appropriate forum. The Feedback forum is overwhelmed with questions that are having to be moved elsewhere. If you need help to verify your account contact hello@boards.ie
Please note that it is not permitted to have referral links posted in your signature. Keep these links contained in the appropriate forum. Thank you.

https://www.boards.ie/discussion/2055940817/signature-rules

The "Today I did something to my car" thread

Options
1287288290292293328

Comments

  • Closed Accounts Posts: 16,805 ✭✭✭✭Gary ITR


    CianRyan wrote: »
    Looks good, I must grab some and spend a day on them. Better brake pads are on the list too.

    Better brake pads usually means more dust :(


  • Registered Users Posts: 4,160 ✭✭✭Top Dog


    Decided because my car was only washed last week, turtle wax wheel cleaner needed a better challenge....
    Do you think it'd be any use in tackling something like this? Or anyone have any suggestions?

    The brown is burnt filings from metal on metal as my rear pad expired last Friday when I was 300 miles from home. :(

    250000.jpg


  • Registered Users Posts: 16,931 ✭✭✭✭challengemaster


    I'd say it'd be worth a shot trying it anyway. Probably has more hope of lifting it than other normal cleaners


  • Registered Users Posts: 14,721 ✭✭✭✭CianRyan


    Gary ITR wrote: »
    Better brake pads usually means more dust :(

    Bah! Last time I buy white wheels!


  • Registered Users Posts: 4,160 ✭✭✭Top Dog


    I'd say it'd be worth a shot trying it anyway. Probably has more hope of lifting it than other normal cleaners
    Will try pick up some next week so once the new discs & pads are on :)


  • Advertisement
  • Registered Users Posts: 1,258 ✭✭✭sogood


    After spending a while, on and off, refurbing the 20 spoke alloys from my donor car, I finally got around to actually fitting them. I replaced the old, scruffy Kiwi alloys and am really happy with the look. Had two new tyres fitted while I was at it!


  • Registered Users Posts: 1,363 ✭✭✭bmstuff


    I am missing a few speakers, not sure if I will have enough to finish my car...:rolleyes:

    Here is a sneak preview

    1.JPG

    2.JPG

    3.JPG

    4.JPG

    5.JPG

    6.JPG


  • Registered Users Posts: 2,350 ✭✭✭Mar4ix


    bmstuff wrote: »
    I am missing a few speakers, not sure if I will have enough to finish my car...:rolleyes:

    Here is a sneak preview


    That sounds massive :eek:
    I had plans ... good while ago.... get similar set up , but with subwoofer and amplifier.


  • Registered Users Posts: 1,363 ✭✭✭bmstuff


    Mar4ix wrote: »
    That sounds massive :eek:
    I had plans ... good while ago.... get similar set up , but with subwoofer and amplifier.

    What makes you think the ICE guy does not have an amp and woofers? ;)

    The big speakers you see are woofers. They normally go under seats of BMW E6x. The plan is to get them installed in my E39 with a bit of planning.

    They are low profile, I am going to go rear shelf with them. Personally I am no fan of big woofers boxes sitting in the boot. Even integrated in one side or another. I need 100% of my boot space.

    Anyways, what happened to your plan?


  • Registered Users Posts: 2,350 ✭✭✭Mar4ix


    bmstuff wrote: »
    What makes you think the ICE guy does not have an amp and woofers? ;)

    The big speakers you see are woofers. They normally go under seats of BMW E6x. The plan is to get them installed in my E39 with a bit of planning.

    They are low profile, I am going to go rear shelf with them. Personally I am no fan of big woofers boxes sitting in the boot. Even integrated in one side or another. I need 100% of my boot space.

    Anyways, what happened to your plan?

    lack of euro notes :pac:

    one my friend , he was living in USA for number years, and as hobby was participate in car audio quality competitions . , well he didnt get top levels, but some times won some events. .. he made a list with stuff what i needed, and places where to get .. some usa shops, some stuff ebay.. etc.... at the end, figures was around 800 euro, and he called it as a budged level :D i said.. well, might later, when i'll i get some funds,.... my car cost even less :D


  • Advertisement
  • Registered Users Posts: 1,363 ✭✭✭bmstuff


    Mar4ix wrote: »
    lack of euro notes :pac:

    one my friend , he was living in USA for number years, and as hobby was participate in car audio quality competitions . , well he didnt get top levels, but some times won some events. .. he made a list with stuff what i needed, and places where to get .. some usa shops, some stuff ebay.. etc.... at the end, figures was around 800 euro, and he called it as a budged level :D i said.. well, might later, when i'll i get some funds,.... my car cost even less :D

    Yeah high end stuff is expensive I know. I get those things at reseller price obviously, but still cost a fair bit of money.
    As soon as we are talking DSP processors and all, prices just rockets up.
    It is easy to reach 2000 euros on a full set up with DSP for an end customer with installation fee included. Sounds amazing, but not for every ones pockets.

    But for 600 euros you can have a very nice set of speakers and a nice amp too. If you do things yourself, about 600 euros will get you some very nice set up. Not the best, but very good nonetheless.


  • Registered Users Posts: 6,275 ✭✭✭evolutionqy7


    Great day outside so started doing some bits and bobs that have been sitting on the to do list.

    Installed a Parrot hands free kit today :) Handy enough, didnt need any adaptors for in the Hyundai i30. Great guide here too

    Decided I had to change the bulbs to a nicer white/blue color vs. ugly yellow. Meawhile doing that noticed the engine bay was qute dirty,so cleaned all the covers.

    Seeing as the previous owner damaged the rear boot door card and the glove box I finally got around to replacing those with the spare parts I picked up a couple of weeks ago, simplest thing ever.

    Tried looking for that Turtle Wax Ice Wheel cleaner stuff, but couldn't find any in my local halfords store.

    Next up is servicing and a proper polish and wax session :)


  • Registered Users Posts: 19,106 ✭✭✭✭TestTransmission


    I "think" I may have lowered my car too much :pac:


  • Registered Users Posts: 14,721 ✭✭✭✭CianRyan


    Pics, details?
    New coilies?


  • Registered Users Posts: 19,106 ✭✭✭✭TestTransmission


    CianRyan wrote: »
    Pics, details?
    New coilies?

    Just adjusted the ride height.Always been on coilovers. :cool:


  • Registered Users Posts: 9,662 ✭✭✭Voodoomelon


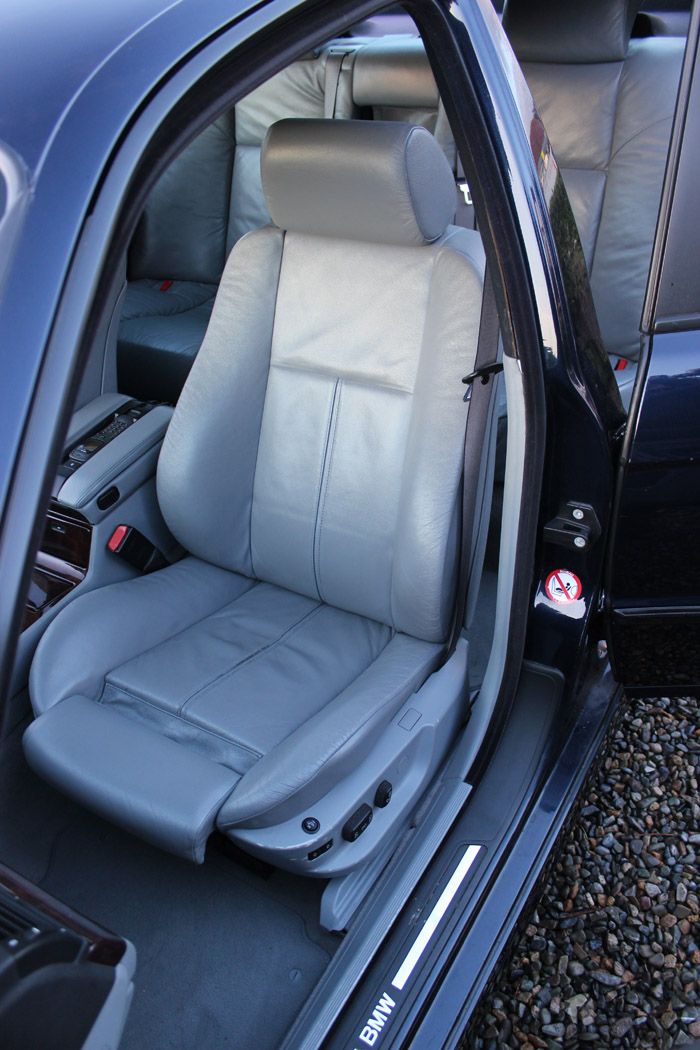
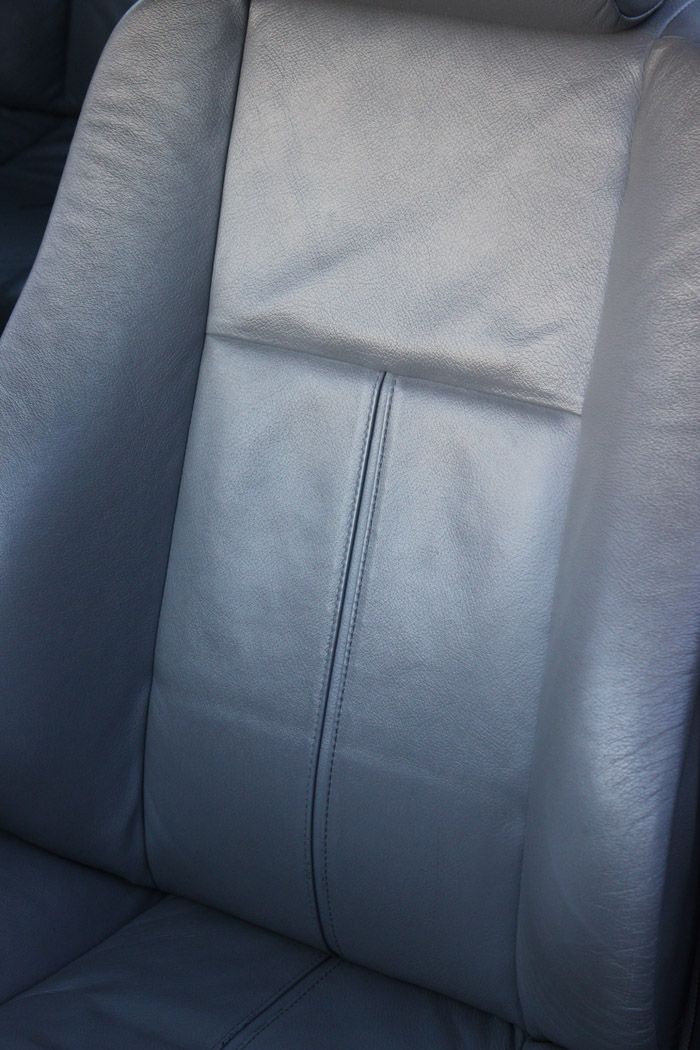
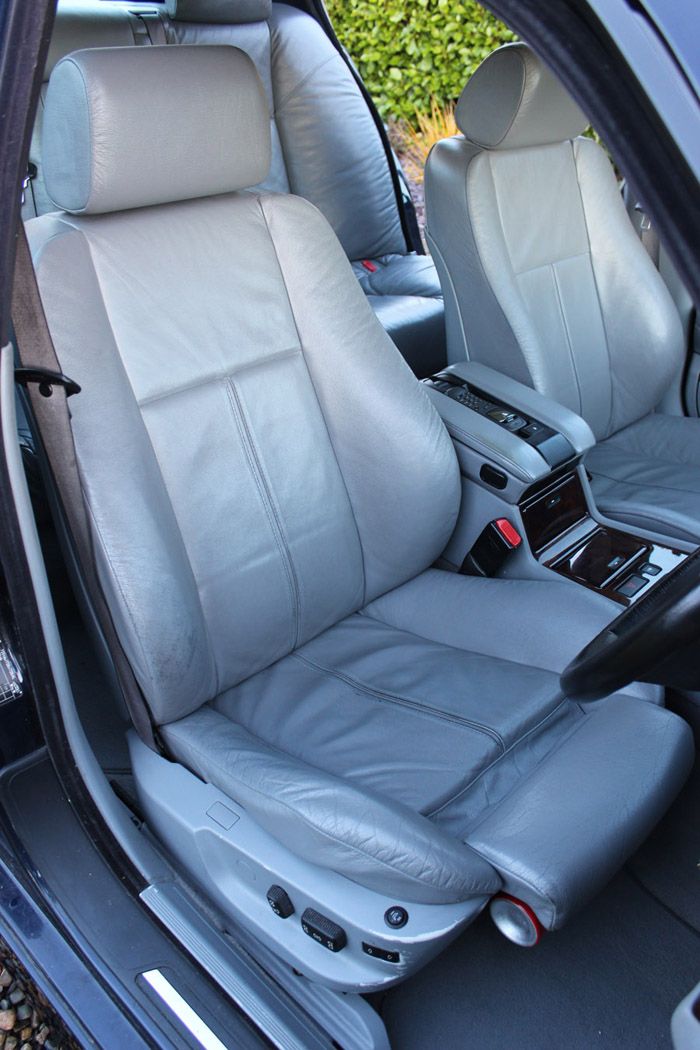
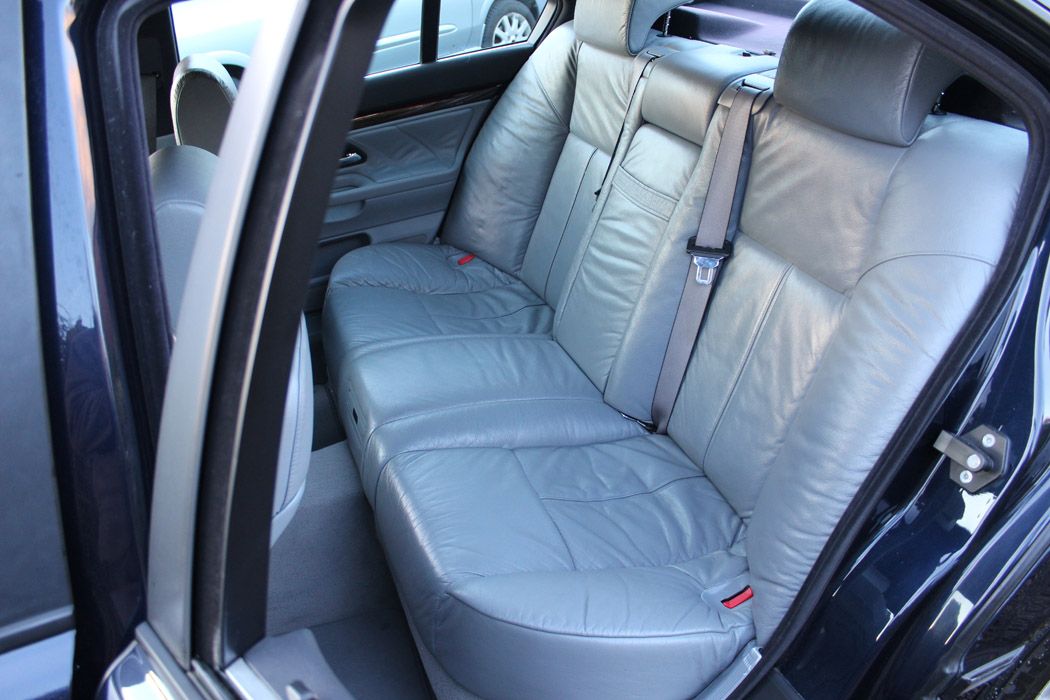
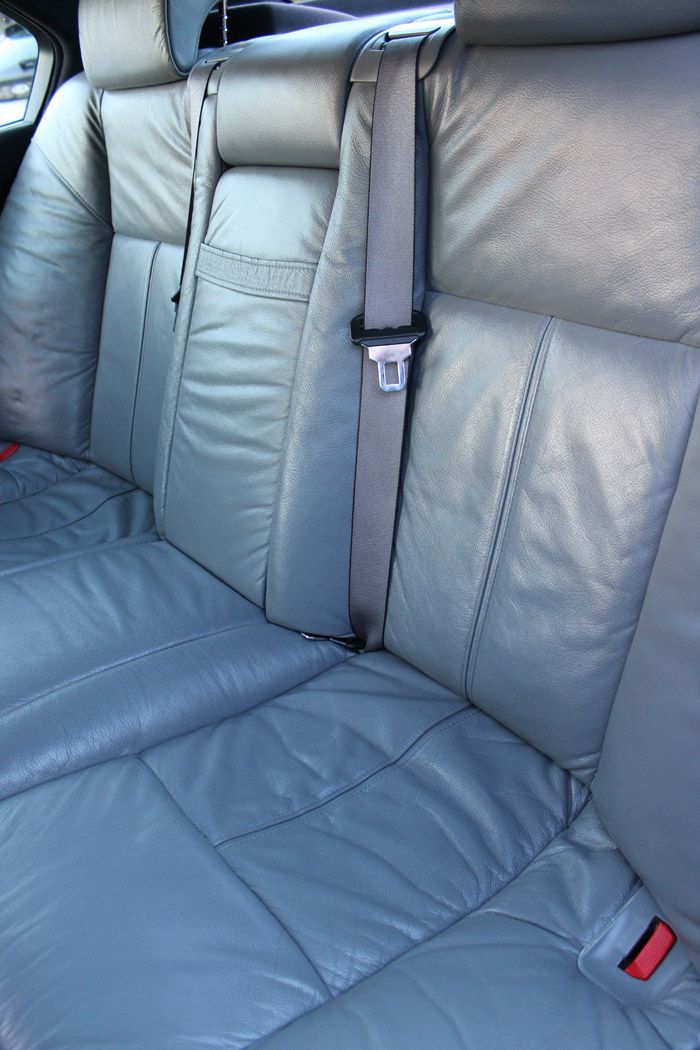
    Cleaned and treated my leather today for the first time in a while.

    Used Autoglym leather cleaner, then Autoglym leather balm, it really makes the leather look like new, as well as bring out the leather smell.

    leather3_zpsa2d9b199.jpg

    leather2_zpsed03caab.jpg

    leather1_zpsa7efa882.jpg

    leather4_zps541e9e55.jpg

    leather5_zps2cd76bd2.jpg


  • Registered Users Posts: 3,570 ✭✭✭rebel.ranter


    CCV Valve System Replacement in a BMW 525iA Sport

    After a bit of searching you will see that the main reasons to change the CCV valve are:
    - Increased consumption of oil
    - Smokey at idle
    - Rough running at idle after starting on a cold day
    - Erratic idle
    - White residue build up on dipstick & underside of oil cap

    Mine had the third issue. As you can see some of the symptoms above are consistent with other faults so be sure that you have thoroughly diagnosed the issue.

    Don’t even think about changing the valve unless you are doing the entire system, the pipes get so brittle that it would be impossible to avoid breaking them. Plus I had a good look through mine and there were little bits of crud inside most of them partially blocking them. It is more or less a service item really.
    The “kit” is the same for the M52 & M54 engines, identical parts. The M52 has an additional narrow rubber hose that goes from the CCV to the fuel pressure regulator, the M54 doesn’t need this, there’s a little rubber bung that you must remove from your old CCV & put on to the new one.

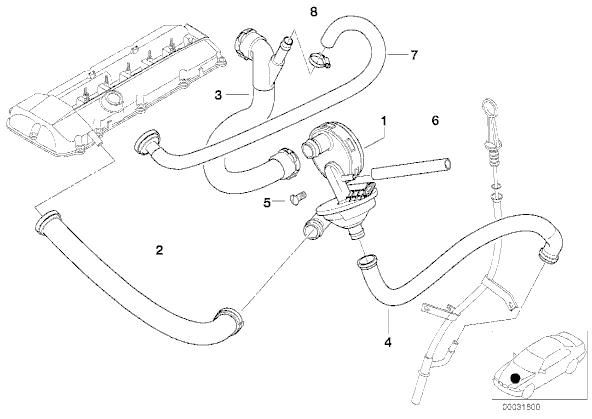
    Here are the different elements to the kit:

    No. Description Part Number
    01 PRESSURE REGULATING VALVE 11617501566
    02 Vent pipe 11611432559
    03 Connecting line 11617504535
    04 Vent hose 11157532649
    07 Return pipe 11617504536

    M52 only:
    06 VACUUM HOSE BLACK 11727545323

    CCVValvesystem_zps20453503.jpg
    Note: The interaction of part #3 & #7 in the diagram above is wrong, just in case there is confusion.

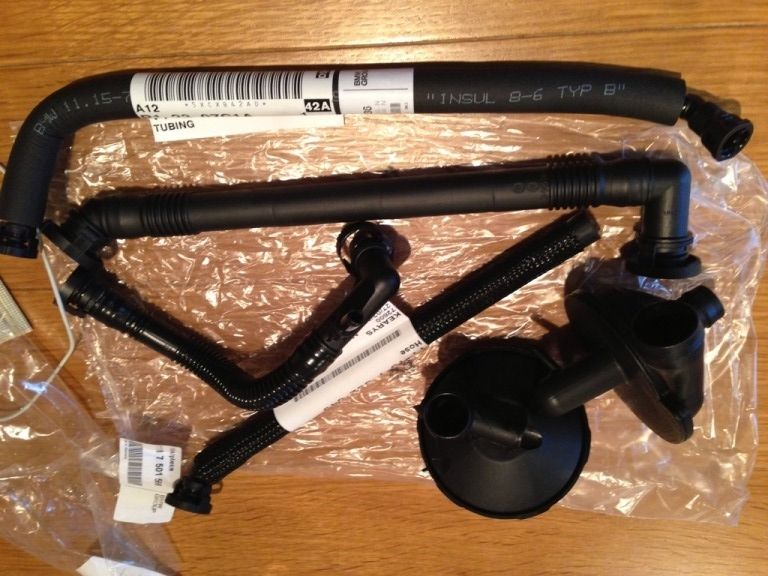
    Here is the "kit":
    3B0D1907-DB5F-4804-81A0-A2E223AA525F-2130-0000013521C5DB39_zps3c0af6ec.jpg

    Total cost of the kit from BMW is €180 (without the M52 only pipe). There is a “cold climate” version of the kit; it is a few quid dearer as the pipes have insulation on them. I think if I was doing it again I’d go with the cold climate units.

    There are some excellent DIY video tutorials on YouTube (links below) so it would be a bit of a waste putting together another document. I have instead decided to give a brief summary of what needs to be done while pointing out some areas to watch out for.

    Steps:
    1. Remove the airbox, MAF & associated rubber boots. The hardest part of this whole install is the loosening of the jubilee clips! When you get to the rubber boot that connects to the throttle body don’t forget to loosen the smaller pipe. Examine all the boots for cracks, especially the little one coming out of the “F” shaped connector into the intake boot. Replace any that look a bit damaged. After all, you are replacing a vacuum based system; the vacuum is only as good as the weakest point in the system. All the jubilee clips are a 6mm socket or a flat blade screwdriver.
    2. Loosen the dipstick; a 10mm bolt holds it to the block. There is also an electrical cable feeding through a holder attached to the dipstick. IT is probably best just to remove it at this stage so it is out of the way. Just slice the rubber pipe going in to the dipstick (from the CCV) along the line of the pipe to make it easy to remove. Note: it is recommended that you clean out the dipstick unit as this will most likely be full of crud from years of service too. I used brake cleaner for this, followed by WD40 to clear out the brake fluid. The pipe attached to the dipstick assembly was pretty bad inside & in most guides it says this is the one that causes the most issues.
    3. With the dipstick out of the way the next item you want to move out of the way is the electricl junction box in front of the throttle body & CCV. There are 2 x 10mm nuts holding this in place (on throttle body & onto a metal bracket of the DISA valve) & a 10mm bolt holds it on to the bracket by the purge valve. Plug out all the connections to give you maximum room to work. You can go to the trouble of labelling them if you wish but BMW uses the “poka yoke” system on the connectors which basically means it is idiot proof, you can’t plug the wrong one in to the wrong item. You should also pull the purge valve off the little metal hangar too, this will give you room to manoeuvre the little hose (#3) in to place later.
    4. Next remove the throttle body, there is one connector & 4 x 10mm bolts. Wiggle it out & inspect the seal, replace if necessary. Now the CCV valvle should be visible.
    5. Remove the intake manifold cover from the top of the engine; be careful not to drop one of the bolts like I did! There’s two 10mm bolts underneath the little trim pieces. You will see the pipe #7 with the foam insulation; the insulation has probably gone brittle though. Be careful not to break the connectors on the car side of the pipe, don’t worry about breaking the pipe, in fact it is easier to remove if you do. The same with the rest of the pipes; break them out while being careful of the car side connectors.
    6. The CCV is held in place with 2 torx screws, one on the right as you look at it (throttle body side), & one at the top of CCV. Again, it is probably easier to break it in half to remove it.
    7. Installation after this is pretty much the reverse, as they say.

    Other things to note:

    - The hardest pipe to refit is #3, the video guide talks about turning it through 90 degrees, however I found it easier to push fit it directly, it will snap fit in to place just like the rest with some careful persuasion!
    - Clean the dipstick out, waste of time doing the job other wise
    - Check boots & other piping for cracks
    - You could take this opportunity to clean out the DISA valve while you’re at it.
    - Check the rocker case ventilation neck for crud, clean it out.
    - Be careful with the rubber boot that goes directly on to the throttle body, it is listed in Realoem.com & BMWfans.info as being discontinued with no alternative part number! It’s worth cleaning up the outside of the boots while you have them off & treat with some tyre dressing or something to protect the, I used AG Tyre Dressing spray.
    - Replace the fuel tank breather valve line from the “F” connector on the intake boot, it’s probably rotten.

    Results:

    What did I notice immediately after fitting? Well, nothing, it started fine, it was smooth but it was also 14 degrees Celsius & I never had an issue at those temperatures before. Mind you the car had not been started in 10 days & it did start immediately & run very smoothly. So only good things were noticed! I’ll keep an eye on the starting situation over the coming weeks & the oil consumption, the car did use a little bit of oil, it has 147k miles on it now, not bad, especially by M54 standards.

    Obligatory Photoshoot:


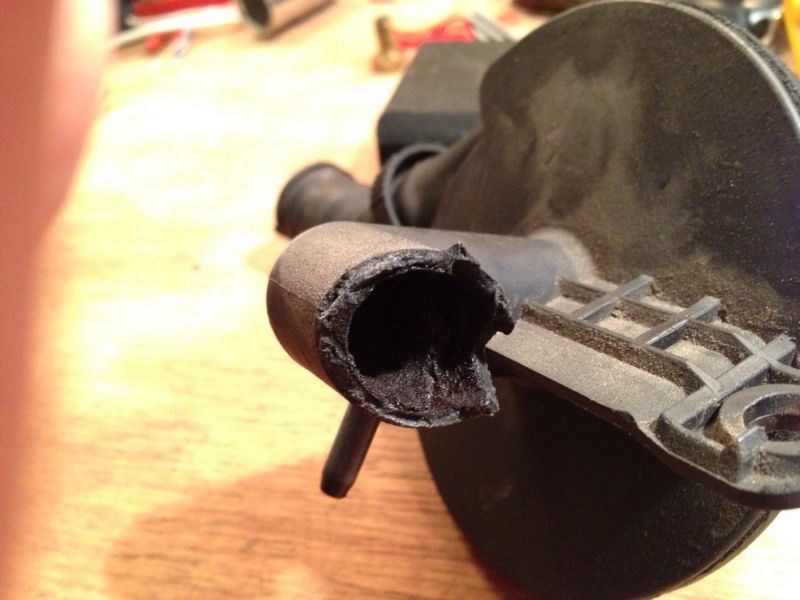
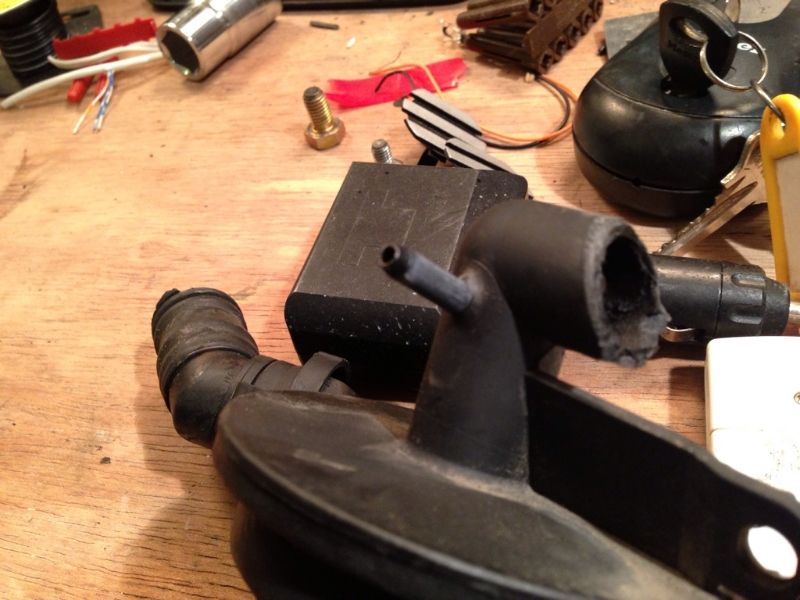
    Crud inside broken CCV valve:

    2E82C3D6-5245-45F0-A68D-FC56DFB7D91B-2200-00000153B36E205B_zps124242b1.jpg

    Narrow pipe where blanking tube needs to be placed for M54 or rubber tubing for fuel pressure regulator on M52:

    B38FE050-5829-4777-98E0-0938014E9F0D-2200-00000153B9984FED_zps21d271b6.jpg

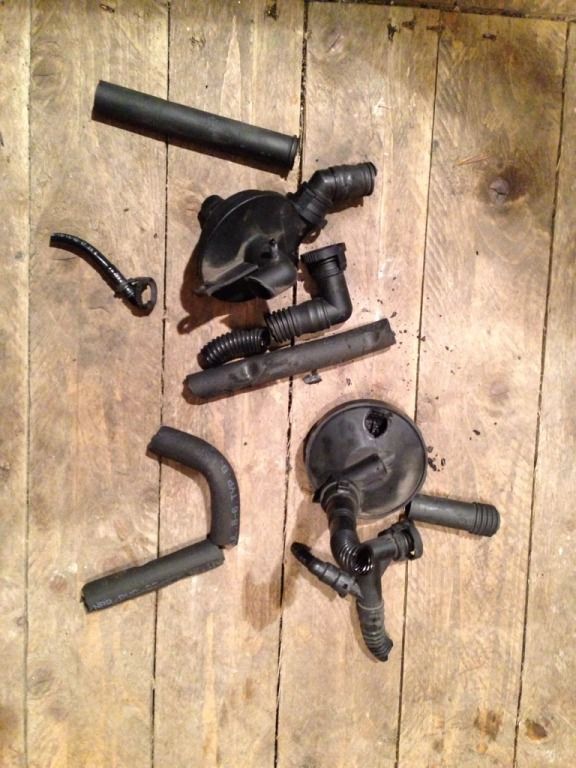
    CCV System in bits after removal (as it will be for yours too):

    985D42E2-6B98-4680-8B74-7F021500784B-2200-000001538D35C92B_zps5a2309ca.jpg

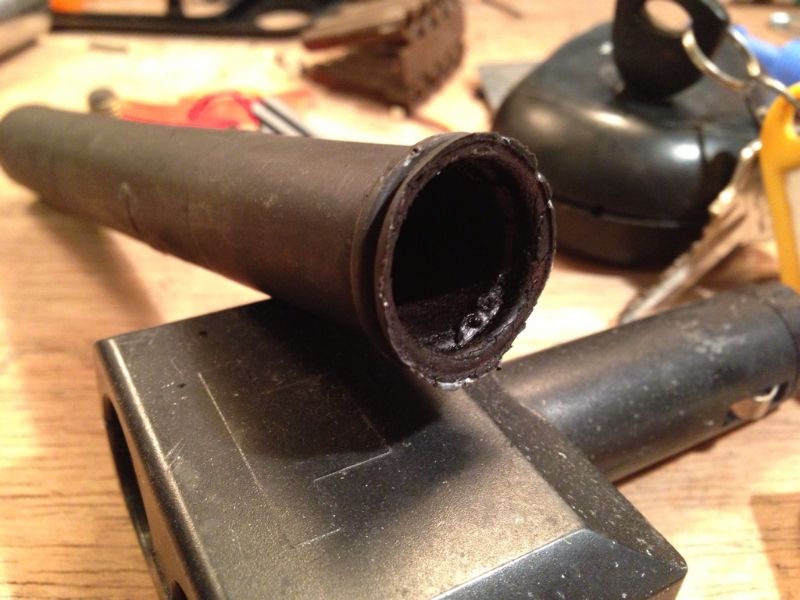
    More crud in pip that goes to rocker cover:

    0C75983A-56C7-49EA-9291-F5EDEA99FA2C-2200-000001539CF96C93_zps921eeafa.jpg

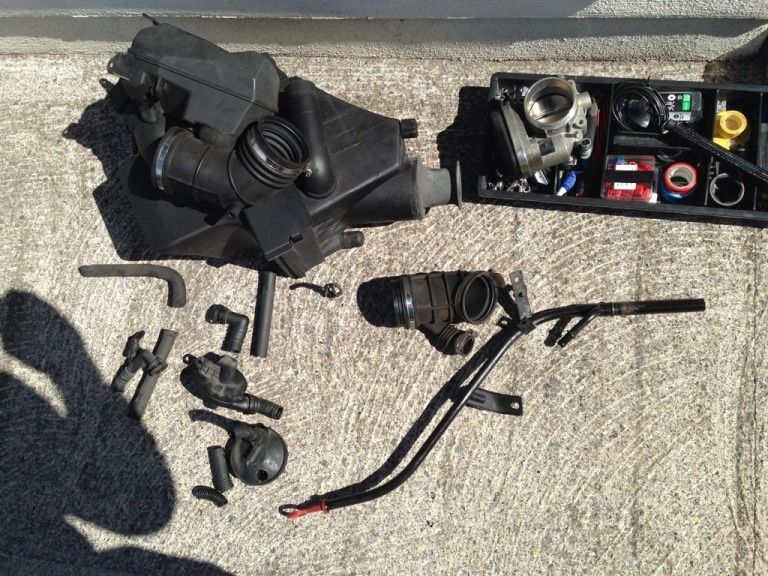
    All the bits that have to come out:

    683A15D4-43C0-4059-9061-3E755FD625AD-2200-00000123175B2DA9_zps810acb64.jpg

    DIY Videos


    These DIY videos require stereo speakers or headphones to hear the sound. These are for an e46 with the M54 engine, there's a bit more ripping in the e46 because there is less space but the rest of the job is identical.

    Part 1


    Part 2


    Part 3


  • Moderators, Motoring & Transport Moderators Posts: 23,157 Mod ✭✭✭✭Alanstrainor


    How long did it take you man? I was only looking at CCV videos there recently, pretty sure mine is all good, but my car at 125,000 will need it sooner rather than later! Awesome work, and great write up :cool:


  • Registered Users Posts: 3,570 ✭✭✭rebel.ranter


    How long did it take you man? I was only looking at CCV videos there recently, pretty sure mine is all good, but my car at 125,000 will need it sooner rather than later! Awesome work, and great write up :cool:

    It took about 3 hours, hard to say really, I had a chat with the next door neighbour in the middle of it, plus I dropped a bolt & a then a screw into the engine bay somewhere so spent ages looking for them. It's worth changing it out, as I said it should be a service item like a timing belt or a shock aborber.


  • Registered Users Posts: 9,238 ✭✭✭Ardennes1944


    You did it! Fair ****s man. Did it cure the rough start up or have you been driving the e39 lately?


  • Advertisement
  • Registered Users Posts: 9,662 ✭✭✭Voodoomelon


    I'll be tackling the above soon too. Don't have any problems at the moment, but would like to have it done.

    Can you order it as a "kit" from the dealer or do you have to give them the rake of part numbers?


  • Registered Users Posts: 2,701 ✭✭✭Cheensbo


    Surf developed some bad ass tramping from the back axle over the past few days, got very bad today with loud bangs, squeals & vibrations to match,

    Got home from work and dropped out the rear prop (very safe, quick and easy job as I don't even have to jack it up to work under it :) )

    At first I took off the prop at the diff end (rear) as it just butts up to the input shaft so is easy drop away, pulled at the uj and found no play and plenty of free movement,

    had a pull at the input shaft and, the backlash is a little more than it should be, but theres no in-and-out movement or bearing play so i think its ok.

    Noticed the diff breather is in an awful state so will do a diff oil change tomorrow and try sort the breather, must make sure to get lsd oil, as amazingly, after 200,000 miles the lsd still works :eek:

    Then, satisfied that the rear uj was ok, I took off the front end of the prop, the yoke was very tight on the studs on the transfer box output, so took a few belts of the hammer to free it, this pointed to a sticky uj on the front end of the prop.

    Got it off and low and behold, the front UJ is in sh!te, barely any movement one one axis, I'd say the previous time I changed it, I left some rollers fall over, it was my first time doing one and did it in the middle of the night in a hurry so Ill take the blame :pac:

    http://www.youtube.com/watch?v=hVaLC1_UZ68

    http://www.youtube.com/watch?v=KYyYRrbAY-A

    New one going in tomorrow, ill take a pic or two of the process and throw them up sure.


  • Registered Users Posts: 3,570 ✭✭✭rebel.ranter


    You did it! Fair ****s man. Did it cure the rough start up or have you been driving the e39 lately?

    I hadn't started it since you did about 10 days ago, it was only an occasional thing anyway but I purposely didn't use the car to leave it as long as I could to create a "worst case scenario". The car started fine so it seems to have sorted it.

    I'll be tackling the above soon too. Don't have any problems at the moment, but would like to have it done.
    Can you order it as a "kit" from the dealer or do you have to give them the rake of part numbers?
    There's no kit available, you need to order the list of parts I have shown above.


  • Closed Accounts Posts: 16,805 ✭✭✭✭Gary ITR


    Head and block full of goodies :)

    922691_10151425167742825_309243955_n.jpg
    602046_10151425168032825_290200680_n.jpg
    534121_10151425168172825_1038131603_n.jpg


  • Closed Accounts Posts: 890 ✭✭✭dh0011


    Went to pump the tyres (like i do every time i fill up), found two bulges in one of the tyres. Got two new tyres Hankook 205/55/16.


  • Registered Users Posts: 6,575 ✭✭✭166man


    dh0011 wrote: »
    Went to pump the tyres (like i do every time i fill up), found two bulges in one of the tyres. Got two new tyres Hankook 205/55/16.

    Mind me asking how much?


  • Closed Accounts Posts: 890 ✭✭✭dh0011


    80 each including balancing/fitting
    put new tyres on the front about 6 months back (bridgestones) 95 each incl fitting balancing.
    Would have gone for the bridgestones again but the lad was out of them.


  • Closed Accounts Posts: 16,805 ✭✭✭✭Gary ITR


    Head all torqued down with the new cometic gasket. Bottom end fully assembled with new rings, bearings, seals, high compression pistons and new crank seals and gasket seals....

    379947_10151426962082825_1262317715_n.jpg


  • Registered Users Posts: 2,701 ✭✭✭Cheensbo


    Follow up to #8866

    So with the prop off, went to my local motor factors and picked up 2 UJ's,

    Best to do them in pairs as if one wobbles it can throw off the other/ reduce its lifetime.

    First it was up to the floor press - had nearly 14t & a lot of heat up on it before we gave up,

    (may have forgotten to remove the circlips)

    photofy.jpg

    Moved away from the press and used a more persuasive tool:

    photo3uxq.jpg

    Half way there

    photo4oyx.jpg

    One New UJ ready to go in :)
    photo2bcg.jpg

    Pressed in & Greased up :)


    photo5zw.jpg

    And bolted back on again :)

    photo6lp.jpg

    Just repeated the process for the far end (except I removed the circlips and pressed them out :D )

    Ill fire a shot of grease into them at every oil change - (every 5k miles) and they'll be good for a long long time.

    Its an easy job to do, all you need is some sockets & access to a bench vise or a floor press, of if you're a real bad ass/rough cnut you'd do them with a hammer.

    Thanks for reading.


  • Advertisement
  • Closed Accounts Posts: 12,985 ✭✭✭✭dgt


    A rather annoying clonk developed, gawking underneath revealed the engine movement limiter was flopping about, bolt loosened out! :eek: threadlock didn't do the job there :(

    A sign to take the engine out again perhaps??? :pac:

    Noticed my balljoint boots are beginning to perish, how??? They're less than 3 months old :mad:

    At least the wishbones are sound...


This discussion has been closed.
Advertisement