Advertisement
If you have a new account but are having problems posting or verifying your account, please email us on hello@boards.ie for help. Thanks :)
Hello all! Please ensure that you are posting a new thread or question in the appropriate forum. The Feedback forum is overwhelmed with questions that are having to be moved elsewhere. If you need help to verify your account contact hello@boards.ie
Hi all,
Vanilla are planning an update to the site on April 24th (next Wednesday). It is a major PHP8 update which is expected to boost performance across the site. The site will be down from 7pm and it is expected to take about an hour to complete. We appreciate your patience during the update.
Thanks all.

Shed build - help

Options
1246711

Comments

  • Registered Users Posts: 31,008 ✭✭✭✭Lumen


    Oh, I think I found an Irish supplier of 6mm weldmesh rolls.

    https://petcagewarehouse.com/product/14-mouse-proof-galvanised-aviary-weldmesh/

    Apparently stainless is harder to chew through but galvanized is cheaper and according to various sources this 0.8mm/20g mesh is rat proof.

    Also, insect mesh is not rat proof cos it's too fine, so I'm glad I didn't get that.


  • Closed Accounts Posts: 9,764 ✭✭✭my3cents


    If you have the patience put that wire in with very small staples. They aren't easy to get and fiddly to put in but do the job well. I've tired using staples put in with a pneumatic nail gun stapler and it wasn't a great success.


  • Registered Users Posts: 31,008 ✭✭✭✭Lumen


    my3cents wrote: »
    If you have the patience put that wire in with very small staples. They aren't easy to get and fiddly to put in but do the job well. I've tired using staples put in with a pneumatic nail gun stapler and it wasn't a great success.

    I was going to try Timber tek screws with washers, like these:

    https://www.proweld.ie/product/timber-tek-screws-with-washers/

    ...put in using my right-angle drill attachment. And then when it gets too tight I'll just pull the mesh out to the rafter ends, wrap over the beams and more Tek screws.


  • Closed Accounts Posts: 9,764 ✭✭✭my3cents


    That will work.


  • Registered Users Posts: 1,490 ✭✭✭hesker


    I managed to staple on wire mesh farily easily using a €20 staple gun.

    Mesh was ¼ x ¼ x 48" x 15m (22 Gauge, 0.64mm).


  • Advertisement
  • Registered Users Posts: 443 ✭✭Zebbedee


    Lumen wrote: »
    I realise at least some of the stuff I'm posting is quite boring


    Not at all boring for me.
    Then again, I'm a bit of a shed 'anorak' :D


  • Registered Users Posts: 7,826 ✭✭✭Rows Grower


    I'm loving this thread, sheds are addictive and to watch one emerge from nothing with the best of everything is better than a good book.

    Supposed to be a chance of a storm in about two weeks so bear that in mind.

    "Very soon we are going to Mars. You wouldn't have been going to Mars if my opponent won, that I can tell you. You wouldn't even be thinking about it."

    Donald Trump, March 13th 2018.


  • Closed Accounts Posts: 565 ✭✭✭Trasna1


    Cool project. How are you proposing to do the joint between the posts and the ridge beam? Steel plate?

    Is the rainwater being disposed of to a soak away? Could be tricky to lay pipes close to the soil screws without undermining them.


  • Registered Users Posts: 31,008 ✭✭✭✭Lumen


    I like hemp now, since I've figured out that it tears easily by hand in one direction and cuts easily in the other with a non-serrated kitchen knife.

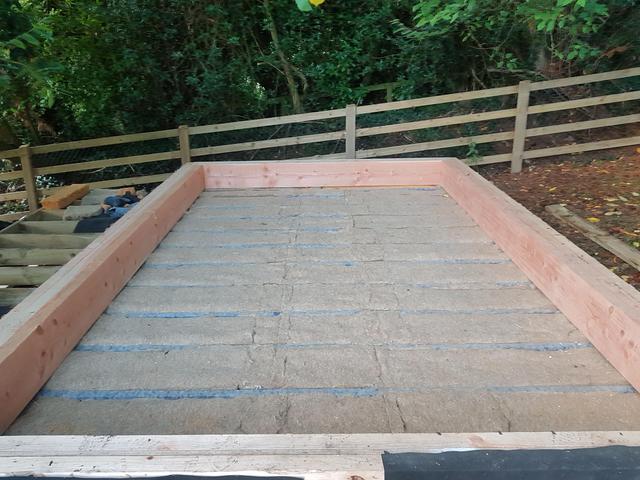
    So I finished the joist insulation, apart from tidying up round the edges.

    Then it was time for the subfloor build.

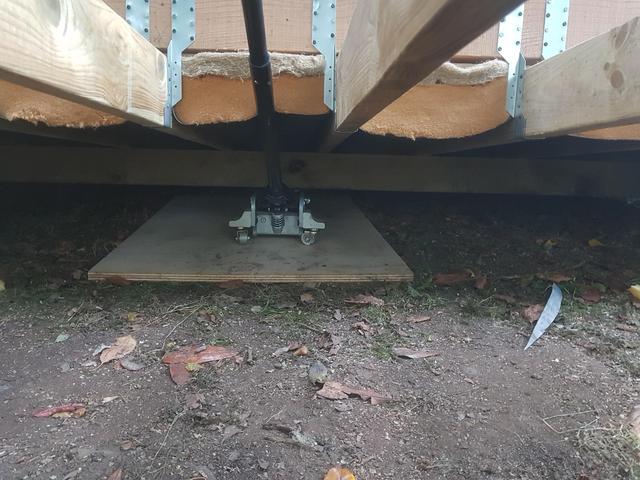
    First jack up the joists a bit, so that the 12mm OSB can be installed pre-tensioned.

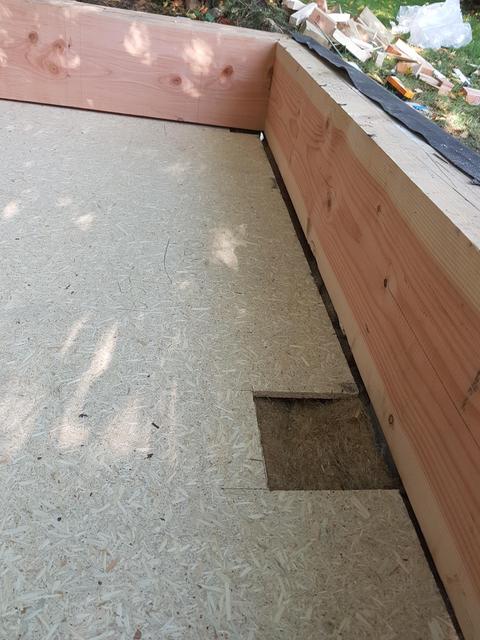
    Then mark the joist locations on the beam in pencil, cut a load of sheets (including cut outs for the ground screws), be careful to overlap in several directions.

    Then put in a hundred or so decking screws, 6" spacing on edges, 12" spacing away from edges. I tried those Reisser cutter things but they were crap, so I went back to the decking screws.

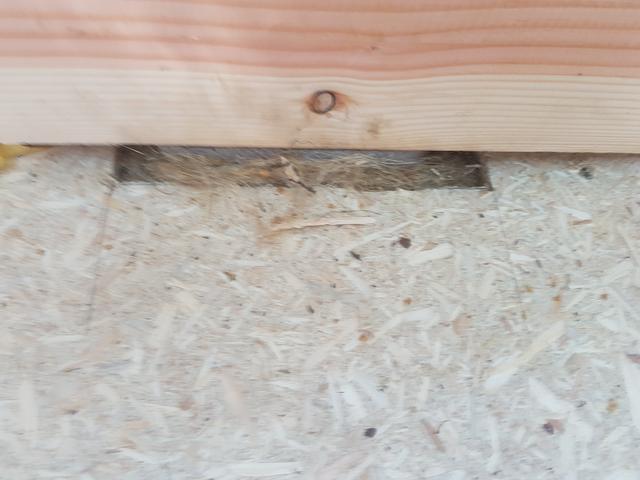
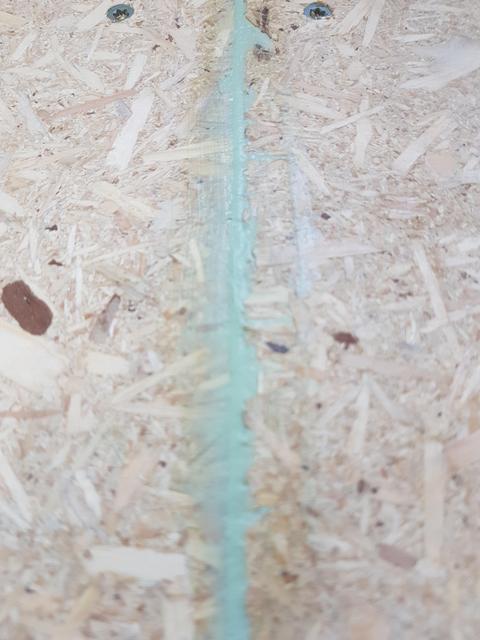
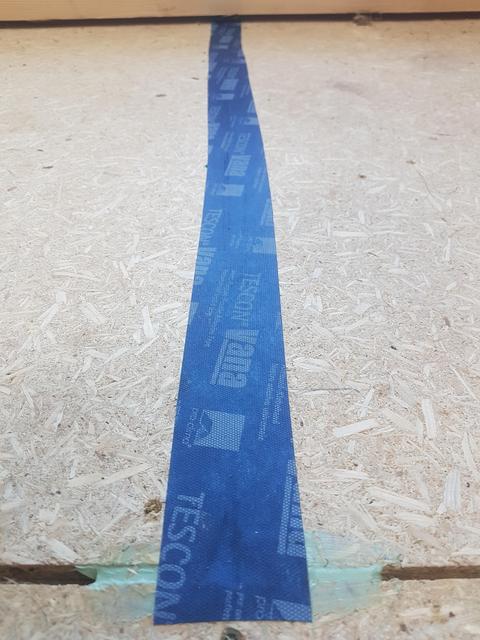
    Then fill the expansion gaps with Orcon F, and tape with Tescon (also tape the ground screw cutouts). The Orcon F was overkill but I wondered how much it would take. Answer: three tubes for the edges of one layer of subfloor. Probably won't be doing that for the wall and roof racking.

    Then repeat the cutting for the second layer of OSB, continuing by desk lamp when night falls. Long day!

    Subfloor feels good even before I've secured the second layer, be interesting to see what it's like when the screws are in and the jack is off.

    Don't have any pictures of the final result cos it was pitch black out.

    Next task: framing! At last. Plus tweaking the edge insulation, tidying the membrane and installing the rat mesh (when I get around to ordering it).

    Need to get a move, on winter is coming....

    Jf3f_Byx.jpg

    xh_Ou_O2_N.jpg

    USnao_Cq.jpg

    Vlk9b_Ln.jpg

    w_Se_Se_TT.jpg

    wp9e_Ere.jpg

    y_Qz_Mf_Ni.jpg

    https://imgur.com/a/O7wkP28


  • Registered Users Posts: 31,008 ✭✭✭✭Lumen


    Trasna1 wrote: »
    How are you proposing to do the joint between the posts and the ridge beam? Steel plate?

    Not sure yet. Maybe just really big screws.
    Trasna1 wrote: »
    Is the rainwater being disposed of to a soak away? Could be tricky to lay pipes close to the soil screws without undermining them.

    Nope, I'll probably just run it along the boundary hedge. Have a load of 6" perforated pipe left over from fixing drainage elsewhere.


  • Advertisement
  • Registered Users Posts: 33,616 ✭✭✭✭listermint


    The orcan is not for that purpose it's actually for the tape itself.its primary purpose is between wall and tape to create additional adhesion on uneven surfaces. You used it in a gap filler capacity which it's not intended for and of course would have used tonnes.

    Gap filler is more appropriate for what you wanted there and tap to seal. I wouldn't waste any more money using orcan as a gap filler


  • Registered Users Posts: 31,008 ✭✭✭✭Lumen


    listermint wrote: »
    The orcan is not for that purpose it's actually for the tape itself.its primary purpose is between wall and tape to create additional adhesion on uneven surfaces. You used it in a gap filler capacity which it's not intended for and of course would have used tonnes.

    Gap filler is more appropriate for what you wanted there and tap to seal. I wouldn't waste any more money using orcan as a gap filler

    Thanks, I realise it's not the primary use of it but I figured it has the advantage of a guaranteed long life and is super sticky and flexible.

    What's products are suitable for permanent air tightness sealing of small gaps in building fabric? I think I've read that ordinary silicone sealant degrades after a time.


  • Registered Users Posts: 33,616 ✭✭✭✭listermint


    Lumen wrote: »
    Thanks, I realise it's not the primary use of it but I figured it has the advantage of a guaranteed long life and is super sticky and flexible.

    What's products are suitable for permanent air tightness sealing of small gaps in building fabric? I think I've read that ordinary silicone sealant degrades after a time.

    The tape is performing that job, Stick with it.

    You can close the gap with simple window foam gap sealant, (window one because it doesnt expand rapidly)

    But the tape is performing the job of air tightness thats its job.


  • Registered Users Posts: 31,008 ✭✭✭✭Lumen


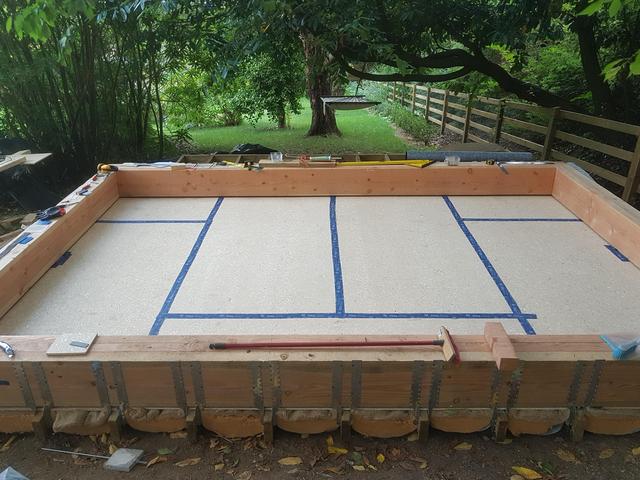
    I discovered some unevenness whilst attempting to lay the second layer of OSB. I'm not sure whether the joists were crowned or I'd caught some insulation between the joists and the OSB, but since I'd stupidly glued the bloody tape on there was no way I was going to pull the floor up to diagnose it. (Aside: the only way I could find to to remove glued Tescon tape is using the edge of an random orbital sander, moving it along the seam at a speed of about 1mm a second. I did a short section, cursed a lot and then re-taped it).

    So I laid some 4mm woodfibre panels on top of the first layer, left out a row over the raised joist, and put the second layer of OSB down over the top. Couple of hundred more decking screws and now it's done!

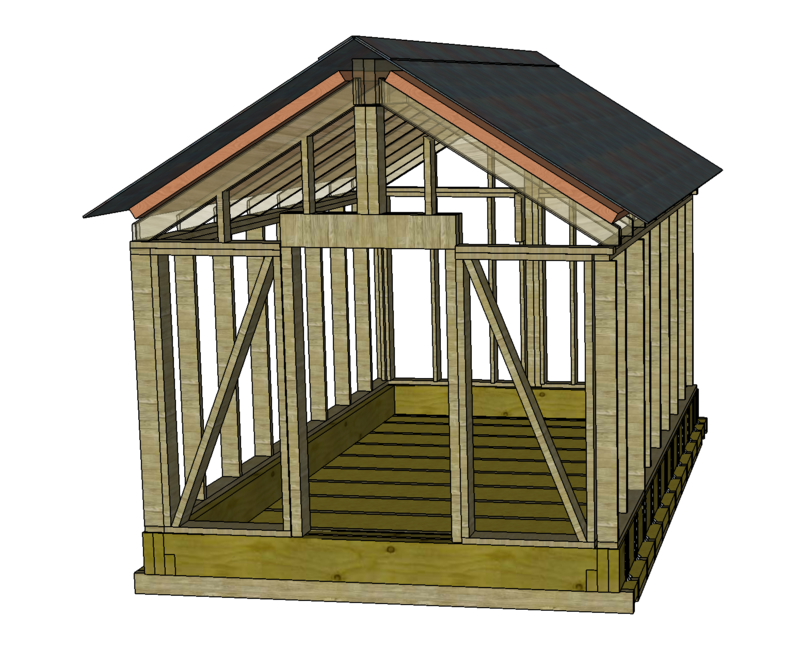
    The door position has been bothering me. It seems so arbitrary. At the side of the gable end, off the raised platform? Something is wrong here.

    So I'm going to switch the front gable from a single king post design to a pair of queen posts, and put the door underneath. This also enables me to raise the door height to a comfortable 2m, and put some diagonal bracing in the stud wall.

    And it looks better.

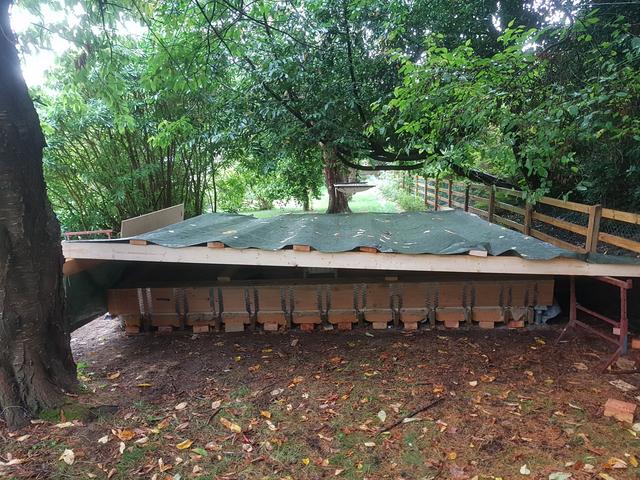
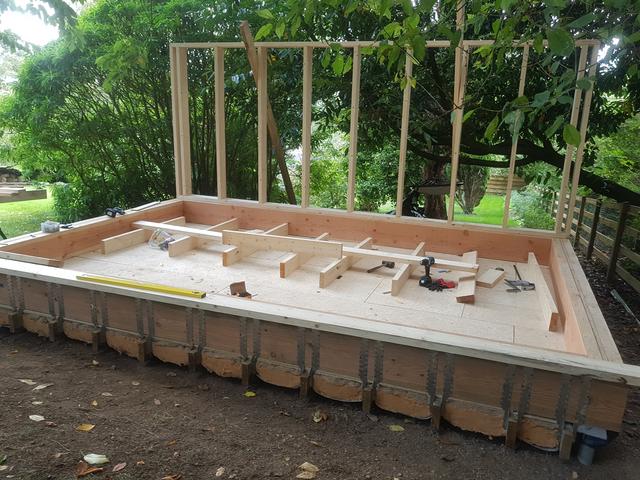
    Anyway, I effectively now have an empty wooden paddling pool. It's raining and I'm trying not to think what happens to all that OSB and woodfibre if my tarp fails, so I'd better get on with it. :D

    Screen_Shot_2018-09-06_at_10.28.36.png

    20180906_113133.jpg


  • Registered Users Posts: 31,008 ✭✭✭✭Lumen


    Oh, I was a bit worried about load bearing on the king/queen posts until I watched this.

    Wood is strong.

    https://www.youtube.com/watch?v=cEUgNjT1nGU&t=1490


  • Registered Users Posts: 33,616 ✭✭✭✭listermint


    Lumen wrote: »
    Oh, I was a bit worried about load bearing on the king/queen posts until I watched this.

    Wood is strong.

    https://www.youtube.com/watch?v=cEUgNjT1nGU&t=1490

    Newgrange and the Pyramids strong :)


  • Closed Accounts Posts: 565 ✭✭✭Trasna1


    I can see why you went for a king/queen post construction for the roof, but it will be quite unstable when it's being erected. That king post frame, unless it has engineered joints will not offer much lateral stability. The design shown won't actually be stable until it's fully sheeted out, so that is something to be mindful of.

    An alternative way of doing the roof would be to have your structural members at the top of the wall panels and have the roof propped off that, somewhat like a ring beam. Granted these beams would be big as they'd have to control the thrust of the roof too - but a couple of ties would bring it back to a manageable size (if it were an option available - work them into the mezzanine design?).

    I'd put braced bays in the long wall panels too, instead of just depending on the diaphragm action of the ply sheeting.


  • Registered Users Posts: 7,826 ✭✭✭Rows Grower


    Lumen wrote: »
    Not sure yet. Maybe just really big screws.


    Nope, I'll probably just run it along the boundary hedge. Have a load of 6" perforated pipe left over from fixing drainage elsewhere.


    But, but.....................................

    "Very soon we are going to Mars. You wouldn't have been going to Mars if my opponent won, that I can tell you. You wouldn't even be thinking about it."

    Donald Trump, March 13th 2018.


  • Registered Users Posts: 31,008 ✭✭✭✭Lumen


    Trasna1 wrote: »
    I can see why you went for a king/queen post construction for the roof, but it will be quite unstable when it's being erected. That king post frame, unless it has engineered joints will not offer much lateral stability. The design shown won't actually be stable until it's fully sheeted out, so that is something to be mindful of.

    Indeed. The way I've seen it done on Youtube is to nail sway braces between the frame and deck (or in my case ring beam) until they're fully braced and sheeted.

    I haven't quite worked out the order of construction yet. In order to prevent the OSB getting rained on I need to get the rafters in place so I can at least drape a tarp over the top.

    So I guess I'll frame the long through walls on the flat, raise and brace them, then frame the gables between them, raise those with posts in place, fix the overlapping top plates, pop the ridge beam on, then rafters, then OSB over the rafters, then insulation over OSB, detailing in the membrane over the edge of the first row of roof insulation.

    At that point I'll have a rainproof roof (the roof insulation will do three months of exposure) and curtains of membrane down the sides, prob polythene stapled to the gables, so it'll be mostly weatherproof. I can then sheet, insulate and batten the the outside of the frame at my leisure.
    Trasna1 wrote: »
    I'd put braced bays in the long wall panels too, instead of just depending on the diaphragm action of the ply sheeting.

    I think I can do that in the corner studs where I'm not going to want windows or recessed shelving. I'll probably turn them 90 degrees and cross them in an "X".
    Trasna1 wrote: »
    An alternative way of doing the roof would be to have your structural members at the top of the wall panels and have the roof propped off that, somewhat like a ring beam. Granted these beams would be big as they'd have to control the thrust of the roof too - but a couple of ties would bring it back to a manageable size (if it were an option available - work them into the mezzanine design?).

    There won't be any outward roof thrust, all the static load is down. That's what the ridge beam is for.

    As I understand it, in a conventional ridge board design the ridge is held up by the rafters, and the collar ties prevent the walls from spreading.

    In a ridge beam design, the top of the rafters are held up by the end posts (via the ridge beam), so there is no outward force on the walls.

    A ridge board design is stronger and more efficient, and works on large spans. The ridge beam design requires very deep timber (or a steel beam) and won't work on large spans. Fortunately I have only 4.7m longitudinal span, and by my calculations I should only get something like 7mm ridge beam deflection at the middle of the 300mm (D) x 150mm (H) beam (the L/360 standard would allow 13mm of deflection).


  • Registered Users Posts: 31,008 ✭✭✭✭Lumen


    But, but.....................................

    What? :D


  • Advertisement
  • Registered Users Posts: 7,826 ✭✭✭Rows Grower


    Lumen wrote: »
    What? :D

    Leftover materials lying around to be used?

    This reminds me of my shed building tactics.

    Get back on track here now, dam the expense and throw money around like it's burning a hole in your pocket.

    "Very soon we are going to Mars. You wouldn't have been going to Mars if my opponent won, that I can tell you. You wouldn't even be thinking about it."

    Donald Trump, March 13th 2018.


  • Closed Accounts Posts: 565 ✭✭✭Trasna1


    If
    Lumen wrote: »
    Indeed. The way I've seen it done on Youtube is to nail sway braces between the frame and deck (or in my case ring beam) until they're fully braced and sheeted.

    I haven't quite worked out the order of construction yet. In order to prevent the OSB getting rained on I need to get the rafters in place so I can at least drape a tarp over the top.

    So I guess I'll frame the long through walls on the flat, raise and brace them, then frame the gables between them, raise those with posts in place, fix the overlapping top plates, pop the ridge beam on, then rafters, then OSB over the rafters, then insulation over OSB, detailing in the membrane over the edge of the first row of roof insulation.

    At that point I'll have a rainproof roof (the roof insulation will do three months of exposure) and curtains of membrane down the sides, prob polythene stapled to the gables, so it'll be mostly weatherproof. I can then sheet, insulate and batten the the outside of the frame at my leisure.


    I think I can do that in the corner studs where I'm not going to want windows or recessed shelving. I'll probably turn them 90 degrees and cross them in an "X".


    There won't be any outward roof thrust, all the static load is down. That's what the ridge beam is for.

    As I understand it, in a conventional ridge board design the ridge is held up by the rafters, and the collar ties prevent the walls from spreading.

    In a ridge beam design, the top of the rafters are held up by the end posts (via the ridge beam), so there is no outward force on the walls.

    A ridge board design is stronger and more efficient, and works on large spans. The ridge beam design requires very deep timber (or a steel beam) and won't work on large spans. Fortunately I have only 4.7m longitudinal span, and by my calculations I should only get something like 7mm ridge beam deflection at the middle of the 300mm (D) x 150mm (H) beam (the L/360 standard would allow 13mm of deflection).
    I think you might have misunderstood what I was getting at. I can see why you went for the design you did in that there is indeed no outward thrust from your design of the roof. The alternative I suggested does have an outward thrust and is somewhat more structurally complex but that can be overcome with a sufficiently strong beam at the top of the longitudinal walls (or by using ties). My suggestion is more structurally inefficient (unless you use ties) but the advantage is that you and do most of the structural work on the ground and avoid having to lift a 4.75 * 0.3 * 0.15 C24 timber beam over your head (which will be not far off 100kg) onto the tops of the posts. You might need to think of lifting the two halves of the double 300x75 separately and bolting together in place and/or having help with the lift. It's the trickiest bit you have left to do (along with how you'll connect it to the posts), and is well worth having a good idea in your head how you are going to go about it.

    I'm not being critical here btw, it's clear your put tons of thought into your design and just as there are many ways to skin a cat, there are as many ways to erect a shed.

    Keep us updated, I love a good shed!


  • Registered Users Posts: 31,008 ✭✭✭✭Lumen


    Trasna1 wrote: »
    My suggestion is more structurally inefficient (unless you use ties) but the advantage is that you and do most of the structural work on the ground and avoid having to lift a 4.75 * 0.3 * 0.15 C24 timber beam over your head (which will be not far off 100kg) onto the tops of the posts. You might need to think of lifting the two halves of the double 300x75 separately and bolting together in place and/or having help with the lift. It's the trickiest bit you have left to do (along with how you'll connect it to the posts), and is well worth having a good idea in your head how you are going to go about it.
    Aha! OK.

    I thought that would hard too, until I discovered the idea of ladder jacks.


  • Registered Users Posts: 31,008 ✭✭✭✭Lumen


    Bit more progress today.

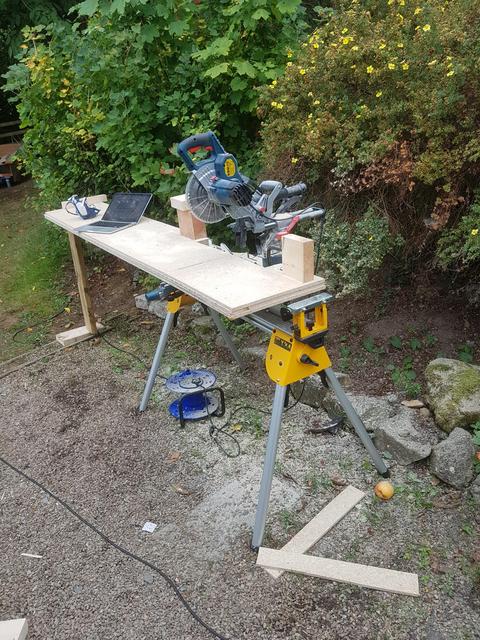
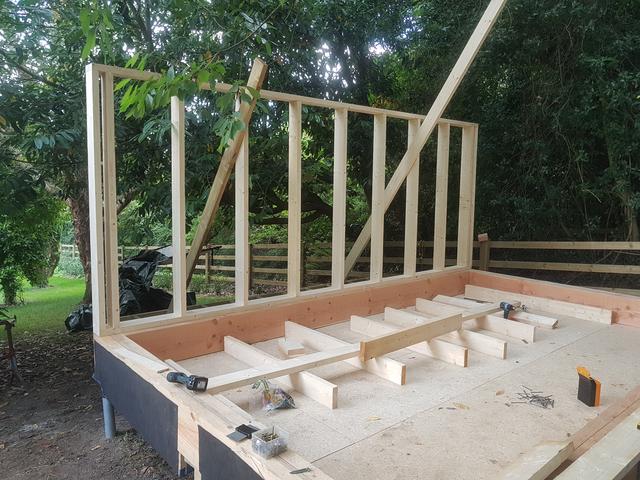
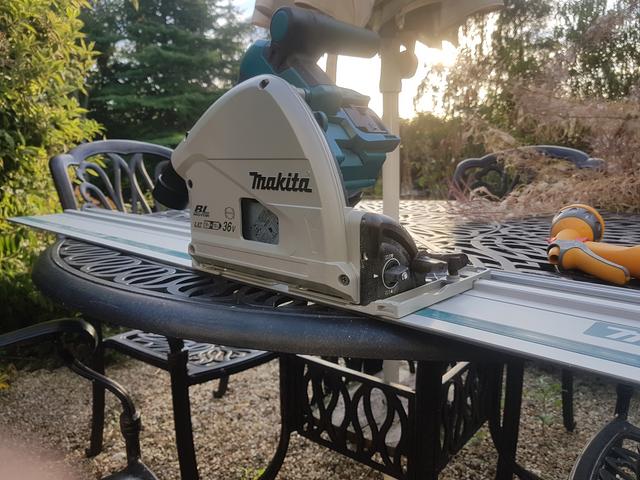
    Built/assembled a mitre station. Played with my new track saw. Dithered over wall height. Cut some studs and plates. Banged in some nails. Raised the first wall.

    Started on the second wall but due to it being after 5pm it was a bit rushed and crap so I'll have to sort that out in the morning.

    https://imgur.com/a/6xYzFtp

    j_NFo_Y2_M.jpg

    Sj_ND4hm.jpg

    ulkt2a2.jpg


  • Registered Users Posts: 33,616 ✭✭✭✭listermint


    There's no pictures of the track saw. :P


  • Registered Users Posts: 31,008 ✭✭✭✭Lumen


    listermint wrote: »
    There's no pictures of the track saw. :P

    Not sure if serious. :D

    The track saw is like a portable table saw, without the serious injury risk. Mark a couple of points, plonk the track over them lining up to the rubber edge, drop the saw on and buzz it.

    I might actually do the rest of the studs with it.

    g_Nqx09_A.jpg


  • Registered Users Posts: 33,616 ✭✭✭✭listermint


    Lumen wrote: »
    Not sure if serious. :D

    The track saw is like a portable table saw, without the serious injury risk. Mark a couple of points, plonk the track over them lining up to the rubber edge, drop the saw on and buzz it.

    I might actually do the rest of the studs with it.

    g_Nqx09_A.jpg

    Oh i know what a track saw is, just wanted to see which one you had.

    was close to pulling trigger on a festool last year. Still might :)


  • Registered Users Posts: 31,008 ✭✭✭✭Lumen


    listermint wrote: »
    Oh i know what a track saw is
    Sorry, am trying to write these posts for people as ignorant as I am. :D


  • Registered Users Posts: 31,008 ✭✭✭✭Lumen


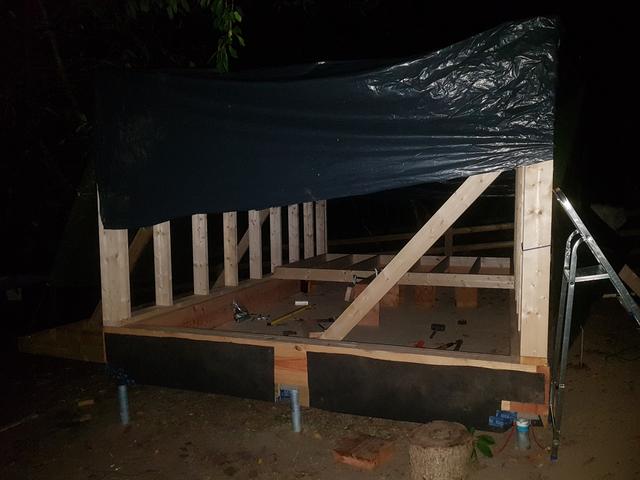
    Fixed and raised the second side wall. Glue-laminated a king post. Framed the back wall. Collected the chunky door header. Made some rafter templates.

    Goodnight Elizabeth.
    Goodnight John Boy.
    Goodnight Shed.
    GOODNIGHT SHED.
    <barely audible rustling of polythene sheeting>

    Fci_HLs6.jpg


  • Advertisement
  • Moderators, Category Moderators, Entertainment Moderators, Sports Moderators Posts: 22,584 CMod ✭✭✭✭Steve


    I feel your pain with trying to keep the rain out.

    3 years ago I started my shed this time of year and no sooner was the timber delivered, it pi$$ed rain every day for 3 months.

    Try keep it dry, it will swell more than you think and when it dries again and settles to a 'normal' state then cracks can appear.


Advertisement