Advertisement
If you have a new account but are having problems posting or verifying your account, please email us on hello@boards.ie for help. Thanks :)
Hello all! Please ensure that you are posting a new thread or question in the appropriate forum. The Feedback forum is overwhelmed with questions that are having to be moved elsewhere. If you need help to verify your account contact hello@boards.ie
Hi all! We have been experiencing an issue on site where threads have been missing the latest postings. The platform host Vanilla are working on this issue. A workaround that has been used by some is to navigate back from 1 to 10+ pages to re-sync the thread and this will then show the latest posts. Thanks, Mike.
Hi there,
There is an issue with role permissions that is being worked on at the moment.
If you are having trouble with access or permissions on regional forums please post here to get access: https://www.boards.ie/discussion/2058365403/you-do-not-have-permission-for-that#latest

What are you working on currently?

1568101123

Comments

  • Registered Users, Registered Users 2 Posts: 3,801 ✭✭✭iamtony


    stuchyg wrote: »
    V well made. What veg will you grow in it?

    Thanks, a bit of a mix. It's for the missus really she suffers with her back. Theres a few sad looking herbs and one cabbage in it at the moment. Is say she will plant carrots, lettuce, spinach, scallions and potatoes for Xmas dinner in it this season, it's a bit late for a lot of stuff really.
    We have the greenhouse behind it but it's been sadly neglected this year but that's usually full of peppers and tomatoes.


  • Registered Users Posts: 95 ✭✭pnecilcaser


    iamtony wrote: »
    Seen this in woodies. It's called a vegtrug. Basically a raised planter. Took a few pictures and gave it a bash.
    I'm proud of it anyway.
    Just needs a bit of sand and stain of something.
    https://photos.app.goo.gl/LGXZE9Qfr4XgmosF8

    this look really professional, well done. i'm hoping to try making some planters out of pallet wood soon for the office. Wont be as complicated as this look though!


  • Registered Users, Registered Users 2 Posts: 3,801 ✭✭✭iamtony


    this look really professional, well done. i'm hoping to try making some planters out of pallet wood soon for the office. Wont be as complicated as this look though!

    Thank you, it wasn't actually that hard, most of the work was done on the chop saw. My biggest problem when making it was the bends in the wood. I was using leftovers from a shed build and some of them were really bad.


  • Registered Users, Registered Users 2 Posts: 1,491 ✭✭✭stuchyg


    iamtony wrote: »
    Thank you, it wasn't actually that hard, most of the work was done on the chop saw. My biggest problem when making it was the bends in the wood. I was using leftovers from a shed build and some of them were really bad.

    Is that a picade in the background?


  • Registered Users, Registered Users 2 Posts: 3,801 ✭✭✭iamtony


    stuchyg wrote: »
    Is that a picade in the background?

    Arcade 1up it's not doing it any favour being in the shed it's getting destroyed with sawdust. It was in the sitting room time the women got sick of looking at it:pac:


  • Registered Users, Registered Users 2 Posts: 549 ✭✭✭chillyspoon


    iamtony wrote: »
    Arcade 1up it's not doing it any favour being in the shed it's getting destroyed with sawdust. It was in the sitting room time the women got sick of looking at it:pac:

    LOL - very cool. I've been thinking of building a cabinet for a RetroPie based rig but it keeps getting pushed down the priority list by practical things! :(


  • Registered Users, Registered Users 2 Posts: 549 ✭✭✭chillyspoon


    Speaking of practical things; I just finished writing up my build of this lathe stand I made for a friend of ours:

    https://www.chillyspoon.com/blog/2019/5/23/making-a-lathe-stand-for-a-record-power-cl3-professional

    483912.jpg


  • Registered Users, Registered Users 2 Posts: 3,801 ✭✭✭iamtony


    Speaking of practical things; I just finished writing up my build of this lathe stand I made for a friend of ours:

    https://www.chillyspoon.com/blog/2019/5/23/making-a-lathe-stand-for-a-record-power-cl3-professional

    483912.jpg
    looks great! I was browsing your website aswell that's a great read!
    Personally I'd be going mad about your friend using that crappy wood to level it after all the attention to detail with everything else


  • Registered Users, Registered Users 2 Posts: 3,801 ✭✭✭iamtony


    https://photos.app.goo.gl/4YM3CZJT2zSUXxqH7

    So this is my little woodworking journey so far. The shed was build for me by my father in-law and there was a lot of used timber at the end of the project so I started messing around with it. Id also ripped up some flooring and I was wondering could it be used.
    The arch was the first project. I wanted everything in the garden the same colour so I bought some cedar wood stain. Sick of it now though.
    The flat part of the wishing well I added to my pond is wood flooring. It's starting to warp a little so I might add a piece of wood underneath the roof to flatten it.
    The miter station/workbench started off life when the father in-law gave me the saw when he seen me cutting miters with a hand miter saw and had spare one lying around so he gave it to me and I just screwed it to the piece of flooring I had. Then I decided to make it into a mobile miter saw station. The only think I can't figure out is how to fill the gap on the edge between the 2*4 and the wood floor. I've tried glue with sawdust and hot glue bit neither worked well. The castors cost peanuts on Amazon.
    The bench in front of the pond was just a few scraps of sleepers and were in a bad way. This was my first venture into proper staining and lacquering. It's a bit sticky though anyone know why?
    Oh, forgot to add the timber rack was made from a pallet and a few off cuts of 2x4.


  • Advertisement
  • Registered Users Posts: 699 ✭✭✭bamayang


    Great website


  • Registered Users, Registered Users 2 Posts: 549 ✭✭✭chillyspoon


    iamtony wrote: »
    https://photos.app.goo.gl/4YM3CZJT2zSUXxqH7
    The bench in front of the pond was just a few scraps of sleepers and were in a bad way. This was my first venture into proper staining and lacquering. It's a bit sticky though anyone know why?

    Stickiness can be caused by not wiping off all of the excess and by not waiting long enough between coats. I've fallen into that trap too; the home stretch rush!

    It's a lovely little bench by the way - clean lines.


  • Registered Users, Registered Users 2 Posts: 3,801 ✭✭✭iamtony


    Stickiness can be caused by not wiping off all of the excess and by not waiting long enough between coats. I've fallen into that trap too; the home stretch rush!

    It's a lovely little bench by the way - clean lines.
    Grand thanks would a few more coats done properly solve it or should I sand it back?
    Thanks I think it's nice and simple and it was a nice feeling to turn a few bits of scrap lying around into something usable.


  • Registered Users, Registered Users 2 Posts: 549 ✭✭✭chillyspoon


    iamtony wrote: »
    Grand thanks would a few more coats done properly solve it or should I sand it back?

    Honestly hard to know without seeing it. A "squidgy" layer of finish will clog sandpaper pretty quick so sanding it back might be a painful task. Another option is to just sit it up somewhere dry, not in direct sunlight and not too humid for a couple of weeks to see if the finish will eventually harden.

    If it's still sticky at that point, then a card/cabinet scraper might be the best option to bring it back to bare timber and go through the finishing process from scratch.


  • Moderators, Category Moderators, Arts Moderators, Sports Moderators Posts: 50,175 CMod ✭✭✭✭magicbastarder


    what causes it to remain sticky? finish is too deep to cure correctly?


  • Registered Users, Registered Users 2 Posts: 549 ✭✭✭chillyspoon


    what causes it to remain sticky? finish is too deep to cure correctly?

    Can't speak for iamtony's situation but that's what caused it for me when it happened (also on a bench coincidentally) a couple of years back.

    I put on way too much oil on the first coat and didn't wipe it back enough before putting on the following coats and it didn't cure until I decided to just start over.


  • Advertisement
  • Registered Users Posts: 699 ✭✭✭bamayang


    3uolQ54

    83pjwua.jpg

    ja4iL94.jpg

    4D5OrMl.jpg

    uQhd23O.jpg

    kt3GAGo.jpg

    zwdFF5r.jpg


    Raised flower bed over last few weeks. Poor pic of finished product, but ya get the idea. Very enjoyable, took some amount of clay to fill. About 20-30 wheel barrows worth. Filled the bottom row with some old sticks to eat up some of the space.


  • Registered Users Posts: 95 ✭✭pnecilcaser


    Super SUPER basic but fun way to spend a few hours. Going to line it and fill it with some potting compost and plants. Hope to make a few more and try out different designs. Was thinking of window boxes but making the "feet" as angled wedges almost with the aim of getting the box bit to be sitting totally flat. Anyone ever done that? any advice?

    IMG_20190721_155736.jpg


  • Registered Users, Registered Users 2 Posts: 3,801 ✭✭✭iamtony


    Super SUPER basic but fun way to spend a few hours. Going to line it and fill it with some potting compost and plants. Hope to make a few more and try out different designs. Was thinking of window boxes but making the "feet" as angled wedges almost with the aim of getting the box bit to be sitting totally flat. Anyone ever done that? any advice?

    IMG_20190721_155736.jpg
    window boxes generally go under the window screwed to the wall. If you were thinking on just resting them on the ledge without sticking them down somehow it would only take a bit of wind to knock them over once you've something growing.

    Nicely made and I think people should post more simple stuff they are making here as it's easy to be intimidated looking at the pros with their fancy joints and everything:pac:

    I tried to make a chess board using my 2x4s and a band saw. It didn't go well:D tablesaw bought the other day so I'll give it another go. I live the idea of making a chess board I can pass on to my daughter who plays chess with me.


  • Registered Users, Registered Users 2 Posts: 3,801 ✭✭✭iamtony


    bamayang wrote: »
    3uolQ54

    83pjwua.jpg

    ja4iL94.jpg

    4D5OrMl.jpg

    uQhd23O.jpg

    kt3GAGo.jpg

    zwdFF5r.jpg


    Raised flower bed over last few weeks. Poor pic of finished product, but ya get the idea. Very enjoyable, took some amount of clay to fill. About 20-30 wheel barrows worth. Filled the bottom row with some old sticks to eat up some of the space.
    looks great, what did you use to cut the sleepers? I've yet to find a way to do it perfectly and I'm not skilled enough to flip it over and cut the other side without it looking terrible.


  • Registered Users Posts: 699 ✭✭✭bamayang


    Just used a skill saw and flipped it to get at it from each side. The key in my opinion is a good square and marking only from 3 sides when marking the cut lines around the edges. If you mark from only 3 corners you minmise the risk of going wrong. Then just take your time with the saw, possibly clamp on a square edge if needs be.
    A lot of work in setting up the area and getting the first few in straight and square, the rest flew then.


  • Advertisement
  • Registered Users Posts: 81 ✭✭brane.nikic87


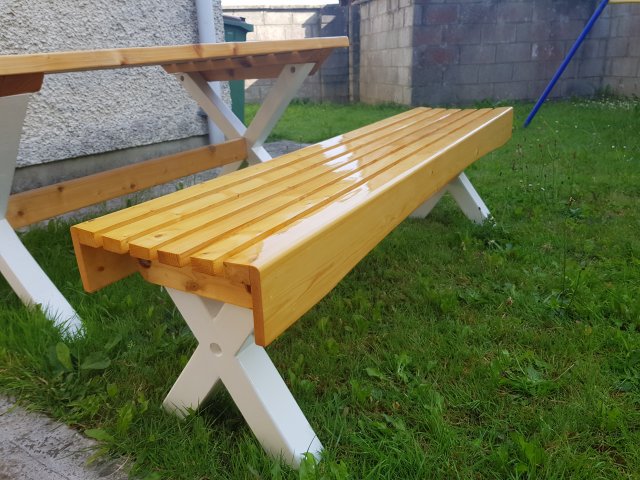
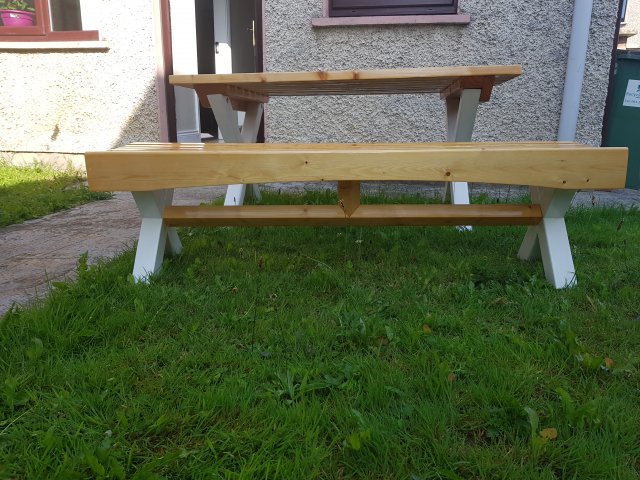
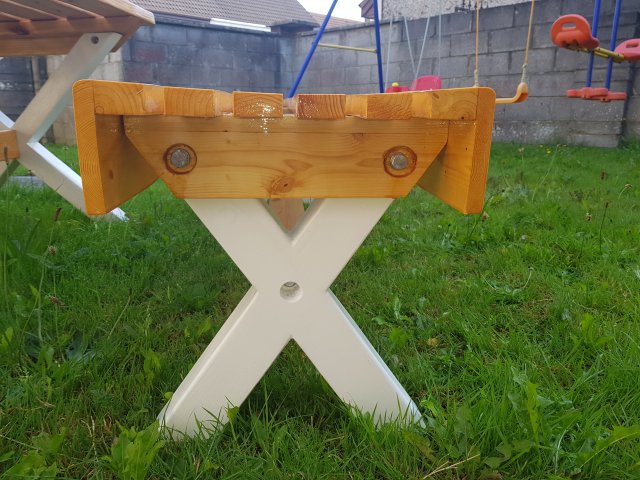
    Garden bench is finally done. I am very happy with the end results.

    10093_20190727_093059.jpg

    10093_20190727_093115.jpg

    10093_20190727_093126.jpg


  • Registered Users, Registered Users 2 Posts: 450 ✭✭Zebbedee


    @brane.nikic87
    Super job on the bench and table.
    How did you cut the curve on the bench?


  • Registered Users Posts: 699 ✭✭✭bamayang


    That’s great attention to detail, lovely job


  • Registered Users Posts: 81 ✭✭brane.nikic87


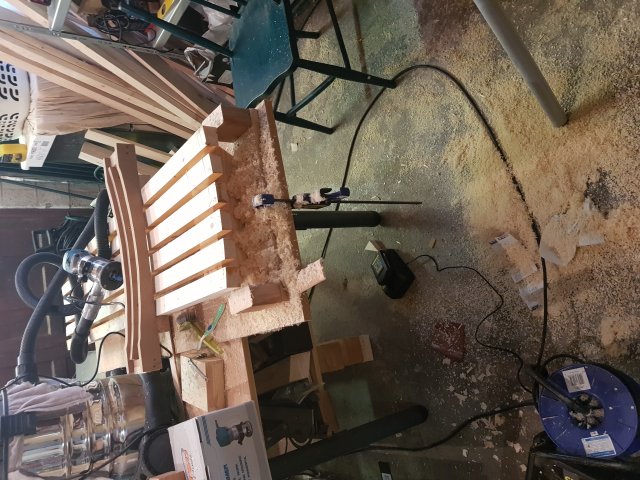
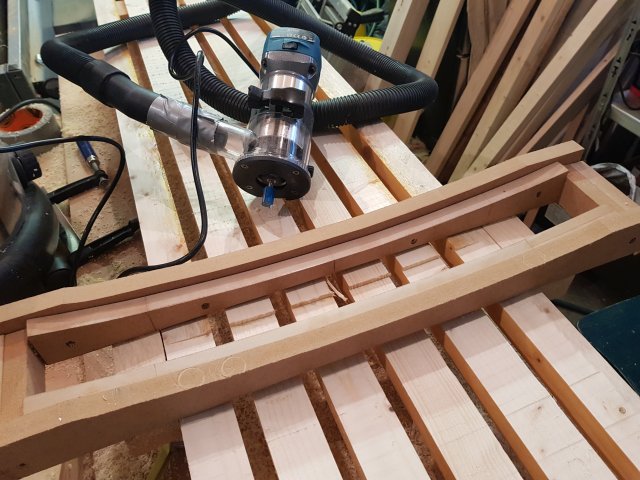
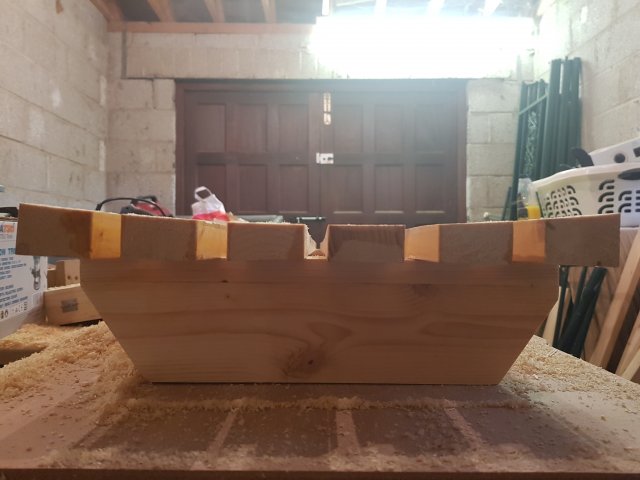
    Side curve is done by doing template on mdf then tracing it on a 1x4 planed timber, cutting it a bit bigger on bandsaw, and then aligning it with template again and tracing it with router to make it exactly the same on both sides.

    Top recessed part is done by building a sled from mdf and then moving it to side 5-6mm each pass. It took me around 800 passes as I was taking 2-3mm away in each pass. `

    10093_20190607_193517.jpg

    10093_20190607_193532.jpg

    10093_20190608_204015.jpg


  • Registered Users, Registered Users 2 Posts: 563 ✭✭✭timfromtang


    Hi All,
    The Brown sign fitted by the council for the cemetery on our farm has disappeared again. Since I had a nice bit of ash from surgery on a roadside tree I spent some time carving a new one. Fitted it yesterday.
    https://youtu.be/63k7dJUB3YE
    sideB.JPG

    sideA.jpg


    tim


  • Registered Users, Registered Users 2 Posts: 169 ✭✭The Duk


    The little ones room was in need of some storage, so I stuck up the following shelving and peg board. Still needs some sanding and varnish to finish it off.


  • Registered Users, Registered Users 2 Posts: 1,715 ✭✭✭Gryzor


    Been a while, side table made from oak. Pictures came out really dark for some reason..two more to go..

    487377.jpg

    487378.jpg


  • Posts: 3,637 ✭✭✭ [Deleted User]


    Lovely lines on that table! Great job.


  • Registered Users, Registered Users 2 Posts: 549 ✭✭✭chillyspoon


    This week I finished an odd little kitchen table, which came about through a combination of accident and necessity.

    The embarrassing part is that when I Instagram'd the photo a professional woodworker in the US complimented the wood grain and I don't think he realised that the central portion is just cheapo melamine kitchen counter top :o

    I'll be coming back to it later to make dedicated legs rather than the Lidl "Workmate" it's mounted on at the moment.

    https://www.chillyspoon.com/blog/2019/5/10/making-a-kitchen-table-from-a-workbench-and-an-off-cut-of-kitchen-counter-top

    487702.jpg


  • Registered Users, Registered Users 2 Posts: 1,265 ✭✭✭..Brian..


    Spent the last months worth of evenings and weekends making up some new beds for the kids. Biggest project to date, learned a lot, had fun! Defo will be doing something smaller next tho!

    IMG-20190826-133048.jpg

    IMG-20190826-133105.jpg

    IMG-20190826-133116.jpg

    IMG-20190826-133523.jpg


  • Advertisement
  • Registered Users, Registered Users 2 Posts: 4,290 ✭✭✭-=al=-


    Looks fantastic, the window is a really cool touch!


  • Moderators, Category Moderators, Arts Moderators, Sports Moderators Posts: 50,175 CMod ✭✭✭✭magicbastarder


    has it been settled yet about who gets which bed?


  • Moderators, Category Moderators, Arts Moderators, Sports Moderators Posts: 50,175 CMod ✭✭✭✭magicbastarder


    certainly not me, but there doesn't seem a general chat thread here.

    this is an utterly bananas guitar build:


    the whole build process is documented at standard speed too in a series of videos, lest you have several hours to watch - the above was the first half of the complete build, uploaded yesterday, i guess there might be a couple of days wait for part 2.


  • Registered Users, Registered Users 2 Posts: 1,286 ✭✭✭OAOB


    Finished this project months ago and have been meaning to put this up.

    Was watching youtube videos and was loving the look of the barn door cabinets so said I’d try my hand at it.

    uHovJXf.jpg

    cd7nzLe.jpg

    szHdU8r.jpg

    I built the cabinet out of 18mm plywood and had 4x1 planed pine as the front of it.

    The doors were made out of an old pallet with a scrap piece of 6mm ply for the centres.

    The middle shelves are an old stair thread but I had to glue an additional section on to make it deep enough. There are individual shelves in all compartments and the height can be adjusted

    I was looking to buy the barn door mechanism on line but it was really expensive so just bought the steel, wheels and bolts and put it together.

    The top was a lot of work, there’s lots of imperfections in it that I see but I’m actually delighted how well it turned out. I made it out of old teak doors that had been left in the shed by the previous owner of my house. I bought a second hand thicknesser for the job but the wood was so hard you could only take a fraction off at a time or it would jam. Once they were all at the same thickness I cut them to random lengths, laid them out in a pattern I thought looked nice and glued them up.

    I would have liked to paint the cabinet but my wife like the timber effect. I was hoping to hide a few mistakes under the paint :D


  • Registered Users, Registered Users 2 Posts: 1,286 ✭✭✭OAOB


    This shelf seemed like a simple project
    • cut door in half
    • screw door back together
    • insert shelves
    • paint

    Unfortunately i had only had a cheap laminate door to work with so when i cut it in half it lost all structural integrity. The shelves are what's primarily hold this together now but it works:)

    [IMG][/img]jGU5DIC.jpg


  • Registered Users, Registered Users 2 Posts: 460 ✭✭mcbert


    OAOB wrote: »
    This shelf seemed like a simple project
    • cut door in half
    • screw door back together
    • insert shelves
    • paint

    Unfortunately i had only had a cheap laminate door to work with so when i cut it in half it lost all structural integrity. The shelves are what's primarily hold this together now but it works:)

    [IMG][/img]jGU5DIC.jpg


    Thats great!


  • Registered Users, Registered Users 2 Posts: 40,038 ✭✭✭✭Sparks


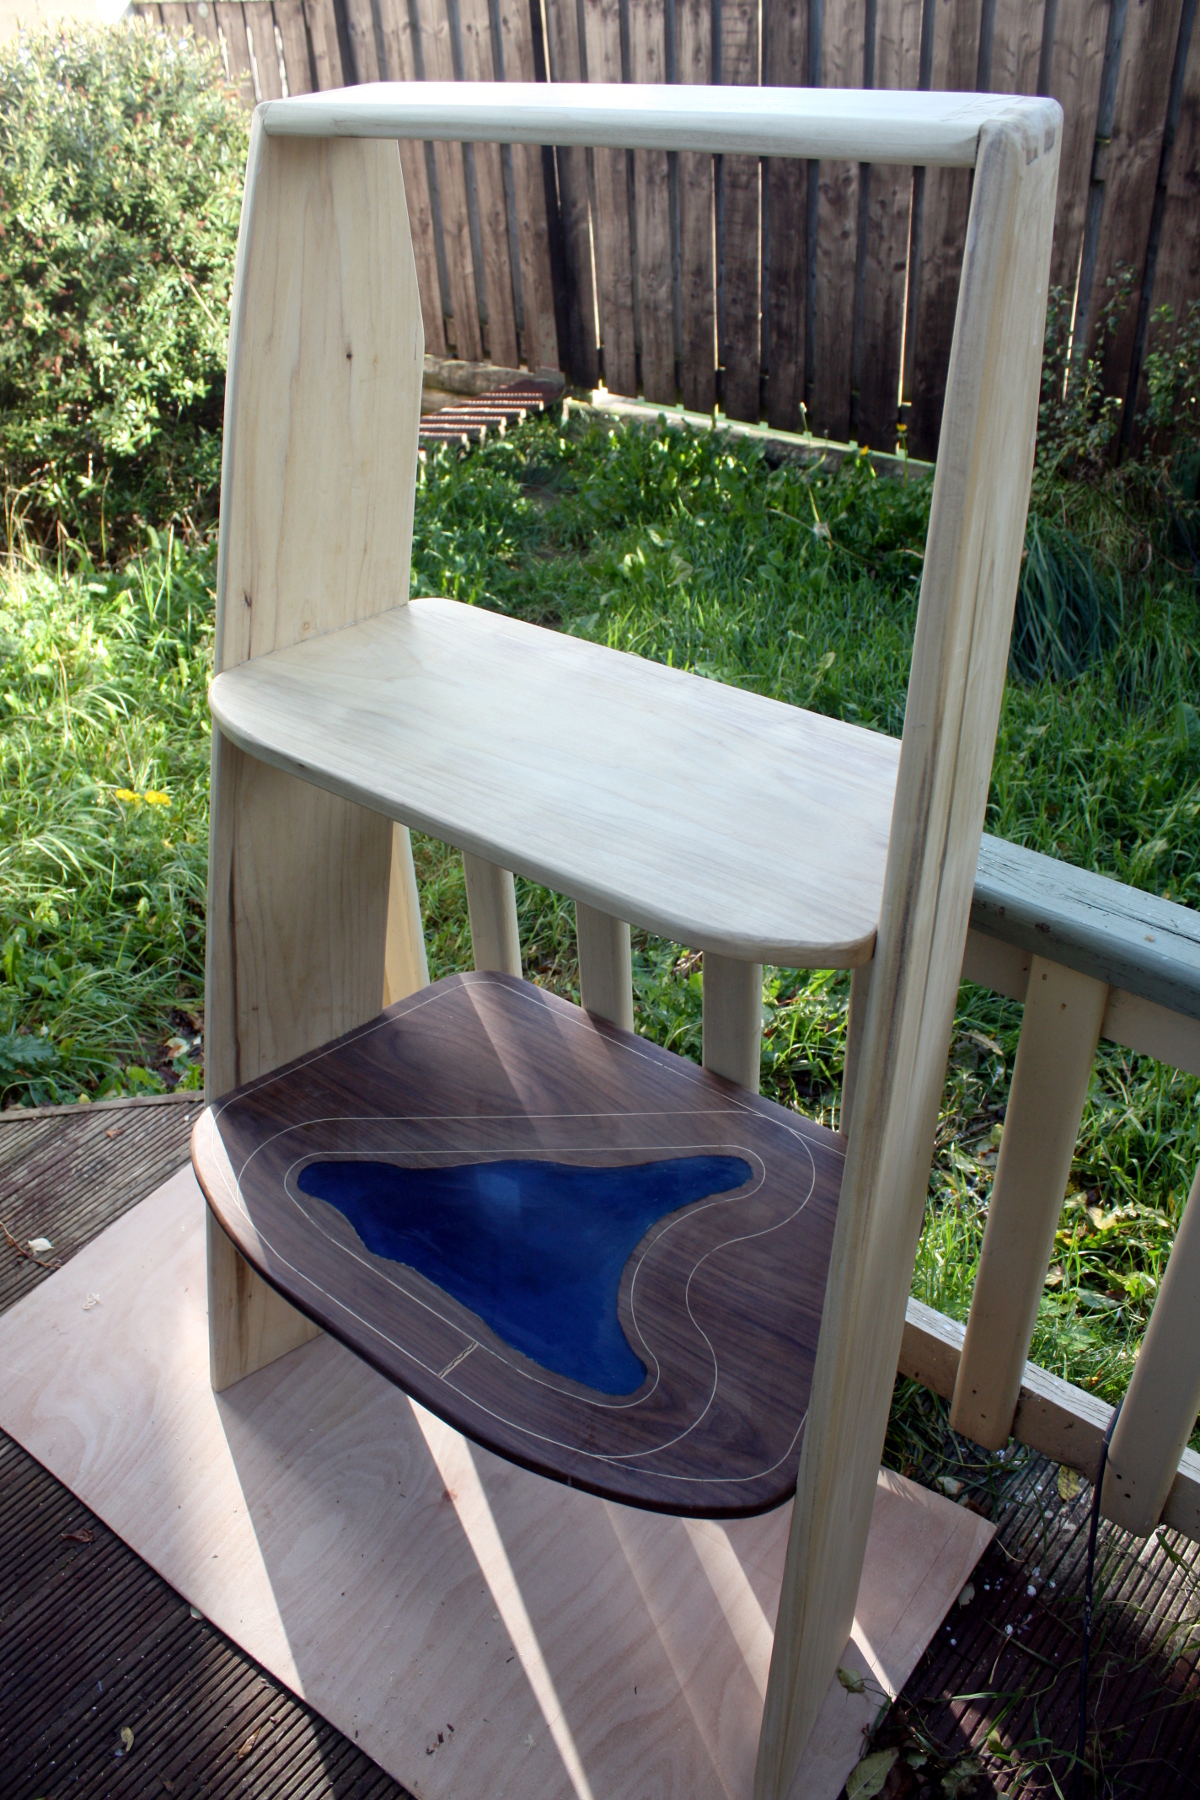
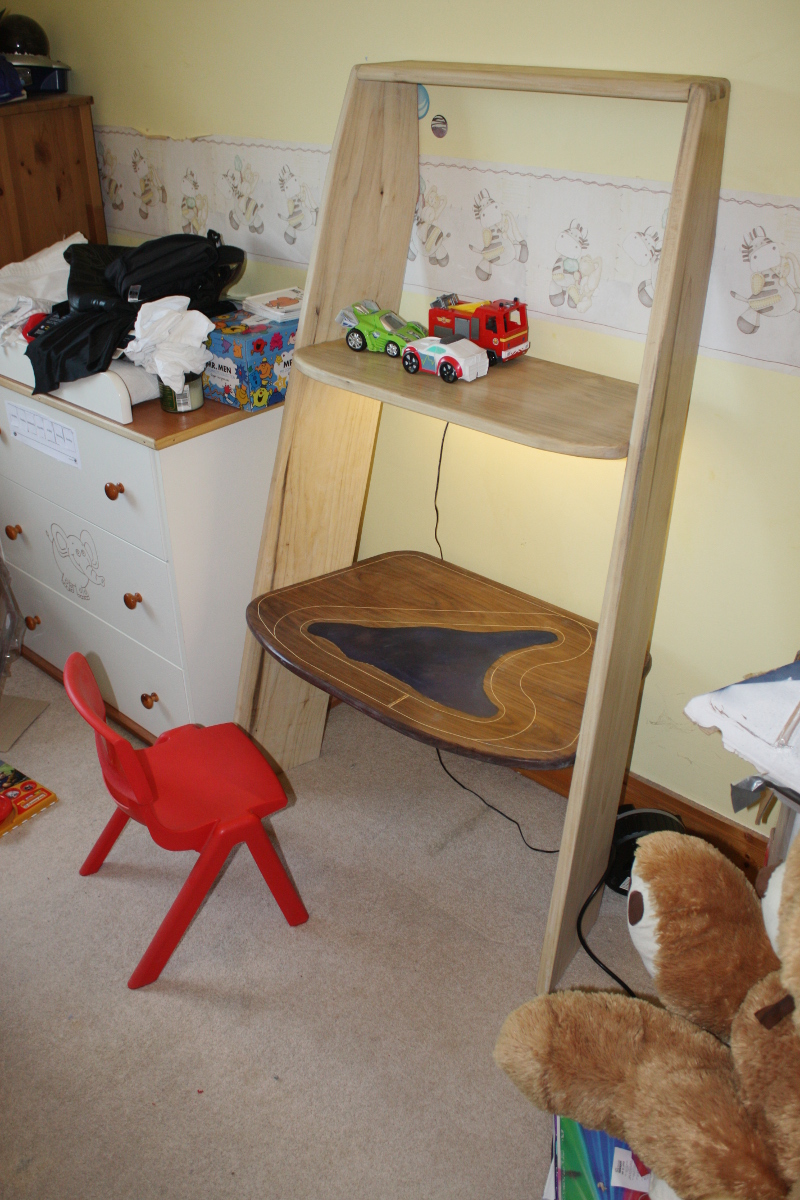
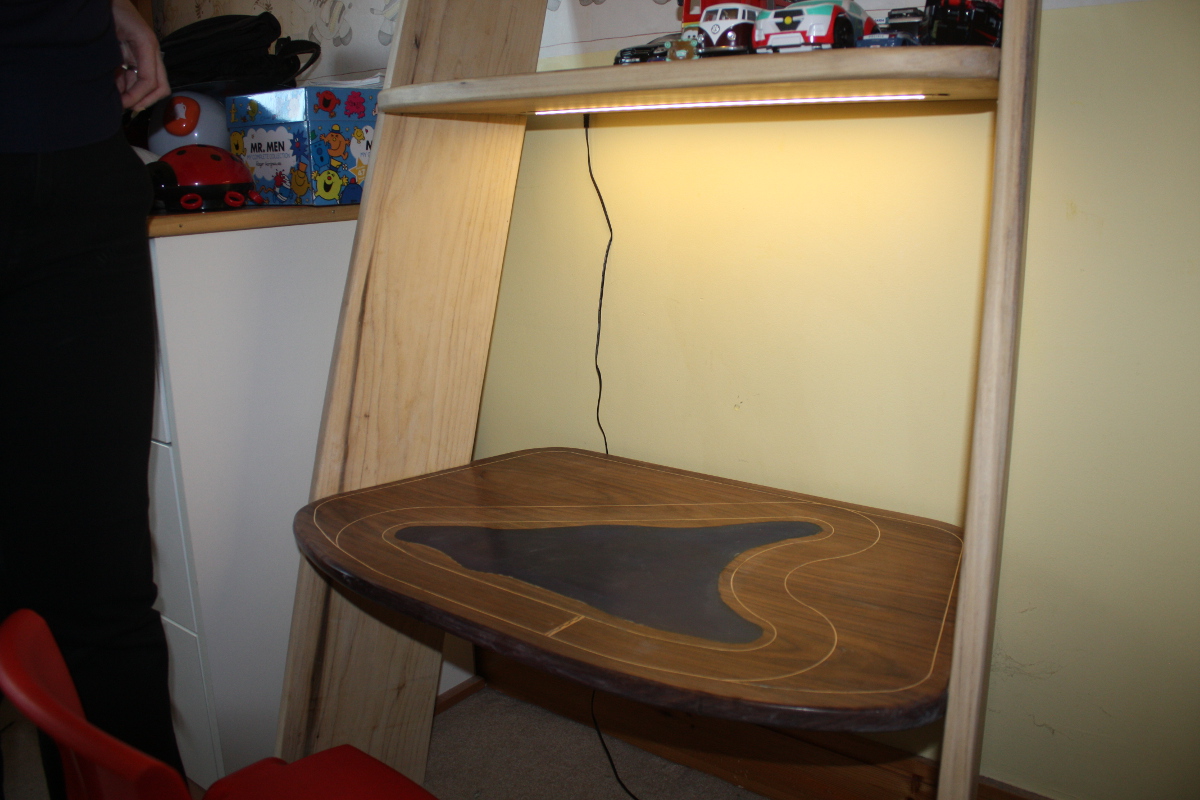
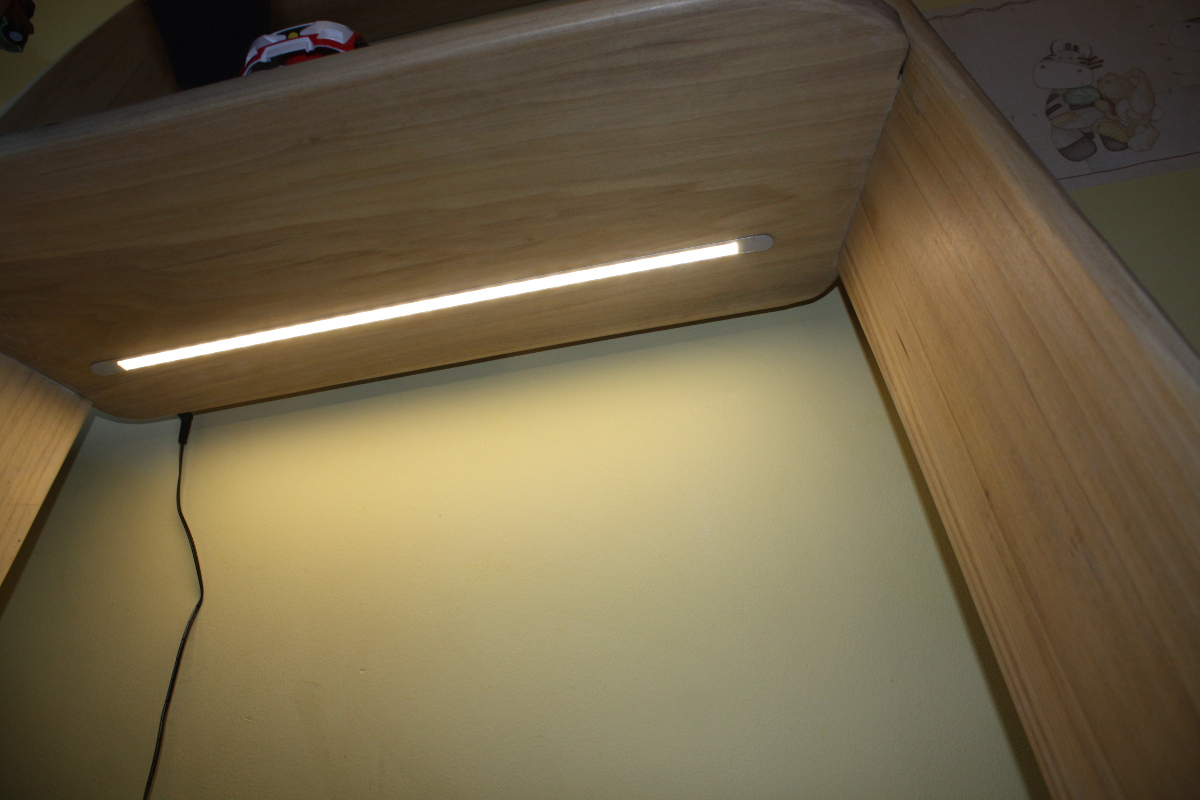
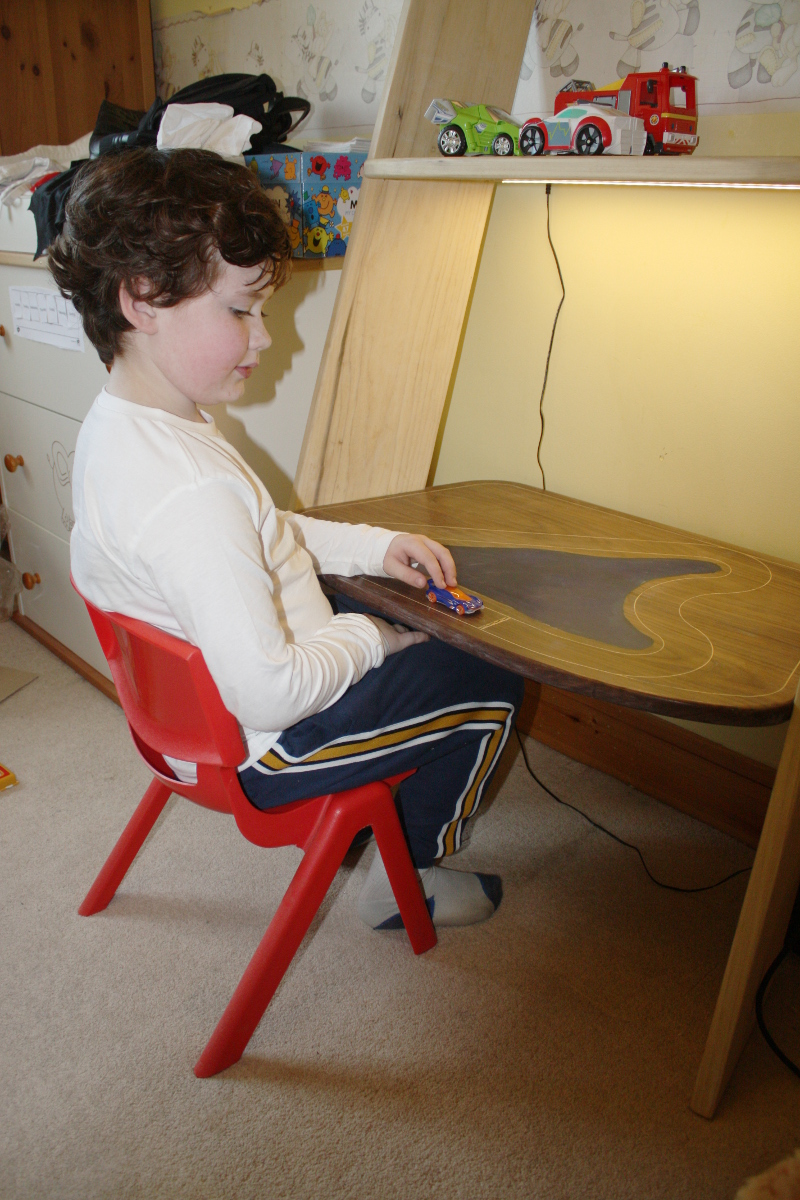
    Finished a nice simple kid's desk.

    http://www.stochasticgeometry.ie/2019/10/27/done-6/

    IMG_4043a.jpg

    IMG_4042a.jpg

    IMG_4057a.jpg

    IMG_4067a.jpg

    IMG_4064a.jpg

    IMG_4060a.jpg


    Only took a year and four months. Holy carp. I need a bigger shed...


  • Registered Users Posts: 699 ✭✭✭bamayang


    Trying to level a kitchen table slab. Lot of sawdust. Using a fairly simple routing jig. Got a 25mm flattening router bit, flies through it.


    Fair twist in it
    NX94rSq.jpg


    After first pass
    yPilhMi.jpg


    Little and often
    8cBLgek.jpg


    Nearly down to flat
    00aCTCs.jpg


  • Registered Users, Registered Users 2 Posts: 2,804 ✭✭✭recipio


    OAOB wrote: »
    This shelf seemed like a simple project
    • cut door in half
    • screw door back together
    • insert shelves
    • paint

    Unfortunately i had only had a cheap laminate door to work with so when i cut it in half it lost all structural integrity. The shelves are what's primarily hold this together now but it works:)

    [IMG][/img]jGU5DIC.jpg

    When you expose the 'eggbox' interior of a laminate door just glue in a batten between the two outer layers and the strength of the door will return . It does need a snug fit so a thicknesser machine is handy ! I use this technique for making thick shelving.


  • Advertisement
  • Registered Users, Registered Users 2 Posts: 1,371 ✭✭✭MickeyShtyles


    Wedding present for herself.
    First time I’ve used a scroll saw. :)


  • Moderators, Category Moderators, Arts Moderators, Sports Moderators Posts: 50,175 CMod ✭✭✭✭magicbastarder


    tonight was general tidying; long overdue, but the shed is in worse nick now that when i started. i have too small a shed and too many items that take up worktop space, but the main issue was that i lifted some of my planes down (not used in at least six weeks) off a shelf to find several of them with a decent amount of rust on the soles; the shelf they're sitting on is sodden. and i cannot find for the life of me where the water is coming from, there's no sign of it anywhere except in the (MDF) shelf itself.


  • Registered Users, Registered Users 2 Posts: 3,801 ✭✭✭iamtony


    tonight was general tidying; long overdue, but the shed is in worse nick now that when i started. i have too small a shed and too many items that take up worktop space, but the main issue was that i lifted some of my planes down (not used in at least six weeks) off a shelf to find several of them with a decent amount of rust on the soles; the shelf they're sitting on is sodden. and i cannot find for the life of me where the water is coming from, there's no sign of it anywhere except in the (MDF) shelf itself.
    funny enough I've had similar issues with my shed. Few spots were damp when I moved bits of wood and no ideas how.
    Gonna have to camp out next time it's lashing rain.


  • Registered Users, Registered Users 2 Posts: 1,410 ✭✭✭dathi


    tonight was general tidying; long overdue, but the shed is in worse nick now that when i started. i have too small a shed and too many items that take up worktop space, but the main issue was that i lifted some of my planes down (not used in at least six weeks) off a shelf to find several of them with a decent amount of rust on the soles; the shelf they're sitting on is sodden. and i cannot find for the life of me where the water is coming from, there's no sign of it anywhere except in the (MDF) shelf itself.

    condensation forming on the cold cast iron planes?


  • Moderators, Category Moderators, Arts Moderators, Sports Moderators Posts: 50,175 CMod ✭✭✭✭magicbastarder


    there's plenty of other metal out in the shed which would also be suffering the same way, if it was condensation.
    it must be all the rain we've been having - but as to how it's getting to that particular spot is baffling me.


  • Registered Users, Registered Users 2 Posts: 3,891 ✭✭✭Odelay


    there's plenty of other metal out in the shed which would also be suffering the same way, if it was condensation.
    it must be all the rain we've been having - but as to how it's getting to that particular spot is baffling me.

    Is the roof insulated?


  • Advertisement
  • Moderators, Category Moderators, Arts Moderators, Sports Moderators Posts: 50,175 CMod ✭✭✭✭magicbastarder


    no, but i generally don't have a problem with condensation in the shed, kinda surprisingly. it's WBP with felt on it.


  • Registered Users, Registered Users 2 Posts: 3,801 ✭✭✭iamtony


    Odelay wrote: »
    Is the roof insulated?
    I've a load of insulation board to use up but not enough to do whole shed would the roof be the best place to use it?


  • Registered Users, Registered Users 2 Posts: 169 ✭✭The Duk


    Currently working on a new desk, using 18mm birch ply. The top is 2 panels glued together. The bottom panel is inset by 10mm. Its my first project to really use my palm router for rounding corners and i even managed to round over the edges. I still gotta learn how to avoid burn marks, slow speed quick movement?

    Im thinking of using liberon medium oak wood dye (water based) to stain it so it fits the room. Any advice on a finishing coat that will stand up to wear?


  • Posts: 3,637 ✭✭✭ [Deleted User]


    The Duk wrote: »
    Currently working on a new desk, using 18mm birch ply. The top is 2 panels glued together. The bottom panel is inset by 10mm. Its my first project to really use my palm router for rounding corners and i even managed to round over the edges. I still gotta learn how to avoid burn marks, slow speed quick movement?

    Im thinking of using liberon medium oak wood dye (water based) to stain it so it fits the room. Any advice on a finishing coat that will stand up to wear?

    Nice job and design for the desk.

    I'm a big fan of the liberon range, but beware using it for staining birch ply. The ply itself is the problem in my own experience, as it really doesn't take stains particularly well. It can be great in 80-90% of the surface, then hideously blotchy looking in one part, ruining it overall to my own eyes. You can try a prestain conditioner, but even then, results are pretty unpredictable.

    I don't really know how best to proceed. My own thought is to find something other than a dark stain as a way forward. Or try something like a dyed shellac with clear poly topcoats. In any case, plenty of test pieces required and be disciplined in keeping a note of how/what/when so you can repeat the process on the desk when you settle on something you like.


  • Registered Users Posts: 699 ✭✭✭bamayang


    Slabs levelled and glued. Onto legs next


  • Advertisement
Advertisement