Advertisement
If you have a new account but are having problems posting or verifying your account, please email us on hello@boards.ie for help. Thanks :)
Hello all! Please ensure that you are posting a new thread or question in the appropriate forum. The Feedback forum is overwhelmed with questions that are having to be moved elsewhere. If you need help to verify your account contact hello@boards.ie
Please note that it is not permitted to have referral links posted in your signature. Keep these links contained in the appropriate forum. Thank you.

https://www.boards.ie/discussion/2055940817/signature-rules

Today I did something to my car (volume 2)

Options
1247248250252253327

Comments

  • Registered Users Posts: 4,141 ✭✭✭Stallingrad


    Good job though flush with the bumper, very OE looking.


  • Registered Users Posts: 9,238 ✭✭✭Ardennes1944


    Thanks, the left one will have to be redone, you can see its a little indented which is annoying me already, the curve in the bumper meant it didn't want to stay in position as good.

    Nightmare? Well in the Civic to get to the reverse wire you have to remove most of the boot lining, which is fine, but in all my other cars it has come off in sections or was somewhat flexible, but in the Civic it just comes off as one massive piece as far as the back door and its not flexible at all, top that off with a ****e wiring diagram from the manufacturer and the result is two hands that have little skin left on them :pac:


  • Registered Users Posts: 2,340 ✭✭✭Cmar-Ireland


    Replaced the windscreen washer pump on the Avensis at the weekend. Picked up this one from eBay.

    Easy enough job, remove driver side wheel, wheel arch liner and loosen some of the undertray for easier access.
    The pump pops out from the bottom of the washer tank and then twists out.

    Would have been well over €100 for Toyota to do it, verses €16 for the pump from eBay.

    Happy days!


  • Registered Users Posts: 1,597 ✭✭✭traco


    Not today but last night, rears done. Fronts today. All fluids, plugs and filters on Saturday along with new brake hoses and fluid. Also have the serpentine belt and a new air / oil separator. Doubt I will get the belt and separator done on Saturday so that might be another days work.

    6.5 hours, started around 4:30 and left around 11pm. Complete PITA, seized pins on the rear and as for the handbrake mechanism. Do not attempt without a spring puller unless you want to completely wreck your head.

    3D8B644C-F935-40D9-B797-2430224C0110_zpsrjzxsr2e.jpg


  • Registered Users Posts: 73,396 ✭✭✭✭colm_mcm


    Installed some parking sensors to the Civic so I don't reverse over anyone. Absolute nightmare of a job

    IMG_20170402_175350.jpg

    What sensors did you get? They look very factory.


  • Advertisement
  • Registered Users Posts: 73,396 ✭✭✭✭colm_mcm


    Did you just use touch up paint on the bumper where the holes are?


  • Registered Users Posts: 9,238 ✭✭✭Ardennes1944


    I prepped and sprayed them 2 days before fitting.


  • Registered Users Posts: 19,854 ✭✭✭✭MetzgerMeister


    Very good match/job done on them if that's the case Ardennes :)


  • Registered Users Posts: 73,396 ✭✭✭✭colm_mcm


    So, my bonnet (which got resprayed 5 years ago because of stone chips) was gone to Shiite lately. The paint was oxidised and covered in crazing and cracks. I had tried using the DA and all manner of cutting compounds but was getting nowhere. I also tried compounding it by hand, but it wasn't touching it.
    So today I grew some balls and wet sanded the whole thing.
    It actually turned out really well from what I can see. I used 3 grades of paper from 600 to 1200, then followed up with heavy duty compound, then T cut, then polish, then wax. Looks a million times better now, but it did take off too much paint in one spot on the crease. Reckon I must have taken paint off with the DA and there was feck all there before I sanded.
    I'll figure something out.

    No pics yet.


  • Advertisement
  • Registered Users Posts: 1,034 ✭✭✭duffman3833


    the gf scraped the side of her car of a gate and left small marks. A can of WD40 and tissue, spray and wipe and it was gone, what cant WD40 not do? :)


  • Registered Users Posts: 81,223 ✭✭✭✭biko


    Yeah WD40 will clean the scrape really good. Most of the mark is just debris from the gate.


  • Registered Users Posts: 13,539 ✭✭✭✭joujoujou
    Unregistered Users


    I have to admit I used it only once (and it was long, long time ago), but it's very good parking sensor, so won't rid of it. :D

    One day decided to replace plastic socket (missing cap) with metal one. Looked nice and shiny when I bought it.

    Wrong! It's made of a sort of aluminium alloy. And recently it didn't look nice nor shiny anymore. :mad:

    414086.jpg

    Broke apart during removal:

    414087.jpg

    414088.jpg

    New one. Forgot to peel the sticker off. :o

    414089.jpg


  • Registered Users Posts: 1,597 ✭✭✭traco


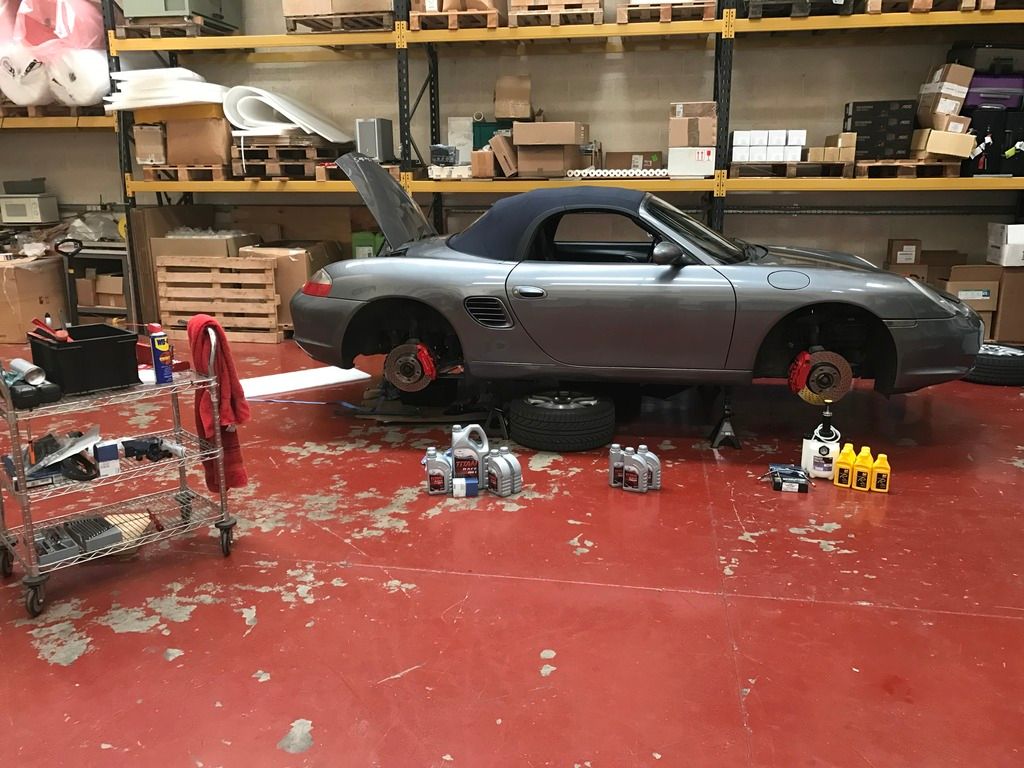
    For today's spanner spinning activities I will attempt the following.
    Oil and filter change.
    Gearbox oil change - bit of a mare as lots of members and pan needs to be removed.
    Finish the brake upgrade with braided hoses and new fluid.
    After that hopefully a top down spin on the sun if it's still out of course that assumes I don't mess something up.

    1C0692EC-CCF4-447A-A059-7CB53F39A829_zpsbzswjfbd.jpg


  • Registered Users Posts: 13,539 ✭✭✭✭joujoujou
    Unregistered Users


    LIGHTNING wrote: »
    [...]

    After:

    [...]

    Wow. Just wow.


  • Moderators, Science, Health & Environment Moderators, Society & Culture Moderators Posts: 60,101 Mod ✭✭✭✭Wibbs


    Oily gnashing of metal teeth parts needed oily stuff to ease the gnashing. And as a Fast and Furious treat to myself new Spoon Sport magnetic drain bolts as an add on.

    414148.jpg

    I have to say, having used it for a while now, I really rate this Millers oil. Not exactly cheap, but the engine feels "looser" with it and it stands up to both short trips to the shops and VTEC Yo!.

    Rejoice in the awareness of feeling stupid, for that’s how you end up learning new things. If you’re not aware you’re stupid, you probably are.


  • Registered Users Posts: 9,662 ✭✭✭Voodoomelon


    It must be oil change week. :)

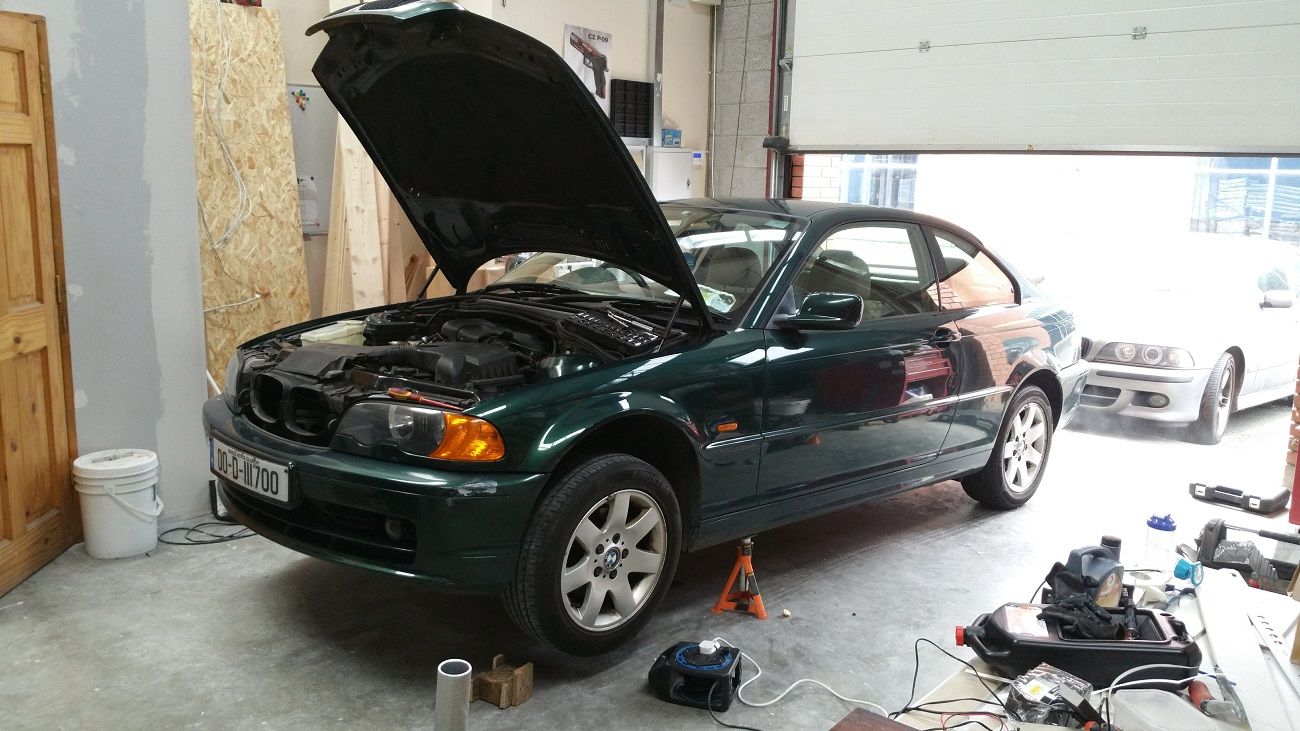
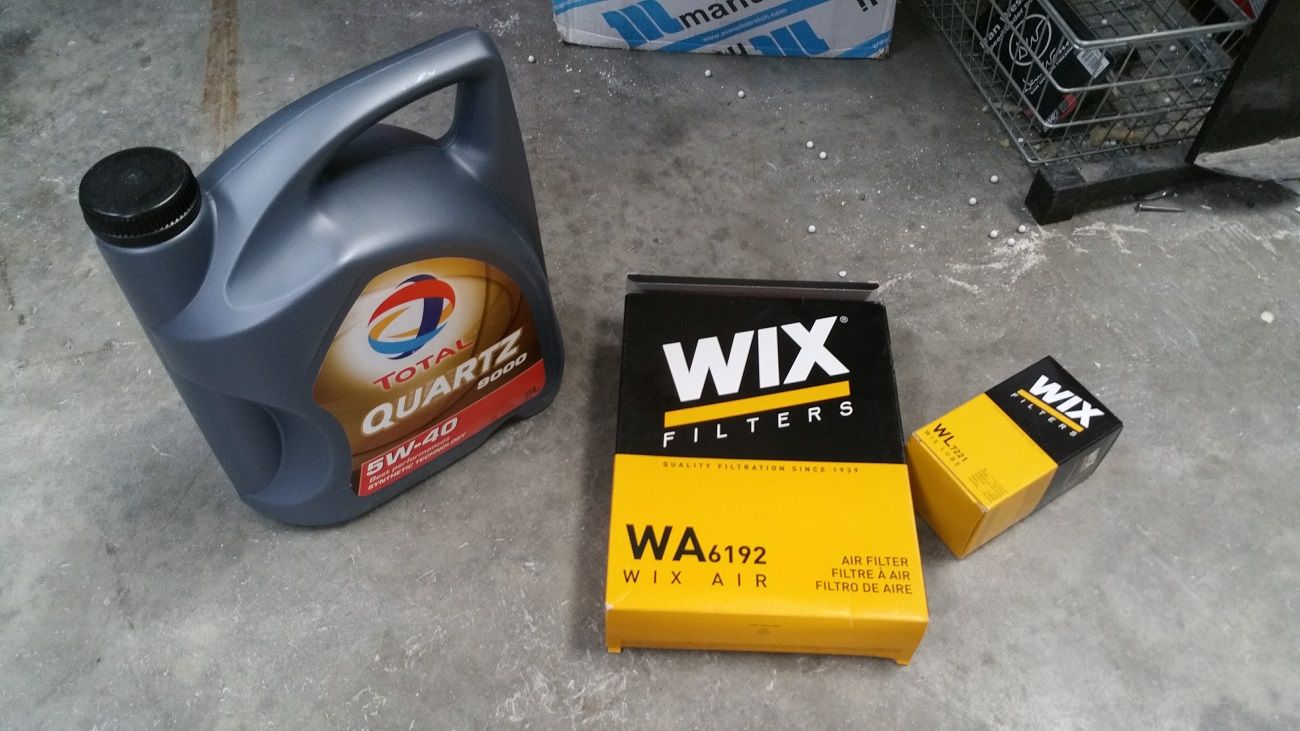
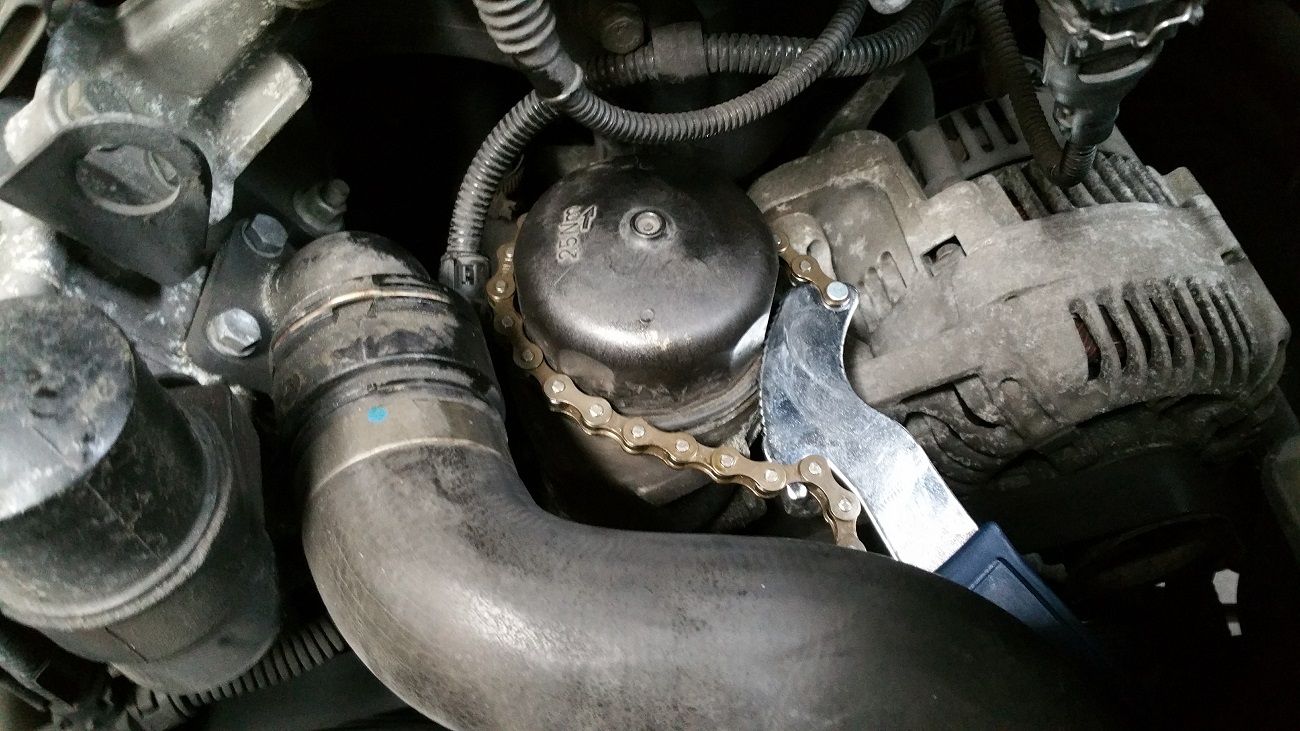
    Pulled the 318Ci in to do a quick oil service. The oil filter housing cap was a nightmare to get off, had to pick up one of those bike chain wrenches and stick the hollow jack bar over it to get enough leverage.

    BMW LL spec oil and tried Wix filters for the first time ever, seem like decent quality. Total cost, €35.

    1_zps7ht2ooeb.jpg~original

    3_zpslotcvpen.jpg~original

    2_zpsd9tatbzj.jpg~original

    4_zpsakrnwz0f.jpg~original


  • Closed Accounts Posts: 2,881 ✭✭✭shietpilot


    The ABS light started coming on in my E36 intermittently. After a spin through Sally Gap it stopped being intermittent and became permanently on :( I plugged in the diagnostics and a code for "ABS pump motor" came up.

    nJO9mdp.jpg?1

    Reading online I found a few posts saying a replacement ABS pump would need to be coded to work so I wasn't really interested in pursuing that route. On older model E36s the main cause for this issue is a bad ABS relay in the fuse box but on later E36s they integrated the relay into the ABS pump controller which sits bolted onto the ABS pump itself.

    I decided to try and take off the controller but the brake lines were in the way on the pump itself. Removing the brake lines wasn't an option because if I was unable to fix the controller or if the fault was with the ABS pump itself, I wouldn't be able to actuate all the valves on the ABS pump to bleed them as they wouldn't work with a bad controller.

    I ended up spending 2 hours bending the brake lines slightly around the ABS pump to try and slip the controller out. It was tricky but I managed to squeeze it out!

    Then it took me another half an hour to remove the cover on the controller which was glued on, in the factory.

    hDmlQSD.jpg?1

    Looking at the circuit board there were 2 solder joints which were cracked, probably from engine heat (Sally gap *wink* *wink*). They were connected to 2 pins sticking out of the controller which were feeding power to the ABS pump.

    A few minutes with the soldering iron and the joints were all good again :)

    3zM7UHZ.jpg?1

    Put it back together, started the car and a few minutes later the ABS light went off again :)

    s6fJgEO.jpg?1

    Absolutely free fix and I'm delighted I didn't attempt to send it off to a re-manufacturing company which would have done the same job :cool:


  • Registered Users Posts: 9,662 ✭✭✭Voodoomelon


    Fantastic job, a satisfying result. I had something happen years ago with the radio module in my E38, the radio would dip out and you'd have to get out of the car, open the boot, punch the boot liner which covered the module in order to get the sound to come back.

    Opened the module up one day, re-soldered about 50 joints and bingo, no more problems!


  • Closed Accounts Posts: 2,881 ✭✭✭shietpilot


    Fantastic job, a satisfying result. I had something happen years ago with the radio module in my E38, the radio would dip out and you'd have to get out of the car, open the boot, punch the boot liner which covered the module in order to get the sound to come back.

    Opened the module up one day, re-soldered about 50 joints and bingo, no more problems!

    Yeah dry solder joints are a common problem with car electrics especially around heat! My trip display on the instrument cluster doesn't display the last digit properly (as seen in above photos) but normally it starts to appear properly after the car warms up! Must take it out some day and sort it :)


  • Advertisement
  • Posts: 0 [Deleted User]


    shietpilot wrote: »
    The ABS light started coming on in my E36 intermittently.

    I love when you tackle your cars. You remind me of me when I was younger, except you actually manage to fix the problem parts you take apart instead of making the problem worse. Good going dude. Fair play!


  • Closed Accounts Posts: 2,881 ✭✭✭shietpilot


    I love when you tackle your cars. You remind me of me when I was younger, except you actually manage to fix the problem parts you take apart instead of making the problem worse. Good going dude. Fair play!

    Thanks! I'm on a student budget with 3 cars :D I try to fix more than replace :)


  • Closed Accounts Posts: 6,221 ✭✭✭pablo128


    shietpilot wrote: »
    Thanks! I'm on a student budget with 3 cars :D I try to fix more than replace :)

    I try to fix rather than replace too but purely because I'm a mean wh0re!:pac:

    The auld fellas alternator was giving trouble one day, so I took out the brush pack. Sure enough the brushes were worn to nothing. 6 euro for a pair of genuine brushes from a main dealer, a bit of soldering and she was rocking again. I didn't even have to take the alternator off the car!:)


  • Registered Users Posts: 73,396 ✭✭✭✭colm_mcm


    Got to try out my new axle stands today. The heat shield under the rear seats broke off at the front end (only fixed the back end a few weeks ago) Pig of a job. Stuck some M8 washers behind the bolts which worked a treat!
    Got to use my massive Halfords socket set and breaker bar finally on the wheel nuts. Not a waste of money then!
    No more rattley civic


  • Registered Users Posts: 1,001 ✭✭✭LawlessBoy


    Bought a MK5 GTI the weekend, looked great 180km on clock, FSH, DSG and good spec in general. Servied it tuesday with Liqui Moly top texh fully synth 5w30, new plugs, air fuel the whole works. Was planning to do a DSG service this weekend.

    While i was digging into all this i said i should replace the cam follower as its a known problem on them. I dont even know how the car drove so smooth!

    17887071_1534319089919650_1805239798_o.jpg
    image hosting temporary

    Cam follower was completely smashed through! High pressure fuel pump also damaged along with the can now needing a new inlet camshaft because of this! Not a good start to my first week of ownership!

    17916535_1534319169919642_1501598936_o.jpg
    image hosting temporary

    17916746_1534322619919297_908149808_o.jpg
    image hosting temporary

    Got a price for OEM parts from the stealers. €818 and that isnt including the timing belt kit that will need to be done as you have to remove it to replace the camshaft. :mad::mad::mad:


  • Registered Users Posts: 4,316 ✭✭✭lafors


    LawlessBoy wrote: »
    Bought a MK5 GTI the weekend, looked great 180km on clock, FSH, DSG and good spec in general. Servied it tuesday with Liqui Moly top texh fully synth 5w30, new plugs, air fuel the whole works. Was planning to do a DSG service this weekend.

    While i was digging into all this i said i should replace the cam follower as its a known problem on them. I dont even know how the car drove so smooth!


    Cam follower was completely smashed through! High pressure fuel pump also damaged along with the can now needing a new inlet camshaft because of this! Not a good start to my first week of ownership!

    Got a price for OEM parts from the stealers. €818 and that isnt including the timing belt kit that will need to be done as you have to remove it to replace the camshaft. :mad::mad::mad:

    I'd be worried about where the rest of it is! I took a worn one out of my old vrs years ago, it was an 06, and it was well worn but looked brand new in comparison to that!

    Big/expensive job to replace the cam, hpfp. Could you get the cam resurfaced/skimmed rather than replacing it?


  • Registered Users Posts: 1,001 ✭✭✭LawlessBoy


    lafors wrote: »
    I'd be worried about where the rest of it is! I took a worn one out of my old vrs years ago, it was an 06, and it was well worn but looked brand new in comparison to that!

    Big/expensive job to replace the cam, hpfp. Could you get the cam resurfaced/skimmed rather than replacing it?

    Not 100% sure about it being resurfaced. I wouldnt tackle anything that advanced myself. Ill be handing it over to my mechanic for the work. Looking around online though i can pick up an OEM HPFP from ebay with warranty for €200 as opposed to 350 from the main dealers.

    I didnt notice any metal shavings or pieces in the oil while i was draining it. The sump will be getting dropped and inspected along with the oil pickup! Just raging its happened!


  • Registered Users Posts: 12,917 ✭✭✭✭Toyotafanboi


    colm_mcm wrote: »
    Got to try out my new axle stands today. The heat shield under the rear seats broke off at the front end (only fixed the back end a few weeks ago) Pig of a job. Stuck some M8 washers behind the bolts which worked a treat!
    Got to use my massive Halfords socket set and breaker bar finally on the wheel nuts. Not a waste of money then!
    No more rattley civic

    Done exactly that to my own one, a fortnight after I bought it the shield fell down, a couple of gigantic washers later and all was well.


  • Closed Accounts Posts: 6,221 ✭✭✭pablo128


    I tackled my sisters clutch after work on Tuesday. Started at 6pm and finished at 11.30pm. 08 Auris petrol. Straightforward enough. I took this pic at 9.15pm.

    I was using my new LED worklamp. Supposed to have 4 hours light on a full charge. It lasted 5 and a half hours.:cool:


  • Advertisement
  • Registered Users Posts: 4,316 ✭✭✭lafors


    The missus is trading her a3 in against her new kodiaq in a few weeks and the a3 was giving a big clunking noise of acceleration and deceleration and rocking like a mad yoke on startup. Definitely going to be the mounts so checked underneath and rightly the lower engine mount was in bits so decided to fix it to get the most i can for the trade in.

    Anyway i started last night, and got pissed on by the rain on two occasions, lovely! Nothing better than lying under a car and a big shower comes out of no where.

    Removed the mount arm, which looked in bad nick itself.
    Then starting pulling bits of out the lower mount, it was wrecked, bits of rubber everywhere.

    IMG_20170410_183109_zpsp0ncfpyx.jpg

    Bolt was well stuck, time for my favourite tool...
    IMG_20170414_185500_zpsydgda8vy.jpg

    Got most of the centre section out and then the hard bit, trying to remove the outer casing.
    IMG_20170414_190405_zpsfbqk3mb4.jpg
    IMG_20170414_195911_zpsp1cppg0w.jpg

    Part of the problem is the lack of space when lying under the car. I was trying to pry it out bit by bit and hammer around the edges to loosen it up but was getting no where. I then got the dremel out and tried to cut it to weaken it. It sort of worked but the outer casing was chipping when hammering out rather than splitting in one piece.

    Then while prying with a pry bar and getting my legs soaked in a downfall i managed to catch my finger, painful!
    It was getting dark and my torch ran out and needed recharging so decided to take a break for the night.
    Finger was throbbing and swelling so had to go at it with the drill bit too release the pressure...Ouch!

    Much better this morning, swelling has gone

    IMG_20170415_100002_zpszkqmjz49.jpg

    So after a good night's sleep i decided to take a different approach and use a tool I've never used on a car before....My trusty jigsaw!!!
    Within 2 minutes i had the casing out :)

    IMG_20170415_102724_zpshi674eo7.jpg
    IMG_20170415_102717_zpsjyxgeclq.jpg

    Next was to inspect the top lower mount, surprisingly it was in very good condition! Wohoo!
    IMG_20170415_102339_zpstrfbltrn.jpg

    Cleaned out the remaining crap around the mounting hole with a small wire brush.
    Fitting the new bottom lower mount was a pox. The shortened edge (where the mount bar slides in and attaches) is very hard to get past the lip. In the end as I'd little room to swing the rubber mallet i put a small wooden disk i made on the puck of the jack and raised it slowly. The mount began to side in :)
    I then used the mallet to put it in the rest of the way.

    With that all in i had a look at the mounting arm and i wasn't happy to put it back in so around the corner to gsf and got a replacement for around €20.
    IMG_20170415_112908_zps4amywf9j.jpg
    IMG_20170415_112915_zpssfwe2yiv.jpg
    IMG_20170415_112920_zpsx2l0zjsz.jpg

    Refitted everything and out for a test drive....Perfect, very happy with the fix except my finger! Hopefully get better trade for the car now!

    IMG_20170415_114625_zpsquqefnzl.jpg

    Next job, get these fitted to the 645...
    IMG_20170412_221412_zps9ujx7jsd.jpg


Advertisement