Advertisement
If you have a new account but are having problems posting or verifying your account, please email us on hello@boards.ie for help. Thanks :)
Hello all! Please ensure that you are posting a new thread or question in the appropriate forum. The Feedback forum is overwhelmed with questions that are having to be moved elsewhere. If you need help to verify your account contact hello@boards.ie
Hi there,
There is an issue with role permissions that is being worked on at the moment.
If you are having trouble with access or permissions on regional forums please post here to get access: https://www.boards.ie/discussion/2058365403/you-do-not-have-permission-for-that#latest

Painting a fibreglass boat

  • 15-04-2014 3:30pm
    #1
    Registered Users, Registered Users 2 Posts: 93 ✭✭


    So we have a small 17ft dory that is not in the best shape aesthetically speaking, i was looking up some paints for fibreglass boats and was completely overwhelmed by the different types and the choice.

    Would anyone be able to give me some advice?

    I am considering a two tone scheme maybe red for the hull and white for up top, If the boat is kept on a trailer i.e. not in the water all the time, is antifouling a necessity? How much sanding is required, are you trying to clear the old paint off or just coarse up the area so the new paint will stick.
    Thanks


«1

Comments

  • Moderators, Motoring & Transport Moderators, Sports Moderators Posts: 6,344 Mod ✭✭✭✭fergal.b


    Hi mikesvr6, if you sand down to the fiberglass you will need to use a primer something like Pre-kote but if you can lightly sand the paint and get a good smooth finish you can paint straight on top of it,and as you will not be leaving the boat in the water you can paint it with a top side paint and no anti foul I like Top-lac it's a one pac made by international and you can get a very good finish by roll and tipping http://www.boards.ie/vbulletin/showthread.php?t=2057167854


    .


  • Registered Users, Registered Users 2 Posts: 93 ✭✭mikesvr6


    Thansk fergal, that technique looks brilliant. It looks like someone did a repair on a small section of the hull so i can see fibrglass there. Would you recommend putting primer on that section?


  • Moderators, Motoring & Transport Moderators, Sports Moderators Posts: 6,344 Mod ✭✭✭✭fergal.b


    If it's just a small bit you will probably get away with. A 17 foot Dory is going to get a few scratches and dings so you will be touching it up every so often anyway, if you want it to be in showroom condition it would be worth your while priming it.


    .


  • Registered Users, Registered Users 2 Posts: 93 ✭✭mikesvr6


    Thanks again, will post my progress as i get it done.


  • Moderators, Motoring & Transport Moderators, Sports Moderators Posts: 6,344 Mod ✭✭✭✭fergal.b


    mikesvr6 wrote: »
    Thanks again, will post my progress as i get it done.

    Here is a post I did on a "little" fiberglass boat by roll and tipping without any fine sanding on the finish, it's only a play boat so no need for all the work of a mirror finish but it still looks fine. http://www.boards.ie/vbulletin/showthread.php?t=2057059715


    .


  • Advertisement
  • Registered Users, Registered Users 2 Posts: 93 ✭✭mikesvr6


    That's exactly the colour scheme we were thinking of. My father was from cork so we are doing up a boat he got shortly before he passed. What colour red is that? it is hard to make out from the colour cards online. thanks


  • Moderators, Motoring & Transport Moderators, Sports Moderators Posts: 6,344 Mod ✭✭✭✭fergal.b


    mikesvr6 wrote: »
    That's exactly the colour scheme we were thinking of. My father was from cork so we are doing up a boat he got shortly before he passed. What colour red is that? it is hard to make out from the colour cards online. thanks

    It's Toplac 504 fire red http://marineparts.ie/international-toplac-paint-rescue-fire-red-750ml.html


    .


  • Registered Users, Registered Users 2 Posts: 93 ✭✭mikesvr6


    I suppose its difficult to show the gloss finish on a colour card


  • Moderators, Motoring & Transport Moderators, Sports Moderators Posts: 6,344 Mod ✭✭✭✭fergal.b


    mikesvr6 wrote: »
    I suppose its difficult to show the gloss finish on a colour card

    Remember the Finnish is under the paint in the preparation :D


    .


  • Registered Users, Registered Users 2 Posts: 93 ✭✭mikesvr6


    Sorry again, do you have the name of the white? is it polar white?


  • Advertisement
  • Moderators, Motoring & Transport Moderators, Sports Moderators Posts: 6,344 Mod ✭✭✭✭fergal.b


    mikesvr6 wrote: »
    Sorry again, do you have the name of the white? is it polar white?

    Snow white 001

    international_toplac_yacht_paint_colour_chart_1_1.jpg


  • Registered Users, Registered Users 2 Posts: 93 ✭✭mikesvr6


    Going to order it now, sorry for even more questions but about the quantity the boat is a dell quay dory 17 similar to this http://www.donedeal.ie/boats-for-sale/cheap-17ft-sea-boat-and-trailer/6544592 . How much paint would be needed for this i wonder? Can't wait to get started now.


  • Closed Accounts Posts: 236 ✭✭davlacey


    a 750 mil can should get u 2 or 3 coats on the hull. like mine only needed a can of red and black for the whole boat with 2 or 3 coats of each check out marinewebstore they sell teamac marine gloss its what i used


  • Moderators, Motoring & Transport Moderators, Sports Moderators Posts: 6,344 Mod ✭✭✭✭fergal.b


    mikesvr6 wrote: »
    Going to order it now, sorry for even more questions but about the quantity the boat is a dell quay dory 17 similar to this http://www.donedeal.ie/boats-for-sale/cheap-17ft-sea-boat-and-trailer/6544592 . How much paint would be needed for this i wonder? Can't wait to get started now.

    Very hard to say, red over white might take 2-3 coats and white over a dark colour would be the same. How is the Gelcoat on the boat if it's any good it might be worth buffing it out instead of painting it.


    .


  • Registered Users, Registered Users 2 Posts: 93 ✭✭mikesvr6


    Its not in great shape, i think i will sand it down and use a primer first just to have a solid start. thanks again


  • Registered Users, Registered Users 2 Posts: 93 ✭✭mikesvr6


    It might sound a stupid question but do these paints need thinners or are they applied directly?? thanks:confused:


  • Moderators, Motoring & Transport Moderators, Sports Moderators Posts: 6,344 Mod ✭✭✭✭fergal.b


    mikesvr6 wrote: »
    It might sound a stupid question but do these paints need thinners or are they applied directly?? thanks:confused:

    I add 10% to the last coat.


    .


  • Registered Users, Registered Users 2 Posts: 93 ✭✭mikesvr6


    Thanks again. Start with the prep work tomorrow!


  • Registered Users, Registered Users 2 Posts: 93 ✭✭mikesvr6


    Just going to put up some pics of what i've to deal with
    Bow with cabin
    ymq0.jpg
    Inside
    8ddz.jpg
    Side view
    4dpn.jpg

    And last but not least the motivation
    otsz.jpg

    Can't wait to get stuck in now, will hopefully post some updates as i go along.


  • Moderators, Motoring & Transport Moderators, Sports Moderators Posts: 6,344 Mod ✭✭✭✭fergal.b


    That's motivation alright, I think I'd just launch the boat go fishing and do the painting over the winter :D


    .


  • Advertisement
  • Registered Users, Registered Users 2 Posts: 93 ✭✭mikesvr6


    The rain has landed to help with the pre-wash so think the gods want it done before the summers over!:p


  • Closed Accounts Posts: 236 ✭✭davlacey


    fergal.b wrote: »
    That's motivation alright, I think I'd just launch the boat go fishing and do the painting over the winter :D


    .
    id wait till the end of september myself and enjoy it for the summer;)


  • Registered Users, Registered Users 2 Posts: 93 ✭✭mikesvr6


    Can change quickly the above photo was only last weekend,
    This one is only a couple of days old
    pk3z.jpg
    :D


  • Registered Users, Registered Users 2 Posts: 93 ✭✭mikesvr6


    So just a quick update, i got bogged down in work so only did small bits here and there on the boat until i reached the transom.

    I Started to remove some of the fittings like the aux engine mount, this was when i noticed that the bolts were coming out wet!!

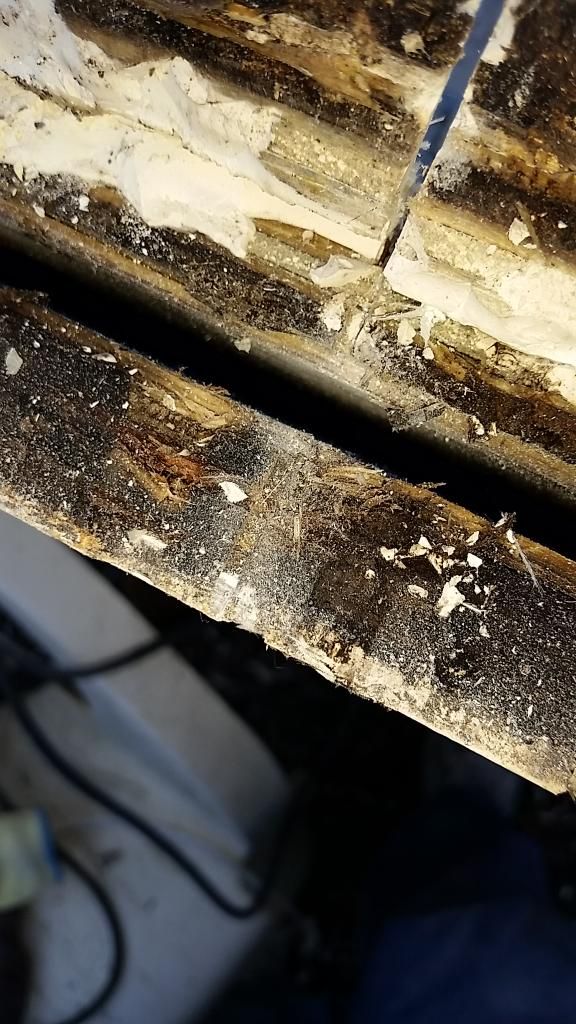
    I removed them all and saw what i dreaded to see, the timber inside the transom was basically mush around where the bolts had come out.

    The next thing i found was (after deciding to take the D fendering off) some damage where a simple plastic square had been inserted behind the D fender, the foam behind this was saturated. I wanted to see how much the foam had soaked up, but once pulled some out it seemed dry.

    I looked up on google for similar restoration projects and they all seem to suggest that the foam once wet cannot be dried. My question here i suppose is if anyone on boards has experience with this foam. :confused:


  • Registered Users, Registered Users 2 Posts: 605 ✭✭✭breghall


    The foam is to add structural strength between the outer and inner skins. If wet it can add at times huge weight to a boat.
    I don't think it'll be easy to dry it out, hopefully it's just on the top. The only way to find out is to drill some small holes down low and see if it's wet there ( same for the transom). then fill in with Sikaflex or better some epoxy resin.

    There are countless pages out there on rotten transoms, and with that big engine hanging off the transom, i think you should read them.... you don't want to be bouncing around at sea, with a bad transom and a big four stroke.


  • Registered Users, Registered Users 2 Posts: 93 ✭✭mikesvr6


    Thanks Breghall, i just drilled out some inspection holes in the deck. The top of the foam was damp so i pulled out some of it.

    Two things happened, first the hole( 3 inch deep) vacated by the foam quickly filled with water. The other thing that happened or that i noticed was that the foam seemed dry when i squeezed it. will get photos up shortly


  • Registered Users, Registered Users 2 Posts: 93 ✭✭mikesvr6


    Inspection hole = not good [IMG][/img]14296647773_ddea3a9dfe_s.jpg2014-05-26 16.23.42 by moceallachain, on Flickr


  • Moderators, Motoring & Transport Moderators, Sports Moderators Posts: 6,344 Mod ✭✭✭✭fergal.b


    Holy crap :eek: Do I have to tell you how to fix this, your not going to like it :( but I think this is what you would have to do "the music doesn't help"


    .


  • Registered Users, Registered Users 2 Posts: 93 ✭✭mikesvr6


    Thanks fergal, i have been reading threads about dory restorations from before and have watched that video, i was wondering if anyone knew of the different foam types, because it is strange to me that the bits that come out are dry.


  • Advertisement
  • Registered Users, Registered Users 2 Posts: 605 ✭✭✭breghall


    mikesvr6 wrote: »
    Thanks fergal, i have been reading threads about dory restorations from before and have watched that video, i was wondering if anyone knew of the different foam types, because it is strange to me that the bits that come out are dry.

    The foam most used is a two part polyurethane foam I think.


  • Closed Accounts Posts: 5,108 ✭✭✭pedroeibar1


    breghall wrote: »
    ........ you don't want to be bouncing around at sea, with a bad transom and a big four stroke.

    Nope Breghaal, not correct.;) He'd be bouncing around on a raft, the back end fallen off and the engine gone with it.:eek:
    Old boats and old houses have a lot in common.


  • Registered Users, Registered Users 2 Posts: 93 ✭✭mikesvr6


    Not a great start to a summer of boating!! I'd rather keep the outboard and both ends of the boat together if at all possible:D


  • Moderators, Motoring & Transport Moderators, Sports Moderators Posts: 6,344 Mod ✭✭✭✭fergal.b


    mikesvr6 wrote: »
    Thanks fergal, i have been reading threads about dory restorations from before and have watched that video, i was wondering if anyone knew of the different foam types, because it is strange to me that the bits that come out are dry.

    It maybe a semi closed cell foam where some of it has broken down and is holding water and some of the cells have stayed intact, it might also be that gravity is holding water at the bottom of the foam but the top is dry, there is also a chance that the chambers are full of water and the foam is ok if so you could try and tilt the boat up as high as you can and drill some holes in the lowest part of the transom and let it run out if it's the foam thats socked maybe cut some vent holes in the deck and park it up in a glasshouse to dry it out it might take a while but could work failing that the foam will have to be replaced :(


    .


  • Registered Users, Registered Users 2 Posts: 93 ✭✭mikesvr6


    Of the holes i made i took the water out and the level has not risen again. This leads me to believe two things, like fergal said it must be a semi closed foam and the water is trapped in between the closed cells and the other is that it will not drain out because if it was free to drain out then the holes would of refilled.

    Bottom line is a deep conversation with the family on whether to restore the boat(belonged to my father who has passed away) or to consider another boat.

    I am leaning on the restore side, i would like to get used to working with fibreglass and from the many projects i've read through it seems that if you are prepared for the hard work that you can "eventually" come out with something to be proud of.


  • Moderators, Motoring & Transport Moderators, Sports Moderators Posts: 6,344 Mod ✭✭✭✭fergal.b


    If your willing to learn put in the work and spend money on epoxy you could have a boat thats as good as new and when your sitting back out on the water maybe in the same place that your Dad did you can think to your self "I did this":)


    .


  • Advertisement
  • Registered Users, Registered Users 2 Posts: 93 ✭✭mikesvr6


    Thanks fergal. If we do go ahead with it I'm sure I'll be on here a fair bit. Just a quick question from the off. When putting in the new floor ribs excetera would you use epoxy for all the work or could you do the floor with polyester and keep the epoxy for the transom work?
    I only ask to make up a rough cost estimate. Thanks.


  • Moderators, Motoring & Transport Moderators, Sports Moderators Posts: 6,344 Mod ✭✭✭✭fergal.b


    mikesvr6 wrote: »
    Thanks fergal. If we do go ahead with it I'm sure I'll be on here a fair bit. Just a quick question from the off. When putting in the new floor ribs excetera would you use epoxy for all the work or could you do the floor with polyester and keep the epoxy for the transom work?
    I only ask to make up a rough cost estimate. Thanks.

    I would do it all in epoxy it's a lot stronger than polyester and will bond to anything where the polyester is more for bonding to fiberglass fibers it's not great at bonding to wood and is not as waterproof.


    .


  • Registered Users, Registered Users 2 Posts: 605 ✭✭✭breghall


    fergal.b wrote: »
    I would do it all in epoxy

    Oh you wooden boat builders are perfectionists :rolleyes: ....:D

    I personally would ( and have more than once ) use polyester, sure the boat itself is made from a poly resin.

    A good key to the original glassfibre and good workmanship when laying the cloth,would make the boat very strong. If worried about water penetration then maybe coat the timbers in epoxy before glassing them in using polyester.


  • Registered Users, Registered Users 2 Posts: 93 ✭✭mikesvr6


    Thanks breghall and fergal. I have been searching for others who have done similar projects and reading through dnme's thread and there sure is a lot of different thoughts on fibreglassing with the different resins and whether to use csm or to layer csm or to buy combi mat to begin with.

    One project I found was basically the same as what I'll have to do, one aspect of it was interesting. The new stringers(if that's what there called, where the deck will sit) were built with insulation capped by marine ply slats. These were then glassed in ill try and get a photo up it'll be easier than describing it


  • Registered Users, Registered Users 2 Posts: 93 ✭✭mikesvr6


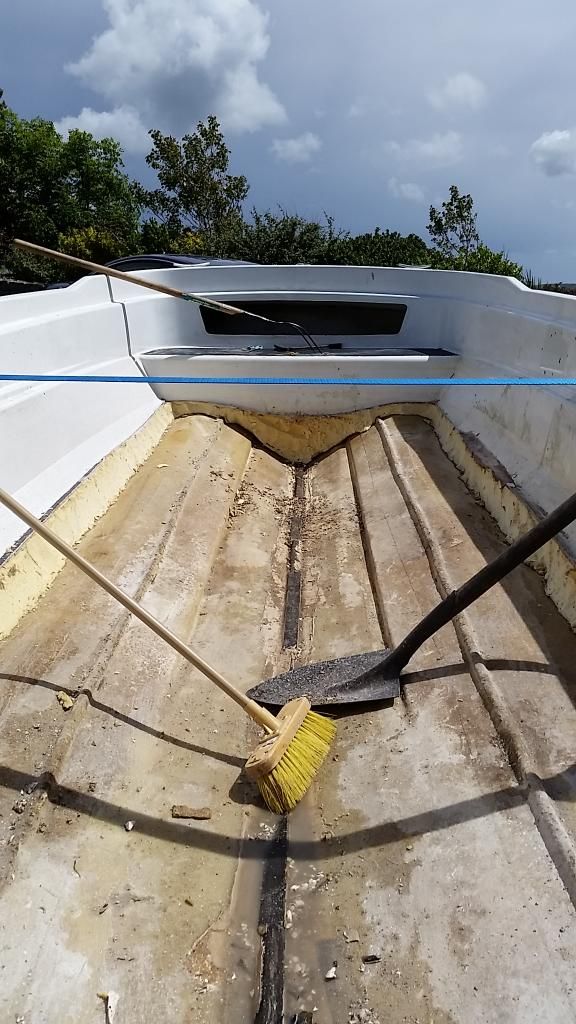
    Another update, cut out a bigger section of the deck to see what was underneath

    As you see below, the the deck was free from the foam and a layer of water was inbetween. The foam is spongy and damp
    2014-05-29172624_zpsaef1ae64.jpg
    I inspected further to see how damp the foam was and found that

    The foam is dry....well past the first cm or so, and at the outerskin it sits about 1cm from it (i.e. not supporting it)
    2014-05-29173810_zps103c01ee.jpg

    I assumed the foam would be saturated through, so kinda confused with that one. The gap between the foam and the outer skin(which is wet) is worrying.


  • Advertisement
  • Moderators, Motoring & Transport Moderators, Sports Moderators Posts: 6,344 Mod ✭✭✭✭fergal.b


    That looks ok maybe it's the chambers that are holding water.


    .


  • Registered Users, Registered Users 2 Posts: 93 ✭✭mikesvr6


    I'll cut another section to see if its consistent. I still have reservations about the transom being saturated so might have to do that yet


  • Moderators, Motoring & Transport Moderators, Sports Moderators Posts: 6,344 Mod ✭✭✭✭fergal.b


    mikesvr6 wrote: »
    I'll cut another section to see if its consistent. I still have reservations about the transom being saturated so might have to do that yet

    Yep I'd say the transom should be done, in the meantime drill some holes low down on it through the wood then tip the boat up and see the water drains out.


    .


  • Registered Users, Registered Users 2 Posts: 93 ✭✭mikesvr6


    Would you do the transom from the outside then? i drilled one for a drain plug before and water did come out.
    I've just found out that there was a hole on the deck at one stage that was repaired(on the starboard side)

    Wish i knew that before i cut the deck( inspection spot is on the port side)


  • Moderators, Motoring & Transport Moderators, Sports Moderators Posts: 6,344 Mod ✭✭✭✭fergal.b


    mikesvr6 wrote: »
    Would you do the transom from the outside then?

    I'm not sure what way would be best it might be easier to hide the repair on the inside but the work might be easier to do from the outside:), what have other guy's done.


    .


  • Registered Users, Registered Users 2 Posts: 93 ✭✭mikesvr6


    Most of what i've found is a deck + transom job, so they leave the outer skin as is and use it as a template for the new transom.

    One thread had the transom done from the outside but he admitted it was more difficult.


  • Moderators, Motoring & Transport Moderators, Sports Moderators Posts: 6,344 Mod ✭✭✭✭fergal.b


    Up to you so :) Make sure you cover up well when cutting fiberglass the dust off it can drive you mad with the itch:eek: I use a painters suit and a dental face mask :cool:


    890411.jpg


    face-shields-interchangeable-shields_MED.jpg


  • Registered Users, Registered Users 2 Posts: 93 ✭✭mikesvr6


    TOO LATE....... AGH


  • Registered Users, Registered Users 2 Posts: 605 ✭✭✭breghall


    your lucky enough if the foam isn't saturated through. Some of those types of boats are simply stapled and sealed behind the rubrail. Maybe it might be easy enought to remove the rubrail and staples and lift the top half off, this may give you full access to the transom and foam.

    My tip of the day:

    I find if you get fibreglass on your skin don't wash it off with hot water, use cold first as it won't open the pores as much.


  • Registered Users, Registered Users 2 Posts: 93 ✭✭mikesvr6


    Another update,
    got a few evenings with the boat in between the showers and actual work!
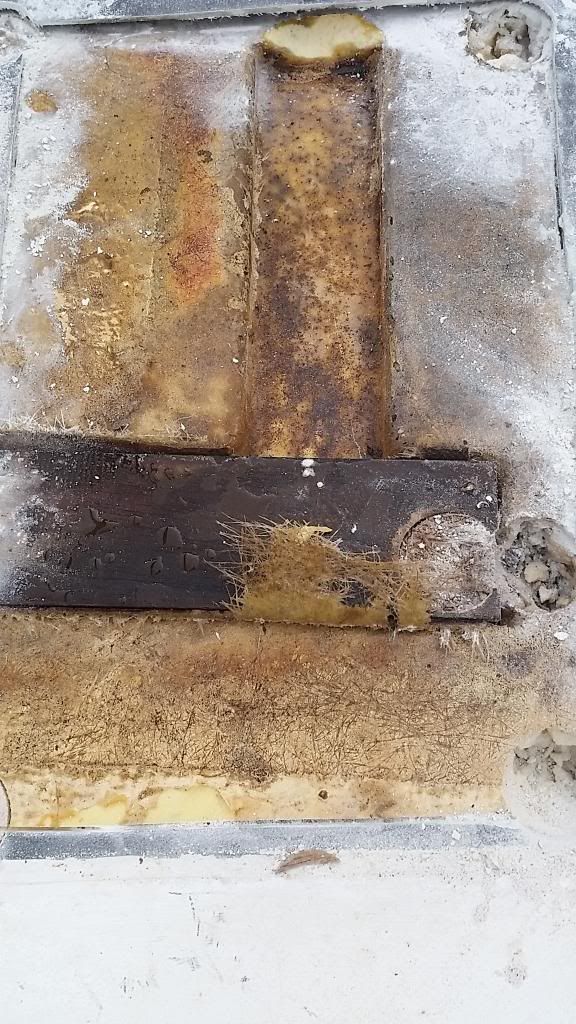
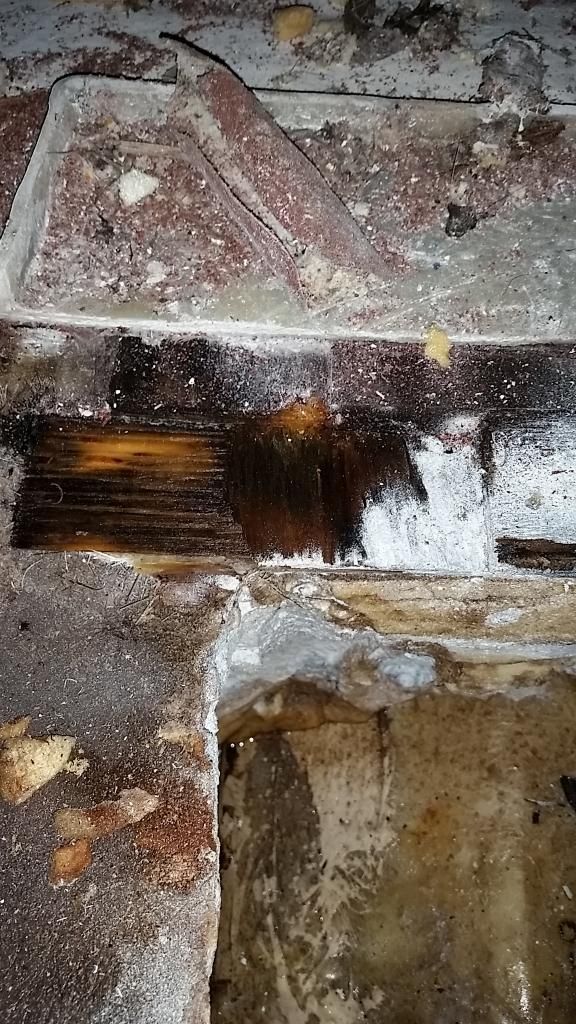
    More saturated boards+foam
    2014-06-03221820_zps1818cd5f.jpg

    Some saturated and broken up ply hiding a section of foam that was removed.
    2014-06-03224314_zps3fbc284b.jpg

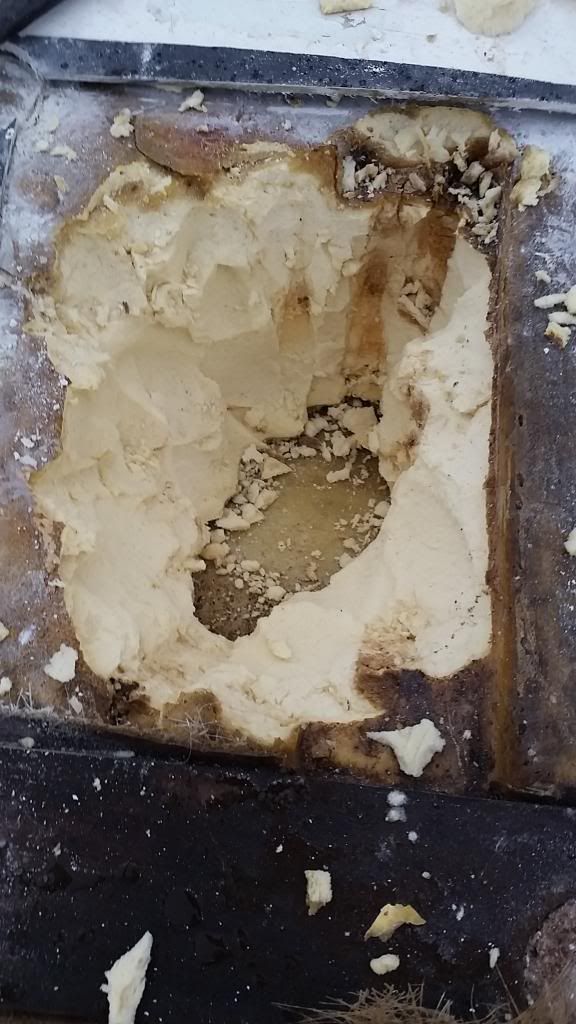
    More foam and wood saturated
    2014-06-03224517_zps99be1285.jpg

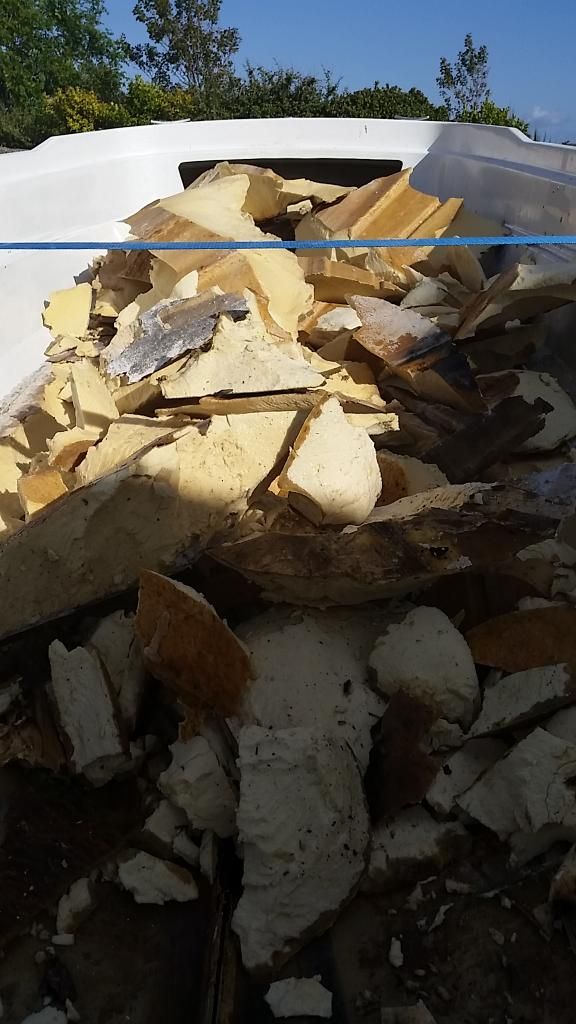
    Foam up about 30% saturated
    2014-06-04182016_zpsdd0e4086.jpg

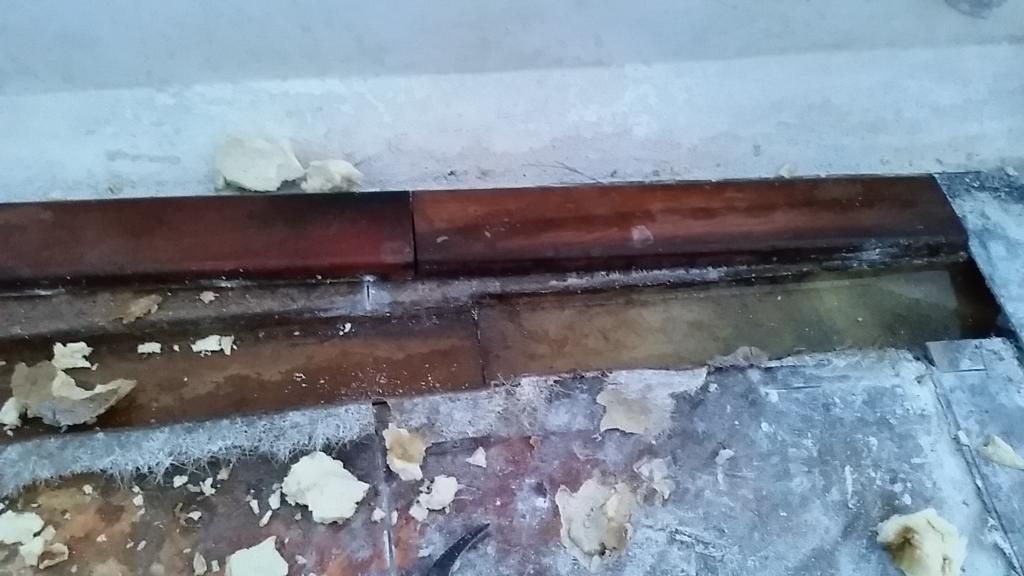
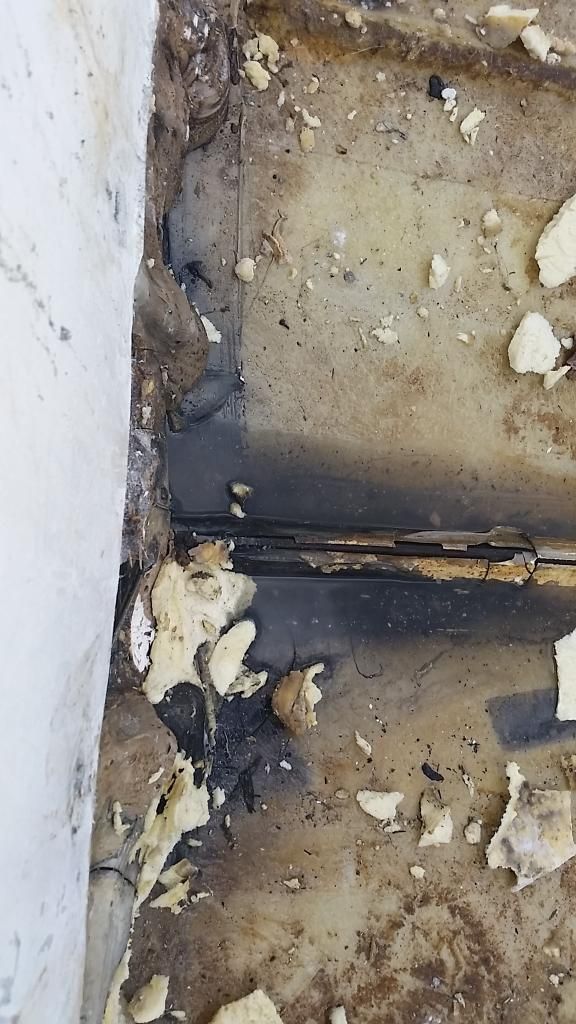
    Lower of transom soaked and exposed ply is spongy
    2014-06-04182024_zpsd73599fd.jpg

    2014-06-04182031_zps98115854.jpg
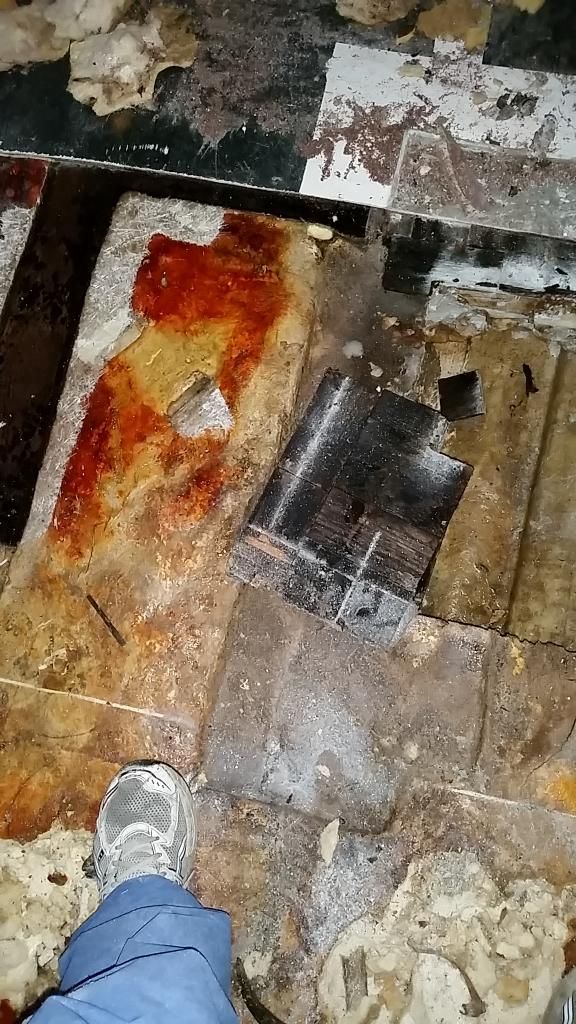
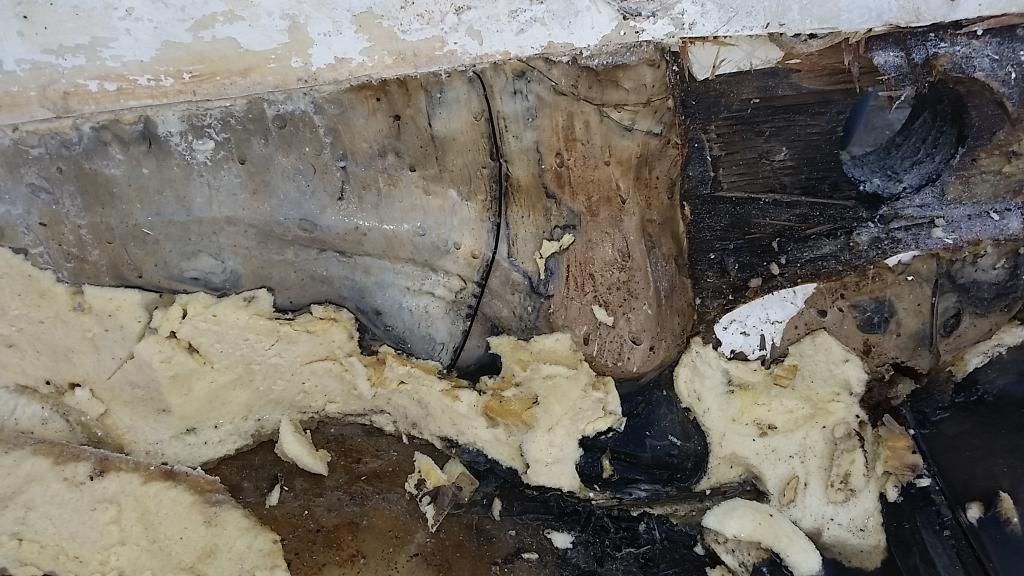
    Transom boards seperated(probably due to the water)
    2014-06-04190411_zps1418104d.jpg
    Getting there
    2014-06-10143747_zps0b26cd1d.jpg


  • Advertisement
Advertisement