Advertisement
Help Keep Boards Alive. Support us by going ad free today. See here: https://subscriptions.boards.ie/.
If we do not hit our goal we will be forced to close the site.

Current status: https://keepboardsalive.com/

Annual subs are best for most impact. If you are still undecided on going Ad Free - you can also donate using the Paypal Donate option. All contribution helps. Thank you.
https://www.boards.ie/group/1878-subscribers-forum

Private Group for paid up members of Boards.ie. Join the club.

Arcade & Retro Repairs & Mods, all new recipe, with no added MSG...

18990929495111

Comments

  • Registered Users, Registered Users 2 Posts: 2,062 ✭✭✭Colonel Panic


    It depends on where they're being used. If we're talking the usual TTL voltage then 35V will be fine as things will be around 5V at all times.


  • Registered Users, Registered Users 2 Posts: 8,171 ✭✭✭Inviere


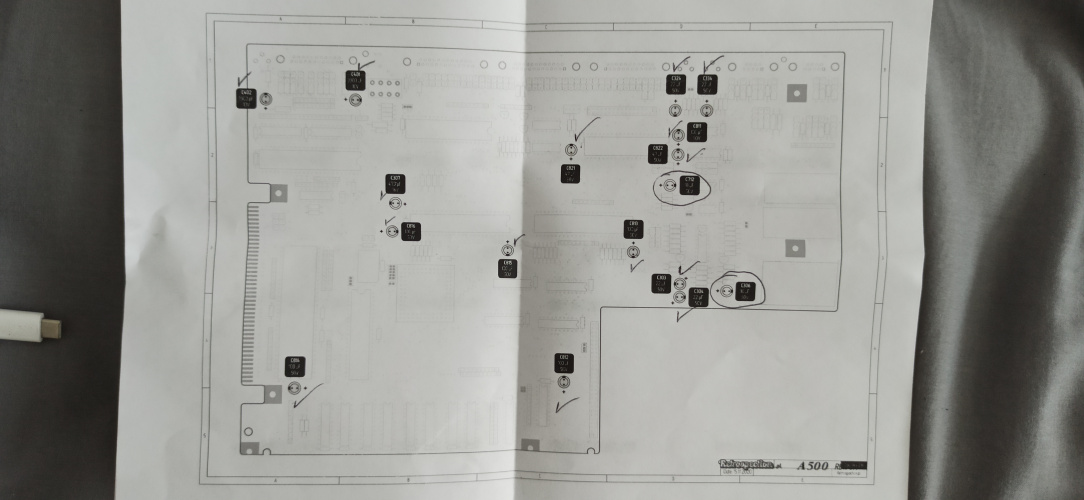
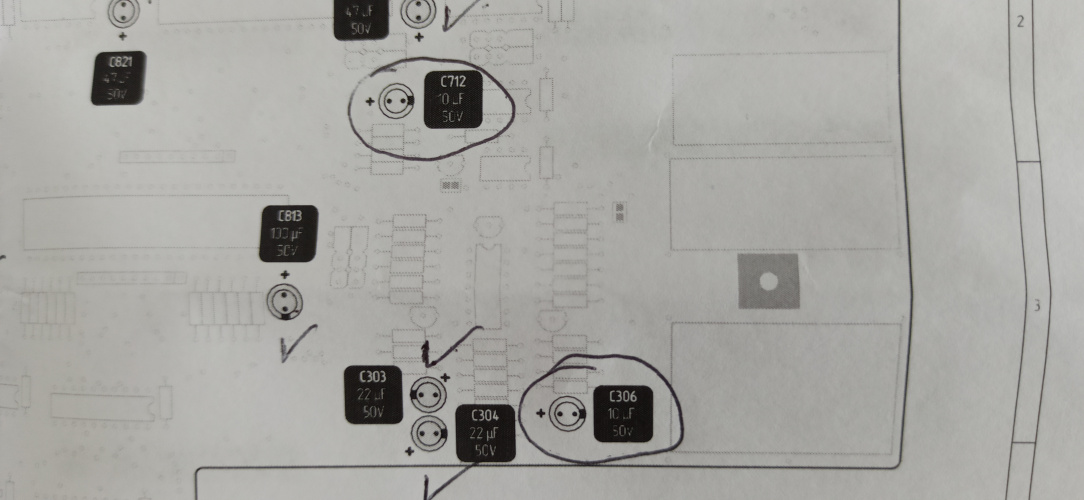
    They're at locations C712 and C306, I'm not sure of the voltages at these locations. See pics, locations are circled...

    IMG_20220507_162627.jpg IMG_20220507_162632.jpg


  • Registered Users, Registered Users 2 Posts: 8,171 ✭✭✭Inviere


    That's how I'm leaning. So depending on what @Colonel Panic says, I'll either be OK to use the 35v's or else I'll just order matching values.


  • Registered Users, Registered Users 2 Posts: 2,062 ✭✭✭Colonel Panic


    Looking at a schematic, C712 is part of a timer in a power on reset circuit and C306 is a filter capacitor for powering the IO microcontroller so yeah, I'd play it safe and go 50V (but 35V would probably be okay).


  • Registered Users, Registered Users 2 Posts: 8,171 ✭✭✭Inviere


  • Advertisement
  • Registered Users, Registered Users 2 Posts: 8,171 ✭✭✭Inviere


    BTW if anyone has any 10uf 50v caps spare give me a shout, I'll order some anyway but would really like to crack on with this 500 and finish it ASAP (delivery times being what they are these days)


  • Registered Users, Registered Users 2 Posts: 8,171 ✭✭✭Inviere


  • Registered Users, Registered Users 2 Posts: 8,171 ✭✭✭Inviere


    The seller is adament that the caps I removed aren't original (the Mig was sealed, and all soldering on the pcb is a factory finish so I'm in no doubt that's not the case). All of the cap maps I've seen suggests the 50v is the correct value, but seller is insisting its supposed to be 35v.

    It's strange, I'm not looking for compensation like its a cheap cap. Won't hear a bar of it though. Quite poor attitude tbh, and I won't be in a hurry to use again. Maybe I'm completely wrong, but there's zero chance the original caps I removed have been already replaced, the soldering is factory.


  • Registered Users, Registered Users 2 Posts: 3,732 ✭✭✭The Last Bandit


    Depending on the service manuals for the 500 I've seen, they either specify a 35V part or its unspecified.

    You're dealing with Commodore here so they would use whatever part was on hand so long as it was within spec, regardless of what engineering specified.

    Anyway, safe rule of thumb is the capacitor rating should be +50% of the working DC voltage, highest DC voltage in the Amiga is 12V so a cap rated over 18V is perfectly safe to use.


  • Registered Users, Registered Users 2 Posts: 8,171 ✭✭✭Inviere


    So you reckon then the 35's are safe using that rule of thumb? 18+6=14, so both 35v and 50v are safe once the farrad rating matches?


  • Advertisement
  • Registered Users, Registered Users 2 Posts: 3,732 ✭✭✭The Last Bandit


    Yep the ones rates 35V are fine to use.


  • Registered Users, Registered Users 2 Posts: 2,062 ✭✭✭Colonel Panic


    Did another FunnyPlaying modded Game Boy Colour yesterday for a friend. He wanted a DMG-styled case for him.

    Looks great and such an easy mod.


  • Registered Users, Registered Users 2 Posts: 1,607 ✭✭✭BGOllie


    found a "recent" mod to convert these mid res Nanao MS9 monitors to 31kh . meaning you can now use them on any VGA type setups .

    http://mikejmoffitt.com/pages/ms9-hax/

    I'm maming one of the Sega Scud Race cabs I got recently (managed to get one running out of the two) so I'll report on the mod once this is done :)

    I'll be great to be able to save and use these unloved monitors


  • Registered Users, Registered Users 2 Posts: 4,219 ✭✭✭Quigs Snr


    I got my Amiga 600 recapped and back up and running again. I wasn't brave enough to take the soldering iron to a clean, boxed example like it so I sent it off to Retropassion in the UK, who only charged 29.99 to recap the whole thing. Postage there and back and a tiny bit of customs was murder however. Worth it though to have the machine like new again.

    In the meantime, I have an original gameboy with the horizontal lines issue.. the advice I am getting is to forget about it.


  • Registered Users, Registered Users 2 Posts: 3,732 ✭✭✭The Last Bandit


    Ideal candidate for an IPS screen upgrade then


  • Registered Users, Registered Users 2, Paid Member Posts: 37,119 ✭✭✭✭o1s1n
    Master of the Universe


    Thats ridiculously cheap for a recap, great to know people are out there willing to do it for good prices.


  • Registered Users, Registered Users 2 Posts: 8,171 ✭✭✭Inviere


    Great price to be fair. I'm in the middle of recapping Amiga's right now, and I wouldn't be doing it for €30 with caps included. So fair play to them.

    Re the GameBoy, definitely an IPS upgrade candidate.


  • Registered Users, Registered Users 2 Posts: 4,219 ✭✭✭Quigs Snr


    Thats what I was thinking too. It cost me 28 euro to post it registered and it was about £23 to post it back. I had marked the value as 100 euro on the way out, so got hit for 23 euro customs on the way back too. So it worked out a lot more but still, worth it to have a better than new and fully functioning Amiga again.


  • Registered Users, Registered Users 2 Posts: 4,219 ✭✭✭Quigs Snr


    Thats what I was thinking. All I have to do now is find a reputable source of the parts and someone to do it.


  • Registered Users, Registered Users 2 Posts: 3,732 ✭✭✭The Last Bandit


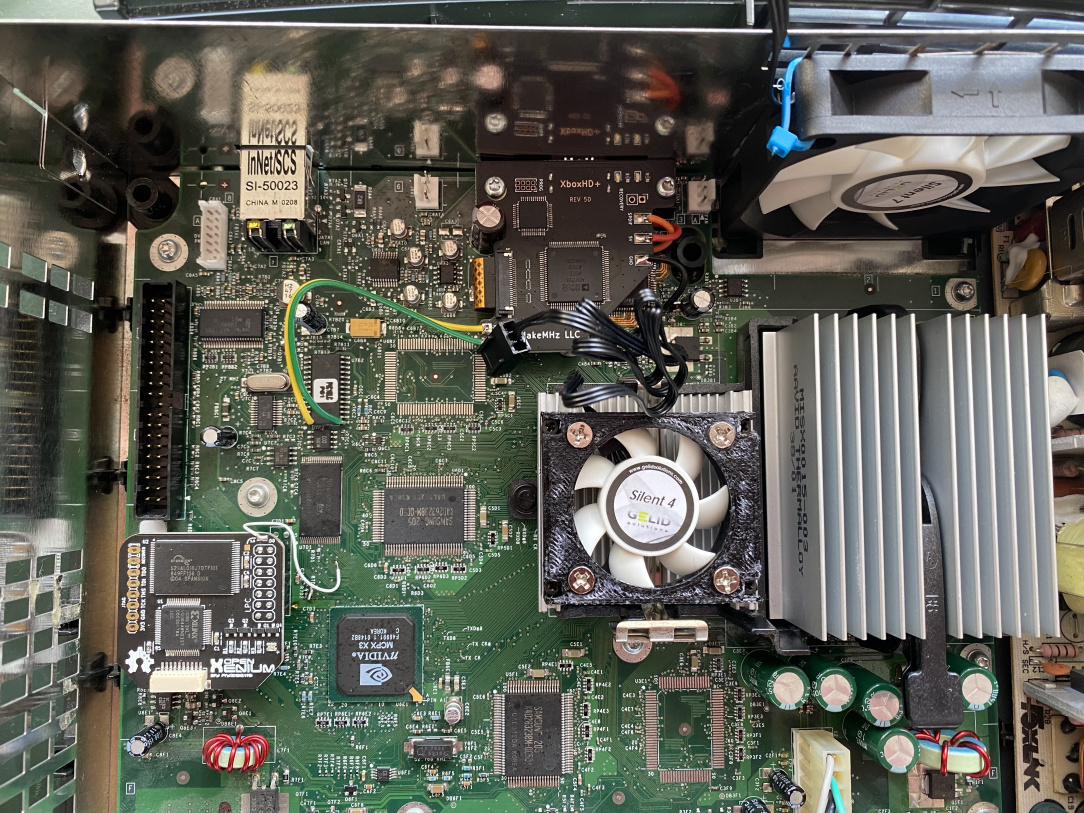
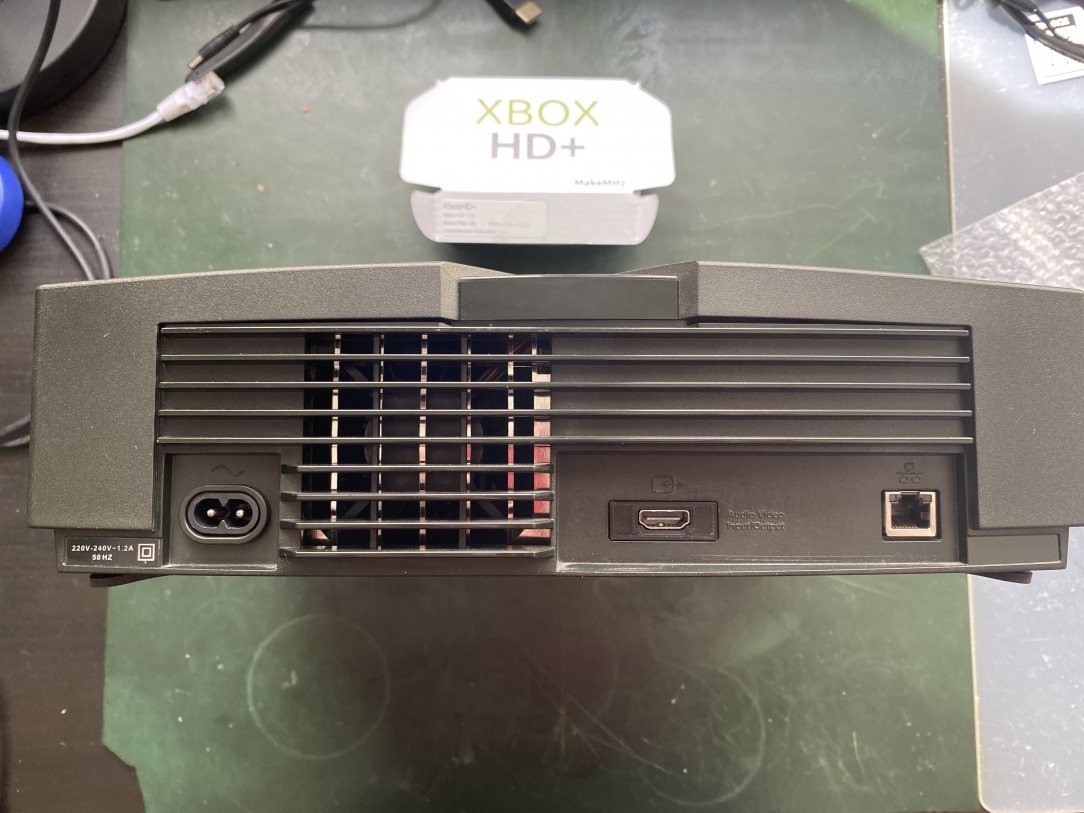
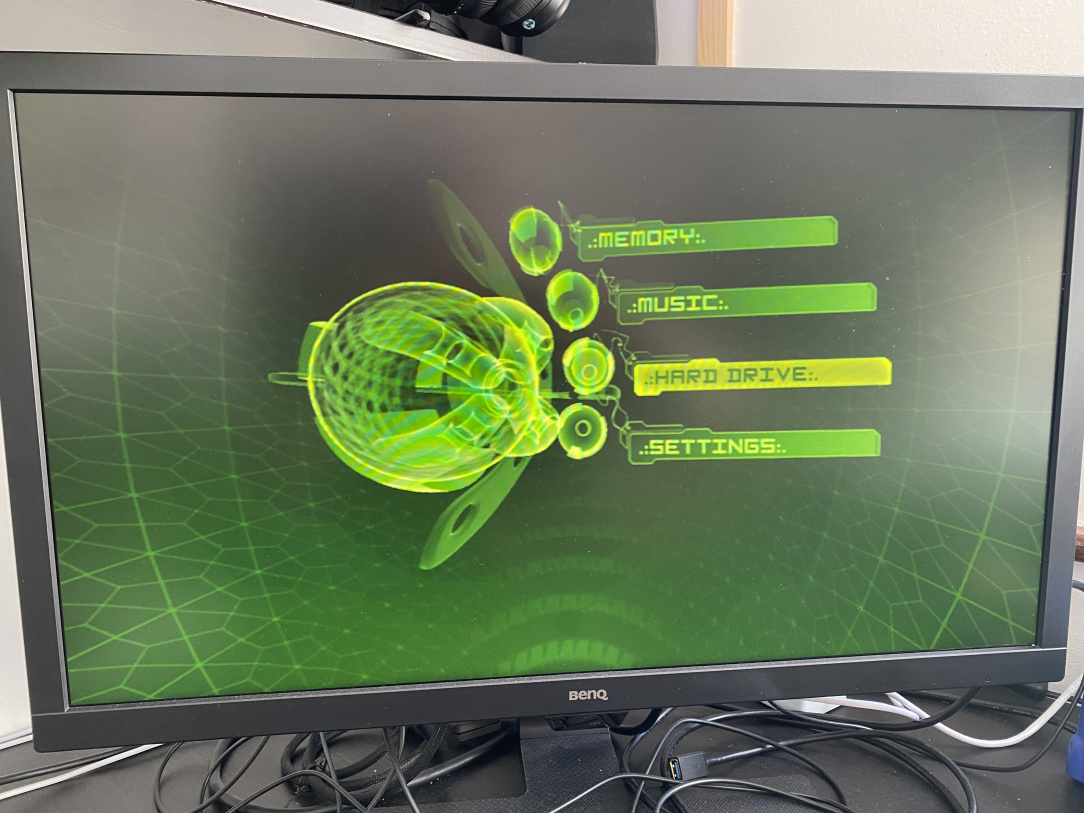
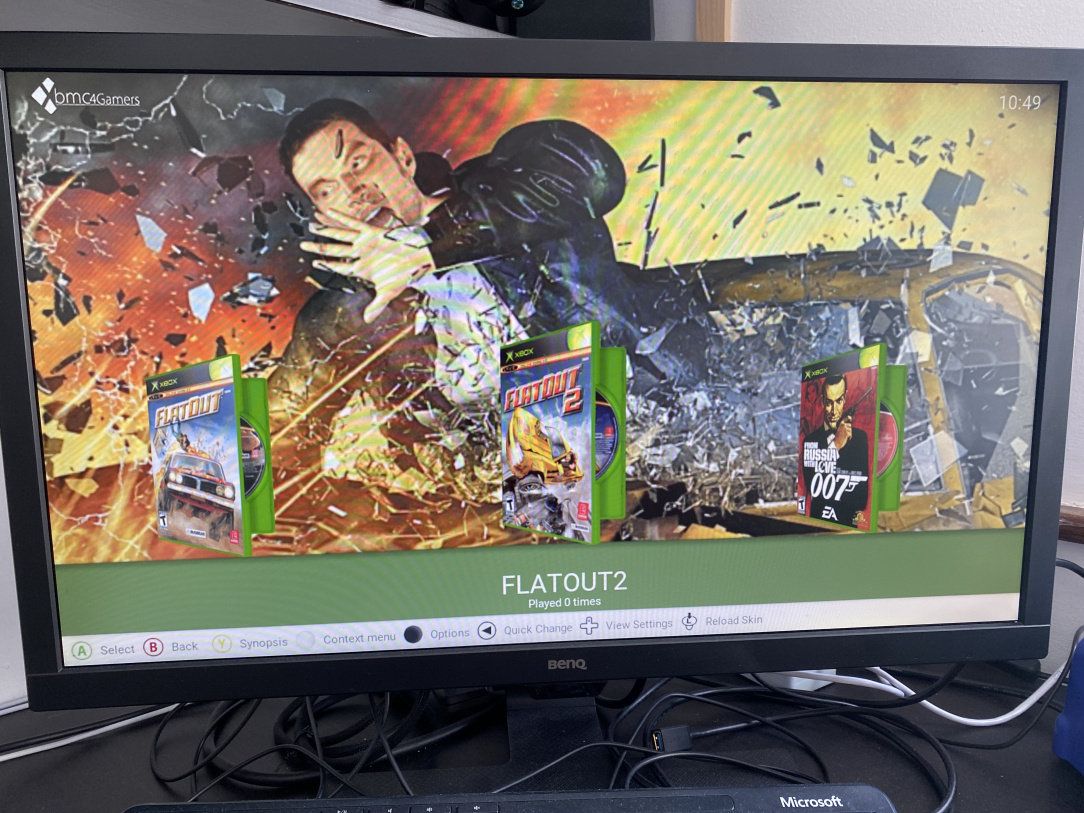
    Treated the old Xbox to a few upgrades including a XboxHD+ hdmi output, new fans & thermals to help quieten it a bit. This is V1.0 with a very loud GPU fan, later models removed this fan entirely.

    Whole lot was pretty time consuming, HD+ requires a patched bios, its own app as well as the physical install and is a total teardown to fit the 3d printed HDMI bezel to the case. Worth the effort though, looks great now and much quieter than before.

    IMG_1255.jpeg


    IMG_1260 2.jpeg


    IMG_1259.jpeg IMG_1258.jpeg


  • Advertisement
  • Registered Users, Registered Users 2 Posts: 9,294 ✭✭✭MrVestek


    Recently hard modded my original Xbox myself... good job! I elected for a Kaico cable to get it to HDMI myself.


  • Registered Users, Registered Users 2 Posts: 3,732 ✭✭✭The Last Bandit


    Nope, I have a 2TB and struggling to fill that with useful stuff. Using FATXplorer on the PC is great though for loading up the disk - no more slow ftps


  • Registered Users, Registered Users 2 Posts: 3,732 ✭✭✭The Last Bandit


    Well that piece of joy didn't last too long :(

    Was working on a HDMI dev board and was stupidly using an open frame psu (can ya guess what happens yet) .. somehow I shorted the psu, don't know if something dropped into it or what but it tripped the circuit breaker, damaged the HDMI dev board and everything connected to it - so that includes the HDMI switch, newish 27" monitor and or course the newly modded Xbox.

    HDMI switch is dead

    HDMI input on the monitor is dead other ports are ok so can find a use for it

    XBOX HDMI board is dead, console itself is fine and running again with the standard AV port refitted.


  • Registered Users, Registered Users 2 Posts: 9,294 ✭✭✭MrVestek


    Kablooey! Sorry to hear that.

    I can't remember what program I used to enable the extra partitions on the drive but I have a SATA -> IDE connector in mine for the drive. I think 16Tb would be a bit overkill though.

    I've basically grabbed a torrent of all original Xbox games from archive.org and I'm just cherry picking which games to transfer over.


  • Registered Users, Registered Users 2 Posts: 8,171 ✭✭✭Inviere


    I know Chongx caps are meant to be garbage, but can't find anything specific about Chong caps....anybody here ever use them or have any info on them?


  • Registered Users, Registered Users 2 Posts: 8,171 ✭✭✭Inviere


    Another day, another repair grinds to a halt because of Sordan.ie

    This time its an Amiga 600, and the cap kit they list states its compatible with a v1 board. It is unfortunately, not at all compatible....the caps are far too big at several locations because on this board some of the caps are back to back, and side by side (where they aren't necessarily on other revisions.)

    IMG_20220602_135708.jpg

    See above, these are just loosely placed and not soldered. There's no room to shift them to the right a little because of the little regulator. So the cap on the left is nowhere near its pads.

    IMG_20220602_140717.jpg

    Same two caps from above, you can see how far to the right the left most cap sits. Not a hope of seating the next cap in place. There's another location or two on the board which is even tighter than this one.

    I've had nothing but trouble with this shop, and a dismissive attitude to back it up. I'm done with them now. I don't mind cheap and cheerful (cap kits don't even come with a cheap printed cap map, fine, they're cheap like), but this type of nonsense is so annoying because I've a console sitting here now with no caps inside, and it'll have to wait here in my way until a buy another kit from a higher standard of seller.

    Rant over.


  • Registered Users, Registered Users 2 Posts: 9,294 ✭✭✭MrVestek


    Not sure why these videos don't have any sound but... I've had some adventures in modding the past two weeks.

    First up was creating a proper kick harness for my Sega Blast City's I/O board so that I could get buttons 4, 5 and 6 functional with JVS. Cobbled together this adapter board as a result using one of Banjo Buy Ollie's JAMMA Finger Boards:

    image.png image.png


    The result can be seen here:

    https://i.imgur.com/2NyVkcR.mp4


    I also got a PIC chip and programmed it with the MultiMode3 instruction set, which essentially turned the chip into a PS1 modchip.

    image.png image.png

    Soldered the chip to a breakout board and soldered wiring from said board to various points on the PU-8 revision motherboard... like so...

    image.png

    It only went and bloody worked FIRST TIME!

    So gotta say... feeling kinda chuffed with myself AND loving the clear evidence that I'M LEARNDING!


  • Registered Users, Registered Users 2 Posts: 9,294 ✭✭✭MrVestek


    Bit of an update. So I noticed that the PS1 was struggling to read some discs and absolutely point blank refused to boot a CDR passed the second loading stage... if it ever even got there.

    So I tried to adjust the laser power pot but I couldn't find a tool small enough to make the adjustment.

    Then I had a thought... surely PS1 lasers can't be all that different to eachother? I had an old PSOne lying around with a broken lid donated to me by a friend a few years ago that I just hadn't gotten around to fixing yet.

    I stole the disc drive from that, connected it up to the PU-8 model of PS1 and... it worked beautifully, no more struggling to read discs.

    Figured that was that, until I tried to put the case back together. Uh oh. Doesn't fit!

    That was sorted after a few minutes with my dremel and now she's purring softly and booting up any disc I throw at her with ease. :-)


  • Registered Users, Registered Users 2 Posts: 9,294 ✭✭✭MrVestek


    Well crap... I knew my recent successes were too good to be true as I've now accidentally killed my Sega Mega Drive 2 by trying to install a hybrid in-game reset / region switchless mod.

    The in-game reset was working fine but the video reset just would refuse to work and I couldn't figure out why. I decided to get brave and tried soldering directly to one of the legs of the main CPU and... yeah I accidentally killed a bunch of traces and ended up bridging a bunch of points on the CPU and essentially killed it.

    I guess I'm not ready for that yet! I tried to fix my fuckup but just kept making it worse, whoops!

    Ohh well... time to find a replacement! I think I'll just stick to the manual single pull / single throw switched mod next time. :-/


  • Advertisement
  • Registered Users, Registered Users 2 Posts: 8,171 ✭✭✭Inviere


    It's very salvageable with some different skills and tools. You'll want some flux paste or liquid, some solder braid, and your soldering iron. Look at some vids on using braid, and you'll be able to remove any of the bridges.

    If you've damaged traces, it's possible to bypass traces with some fine wire, use a multimeter to try find alternative points, this can be done using the continuity setting. Even if you grab a replacement, the skills/tools needed can be developed on this borked board, you'll be surprised how quickly you get comfortable using braid and flux.


Advertisement