Advertisement
If you have a new account but are having problems posting or verifying your account, please email us on hello@boards.ie for help. Thanks :)
Hello all! Please ensure that you are posting a new thread or question in the appropriate forum. The Feedback forum is overwhelmed with questions that are having to be moved elsewhere. If you need help to verify your account contact hello@boards.ie
Hi there,
There is an issue with role permissions that is being worked on at the moment.
If you are having trouble with access or permissions on regional forums please post here to get access: https://www.boards.ie/discussion/2058365403/you-do-not-have-permission-for-that#latest

Ducati 916 Build

  • 01-11-2007 8:10pm
    #1
    Closed Accounts Posts: 195 ✭✭


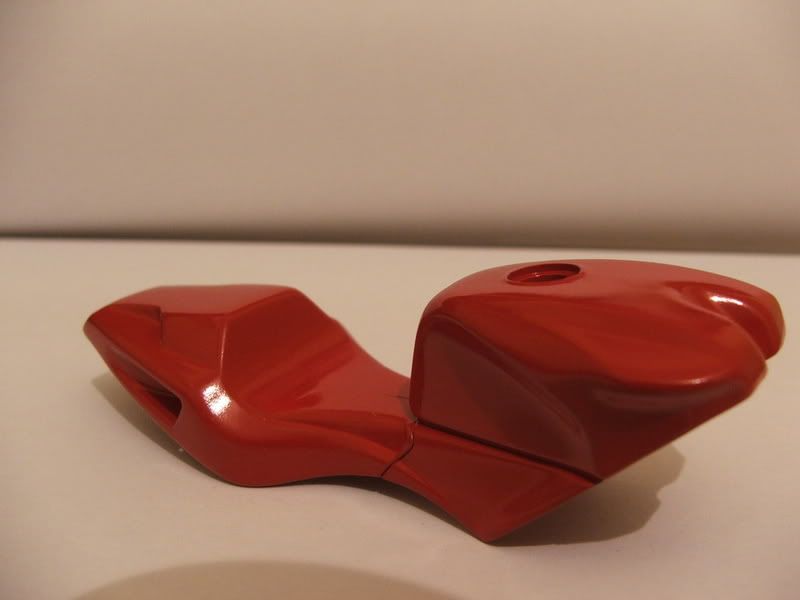
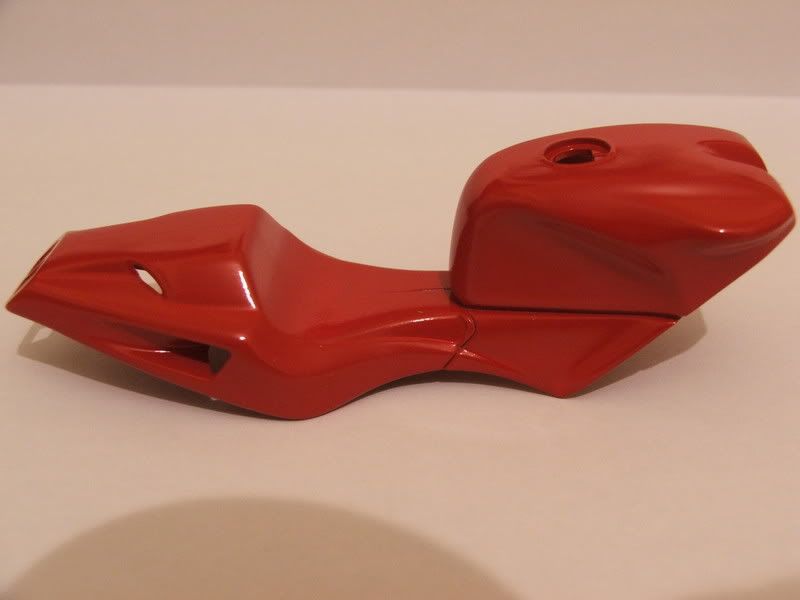
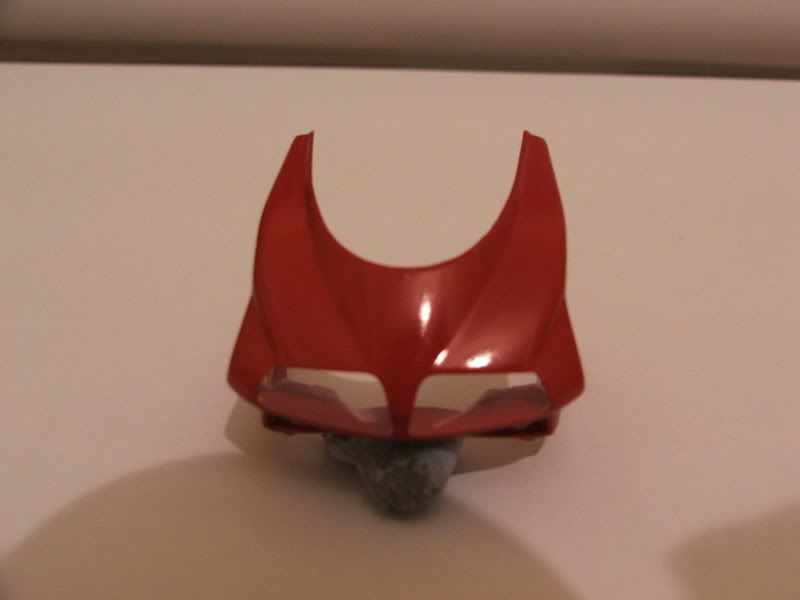
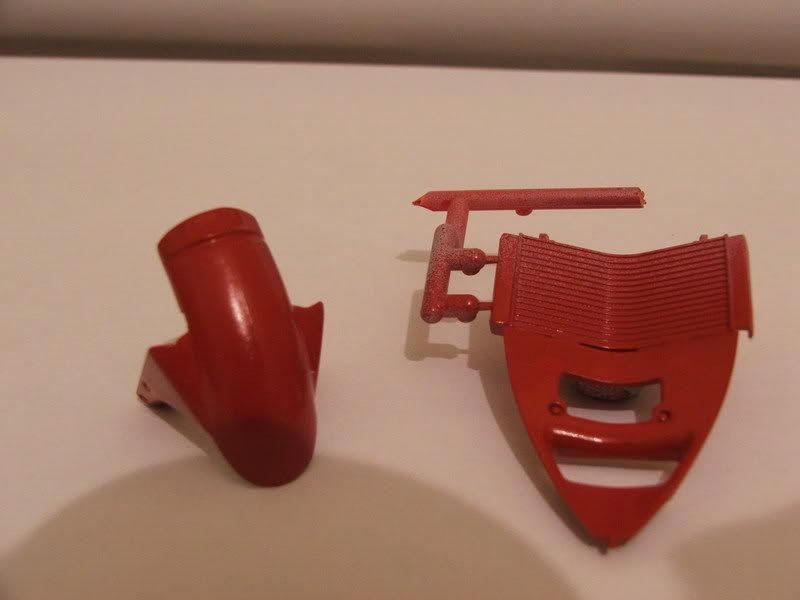
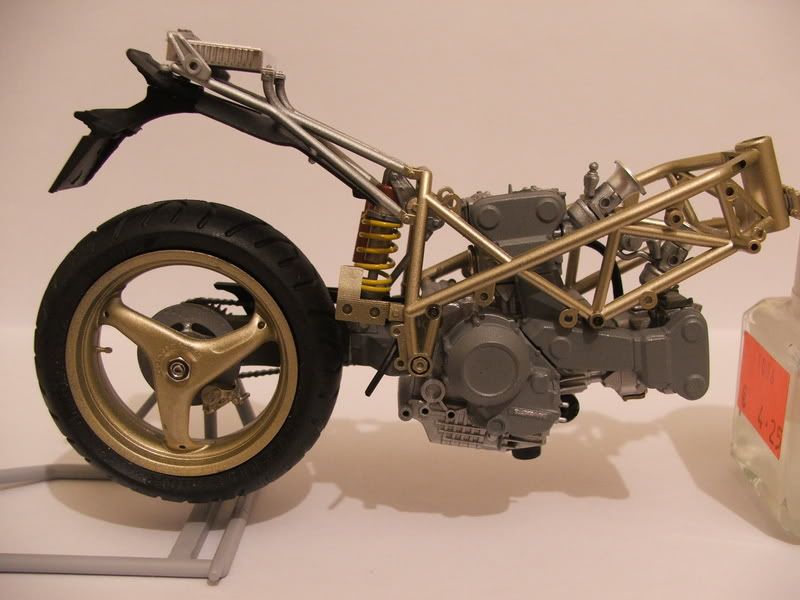
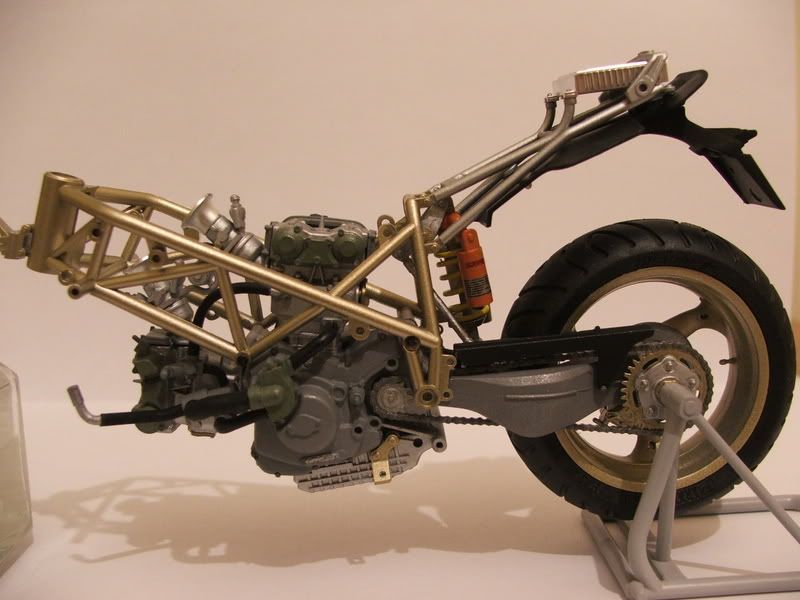
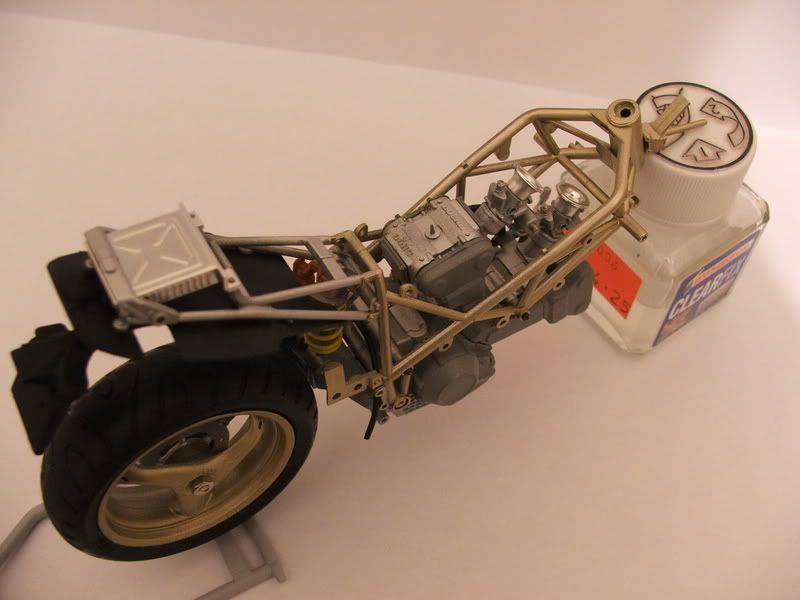
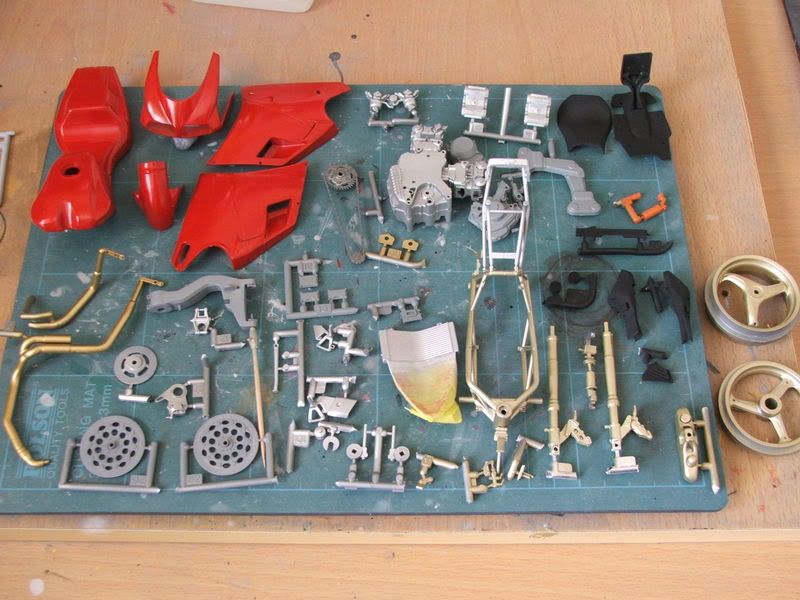
    Taking inspiration from The Doktors YZR 500 build thread, this is what I am currently working on a Tamiya 1/12 Ducati 916. It is a change for me as I am normally a car builder. I must admit I am quite enjoying the build. Well here are a few pics. Any questions, suggestions, constructive criticism welcome.

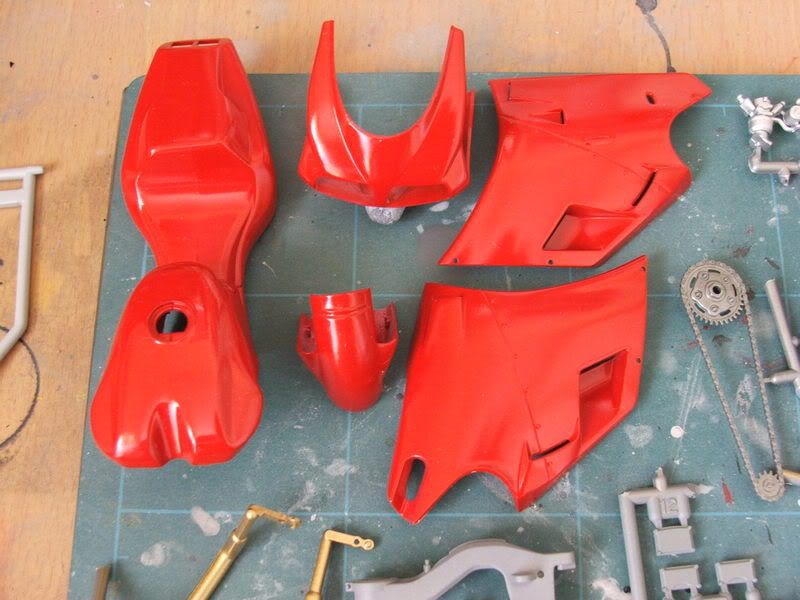
    Body parts need to be wet sanded and goingover with rubbing compound, they are a little rough at the moment. Side panels are done aswell just forgot to photograph them.
    DSCF2267.jpg
    DSCF2249.jpg
    DSCF2253.jpg
    DSCF2254.jpg

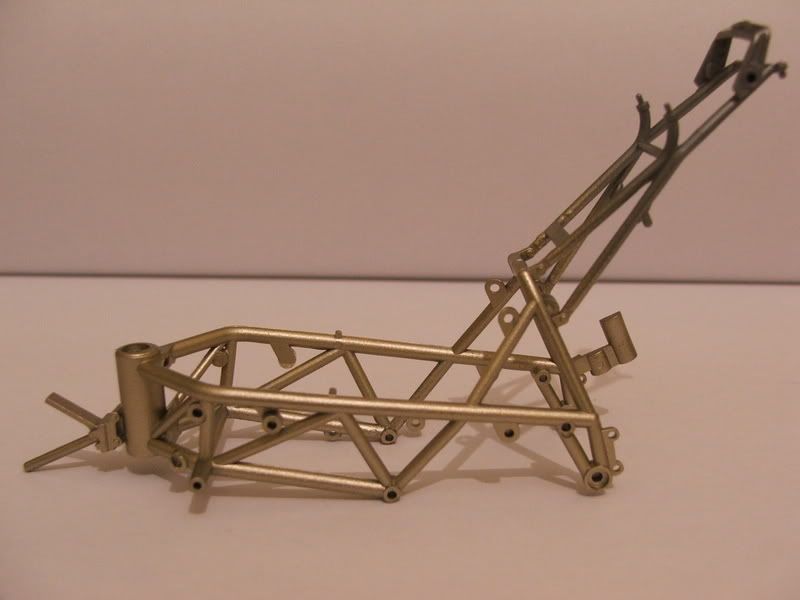
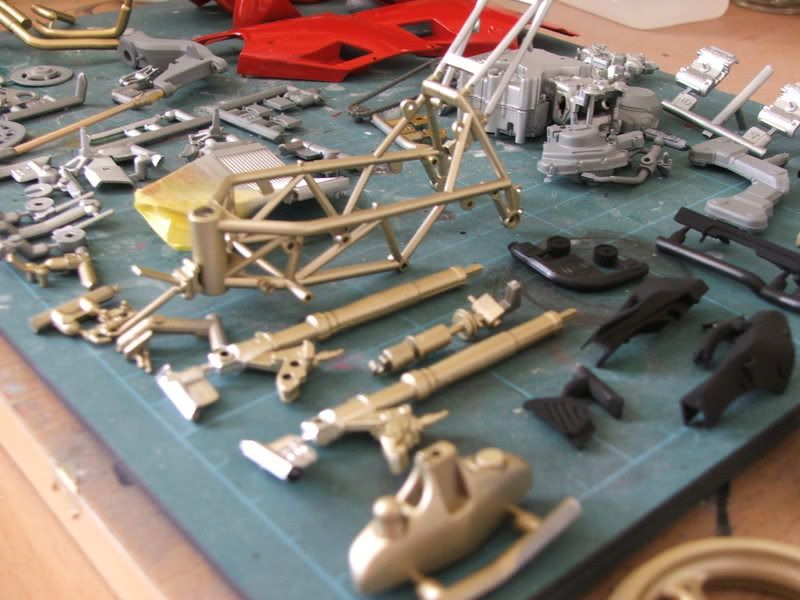
    Frame
    Rear end is to be painted in flat aluminium.
    DSCF2265.jpg

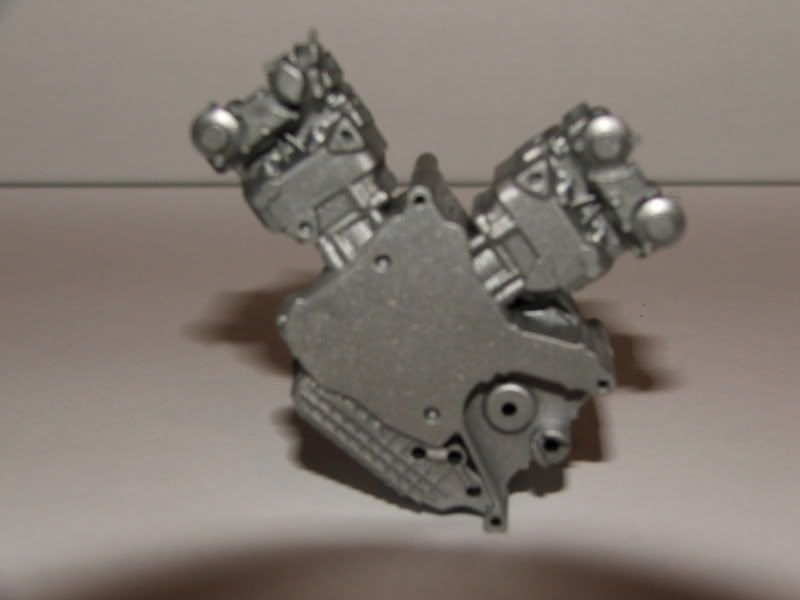
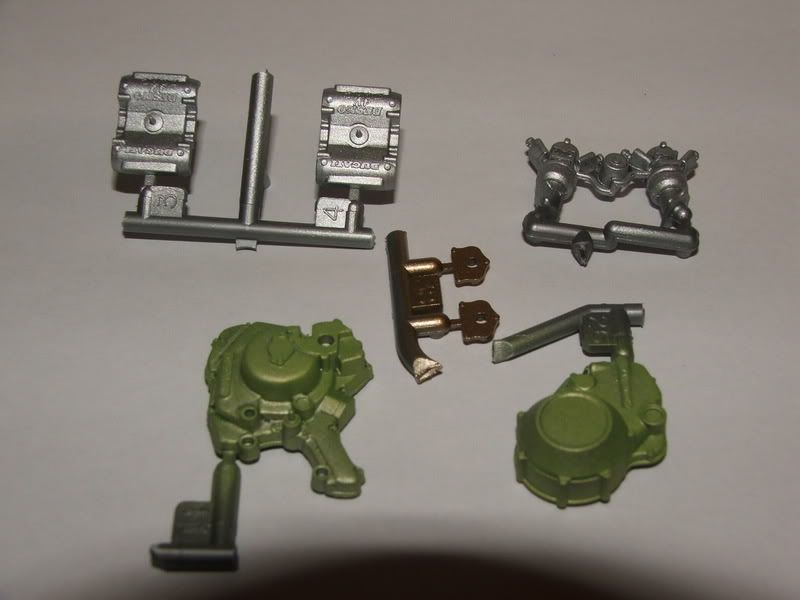
    Engline block and parts
    DSCF2263.jpg
    DSCF2257.jpg

    Oh yes apologies for the poor pictures, would have preferred to have taken pics with natural light but we are all a bit short on that lately! Until next time!


Comments

  • Registered Users, Registered Users 2 Posts: 1,208 ✭✭✭The Doktor


    So far its lookin good alright!.
    Watch out for that green colour on the engine. I think it might be kinda too green. I seem to remember that the colour the instructions give was a bit green.
    Have a look at www.bikepics.com and you might get a better idea of what it should be like.
    http://www.bikepics.com/pictures/071999/


    though looking at the fairing i think you need to remodel it a little, judging by this pic...
    http://www.bikepics.com/pictures/006971/ :D:D


  • Registered Users, Registered Users 2 Posts: 2,149 ✭✭✭BFassassin


    Looking good Ciaran Dub. The fairings look quite smooth already.


  • Closed Accounts Posts: 195 ✭✭Ciaran_Dub


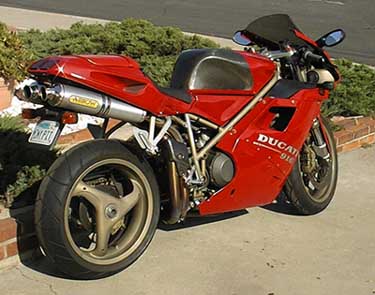
    The Doktor I think you could be right about the green alright, only thing is that pic looks more like gun metal type colour rather then green. I was going by this pic Ducati916004.jpg its from a build on AutomotiveForums by a very good builder.
    Cheers BFassassin,yeah in the pics its looks smooth but in person it defo needs the wet sand but not much thank god.


  • Registered Users, Registered Users 2 Posts: 1,208 ✭✭✭The Doktor


    Ciaran_Dub wrote: »
    The Doktor I think you could be right about the green alright, only thing is that pic looks more like gun metal type colour rather then green. I was going by this pic Ducati916004.jpg its from a build on AutomotiveForums by a very good builder.
    Cheers BFassassin,yeah in the pics its looks smooth but in person it defo needs the wet sand but not much thank god.

    When I did the 916 a few years ago, I was lucky enough to see the real thing in the flesh stripped in a bike shop, and yeah, it does look like that pic i posted above. In the flesh you see that it does have the green in it alright. A mix of tamiya metallic grey, with just a drop of green should do it...
    Thing is though, the whole idea of the green makes the model more interesting, which is what is about... somtimes.... Though itll be covered up in the end!!


  • Closed Accounts Posts: 195 ✭✭Ciaran_Dub


    The Doktor wrote: »
    Thing is though, the whole idea of the green makes the model more interesting, which is what is about... somtimes.... Though itll be covered up in the end!!

    That is very true,the very same reason I wasnt too worried about seam lines on the engine block. That and the fact I dont have metallic grey! must pick some up some day now that I think about it!


  • Advertisement
  • Registered Users, Registered Users 2 Posts: 1,208 ✭✭✭The Doktor


    Just wonderin, do you put the Decals on and then do a clear coat over it? Or do you just use some sort of polish to give the final shinyness?
    I use the clearcoat method meself, looks pretty good, but is it possible to get it even shinyer (if thats a word!)??
    Heres an example of the clear using laquer out of a spray can decanted into an airbrush.
    Right Finished.jpg


  • Closed Accounts Posts: 195 ✭✭Ciaran_Dub


    The Doktor wrote: »
    Just wonderin, do you put the Decals on and then do a clear coat over it? Or do you just use some sort of polish to give the final shinyness?
    I use the clearcoat method meself, looks pretty good, but is it possible to get it even shinyer (if thats a word!)??
    Heres an example of the clear using laquer out of a spray can decanted into an airbrush.
    Right Finished.jpg


    I have never used clear to be honest, never really ben a great fan of it and especially when you consider after doing a good decal and paint job the risks of running it by the clear eating at the decals is too high in my mind! I also find that sometiems it can leavve a very plasticy (Not a realy word of course) look to the finished model, in sying that though the Repsol looks great.

    What I do is wet sand out the light orange peel I normally get (you can see it in the above pics) then use rubbing compound, I find the Tamiya one fine to use, then I use wax/polish over that. Have only used the Tamiya model wax but find it pretty good.

    Sorry just to add I know a lot of guys use Meguiers Scratch X and Meguires polishing creams to get a higher shine from the cars. And it seems to work, drop over to Automotiveforums to see what I am talking about, some excellent builders there that never use clearcoat!


  • Closed Accounts Posts: 195 ✭✭Ciaran_Dub


    Just a quick update just more parts painted no actual assembly done. Oh Dok took your advice and repaintedthe grey/green engine parts cant really see them in the pics but they just have a green hue to them

    DSCF2273.jpg

    DSCF2268.jpg

    Here are all the body parts, including the side fairings I forgot to post last time.
    DSCF2270.jpg

    Anyway I hope to get some assembly done during the week a lot of the engine parts are small and need one or two colours hand painted onto them.


  • Registered Users, Registered Users 2 Posts: 9,248 ✭✭✭Plug


    Can these kits be bought from tower?


  • Closed Accounts Posts: 195 ✭✭Ciaran_Dub


    Yes Plug they can. There is a link on Tower Hobbies front page that brings you to this link http://www.plastic-models.com/. I have looked at the prices before and to be honest I dont think they are great. If you are thinking about getting one, you would be better at looking at one of the japanese sites, like http://www.hlj.com or http://www.rainbowten.co.jp/english/index.html.


  • Advertisement
  • Registered Users, Registered Users 2 Posts: 12,683 ✭✭✭✭Owen


    If you decide to sell this, let me know. It's a perfect match for my baby!


  • Closed Accounts Posts: 195 ✭✭Ciaran_Dub


    Ned78 I dont normally sell my models but if you are making an offer by all means do.

    Plug here is the Ducati on Tower http://www3.towerhobbies.com/cgi-bin/wti0001p?&I=LXGS82&P=W
    Plus another $25 approx for shipping!! Compared to http://www.hlj.com/product/TAM14068
    Which is about €20 delivered! Says it all really


  • Registered Users, Registered Users 2 Posts: 2,149 ✭✭✭BFassassin


    All the parts look very realistic Ciaran. The painting really makes them come to life.


  • Registered Users, Registered Users 2 Posts: 9,248 ✭✭✭Plug


    What are they like to deal with?


  • Closed Accounts Posts: 195 ✭✭Ciaran_Dub


    To be honest plug there is no real way to answer the question. It depends on a lot fo things, your own skill level and patience, how detailed you wish to make the model, obviously which model you pick! Thisis my first bike and I must say it is quite easy to deal with, so far no major problems. I suppose it depends on what tools you have to build one! So the short answer is there is no short answer, just give one a go and see what you think.


  • Registered Users, Registered Users 2 Posts: 15,626 ✭✭✭✭vectra


    Plug wrote: »
    What are they like to deal with?

    I think Rennicks Modeltune in the North sells Static Models as well ;)


  • Closed Accounts Posts: 195 ✭✭Ciaran_Dub


    BFassassin wrote: »
    All the parts look very realistic Ciaran. The painting really makes them come to life.

    Cheers Assassin, its amazing what can be done with a camera ;) ah no I am happy so far with how they have come out. I must admit I love the titanium gold colour it looks very cool airbrushed! And that is one thing having a decent airbrush makes such a difference when it comes to painting partsit gives a much better finish.


  • Registered Users, Registered Users 2 Posts: 2,149 ✭✭✭BFassassin


    Yeah the airbrush is brilliant when its working right. I have a cheap airbrush that was in aldi a couple of years ago and it worked ok the first time i used it but no great any time after that. It could be the type of paint and thinners I was using though.


  • Closed Accounts Posts: 195 ✭✭Ciaran_Dub


    BFassassin wrote: »
    Yeah the airbrush is brilliant when its working right. I have a cheap airbrush that was in aldi a couple of years ago and it worked ok the first time i used it but no great any time after that. It could be the type of paint and thinners I was using though.

    I have a cheap airbrush I got from Marks Models and loads of things can effect it, the tube itself, not cleaning it properly, and as you said yourself getting the paint/thinner mixing right. The rule of thumb is the mixing should be the consistence (sp) of milk. Also can you adjust the spray pattern on the airbrush, also is it single or double action airbrush?


  • Registered Users, Registered Users 2 Posts: 2,149 ✭✭✭BFassassin


    Its just a basic one so I presume its a single action. I might pick a new one sometime though and get a good paint finish on my models


  • Advertisement
  • Closed Accounts Posts: 195 ✭✭Ciaran_Dub


    Ah its worth the money considering the difference in finish. Ill never regret spending the money on the Badger I got.


  • Registered Users, Registered Users 2 Posts: 1,208 ✭✭✭The Doktor


    Lookin good Ciaran. Where did ye pick up the cutting mat. I can never seem to get em anywhere.
    If I was you I would definately do the oil wash around the likes of the brake calipers! will really bring out the detail.

    I havent done anything on my YZR all week... painting the kitchen :(
    not fair...


  • Closed Accounts Posts: 195 ✭✭Ciaran_Dub


    The Doktor wrote: »
    Lookin good Ciaran. Where did ye pick up the cutting mat. I can never seem to get em anywhere.
    If I was you I would definately do the oil wash around the likes of the brake calipers! will really bring out the detail.

    I havent done anything on my YZR all week... painting the kitchen :(
    not fair...

    Cheers Dok, yeah I am thinking about it myself alright, will need to pick up some oil paints first. I cant remember whree I got the cutting mat I think it was in Maplin. You are doing the wrong type of painting!?!?!


  • Registered Users, Registered Users 2 Posts: 1,208 ✭✭✭The Doktor


    Just lookin at your exhausts...I think you can do a lot better:D
    In the instructions of a model they will tell you to paint them one overall colour, and as far as I can remember on this one its titanium gold...
    However on the real thing thats not the case. They are made from stainless steel which discolours the more the bike is used from the heat of the gasses...
    In this pic you can see they are pretty much "silver"..
    916%20018.jpg

    Yet in this pic you can see gold colours and blacks ..
    916_bip.jpg

    What happens is as the bike is used the areas where there is bends, welds etc the heat builds up more, and theses areas turns gold. This will eventually spread out, and those areas at the bends will darken even more, going to near blacks, maybe even blues and purples...
    On the likes of a Ducati (i.e. joe public road bike) It seems to be mainly gold/black/silver. But on a racing bike, like Moto GP ones, its even more pronounced, with lots of blue..

    Also, to get an idea of how long it takes for the colour changes to happen, I polished the exhaust of my own bike, so that they were nice and silver. I took it for a short spin, of about 50km, and already you could see the goldy colours on the hottest areas. So its not as if it takes months or years for this to happen.

    Soooo... I think this adds to a finished model, And its easy.
    All you need to do, is start by painting the Exhaust as shiny as you can with alcald chrome. The using tamiya "clear orange" start at each bend/joint and work the airbrush out, so the darkest parts will be at the bend, and it will fade to lighter orange on the straighter parts. Then when thats dry, use some "Smoke" (clear black) with a tiny drop of matt black, and again, start at the bends, and work out.
    Its worth a try, and if you make a mess of it, all ye need to do is rub it down and start again...:D

    Oh yeah, just to note on the first picture I reckon the exhausts were polished before the pic was taken...


  • Closed Accounts Posts: 195 ✭✭Ciaran_Dub


    The Doktor wrote: »
    Just lookin at your exhausts...I think you can do a lot better:D
    In the instructions of a model they will tell you to paint them one overall colour, and as far as I can remember on this one its titanium gold...
    However on the real thing thats not the case. They are made from stainless steel which discolours the more the bike is used from the heat of the gasses...
    In this pic you can see they are pretty much "silver"..
    916%20018.jpg

    Yet in this pic you can see gold colours and blacks ..
    916_bip.jpg

    What happens is as the bike is used the areas where there is bends, welds etc the heat builds up more, and theses areas turns gold. This will eventually spread out, and those areas at the bends will darken even more, going to near blacks, maybe even blues and purples...
    On the likes of a Ducati (i.e. joe public road bike) It seems to be mainly gold/black/silver. But on a racing bike, like Moto GP ones, its even more pronounced, with lots of blue..

    Also, to get an idea of how long it takes for the colour changes to happen, I polished the exhaust of my own bike, so that they were nice and silver. I took it for a short spin, of about 50km, and already you could see the goldy colours on the hottest areas. So its not as if it takes months or years for this to happen.

    Soooo... I think this adds to a finished model, And its easy.
    All you need to do, is start by painting the Exhaust as shiny as you can with alcald chrome. The using tamiya "clear orange" start at each bend/joint and work the airbrush out, so the darkest parts will be at the bend, and it will fade to lighter orange on the straighter parts. Then when thats dry, use some "Smoke" (clear black) with a tiny drop of matt black, and again, start at the bends, and work out.
    Its worth a try, and if you make a mess of it, all ye need to do is rub it down and start again...:D

    Oh yeah, just to note on the first picture I reckon the exhausts were polished before the pic was taken...

    Short answer had been keeping that in mind! :D, I already did the exhausts the goldy type colour and thought they didnt look great so am thinking a nice chrome silver and the heat patterns will look much better. Great minds think alike ;)


  • Closed Accounts Posts: 195 ✭✭Ciaran_Dub


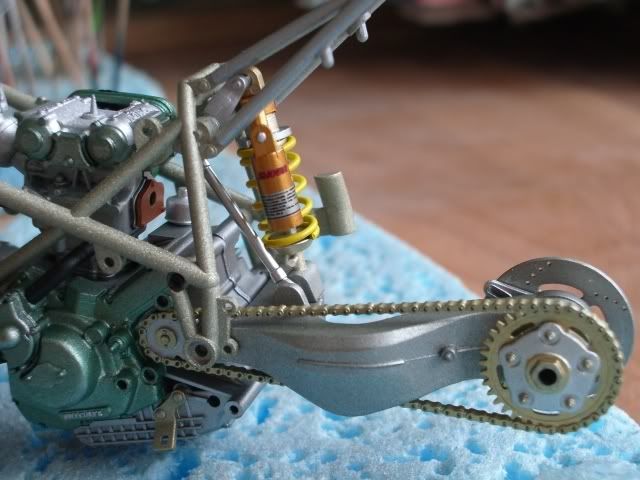
    Okay quick update, have got a lot done over the last week or so. Pics tellthe story really. Only thing is I didnt dowash the wash of the engine and chain, two reasons a) not to pushed because the engine wont really been seen anyway b) I was too lazy to go get the oil paint and didnt want to hold up the build. So exhausts (I will do the hest patterns) and front end next.

    FAO Doktor - appreciate the pics I am useless for not getting proper reference pics before a build BUT something I have noticed with all the pics I have started looking at all the engine/exhaust/frame/brake parts are all different colours! :D So am going to go my own route now but agree the silver exhausts look much better, I did them titanium silver and came out very cool. I really have got to put an order in on the Alclad though it make a huge difference. Anyway enough blabbering the pics

    DSCF2287.jpg

    DSCF2285.jpg

    DSCF2289.jpg


  • Registered Users, Registered Users 2 Posts: 1,208 ✭✭✭The Doktor


    lookin very good! a really clean build.
    But im gonna critisise ye! :D
    your tyres... give em a sand! rub that mold line off em!
    It takes 2 mins, and makes a big difference to a model. It will remove a line that isnt there on a real tyre, and will make the tyre look like its been used.
    If you dont want a used tyre, u gotta do little red an yellow lines that would be on a new tyre!:D


  • Closed Accounts Posts: 195 ✭✭Ciaran_Dub


    The Doktor wrote: »
    lookin very good! a really clean build.
    But im gonna critisise ye! :D
    your tyres... give em a sand! rub that mold line off em!
    It takes 2 mins, and makes a big difference to a model. It will remove a line that isnt there on a real tyre, and will make the tyre look like its been used.
    If you dont want a used tyre, u gotta do little red an yellow lines that would be on a new tyre!:D

    No hadnt forgotten about the tyres, meant to say the tyre is only for show at the moment. Jeez talk about a hard audience :rolleyes:....kidding appreciate the comments gotta say I am pretty happy with it so far. Like I said first bike but will definately be getting another its been fun build so far.


  • Registered Users, Registered Users 2 Posts: 1,208 ✭✭✭The Doktor


    Ciaran_Dub wrote: »
    No hadnt forgotten about the tyres, meant to say the tyre is only for show at the moment. Jeez talk about a hard audience :rolleyes:....kidding appreciate the comments gotta say I am pretty happy with it so far. Like I said first bike but will definately be getting another its been fun build so far.

    Ah good man!
    Yeah, dunno what it is about bikes, I love doin em... I get bored with cars, but never bikes...


  • Advertisement
  • Closed Accounts Posts: 195 ✭✭Ciaran_Dub


    Okits been a while since I updated this, what with getting ready for xmas and the arrival of a bundle of joy in the New Year time has gotten away from me. I have continued with it but disaster struck at the weekend! I was basically left with just doing the body parts and decaling. So I was lightly sanding the engine/seat cowl with 1200 grit sand paper and went to far with it! Sanded through the paint. D'Oh! But the disaster didnt end there, I was doing the side cowl and went to far with the rubbing compound! Complete and utter disaster, my own fault was doing it all in poor light!

    Anyway not a big deal to repair it all but for one thing I have run out of TS8 the colour I did the body in! So now to what is really what is disaster no 2. I thought I would use X7 through an airbrush and I must say the colour match was pretty decent! But I rushed it, sanded paint today and cut it with rubbing compound. Looked actually quite good BUT I didnt realise some of the paint was not completely cured and got a lovely deep finger print in it!

    So that is meout ofaction till I get my hands on some TS8 or get around to stripping the whole panel and starting fresh with x7 instead. Not decided yet what to do but when I get around to it I will update again.


  • Registered Users, Registered Users 2 Posts: 1,208 ✭✭✭The Doktor


    LOL... reminds me of when I dont that kit!
    I had a total disaster with one of the side fairings. I made a mess of the spray job and spent 2 evenings sanding it. Then I spilled Cellulose thinners on it and it melted! LOL...
    I ended up leaving the fairing off .. "so ye can see the detail..:D"
    It was actually nice like that


  • Closed Accounts Posts: 195 ✭✭Ciaran_Dub


    Glad my misery has cheered you up :D, not a bad idea with the leaving the side off have thought about something similiar before but if I was doing that I would like to do it as a "Stripped" model so that the panels where still beside the model!If that makes sense.

    Ah might getaround to stripping it on Wednesday and sanding it before the weekend. Might be heading up to Belfast at the weekend so will drop into the model shop hopefully the UK issue with Tamyia sprays has been sorted and they have them back in stock.


  • Closed Accounts Posts: 195 ✭✭Ciaran_Dub


    Just some piccy updates got the side panel stripped will prime tomorrow and order the TS 8 paint over the next week.

    DSCF2297.jpg
    DSCF2296.jpg
    DSCF2295.jpg
    DSCF2294.jpg
    DSCF2293.jpg


  • Registered Users, Registered Users 2 Posts: 2,149 ✭✭✭BFassassin


    Almost finished now Ciaran.
    Looking good.


  • Registered Users, Registered Users 2 Posts: 1,208 ✭✭✭The Doktor


    Lookin very very good.......
    dont forget the valves on the tyres... :p


  • Advertisement
  • Closed Accounts Posts: 195 ✭✭Ciaran_Dub


    Cheers lads yeah i am quite happy with it. Like I said at the start its been a whilesince i built a model so am happy I havent completely lost any of the few skills i had!

    Doktor the valves are done ;) I did them gold for the stem as withthe wheels and used chrome for the valve covers,you just cant see it in the pic. The one thing I have forgotten to do is the black trim on top of the windscreen.


  • Closed Accounts Posts: 195 ✭✭Ciaran_Dub


    Ok so after a few delays the paint finally arrived at the same time my baby daughter arrived a week early (Everybody AWWWWWWW!) anyway got the paint done.

    Now a couple of things for the eagle eyed amongst you (Dok I am looking in your direction) you will notice a couple of things. One I had a slight mishap with the left mirror and I destroyed the paint a little, I have brushed paint it for the moment but I will get around to fixing it properly with the airbrush. Nowfor the second issue dippy here painted the indicators clear red instead of clear orange!! What a grade a muppet I am! but other then that it all went together fine. Happy enough with the build and will definately be doing another bike again.

    So the final pics
    DSCF2373.jpg
    DSCF2375.jpg
    DSCF2376.jpg
    DSCF2380.jpg
    DSCF2379.jpg

    So hope u all enjoyed following the build. I think me and Dok will have to keep the plastic model building end of the hobby up!! The reason for the bike build was to reignite my passion in the hobby and I think I have done that. I will keep doing build threads if everyone enjoys them. My next build is an Revell AC Cobra so keep an eye out for the thread.


  • Registered Users, Registered Users 2 Posts: 2,149 ✭✭✭BFassassin


    Congrats on finishing the build and your new daughter.


  • Registered Users, Registered Users 2 Posts: 1,208 ✭✭✭The Doktor


    Lookin really good!
    As for the mirror... tell everyone its a "stone chip":D
    Ill say nothin about the red indicators:p

    Ive started into a diorama, for the tree I made a few weeks ago, see "shakin that tree" thread...
    Still dunno what to put on it.


  • Closed Accounts Posts: 195 ✭✭Ciaran_Dub


    The Doktor wrote: »
    Lookin really good!
    As for the mirror... tell everyone its a "stone chip":D
    Ill say nothin about the red indicators:p

    Ive started into a diorama, for the tree I made a few weeks ago, see "shakin that tree" thread...
    Still dunno what to put on it.

    Sorry did I not mention that it was a "custom" build!! decidedto change the lights!!! :p

    Hmm the diorama not really sure about that one to be honest. Tryingone myself for the infamous DeLorean I keep speaking off. I have the base done to the point where I need to find appropriate groundwork for a desert scene.


  • Advertisement
  • Registered Users, Registered Users 2 Posts: 1,208 ✭✭✭The Doktor


    Ciaran_Dub wrote: »
    Sorry did I not mention that it was a "custom" build!! decidedto change the lights!!! :p

    Hmm the diorama not really sure about that one to be honest. Tryingone myself for the infamous DeLorean I keep speaking off. I have the base done to the point where I need to find appropriate groundwork for a desert scene.

    Desert is easy...
    Just build up the base in the shape you want with polyfilla. Paint it with "sand " paint.
    Then spray on photo mount (glue) and sprinkle on somtimg like Mig pigments "sand". Or, you can just use actual fine sand.


  • Closed Accounts Posts: 195 ✭✭Ciaran_Dub


    That had pretty much been the plan Dok. I got a photo frams and took out the glass. Then used the backing of the frame to make the base from Polyfilla. That is where I am too at this stage. I was going to water down white glue and then put the ground work on top. I noticed in Art & Hobby they had Games Workshop bits and pieces which included groundwork. They had sand which looked very good and it wasnt expensive. I have a few other bits to add into it that will add a bit more to the diorama. But all is on hold for the time being as you can imagine


Advertisement