Advertisement
If you have a new account but are having problems posting or verifying your account, please email us on hello@boards.ie for help. Thanks :)
Hello all! Please ensure that you are posting a new thread or question in the appropriate forum. The Feedback forum is overwhelmed with questions that are having to be moved elsewhere. If you need help to verify your account contact hello@boards.ie
Hi all! We have been experiencing an issue on site where threads have been missing the latest postings. The platform host Vanilla are working on this issue. A workaround that has been used by some is to navigate back from 1 to 10+ pages to re-sync the thread and this will then show the latest posts. Thanks, Mike.
Hi there,
There is an issue with role permissions that is being worked on at the moment.
If you are having trouble with access or permissions on regional forums please post here to get access: https://www.boards.ie/discussion/2058365403/you-do-not-have-permission-for-that#latest

My Ford Transit Hi-Cube Conversion

  • 13-10-2010 8:26pm
    #1
    Registered Users, Registered Users 2 Posts: 6,260 ✭✭✭


    Ok, So I've finally got the finger out and cracked into my conversion.
    Last year, I bought a 1996 Ford Transit High Cube, and a caravan as a donor for my van. Never really got around to getting it done, until this week when I've gone at it hammer and tongs. Here's how I'm getting on.

    Any questions, suggestions or tips, let me have 'em

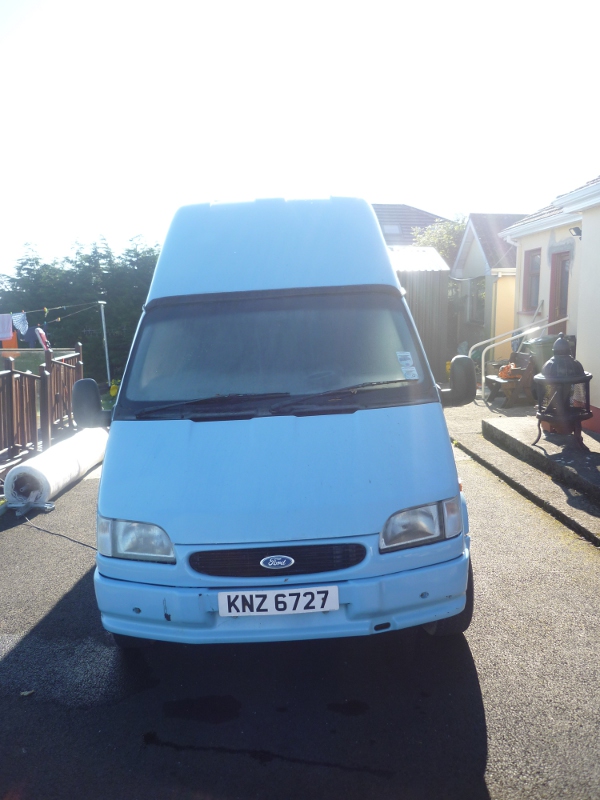
    My Van, in very good shape, considering its 16 years old
    P1020310.jpg

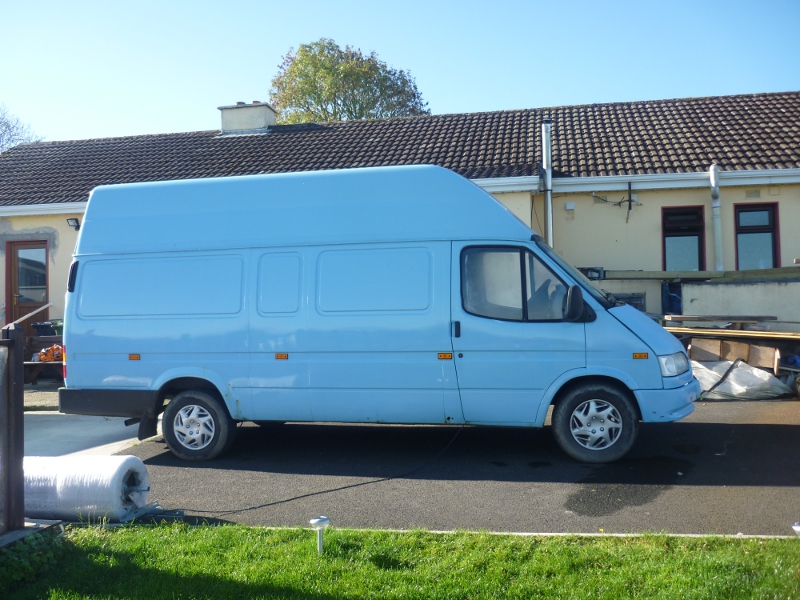
    From the Side
    P1020311.jpg

    Notice, there are a few bubbles of rust in the side arch and floor, and a hole behind the drivers door. Nothing major though, and certainly nothing that can't be fixed with a bit of P38 :D


«1345

Comments

  • Registered Users, Registered Users 2 Posts: 6,260 ✭✭✭Buford T Justice


    First Job on the List:

    Everything out. Not difficult since there was nothing in it barr a floor. Duly removed the floor and the seats from the van.

    Since I was at it, I took up the Carpet in the front and got some sound deadening mats, and lined out the front floor with them, as it was a bit noisy when on the road. Hopefully this'll keep the clunking down when on long roads. I've not taken a pic of this though, but its rather un-exciting.

    So, Floor was lifted and I de-greased and power washed out the van. There were four holes in the back of the van behind the wheel arches, and they were cut out, cleaned up and plated with steel and sprayed with primer.

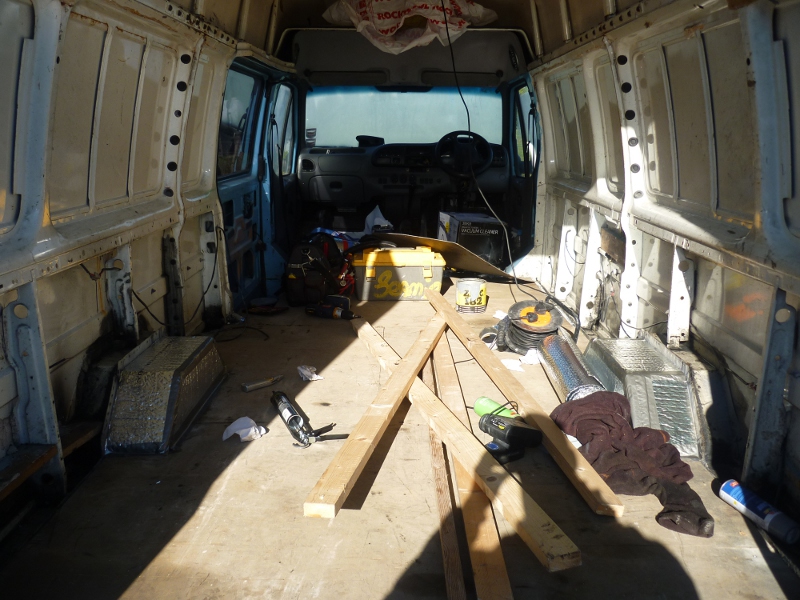
    The Floor was then insulated with Thermawrap General Purpose insulation, from Homebase @ €20 a roll. Stuck it down with Carpet adhesive, and I put the Floor back down again. It'll be perfect as a base floor to have everything built on.

    Not a great photo, as its very sunny this time of the morning, but you can see the insulation on the wheel arches.

    P1020312.jpg


  • Registered Users, Registered Users 2 Posts: 6,260 ✭✭✭Buford T Justice


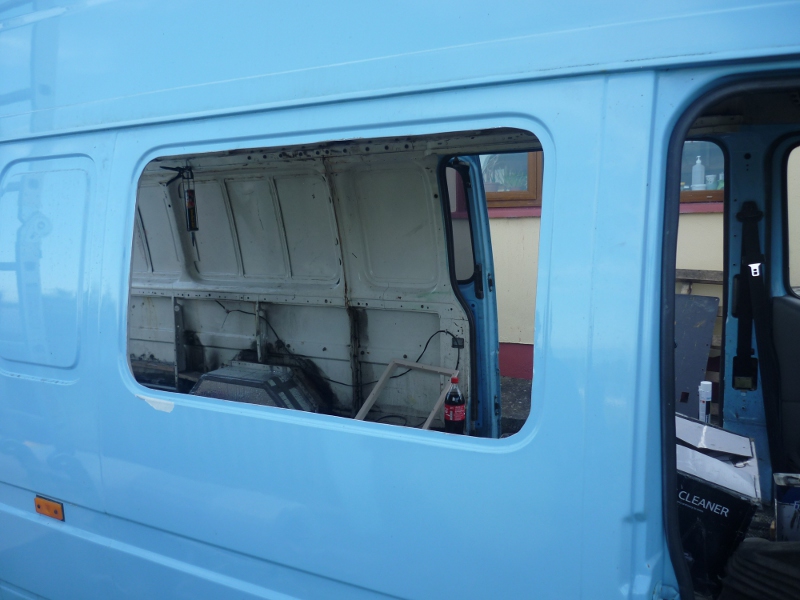
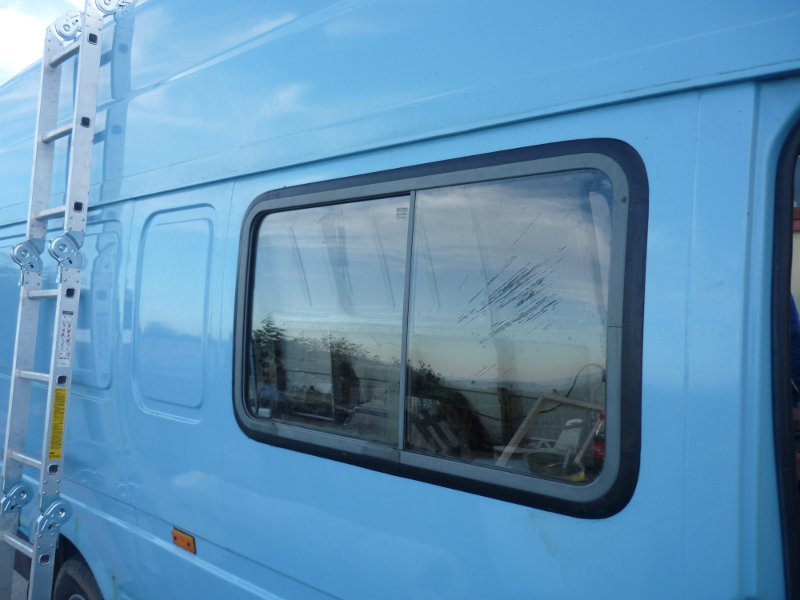
    Ummm, Whats this big hole in the Side of me van???

    Oh yeah, its for my new window to be fitted.
    Gotta be honest, its a nervous time cutting holes in the side of the van

    P1020314.jpg

    And the finished product. I have to say I was actually quite relieved about how well it looks, and how easy the window was fitted. Its a nice snug fit. Note, the edges of the metal were all filed down and sprayed with primer to prevent rusting.

    P1020315.jpg


  • Registered Users, Registered Users 2 Posts: 6,260 ✭✭✭Buford T Justice


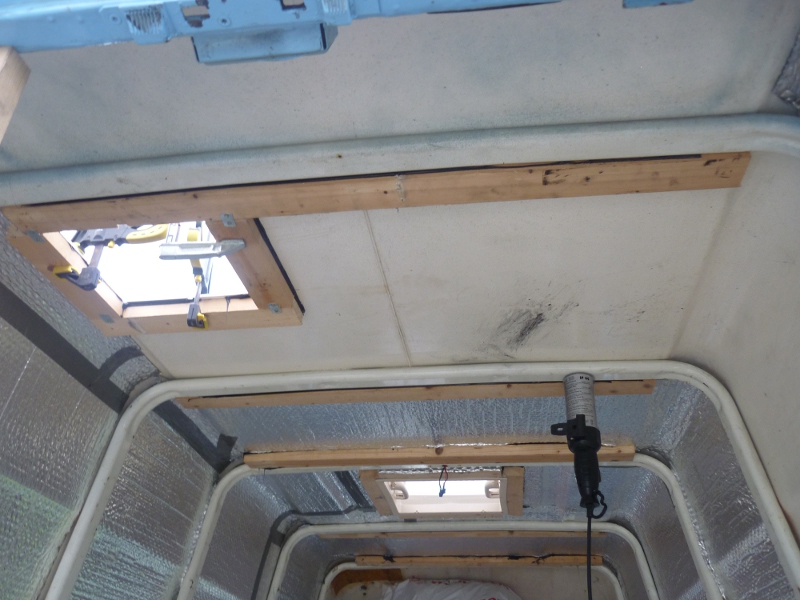
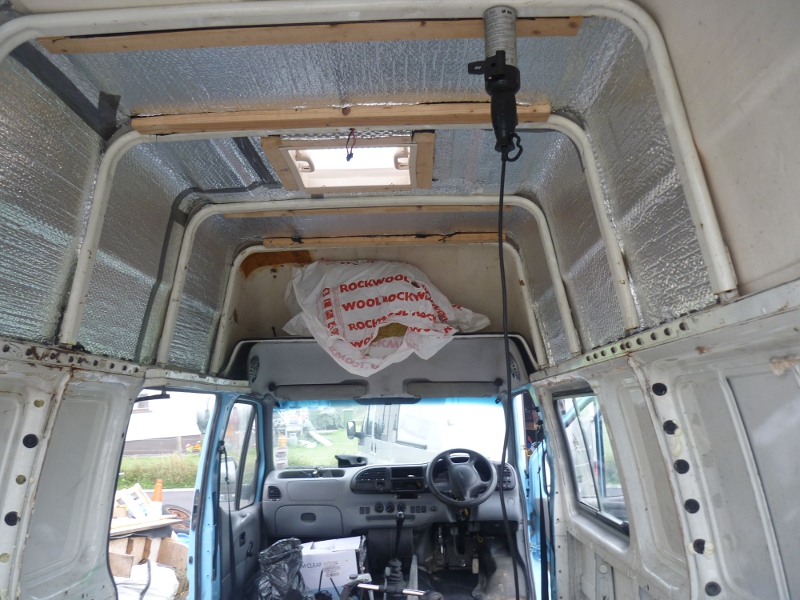
    Next job is to insulate the roof of the van, which to be honest was a bit of a laborious and tedious job. Nonetheless I persevered and managed to get it done.

    Before I did it, I bonded timbers into the roof along side the supporting bars using Sikaflex 227. Expensive stuff, but man does it grip!

    Since I was up there, I decided that it would be a good time to fit two Skylights. The timbers around the skylights were bonded with 227, and the Skylights were sealed down with Sikaflex Windscreen sealer.

    P1020317.jpg

    These photos were taken before i was completely finished the roof, but at this stage its fully insulated and even down over the cab has been done.

    P1020318.jpg

    So thats most of that out of the way, the real fun can begin, and I'm Starting to do the privvy now. Will update more once I have it.


  • Registered Users Posts: 105 ✭✭redcube


    where did you get the windows as i have a transit to and need some for my camper

    On the rust side of things if the wheel arch are bubbling dig a bit depper as there could be more rust hidding check the chassis at the back as they all go there i do recommond paint the under side with under body paint and waxhole in the chassis and even in the doors also check that all drains in the back door are clear as they can block

    i know all this as my own van was rotten at the back i had to cut out large parts of the chassis and weld in fresh metal and all i had was a hole in the floor at frist and it ended up a big job i also now about wheel arch fail as my left on was bubbing i hit with a hammer and i was left with no wheel arch :D


  • Registered Users, Registered Users 2 Posts: 6,260 ✭✭✭Buford T Justice


    redcube wrote: »
    where did you get the windows as i have a transit to and need some for my camper
    From a minibus from a breakers yard. Get on the phone and ring around. They should be common enough to get a hold of. Where are you located?
    redcube wrote: »
    On the rust side of things if the wheel arch are bubbling dig a bit depper as there could be more rust hidding check the chassis at the back as they all go there i do recommond paint the under side with under body paint and waxhole in the chassis and even in the doors also check that all drains in the back door are clear as they can block
    All the body floor was coated in burned oil when I bought it to keep the rust at bay, hence the powerwash. I've used Dinitrol as waxoyl on all the lower panes inside the van to keep the rust out, and the thought crossed my mind about spraying the underside of the chassis and body. Might get a whirl next week.
    redcube wrote: »
    i know all this as my own van was rotten at the back i had to cut out large parts of the chassis and weld in fresh metal and all i had was a hole in the floor at frist and it ended up a big job i also now about wheel arch fail as my left on was bubbing i hit with a hammer and i was left with no wheel arch :D

    I've been all around it prodding and poking the body. Thats how i found the holes i the floor and the one behind the drivers door. Its easy enough to find the holes with a quick poke of a screwdriver.

    Have you any pics of your van?


  • Advertisement
  • Registered Users Posts: 105 ✭✭redcube


    I'll post up a picture in my camper conversion thread go easy on the old girl its had a hard life

    You got luckly with rust then i didn't

    I'll ring around the scarp yards in the morning to see how much they want for the windows i'm based in co clare


  • Registered Users, Registered Users 2 Posts: 2,213 ✭✭✭Aidan_M_M


    Good start! What insulation are you using? And good to see proper clear skylights , they make a huge difference . Have you a wiring plan done for it , so as to start running cables now ?


  • Registered Users, Registered Users 2 Posts: 6,260 ✭✭✭Buford T Justice


    Aidan_M_M wrote: »
    Good start! What insulation are you using? And good to see proper clear skylights , they make a huge difference . Have you a wiring plan done for it , so as to start running cables now ?

    For the Floor and roof, I used thinsulate. Like bubble wrap coated with foil both sides. Used this primarily to keep the height as big as possible. I can still stand up straight in it, and I'm 6"3'. The walls will be done with Rockwool or something similar stuck to the steel panels with carpet adhesive before the lining goes over it.

    For the wiring, I'm making it up as I go. That's not to say that I don't know what I'm doing, i do. But I've no drawings as such, and as I progress through each appliance and unit, I'll pull in cables as i go

    As an example, today, I've fitted the door for the thetford cassette at the back left of the van near the door. The john will fit there, and the wall in front of you as you sit on it will be slightly over the mudguard. No shower as I don't have the space but sink to go in.

    I intend to put the kitchen in front of the toilet, and over the side door a bit if I need to, but it depends on how long it is. I've not decided wheather to put the controls and units above the kitchen or over the front passenger in the headspace yet, but I've run two sets of cables down to the toilet. One for the Sink and one for the Toilet. There is enough length on it to go up to the front if needs. The mains inlet will be behind the drivers seat just past the Pillar at a low ish level. easily routed wherever I decide to put the controls

    I intend to build the water heater (Carver Cascade) into the kitchen unit, and it protrudes an inch and a half out from the side of the caravan currently. When the sliding door is open, there seems to be 2 inches of a void between the door and the van, so its looking good so far. The fridge exhaust and vents should also pose no problem.

    The remainder of the floor level area will be for seating and beds but that will definitely be an interesting job. When I see the space left I will start to build. Overhead storage to the top then on the drivers side, and wherever else I can fit it, oh and maybe a fold down bed for the kids


    Depending on the water tank that I get will depend on the amount of work and piping needed to plumb it in. If its under the van (hopefully) I'll need to plumb across the floor underneath and into the kitchen unit.

    Gas is the next trick. I think I might build a sealed box at the back door opposite the toilet to house the cylinder, and again under the floor to the kitchen unit. Will see what stuff I can pick up on Saturday

    What do you think? Any obvious pitfalls?


  • Registered Users, Registered Users 2 Posts: 4,028 ✭✭✭spaceHopper


    Careful about the water heater, if you have the door open and it on you’ll bock the vents and build up heat. Also go to your local bring center to get empty gas cylinders as there is a deposit on them yet still people throw them out, I use the small 5kg Calor gas but can’t get it down the country, it’d be best to use a 11kg or two smaller ones, if you plan go going to France go big or two that you can get over there!
    Also don’t forget to have a hole in the floor by the fridge and gas bottle in case of leaks. A vent for the fridge and a fan would also be good


  • Registered Users, Registered Users 2 Posts: 2,213 ✭✭✭Aidan_M_M


    Agreed on the floor vents. And also agreed on the sealed compartment for the gas , and bear in mind all gas lines have to be solid , ie no flexi pipe anywhere apart from the regulator to the wall. We always use GOK Steel pipe , incredibly strong yet malleable .


    I'd stop for a half day and try and plan the wiring if it were me , and have cables ran and hidden now for mains sockets , TV Aerial , downlighters etc.


  • Advertisement
  • Registered Users, Registered Users 2 Posts: 6,260 ✭✭✭Buford T Justice


    Aidan_M_M wrote: »
    Agreed on the floor vents. And also agreed on the sealed compartment for the gas , and bear in mind all gas lines have to be solid , ie no flexi pipe anywhere apart from the regulator to the wall. We always use GOK Steel pipe , incredibly strong yet malleable .


    I'd stop for a half day and try and plan the wiring if it were me , and have cables ran and hidden now for mains sockets , TV Aerial , downlighters etc.

    I'll be knocking in a hole or two around the gas bottle to let out the vapours if any from it. Will be using the solid gas line, as I think they have some up in leterkenny, plus a fancy pants manifold for it with a couple of compression fittings.

    Will have a think about what wiring is going in, but I know whats going in where, and i'll run in the cables when i get to that part of the van. Never thought of the sockets though. What gauge of cable is used for it, is it 2.5?


  • Registered Users, Registered Users 2 Posts: 6,260 ✭✭✭Buford T Justice


    Update:

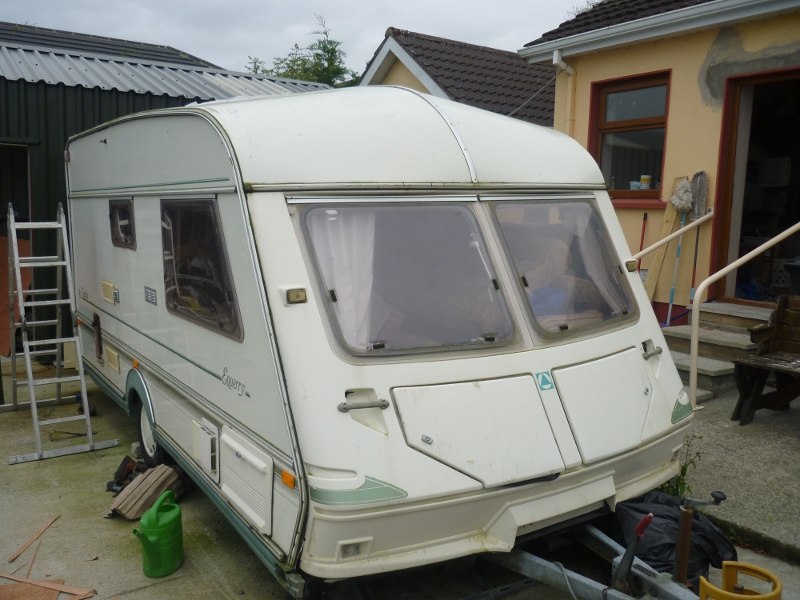
    For the sake of it, I've posted a pic of the donor Caravan for my project.

    'ere it is.
    P1020320.jpg


  • Registered Users, Registered Users 2 Posts: 6,260 ✭✭✭Buford T Justice


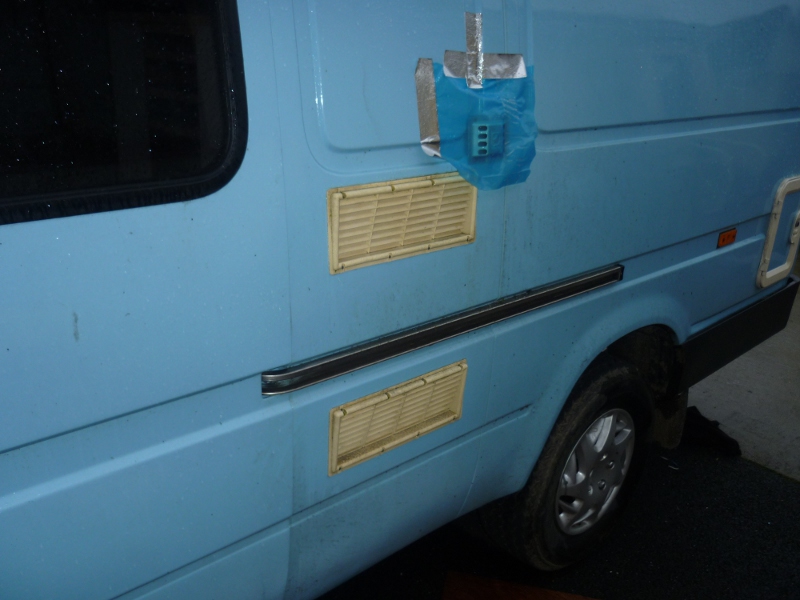
    Right. That's that out of the way, and I've been busy cutting holes in the side of the van.

    The below pic is for the two air vents for the fridge, and the Flue for the gas burner. Note, I need to extend the flue from the fridge to meet the chassis mounted one as the distance between the two is larger given that this is a van with curved walls and not a straight one. Plastic is only there to let the sealer cure before the rain gets at it
    Any suggestions would be appreciated.

    Also, to save me loading another pic, you can see at the very back the door that has been fitted for the Cassette toilet. Thetford C2

    P1020324.jpg


  • Registered Users, Registered Users 2 Posts: 6,260 ✭✭✭Buford T Justice


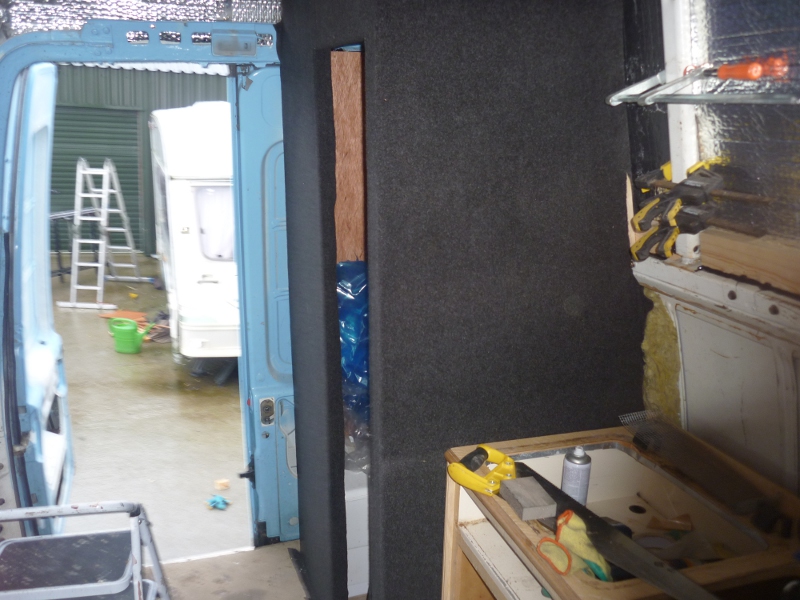
    I've been quite busy lately, and I've managed to build the enclosure for the toilet and lined it with carpet. This was no mean feat mind you, as its two sheets of 3mm ply with a timber in between, effectively making it a double paneled wall. The pic shows the outside of it, lined with carpet

    P1020327.jpg

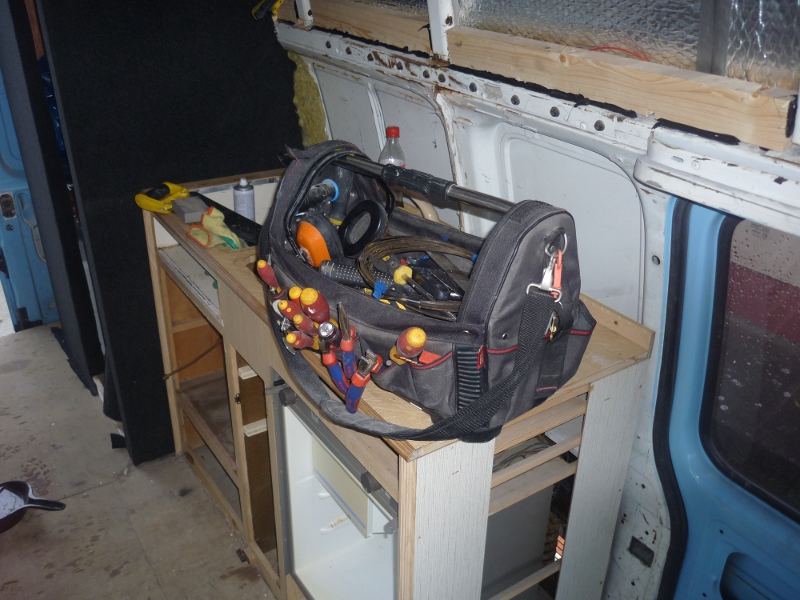
    I've also borrowed / stolen the kitchen unit from the caravan and intend to use it. Below is a pic of it, minus the toolbag of course :D

    I'm a bit further on than this, but these are all the pics I have at the moment. Any suggestions re the flue I would appreciate.

    P1020329.jpg


  • Closed Accounts Posts: 1,927 ✭✭✭paddyp


    If you plan on keeping the van I wouldn't put fibreglass or rockwool in it both absorb water and lead to rust (look at the vw campervan forums for great examples or what happens with soggy fibreglass). Its guaranteed to get wet in a campervan where condensation from cooking and occupants is guaranteed.

    If you really want to use either then get rockwool batts which are designed to wick the water downwards inside cavity walls. Make sure you orientate the rockwool correctly with the fibres running vertically.

    The foil insulation r-value is based on a inch air gap either side so don't expect much from it. Also if you don't insulate over the ribs of the van you'll get condensation at those cold bridge points. Camping mats are good for insulating the awkward bits I got mine for a couple of euros in the end of season sale.

    Good luck with the conversion.


  • Registered Users, Registered Users 2 Posts: 6,260 ✭✭✭Buford T Justice


    Ta.

    The ribs so far have been filled with expanding foam to give it something rather than nothing

    Have you any pics of your camper paddy, just so i can steal some ideas erm get some inspiration :p


  • Closed Accounts Posts: 1,927 ✭✭✭paddyp


    Think i have some pictures of insulation somewhere, I used kingspan I may have to use a squirt of expanding foam in places to stop squeaks now :) If you're using expanding foam it needs to be closed cell so it doesn't absorb water. VW made that mistake filling the pillars of the later beetle and they all rotted


  • Registered Users, Registered Users 2 Posts: 5,702 ✭✭✭fonecrusher1


    Great thread.:)

    Keep loading the photos OP, im very interested in the whole campervan conversion lark. Hope to mabye take on my on project at some time in future.


  • Registered Users, Registered Users 2 Posts: 6,260 ✭✭✭Buford T Justice


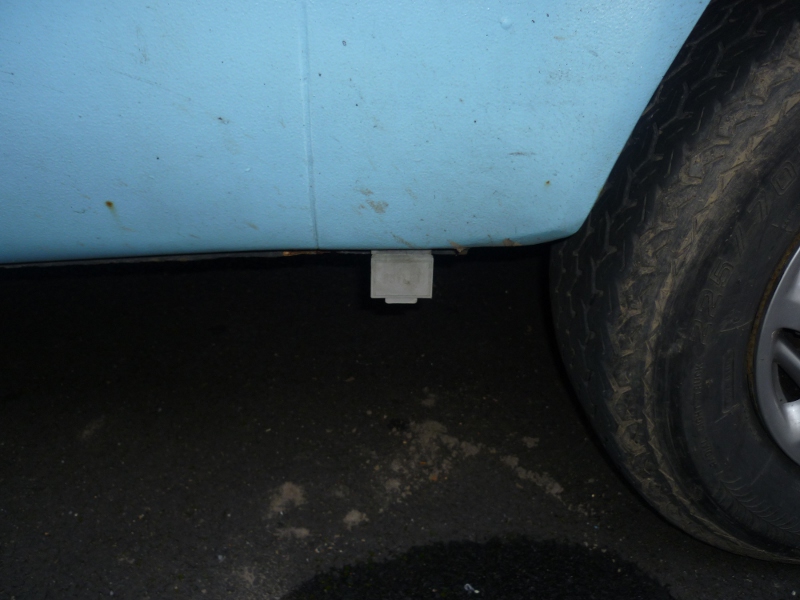
    Next on the list was doing some plumbing on the van for waste and fresh water. Below is an image of the waste water outlet fitted to the underside of the van just in front of the wheel arch

    P1020330.jpg

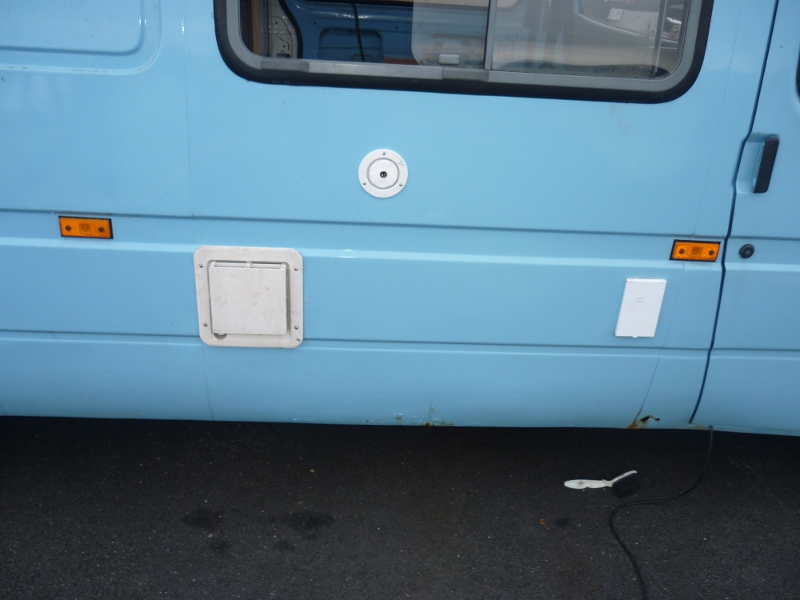
    This image shows what has been added to the drivers side of the van - More cutting holes - yaay!!!
    What you can see is the 240V inlet, the fresh water inlet and the Carver water heater
    P1020331.jpg


  • Registered Users, Registered Users 2 Posts: 6,260 ✭✭✭Buford T Justice


    Its been a hard few days, and in today in particular. It was plumbing day today and I spent most of the day clambering around the underneath of the van fixing pipes to it.

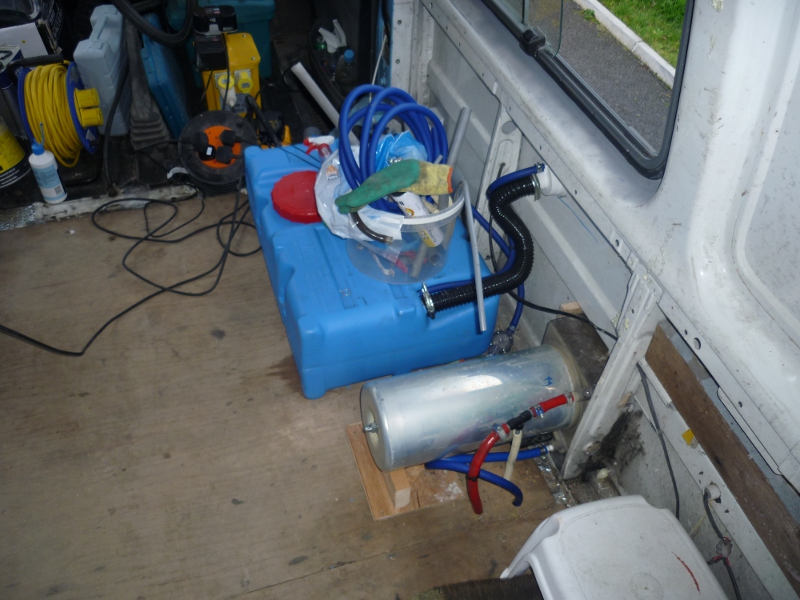
    The below picture shows the water tank fitted into place & the water heater. This was a pig of a job to be honest, and in hindsight I would have done a few things differently.
    I would have spent more time sourcing a tank from CAK which would have enabled me to site the tank under the van. My downfall is metalwork. I can cut it, but not so good at shaping and welding thing, so my reasoning to avoid it as much as possible.

    I would have not put the filler inlet so high on the van, as keeping the pipework behind the panels now will be a pain, as they can stick out a bit now. The water heater was fitted with an overflow from the hot outlet also.

    I tried to be a bit clever with the water tank and avoid paying €80 for a pump. I fitted a submersible pump into the tank as it will be able to lift and pump the water through the van.
    P1020332.jpg


  • Advertisement
  • Registered Users, Registered Users 2 Posts: 6,260 ✭✭✭Buford T Justice


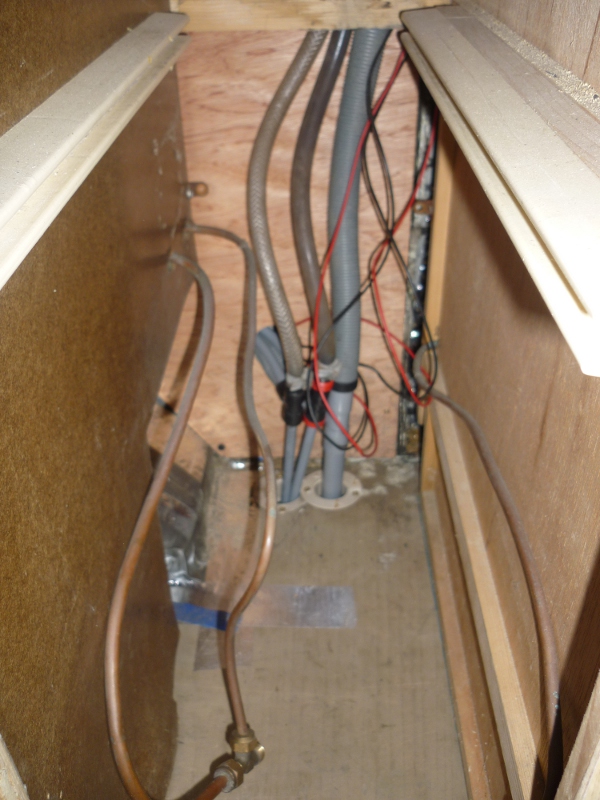
    To follow on in the plumbing theme, this is behind the sink. Water and waste from the toilet sink are coming in here and meeting with the kitchen sink. Wiring there is the bathroom taps and the cassette toilet pump. Still no decision on where to mount the wiring units yet, hence the big coils
    P1020333.jpg

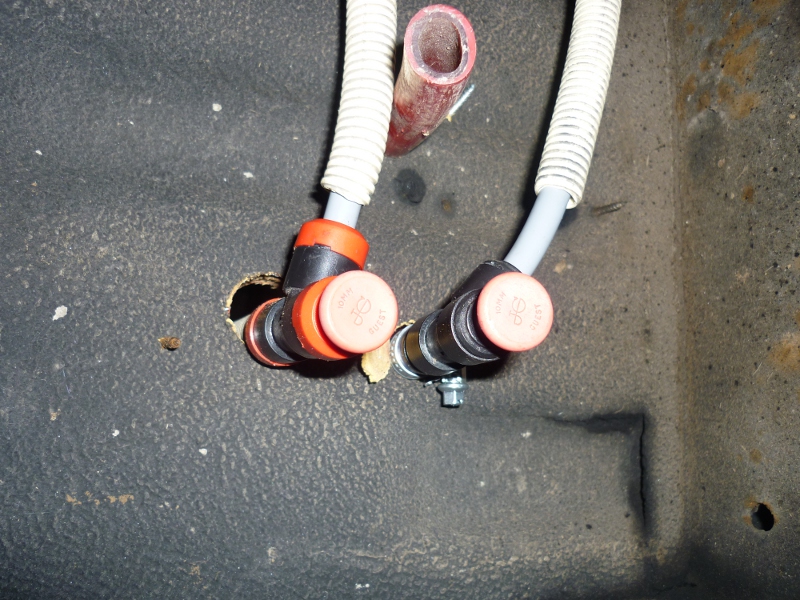
    This is where the pipes come down through the floor. Not sure what the red caps are for, perhaps just to release the water from the lines when lying up

    P1020337.jpg

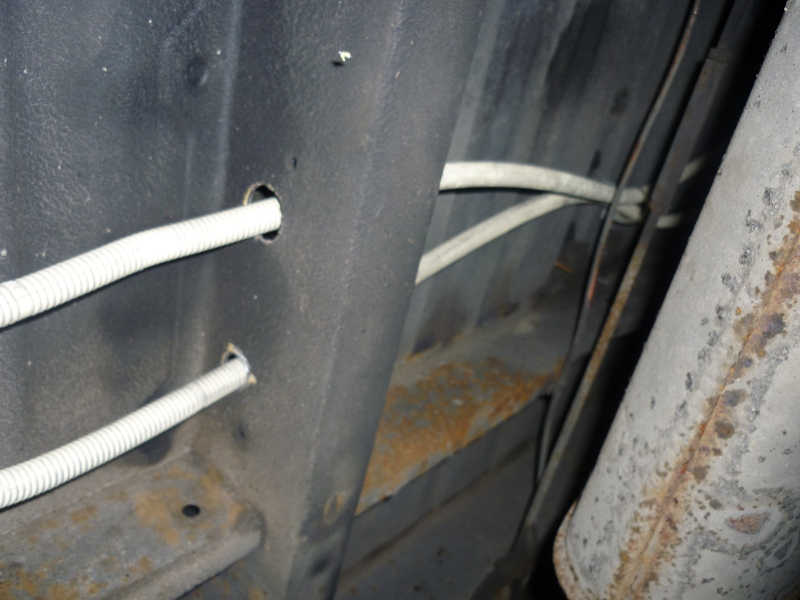
    Pipes are in conduit under the chassis, mainly because I had it and because I didn't want the pipes rubbing against the frame when in motion.

    P1020338.jpg


    Job for tomorrow - GAS!


  • Registered Users, Registered Users 2 Posts: 471 ✭✭nophd08


    Hi Fingers,
    Nice work your doing, it'll be a super job when finished.
    Regards the gas flue, is the outlet on burner round or square?. If its round then would flexible foil duct do, secured by large jubilee clips. Most car accessorie shops sell small diameter duct.

    How will VRT work out. Rumour has it that 50e VRT is gone but no one seems to know for sure.


  • Registered Users, Registered Users 2 Posts: 6,260 ✭✭✭Buford T Justice


    nophd08 wrote: »
    Hi Fingers,
    Nice work your doing, it'll be a super job when finished.
    Regards the gas flue, is the outlet on burner round or square?. If its round then would flexible foil duct do, secured by large jubilee clips. Most car accessorie shops sell small diameter duct.

    How will VRT work out. Rumour has it that 50e VRT is gone but no one seems to know for sure.

    Ta very much
    Its a round gas outlet. I managed to salvage a bit of flexi flue from an old heater from the caravan, but its about twice the diameter of the existing flue. I'll check with the motor factors tomorrow and see if they have any small diameter flexi pipe. Need to check out and see if they have my leisure battery in for me.


  • Registered Users, Registered Users 2 Posts: 2,213 ✭✭✭Aidan_M_M


    Brian , see where the vent pipe goes into the cap-body? remove the cap , you'll see the standard hole is half covered off . I normally open it out with a drill , carefully! Less chance of airlocking , especially with the S bend on your filler hose.


  • Registered Users Posts: 105 ✭✭redcube


    Looking good so far i hope to start on mine next week i just have to wait for bits


  • Registered Users, Registered Users 2 Posts: 6,260 ✭✭✭Buford T Justice


    If it helps, you are welcome to anything thats left of the caravan once I'm done with it, but it mightn't be up to much.

    So, for those of us who have had their heads in the sand today, you may have noticed it was raining a lot......


    I have only one word to say, and apologies in advance.......

    Fuck :mad::mad::mad:

    I have two leaks in the roof of the van. One is at the seam from the GRP top to the body, and is easily sealed but there is another one and I'm not sure where it is. The water is dripping from one of the support bars inside the van and is running in from somewhere. Its at the very top of the van and has to be something in the flat of the roof. Had a look and can't see anything obvious upstairs so I'll need to have a closer look when the rain dies off.

    I do know that its nothing to do with the vents and skylights that I fitted but I am not one bit happy about this revelation as you can imagine. Especially as I may have to go pulling down insulation to find it.

    Aah the joys of a self build.

    Edit:

    Aidan, Did just what you said and you were spot on with the vent in the top only being half open. Thanks for that.


  • Registered Users, Registered Users 2 Posts: 6,260 ✭✭✭Buford T Justice


    Also. Went and got a smaller 5kg cylinder of gas for the van. Someone mentioned that the regulator on the van needs to be screw on.

    Do I need a screw on reg? If so, where the feck can I get a 5kg cylnder of gas to suit it near sligo? cos I've just blown €50 on one already


    The box for the cylnder. Can I have it in such a way that I can open the back door of the van and then open the cylinder door? I don't intend to seal off the back of the van and i don't want to do another hole in the side of the van if I can avoid it


  • Registered Users, Registered Users 2 Posts: 2,213 ✭✭✭Aidan_M_M


    No , you don't have to have a screw on reg .


  • Registered Users, Registered Users 2 Posts: 6,260 ✭✭✭Buford T Justice


    Aidan_M_M wrote: »
    No , you don't have to have a screw on reg .

    Thanks for that. Can I use the idea for the Gas Box? Do I need to have the door off the side if the back of the van isn't sealed, or can I have a door inside the back door that can only be opened when the back door is open?


  • Advertisement
  • Registered Users Posts: 105 ✭✭redcube


    I had a leak on my vans roof i got a mate to stand inside while i got on the roof and ran the hose over it found the leak you can stand on the roof but just try to stay on the ribs sometime the roof can crack from stone chips and trees hitting the roofa mine had a small crack from a stone chip

    I to spot the rain today my shed was leaking like mad all over my cars :D


  • Registered Users, Registered Users 2 Posts: 2,213 ✭✭✭Aidan_M_M


    That's exactly how Adria do it with the factory built van conversion.


  • Registered Users, Registered Users 2 Posts: 6,260 ✭✭✭Buford T Justice


    Ok, so i managed to get my hands on an eberspacher d1lc diesel night heater for the van. Its from an old 4 series Scania and runs on 24V
    Now, the 24v part of it is not an issue for me, as I can easily get 24V in the van, but the wiring loom is a bit of a mess.

    Does anyone have any experience in fitting this unit? I'm looking for the + and - in, and the controls to pulse the fuel pump.

    MTIA


  • Closed Accounts Posts: 1,927 ✭✭✭paddyp


  • Registered Users, Registered Users 2 Posts: 6,260 ✭✭✭Buford T Justice


    Thanks, indeed google is a good friend, but when he gives you a convoluted wiring diagram, sometimes methinks they get a wee kick out of it.

    I think I may have the conundrum figured out, but as things would go, I have some real work to do this week for a few days, so I can't put my theory to the test, nor can I wire up my fancy shmancy 24V relay operated system.

    Will update soon (I hope)


  • Registered Users, Registered Users 2 Posts: 6,260 ✭✭✭Buford T Justice


    Ok, so its been a hard slog these last few days, and I've been busy wiring the inside of the van.
    All 12V cables have been run and all 240 cables have been run. The Consumer unit has been installed and the 12V charger has been done. Have also installed a split charge relay in the front of the van to take care of charging. 70AH leisure battery has been installed under the bonnet too.

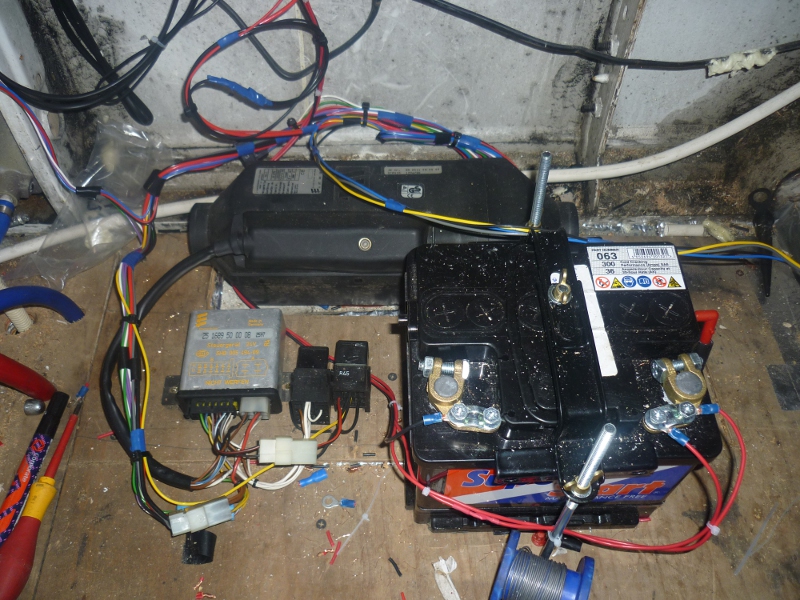
    Below is the night heater has been installed, and an additional cheap 12v battery has been put in to get 24v when needed for the night heater.

    P1020410.jpg

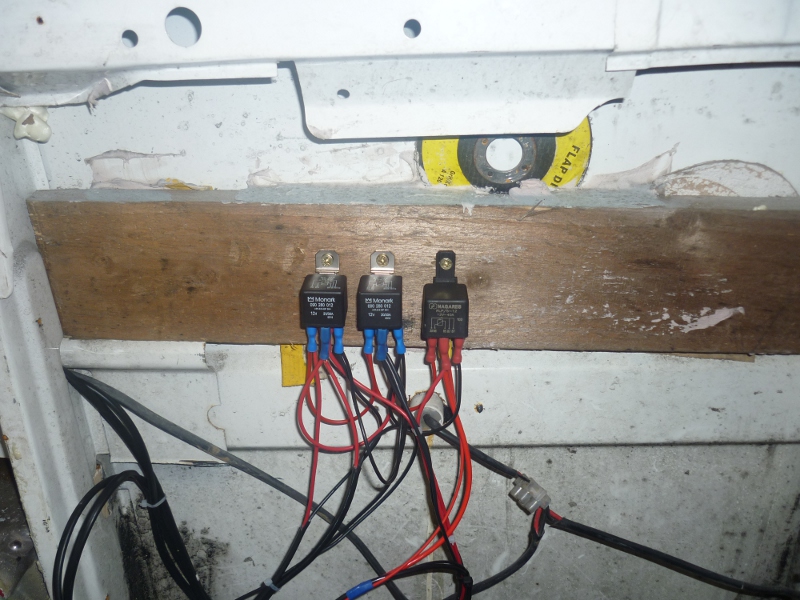
    This photo is three of the four relays used to control the 24V on demand. It's quite cleverly done. Under normal circumstances, the two batteries are in parallel, and are being charged, giving me a total of 90 AH. When the switch is thrown for the heater, the charger is disconnected from the system and the two batteries are now put in series, giving me a 24V supply out to the heater. I can post a schematic of this if anyone wants it.

    P1020411.jpg

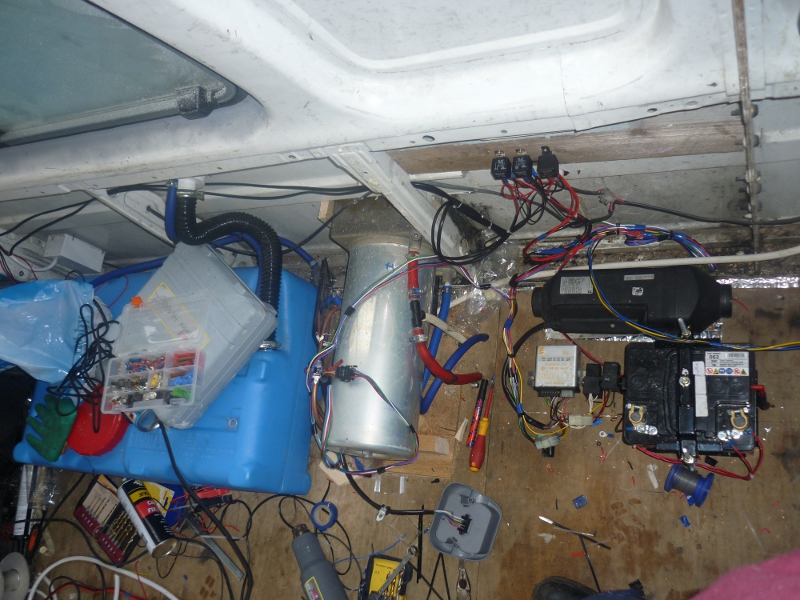
    Below is where everything sits in context under the bench, when it goes in

    P1020412.jpg


  • Advertisement
  • Registered Users, Registered Users 2 Posts: 6,260 ✭✭✭Buford T Justice


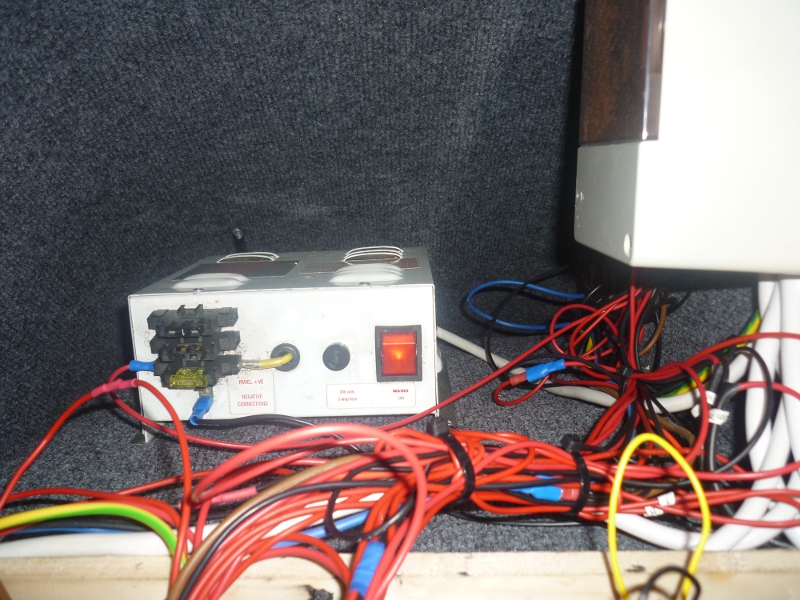
    Below is the power box, for want of a better phrase. On the right, an MCB Board and straight in front is the Charger type thing. Its a Logic 1 unit

    P1020413.jpg

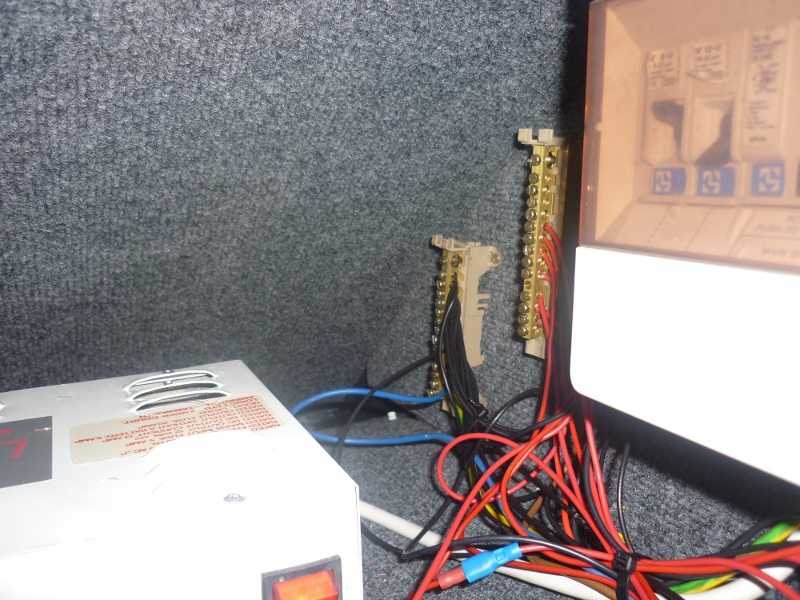
    Behind the MCB board are two buzz bars, one + 12V and one - 12V to distribute the power as needed

    P1020414.jpg

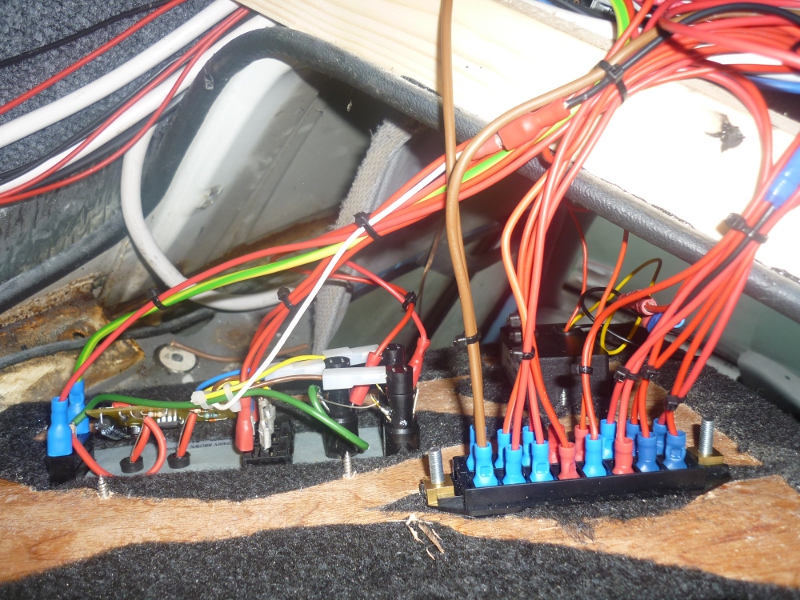
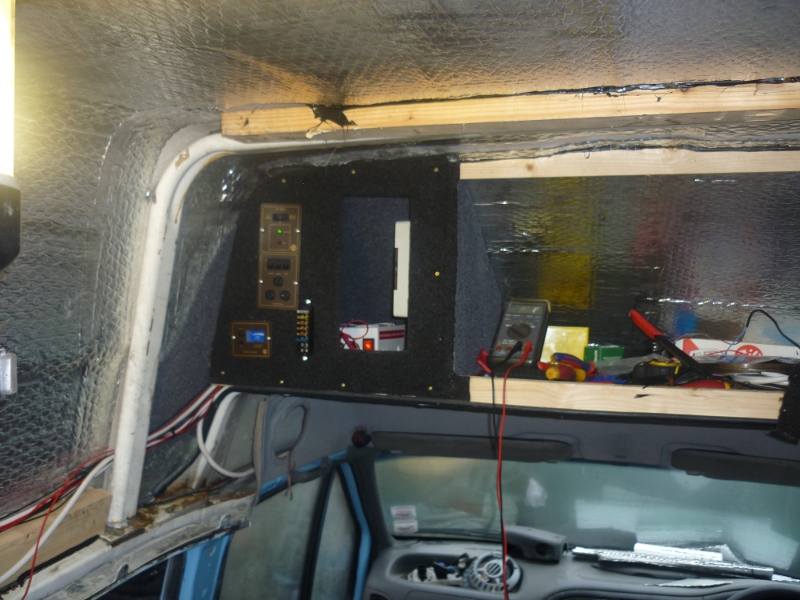
    Next is the back of the main panel, water meter, fuse board and zig switcher unit. Lots and lots of wires.

    P1020415.jpg

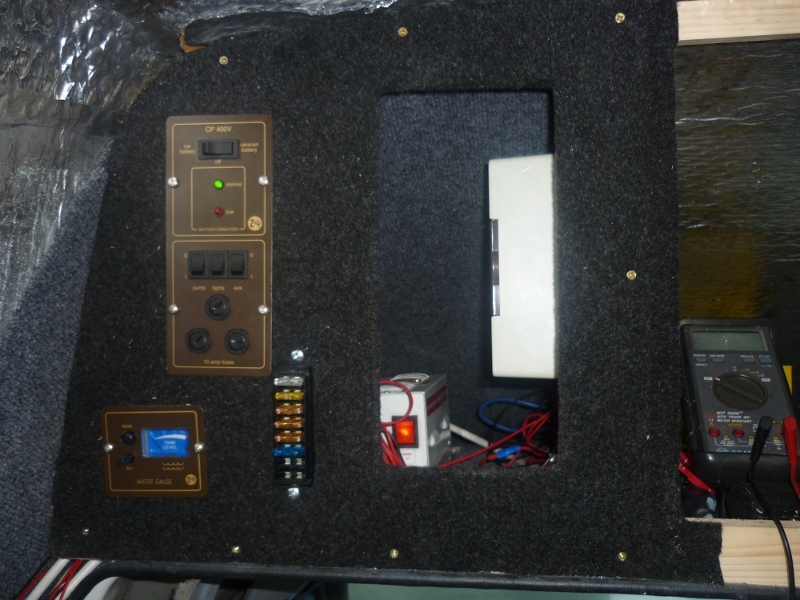
    Then the main panel in situe, and another pic of it, to show where it is in context.

    P1020416.jpg

    P1020417.jpg


  • Registered Users, Registered Users 2 Posts: 6,260 ✭✭✭Buford T Justice


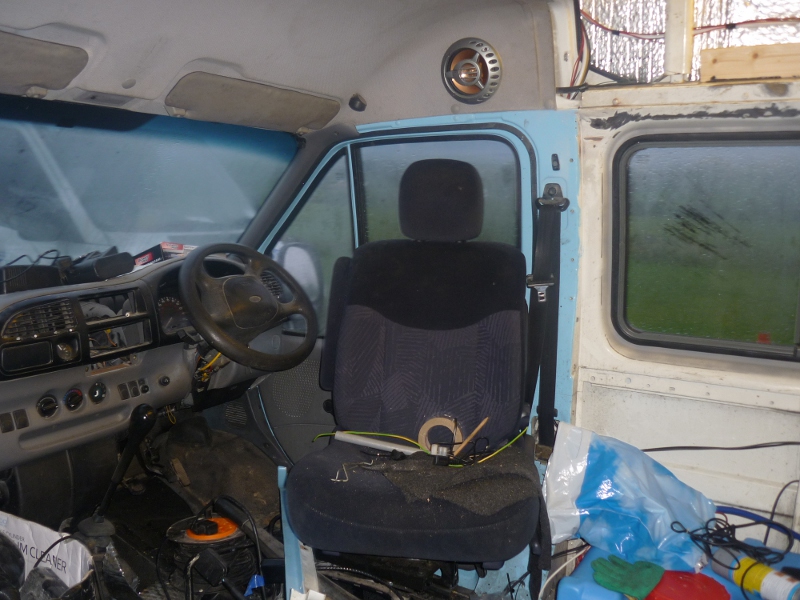
    Forgot to mention, I've installed one of the swivel seats in the van, which were taken from a renault espace. Interestingly enough, the drivers and passenger seats swivel the wrong way, so I've had to put the passenger seat in the drivers seat to get the right swivel, and the armrest is on the wrong side.

    P1020419.jpg


  • Registered Users, Registered Users 2 Posts: 6,260 ✭✭✭Buford T Justice


    Finally, jut to add, I think the taps in the sink are leaking.

    I was running them the other day and there was then a pool of water on top of the worktop afterwards. It looks as though its leaking at the base of the tap itself where it swivels. They are whale taps with microswitches. Does anyone know if this is a common issue with these taps, or is there an easy fix for this?

    These be the ones I have


  • Registered Users, Registered Users 2 Posts: 2,213 ✭✭✭Aidan_M_M


    I've had a few of them leaking , can't remember if I was able to change the o rings or had to replace them tho.


  • Registered Users, Registered Users 2 Posts: 4,757 ✭✭✭meercat


    lots of work done
    following with interest
    hope to do something similar myself
    good luck and keep us updated
    cheers


  • Advertisement
  • Registered Users, Registered Users 2 Posts: 222 ✭✭defike


    Had the same problem with my Ford galaxy seats so cut off the lug that was preventing them from swiveling 360.This lug was also to strenghten the seat belt reciever in a crash so moved them onto the base.
    I came across a 12v to 24v invertor on ebay .It's supposed to supply 3 amps but its tiny.
    Haven't fitted it yet so not sure if it will do.


  • Registered Users, Registered Users 2 Posts: 6,260 ✭✭✭Buford T Justice


    defike wrote: »
    Had the same problem with my Ford galaxy seats so cut off the lug that was preventing them from swiveling 360.This lug was also to strenghten the seat belt reciever in a crash so moved them onto the base.
    I came across a 12v to 24v invertor on ebay .It's supposed to supply 3 amps but its tiny.
    Haven't fitted it yet so not sure if it will do.

    there is a 12 to 24 v step up on ebay for £65 STG, but its only rated for 10A. The night heater pulls 11.8 on startup so its useless and a 20A one is about twice the price.

    I wired it with two batteries, the second was €40, a corsa battery, and four relays for €24 with a bit of wire and know how, i can now get 24V whenever I want and its not limited to 10A


  • Registered Users, Registered Users 2 Posts: 222 ✭✭defike


    Thanks for the info invertor is out will have to get a second battery.


  • Registered Users, Registered Users 2 Posts: 6,260 ✭✭✭Buford T Justice


    defike wrote: »
    Thanks for the info invertor is out will have to get a second battery.

    You can wire them together with double pole relays to use it as a 12V addition to the leisure battery and get charged, and to get 24V in series when you switch on the heater. Charger to be disconnected when the 24 Loop is in use.


  • Registered Users, Registered Users 2 Posts: 6,260 ✭✭✭Buford T Justice


    defike wrote: »
    Had the same problem with my Ford galaxy seats so cut off the lug that was preventing them from swiveling 360.

    Had a look at this today and there are four lugs preventing the swivel the opposite way. I'm a bit apprehensive about cutting them though, not sure if it will upset the stability of the seat in normal driving position if i do this.


  • Registered Users, Registered Users 2 Posts: 471 ✭✭nophd08


    Had a look at this today and there are four lugs preventing the swivel the opposite way. I'm a bit apprehensive about cutting them though, not sure if it will upset the stability of the seat in normal driving position if i do this.

    Can you cut lugs and reweld on other side. I'm sure other seat is mirror image and only difference is position of lugs. Post some pics.


  • Registered Users, Registered Users 2 Posts: 6,260 ✭✭✭Buford T Justice


    nophd08 wrote: »
    Can you cut lugs and reweld on other side. I'm sure other seat is mirror image and only difference is position of lugs. Post some pics.

    Its not possible to get the brackets off the seats, I've tried, so if I weld them again I run the risk of burning the seats. I'll post some pics soon, as I'll be updating with more work in the next few days


  • Registered Users, Registered Users 2 Posts: 222 ✭✭defike


    I might be all wrong here but I think you should have brought your van to the revenue before work started.50 euro vrt.
    If you bring it after conversion I think you will be paying vrt on a camper.


  • Registered Users, Registered Users 2 Posts: 6,260 ✭✭✭Buford T Justice


    defike wrote: »
    I might be all wrong here but I think you should have brought your van to the revenue before work started.50 euro vrt.
    If you bring it after conversion I think you will be paying vrt on a camper.

    Its still a work in progress at the minute, so I can drive it to the DOE Center and clear it as a van. Might ring them on monday and see if I can book it in.


  • Registered Users, Registered Users 2 Posts: 6,260 ✭✭✭Buford T Justice


    Booked into the NCT Center for friday. Going to try to get Irish plates for it.

    Updates:

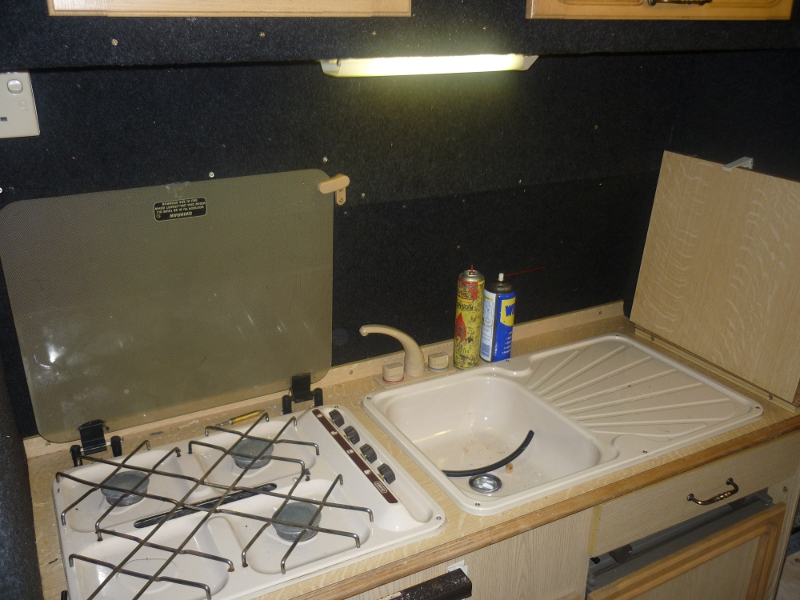
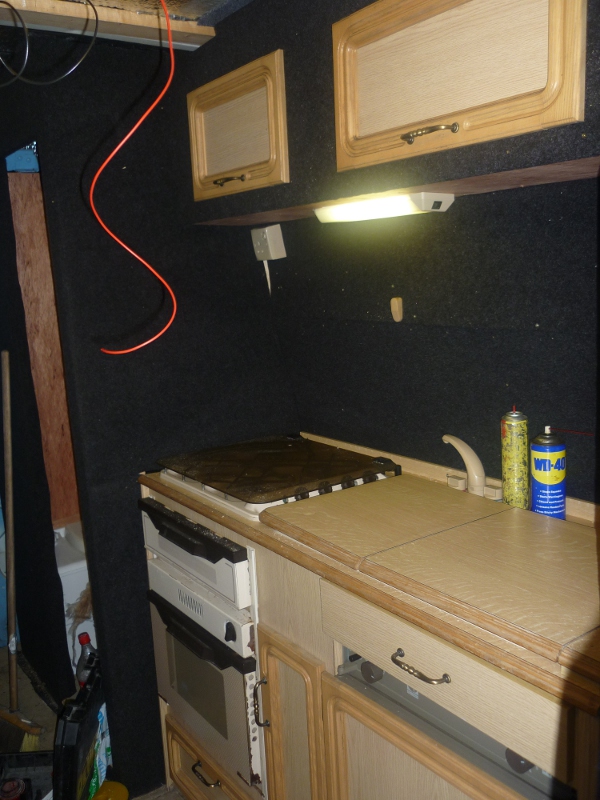
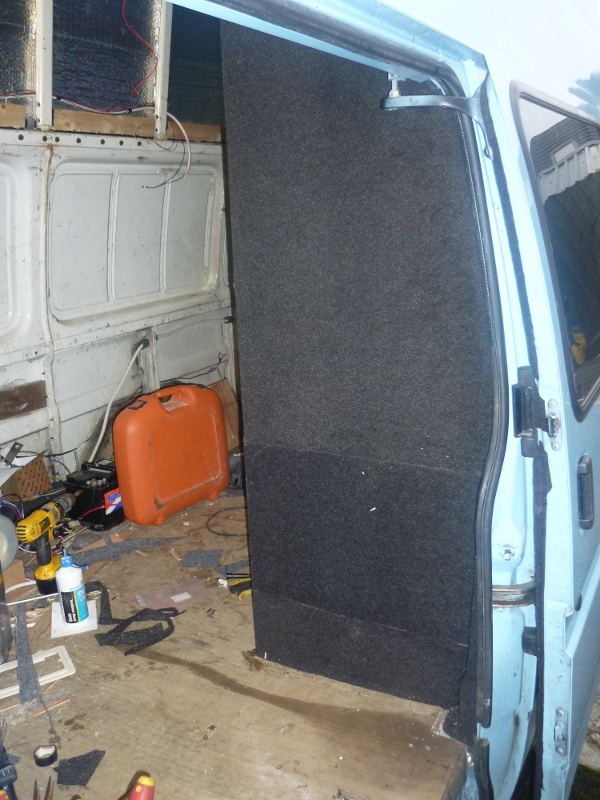
    The Kitchen unit is now complete. All overhead units have been built & Fitted, a light has been added and carpet put on all the panels. Was a bit tedious to be honest, but perseverance paid off on this one. Still need to sort out those taps though
    P1020422.jpg

    P1020427.jpg

    P1020430.jpg


  • Advertisement
Advertisement