Advertisement
If you have a new account but are having problems posting or verifying your account, please email us on hello@boards.ie for help. Thanks :)
Hello all! Please ensure that you are posting a new thread or question in the appropriate forum. The Feedback forum is overwhelmed with questions that are having to be moved elsewhere. If you need help to verify your account contact hello@boards.ie
Hi all! We have been experiencing an issue on site where threads have been missing the latest postings. The platform host Vanilla are working on this issue. A workaround that has been used by some is to navigate back from 1 to 10+ pages to re-sync the thread and this will then show the latest posts. Thanks, Mike.
Hi there,
There is an issue with role permissions that is being worked on at the moment.
If you are having trouble with access or permissions on regional forums please post here to get access: https://www.boards.ie/discussion/2058365403/you-do-not-have-permission-for-that#latest

Clinker boat restoration

  • 08-02-2015 8:55pm
    #1
    Registered Users, Registered Users 2 Posts: 657 ✭✭✭


    Lads. I'm attempting to restore a 17 foot clinker boat. Lovely boat and I've spent quite a bit of time with a heat gun stripping years and years of paint and varnish.

    I've also about 10 ribs to replace as they have cracked.

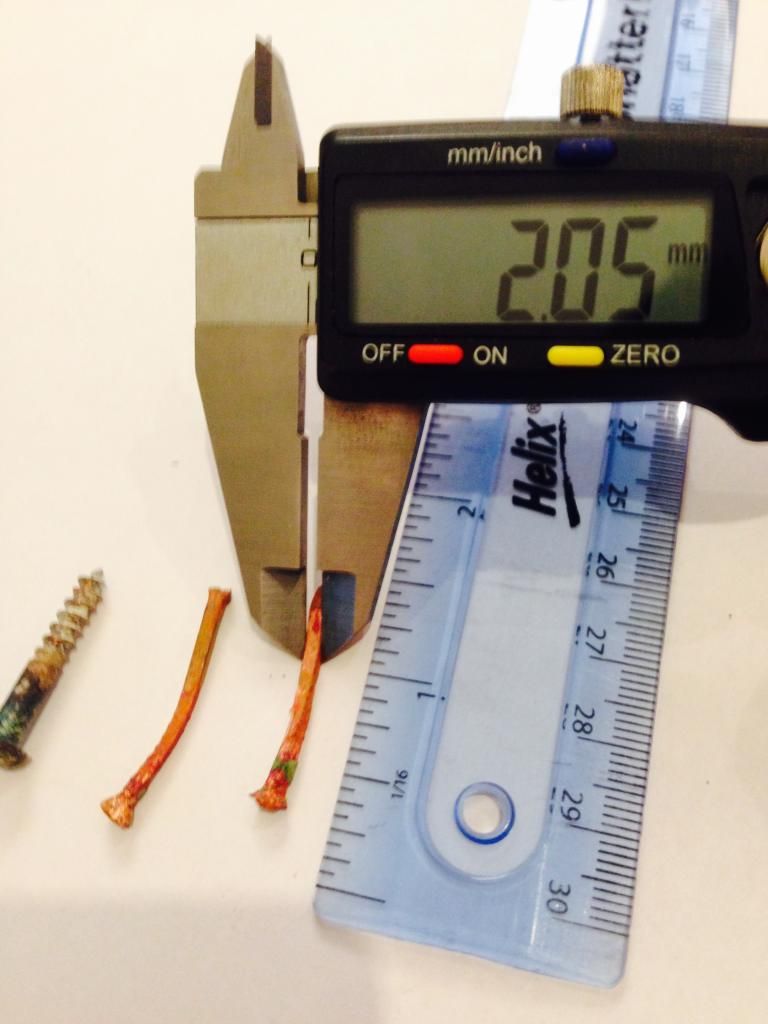
    I took one rib off and the copper nails are 2mm shank diameter. Looking on davey.co.uk this is gauge 14.

    My question is should I use the same gauge again or go up one size? I have a feeling I should go up one size to ensure a tighter fit.

    I must post some photos as I think I could be back to you looking for some help. I'm very new to this. Thank you


Comments

  • Moderators, Motoring & Transport Moderators, Sports Moderators Posts: 6,337 Mod ✭✭✭✭fergal.b


    Hi FirstIn and welcome, some photos would be nice :) what is the wood like around the nail holes do you think water got in turning it black and are the nails ring shank, smooth or roves, counter sunk and filled or flush.


    .


  • Registered Users, Registered Users 2 Posts: 680 ✭✭✭copper12


    A few photos would help a lot


  • Registered Users, Registered Users 2 Posts: 657 ✭✭✭FirstIn


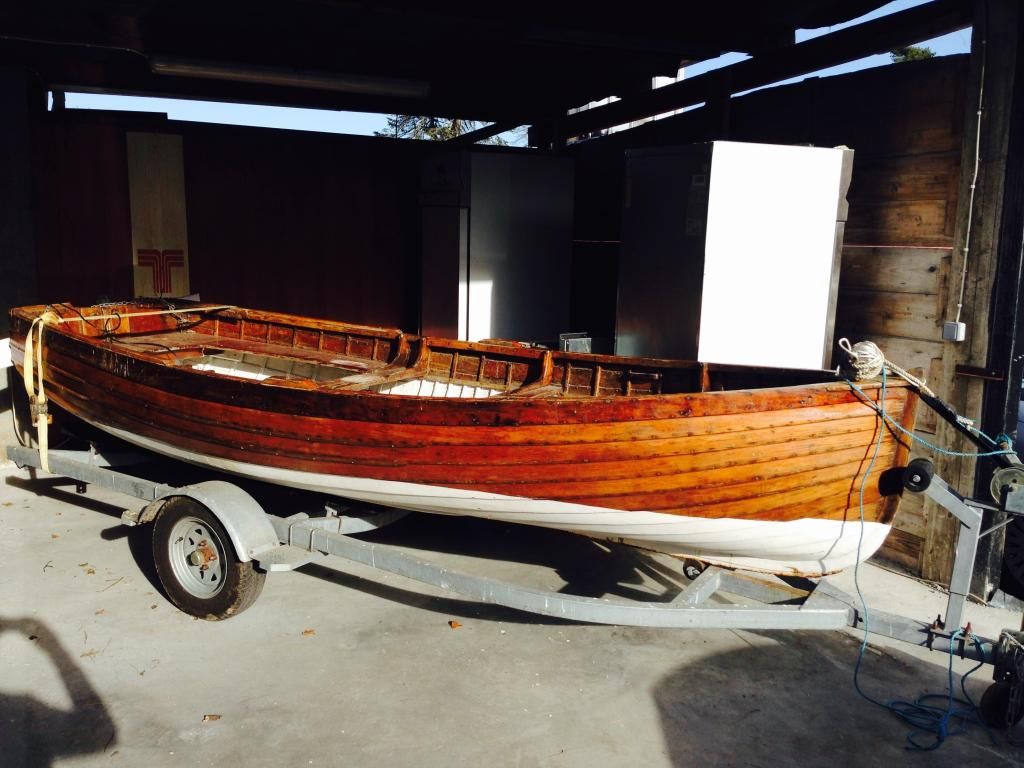
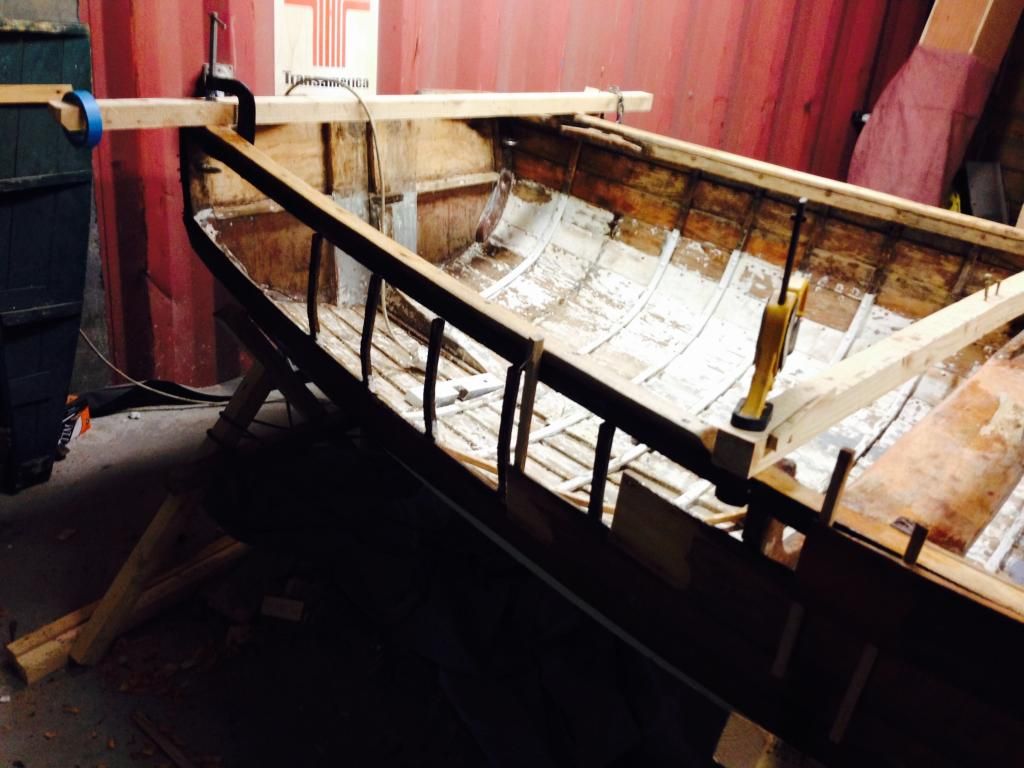
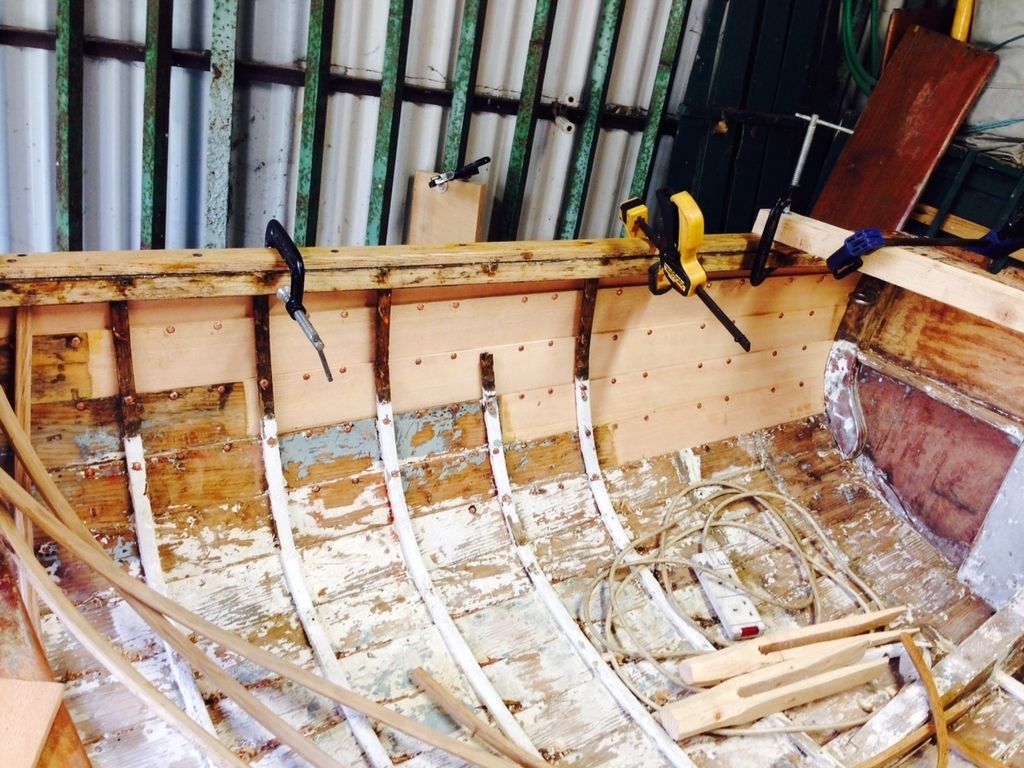
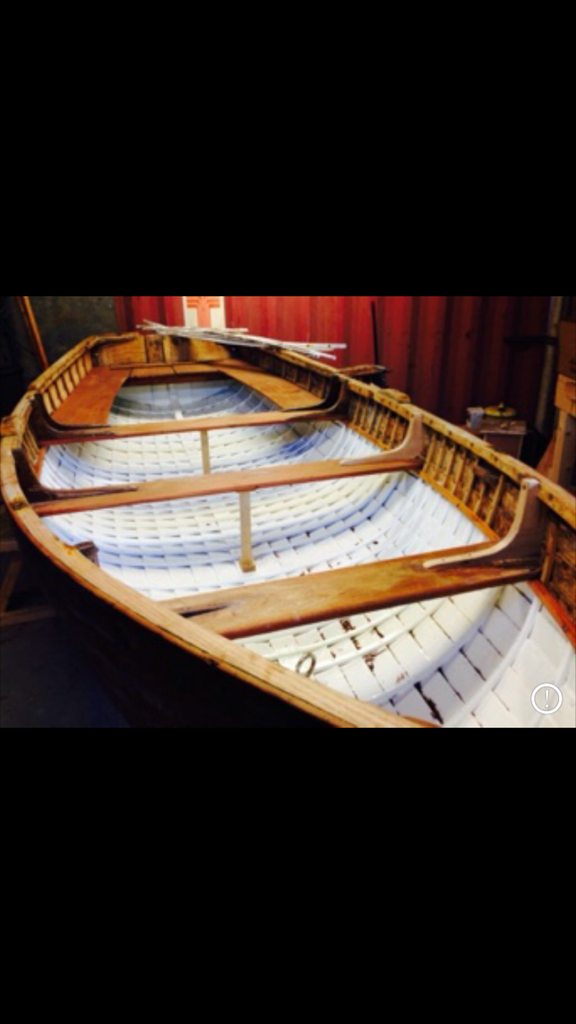
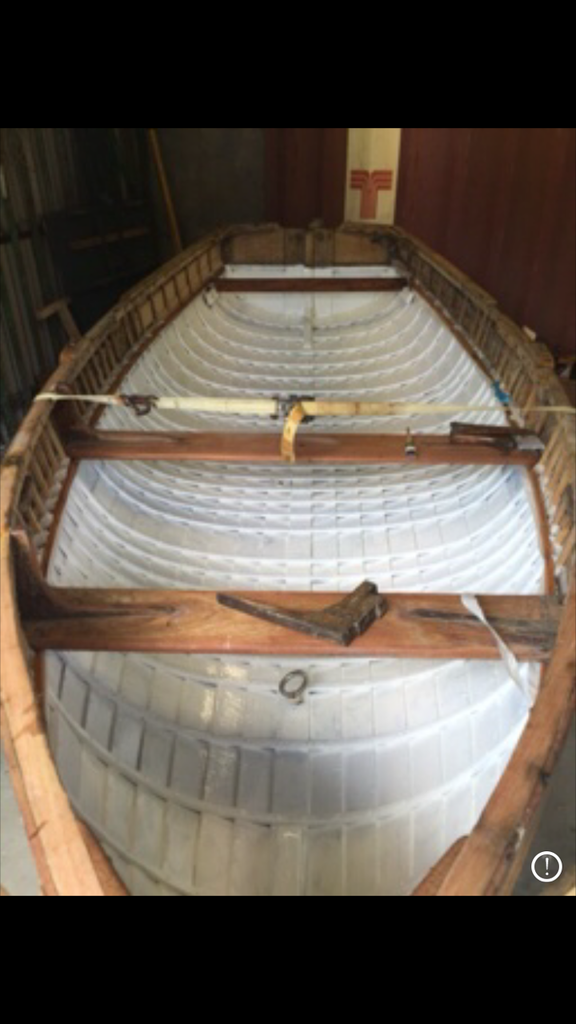
    Here are some pictures,

    boat%20in%20shed_zpsa802cb7a.jpg

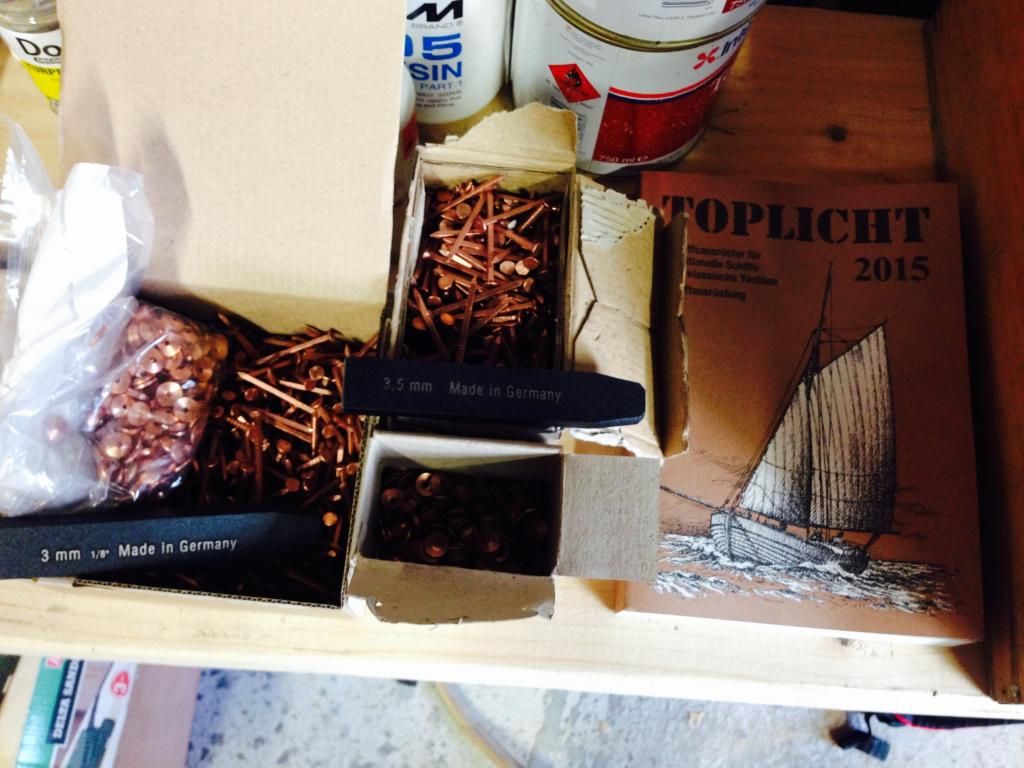
    copper%20nail%20and%20brass%20screw_zps0858c649.jpg

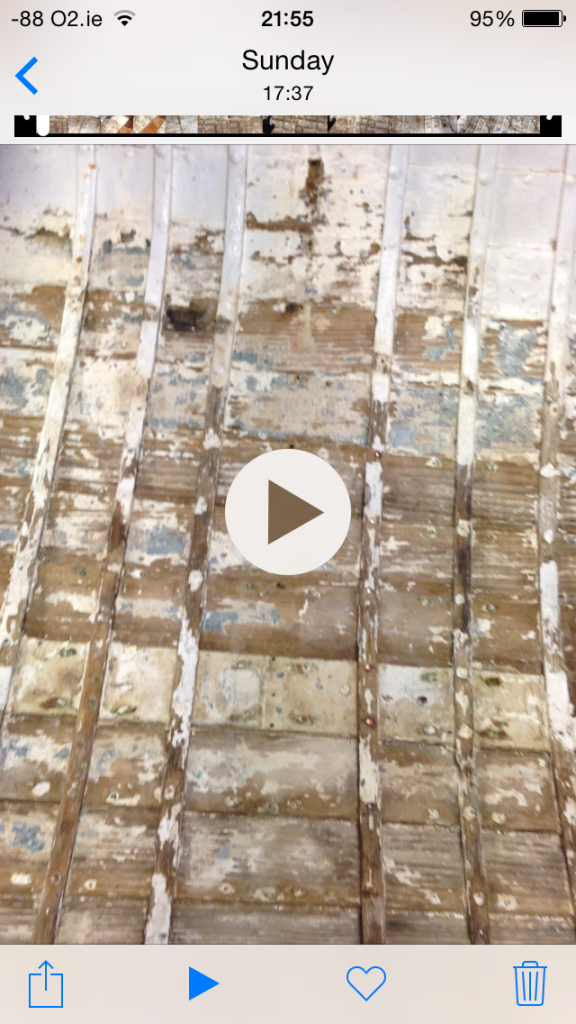
    Prep_zpsb30d312d.png


  • Registered Users, Registered Users 2 Posts: 657 ✭✭✭FirstIn


    It's really tough work,, I'm using a heat gun and scraping the old paint off.

    At some stage someone used an aluminium paint and boy it is really really stuck. Stuck hard. However, as I won't be able to bring it back to bare wood inside I will paint it in white again. Where the paint refuses to come off it can stay.

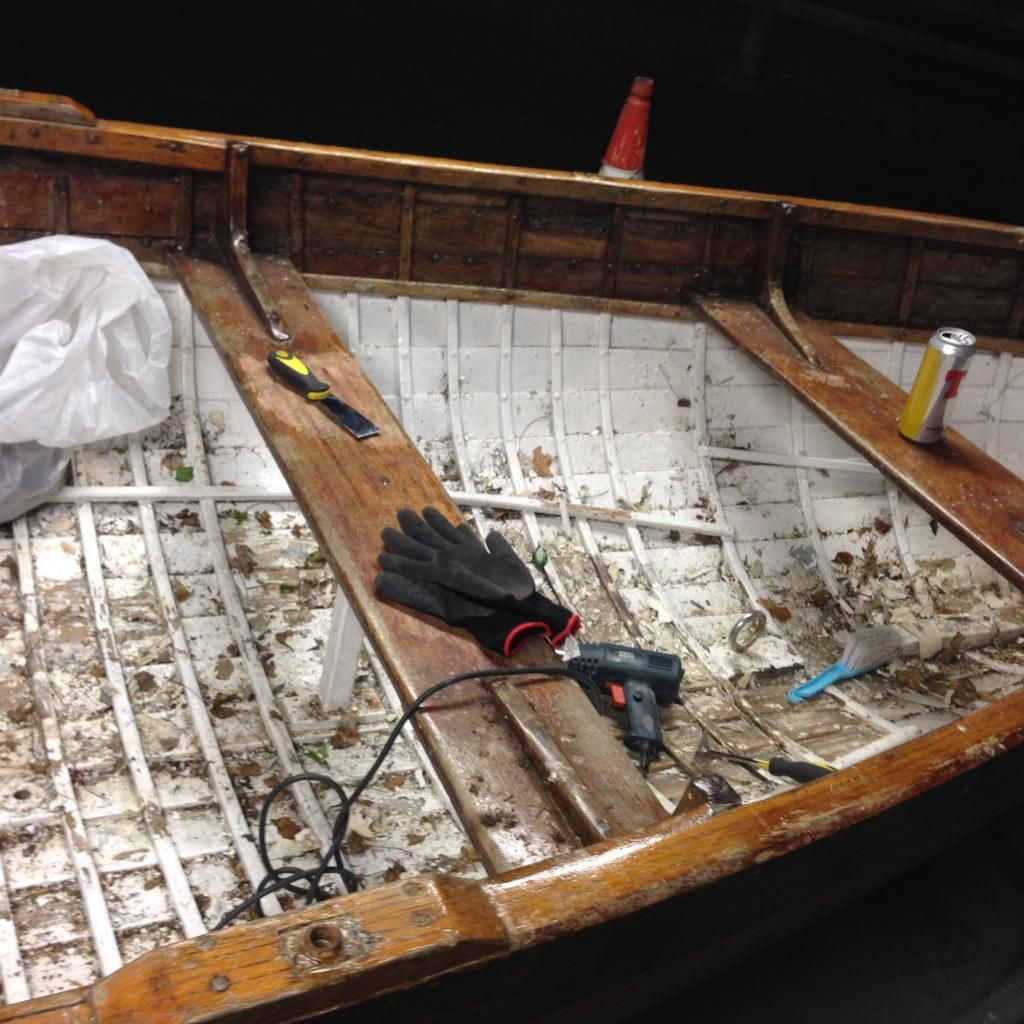
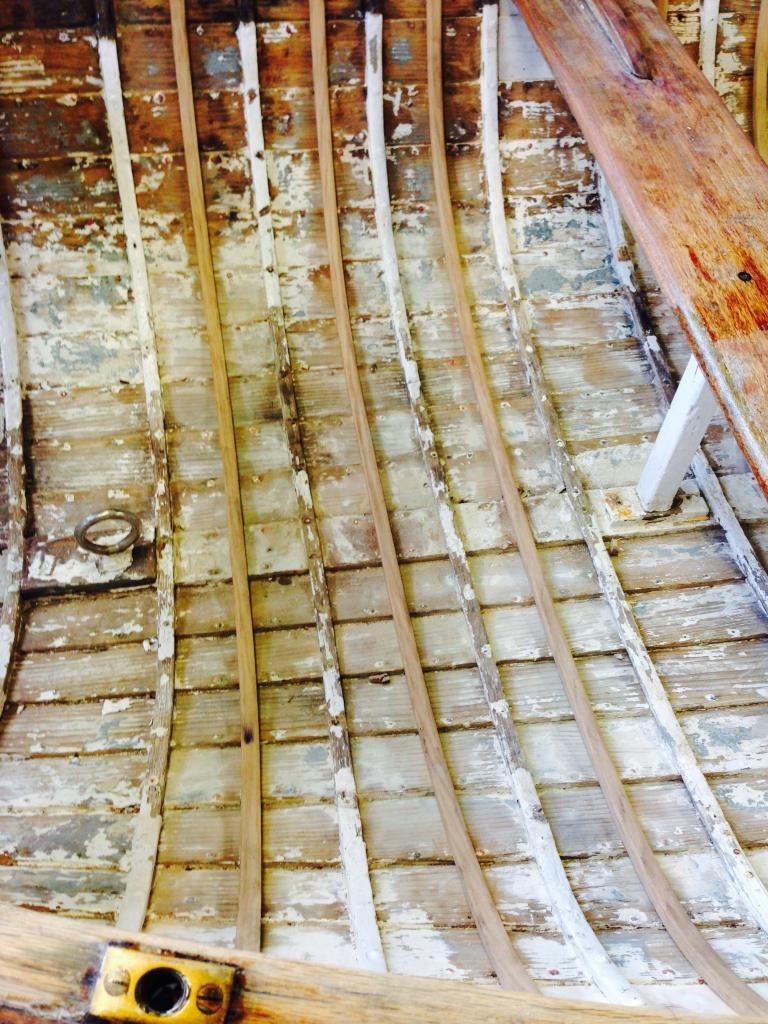
    The big challenge now is the replacement of the cracked ribs, all told there are 10 that need doing. I believe extra ribs were added in some time ago, look at the pic below and you can see some ribs go all the way to the gunwale, these I guess are the originals. Also, determining what to do/if anything with the cracked hull plank.

    I did remove one of the shorter ribs as I wanted to determine what size copper nails to buy, hence my earlier question.

    boat%20ribs_zpsaupgm19b.jpg

    We also have a very rotten stringer to replace. I believe the ribs and stringer are made from oak, in fact I think the whole boat bar the seats is oak.

    Anyhow, I have a carpenter that will tackle the ribs and when he removes the broken ones it will allow me to remove more of the paint that is below the ribs/between the rib and the hull planks.

    I'll get some better pictures, it has progressed quite a bit in the last few days with a lot more of the old paint removed. I also want to get some close ups of of the crack in the hull plank.


  • Moderators, Motoring & Transport Moderators, Sports Moderators Posts: 6,337 Mod ✭✭✭✭fergal.b


    Nice boat, you might want to check it out but would 14 gauge not be just over 1 1/2mm so smaller than the 2.05mm nails you have :confused: you would be ok going a small bit bigger as long as the don't split the ribs, you could also go with screws to make doing repair jobs in the future easier but it might take the look off the boat with them not matching the nails.


    .


  • Advertisement
  • Registered Users, Registered Users 2 Posts: 657 ✭✭✭FirstIn


    Just going by http://davey.co.uk/pdf/fastenings.pdf

    The nails we have are 14g. I think we will move up one size to 13g.

    Interesting you mention screws Fergal. I did wonder why they use nails and roves and not screws. I'd certainly consider that, bronze, brass or galvanised?

    I made a mistake earlier , she's 14 ft not 17.


  • Registered Users, Registered Users 2 Posts: 657 ✭✭✭FirstIn


    Guys. Is there anywhere in dublin selling copper nails , roves and we also need a rove punch? Somewhere that isn't crazy expensive.


  • Moderators, Motoring & Transport Moderators, Sports Moderators Posts: 6,337 Mod ✭✭✭✭fergal.b


    You can get them from http://www.unionchandlery.ie/shop-all.html just give them a ring, I think it works out about €55 for a 1kg box. You could also try these http://www.allmetalfasteners.com/products/Rivets


    .


  • Registered Users, Registered Users 2 Posts: 657 ✭✭✭FirstIn


    As work progresses on the boat a couple of things of note:

    1: the paint is really tough to remove. Many many hours have gone in to it and I'm wondering is there an easier way? We're using heat guns and scrapers.

    2: We've removed the cracked ribs and hope to steam and fit the new ones on Saturday. Obviously where the new rib touches the plank it will not be painted. There doesn't appear to be any way round that. Is that ok?

    3: I've read that the boat will "take up". That is absorb and swell with water to make tighter contact between the planks. However does this taking up not mean the planks will be wet and thus rot? We have a few cracks in lower planks that we need to do something about and some people are saying "well the paint on the outside will keep her watertight". However, if the idea is to let her take up water to help her seal then we don't want the paint making her watertight ! I'm confused.


  • Moderators, Motoring & Transport Moderators, Sports Moderators Posts: 6,337 Mod ✭✭✭✭fergal.b


    If the cracks are bad I would fill them with epoxy resin before painting. For stripping the paint you could get it soda blasted it will bring every inch of it back to the wood without doing any damage downside it's not cheep but if you count up your man hours stripping it can be worth it.


    .


  • Advertisement
  • Registered Users, Registered Users 2 Posts: 680 ✭✭✭copper12


    Tough I know; the good thing about using the heat gun’ is it will give you the opportunity to examine the whole boat inch by inch.
    It took me six weeks to strip Coe Na Mara
    If you re right handed. And hold the heat gun in your right hand. the moving from right to leaf; only heating about an area’ four to six inches’ while you are scraping’ the part you have just heated you can be heating the next section’ use a triangle scraper’ I found this type of scraper the best’ for removing heat treated paint.
    Provided the cracks are not too wide; a photo would let us know.
    You can fill the cracks with putty, then paint over the putty’ it will squeeze out’ when she takes up water.
    I would not worry too much; as to the amount of water’ that the boards take up’ provided you take reasonable care’ of her over the years’ then it should not be a problem.
    All wooden boats leak a little’ that’s the joy of them.
    Provided the planks and the ribs are as tights; you can make them’ when the timber swells’ from absorbing water’ then a lot of the little cracks will close up.


  • Registered Users, Registered Users 2 Posts: 657 ✭✭✭FirstIn


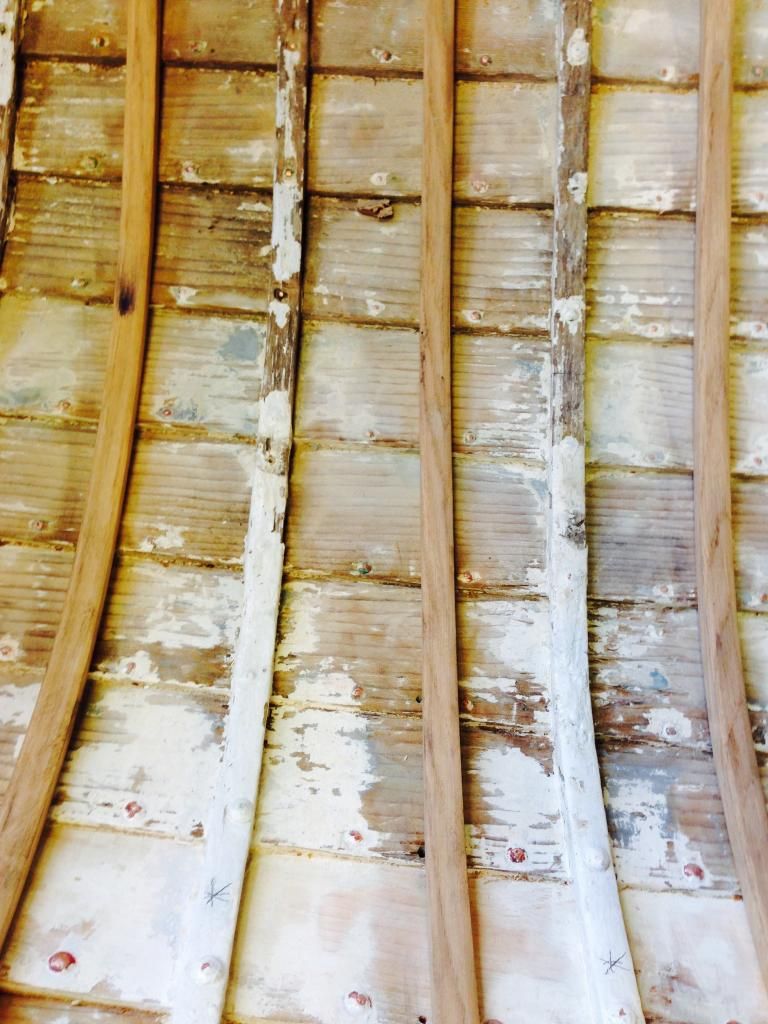
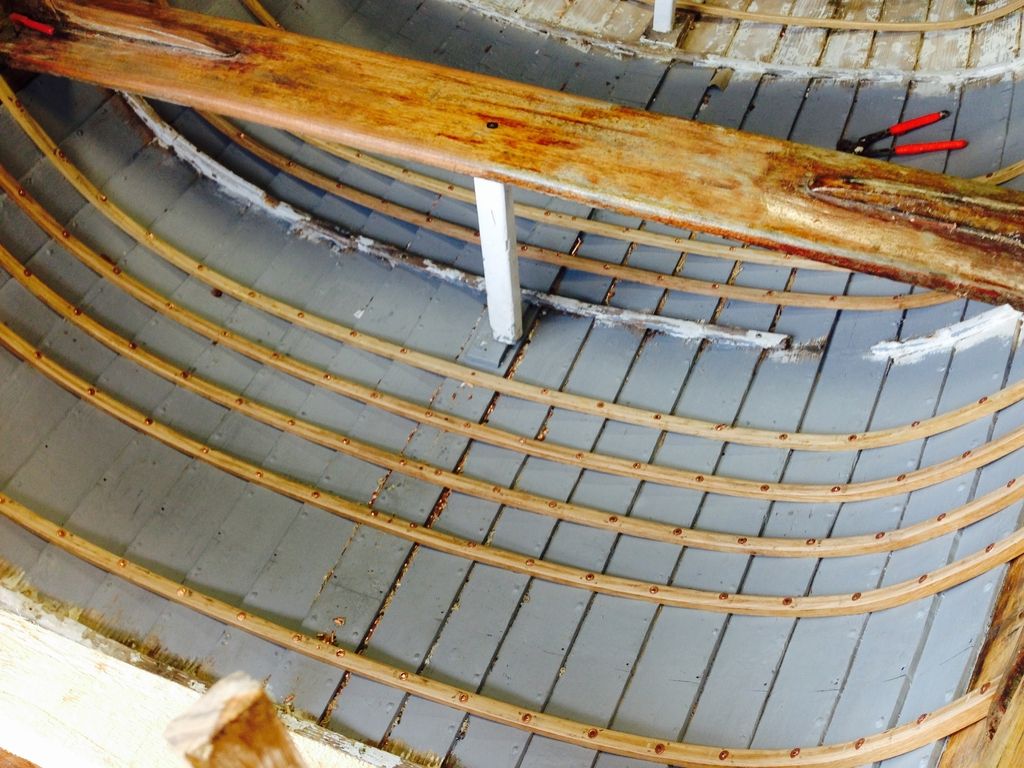
    Good day on the boat today,, my carpeneter mate built a steam box and with 2 * woodies walpaper steamers it worked really well. Here are some pictures.

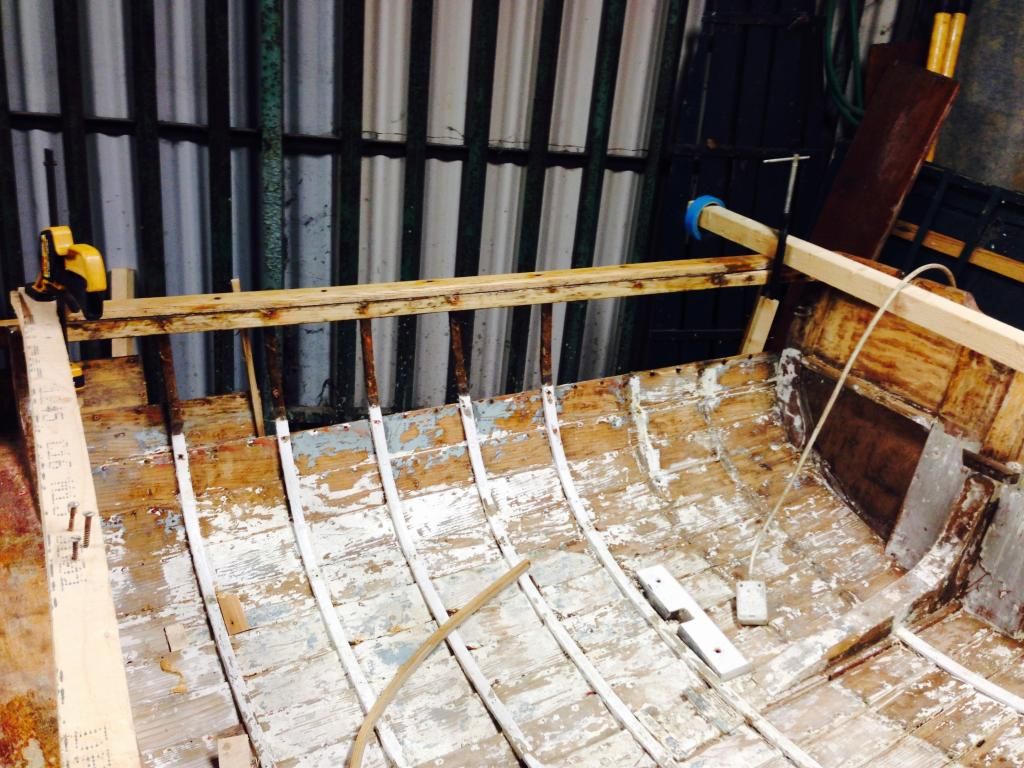
    ribs3_zpsuie0ht6q.jpg

    ribs2_zps4kmui769.jpg

    ribs4_zpsrbjsczfe.jpg


  • Registered Users, Registered Users 2 Posts: 657 ✭✭✭FirstIn


    A few items of note:

    Most of the ribs will be replaced.

    There seems to be a suppy issue with copper nails, however we hope to have them next week.

    I've been told to use sikaflex on any cracks,, does any one know which version to use? I also plan on pushing some sikaflex in to the nail holes, remember we are using existing holes.

    I've got to start thinking of the painting process for the inside,,, white again for sure with varnish on the higher planks, seat, gunwales. Any suggestions on the best products to use (and where to buy them) would really be appreciated.

    Thank you.


  • Registered Users, Registered Users 2 Posts: 680 ✭✭✭copper12


    If you’re badly stuck then try a few builders’ providers for copper nails
    The ribs turned out well fair play
    If you think you will use a tube or two’ of siekaflex’ then it depends on weather it will be seen.
    If it’s being painted over then I suppose any colour will do
    As for type the one they use for teak decking should do
    If you’re going to use a dozen or so then I would look at an alternative
    Looking good


    What I say isn’t gospel ;it’s just my tupence worth:D


  • Moderators, Motoring & Transport Moderators, Sports Moderators Posts: 6,337 Mod ✭✭✭✭fergal.b


    I would go with epoxy over the sikaflex as it will stop the crack from spreading and be a much stronger fix also most oil based paints won't cure over sikaflex so you might have to get a special primer. I used toplac by international and was very happy with it.
    She is looking great.


    .


  • Registered Users, Registered Users 2 Posts: 657 ✭✭✭FirstIn


    Thanks Fergal, I had a look at the west system epoxy and I think it will do the job,,

    I've also the quandary of what to do with the copper nail size. I had planned on going to gauge 12 i.e 2.65mm but I am worried that it might be too big for the new ribs, remember the copper nails already in the boat are size 14, i.e 2mm.

    I was thus wondering,

    1:(This is very much after watching the videos etc on the west system epoxy site) Whether I should try and pre fill the holes with epoxy, let it set and then freshly drill them when we come to rivit and use gauge 14 nails again?

    2:Or perhaps use gauge 14 nails again but when inserting them add epoxy then.

    3:Or go up the size to gauge 12.


  • Registered Users, Registered Users 2 Posts: 657 ✭✭✭FirstIn


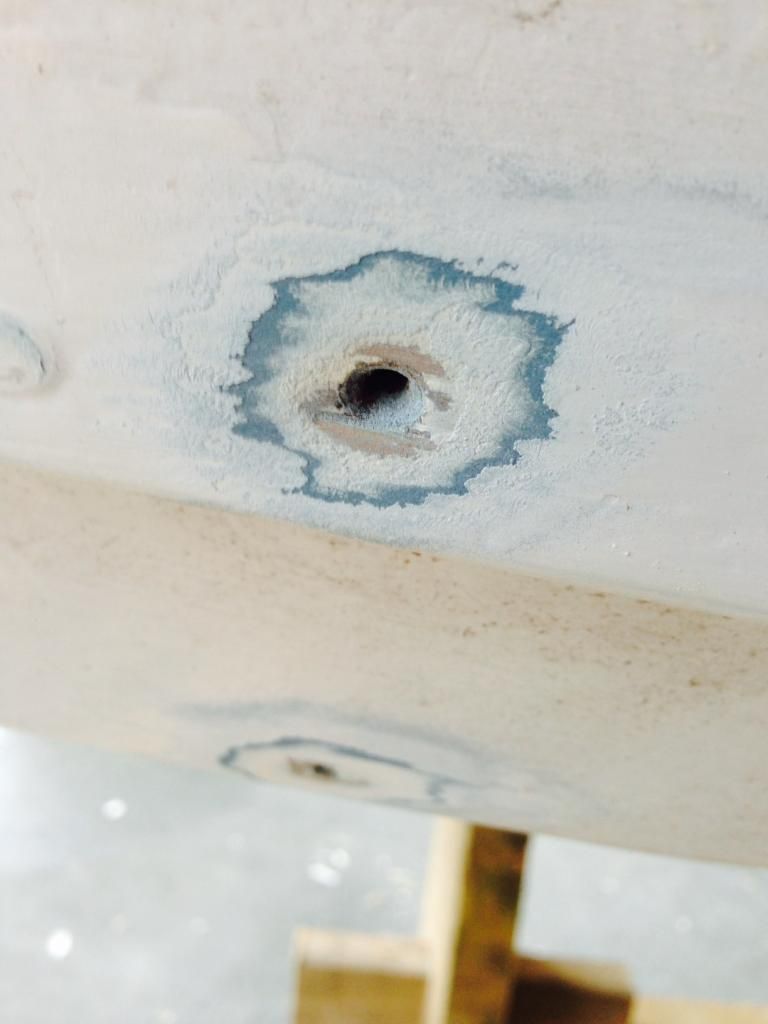
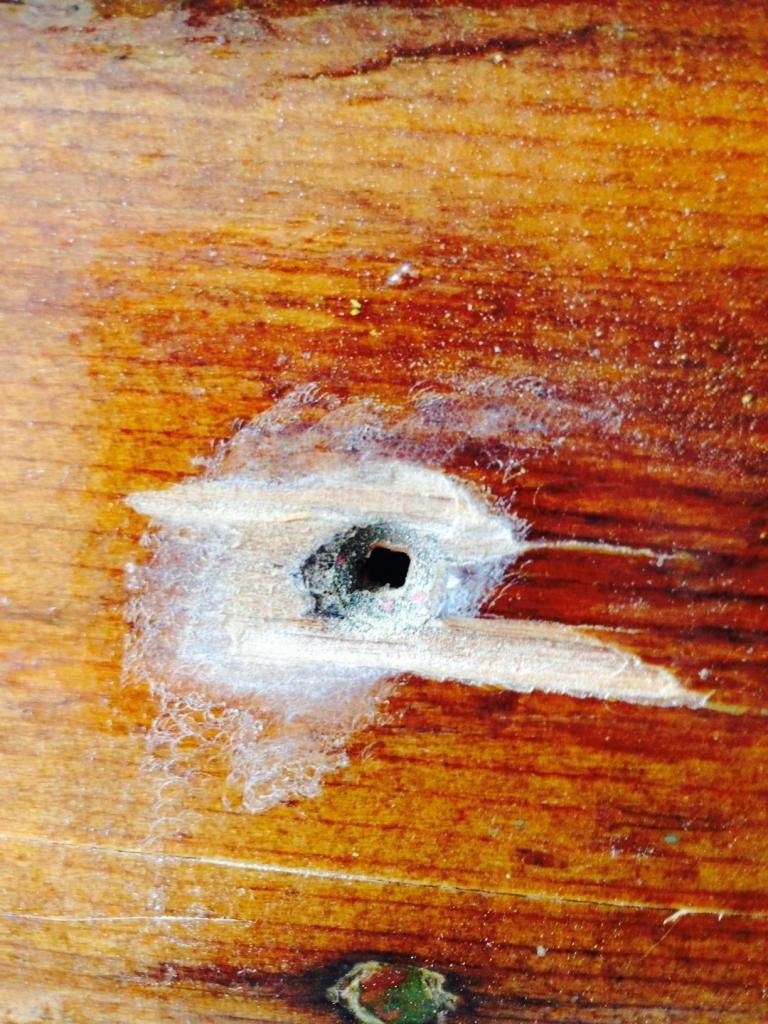
    hole1_zpsx6ywpjuu.jpg

    hole2_zpsdxtflxzk.jpg

    See the damage round the hole? Is there anything I can do to fill that?


  • Registered Users, Registered Users 2 Posts: 657 ✭✭✭FirstIn


    Final questions;

    I want to clean the surfaces I have sanded pre painting and I was wondering is white spirit on a rag ok, or would I be better with turpentine or even methylated spirits? I see people mention alcohol,, but where can you get that?


  • Moderators, Motoring & Transport Moderators, Sports Moderators Posts: 6,337 Mod ✭✭✭✭fergal.b


    You could mix the epoxy with any fine sanding dust you have of the planks to make a filler that will match the wood and then drill out the holes going a little bit into the rib to help pervent splitting it, another option would be to drill out the holes and if you have an old bit of matching wood use a wood plug cutter and epoxy in the plugs lining up the wood grain this will give you a near invisible fix you can then drill and nail the plug or if possible make a new hole next to it. If you epoxy in the nails it will be very hard to do any future repairs as the nails will be well stuck in. White spirt is fine as long as you let it evaporate before you use paint or varnish.


    .


  • Registered Users, Registered Users 2 Posts: 9,605 ✭✭✭gctest50


    FirstIn wrote: »
    .... I see people mention alcohol,, but where can you get that?

    IPA / isopropyl alcohol maybe ?

    chemist should have it / be able to get it - ask for price first though

    http://www.caulfieldindustrial.com/citec-isopropylalcohol/p-124659pd.html


  • Advertisement
  • Registered Users, Registered Users 2 Posts: 657 ✭✭✭FirstIn


    As we haven't nailed the ribs in place it gives me an opportunity to varnish/treat them before they are fixed for good.

    What would you recommend? Simply a few coats of a good yacht varnish? Or should I try and paint them with epoxy? What's best?

    Thank you as always.


  • Moderators, Motoring & Transport Moderators, Sports Moderators Posts: 6,337 Mod ✭✭✭✭fergal.b


    If you want them to last coating them in epoxy would be the way to go but you have to weigh in the extra work and expense to know if it will be worth your while. I coated the inside of my boat with epoxy and varnish :)

    2012-05-05121418.jpg


  • Registered Users, Registered Users 2 Posts: 657 ✭✭✭FirstIn


    I bought international yacht varnish so I'll use that, a couple of coats on the ribs and the top parts of the boat.

    For the white inside I was going to use an aluminium paint as a primer and then white over it. However I'm not sure which white to use.

    For the below the waterline on the outside can I also use the alumium paint as a primer ? And which white would be best? I guess any white anti fouling is the best bet. Thanks


  • Moderators, Motoring & Transport Moderators, Sports Moderators Posts: 6,337 Mod ✭✭✭✭fergal.b


    If the boat is not going to be on the water for more than 3-4 days at a time you can get away with using topside paint below the waterline other than that you will need a bottom paint "anti foul" the aluminium paint will be fine as a primer and unless your going racing any of the cheeper one coat anti-fouls will do.


    .


  • Registered Users Posts: 10 Embla


    Check out Louis Sauzsede on Youtube
    He is a master shipwright and has some very good educational videos including one specifically on stripping varnish with a heat gun.


  • Closed Accounts Posts: 5,108 ✭✭✭pedroeibar1


    I’m nowhere near Fergal’s level in boat building but I’ve done some research on paints/surface coatings. The reason aluminium and zinc primers work as a base layer is that the zinc and aluminium they contain are ‘platelets’ and form a solid flat layer – think of covering a flat surface with a layer of flat sheets as opposed to covering it with tennis balls. (Anti-perspirants work the same way, they contain zinc!) I’m not certain that aluminium primer would be best for a base layer on a surface that would be immersed for a long time if the covering layer is permeable (as are most antifoulings). After the huge amount of effort/work done, for the underwater I’d use International’s Primocon as a base layer followed by whatever antifouling is appropriate (boat speed/fresh/salt water). For the interior I’d use Pre-Coat for the base layer and as Toplac already is expensive I’d go the extra few quid and by ‘Perfection’ the two-part paint that is the next step up from Toplac (which is a very good finish, but Perfection is better, more hard-wearing.)
    Lovely looking boat, looking forward to seeing the finished job!


  • Registered Users, Registered Users 2 Posts: 657 ✭✭✭FirstIn


    Plenty of work continuing on the boat.

    We have a lot of the ribs steamed and ready to go in. We are reluctant to remove more ribs till we nail (cold nail) the new ribs in.

    However as we were wating for the nails to arrive we decided to;

    1: Epoxy resin some of the cracks and the larger holes where we removed nails.
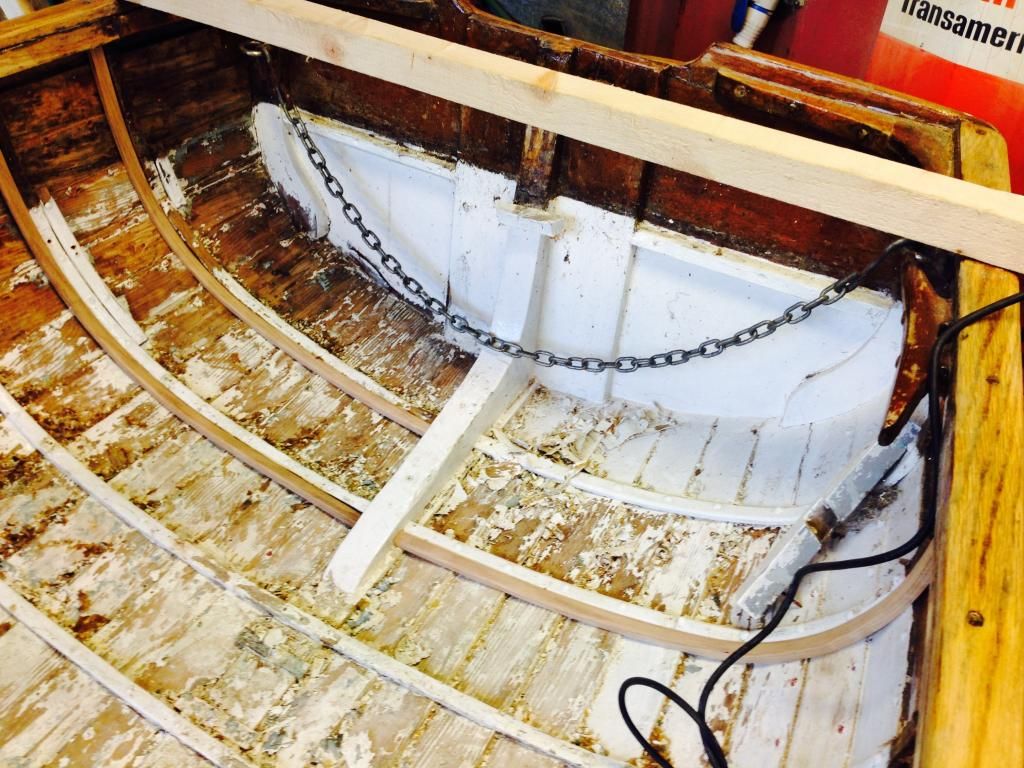
    2: Attend to some cracked ribs, see photos.
    3: Varnish the underside of the new ribs and prep the area were the ribs have been removed.

    The nails have arrived now so next steps are to replace the starboard rear top planks and then get riveting.


  • Registered Users, Registered Users 2 Posts: 657 ✭✭✭FirstIn


    nails_zpsn00cknrc.jpg
    primer_zpsy6m27sq6.jpg
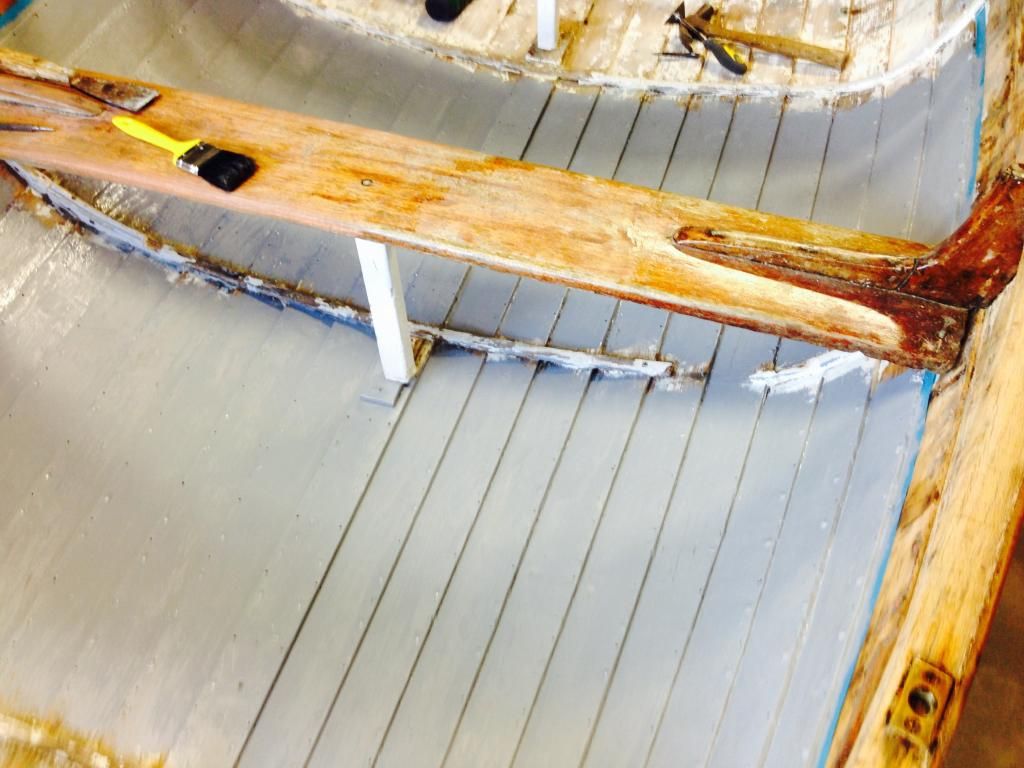
    removed%20planks2_zpsx06hprty.jpg
    removed%20planks_zps7kqqgplh.jpg


  • Registered Users, Registered Users 2 Posts: 657 ✭✭✭FirstIn


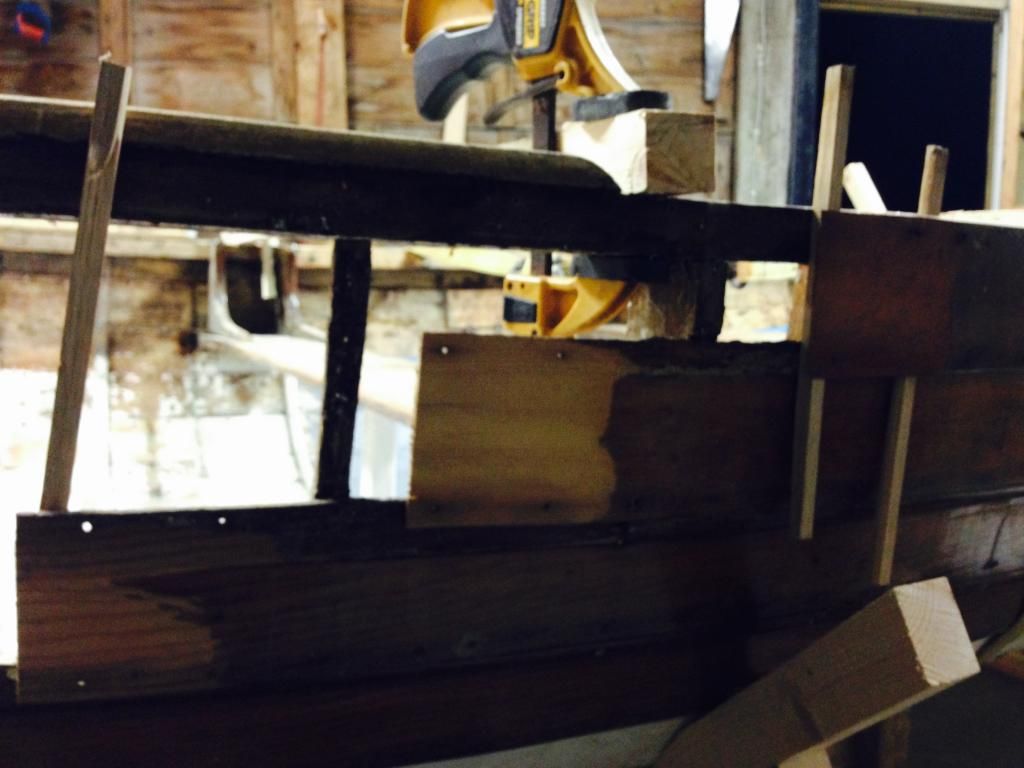
    One thing of note,,, the upper plank appears to be a hard wood, teak perhaps. Is there any reason why this would be? It appears to be more prone to cracking, see pic
    planks_zpsacnrjcue.jpg


  • Advertisement
  • Registered Users, Registered Users 2 Posts: 680 ✭✭✭copper12


    This may be because of attachments’ oarlocks and such


  • Registered Users, Registered Users 2 Posts: 657 ✭✭✭FirstIn


    Ah Ok. So it's a stronger wood to take them.


  • Registered Users, Registered Users 2 Posts: 657 ✭✭✭FirstIn


    bow%20post1_zpsu0ax5lq4.png


  • Registered Users, Registered Users 2 Posts: 657 ✭✭✭FirstIn


    As you can see guys we have some rot that we've removed at the bow. This I reckon is down to the storage of the boat, i.e the shed it was in didn't have a door and the bow was exposed somewhat to the elements.

    We're really not sure how far to go with it here. Between the planks we're replacing and this rot at the bow the restoration is growing "legs".


  • Registered Users, Registered Users 2 Posts: 657 ✭✭✭FirstIn


    Guys. Is anyone on here familiar with binding using epoxy. We are scarfing in new planks and gluing them.

    The guide mentions using a filler. Is this needed if the surfaces are smooth.

    http://www.westsystem.com/ss/bonding-gluing-clamping/


  • Moderators, Motoring & Transport Moderators, Sports Moderators Posts: 6,337 Mod ✭✭✭✭fergal.b


    What I do is first wet the two joints with epoxy resin and let it get absorbed into the wood then while it's sticky apply some resin that has been into a paste with micro balloons "407" or fine sanding dust, even though your finish is nice and smooth it will still absorb resin on it's own but not as a paste.


    .


  • Advertisement
  • Registered Users, Registered Users 2 Posts: 657 ✭✭✭FirstIn


    fergal.b wrote: »
    What I do is first wet the two joints with epoxy resin and let it get absorbed into the wood then while it's sticky apply some resin that has been into a paste with micro balloons "407" or fine sanding dust, even though your finish is nice and smooth it will still absorb resin on it's own but not as a paste.


    .
    Good explanation Fergal. I understand now. Thank you


  • Registered Users, Registered Users 2 Posts: 657 ✭✭✭FirstIn


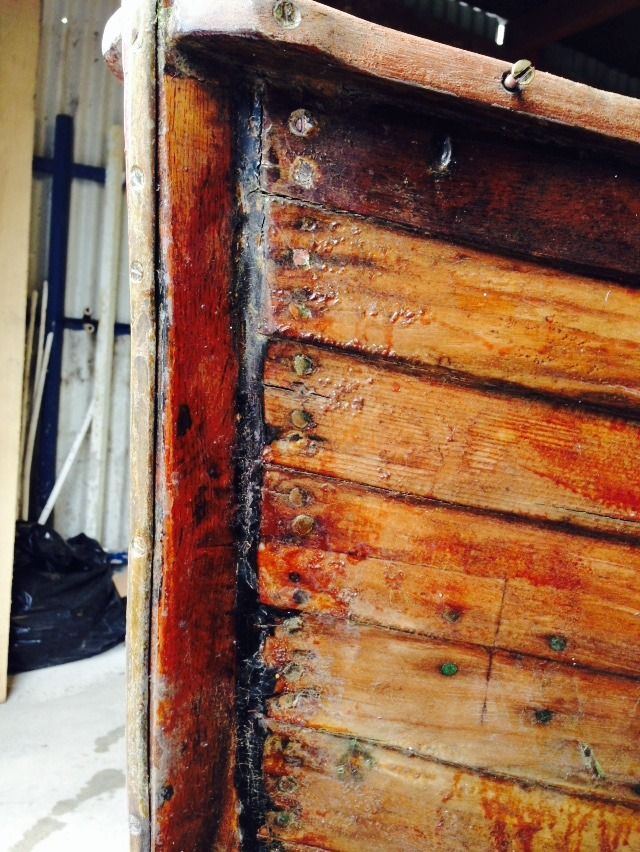
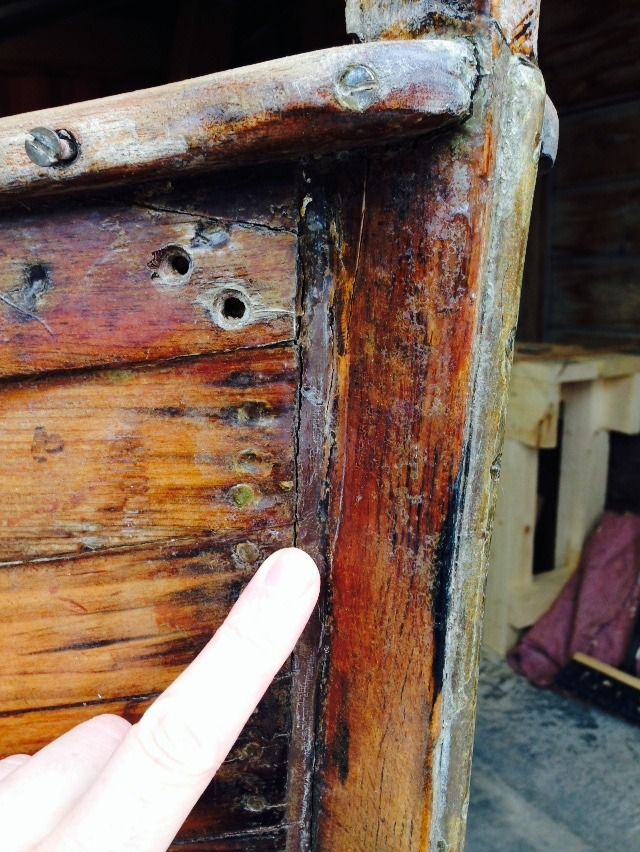
    Folks,what is the best filler/putty to use on the leading edges of the planks, as per these photos?

    Thank you

    9F7F3347-0299-49C7-A497-6F84184046CA_zpsmxqjfoln.jpg

    99AF652B-F1B7-4A8C-81A3-A679030327D8_zpshntmijmg.jpg


  • Moderators, Motoring & Transport Moderators, Sports Moderators Posts: 6,337 Mod ✭✭✭✭fergal.b


    That looks like a big gap between the planking and breast hook do you think something moved out of place and just got filled instead of been fixed ?
    If I wanted a permeant fix that added strength I would go with epoxy resin mixed with sawdust from the planks to try and match the colour.
    If you just want to fill it in a way that you get a good seal and the planks can be easily removed for repair something like silkaflex caulking would do.


    .


  • Registered Users, Registered Users 2 Posts: 657 ✭✭✭FirstIn


    Apologies, amiss of me not to keep you guys current on progress.

    In a nutshell,
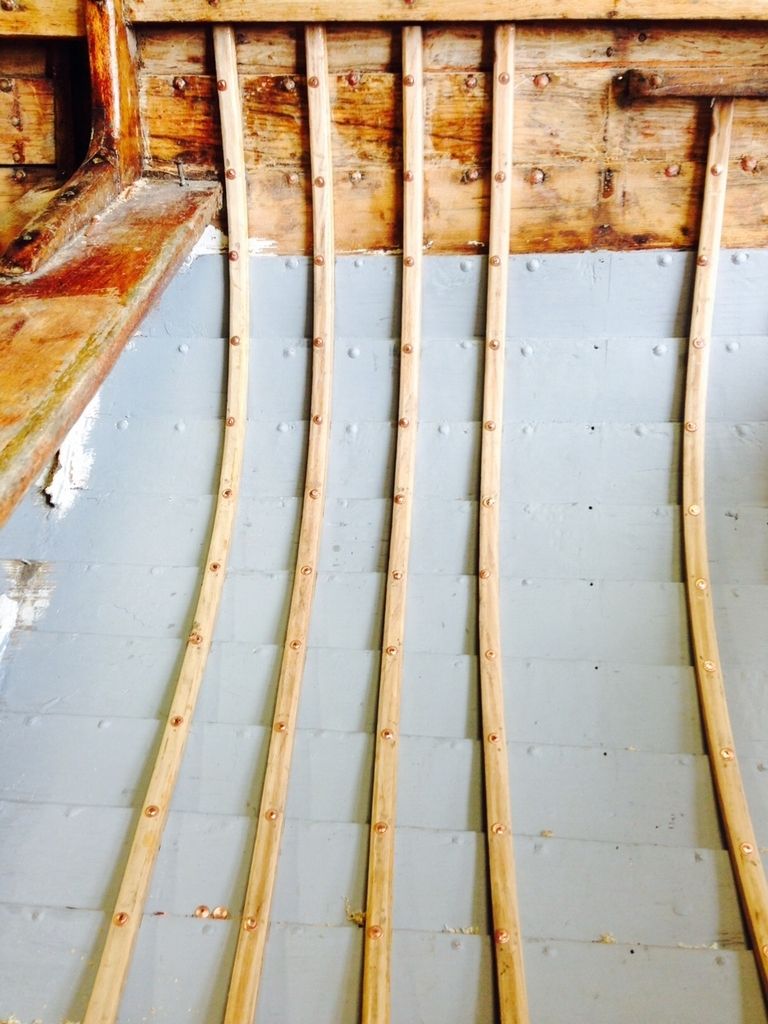
    We have managed to copper nail in quite a number of the ribs. This is cold nailing/riveting.
    Cracked planks to the starboard stern replaced.
    More prep of the surfaces ready for more ribs.
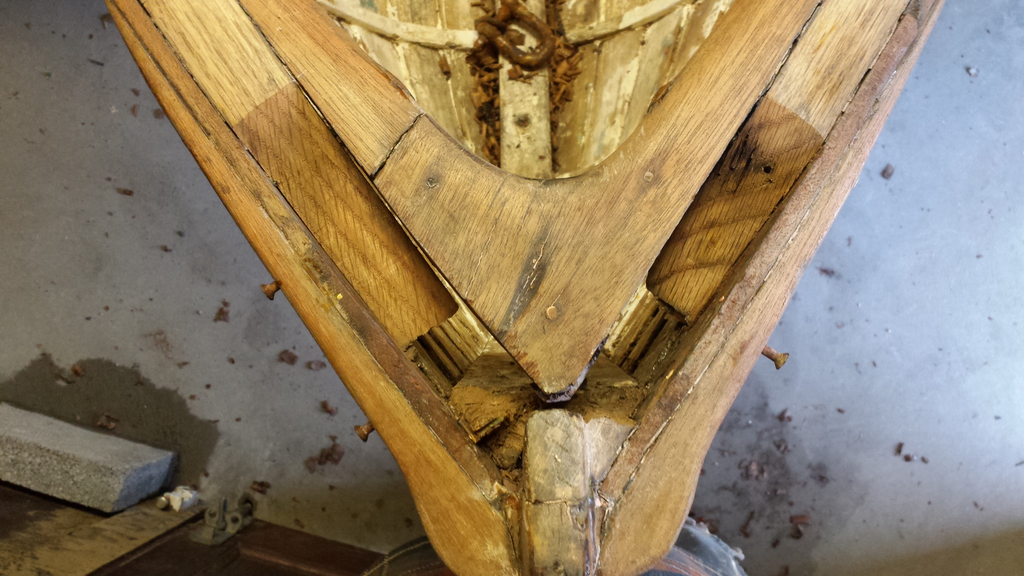
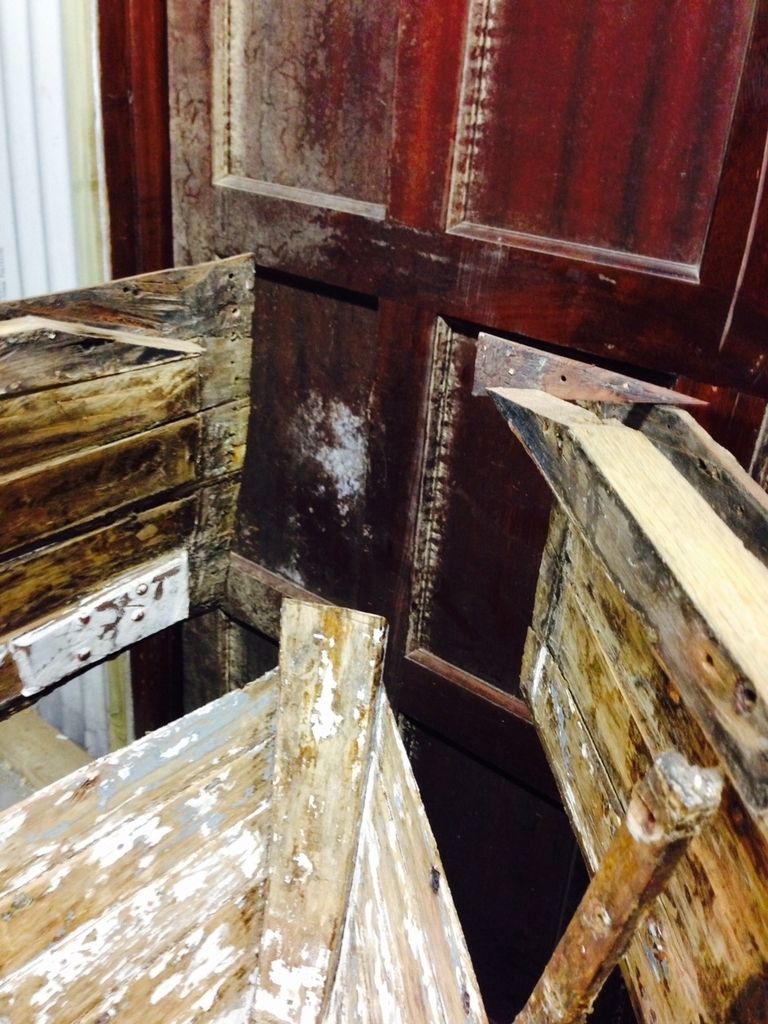
    A massive undertaking on the bow stem. The upper part of this was rotten and we are having this replaced.

    Here are some pics.


  • Registered Users, Registered Users 2 Posts: 657 ✭✭✭FirstIn


    ribs%20again_zpsl2ek4ho8.jpg

    nailed%20ribs_zps3rzerlse.jpg

    rear%20planks_zps05plxoie.jpg

    rear%20planks2_zps4plkifo4.jpg

    opened%20bow_zpshbzceoki.jpg

    rear%20prepped_zpsbkce8lyn.jpg


  • Advertisement
  • Registered Users, Registered Users 2 Posts: 657 ✭✭✭FirstIn


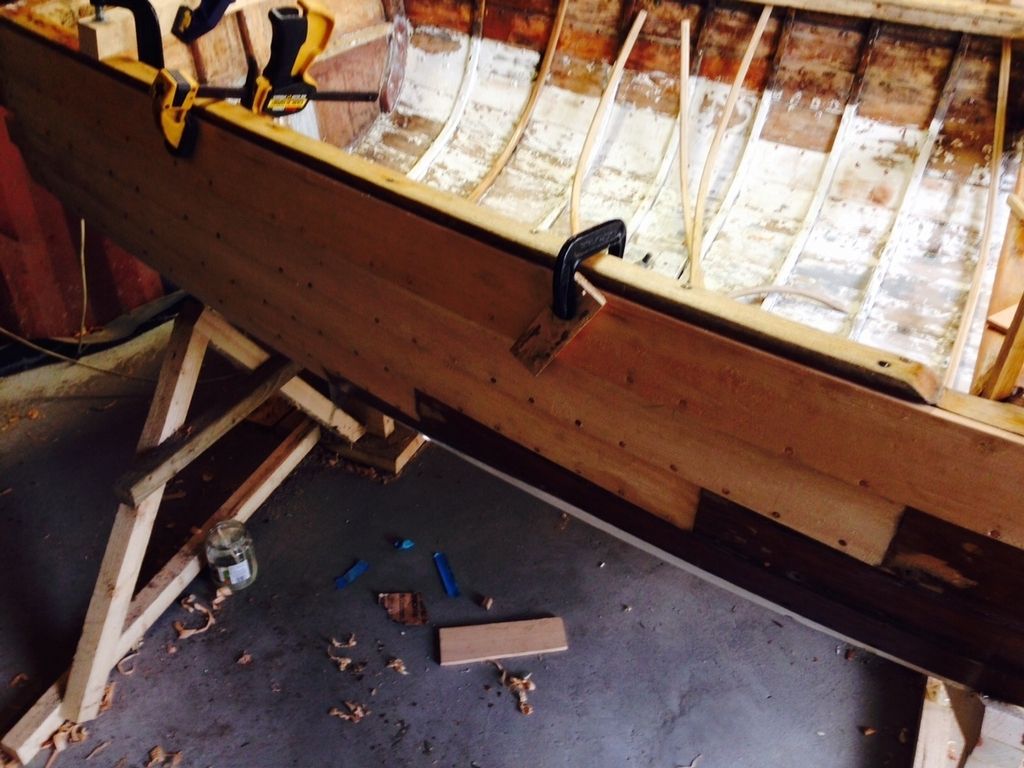
    Folks , we're still busy on the boat and at this stage we have most of the ribs replaced. The work on the bow / new breast hook has been completed.

    What I have noticed though and it concerns me is the gap between the garboarb planks on both sides at the forward extension of the keel. The stem. I understand the garboarb planks attach to the keel , to the underside of what can be thought of as a T shape made by the keel. But forward of the keel/the stem where it raises upwards this isn't the case.

    I could certainly mix west system epoxy with their filler powder and fill the gaps. However I'm worried about the consequences of expansion when we do get the boat in the water. The epoxy will be solid. In essence the boards won't be able to expand here.

    Is epoxy really what I should use?


  • Moderators, Motoring & Transport Moderators, Sports Moderators Posts: 6,337 Mod ✭✭✭✭fergal.b


    The wood should be able to expand in other directions if needed, would it help to cut a strip of timber to fill the gap or maybe wet the boat down a few times over a week and see if expand and close up the gap a bit.


    .


  • Registered Users, Registered Users 2 Posts: 657 ✭✭✭FirstIn


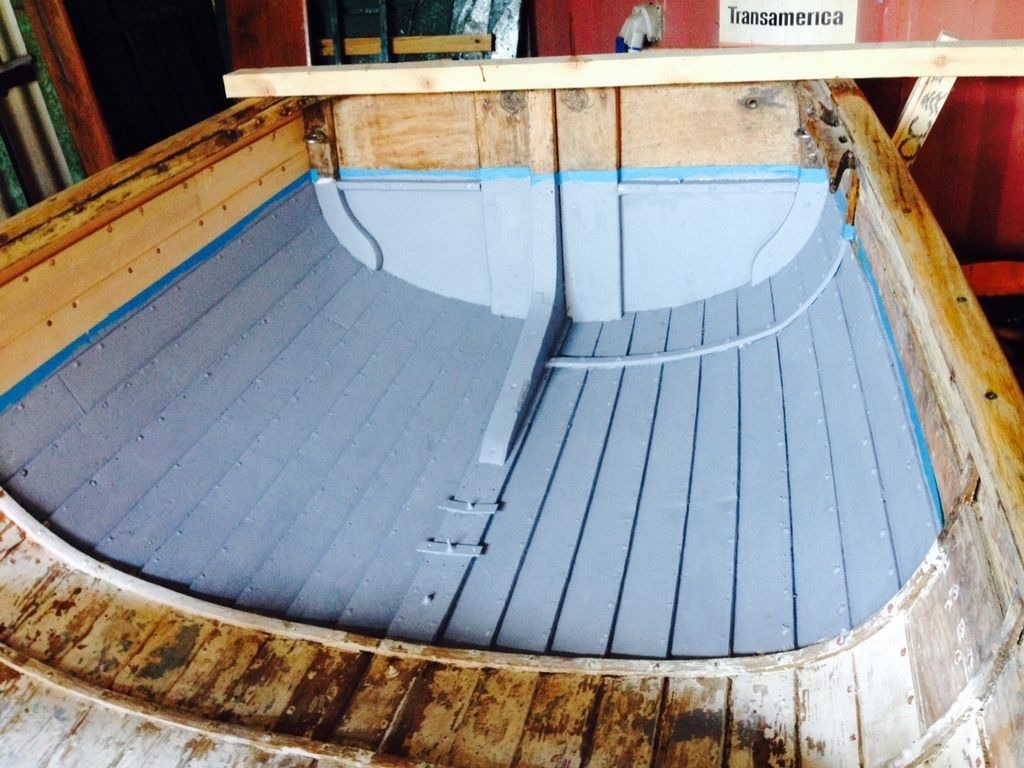
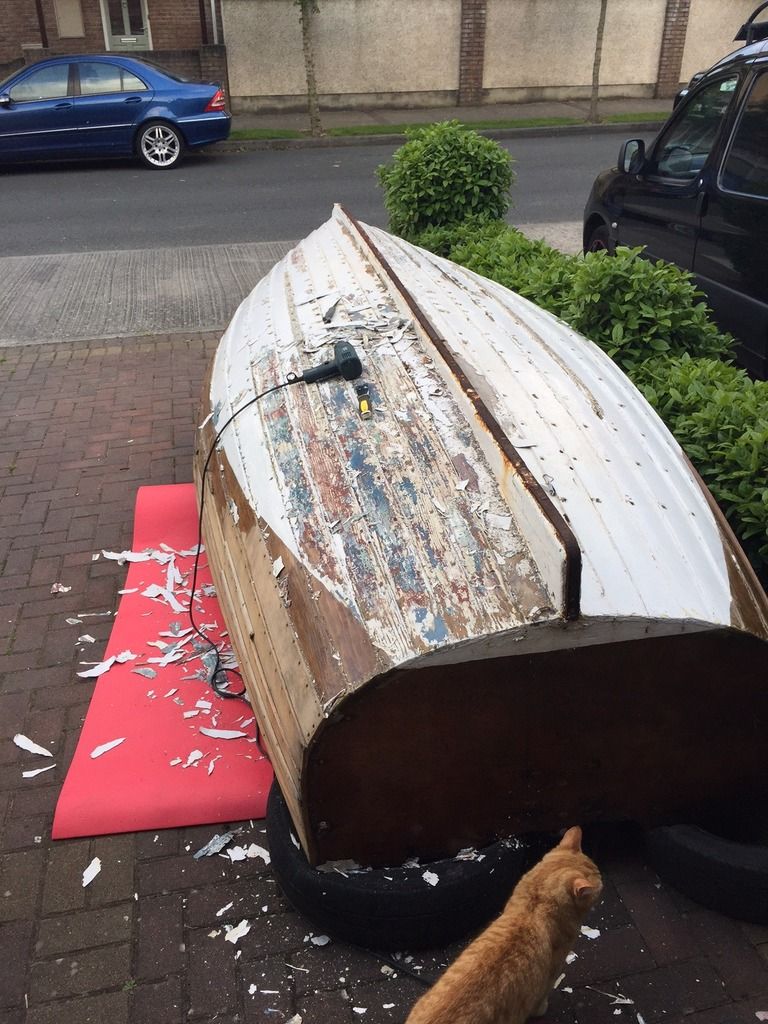
    Two years, a wee while. So how far did we get? We 95% completed the inside.
    We didn't get to the outside. We lost our shed and things/life got in the way.

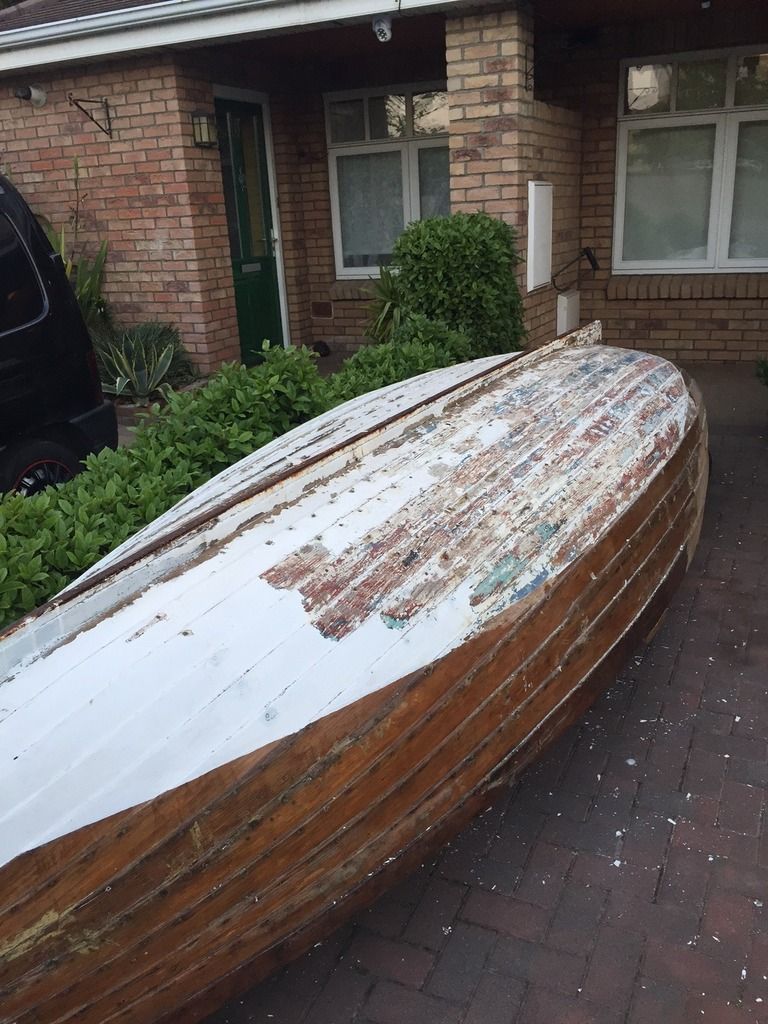
    We still don't have a shed so I now have the boat in my drive. A bit of a pain, but at least with some decent weather it gives me the chance to try and finish this off. My carpenter has "emigrated" to Cork. This is a big problem as we have some wood work left to do, not much but tasks I can't do. Such as the "skids/runners" that were on the hull. Just one each side. So I've got to sort that.

    Here are some pics.

    Boat1_zpsb4xnscyc.png

    Boat2_zpszyszrf8p.png

    Boat3_zpszji3di4c.jpg

    The cat is Myles. He's taken on the important function of clerk of works on this job.


  • Registered Users, Registered Users 2 Posts: 657 ✭✭✭FirstIn


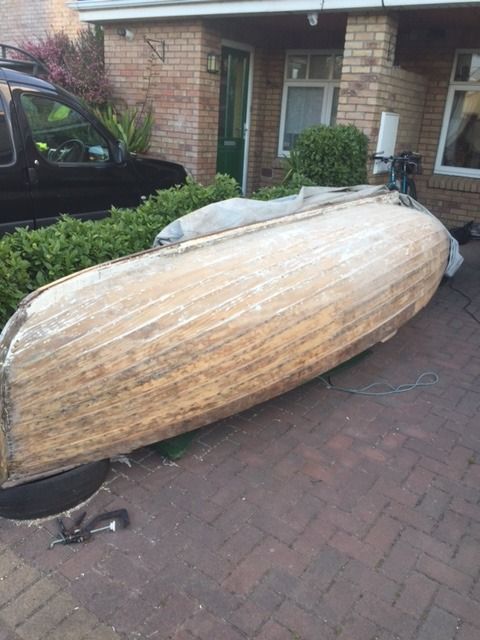
    More heating and scrapping this evening. I have a long way to go. Progress may look good but ensuring the joins between the planks/lands are clean and then sanding will take some time. While this prep continues I am wondering re;

    What product to use to fill the small gaps at the lands and also where the innermost plank meets at the keel. Would sikaflex be ok? Can you paint over it?
    A trip in to Viking marine to get undercoat and paint.
    Should I use two part epoxy (west system) to coat the underside?
    Trying to find a carpenter that knows a thing or two re boats to make the short stringers we need towards the bow of the boat and a few other small parts.

    boat4_zpsa14bxwhy.jpg


  • Moderators, Motoring & Transport Moderators, Sports Moderators Posts: 6,337 Mod ✭✭✭✭fergal.b


    I would go with the west systems to seal the planks you can also mix up the resin with your wood sanding dust to make a thick or tin filler for any gaps. Paint wont stay on skaflex .


    .


  • Registered Users, Registered Users 2 Posts: 1,258 ✭✭✭sogood


    Enjoying the thread and admiring your work and dedication. Sorry to hear that your progress has been hampered by the change in circumstances. Best of luck in getting it finished.


  • Registered Users, Registered Users 2 Posts: 657 ✭✭✭FirstIn


    Making some more progress. Keel band off this evening. What do people use for keel bands? Stainless Steel? Does anyone know a place in Dublin that will sell a strip of stainless if indeed that is what I need?

    boat5_zpsjl6ydack.jpg


  • Moderators, Motoring & Transport Moderators, Sports Moderators Posts: 6,337 Mod ✭✭✭✭fergal.b


    FirstIn wrote:
    Making some more progress. Keel band off this evening. What do people use for keel bands? Stainless Steel? Does anyone know a place in Dublin that will sell a strip of stainless if indeed that is what I need?


    Stainless will be expensive just go with steel , aluminium or galvanised steel . I had lots of rub rail that would have done you but it's all gone to the scrapman now.


    .


  • Registered Users, Registered Users 2 Posts: 657 ✭✭✭FirstIn


    Hi folks , I never did get to finish the boat. It’s up for sale now. (Hope that’s ok to say here) See donedeal and type clinker as the search.


  • Registered Users, Registered Users 2 Posts: 1,258 ✭✭✭sogood


    It happens sometimes. We don't always get to finish the projects we start, but then, some people don't even get to start them in the first place. Many people harbour the notion to restore and old car, motorboat or whatever and they go to meet their maker that way. Life is all about the journey, not the destination. Top marks for what you did get done.


  • Advertisement
Advertisement