Advertisement
If you have a new account but are having problems posting or verifying your account, please email us on hello@boards.ie for help. Thanks :)
Hello all! Please ensure that you are posting a new thread or question in the appropriate forum. The Feedback forum is overwhelmed with questions that are having to be moved elsewhere. If you need help to verify your account contact hello@boards.ie

Shed build - help

Options
1567810

Comments

  • Registered Users Posts: 33,769 ✭✭✭✭listermint


    Lumen wrote: »
    The edges are sealed with a couple of coats of yacht varnish. I tried it also on the flat sections but didn't like the satin finish so I took it off and switched to danish oil for those. I'll do some experiments with Textrol soon.

    The windows are fairly well sheltered anyway, with tree shelter blocking wind and the gutter blocking rain from above.

    Time will tell whether it will hold up.

    You mentioned tape is that the tape on the external section ? Just considering it may not have the run off you want. That silicone would give. In terms of shape and angle.

    You don't want any water sitting there for any time.


  • Registered Users Posts: 31,025 ✭✭✭✭Lumen


    listermint wrote: »
    You mentioned tape is that the tape on the external section ? Just considering it may not have the run off you want. That silicone would give. In terms of shape and angle.

    You don't want any water sitting there for any time.

    The correct procedure is to position the tape so that it comes out past the upstand, and then cut it back with a sharp blade. On the bottom upstand the cut should be angled upwards to create a run off.

    I tried!

    The tape isn't like EDPM foam tape, it's more like a gum or playdoh consistency, so is a bit malleable. I can see through the glazing to check for leaks and then sort it out if necessary. The joy of DIY is that there's nothing done that can't be re-done. If the worst comes to the worst the drainage/ventilation holes in the bottom of the frame will weep out any seepage.


  • Registered Users Posts: 31,025 ✭✭✭✭Lumen


    karlitob wrote: »
    I used textrol on an outdoor workbench recently with a wide brush. I have to say - I found it very hard to work with. It needs to go on wet on wet and you apply as many coats as it can absorb. I put two coats on but it started to dry fairly quickly so I was only a quarter way through the job before it dried It looks quite streaky now (it’s in grey). It’s fine - it needs another coat Or two and I’m sure it’ll look better. Just thought I’d give my experience. And I’m fairly handy at the painting - quite enjoy it.

    What kind of timber did you use? New pressure-treated softwood? Rough or planed? As I understand it, Textrol should not require "as many coats as it can absorb", it should require exactly two, according to the directions. Mill glaze from planing and pressure treatment will both stop it penetrating.

    Last night I read the data sheets and third party advice on Textrol application. It is not supposed to be used on freshly milled or pre-treated timber, otherwise it won't penetrate.

    The Balau decking arrived yesterday and the procedure I'll use for that is:

    - Prepdeck to remove mill glaze (strip)
    - Net-trol to stop the effect of the stripper (neutralize)
    - Dry for 48 hours (dry)
    - Deks Olje D1 (but could be Textrol) (treat)

    This is the recommended approach, see here for example:

    https://www.owatrolusa.com/how-to-guides/remove-mill-glaze/

    ...and the PDF attached which I found from a Balau decking supplier.

    Lots of washing used in the first couple of steps so I'll do that outdoors and then treat the decking lengths in the shed where it's dry.

    The same strip/neutralize/dry/treat approach is recommended also for Textrol, on new wood and previously treated wood (unless the treatment is a re-application of the same thing).

    The alternative is to let the wood weather for at least 6 months, which has the same effect as the stripping and so replaces the first two steps.

    If this all goes to plan with the decking I'll might try it out on the non-varnished parts of the window frames.

    FWIW I decided to use Deks Olje D1 rather than Textrol on the decking because...the boaty people use it, and I like oil on wood. But they do the same job.

    I am inexperienced so trying to learn from wherever I can. Hopefully I have this right, please correct if not!


  • Registered Users Posts: 2,588 ✭✭✭karlitob


    Lumen wrote: »
    What kind of timber did you use? New pressure-treated softwood? Rough or planed? As I understand it, Textrol should not require "as many coats as it can absorb", it should require exactly two, according to the directions. Mill glaze from planing and pressure treatment will both stop it penetrating.

    Last night I read the data sheets and third party advice on Textrol application. It is not supposed to be used on freshly milled or pre-treated timber, otherwise it won't penetrate.

    The Balau decking arrived yesterday and the procedure I'll use for that is:

    - Prepdeck to remove mill glaze (strip)
    - Net-trol to stop the effect of the stripper (neutralize)
    - Dry for 48 hours (dry)
    - Deks Olje D1 (but could be Textrol) (treat)

    This is the recommended approach, see here for example:

    https://www.owatrolusa.com/how-to-guides/remove-mill-glaze/

    ...and the PDF attached which I found from a Balau decking supplier.

    Lots of washing used in the first couple of steps so I'll do that outdoors and then treat the decking lengths in the shed where it's dry.

    The same strip/neutralize/dry/treat approach is recommended also for Textrol, on new wood and previously treated wood (unless the treatment is a re-application of the same thing).

    The alternative is to let the wood weather for at least 6 months, which has the same effect as the stripping and so replaces the first two steps.

    If this all goes to plan with the decking I'll might try it out on the non-varnished parts of the window frames.

    FWIW I decided to use Deks Olje D1 rather than Textrol on the decking because...the boaty people use it, and I like oil on wood. But they do the same job.

    I am inexperienced so trying to learn from wherever I can. Hopefully I have this right, please correct if not!

    Well you’re asking the wrong man for an expert opinion - an optimistic enthusiast would be about my limit.


    It’s was made of old and well seasoned wood by a carpenter neighbour. Freshly sanded etx.

    You’re correct on the two coats - and I copied that approach. But I *though* the YouTube clip on textrol suggested that you could keep going til absorbed.

    My workbench is staying outdoors so I wanted to give it a lash of something good, as well as seeing how it would look/hold up for other planned work.

    I think the fact I had to brush hard to reach areas made it hard to use. Roller onto to flat surfaces like cladding or decking would be easier.

    Like you - I think I might stick to natural colour oil like the Deks.

    Looks like you’ve done your research. Best of luck with it. Photos when your finished would be great.


  • Registered Users Posts: 12,326 ✭✭✭✭Goldengirl


    Lumen wrote: »
    What kind of timber did you use? New pressure-treated softwood? Rough or planed? As I understand it, Textrol should not require "as many coats as it can absorb", it should require exactly two, according to the directions. Mill glaze from planing and pressure treatment will both stop it penetrating.

    Last night I read the data sheets and third party advice on Textrol application. It is not supposed to be used on freshly milled or pre-treated timber, otherwise it won't penetrate.

    The Balau decking arrived yesterday and the procedure I'll use for that is:

    - Prepdeck to remove mill glaze (strip)
    - Net-trol to stop the effect of the stripper (neutralize)
    - Dry for 48 hours (dry)
    - Deks Olje D1 (but could be Textrol) (treat)

    This is the recommended approach, see here for example:

    https://www.owatrolusa.com/how-to-guides/remove-mill-glaze/

    ...and the PDF attached which I found from a Balau decking supplier.

    Lots of washing used in the first couple of steps so I'll do that outdoors and then treat the decking lengths in the shed where it's dry.

    The same strip/neutralize/dry/treat approach is recommended also for Textrol, on new wood and previously treated wood (unless the treatment is a re-application of the same thing).

    The alternative is to let the wood weather for at least 6 months, which has the same effect as the stripping and so replaces the first two steps.

    If this all goes to plan with the decking I'll might try it out on the non-varnished parts of the window frames.

    FWIW I decided to use Deks Olje D1 rather than Textrol on the decking because...the boaty people use it, and I like oil on wood. But they do the same job.

    I am inexperienced so trying to learn from wherever I can. Hopefully I have this right, please correct if not!

    Hi Lumen .
    Lovely job you are doing here , have been following with interest although am no good at the hardwork but like picking up tips, lol.
    I have used both Netrol and Textrol on a deck .
    Left the deck which was pressure treated for a while before cleaning with Netrol. Came up a treat . Picked a dry week forecast wise in Summer .Used the Textrol a few days later , 2 coats , it just disappeared into the wood and I thought it wasn't enough .
    But it was .
    Apart from a top up a few years later the deck was perfect for 10 years .
    When it started to get dry and grey I redid it ..but ...
    I made the mistake after that of changing to deck oil, Cuprinol , which sat on top like thick butter and the wood didn't absorb it .
    It went black in parts and rotted after that . Got rid this year and paved instead .
    I don't know if this would have happened anyway ie. it's time was up , or I did something wrong , or the wood with the Textrol just wasn't absorbing the oil .
    Anyway , my tuppence worth is if going with Textrol, stick with Textrol, or if oil used continue oiling .
    You probably know this already .
    Reason I didn't continue with the Textrol is I have asthma and found it a bit overwhelming when I did it even though outdoors .
    The oil is less pungent .
    Best of luck with your lovely " shed" !


  • Advertisement
  • Registered Users Posts: 31,025 ✭✭✭✭Lumen


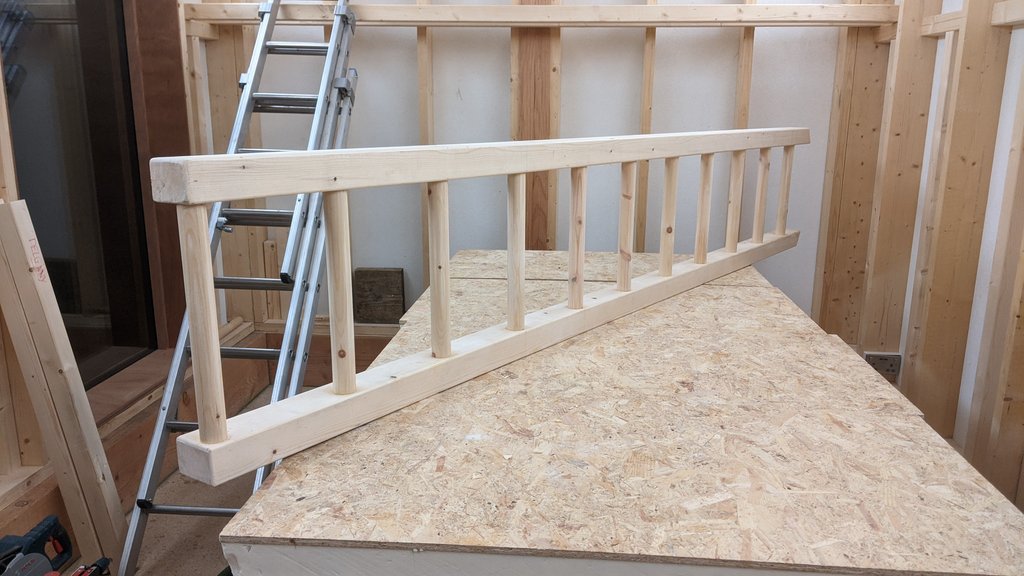
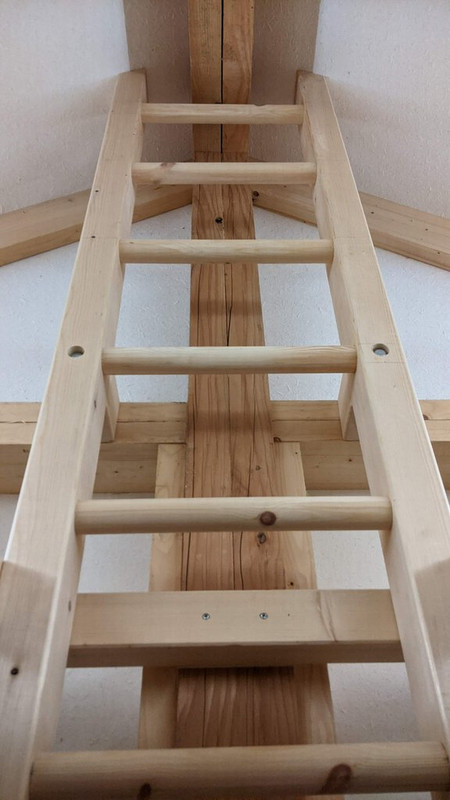
    The 38mm dowels I ordered turned out to be 44mm.

    Still, there's no such thing as too strong a ladder right?

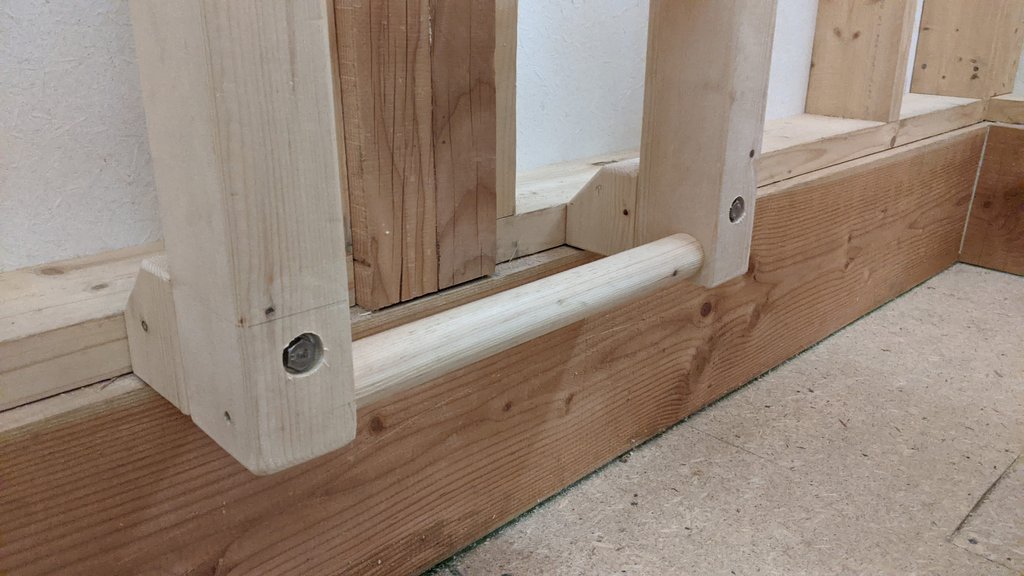
    I couldn't be bothered to route out 22 perfect circles so I just used two 140mm Spax screws and glue for each 380mm rung.

    Uprights are 4x3 PAO with 6mm roundover.

    PXL-20201020-202639859.jpg


  • Registered Users Posts: 31,025 ✭✭✭✭Lumen


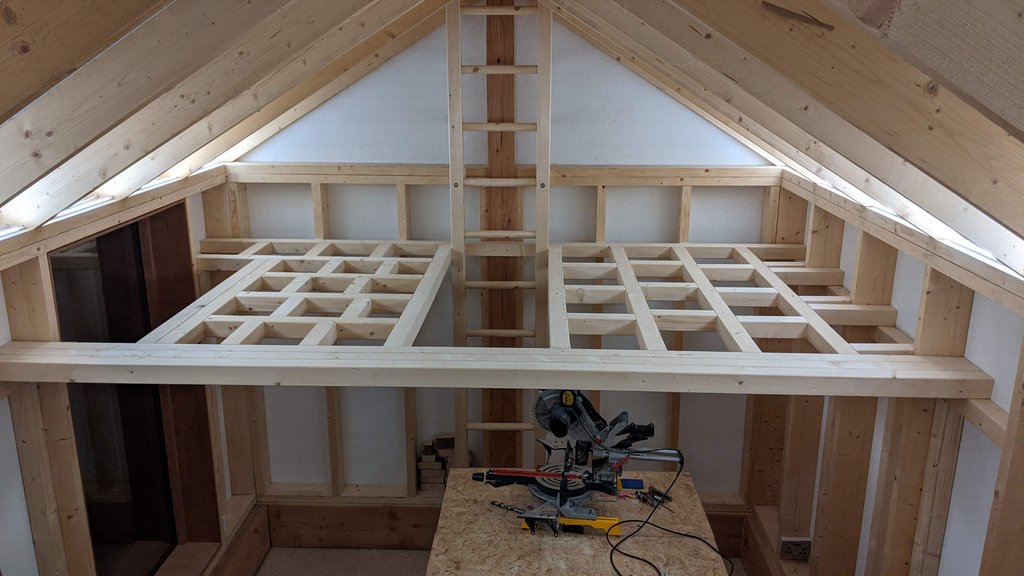
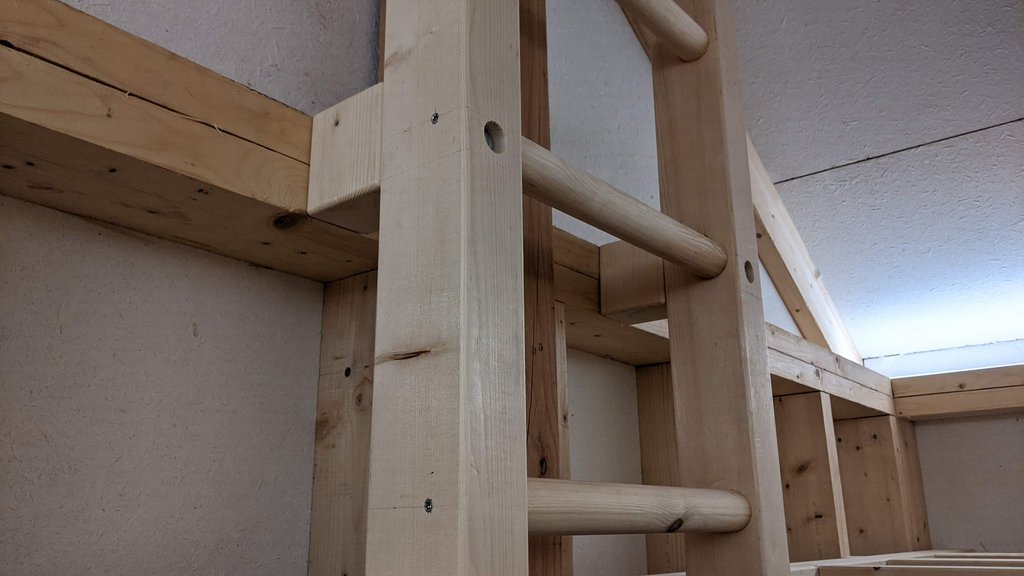
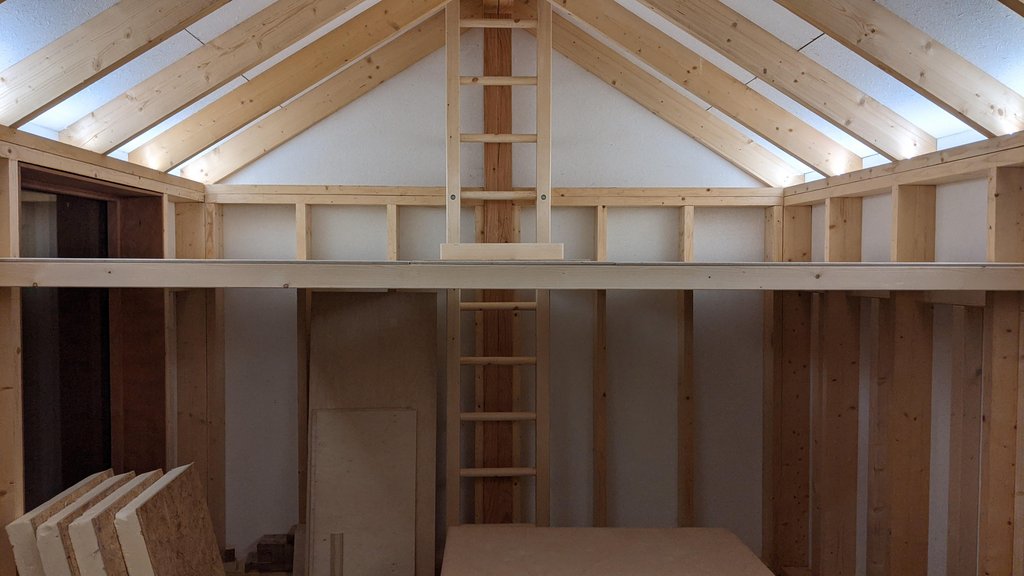
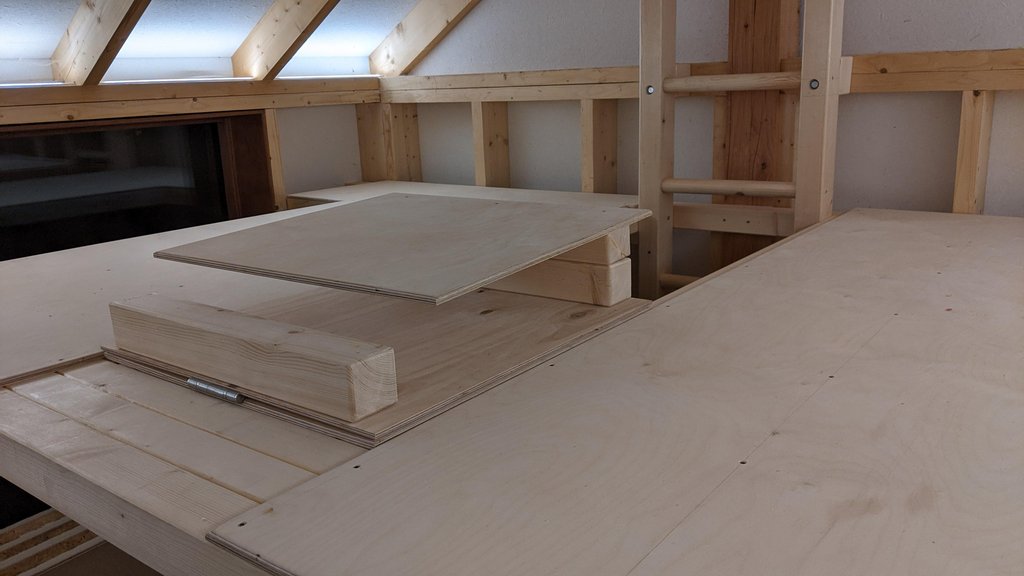
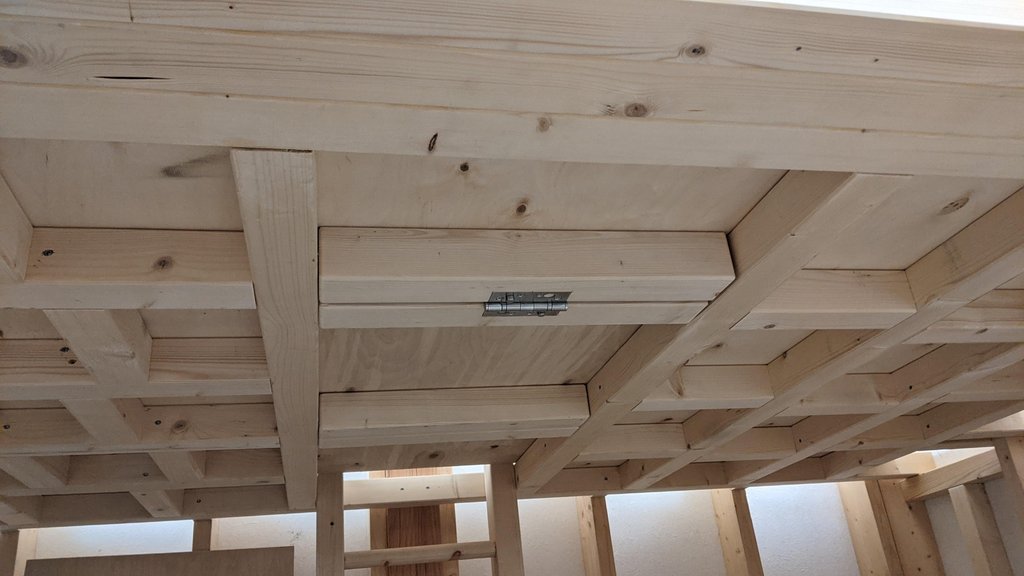
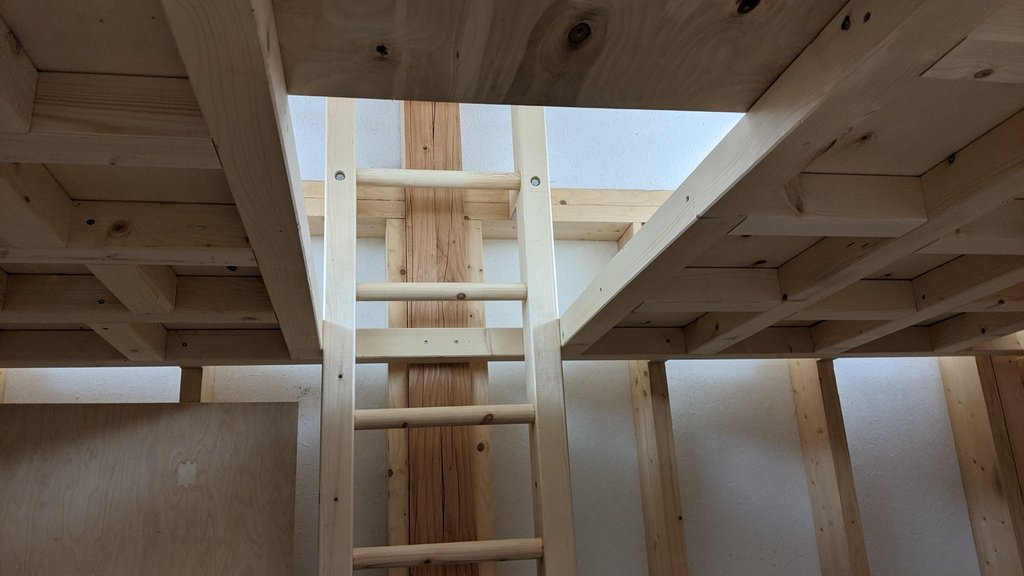
    Put up the ladder and framed the mezzanine floor.

    Most of it is held together with 140mm Spax screws, apart from the ladder which is bolted to the wall with stainless lag screws, and the outer triple beam bit which is glued for stiffness and to avoid visible screws.

    The floor frame is reasonably stiff although obviously gets springier to towards the centre of the unsupported leading edge, hopefully the birch ply will help a bit more. If necessary I can add a wire rope to the beam.

    None of it touches the floor - all the load is transferred to the ring beam. This is important as the lower floor joists are only 150mm - it's all been about conserving internal headroom.

    To get the long screws into the close framing I used one of these:

    9929V_P&$prodImageMedium$

    Anyway, all straightforward enough.

    Onwards and upwards, literally.

    PXL-20201025-201038164.jpg

    PXL-20201025-201829981.jpg

    PXL-20201025-201845713.jpg

    PXL-20201025-201941459.jpg


  • Registered Users Posts: 33,769 ✭✭✭✭listermint


    Lovely level of work. Are you playing the top and underneath surface? If yes I'd imagine that would add a huge amount of ridigity to it. Just top side alone might not.

    Very nice detail. Like the central ladder idea.


  • Registered Users Posts: 31,025 ✭✭✭✭Lumen


    It's a straight play off between aesthetics and engineering.

    I'm really loathed to lose the view of the framing from below.


  • Registered Users Posts: 33,769 ✭✭✭✭listermint


    Lumen wrote: »
    It's a straight play off between aesthetics and engineering.

    I'm really loathed to lose the view of the framing from below.

    I kinda knew you'd say that. I'd be the same.


  • Advertisement
  • Registered Users Posts: 31,025 ✭✭✭✭Lumen


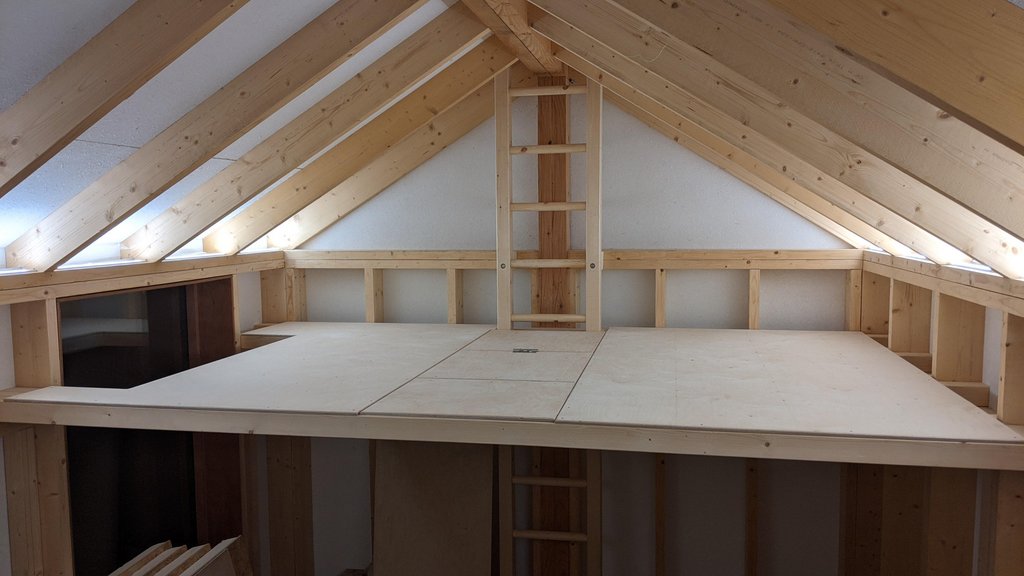
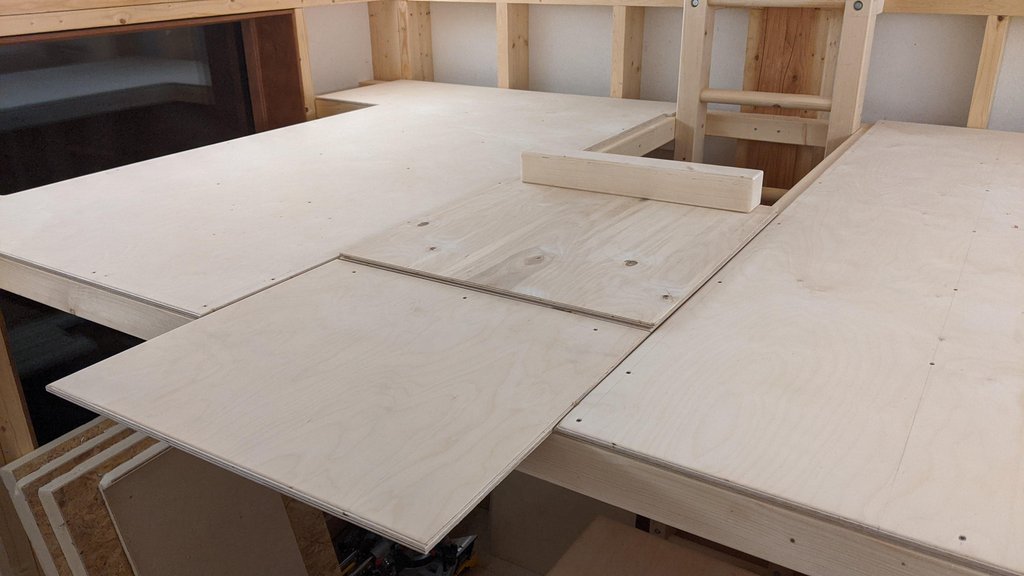
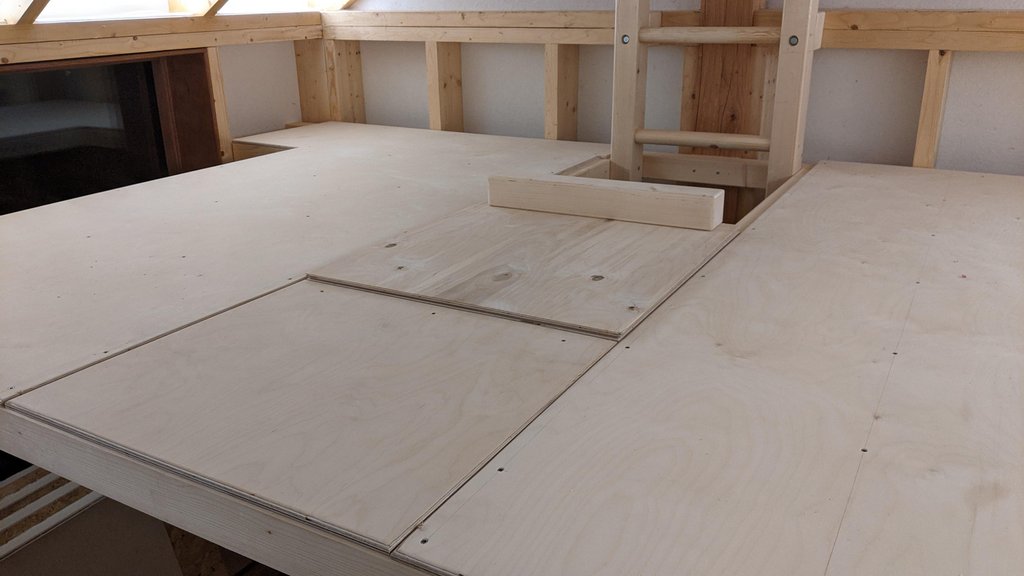
    Right, so the ply didn't help the deflection, 6mm with me sitting on the unsupported leading edge, with or without ply, which amounts to 1/500 deflection. 1/300 is generally considered OK, so it'll do for the intended purpose and I won't bother doing the underneath, might add some more recessed lighting instead.

    I made a sliding, double hinged access hatch. It offers various permutations of finger-trapping goodness.

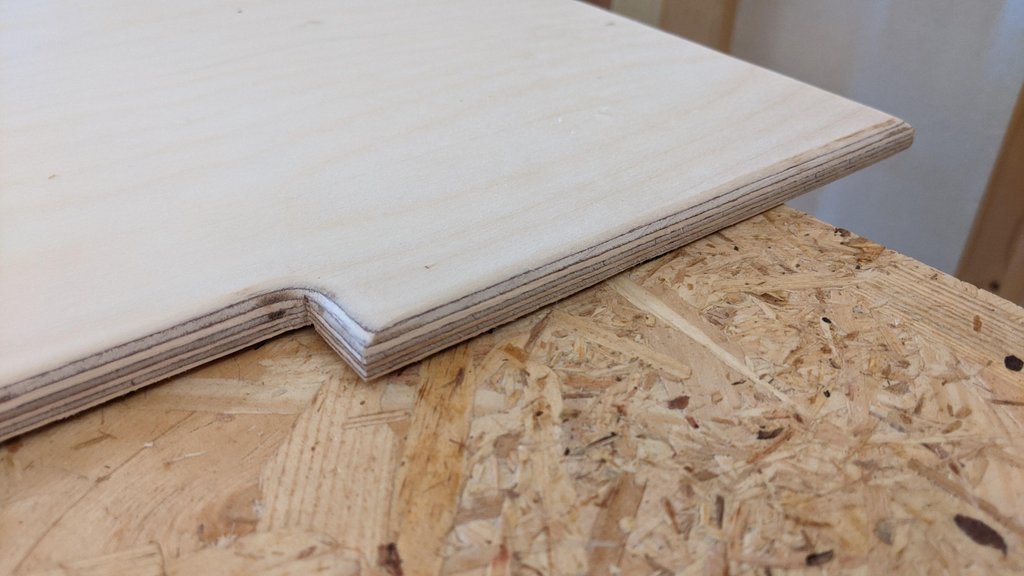
    Birch ply is not the prettiest but it's super strong and looks OK with a roundover applied to the edges with a trimmer router. Anyone got ideas of what to treat it with? I have some Owatrol D1 oil which I might slap on to stop it picking up dirt.

    Decking and flooring next. I'll do the full 3-stage Owatrol treatment on the Bangkirai decking and then decide whether to use it inside too. I definitely don't want proper engineered flooring as it'll look too housey, but I reckon plywood is too fragile for foot traffic.

    https://imgur.com/a/x1xVgns

    1A0n9Lw.jpg

    FBGEXYM.jpg

    04TGPk8.jpg

    iddVevV.jpg

    mftk6Y9.jpg

    unWI72O.jpg

    VsTSwaO.jpg

    fcoqprJ.jpg


  • Registered Users Posts: 9,454 ✭✭✭mloc123


    Lumen wrote: »

    Birch ply is not the prettiest

    How dare you...


  • Registered Users Posts: 7,336 ✭✭✭bladespin


    This has become a work of art, much more than just a 'shed thread' lol. Loving it.


  • Registered Users Posts: 31,025 ✭✭✭✭Lumen


    bladespin wrote: »
    This has become a work of art, much more than just a 'shed thread' lol. Loving it.

    I think I'm slightly scared of finishing it before there's a vaccine. :D


  • Registered Users Posts: 31,025 ✭✭✭✭Lumen


    Posh decking prep!

    So I went down the full 3-stage Owatrol route (Prepdeck, Net-trol, D-1 oil) with the Bangkiri decking.

    This is an alternative to just letting it weather for a year and then oiling it. The reason I didn't want to do that is because there are reports of this type of decking cupping and splitting if not properly installed and treated. That risk is made worse if each face performs differently e.g. through moisture absorption, so to make both faces the same I had to treat before installation. Also, it means that when I'm done, I'm done. At least for a couple of years.

    There's only about 7sqm of decking to do but as usual, it took ages.

    Here are the instructions for the 2-stage stripping process. That took about a day spread over the working week.

    https://www.owatrolusa.com/how-to-guides/remove-mill-glaze/

    Then the oiling, which took another half day. It's done wet-on-wet over a couple of hours, with a wipe down after a 30 minutes break at the end to remove excess. So two batches took half a day.

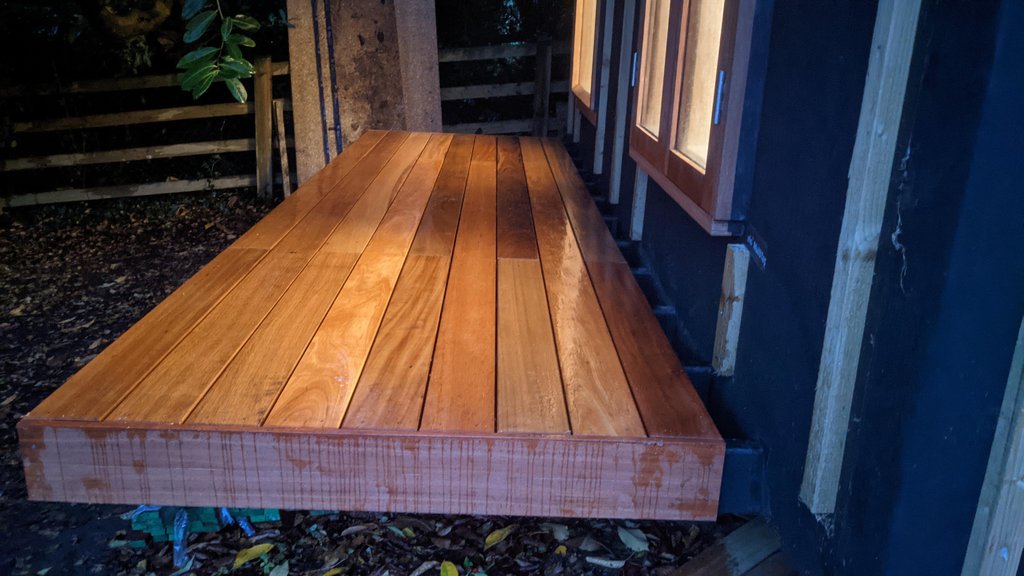
    Below pics are of the decking before and after the oiling.

    I'm happy enough with the results but no-f'ing way I'm doing twice that effort for the flooring, so I ordered some jumbo sheets of 12mm birch ply which I intend to treat with water-based matt poly varnish.

    image.jpg

    image.jpg


  • Registered Users Posts: 33,769 ✭✭✭✭listermint


    jesus thats alot of effort = Personally i would have just gone with oiling both sides properly and well. Cupping has nothing to do with glaze on the wood. Its as you know wood drying out quickly. Oil applied correctly slows that right down or stops it fully for a long period of time.

    The prep stuff for me is unnecessary , i've been guilty on plenty of projects of over egging the research and not doing enough of the 'doing'.


  • Registered Users Posts: 31,025 ✭✭✭✭Lumen


    listermint wrote: »
    jesus thats alot of effort = Personally i would have just gone with oiling both sides properly and well. Cupping has nothing to do with glaze on the wood. Its as you know wood drying out quickly. Oil applied correctly slows that right down or stops it fully for a long period of time.

    The prep stuff for me is unnecessary , i've been guilty on plenty of projects of over egging the research and not doing enough of the 'doing'.

    Yeah, well someone has to follow the instructions, right? :D

    I really should have done one of them the lazy way to compare.


  • Registered Users Posts: 31,025 ✭✭✭✭Lumen


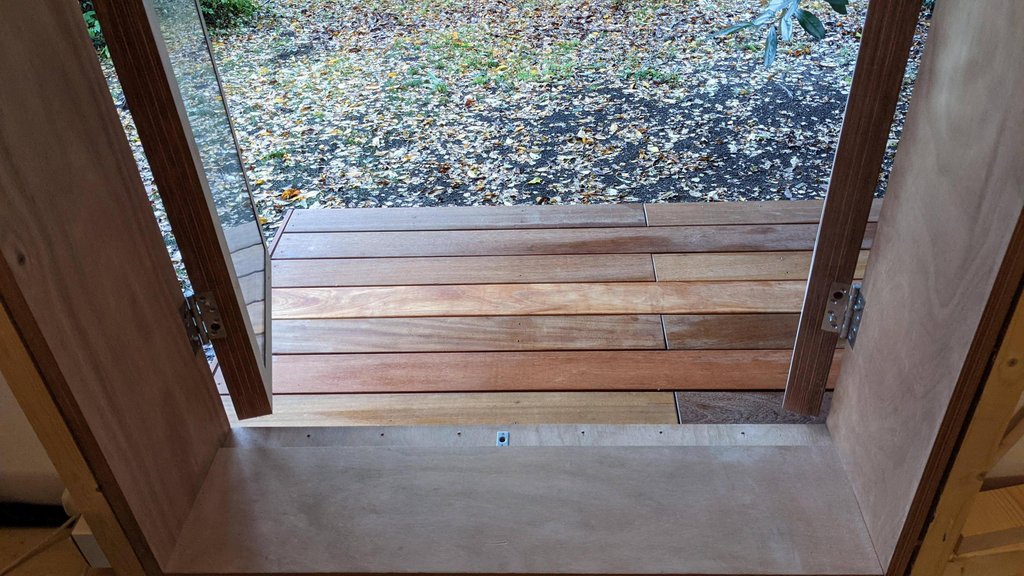
    Fitted the decking. Need to put more screws in but first I have a question.

    When two boards meet on a 2 inch joist, there is not enough "meat" to screw down the boards directly down into that joist without splitting the ends. So should the joist be "loose" at those ends and just screwed everywhere else? Or screwed down at an angle (but then the heads won't be straight!)?

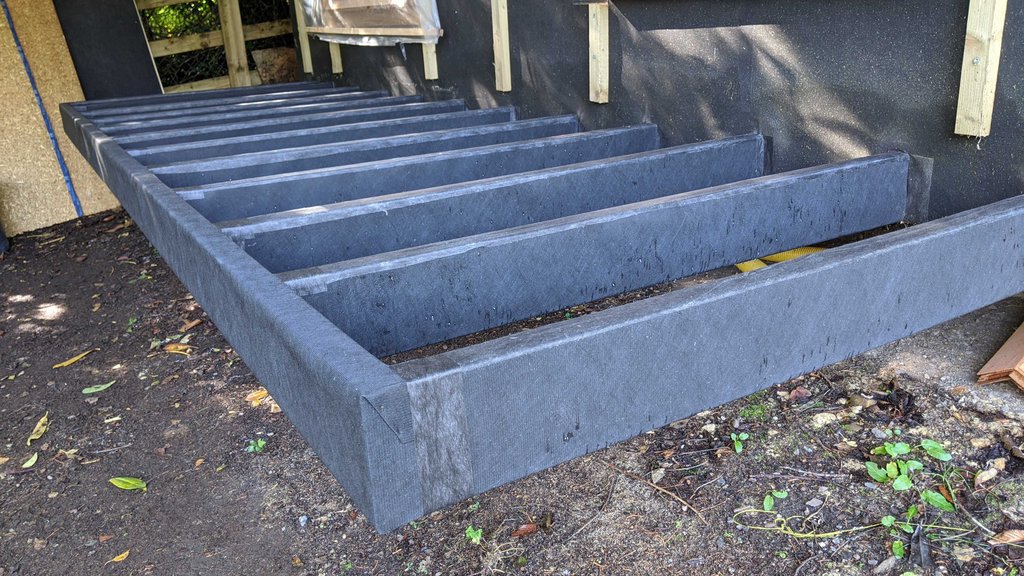
    Anyway, I first did a fresh soaking of ProTim on the joists, then upholstered with leftover membrane. This is no doubt going to send listermint over the edge, but remember that I can't really ever replace these joists - they are the ends of the 4.8m joists which are slung under the ring beam of the shed. So they need to be protected to the maximum.

    I used 5mm spacing between boards and 1-2mm at the ends. This is on the basis that wood expands very much perpendicular to the grain, and hardly at all along the grain.

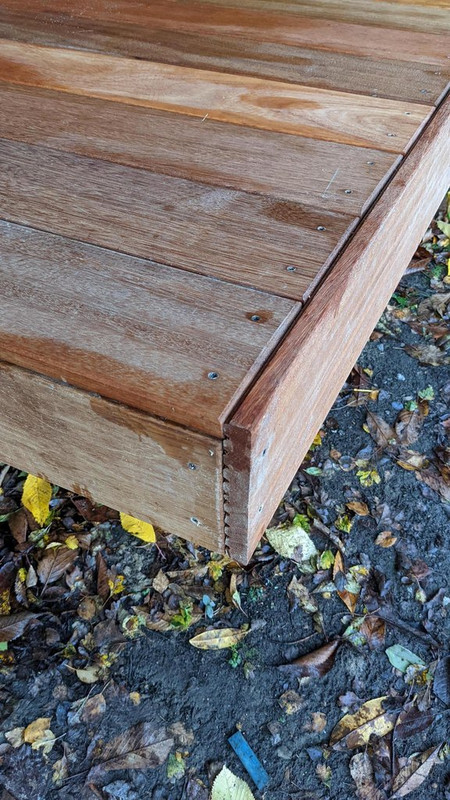
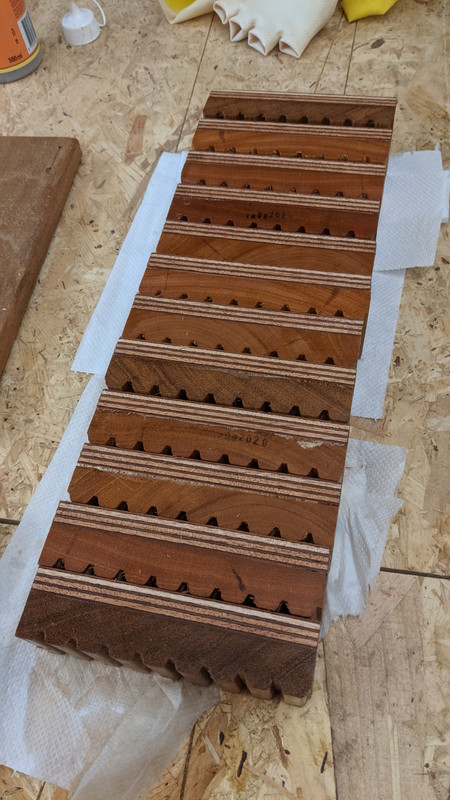
    I tried to eliminate all showing of the ribbed underside (*) and almost achieved it, except for at the corners. To get the ends hidden I made wider end boards by cutting and glueing two boards to get an additional 21mm of width.

    Also, I found that pre-drilling hardwood is absolutely essential even with these self-drilling stainless Spax flooring screws.

    (*) there is a 10-page argument on the Screwfix forums about which way up decking boards are supposed to go. I choose ribs down. It's an ecumenical matter. :D

    dIWPP8v.jpg

    Yk6KKt3.jpg

    ARzkrjK.jpg

    V2y9Wq2.jpg


  • Registered Users Posts: 33,769 ✭✭✭✭listermint


    If I get your question. You need to but in extra joist either side of that joist to screws the board down on to. If a joist is not thick enough then you add thickness with more joist one or either side. This is common on all floorings definitely where boards meet above and there's little or no joist below.

    It can be just a small section of timber to the joist you don't have to put a full length in.


  • Registered Users Posts: 31,025 ✭✭✭✭Lumen


    listermint wrote: »
    If I get your question. You need to but in extra joist either side of that joist to screws the board down on to. If a joist is not thick enough then you add thickness with more joist one or either side. This is common on all floorings definitely where boards meet above and there's little or no joist below.

    It can be just a small section of timber to the joist you don't have to put a full length in.

    Ok cool. Like these I made to space out the side trim so I could use complete board widths.

    PXL-20201101-141911575.jpg


  • Advertisement
  • Registered Users Posts: 33,769 ✭✭✭✭listermint


    No I think you'd be best using a will width joist top to bottom. Not full length left to right. You'd only need about 200-300mm length. But full width because the screws could split the spacers you have there.

    Quick sketch of what I mean. Not sure if it matches your issue though.


  • Registered Users Posts: 31,025 ✭✭✭✭Lumen


    Thanks, I have a load of 3x3 offcuts left over from the mezzanine framing that would probably work fine.


  • Registered Users Posts: 31,025 ✭✭✭✭Lumen


    Oh, one more fun thing. I noticed last night that my "home made" windows have condensation on the outside!

    I was half concerned that I'd buggered up the seals when fitting them, but obviously not.

    Triple glazing FTW.

    image.png


  • Registered Users Posts: 31,025 ✭✭✭✭Lumen


    Currently working on the cladding, was going to post when finished but there's been discussion in the Garden Room thread about cladding so thought people might be interested.

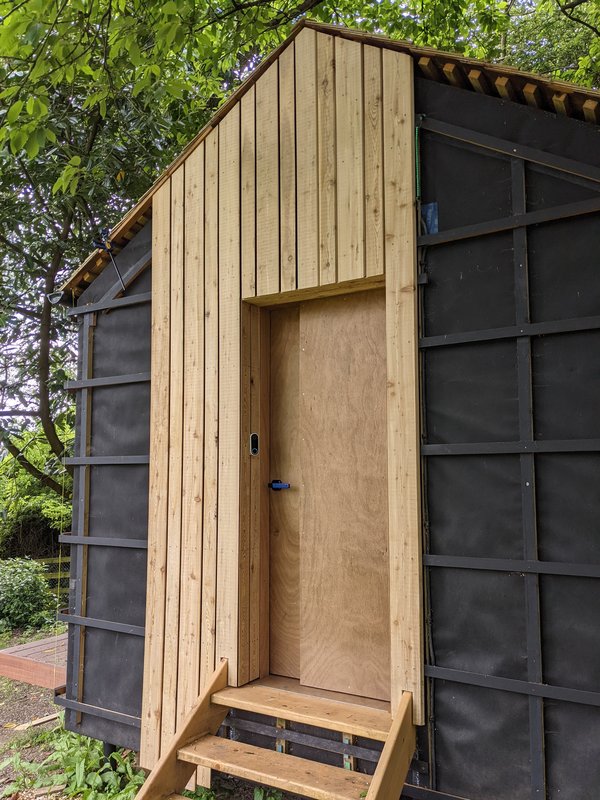
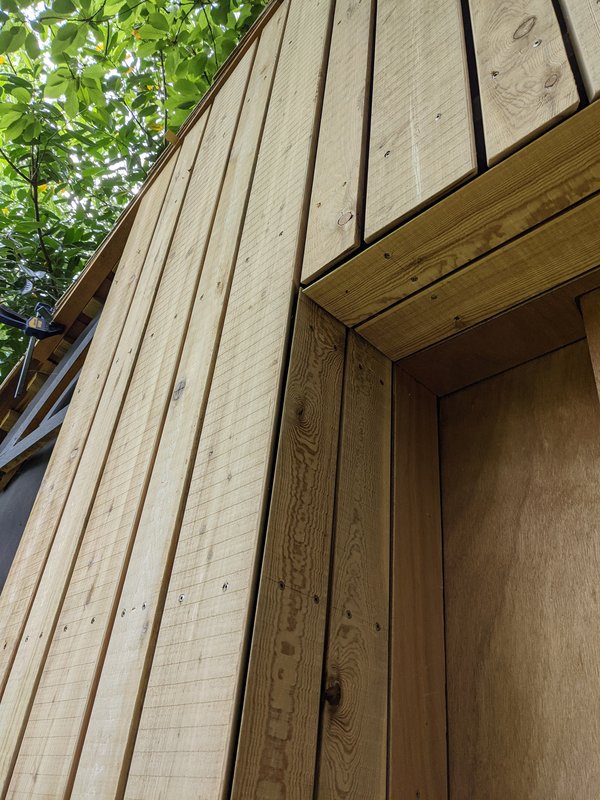
    This is bandsawn larch with a double bevelled profile in mixed widths, with Sioo:X factory applied. It's been a bit neglected over the winter but still seems in reasonable condition.

    The top and bottom cuts are rough, will be tracksawed when finished.

    External corners are mitred at 45 degrees.

    Fixings are stainless steel Spax facade screws on bevelled hardwood counterbattens.

    Click for big versions.

    PXL-20210611-094425146.jpg

    PXL-20210611-094442642.jpg


  • Registered Users Posts: 552 ✭✭✭Fine Cheers


    Class job. Love the grain and colour of the Siberian Larch. Dare I ask, any final treatment proposed, oil etc ?


  • Registered Users Posts: 31,025 ✭✭✭✭Lumen


    Class job. Love the grain and colour of the Siberian Larch. Dare I ask, any final treatment proposed, oil etc ?

    Nope. It should grey naturally and hopefully not clash with the cedar roof shingles.

    The hardwood decking and spruce steps...well they'll just have to, eh... contrast for now.

    The steps were experimental so I didn't want to use expensive timber, and I thought larch decking would make .. too much larch!

    I'm not far off being able to form a view on what worked and what didn't.


  • Registered Users Posts: 31,025 ✭✭✭✭Lumen


    Oh, I might also eventually clad the door too.


  • Registered Users Posts: 1,491 ✭✭✭hesker


    Great job on the cladding. My larch cladding is about 5 years old now and has silvered quite a bit which I like.

    Did you machine the boards yourself?


  • Registered Users Posts: 31,025 ✭✭✭✭Lumen


    hesker wrote: »
    Great job on the cladding. My larch cladding is about 5 years old now and has silvered quite a bit which I like.

    Did you machine the boards yourself?

    Got any pics?

    No, they came like that. They've also got two cuts running down the back, I think to help prevent cupping.


  • Advertisement
  • Registered Users Posts: 1,491 ✭✭✭hesker


    Lumen wrote: »
    Got any pics?

    No, they came like that. They've also got two cuts running down the back, I think to help prevent cupping.

    ....

    555666.jpg


Advertisement