Advertisement
If you have a new account but are having problems posting or verifying your account, please email us on hello@boards.ie for help. Thanks :)
Hello all! Please ensure that you are posting a new thread or question in the appropriate forum. The Feedback forum is overwhelmed with questions that are having to be moved elsewhere. If you need help to verify your account contact hello@boards.ie
Help Keep Boards Alive. Support us by going ad free today. See here: https://subscriptions.boards.ie/.
If we do not hit our goal we will be forced to close the site.

Current status: https://keepboardsalive.com/

Annual subs are best for most impact. If you are still undecided on going Ad Free - you can also donate using the Paypal Donate option. All contribution helps. Thank you.

Shower questions

2»

Comments

  • Registered Users Posts: 291 ✭✭MarcusMaximus


    Not sure about the soldering, seems a bit complicated with the blow torch etc. I'm going to see if there's another way before committing to that!

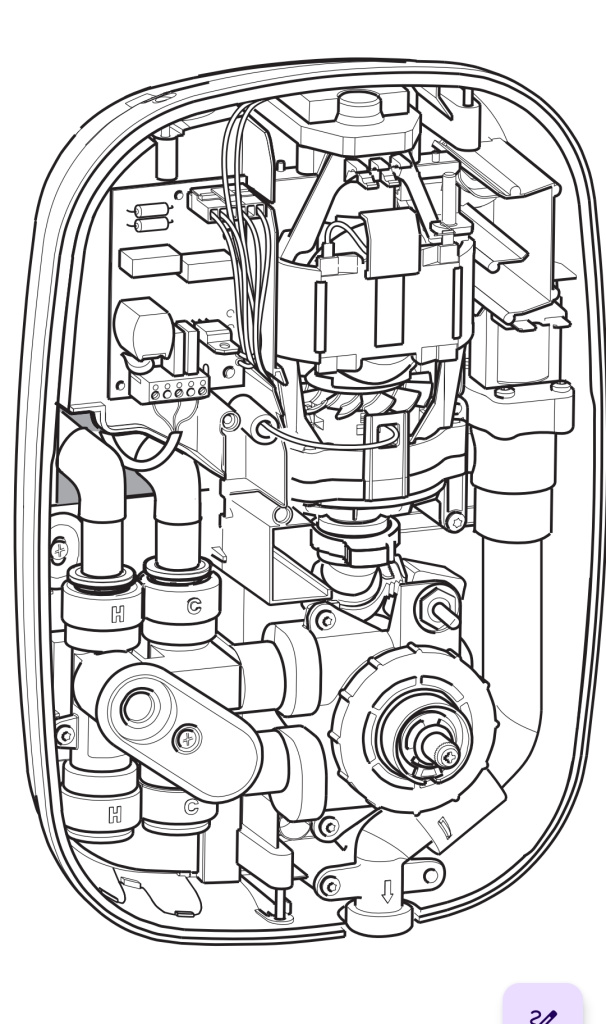
    In terms of the process you describe, I think you mean to join the elbows to the inlets of the shower unit and then come up and join the pex via straight couplers (310's). Is that right? The inlets are situated vertically at the back of the unit and can only be accessed from the top or the bottom, or from the rear via some sort of adaptor or elbow. The actual entry points are 15mm push fit. Here's the diagram for rear entry:

    Screenshot_20250822_162139.jpg

    They show 45 degree elbows but 90 would work either. So I have to come out of the wall somehow at right angles to get down into them, which is why I thought 2 90 degree elbows for each inlet with the rear one connected to the rising pipe would be the only way to make the 180 degree turn. Sorry if I'm being thick here but I don't see where the 310's would come in as they only allow me to go straight, unless I've misunderstood which is definitely possible! 😏

    Post edited by MarcusMaximus on


  • Registered Users, Registered Users 2 Posts: 50 ✭✭winklepicker2025


    as a plumber this type of work is done quite often.

    Depending on the way the pipes are it looks very straight forward.

    If the pipes are coming from above you could put the 310s anywhere along the line above the shower

    Same as coming from below.

    The 310s would only join onto the soldered elbows which would be soldered out of place.


  • Registered Users Posts: 291 ✭✭MarcusMaximus


    Yes I’m sure to a plumber this is all very obvious and easy as pie. To an average diy’er like me with minimal plumbing experience not so much perhaps.

    If the pipes were coming up or down on the surface of the wall it would indeed be straightforward as the inlets would be directly in line with them. However given they will be going up from the floor set into the wall in the chasing, they have to come out perpendicular to the surface and then turn again to go down into the inlets. So it has to involve 2 elbows for each pipe to make that 180 degree turnabout. All that will be hidden behind the unit due to the rear entry.

    Anyways, don’t want to keep flogging a dead horse. I re-measured today and discovered that I have more space than I thought I did due to the 50mm of insulation plus a small gap, the depth of the plasterboard and skim and then 6mm of tile backer board and 8mm of tiles! So I can easily fit two of those Speedfit elbows back to back. I just hope it’s ok to use them in series like that and not adversely affect the flow, or create a problem by having the rear ones buried in the wall. No doubt that’s why you suggest soldered ones as they’re less likely to leak, as long as they’re done properly. I just would really prefer not to get into soldering if I can help it.

    As an alternative to the Speedfit I’m considering getting 4 of these as they are less bulky and maybe more reliable in the long-term, at least they look stronger and more solid to me:

    https://www.screwfix.ie/p/tectite-classic-brass-push-fit-equal-90-elbow-15mm/9133x

    Using copper pipe and bending it would avoid the need for the first buried elbow but it would probably then be too long at the end. Same for pex using a bend support I imagine.

    Post edited by MarcusMaximus on


  • Registered Users Posts: 291 ✭✭MarcusMaximus


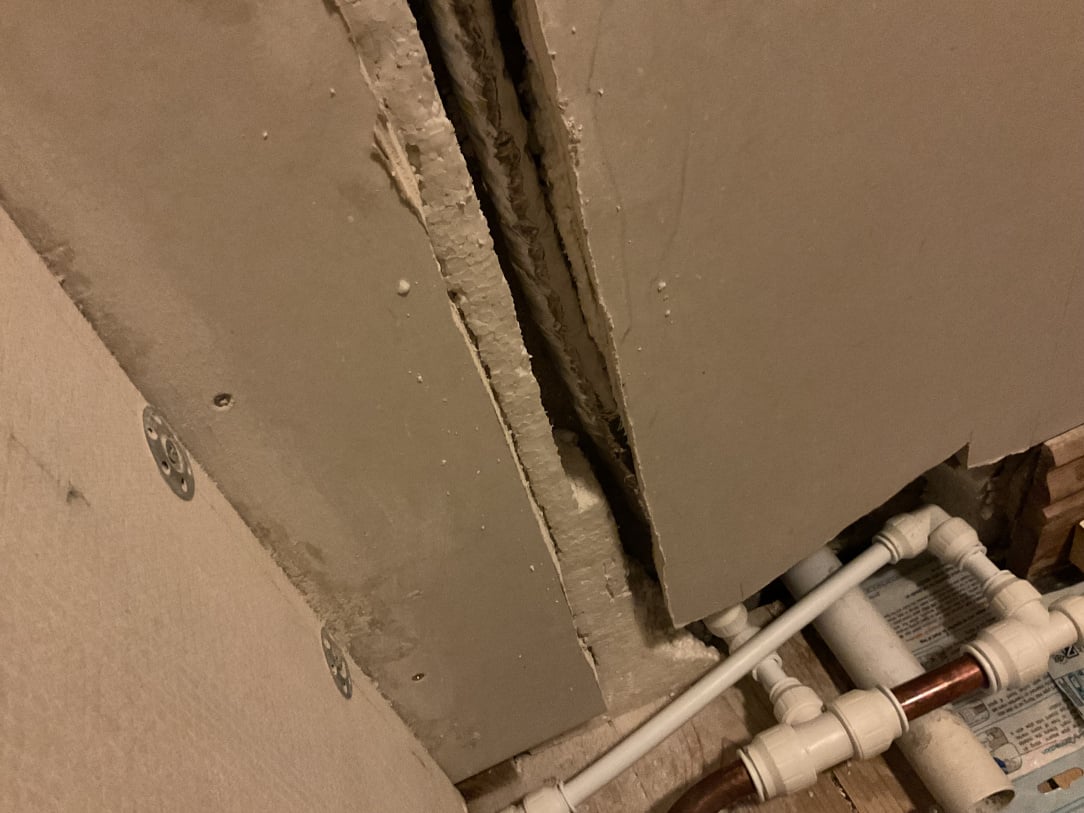
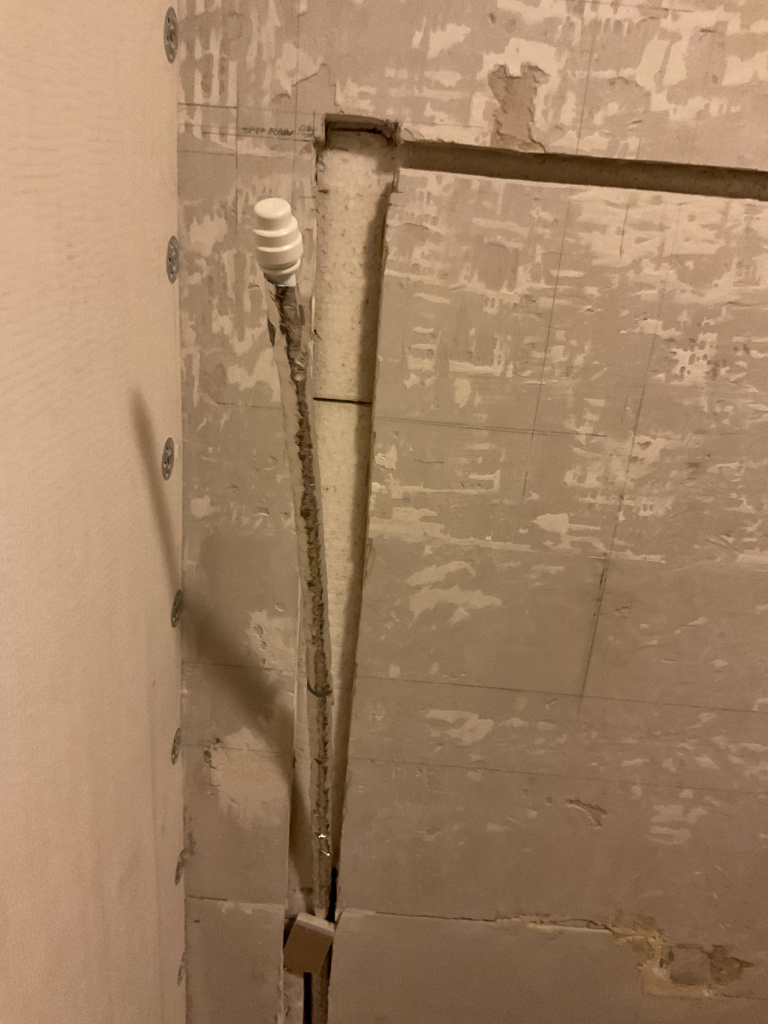
    I started running the 15mm pex up the wall yesterday to feed the shower unit. Because of the oblique angle of an elbow on the floor, the cold pipe was oriented slightly backwards towards the inside of the wall as well as upwards. I flexed the pipe a little to compensate for that angle but it still meant I had to take out a strip of the styrofoam insulation so that it could go up in a gentle curve back to find the inner surface of the insulation. Which means it runs adjacent to the concrete block for a distance. This being an external wall, I’m wondering if this is ok? I have wrapped it in Thermawrap and will do the same with the hot pipe, though it should have more of a straight run up the inside of the insulation.

    Also, in order to accommodate the two elbows back to back at the top to turn 180 degrees and drop directly down into the shower inlets, both pipes will have to run adjacent to the block once again, or very close to it. Which would mean removing more of the insulation layer. Although both pipes will be insulated, I imagine this is less than ideal. I have read that all piping should run on the inside of the insulation and not in external walls at all if it can be avoided. So am I ok to proceed with this or should I find another way, perhaps joining the pex to copper with 310’s at some point along this run and then using the far less bulky solder ring elbows as per @winklepicker2025 ’s suggestion (solder, not specifically the ring type)? That would mean having those couplers buried in the chase but maybe that would be ok?

    Again, my preference is to use pex and push fit all the way but I will consider using copper and solder instead if I absolutely have to.

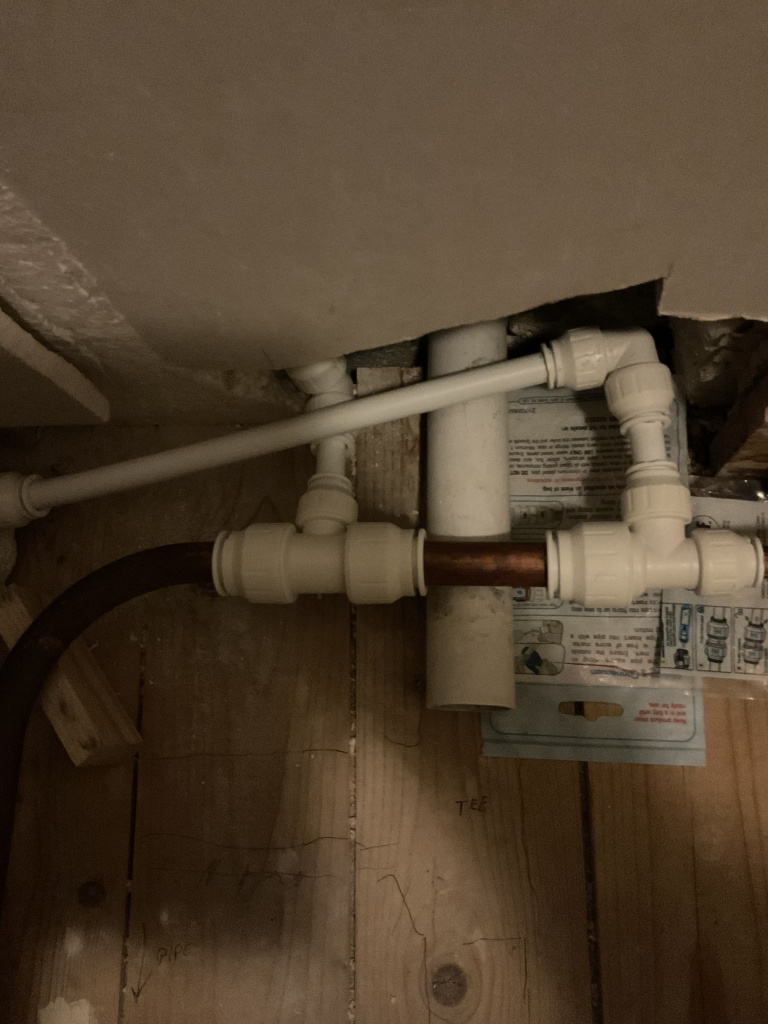
    IMG_0073.jpeg

    IMG_0074.jpeg

    IMG_0075.jpeg
    Post edited by MarcusMaximus on


  • Registered Users Posts: 291 ✭✭MarcusMaximus


    Posted in the DIY section:

    Actually what I can do is replace the 50mm styrofoam insulation with 18 mm just for the chasing. That will give me enough room to do what I need in terms of fittings at the end of the pipes. They'll be wrapped in ThermaWrap so hopefully that will provide enough insulation with them on the inside of the styrofoam.


  • Advertisement
Advertisement