Advertisement
Please note that it is not permitted to have referral links posted in your signature. Keep these links contained in the appropriate forum. Thank you.

https://www.boards.ie/discussion/2055940817/signature-rules
Help Keep Boards Alive. Support us by going ad free today. See here: https://subscriptions.boards.ie/.
If we do not hit our goal we will be forced to close the site.

Current status: https://keepboardsalive.com/

Annual subs are best for most impact. If you are still undecided on going Ad Free - you can also donate using the Paypal Donate option. All contribution helps. Thank you.
https://www.boards.ie/group/1878-subscribers-forum

Private Group for paid up members of Boards.ie. Join the club.

Today I did something to my car (volume 2)

1322323324325326328»

Comments

  • Registered Users, Registered Users 2 Posts: 4,867 ✭✭✭fancy pigeon


    Wait what… It's the annual oil change for the S60 already?! In the same location? With the same cars in the background? Better get the only person I can think of to do the job… The king

    Having trouble with a bulb holder too but bah, I'll root out a spare holder and plough on. It is a 24 year old car after all

    Had a small problem with the power brakes/vacuum servo on the E34, so I altered things a little bit by adding an elec vacuum pump (from some generic non specific VW of some sort) triggered by a vacuum switch when the vacuum drops too low (now take a glass of brandy and port every time you read the word vacuum). To compliment this much improved and genuinely fantastic setup (I'm being serious, the brakes have never felt as consistently good since) I fitted a small breathing apparatus to the exhaust manifold, along with some mix and match pipework to make it all breathe better

    I'll drop in another time soon… Soon…


  • Registered Users, Registered Users 2 Posts: 449 ✭✭sligopaul


    May look the same but that work will make it feel tight and its a fine looking car


  • Registered Users, Registered Users 2 Posts: 1,540 ✭✭✭BlakeS94


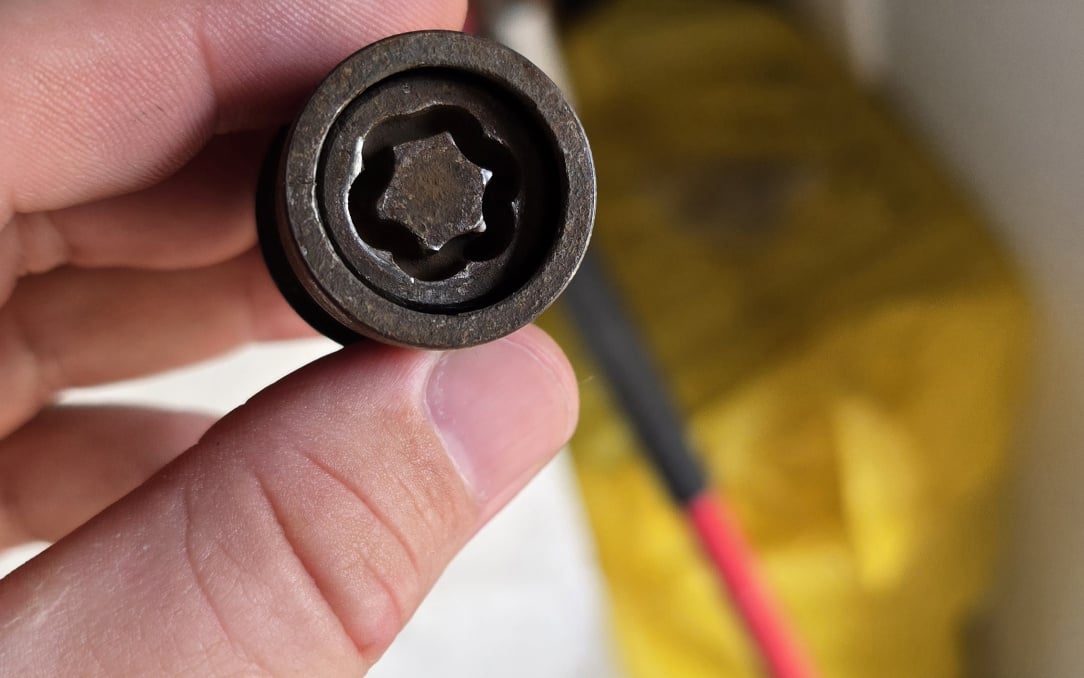
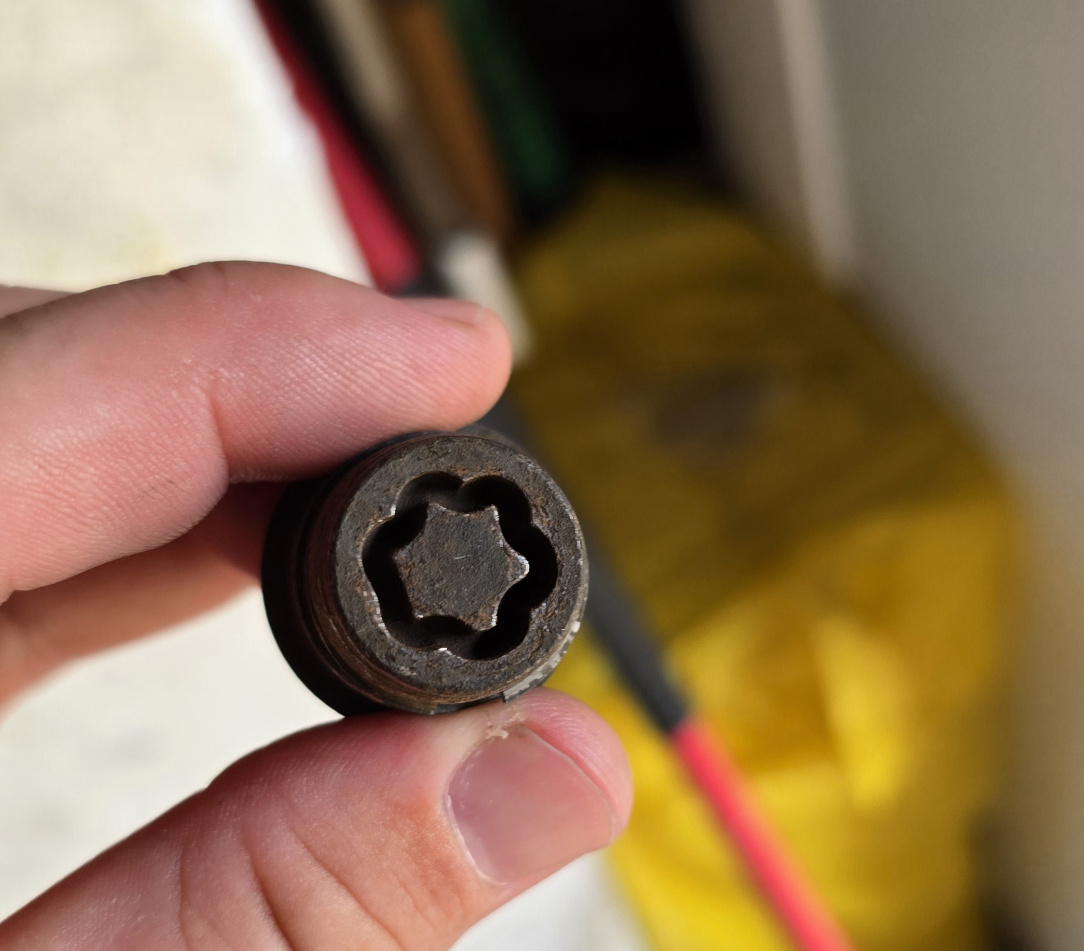
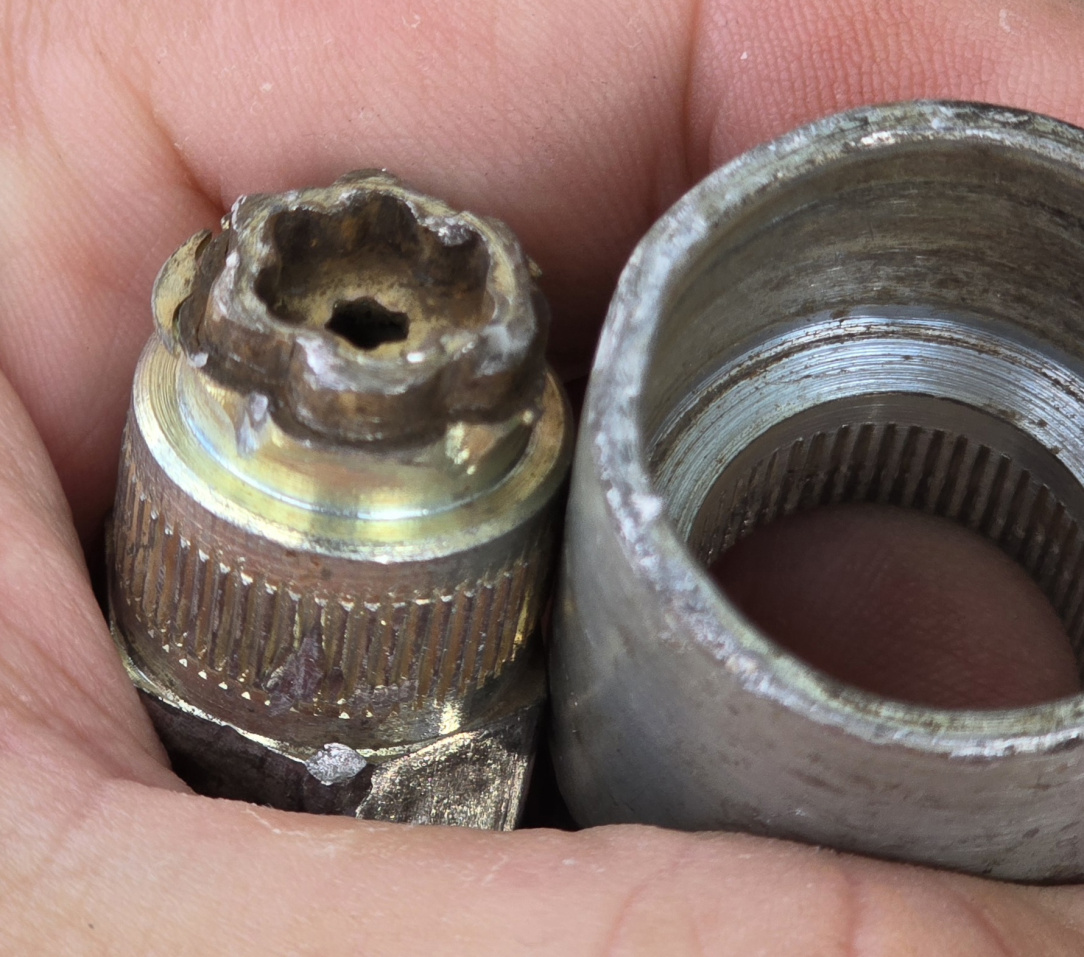
    Not something I chose to do but had no choice, went to remove wheels on the missus car only to find the locking wheel nut key with a load of material taken off the top, wouldn't engage with the nut. Garage wanted 80 quid to remove 4 of them.

    Didnt have the special tools for it so resorted to brute force and ignorance which worked quite well.

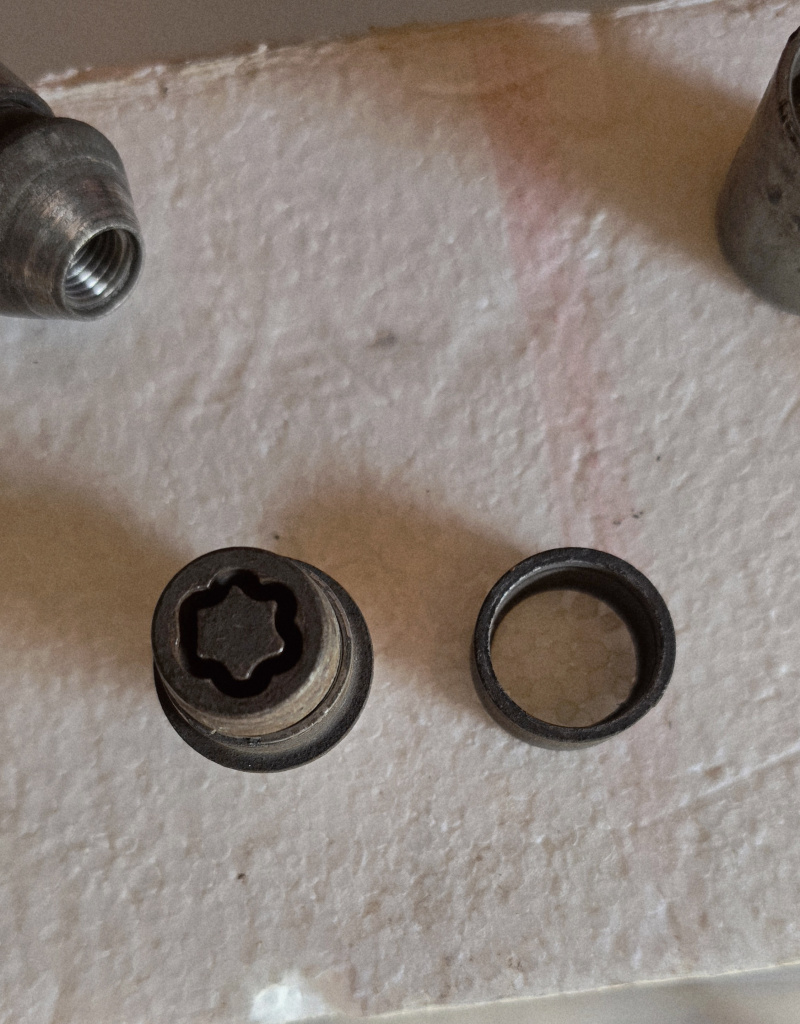
    Firstly hammered off the outer "spinner" on the locking wheel nuts.

    1000016037.jpg 1000016038.jpg 1000016039.jpg

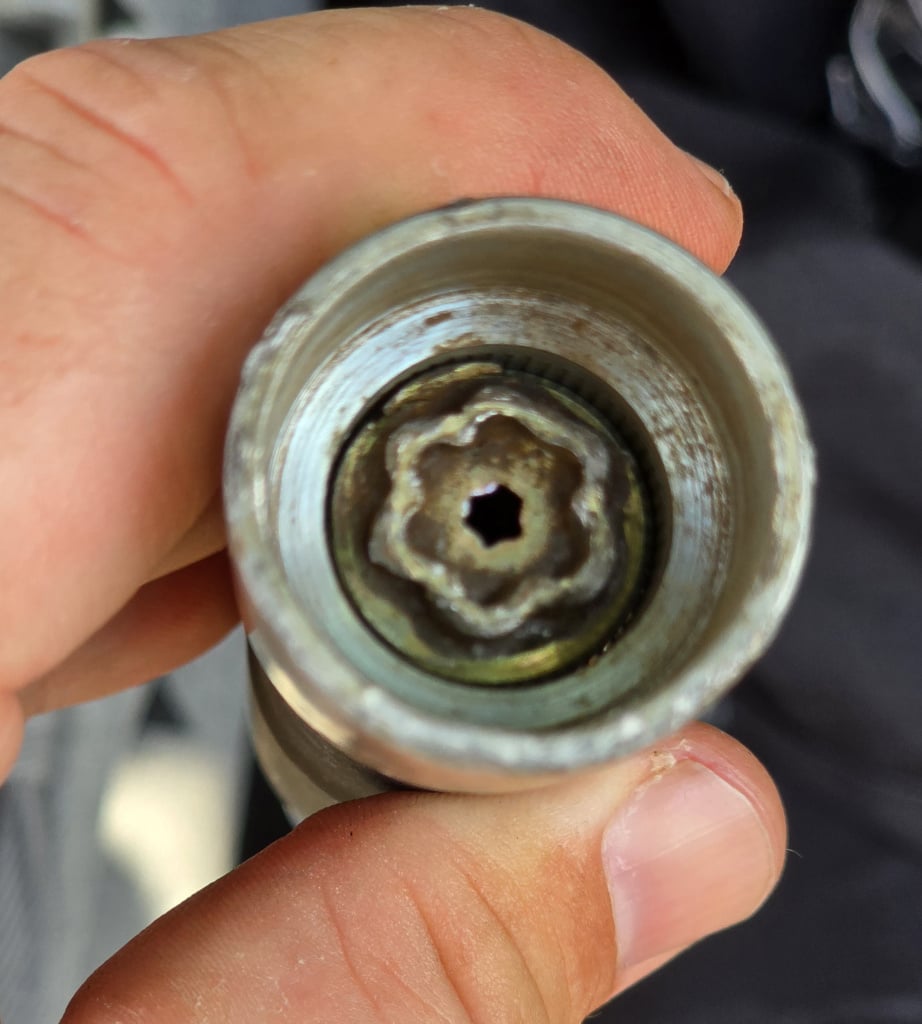
    Then put the key in a vice and hammered from the opposite side, the corresponding outer part of the key is just splined in place.

    1000016040.jpg 1000016041.jpg

    Could still just about get the key to engage with a bit of horizontal force held while undoing, but they all came off happy days.

    Took about 15mins all in all, now off to buy regular lug nuts..

    If you didn't have the locking wheel nut key you could remove the outer spinner and get a rounded bolt socket with the teeth on the inside would work well aswell.


  • Registered Users, Registered Users 2 Posts: 2,580 ✭✭✭Titzon Toast


    That's a win were I'm from anyway. Well done, sir.


  • Registered Users, Registered Users 2 Posts: 1,540 ✭✭✭BlakeS94


    Coming from someone with the amount of work you've been doing on your cars that's high praise.

    Got brownie points in the bag from the missus as I came back into the house and slowly revealed the locking wheel nuts in my hand. Something tells me Adam Sandler won't be the only person swinging a club as we watch Happy Gilmore 2 tonight 😂


  • Advertisement
  • Registered Users, Registered Users 2 Posts: 2,580 ✭✭✭Titzon Toast


    I've been threatening to change my distributor for a good while now.

    Finally did it this morning and it was a complete faff from start to finish and I don't want to talk about it!

    The car is running great now though, just in time for Cars & Coffee in DIT tomorrow anyway.

    Is anyone else here going? Rumor has that a large herd of prancing horses are gonna be there.


  • Registered Users, Registered Users 2 Posts: 1,540 ✭✭✭BlakeS94


    Replaced front discs and pads, rear pads, and a CV boot on the missus MK3 Focus. 3 relatively simple jobs but what an absolute Ballache.

    So..All 8 caliper slide pins seized in place, had to use flathead and a fair whack of a hammer to pop them out, greased up and ran a wire brush drill attachment through the holes. Both rear callipers quite tight, especially the left side, which also had a seized in retaining spring, had to leave it in and managed to change the pads with leaving it in place, spent too much time on it trying to remove.

    Front brake discs were welded onto the hub, had to break out the size 4 Thor hammer.

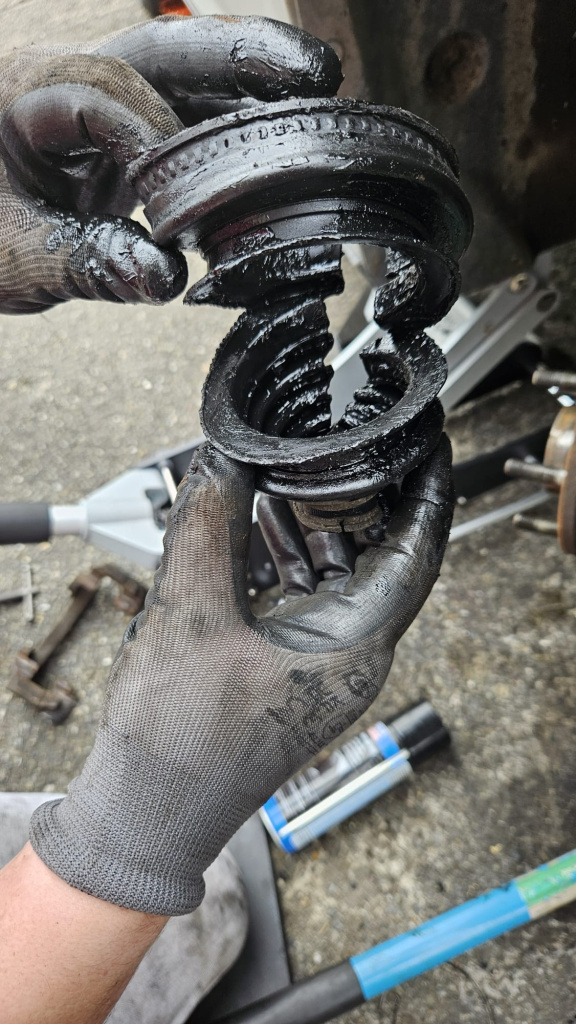
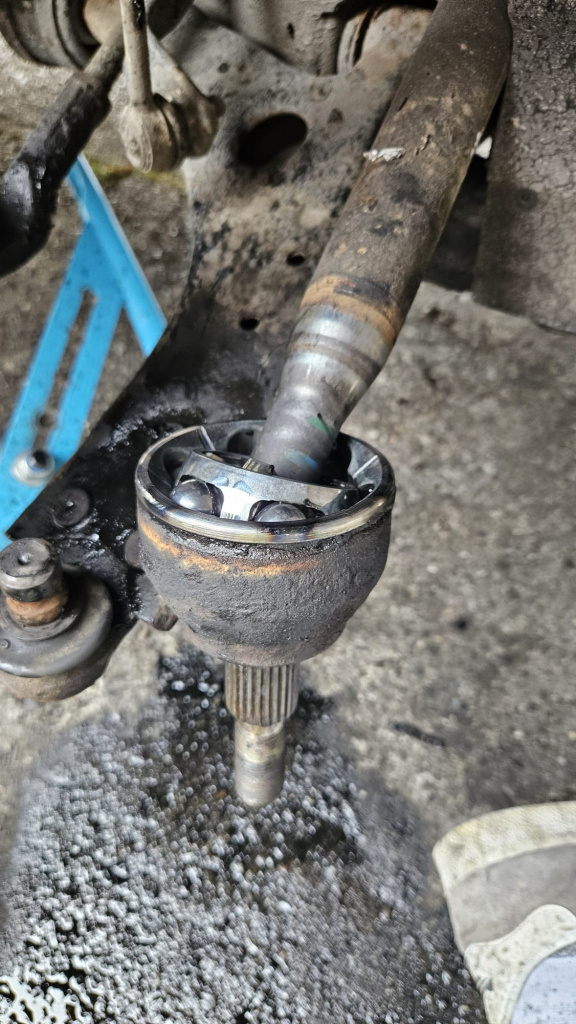
    Then the outer CV boot on drivers side looked like this.

    1000016507.jpg

    All cleaned up

    1000016506.jpg

    Fresh grease and the stretch boot went on pretty easy, easiest part of the job and I thought it'd be the hardest,went onto the cone no bother.

    Didnt last long, the clamp supplied wouldn't close down, I have the correct tool and used multiple times, but just would not grab it, had to send the missus to woodies to buy a bag of €25 cable ties, madness.

    Anyway its held in the meantime until I get a proper clamp.

    If anyone can relate, it was one of those times where I was sitting on the couch after getting cleaned up, deflated, telling the missus im sick to death of cars 😅

    The entire thing from setting up to having tools away and clean myself up was 5hrs. Had planned to bleed 4 corners but I just had nothing left by the end of it

    Did an oil change and belt and tensioner last week which gave me awful trouble aswell


  • Registered Users, Registered Users 2 Posts: 2,396 ✭✭✭extra-ordinary_


    I went at replacing the faded plastic number plates on my car lately, with some nice pressed metal ones. The front went handy enough with the plastic bumper, but the rear on the boot lid has two what look like 6mm thread nuts welded from the back, with the existing plate held on with two plastic reg plate bolts screwed into these nuts. One of the bolts came out without a problem, but the other side was so tight that I ended up snapping the tack welds off the boot lid that were holding the threaded nut. Anyway, in the end I got the while thing off but I'm left with the below to have again tacked onto the boot lid. My problem is removing the snapped plastic bolt seized solid in the nut. I have zero facilities but was thinking throwing it in a fire?

    20250906_110523[1].jpg


  • Registered Users, Registered Users 2 Posts: 14,839 ✭✭✭✭joujoujou
    Unregistered Users


    Well, not today, not yesterday, not even last week, but still, worth posting IMO.

    Long story I have to warn you at the beginning.

    The problem with output shaft rear bearings in Toyota's 5-speed manuals is well known and widely discussed all over the internet. It is also been mentioned that replacing them is doable by average car DIYer once they have knowledge and proper tools.

    I began to think about DIY since I heard from fellow Boardsie that the whole thing is possible without removing gearbox. But firstly, asked few places if they would do it for me - most of them refused, two agreed, but they wanted to have a gearbox brought to them and quoted crazy price of approx €1000 for the job (yes, one thousand euro).

    The knowledge I gained from this thread -

    https://www.toyotaownersclub.com/forums/topic/188782-18-vvti-gearbox-output-shaft-bearing-replacement-experiences/ and this video -

    Got some experience as I already had two broken gearboxes lying in the shed, so spent some time training on them and finding out what tools I need to do a job.

    After two weeks of training and buying tools (online), came 8th of August, the time has come.

    Preparations took approx. 3 hours (I wasn't in a hurry) - jacking car up, draining gearbox fluid, removing wheel, bottom engine covers and lowering the engine to gain access - front and LHS mounts have to be disconnected. Especially LHS mount is tricky as battery and its supporting bracket limits access to the mount, but managed to do the job without removing battery and its bracket.

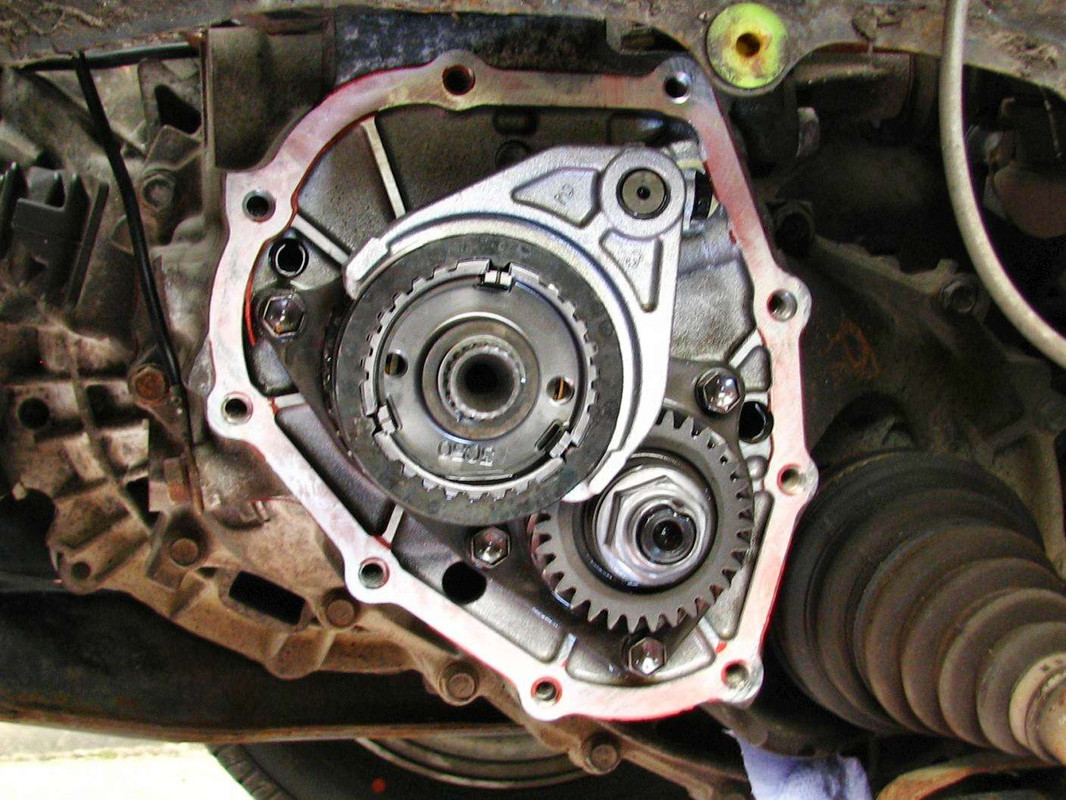
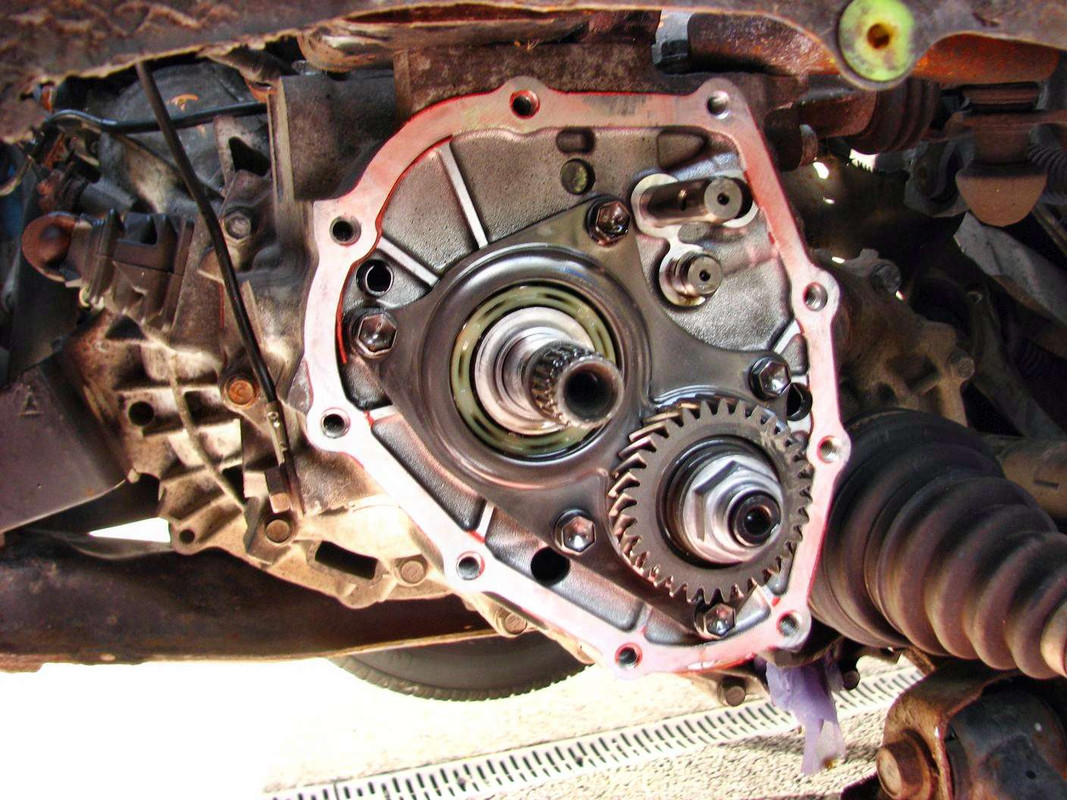
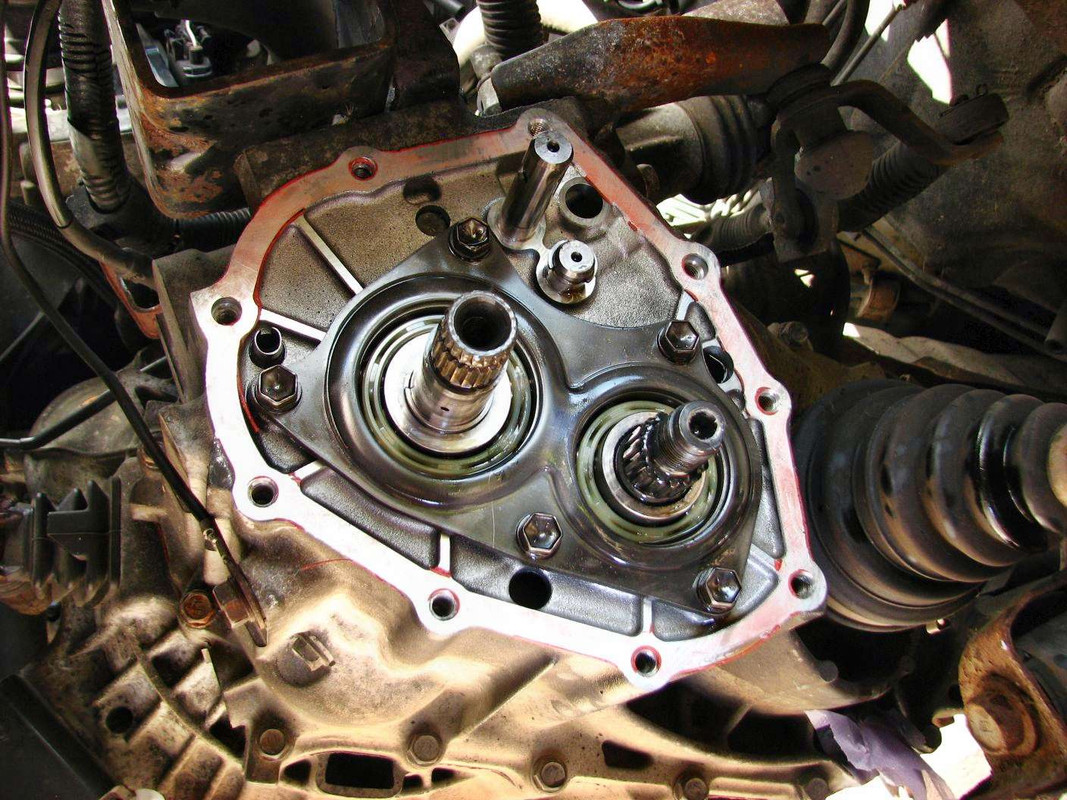
    Here's what you see once 5th gear cover is removed:

    Untitled Image

    IMPORTANT NOTE: take careful measures where each element is in relation to the shaft (like tip-to-hub, tip-to-gear, tip-to-bearing etc) and take notes - to put all back in exact place where they were before.

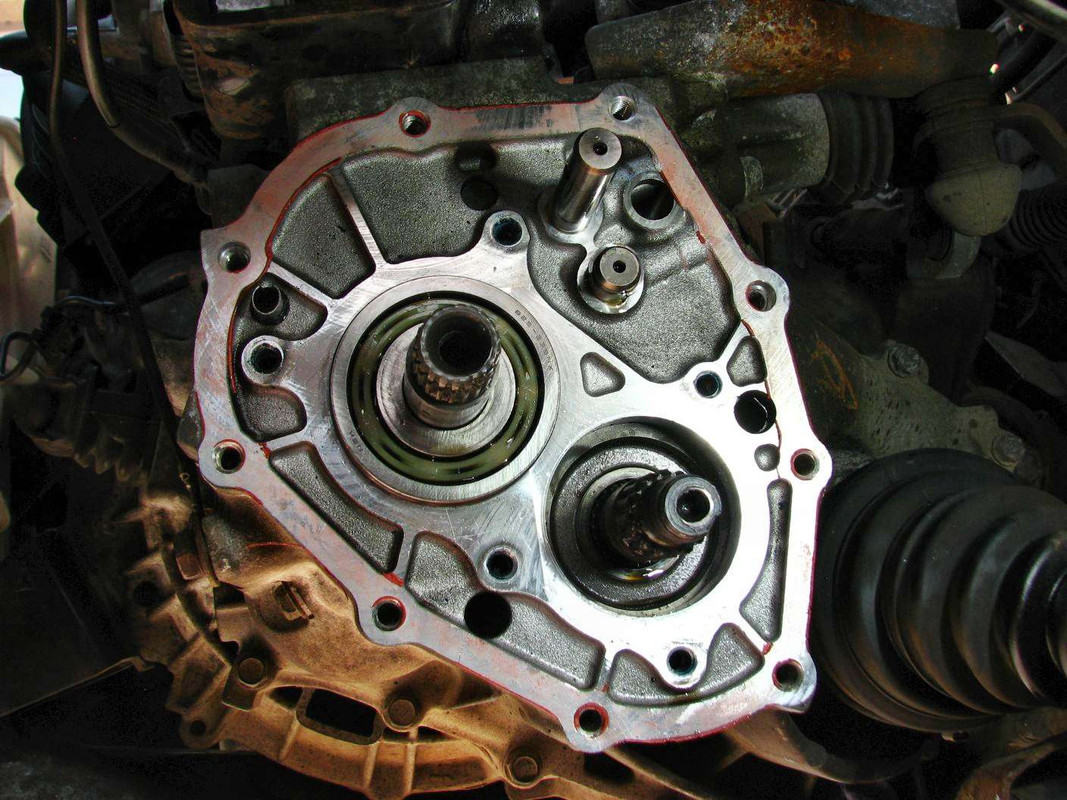
    5th gear selector removed, 5th gear hub too:

    Untitled Image

    How the whole thing looks then:

    Untitled Image

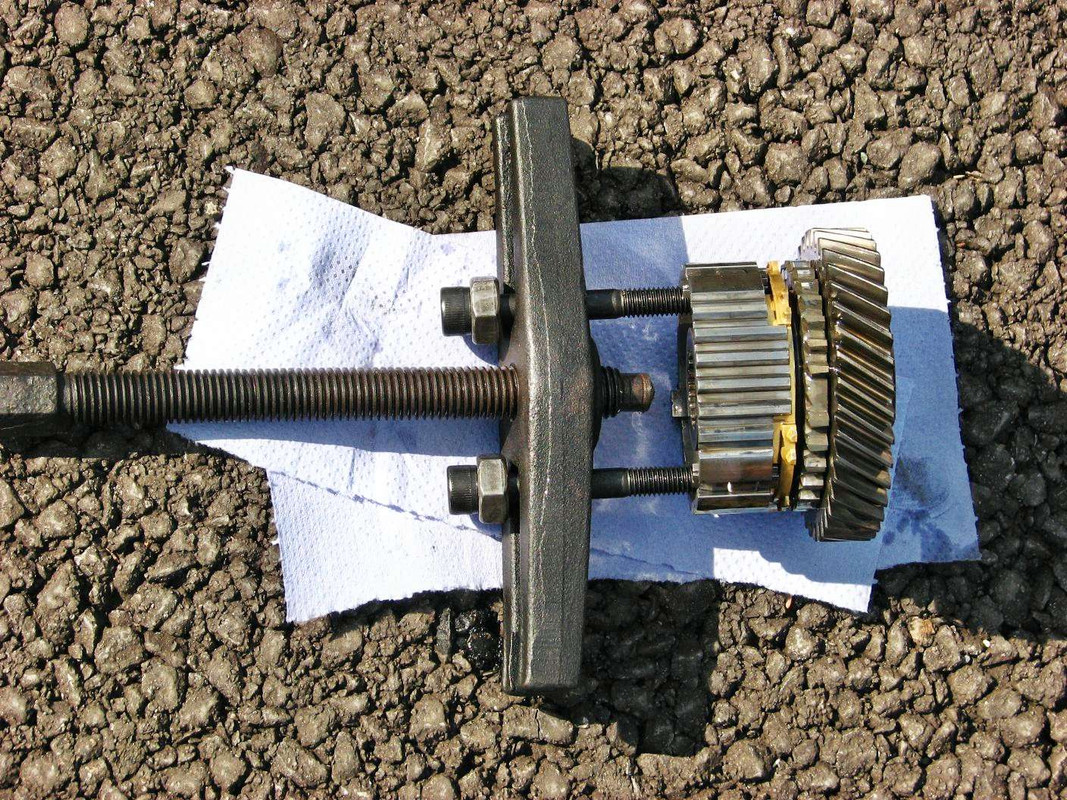
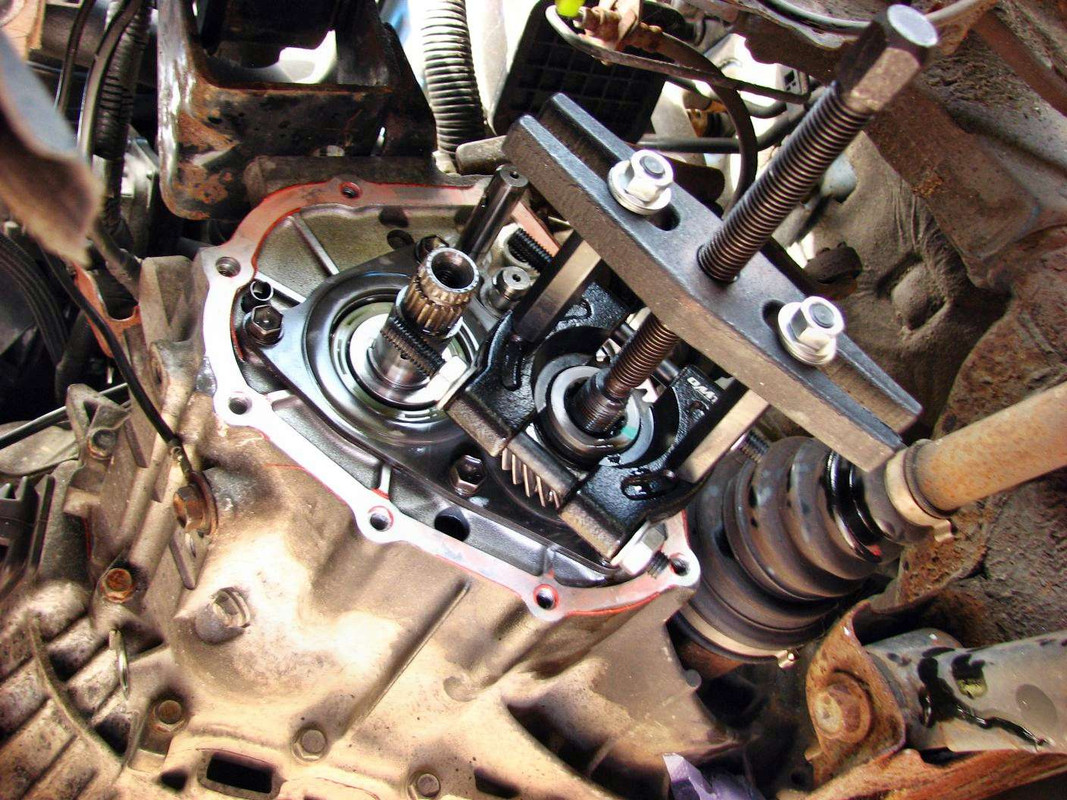
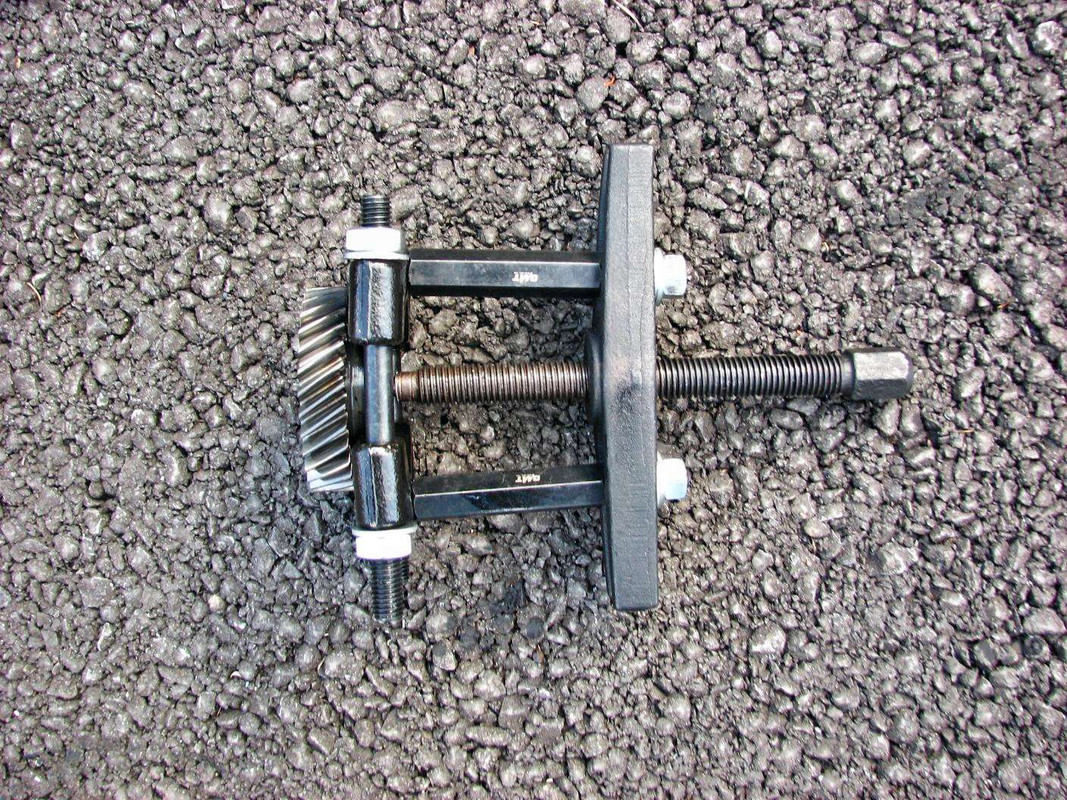
    Time for output shaft. Undo the nut (impact wrench highly recommended), pull 5th gear driven out:

    Untitled Image Untitled Image

    You just made 4-speed manual gearbox. ;-)

    Untitled Image

    Bearing retainer plate removed, snap rings removed, and, finally, noisy bearing too!

    Untitled Image

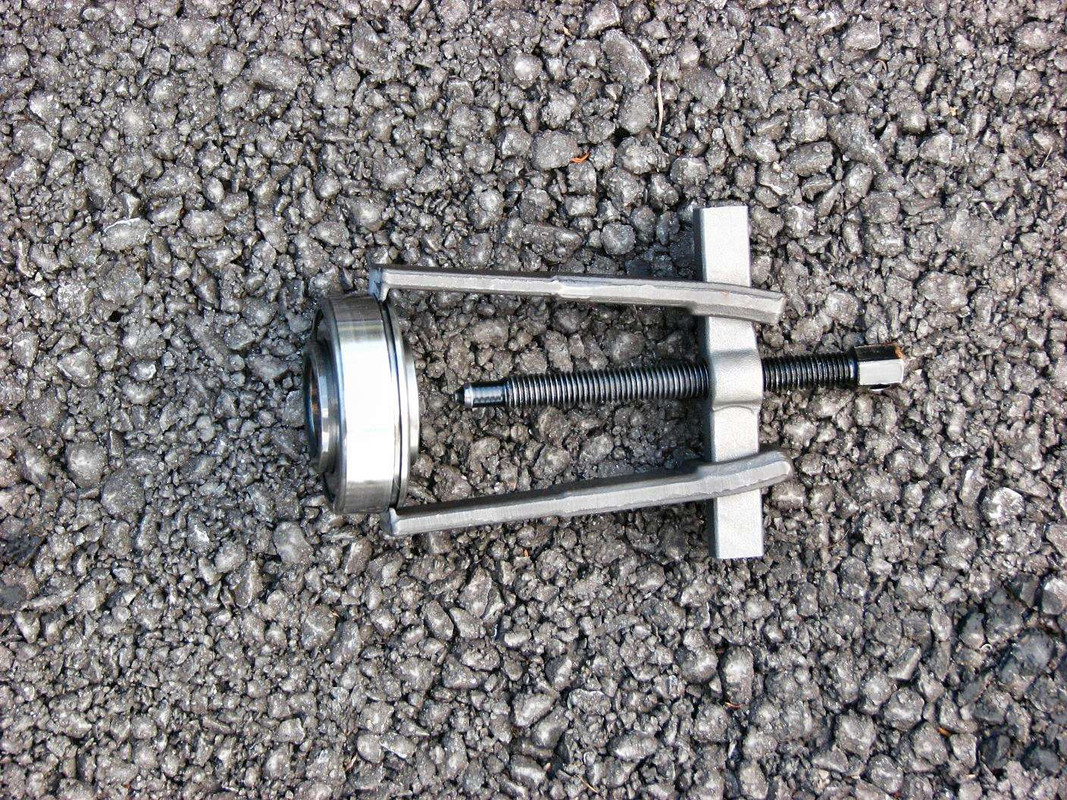
    As you can see, there's not really much to catch, so thin clawed puller is necessary.

    At this stage, tried to remove the other one, input shaft rear bearing:

    Untitled Image

    Failed miserably, the bearing was like welded to the shaft. Destroyed two thin-clawed made of Chinesium pullers (both went to the skip straight away). However, this very bearing rarely wears off, so left it. Had access, had new one, tried, failed, so be it.

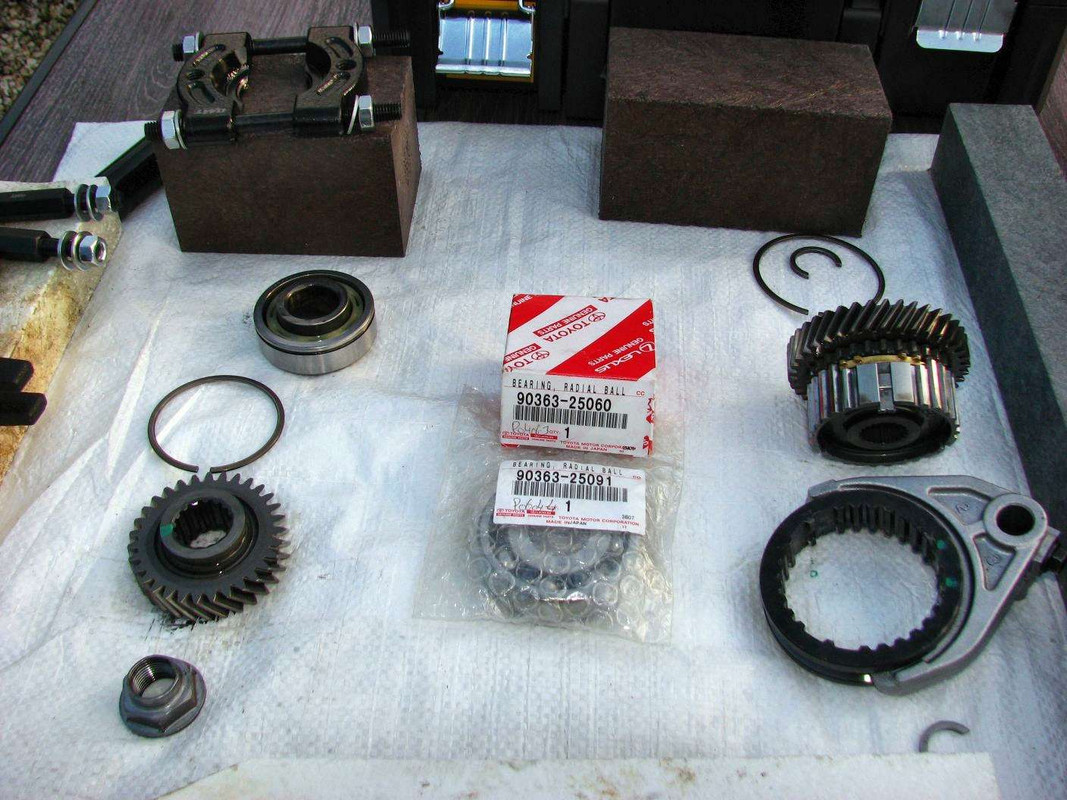
    All the parts I was able to pull out carefully put aside to make sure no mistakes during re-assembly:

    Untitled Image

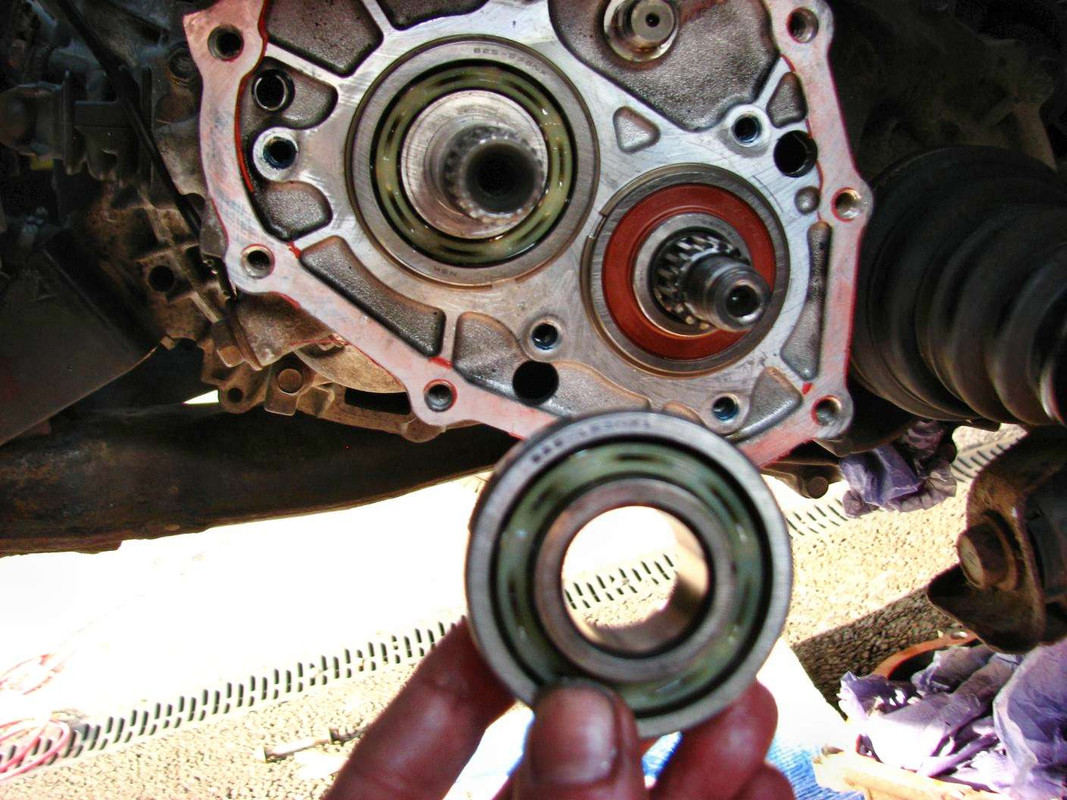
    New bearing on its place. Old vs. new:

    Untitled Image

    Flawlessly re-assembled all the rest of elements, cover sealed with new silicone. 3 hours total - as with preparation mentioned above, took my time.

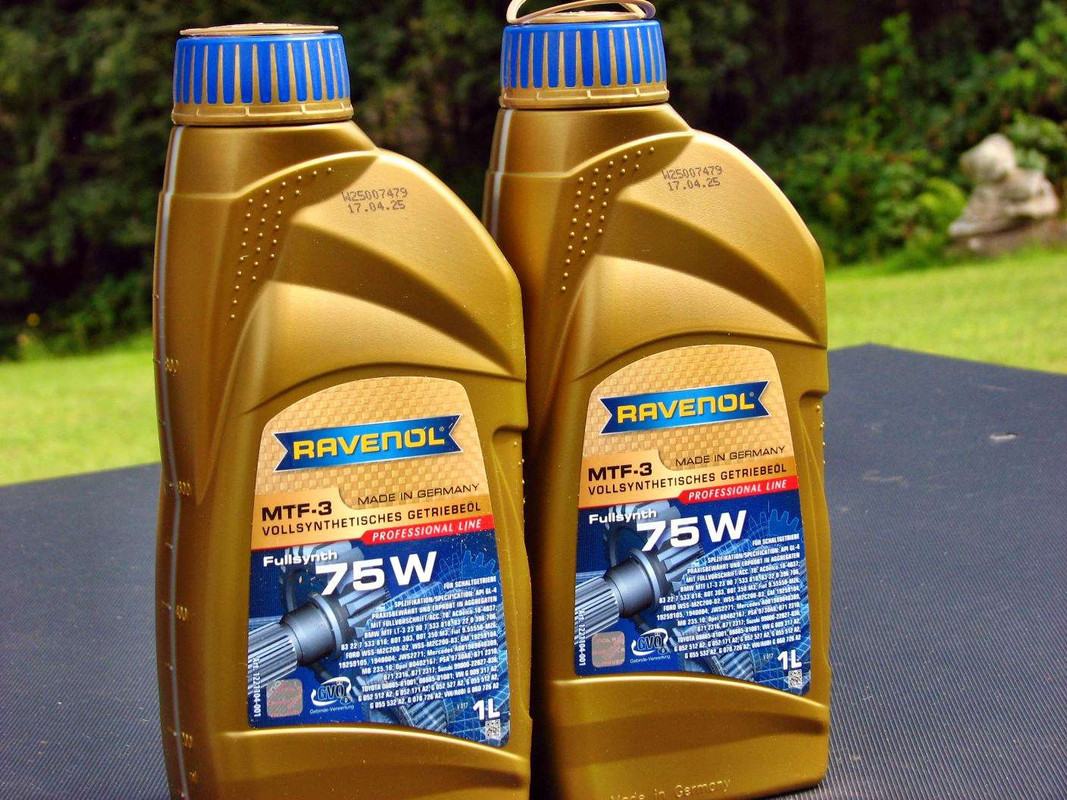
    Silicone needs to dry a bit, so I gave it one day and filled the gearbox with new oil:

    Untitled Image

    As a result - no more noise! Happy days!

    ============================

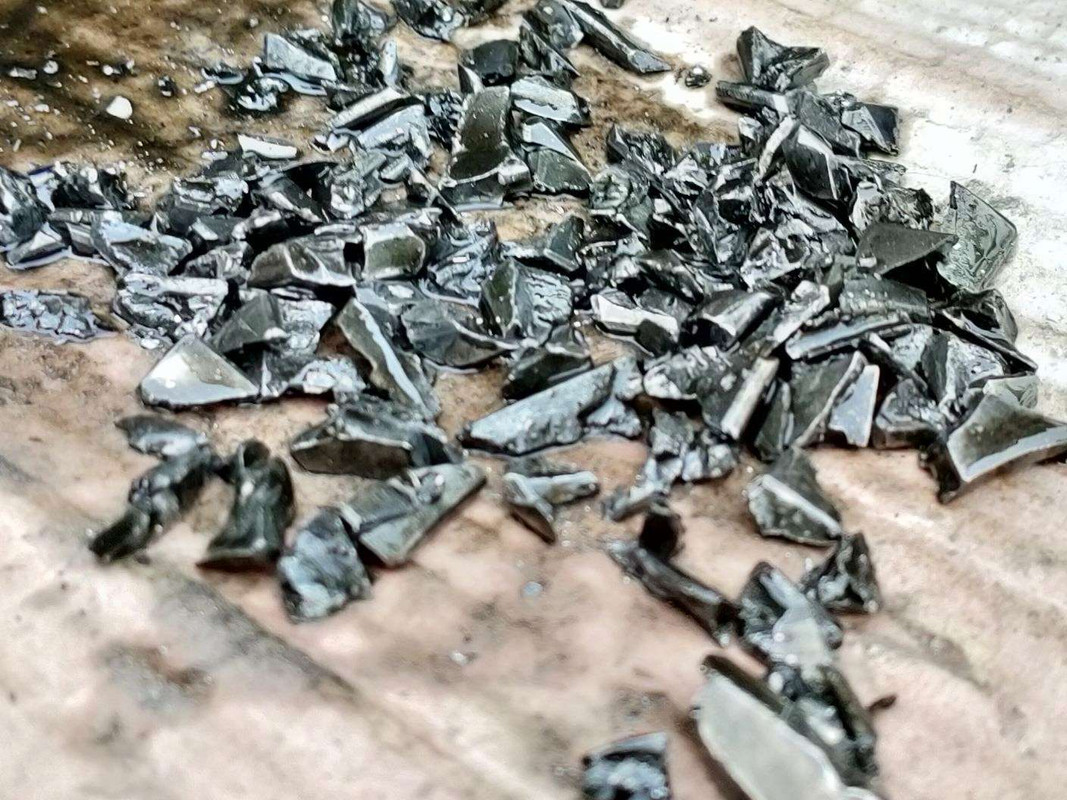
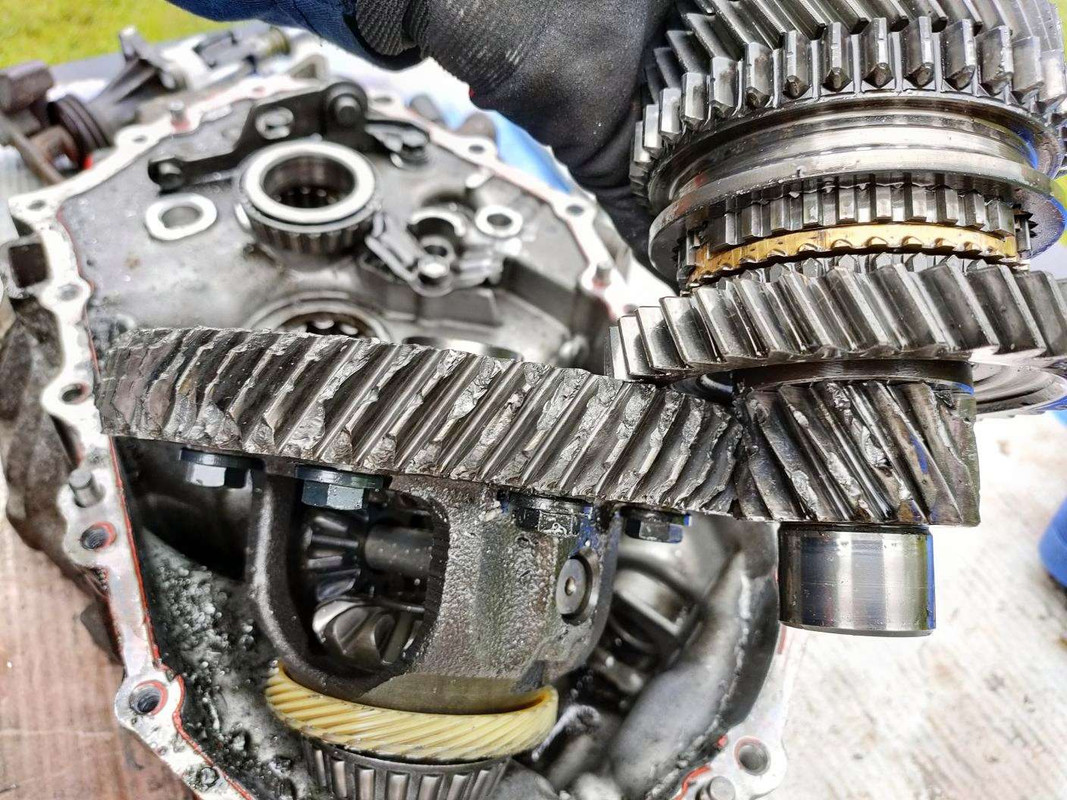
    Bonus - word of warning. What will happen if you ignore the symptoms and drive with noisy bearing until it disintegrate. I mentioned I have already dead gearbox due to the same reason? Here's what fell out when I stripped it:

    Untitled Image

    And now - destroyed final drive:

    Untitled Image

    In brief - disintegrated bearing fell down the gearbox assembly and done what you see.

    That's all folks! Thanks for reading! :-D


Advertisement