Advertisement
Help Keep Boards Alive. Support us by going ad free today. See here: https://subscriptions.boards.ie/.
If we do not hit our goal we will be forced to close the site.

Current status: https://keepboardsalive.com/

Annual subs are best for most impact. If you are still undecided on going Ad Free - you can also donate using the Paypal Donate option. All contribution helps. Thank you.
https://www.boards.ie/group/1878-subscribers-forum

Private Group for paid up members of Boards.ie. Join the club.
Hi all, please see this major site announcement: https://www.boards.ie/discussion/2058427594/boards-ie-2026

Tiling question

  • 14-11-2025 07:51PM
    #1
    Registered Users Posts: 345 ✭✭


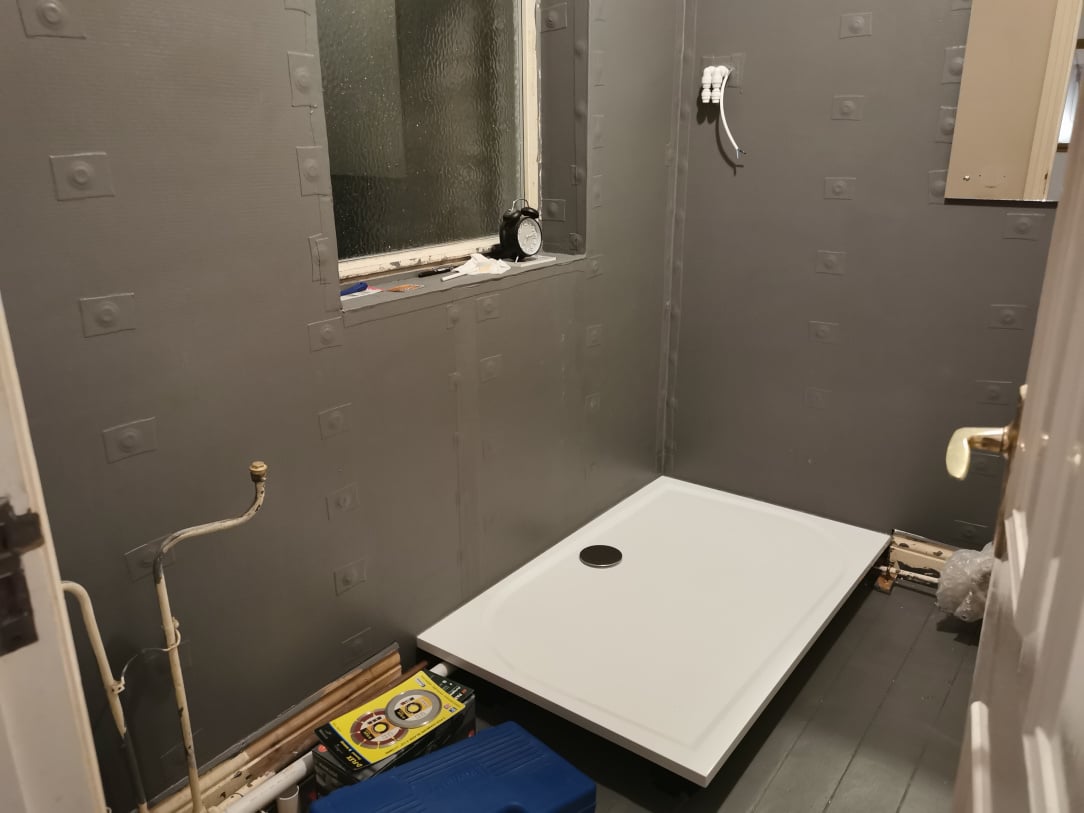
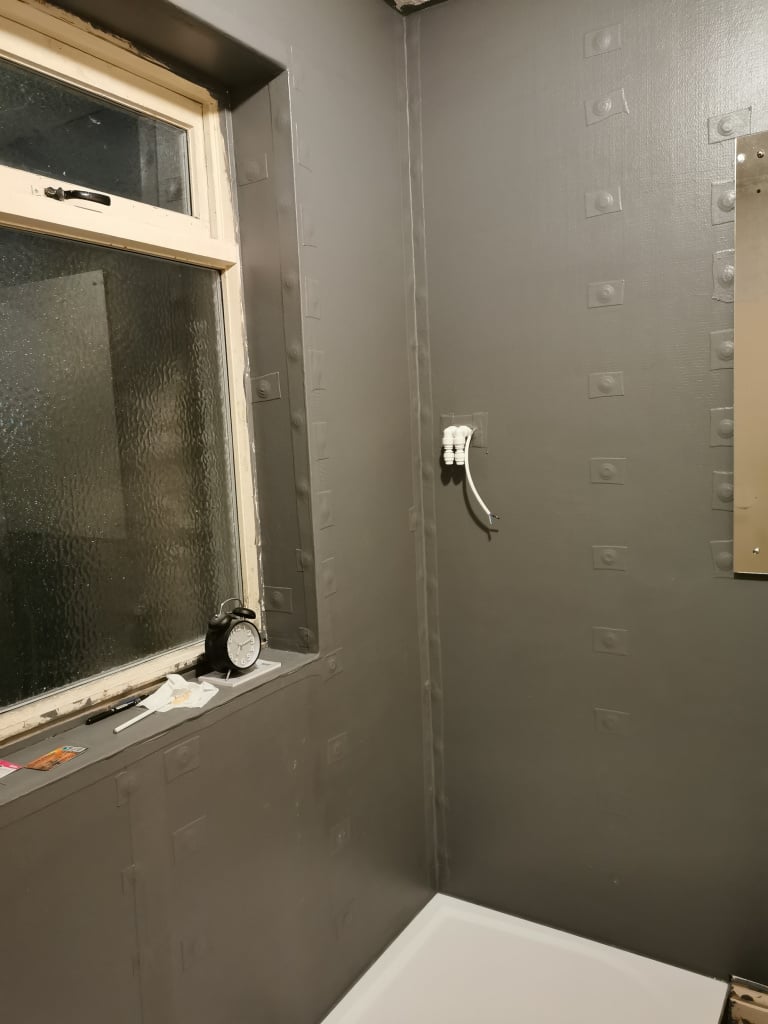
    Just about to start tiling our small bathroom walls, 2.18 by 1.44 m. I'm putting up 30 x 60 cm tiles. On the long window wall I'll fit about 3.5 tiles per row and on the other one about 2.5. Around 7.75 will fit going up.

    In terms of the layout I have a couple of options. To have the roughly half tile at the end of both walls and whole tiles in the corner of the shower, or else start from the middle on both walls and have about a 3rd in each corner of the long wall and about 10 cm on either side of the short one. I don't like that narrow cut so could possibly have the half tile there instead with two whole ones after.

    I know the risk with the whole tiles in the corner is it is unlikely to be perfectly square so we might get a gap, which is why the general advice is not to do this. However the other more correct way might look a bit messy with cuts at each end.

    I've tried stacking a few up in the corner and the gap doesn't seem too bad, just a few mm, however I know this could get worse as we go up.

    So I'm wondering what folks would advise, given the larger tiles in such a small space.

    Also, the tray is level. Ok to start from there or should I start one row up?

    IMG_20251114_191340.jpg IMG_20251114_191419.jpg

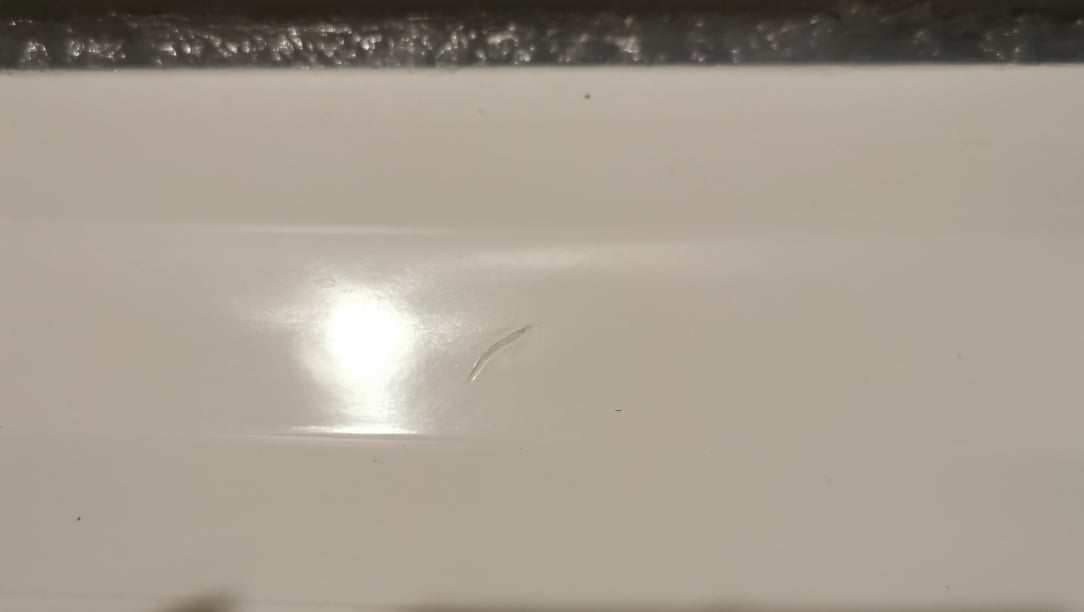
    Finally, muggins here managed to drop a tile on the brand new marble/resin tray and now there's a small chip. (Yes I've had it covered but not at that moment of course). It's very white. What can I use to repair it? Thanks!

    IMG_20251114_191857_edit_12728785945452.jpg


Comments

  • Registered Users, Registered Users 2, Paid Member Posts: 9,732 ✭✭✭10-10-20


    What tanking solution is that? Looks smart even without the tiles!

    I think you'll have to live with that scratch, tbh. Any effort to improve it will be met with inverse and non-proportional disimprovement!


  • Registered Users, Registered Users 2 Posts: 6,210 ✭✭✭standardg60


    You could think outside the box here and go horizontal within the shower tray and vertical outside. That would cover the discrepancy in the corner and near full tile cuts, whilst adding a bit of feature in a small room.

    Agree with the tanking, looks the biz.


  • Registered Users, Registered Users 2 Posts: 37 JorgeL


    Im thinking of tiling my small bathroom also, did you used to have tiles before ?

    I have to remove tiles and wondering if it’ll be too much of a pain in the hole to take out and have level.


    sorry not answering OP but said why not.


  • Registered Users Posts: 345 ✭✭MarcusMaximus


    Yeah I know what you guys mean about the tanking - almost a shame to cover it up! It’s AquaTank btw.

    Pity about the scratch, I would have thought something could sort it out but perhaps not. 😕

    That’s a novel idea though I’m quite attached to the unified horizontal look. It’s kinda why we chose the bigger tiles. But I will consider it alright. Not sure what you mean by “That would cover the discrepancy in the corner and near full tile cuts” but I’ll see if I can get my head around it. Thanks.

    Yes there were old tiles all over those walls. I wanted to get back to the plasterboard but ended up installing backer board as per @10-10-20’s advice as the wall was a bit of a mess after removing both a bath and the tiles. Taking them off was easy and quite satisfying. It’s dealing with what’s left as a result that might be a pain alright! Why don’t you post some pics? I’m sure you’ll get some great help and advice from the good folks on here. 👍️


  • Registered Users, Registered Users 2 Posts: 6,210 ✭✭✭standardg60


    Re the discrepancy in the corner run a straight edge vertically bottom to top and measure the gap at the top. Cut this amount off your bottom tile and then as go up you'll end up with a full tile. Starting in that corner with full/ half tiles the discrepancy will look less obvious.

    When you get to the shower tray edge you'll be able to see whether going horizontal or vertical works out better with the cuts.

    Do post a pic when done.


  • Advertisement
  • Registered Users Posts: 345 ✭✭MarcusMaximus


    Thanks for explaining. I've just run the straight edge up as suggested on both sides of the corner and they don't look too bad, especially the one on the long wall. I might get away with full tiles there given a lot of it is by the window which will have shorter tiles anyway so I can cut them to fit. The short wall is a little more out so I'll probably do what you suggest there.


  • Registered Users, Registered Users 2 Posts: 1,721 ✭✭✭monseiur


    If you decide to start in the corner with a full tile and worried that the wall may be a little out of plumb and thus having a bigger or too big a gap in the top rows consider the following : As the tiles are big cut say 15mm off the first tile and a slightly narrower strip off the tile on top (if required) and son on - this will give some tolerance and will not be noticeable due to the size of the tile. I did it recently in my uncle's old house with wonky walls and it worked a treat.


  • Registered Users, Registered Users 2 Posts: 6,210 ✭✭✭standardg60


    Imitation is the best form of flattery 🙂


  • Registered Users Posts: 345 ✭✭MarcusMaximus


    Well no harm in a good piece of advice being repeated in a slightly different way. It’s like advertising - repeated exposure to the same thing eventually makes it stick! 😏

    Re. posting a pic when I’m finished, will do but I work at a glacial pace due to having to learn about and plan each job and life generally getting in the way, so it might take a while…


  • Registered Users Posts: 345 ✭✭MarcusMaximus


    How about filling the chip with a bit of epoxy putty and then painting it with white gloss or enamel paint?


  • Advertisement
  • Registered Users, Registered Users 2, Paid Member Posts: 10,657 ✭✭✭✭con747


    Don't expect anything from life, just be grateful to be alive.

    Help Keep Boards.ie Alive sign up here

    https://subscriptions.boards.ie/ Keep Boards Subscribed To.


  • Registered Users Posts: 345 ✭✭MarcusMaximus


    Yeah that looks very promising. The reason I thought of the epoxy putty was because I already have it but getting something that is already white might be better.


  • Registered Users Posts: 345 ✭✭MarcusMaximus


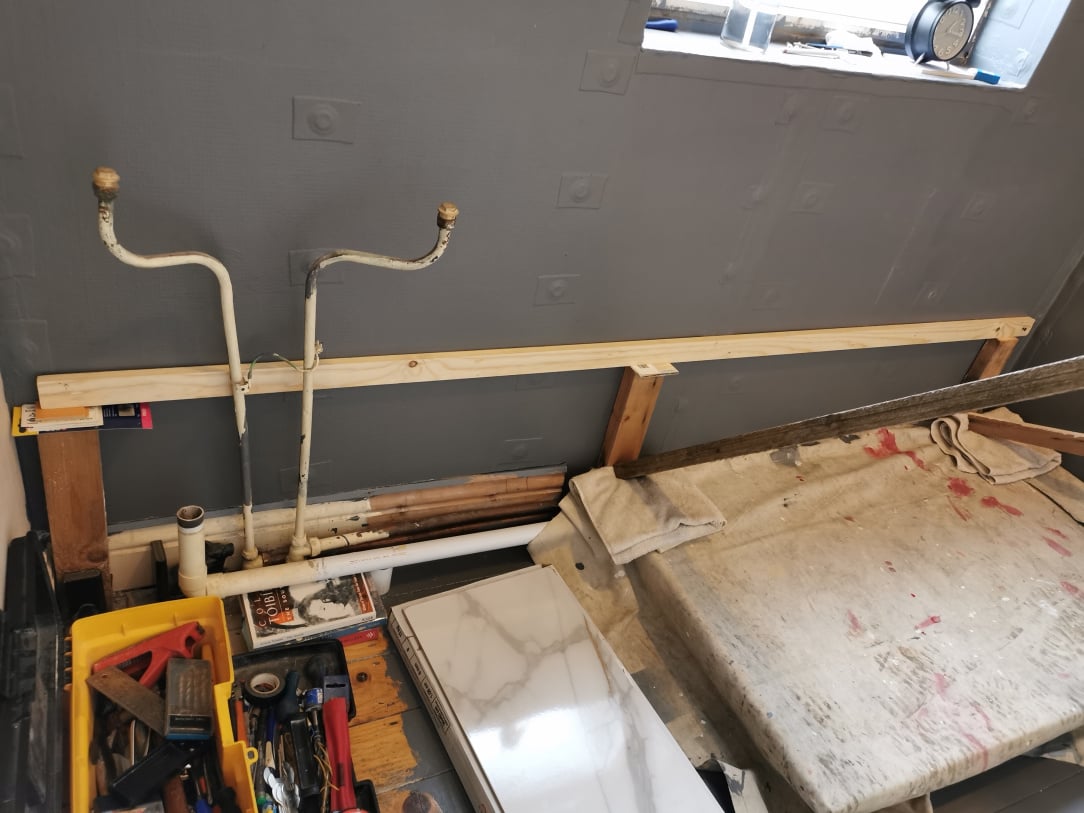
    My batten for the first row of tiles standing on wooden supports so as to avoid screwing through the membrane. The space underneath allows for one tile plus spacer and a 3mm gap between tile and tray. All going well that is..

    IMG_20251116_131709.jpg


Advertisement