Advertisement
If you have a new account but are having problems posting or verifying your account, please email us on hello@boards.ie for help. Thanks :)
Hello all! Please ensure that you are posting a new thread or question in the appropriate forum. The Feedback forum is overwhelmed with questions that are having to be moved elsewhere. If you need help to verify your account contact hello@boards.ie

Genesis Does...Genesis Does....Well, Nothing!

  • 06-05-2025 05:59PM
    #1
    Registered Users, Registered Users 2 Posts: 8,001 ✭✭✭


    As a young teen, I got an amazing present from America….a Sega Genesis II, CD II, and 32X. It introduced me to Snatcher CD, Sonic CD, Doom 32X, and a host of games I'd have never played before. Like most of you here, back then, collecting wasn't really a thing for me, so when the PS1 & Saturn were launching, I sold it all to raise funds for an upgrade. A move I've always regretted. So when I see a Genesis II with its black buttons, and a matching CD II, I'm always reminded of the great times I had with that setup some 30 years ago.

    Browsing eBay a while back, I happen across a real gamble…a non working Genesis II & CD II. The pics showed them true to form, rough, corroded, neglected. There was a make an offer option, which I mulled over, before my heart took over and I threw a small offer in, fully expecting it to be rejected. To my amazement the next morning, my €40 offer (plus postage) nets me the Genesis II & CD II, albeit non working and in very rough shape.

    A short time later, they land.

    IMG_20250418_142019.jpg

    ^^ You can see they've been through a rough time, and there's some indications of the horrors within if you look at the joypad ports…

    IMG_20250418_142025.jpg

    ^^ The joypad pins are literally green with oxidisation, and there's obviously been water ingress, or prolonged exposure to serious moisture given the rust on the plastic.

    IMG_20250418_142115.jpg

    ^^ The story continues when I separate the units. It appears the console had a layer of water as a companion for some time.

    IMG_20250418_142128.jpg

    ^^ Ugh, the CD II hasn't escaped either. Obvious signs of corrosion/rust on the internal mechanical metal parts….hmm, this might not work out after all.

    IMG_20250418_142247.jpg

    ^^ Hmm, opening the Genesis shows more signs of corrosion, not just around the joypad ports, but all around the place. Parts of the shield have literally been eaten through.

    IMG_20250418_142511.jpg

    ^^ Good lord, it's almost been 'burned' by the rust. I wonder how long this thing sat around water to get this bad? You can also see above that a capacitor literally fell out on to the floor due to leakage/corrosion, that might explain why it's not powering on as per the sellers notes? Either way, I won't be trying to power this thing on in this condition.

    IMG_20250418_142528.jpg

    ^^ Check that out. If the console can miraculously be saved, the shielding might have to be binned.

    IMG_20250418_142343.jpg

    ^^ A rare sight of a Rubycon gone very, very bad. Perhaps it shorted out due to moisture? Who knows, but it'll need recapping as a very preliminary measure anyway.

    IMG_20250418_144222.jpg

    ^^ Absolute crud. This stuff has contaminated everything in this area….smd resistors, smd caps, the two sound OPAMPS, via's, traces….it's in a bad way.

    IMG_20250418_142403.jpg

    ^^ The power LED is mysteriously missing too, gone. It obviously corroded off, but is nowhere to be found.

    IMG_20250418_144206.jpg

    ^^ Ok, patient on the table, and prepped for surgery. The plan here first is to decap the entire board, and deep clean with white vinegar, followed by an IPA bath to rinse away any remaining vinegar & contaminants/crud.

    IMG_20250418_153853.jpg

    ^^ Decapped, and ready for decontamination!

    IMG_20250418_153902.jpg

    ^^ If you look at the solder on the SMD resistors & SMD caps, it's gone green with corrosion. This really dulls the solder, and makes it very hard to reflow. You can see several via's are also gunked up with crud, which can block traces/signals too.

    IMG_20250418_160306.jpg

    ^^ A good scrub later, and now an IPA wash. It's a good idea to let the board drain away onto tissue etc, as the IPA evaporates in place and if it doesn't drain off, it'll just leave the crap behind. At least this way, it washes off. You can then do another rinse on the bottom end of the board to remove any remnants.

    IMG_20250418_160312.jpg

    ^^ Rather than desoldering the joypad block, as it's riveted on and is a bit of a pain if not absolutely necessary, I flood the ports with white vinegar and leave it for a while. Thankfully they're water tight so they retain any fluid within. It's very hard to see in the pic, but you could actually see a reaction on the pins as the vinegar reacts with the corrosion and lifts it off.

    IMG_20250418_164232.jpg

    ^^ Ok, the board is looking a LOT cleaner now, and will be easier to work on and troubleshoot.

    IMG_20250418_164251.jpg

    ^^ First pass of white vinegar, and the pins are no longer green. I do this two or three times to return them to almost new again.

    IMG_20250418_164815.jpg

    ^^ The brilliant Luke at Console5 provides a comprehensive cap kit, with all top quality caps as usual.

    IMG_20250418_164820.jpg

    ^^ There's quite a few of them! I've never actually recapped a Sega Megadrive/Genesis before.

    IMG_20250418_172211.jpg

    ^^ Many caps later, and we're done. It's looking a lot more like it should now.

    IMG_20250418_164301.jpg

    ^^ In order to test this properly, I'll need to be able to see if it's actually powering on. I don't have any red led's to hand, so I have to commit the ultimate sin….and fit a blue LED. The 2000's are calling, and they want their blue LED's back! I'll revert this back to a proper one at a later stage, so this will have to do for now as a test led!

    IMG_20250418_164647.jpg

    ^^ Soldered in, and ready for retina burning blue'ness.

    IMG_20250419_124642.jpg

    ^^ Ok, time to test, and see if this was all for nothing. I've an RGB scart here, and a modern power supply.

    IMG_20250419_125018.jpg

    ^^ Hmm, it powers on….but…..there's problems:

    1. There's no FM audio, only basic PSG.
    2. The controller is only partially working, no buttons or Start button work.
    3. The reset button doesn't work.
    4. Testing with my Everdrive Pro, games only show a pink screen.

    So, there's work to do!

    I go over the board with a fine tooth comb and a microscope looking at the sound circuits. I trace everything out with a multimeter, and despite some dodgy looking via's and traces, there's continuity everywhere there needs to be, 5v everywhere there needs to be, and grounds are all working. This is bad. One of two things are likely, 1) the FM sub-processor within the main ASIC has failed, and if so, the board is toast, or 2), the OPAMP's are fried as a result of the corrosion. I decide to roll the dice on a treble bypass board, more on that later.

    The controller I'm able to fix because there's a bad trace directly behind controller port one, where the signal passes through a little resistor (I replace the resistor and repair the trace.)

    The reset button is goosed, I'll need to replace it. I remove the silicon lid, clean the carbon pad under the silicone, and clean the contacts inside the switch, no joy. I have this on order.

    The Everdrive Pro pink screen problem. This is a strange one, seemingly this is a known thing on certain version 1 and 2 Megadrive's/Genesis consoles, and there's a common cause….the CD edge connector needs to be terminated either by using the Sega made 32X Expansion Dongle (I'd never heard of these before now!), or a working/non working Sega CD will also work. Once I try this, the Everdrive Pro worked a charm.

    So I was only really left with the sound problem. Time to bypass the on board audio!

    1746461145612.jpg

    ^^ The mod requires me to remove some of the newly installed sound circuit capacitors, and resistors. You can see where I've removed R22 & R24, then fed their positive sides to the positive sides of where CE2 & CE5 used to be (soldered on the underside.)

    1746461145630.jpg

    ^^ RE73 & RE72 are removed and bridged.

    I also had to lift three pins on the RGB encoder to insulate them from the circuit, but naturally, I forgot to get a picture of this.

    IMG_20250503_184503.jpg

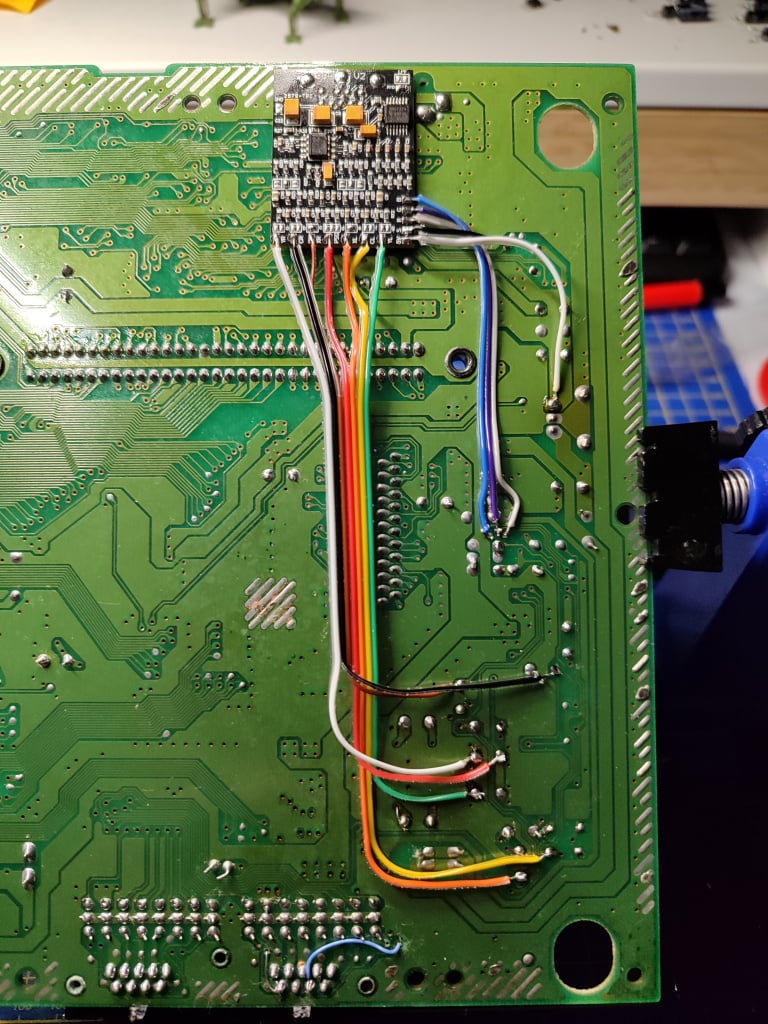
    ^^ The famous 3BP board soldered into place, and all connections made to the various points on the board. You can also see some of the work I done on Joypad Port #1 here, two traces fixed.

    1746461145639.jpg

    ^^ Kapton tape is then used to insulate and protect the new board and wiring from any shorts.

    1746388795649.jpg

    ^^ I'm going YOLO with this and putting it back together to test. In order to do that, I want to really try save the RF shields as much as possible.

    1746388795656.jpg

    ^^ I need to treat them with white vinegar to neutralise the corrosion, cut a small section out to allow the 3BP board to fit without shorting (seen above), and then spray paint them to prevent further corrosion.

    1746461145654.jpg

    ^^ Bottom shield treated, the 3BP section cut out with a dremel, unsalvageable sections removed, sharp edges sanded, and spray painted silver.

    1746461145594.jpg

    ^^ Same treatment for the top shield.

    1746461145584.jpg

    ^^ The console and shield were missing half their screws, so I ordered a pack of x50 M3 10mm's.

    1746461145576.jpg

    ^^ They do nicely, internally, and externally.

    1746461145567.jpg

    ^^ Ok, here goes nothin'…time to test again…

    1746461145539.jpg

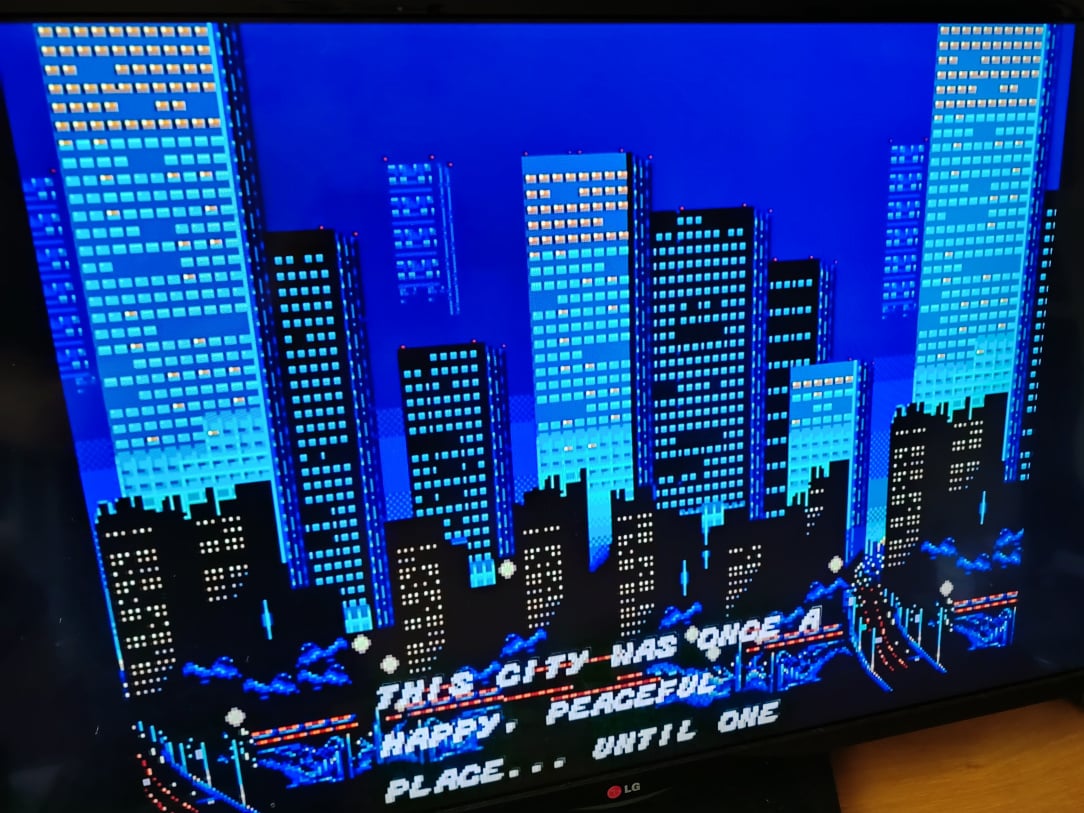
    ^^ I can't photograph sound, so this is the next best thing…you can HEAR this image. Just to confirm, the 3BP board works wonderfully. Full FM & PSG sound restored, and better than ever too. Gone is the crap audio and video output of the stock Model 2, replaced with audio that rivals the best MD1, and crisp, jailbar free RGB sharpness for visuals.

    1746461145527.jpg

    ^^ Ok not a great pic, but it's sharp, vibrant, and punchy in real life.

    1746461145523.jpg

    ^^ A wipe down with some glass cleaner, and it's looking a LOT better now. It's still scuffed on the right hand side, and there's not much I can do about that without ruining the texture of the plastic so I'll leave it as is. I will get some 303 Protectant though to bring it up a notch or two, but for now, that's all.

    I've a lot left to do.

    1. Fit a Switchless Region Free Mod to this console (this resolves the missing power LED too)
    2. Replace the Reset Button
    3. Investigate, repair, and refurbish the Sega CD II it came with
    4. If number 3 works out, I'll fit a Multiregion bios to that Sega CD II also.

    Stay tuned for Part 2!


Comments

  • Registered Users, Registered Users 2 Posts: 3,851 ✭✭✭Doodah7


    This is absolutely amazing! Your diligence and skills are incredible. Looking forward to part 2! How long has all that work taken so far?


  • Registered Users, Registered Users 2 Posts: 8,001 ✭✭✭Inviere


    Thanks for the very kind words. In reality though, I'm far from any kind of expert or pro at this stuff, and have learned it all mostly the hard way. With a bit of patience and investment in it, anybody can learn and do this stuff.

    In terms of time on this, the cap kit and treble bypass board were the quickest, after that the cleaning took a while, but by far the biggest time investment was the troubleshooting of the missing audio. I went over the board with a fine toothed comb, microscope, and multimeter, several hours I'd say. Was absolutely chuffed when the 3BP board saved the audio, it all felt worthwhile then!


  • Registered Users, Registered Users 2 Posts: 4,209 ✭✭✭Quigs Snr


    … that thing looks like it was pulled out of the grand canal, so thats some comeback if you can get everything done.

    And you have reminded me. I still dont have a physical copy of snatcher in the collection. I better remediate that.


  • Registered Users, Registered Users 2 Posts: 36,437 ✭✭✭✭o1s1n
    Master of the Universe


    Reminds me of those YouTube videos where lads restore old guns that have been sitting in the bottom of rivers for decades.

    This is absolutely ridiculous, well done. Can't wait to see if you manage to get the Mega CD going!


  • Registered Users, Registered Users 2 Posts: 8,001 ✭✭✭Inviere


    Thats jumped in value again, the lovely big box Sega CD version if CiB is north of a grand now.


  • Advertisement
  • Registered Users, Registered Users 2 Posts: 772 ✭✭✭80s Synth Pop


    You absolute mad man!! A rare pcb or Japanese computer I can understand but a fugly genesis 2 that was found rotting away in a farmers field along side an R360 in northern Ireland?

    Well done dude what a lovely job.


  • Registered Users, Registered Users 2 Posts: 8,001 ✭✭✭Inviere


    Cheers man. I do really enjoy saving consoles and restoring them! In this case though, I do have a specific connection to the Genesis II & CD II, I wouldn't normally go to this length for such a common and readily replaceable system 😊

    Post edited by Inviere on


  • Registered Users, Registered Users 2 Posts: 36,437 ✭✭✭✭o1s1n
    Master of the Universe


    I always wondered why they didn't keep any of the colour accenting for the US model and gave the PAL version red buttons.

    Would have made more sense given how the box art went for PAL to have blue buttons and for the Genesis to have the red ones.


Advertisement