Advertisement
If you have a new account but are having problems posting or verifying your account, please email us on hello@boards.ie for help. Thanks :)
Hello all! Please ensure that you are posting a new thread or question in the appropriate forum. The Feedback forum is overwhelmed with questions that are having to be moved elsewhere. If you need help to verify your account contact hello@boards.ie

The Xbox 360 - A Glitch in the Matrix....

  • 07-12-2024 04:33PM
    #1
    Registered Users, Registered Users 2 Posts: 7,985 ✭✭✭


    Not so much a retro machine by many measures, but a console I consider to be among the 'last of the greats' really. This, and the PS3, defined their era far more than their 8th generation successors, so why not have a little modding celebration of the great Xbox 360, in all of its unlocked glory! This 360 Slim is to be a Christmas gift to someone who holds the 360 very dear to their heart, so I'll try to make this one as complete as I can…

    1731336846630.jpg

    ^^ I bought this off of eBay, a standard Xbox 360 Slim. I searched specifically for the Trinity version, as the RGH boot times are supposedly the fastest. The serial number on the back, and the glossy shell on this Slim indicate that this is indeed a Trinity model.

    1731336846584.jpg

    ^^ All of the important areas & vents are caked in dust and dirt, it's likely never been cleaned internally (certainly not properly anyway.)

    1731336846600.jpg

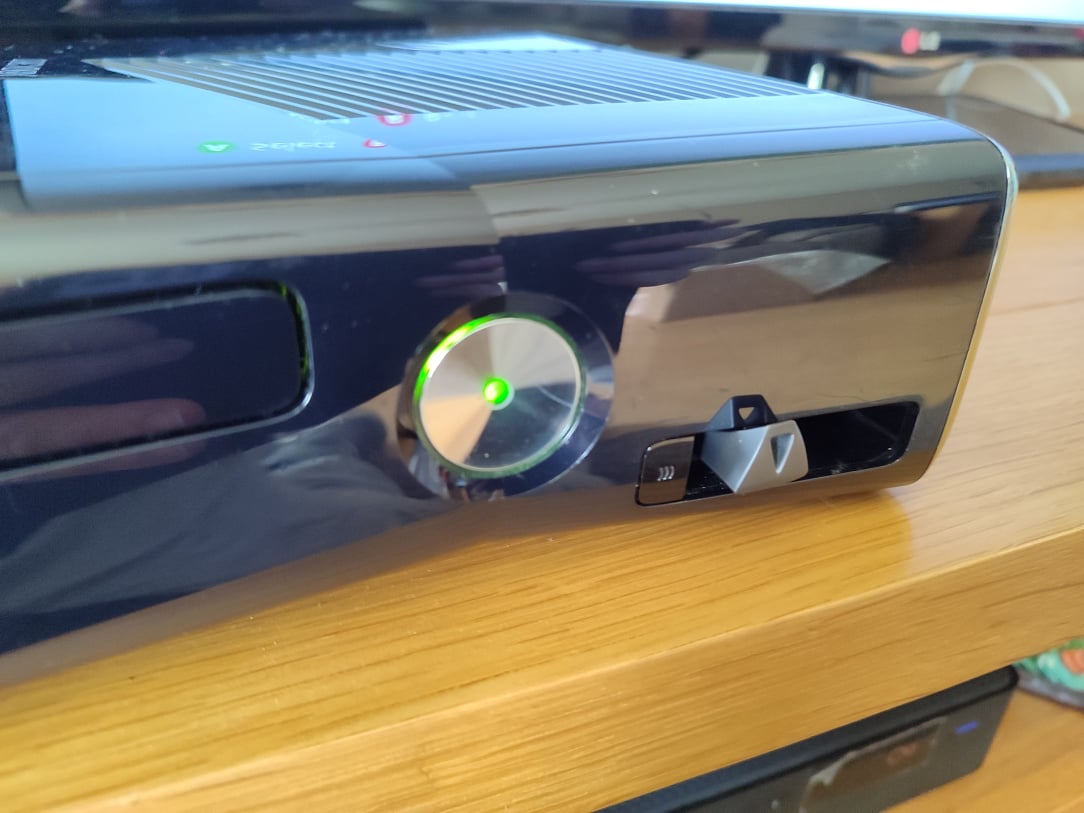
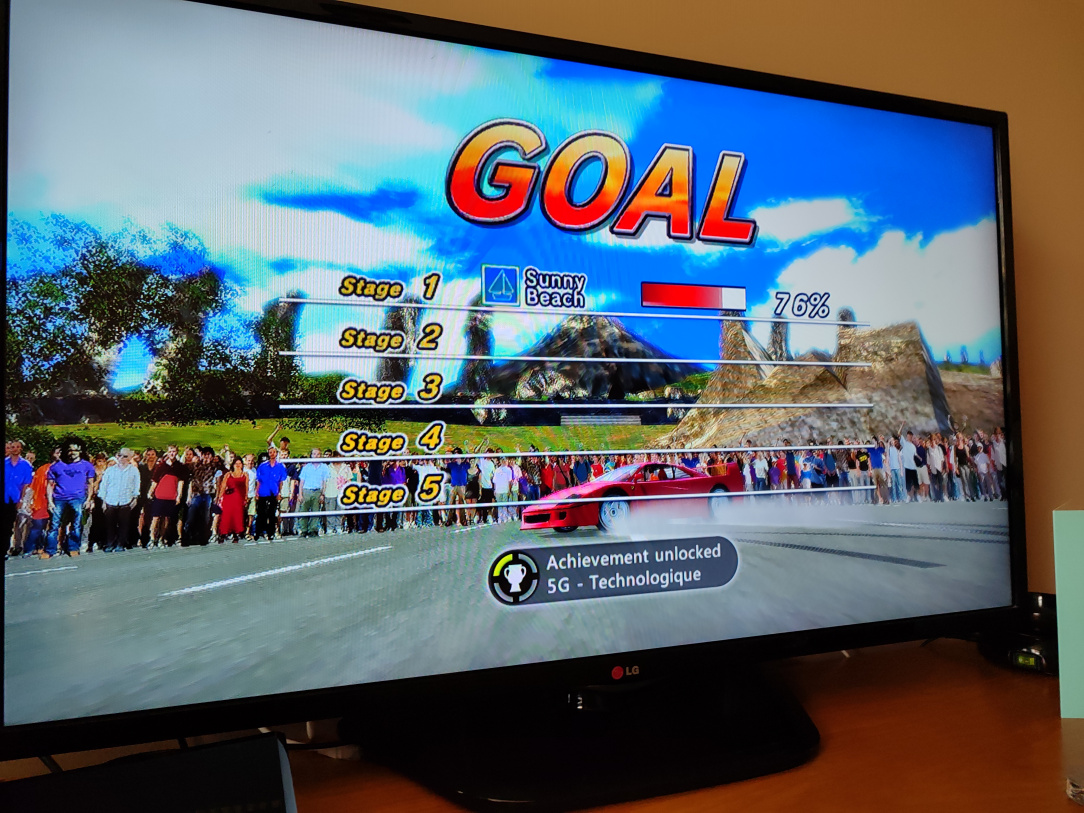
    ^^ It works fine however! It's not on the latest dashboard, but that's irrelevant really as these are all vulnerable to the RGH exploit. I will update it to the latest before modding however, just for the sake of completion.

    1731336846571.jpg

    ^^ A set of Xbox 360 Slim opening tools, courtesy of Aliexpress. The X-Clamp tool is worth its weight in gold, as I find out later on…

    1731336846550.jpg 1731336846531.jpg

    ^^ After a LOT of fiddling with clips, we're in.

    1731336846515.jpg

    ^^ A notable layer of dust covers the fan, the heatsink, the vents on the shell, etc. This will be getting a thorough deep clean!

    1731336846498.jpg

    ^^ I won't detail every step of the disassembly, but the X-Clamp shown here is what applies pressure between the APU IHS and the Heat Sink itself. This needs to be removed to perform the RGH, but to be honest, I'd have removed it anyway to repaste the APU. Any thermal compound on it is undoubtedly long dried up at this stage.

    1731336846482.jpg 1731336846460.jpg

    ^^ This simple & cheap X-Clamp tool makes removing the clamp (and refitting it later) an absolute breeze. It can be done with smaller prying type tools, but there's a risk of scratching the board or damaging it….with this though, that risk is removed.

    1731336846443.jpg 1731336846417.jpg

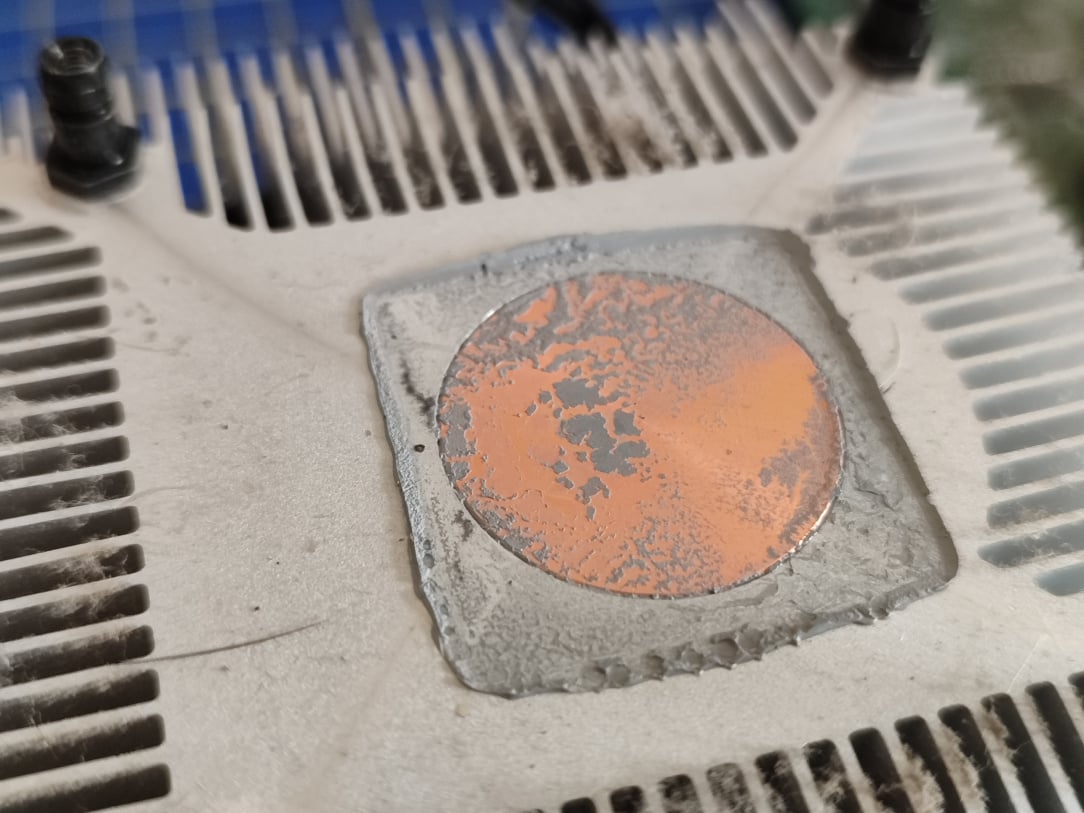
    ^^ As I suspected, the APU & Heat Sink are bone dry of any effective thermal compound. This is bad for longevity & proper removal of heat from the APU & shell, so a repaste here will hopefully help reduce temps, keep the system cooler, and working for a long time to come.

    1731336846399.jpg 1731336846382.jpg

    ^^ I've cleaned off all of that old dried up crud, and can now set these aside to repaste with some fresh thermal paste later on.

    1731336846309.jpg

    ^^ Ok, time to get modding. For this board (Trinity), I'm going with a 10k resistor. The RGH 3 mod is itself a work of art, two wires, four solder points, and a resistor.

    1731336846290.jpg

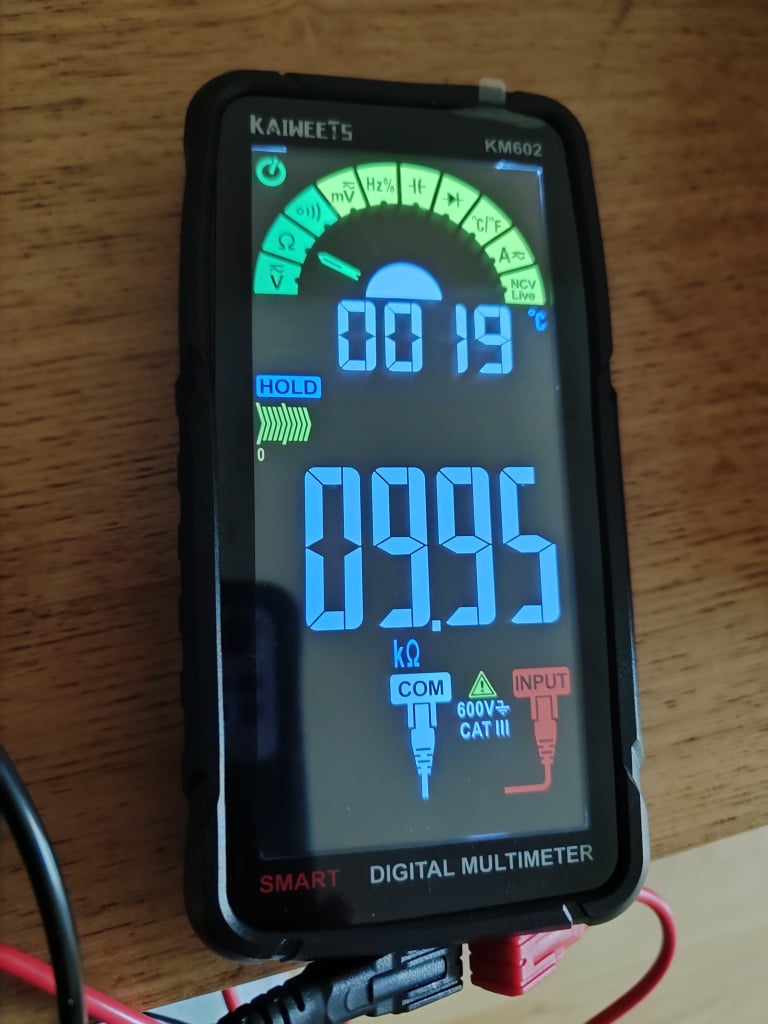
    ^^ Always worth double checking the values on these small components, just in case!

    1731336846273.jpg

    ^^ Resistor prepper with some 30awg solid core wire on both ends, and then protected with a dressing of heat shrink.

    1731336846256.jpg

    ^^ Time to break out the Microscope and boom arm. The mainboard is far too big & unwieldy to just use the standard base on this microscope. The only downside to the boom arm, is I lose the lighting from the normal base. There's a light within the microscope aperture itself though, so I'll be fine.

    1731336846241.jpg

    ^^ Last pic from the phone for a bit, from here I'll use the captures from the scope itself.

    20241111_112530.JPG

    ^^ I began with the points called POST. The one above is very easy (in fact, this entire mod is very simple, with the exception of one of the other points below). Magnification isn't really necessary for this one, but since I had it set up, why not!

    20241111_112824.JPG 20241111_113503.JPG

    ^^ POST point prepped with flux, tinned, wire soldered to it, and then cleaned off with 99% IPA (still wet here, but dries fast.)

    20241111_114050.JPG

    ^^ This is one end of the SMC_PLL wire (with resistor in-line) goes here, again, a nice simple easy solder point.

    20241111_114318.JPG

    ^^ This is the difficult bit. It's very small, and in a very 'busy' part of the mainboard, which makes it very difficult to see with the naked eye (imo, magnification is a must here for me). The point we need to solder to is also covered in solder mask, which needs to be carefully scrapped away. This point is for the PLL_BYPASS wire, and is the eyelet under the 3 in C5R35.

    20241111_114600.JPG

    ^^ Eyelet now scrapped clear of the masking, showing the copper underneath. This allows us to get some solder onto it, and get it tinned for a wire.

    20241111_114929.JPG 20241111_115343.JPG

    ^^ Point fluxed, tinned, soldered to, and cleaned off. That's the core of a 30awg solid wire there, which is normally tiny….shows you how small this point is. That's three of the four points done, the remaining point I must have forgotten to capture, but it was a straight forward one anyway.

    1731336846230.jpg

    ^^ That's the specific wiring needed for the RGH to function all done now. Not the neatest routing, but I was just being cautious with the tiny solder points so as not to stress them, and to keep the wires nicely free of the X-Clamp that'll refit later on.

    20241111_120430.JPG

    ^^ I said the mod is done, and technically it is, but as it stands the console won't boot in any longer. We need a way to read the NAND, modify it with RGH timings among other sorcery, and then reflash it back to the Xbox. The points needed to do this are on the top side of the mainboard, and I've cleaned, fluxed, tinned, and recleaned them here. 7 points, all nice and simple except the one on the very left side second from the bottom…it was difficult to get solder to flow there, despite being really clean and using proper flux. Eventually I got enough that I was happy with.

    So that's the RGH wiring done, and the 360 prepped to have its NAND dumped, modified, and reflashed. What device could we use to do that though? Why the wunderkind itself, the Raspberry Pi Pico! What a little trooper of a device that has turned out to be in recent times.

    1731336846360.jpg

    ^^ The J2C1 and J2C3 bundles are the points we're interested in. Initially I thought these did not look like factory soldered points at all, but the console showed zero other signs of modification. Strange one.

    1731336846219.jpg

    ^^ Time to get the Pi Pico ready for action…

    1731336846210.jpg

    ^^ All seven points prepped on the Pi, and ready for wires…

    1731336846200.jpg

    ^^ All 7 wires soldered. The soldering looks a bit sloppy and excessive here, but I did goa little heavy on the amount of solder used as I wanted a solid connection for nand dumping/writing.

    1731336846192.jpg

    ^^ Wires then soldered to the Pi Pico. We're all set. Next step is to communicate with the 360 now via my PC, and dump the NAND in preparation for the software side of the mod.

    2.png

    ^^ First up, we prep the Pico with the software it needs to be able to act as a NAND reader/writer for this case, the wonderful PicoFlasher. It's as simple as dragging and dropping the file onto the Pi when it's connected to the PC over USB, and it's flashed within a second or two.

    3.png

    ^^ We can see now, when I run Jrunner, it's set up in Pico Flasher mode (as opposed to other modes that require different hardware etc.)

    4.png

    ^^ Hitting Read Nand, Jrunner begins communicating with the 360 and dumping the NAND. This is a great sign, the wiring is obviously all correct, the Pi is working away as it should too. The software will dump the NAND twice, and then compare them. If they match, we're golden, and can proceed further. If they don't match, there's issues and either NAND dump can't be treated as being valid.

    5.png

    ^^ Sweetness, both NAND dumps are the same. I now have a valid NAND dump that I can use for disaster recovery if ever needed (understanding obviously that this is a dump of the stock NAND, and it will not boot with the RGH wiring in place.)

    6.png

    ^^ Next step is to configure Jrunner for my chosen hack (RGH 3), ask it to create a Xell image, and then write the glitch timings to the NAND. You can see here that on the right, the console's own info is detected too.

    7.png

    ^^ Glitch timings successfully written. One last thing is to write the modified NAND image back to the NAND now, this will have Xell on it (a Linux loader for 360 modding purposes), signature checks disabled, and so on.

    1731336846182.jpg

    ^^ Ok before we can write the new NAND image, we need to grab the CPU Key from the console so that the key can be injected into the NAND image. To do that, we need to power up the machine, and that'll necessitate a partial reassembly. First step is to use some new thermal paste on the APU!

    1731336846172.jpg

    ^^ Heat Sink and X-Clamp now back in place, that'll mean I can power up the machine and the APU won't overheat.

    1731336846144.jpg

    ^^ Mainboard now sitting inside the shell, fan and heatsink completely cleaned out, Xbox receiving power (but NOT powered on importantly), and the Pico connected to my PC using an Xbox One controller charging cable (nice long cable as the PC is about 8+ feet away.) I then disconnect the Pico from USB, and from here I can power up the 360 via the Eject button to enter Xell…..IF….everything has gone to plan so far….

    1731336846119.jpg

    ^^ Sweetness. I'll let this boot, and be able to grab the CPU key then…

    1731336846111a.jpg

    ^^ Perfect, key grabbed for reference. However, being lazy, I'm going to connect the 360 to the LAN so that Jrunner can grab the key itself. At least doing this, it'll rule out human error in writing/typing such a long key.

    9a.png

    ^^ Turning the 360 off again, and reconnecting the Pi back to the PC via USB, I hit the important "Get CPU Key" Button. Voila, it pulls the CPU Key from the console over the Network, and then I write the modified NAND image to the console. This is the final step of the RGH mod!

    10a.png

    ^^ Excellent, the image has written successfully. We can now (all going to plan), reassemble the machine, and finish things off by adding a new dash, transferring games, etc.

    1731336846080.jpg

    ^^ We're done with the Pi Pico now too, so that's desoldered & removed.

    1731336846067.jpg

    ^^ The console is now cleaned out internally, repasted, and reassembled fully. Time to power on and finish things off by setting up some software that can actually take advantage of this newly unlocked Xbox 360!

    1731336846090.jpg

    ^^ Brilliant, botting the console now boots as a regular 360 would. Initially, there's really no distinguishable difference between a stock console and an RGH machine when on the stock dash. To take advantage, we need to install a file manager called XeX Menu. This is installed by via some USB trickery…

    11.png

    ^^ We set up a USB drive with the required files (XeX Menu in this case, the others are for later on.)

    1731336846050.jpg

    ^^ USB Inserted…

    1731336846036.jpg

    ^^ XeX Menu shows up then in the Demo's section of the Dash, and from here, all we do is transfer it to the console's storage (or indeed you can run it from USB if you like, but it's nice to have it available on the machine directly.)

    1731336846022.jpg

    ^^ After transferring to the console, two instances are now shown, one on the USB, one from the console itself. Removing the USB will result in only one instance being shown.

    1731336846007.jpg

    ^^ Bad pic sorry, but running XeX Menu then brings us directly into the XeX Menu file manager. From here, we can create folders, move files around, etc. You can even run games directly from here depending on the type of game format. Here, I just want to try an XBLA game to see if signature checks etc are all correctly disabled. XBLA content runs from within the Content\0000000000000000 directory.

    1731336845978.jpg

    ^^ I grab my legit owned XBLA files, and transfer them to the correct location on the hard drive…

    1731336845962.jpg

    ^^ The game now shows up in the stock dash under My Games….

    1731336845921.jpg 1731336845895.jpg

    ^^ Absolutely brilliant, it all works wonderfully.

    However, it's a bit lame using the stock dash to browse games etc. So, we can go one better. Lets install a custom dashboard that makes things a lot prettier, and makes managing content a lot easier than using USB drives etc…


Comments

  • Registered Users, Registered Users 2 Posts: 7,985 ✭✭✭Inviere


    Before we even do that though, I really need to increase the storage size of the internal hard drive. 256GB just won't cut it these days. Yes an SSD won't really benefit in terms of playing games in this case etc, but two areas where it will….writing hundreds of GB's of game files will be a LOT faster, and it'll run quieter and cooler too.

    1732477479874.jpg

    ^^ A 1TB ssd drive, and an AliExpress HDD adapter for the 360 Slim.

    1732477479854.jpg

    ^^ The SSD slots in…

    1732477479846.jpg

    ^^ These enclosures are cheap as chips, and it shows. However, once installed, it'll be doing its job holding the SSD securely in place.

    1732477479831.jpg 1732477479814.jpg

    ^^ Out with the old, and in with the new. Painless upgrade.

    1732477479782.jpg

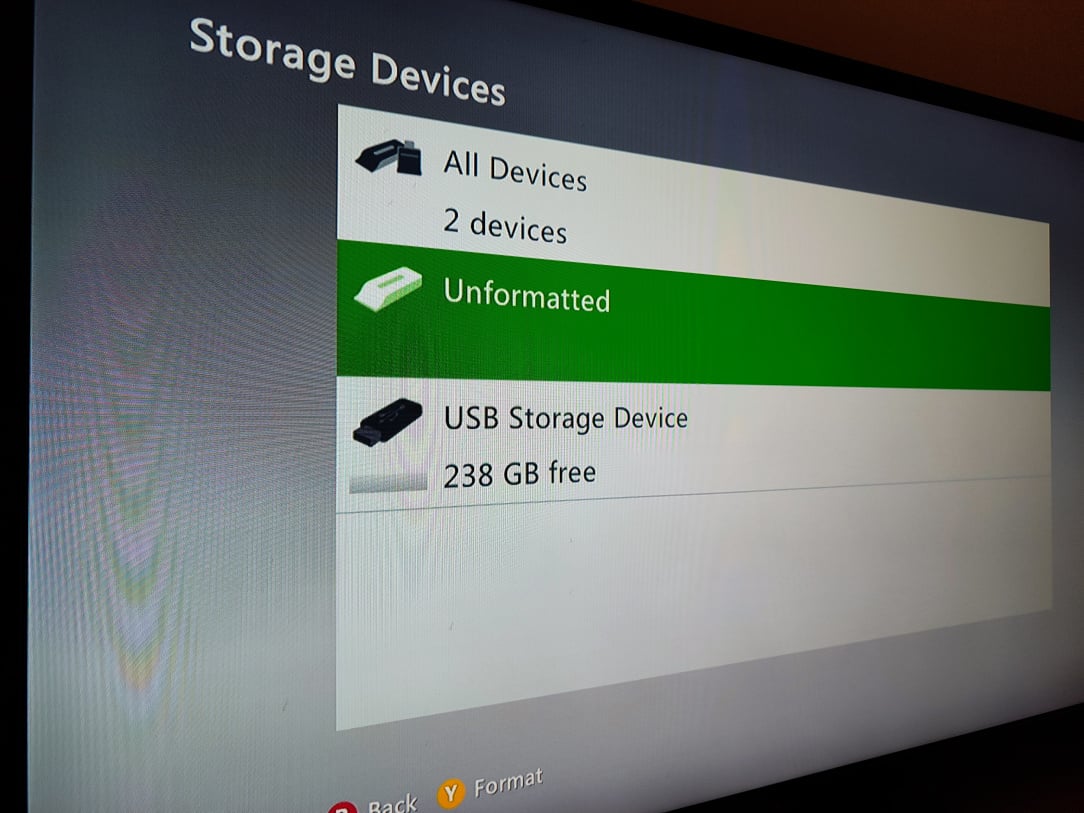
    ^^ The SSD is detected, and needs to be formatted.

    1732477479797a.jpg 1732477479769.jpg 1732477479751.jpg

    ^^ Punch in the console's serial number, format the drive, and eh voila, 1TB of SSD space to use!

    1732477479734.jpg

    ^^ I use XeX Menu again to transfer the Dashlaunch & Aurora folders to HDD1:\Apps. I'm then done with the USB key…

    1732477479715.jpg

    ^^ I can then manually run Dashlaunch from within XeX Menu, and it boots up. From here, I can choose a custom dash to run on subsequent boots of the console.

    1732477479702.jpg

    ^^ Nice cool temps at idle. Well, it's still hot for an idle temp, but for a 360, it's cool!

    1732477479692.jpg

    ^^ I then set the Default Dash to boot Aurora, pretty easy really!

    1732477479680.jpg

    ^^ It's important to save any settings changed before rebooting. I also change some settings related to relaxing some of the Xbox Live blocking (as I want to be able to pull certain metadata etc, and I also switched on some settings relating to activating any XBLA content licenses.)

    1732477479670.jpg

    ^^ Reboot the machine, and hey presto, Aurora boots automatically in all of its glory. It's obviously empty here, so time to get transferring some legally owned content over!

    12.png

    ^^ First up, I need to convert my legally owned 360 iso files into GoD containers. Well, I don't have to, but for the sake of efficiency, space saving, etc, I'm going to. GoD containers are containers for Games on Demand, or, games that the Xbox thinks were downloaded from Xbox Live. Converting an ISO to GoD will remove any padding from the ISO, thereby saving space. I'll use ISO2GOD to do this, version 1.5.0 which is a modified/updated version of the original (abandoned) version.

    13.png

    ^^ I configure my paths….

    14.png

    ^^ Feed it an ISO….

    15.png

    ^^ It'll process the ISO…

    16.png 17.png

    ^^ It'll then begin the conversion, and spit out a folder with the game's title id as the name.

    18.png

    ^^ I then FTP this folder over the network to the 360, into the Content\0000000000000000 folder, and Aurora will detect it, grab metadate for it, and present it all nicely.

    xb360-aurora-07b-enfin-disponible.png

    ^^ After batch converting all the games I need, FTP'ing them to the console, and setting up the directories and paths in Aurora, you're presented with a nice pleasing games library to peruse and enjoy. This is NOT my dash, as I forgot to grab a pic, but you get the idea. The pic actually shows a duplicate game, this is likely a Disc 2. You can configure Aurora to hide multiple discs, and switch to them automatically as required, which is what I've done…makes it much nicer to use.

    I done the same with DLC for certain games, and grabbed a good bit of XBLA content too for completion. One thing remains, the Xbox 360 has an ability to be backward compatible with original Xbox games (well, a select few.) Let's explore what we can do there…

    26.png

    ^^ There are some modern developments in this area. The Xbox emulator has been hacked to allow it to have a go at playing non-whitelisted Xbox games, and more modern version of the emulator have been grabbed from certain Xbox One games too, which updates things considerably.

    1733079614935.jpg

    ^^ So as it stands, this Xbox hasn't been set up with the partition needed for playing OG Xbox games…

    1733079614925.jpg

    ^^ I'll run the partition tool, and that'll do all the work for me…

    1733079614918.jpg 1733079614909.jpg 1733079614904.jpg

    ^^ Bingo, all done.

    1733079614895.jpg

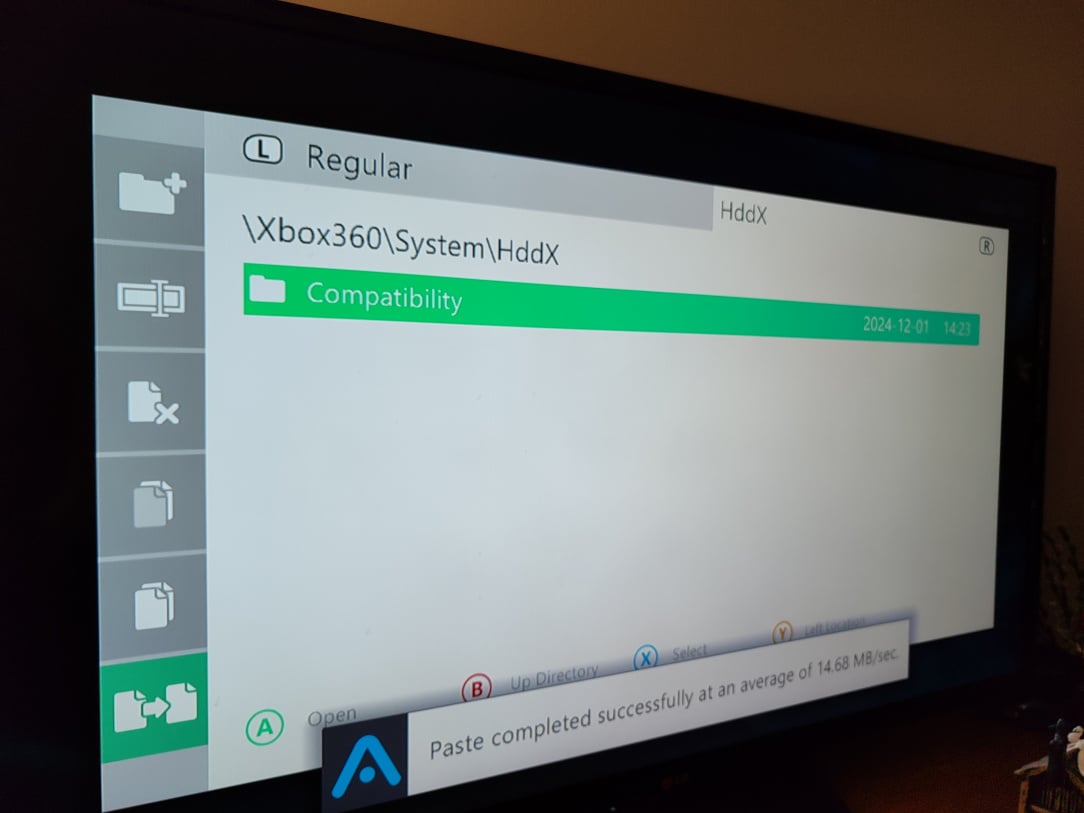
    ^^ I now have HddX, which is what's needed for playing OG Xbox games.

    1733079614889.jpg 1733079614876.jpg 1733079614863.jpg

    ^^ I paste the Compatibility folder into HddX….

    1733079614834.jpg

    ^^ I then paste the newer Xbox One xefu emulator files into the Compatibility folder…

    1733079614821.jpg

    ^^ I then use Xefu Spoofer to select the 2021c emulator file as the default one. This one has much improved compatibility etc.

    1733079614813.jpg

    ^^ Set up the path in Aurora where the OG Xbox games will be…

    24.png

    ^^ I run a script/tool on the PC to batch convert all of my legally owned Xbox iso's into extracted files & folders….

    25.png

    ^^ I then FTP these folders across to the Xbox folder I created on the 360…

    1733079614601.jpg 1733079614593.jpg

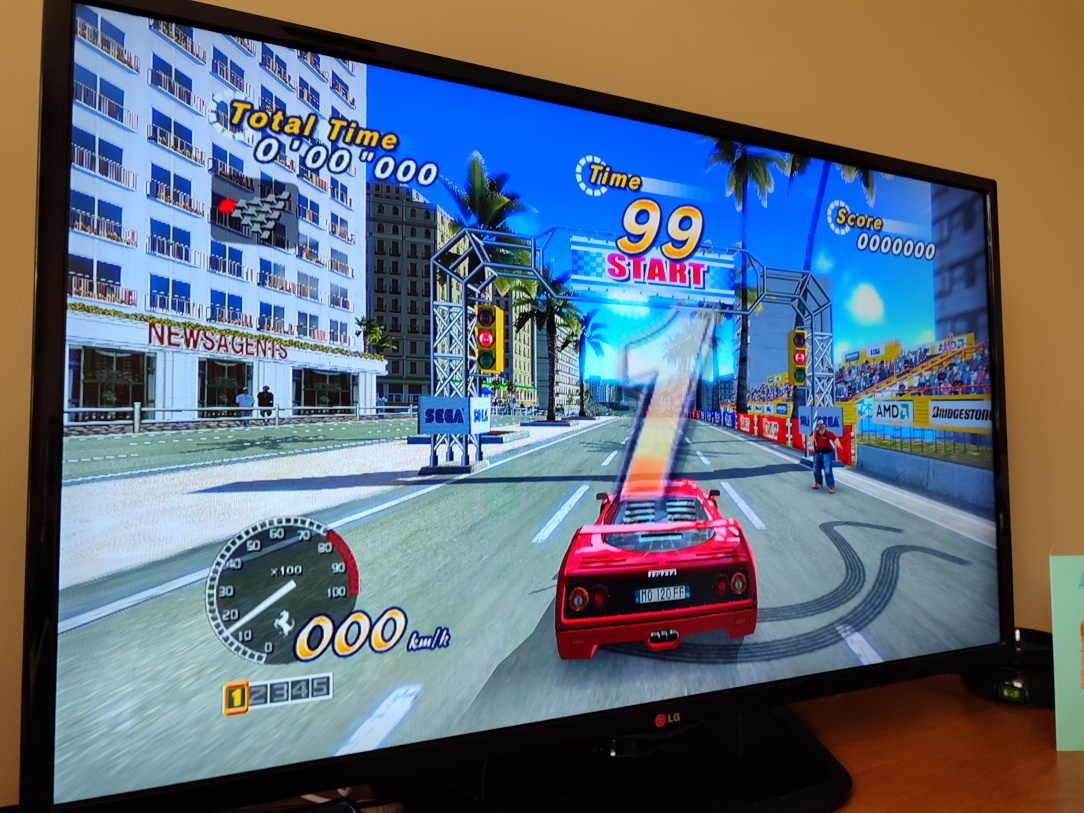
    ^^ Cha ching…..I set up a dedicated filter I can switch to for Xbox Originals and browse them all like this…

    1733079614721.jpg 1733079614788.jpg 1733079614779.jpg

    ^^ Working perfectly!

    1733079614671.jpg

    ^^ Another thing is with a Unity account, you can grab the title updates for 360 games directly from within Aurora (if they're available on Unity)…

    1733079614654.jpg 1733079614627.jpg 1733079614610.jpg

    ^^ Downloaded. You then have to manually enable/disable them for them to be applied.


  • Registered Users, Registered Users 2 Posts: 7,985 ✭✭✭Inviere


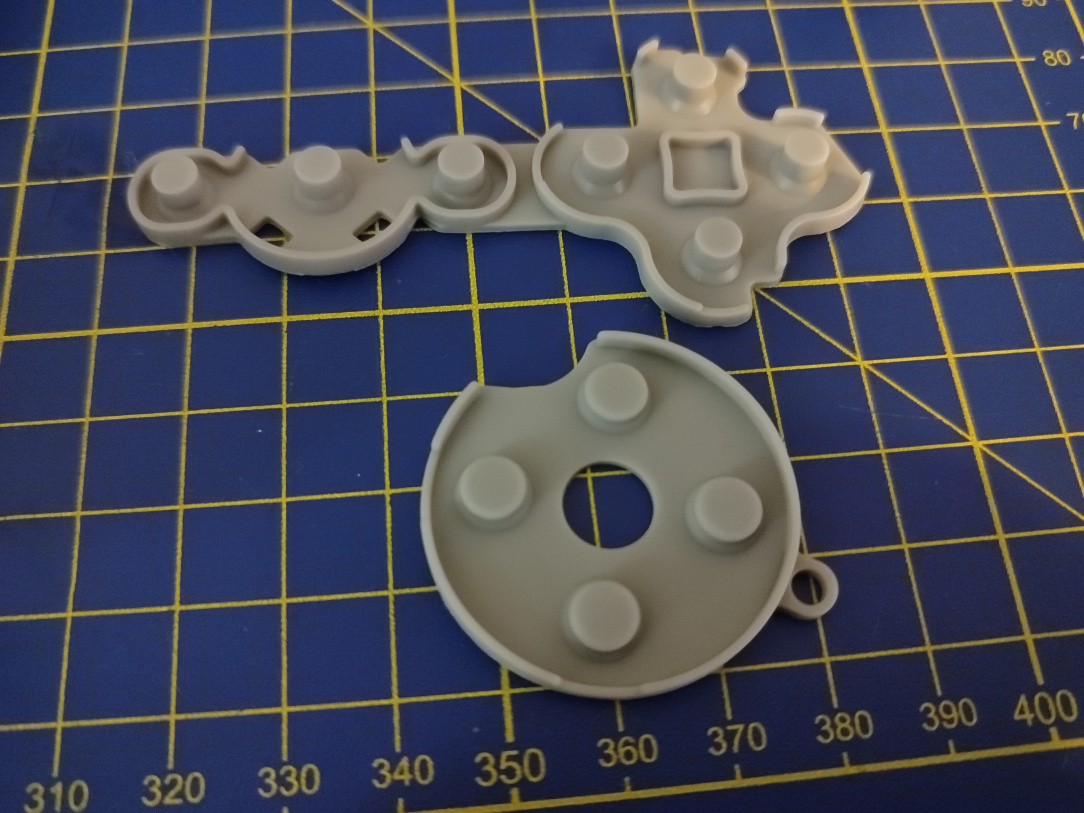
    Last thing, I just want to give the controller a little refresh. The Dpad isn't great on it, so a new membrane is in order….

    1733335265497.jpg

    ^^ New membrane set, for dpad & buttons…

    1733335265489.jpg 1733335265471.jpg 1733335265467.jpg

    ^^ Very simple swap over.

    storage emulated 0 Android data com.miui.gallery cache SecurityShare 1731336845909.jpg

    ^^ Tested perfectly!

    1733335265459.jpg

    ^^ And we're all done, cleaned up, tested, and ready for action…time to wrap this up and get ready to gift it away!


  • Registered Users, Registered Users 2 Posts: 769 ✭✭✭80s Synth Pop


    Great write up man. You should start a blog or you tube channel.

    The problem I have is forgetting what mod was done. Only today I found two xbox 360s in the house. One of them has a parallel port cable hanging out the back (I think it's something to do with a jtag mod?) and the other has an xkey thing on the side. Vaguly remember getting the dvd key from some usb addon, Xecuters X360USB was it? Must be 10-15 years since I looked at these and couldn't tell you now how the mods were done. I've no beautifully presented write up to refresh my memory like you!


  • Registered Users, Registered Users 2 Posts: 4,389 ✭✭✭KeRbDoG


    Ah, the LPT cable fun. Remember doing that mod maybe 15 years ago? Parallel port and a bunch of resistors and a diode :)

    https://consolemods.org/wiki/Xbox_360:LPT_Cable


  • Registered Users, Registered Users 2 Posts: 7,985 ✭✭✭Inviere


    It took several hours to take a nand dump, so a whole evening was needed to dump the nand x3 times for comparisons/verification. Mad to see it happening in seconds these days.


  • Advertisement
  • Registered Users, Registered Users 2 Posts: 7,985 ✭✭✭Inviere


    @80s synth pop Cheers for the kind words. My threads aren't really meant to be guides or tutorials though, more so just a skim over a given mod/job/repair. I feel blogs and videos tend to be more tutorial based. Then if course there's the time needed to set it up etc...


  • Moderators, Category Moderators, Computer Games Moderators Posts: 53,224 CMod ✭✭✭✭Retr0gamer


    I need to get this done to my 360 sometime. Mad that there's still no soft mod for it.


  • Registered Users, Registered Users 2 Posts: 9,274 ✭✭✭MrVestek


    RGH glitched my own 360 about two years ago. I ended up going through two 360s and binning them thinking I had messed up the mod before I realised that I was using the wrong value diodes. Oops.

    Anyway all sorted now. Great write up!

    For funzies install fakeanim and put a custom boot video on there. It'll take anything encoded in wmv9.

    I made mine the PS1 boot intro just to confuse people.


  • Registered Users, Registered Users 2 Posts: 18,158 ✭✭✭✭Thargor


    Best thing I ever did was modding my 360, got so many years of use out of it. I originally used to pop out the disk drive and send it to a friend for modding, then Id just have to slot it back in and it could play burned dual-layer DVDs. Later got the hdd mod done and it lived under my tv for another 10 years after that disk free.

    That was the golden age of gaming for me, always a pile to play and always new stuff on the way. I know we have more choice these days but its just not the same.


Advertisement