Advertisement
If you have a new account but are having problems posting or verifying your account, please email us on hello@boards.ie for help. Thanks :)
Hello all! Please ensure that you are posting a new thread or question in the appropriate forum. The Feedback forum is overwhelmed with questions that are having to be moved elsewhere. If you need help to verify your account contact hello@boards.ie

Nintendo Wii U - There's an Aroma of Wiiception off of this one...

Options
  • 17-07-2023 3:47pm
    #1
    Registered Users Posts: 7,466 ✭✭✭


    As a follow on from this thread a while back, where I took a gamble on a very bruised & battered eBay Wii U, I thought it was time to finish it off. In that previous thread, I was able to install the Tiramisu CFW on the Wii U, give it a good clean up, and install my legitimately owned Wii U games on an SSD and enjoy them from there. This time, I wanted to try out the newest CFW, called Aroma, and finish off by modding the Virtual Wii section of this Wii U, install some games, and have everything handy via channels on the GamePad.

    So, onwards...

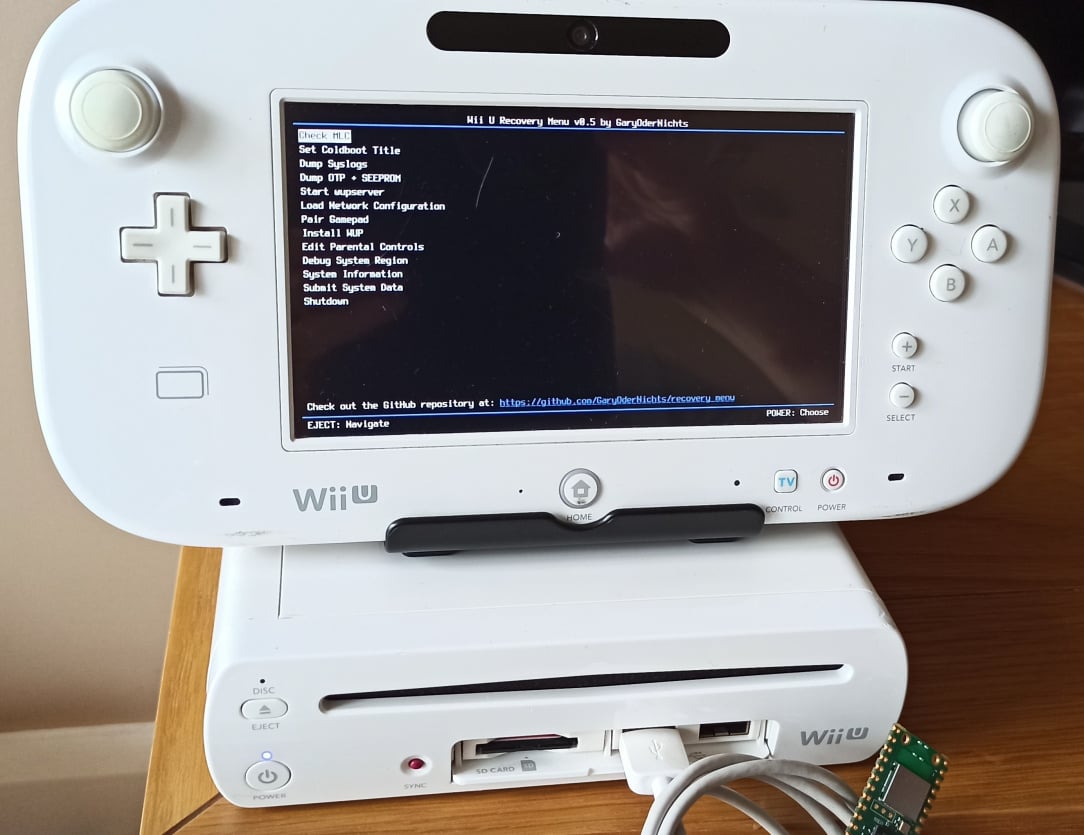
    ^^ First thing's first here. After recent experiences, I thought I'd get a full NAND dump via the USB Recovery Menu. Thankfully, there are zero issues with the NAND in this console (I was told the Hynix degradation issue doesn't affect this particular model, but nice to see anyway.)

    One nice thing, you can dual boot both CFW environments and choose which one you want to use. The Aroma files are located here - https://github.com/wiiu-env/Aroma - and it's simply a matter of dropping them onto the Wii U's sd-card in the appropriate location. A lot of this is covered in the original thread for this console, so I won't cover old ground again.

    By booting the console and holding the X button down, we're brought into the Environment Loader. This is where we choose which CFW to use. We can choose it once, or set it to be the default when booting.

    ^^ I'm going to leave Tiramisu as the default for now, but as Aroma continues to mature, I may change that. You can see it highlighted here in yellow, which means Tiramisu will auto-boot from here on in. If I want to change that, I boot holding X, and alter the setting as needed.

    ^^ The Wii U menu running with Tiramisu. The Mii Maker app double functions as the Homebrew Launcher, and its own function too.

    ^^ I'm going to give Aroma a try now...

    ^^ It boots perfectly, but it shows some of the vWii content that's on the SD card on the main screen which I don't like. Hopefully that'll change in future.

    ^^ The FTPiiU Plugin working away perfectly under Aroma. This is handy for file management - https://github.com/wiiu-env/ftpiiu_plugin

    ^^ NUSspli working away under Aroma. I didn't actually use this app, and just wanted to see if it worked. Seemingly you can connect and download everything, Games, Updates, DLC, etc, all from Nintendo Servers. Bananas to think they haven't patched this. I suppose for the work involved, versus how many Wii U's are out there using it, it's likely not worth the time!


Comments

  • Registered Users Posts: 7,466 ✭✭✭Inviere


    Exploiting the Virtual Wii

    With the Wii U having Wii hardware functionality within, the next logical step is to fully open up the system now, but exploiting the vWii.

    There's tutorials out there for doing this, so I'll just skim all but the finer details - https://wiiu.hacks.guide/#/vwii-modding

    ^^ Back with Tiramisu now, we open the Mii Maker app which runs the Homebrew Launcher

    ^^ Homebrew Launcher open, and ready to go.

    ^^ Run this to automate the installation of the Homebrew Channel on the vWii

    ^^ All done.

    ^^ From here, the next step is to pair a Wiimote to the Wii U

    ^^ All done.

    ^^ Now, we simply run the vWii from the Wii U Home ^^screen...

    ^^ Now there's a familiar sight, the jingle too is quite nostalgic!

    Next, we need to run the exploit.

    ^^ Run the d2x cIOS Installer, and prepare to change a few settings...

    ^^ The settings changes needed (as of this date!) are:

    • cIOS - d2x-v11-beta1-vWii
    • cIOS base - 56, 57, 58
    • cIO slot - 249, 250, 251

    ^^ Do these one at a time, ie, cIOS base 56 - slot 249 and install. Then base 57 over slot 250, etc etc.

    ^^ Then finally, run the Patched IOS80 Installer, and be sure you've stable power because there's a brick risk if power goes off during this bit.

    That's the vWii exploited, and ready to go!


  • Registered Users Posts: 7,466 ✭✭✭Inviere


    Game Installation

    Time to transfer my legitimately owned game dumps over to the Wii U now. One problem with Wii dumps, is they're often in size, and because the SD Card of the Wii U is format in FAT32, it can't handle files of those sizes. Couple that with the files having to be in WBFS format, there's a few little hoops to jump through here...

    ^^ Here's a handful of games, and they're in the new/modern rvz format. This format won't work for the Wii U currently, so we need to first convert them to iso, and then to wbfs.

    ^^ Grab the current version of Dolphin Emulator, and configure it to look where your games are.

    ^^ Select them all, right click, and convert them to ISO.

    ^^ Create a directory for where Dolphin should spit out the new ISO files...

    ^^ And let it do its thing.

    You should now have a folder full of ISO images. Many of these will be too large in file-size to fit on a FAT32 device, so we'll now use Wii Backup Manager to take these iso's and split them into multiple wbfs files that will work perfectly. The other major benefit to Wii Backup Manager is that it'll put the games into correctly named folders, complete with Game ID's in the title. This has to be done otherwise the games won't be detected.

    ^^ In Wii Backup Manager, click to Add either individual files, or a folder containing multiple files.

    ^^ Point it to where your new ISO files are...

    ^^ Your games should be detected and displayed in the list then.

    ^^ Then under Tools, select WBFS File (ensure all games are selected with a tick mark first)

    ^^ Create a folder for where your new WBFS files will be output, and then chosoe that folder as the destination for Wii Backup Manager, and click OK.

    ^^ It'll then convert the ISO's to WBFS files, in their own correctly named folders. This saved a TON of work.

    ^^ Same for Gamecube games, however you can leave these as ISO files as they'll always fit on a FAT32 file system. For these games though, you need to make sure that the disc image in every folder is called "game.iso" - I used a handy shell script to automate this, and rename every game as game.iso for me.

    ^^ Multi-disc GameCube games have the main disc as game.iso, and the second disc as disc2.iso - the naming cannot change.

    Post edited by Inviere on


  • Registered Users Posts: 7,466 ✭✭✭Inviere


    Artwork

    It's always nice to scrape the cover art for these games.

    ^^ All games now detected in USB Loader GX within the vWii.

    ^^ Very simple to scrape all the artwork...

    ^^ You can display either GameCube, Wii, or Both!

    ^^ Games are working, nice.

    Post edited by Inviere on


  • Registered Users Posts: 7,466 ✭✭✭Inviere


    The Finishing Touches

    So, rather than having to enter the Virtual Wii manually, then into the vWii's Homebrew Channel etc, you can instead use Forwarders to run these directly from the Wii U's Home Screen.

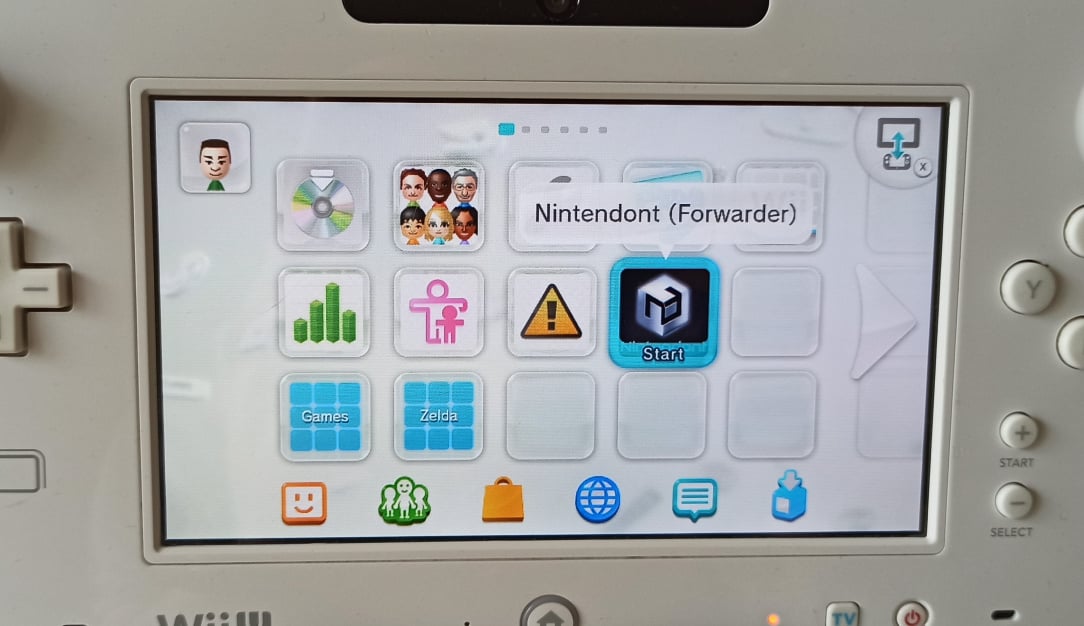
    ^^ Using the Homebrew Launcher from the Wii U's homescreen, we use WUP Installer GX2 to install these Forwarders. This one is for Nintendont, which is a direct GameCube launcher.

    ^^ Done. This should now give us Nintendont directly on the Wii U screen.

    ^^ Perfect, it's there. But does it work?

    ^^ Absolutely beautiful. GameCube working perfectly directly from the Wii U menu, and all with Wii U GamePad support!

    ^^ I wan't to make other Forwarders though, for USB Loader this time, so I can access Wii games directly from the Wii U home-screen. We use ModMii to do this.

    ^^ You fill in the required info and files...

    ^^ ...and it spits out a folder for us. We then use WUP Installer GX2 again to install this folder, and hopefully, that's the new Forwarder....

    ^^ Nice, it worked.

    ^^ Works perfect too. Straight to USB Loader GX directly from Wii U mode.

    ^^ I do the same for N64, SNES, and NES...

    ^^ So there's the Homescreen - Wii U games, Wii games, GameCube games, N64 games, SNES games, and NES games all available with a single press. I could go on and on and add a Virtual Console section too, I might do that at a later time but for now it's time to wrap this up.

    ^^ Done and dusted...almost....

    ^^ I removed some unsightly scuffs from the Wii U GamePad so it's nice and fresh again!

    Post edited by Inviere on


  • Registered Users Posts: 4,146 ✭✭✭CathalDublin


    Nice, I picked up one of these for nothing over Christmas and was actually only setting it up over the weekend.

    I haven’t heard of aroma, so I’ll check that out


  • Advertisement
  • Moderators, Category Moderators, Computer Games Moderators Posts: 50,811 CMod ✭✭✭✭Retr0gamer


    Is there a way to remove the upscaling the wiiu does on Wii content?


  • Registered Users Posts: 7,466 ✭✭✭Inviere


    In terms of the blurring of Wii content, yes that can be disabled through USB Loader GX for Wii content. You can alter the rendering/framebuffer options too in USB Loader GX to output native Wii resolution onto the GamePad (not sure how this works with the TV) so that the display isn't stretched to fit. This reduced blur a little further. This might not suit every game, as seemingly some were intended to be slightly stretched. You've the option to play in 480p/no upscale/4:3 too, which helps with stretching/blur a fair bit too.

    There's compromises to all of these options, but ultimately, Nintendo kinda made a balls of the Wii U in many more ways than one. The Wii would appear to have a higher standard of output.


Advertisement