Advertisement
If you have a new account but are having problems posting or verifying your account, please email us on hello@boards.ie for help. Thanks :)
Hello all! Please ensure that you are posting a new thread or question in the appropriate forum. The Feedback forum is overwhelmed with questions that are having to be moved elsewhere. If you need help to verify your account contact hello@boards.ie
Hi there,
There is an issue with role permissions that is being worked on at the moment.
If you are having trouble with access or permissions on regional forums please post here to get access: https://www.boards.ie/discussion/2058365403/you-do-not-have-permission-for-that#latest

Slidavan diy build - anyone built one?

  • 29-09-2019 10:37am
    #1
    Registered Users, Registered Users 2 Posts: 2,937 ✭✭✭


    Hey folks, I'm thinking of taking on this build as a winter project and was just wondering has anyone on here built one.

    https://youtu.be/41c36Bbrqsg

    https://www.woodenwidget.com/slidagallery.htm

    You can't buy these, you can only buy the plans and self build, but it seems straightforward enough.
    The simple design and foldability of it suits my requirements, I don't need much luxury. Anyone?


«1

Comments

  • Registered Users, Registered Users 2 Posts: 851 ✭✭✭autumnalcore


    Looks like a nice project but couple of things I would say. I've seen several esterel folding caravans go during the winter for similar money that you could build that for. The end result is very 'agricultural'. A teardrop trailer is a lot more attractive imo aare you short for space vertically?


  • Registered Users, Registered Users 2 Posts: 14,907 ✭✭✭✭CJhaughey


    Looks interesting but the big factor with caravans is weather resistance and for my money properly sealed Fibreglass is still the best at resisting the Irish climate.
    Freedom Microlites are pretty reasonable to buy, the build costs for a caravan like that won't be that cheap, windows are expensive and the trailer likewise.


  • Registered Users, Registered Users 2 Posts: 2,937 ✭✭✭SmartinMartin


    Thanks for the replies folks. I've been considering 3 different angles: a teardrop, a box trailer conversion, and this. I'm tall and I like to sit with a cuppa and a newspaper, so the teardrop probably wouldn't suit. I haven't fully ruled it out yet, though sourcing the aluminium skin seems to be a problem. I still like the box trailer idea but they're not cheap. It would certainly be the easiest way. As regards the slidavan, I quite like the agricultural edge to it, it gives the most room and I also like the idea of having built from scratch, and also it's uniqueness. I have a couple of possible donor trailers and storage is not a problem, though I'd prefer the height of the teardrop and slidavan. As for costs, I don't mind doing this over a period of time so I'd hope to pick up a lot of used stuff on the likes of adverts cheaply as it arises.


  • Registered Users, Registered Users 2 Posts: 2,937 ✭✭✭SmartinMartin


    I've just had a look there, I like those esterels. Hmmmmm.


  • Registered Users, Registered Users 2 Posts: 2,937 ✭✭✭SmartinMartin


    On second thoughts no, anything available is from the 70s and 80s, or else really expensive. I'll stick with a project, which one though:confused:


  • Advertisement
  • Registered Users, Registered Users 2 Posts: 26 MattLV


    Hi, I've actually just started building a slidavan and was wondering if anyone else had done one too.


  • Registered Users, Registered Users 2 Posts: 2,937 ✭✭✭SmartinMartin


    Haven't even started gathering the materials yet Matt, as usual life got in the way. Hopefully this summer. What part of the country are you in?


  • Registered Users, Registered Users 2 Posts: 12,822 ✭✭✭✭galwaytt


    We make GRP panels and GRP panelled vehicles, amongst other things - and we use a lot of very high quality, through & through Birch ply.

    I'd never put a timber external on a body. We usually laminate GRP onto the ply - it is the only thing that will last. Ply in this climate will swell & split, guaranteed, eventually. I've even made 'Shepherds Huts' and our own Glamping Pods using that method for a variety of customers :

    503486.jpg


    Not looking for work, but just showing what we do: https://quinnrv.com/video/

    Ode To The Motorist

    “And my existence, while grotesque and incomprehensible to you, generates funds to the exchequer. You don't want to acknowledge that as truth because, deep down in places you don't talk about at the Green Party, you want me on that road, you need me on that road. We use words like freedom, enjoyment, sport and community. We use these words as the backbone of a life spent instilling those values in our families and loved ones. You use them as a punch line. I have neither the time nor the inclination to explain myself to a man who rises and sleeps under the tax revenue and the very freedom to spend it that I provide, and then questions the manner in which I provide it. I would rather you just said "thank you" and went on your way. Otherwise I suggest you pick up a bus pass and get the ********* ********* off the road” 


  • Registered Users, Registered Users 2 Posts: 851 ✭✭✭autumnalcore


    I've thought about doing one of these for the kids numerous times but it definitely comes after finishing the new house, finishing the boat, remodelling the camper etc etc. 😜

    If you can get clean ply I would taper the front end and stitch and glue a nice aerodynamic roof and laminate it in clear or tinted polyurethane like a dinghy. Stitch and glue allows a lot more freedom of form you can get a lot of stiffness and strength with very little weight and bracing and it wouldn't end up looking like a portacabin/dog box. If you get tired of the clear coat or the plywood darkens too much in the light you can throw a self levelling topside boat paint like Brightside on to get the brand new look back every few years.


  • Registered Users, Registered Users 2 Posts: 26 MattLV


    Hi Martin, I'm actually in UK just north of London. Probably a bit strange for me to come on an Irish chat board but this was literally the only place Google could find where there was a mention of anyone actually building one of these. Maybe there's a reason for that but oh well....in for a penny hahaha.
    I've not been at it long, just finished making up the second panel and there's a few more to go but so far the plans have been easy enough to follow for a novice like me.
    My deadline is June 23rd. Wish me luck hahaha


  • Advertisement
  • Registered Users, Registered Users 2 Posts: 2,937 ✭✭✭SmartinMartin


    Good luck. I'd love to see a few photos of the progress if you get a chance.


  • Moderators, Home & Garden Moderators Posts: 5,126 Mod ✭✭✭✭kadman


    I have to agree with galwaytt on this one.
    Fibreglass is the only material to use in the irish climate for a self build
    caravan type vehicle. Any other material with any other covering just wont
    do the business.


  • Registered Users, Registered Users 2 Posts: 851 ✭✭✭autumnalcore


    An alternative is cladding with aluminium composite panels as used for road signage etc. I've seen a few teardrops done like that. Bends beautifully in one plane only down to radius of 15 times the thickness of the sheet.

    https://www.accessplastics.com/composite-aluminium-sheets/

    By the time you've bought seam joint profiles sealants etc grp is probably similar price


  • Registered Users, Registered Users 2 Posts: 1 AeroNautiCal


    MattLV wrote: »
    Hi Martin, I'm actually in UK just north of London. Probably a bit strange for me to come on an Irish chat board but this was literally the only place Google could find where there was a mention of anyone actually building one of these. Maybe there's a reason for that but oh well....in for a penny hahaha.
    I've not been at it long, just finished making up the second panel and there's a few more to go but so far the plans have been easy enough to follow for a novice like me.
    My deadline is June 23rd. Wish me luck hahaha


    I'm in London and have been wanting to build myself a Slidavan but encountered some setbacks in the form of my entire set of professional tools being stolen and not being able to find somewhere affordable to build it in near my home!

    There's nothing to compare a Slidavan to as it's unique and incredibly lightweight for a caravan and I will get to build my own, hopefully by next year.

    The Teardrops n' Tiny Travel Trailers forum likes them and it might also be an idea to post your build on there as it'll get considerable interest.

    tntt.com

    Thank you for posting about yours, I have always wanted to see one being built by an owner.


  • Registered Users, Registered Users 2 Posts: 26 MattLV


    I'll try and post a few pics once I'm allowed


  • Registered Users, Registered Users 2 Posts: 26 MattLV


    seems I have to have made at least 5 posts. This is #4


  • Registered Users, Registered Users 2 Posts: 26 MattLV


    and this is #5


  • Registered Users, Registered Users 2 Posts: 26 MattLV


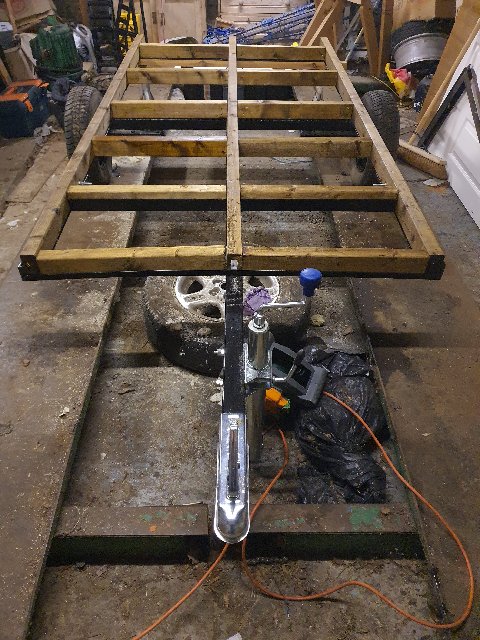
    So this is my base trailer. It's nothing like the bare aluminum trailer that's in the plans, but it's the one I had so it's the one I'm using.

    20200119-210528.jpg

    The trailer was somewhat lacking in cross members so I added some hefty reinforcement. I'm not too worried about making this thing super light or anything.


  • Registered Users, Registered Users 2 Posts: 2,937 ✭✭✭SmartinMartin


    Not seeing anything. Go to a hosting site like photo bucket and upload them there. Click on the 'hotlink for forums' tag and then just paste them here.


  • Registered Users, Registered Users 2 Posts: 26 MattLV


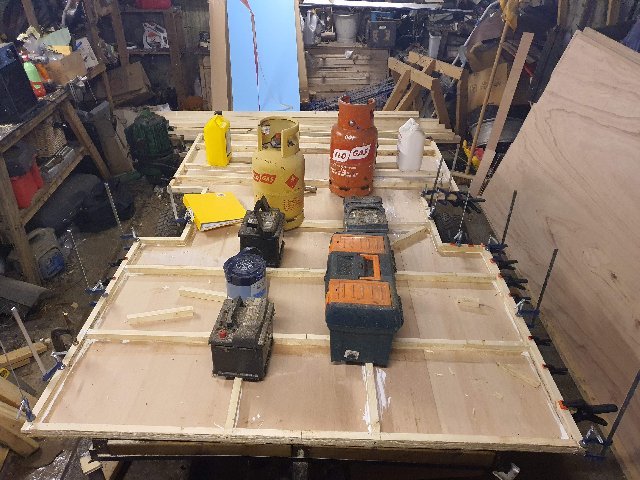
    Gluing inner battens on the floor...

    20200212-193221.jpg


  • Advertisement
  • Registered Users, Registered Users 2 Posts: 26 MattLV


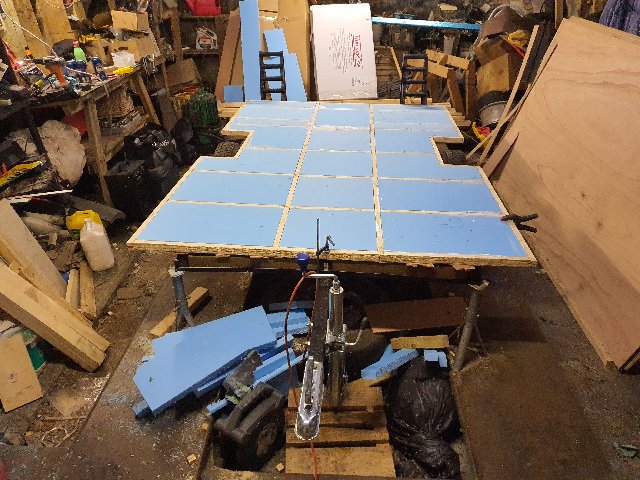
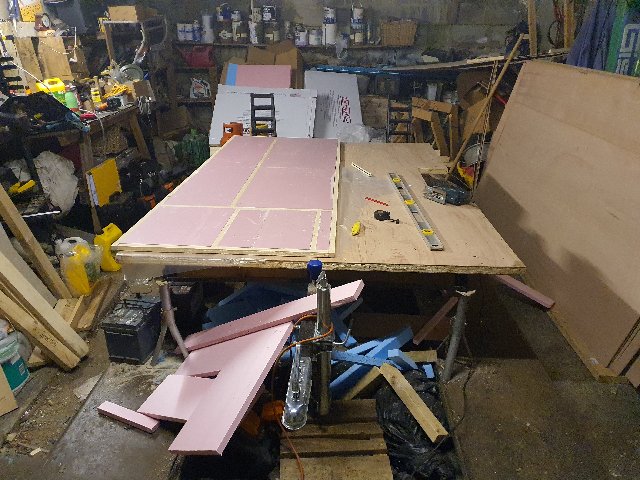
    Battens and insulation foam for floor panel

    20200215-172344.jpg


  • Registered Users, Registered Users 2 Posts: 26 MattLV


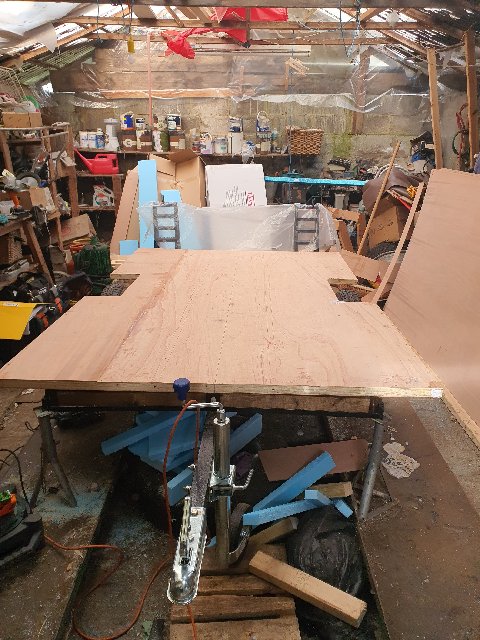
    Floor complete. Does anyone have a messier workshop than me?

    20200217-130202.jpg


  • Registered Users, Registered Users 2 Posts: 26 MattLV


    Lower side panel

    20200219-203641.jpg


  • Registered Users, Registered Users 2 Posts: 26 MattLV


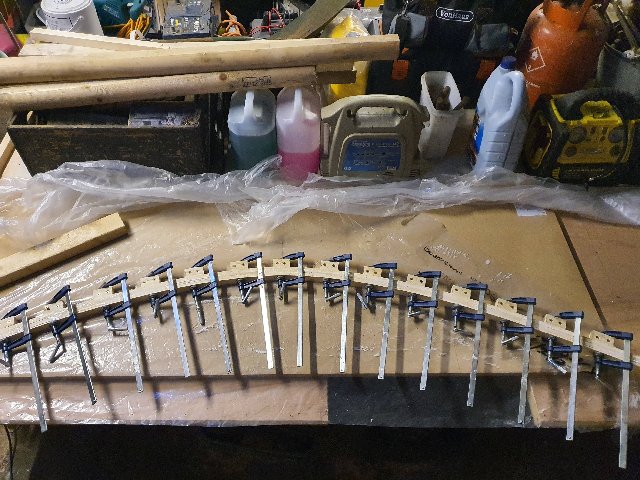
    Made up the first of 5 room beams

    20200223-200455.jpg


  • Registered Users, Registered Users 2 Posts: 26 MattLV


    Applying glue for one of the lower end panels

    20200301-141020.jpg

    that's all for now folks!


  • Registered Users, Registered Users 2 Posts: 26 MattLV


    Not seeing anything. Go to a hosting site like photo bucket and upload them there. Click on the 'hotlink for forums' tag and then just paste them here.


    Hopefully those pics are visible now Martin?


  • Registered Users, Registered Users 2 Posts: 2,937 ✭✭✭SmartinMartin


    What thickness and type of ply are you using? (sorry, yes they're there now)


  • Registered Users, Registered Users 2 Posts: 26 MattLV


    What thickness and type of ply are you using? (sorry, yes they're there now)


    3.5mm thick. Plans state 3mm but 3.5 was the thinnest I could get.
    Sheet sizes are imperial so 1220x2440mm


  • Moderators, Home & Garden Moderators Posts: 5,126 Mod ✭✭✭✭kadman


    MattLV wrote: »
    Made up the first of 5 room beams

    20200223-200455.jpg


    AS you have no former to clamp to, how do you know each beam will be identical??


  • Advertisement
  • Registered Users, Registered Users 2 Posts: 26 MattLV


    kadman wrote: »
    AS you have no former to clamp to, how do you know each beam will be identical??


    That's actually a jig that the strip wood is clamped to while being glued together, so the beams should come out the same give or take.


    The second one is getting un-clamped today so I'll do a comparison and let you know.


    In other news....I've never owned so many clamps! :D


  • Moderators, Home & Garden Moderators Posts: 5,126 Mod ✭✭✭✭kadman


    MattLV wrote: »
    That's actually a jig that the strip wood is clamped to while being glued together, so the beams should come out the same give or take.


    The second one is getting un-clamped today so I'll do a comparison and let you know.


    In other news....I've never owned so many clamps! :D

    Sorry , didn't notice the jig. Whats it made from??


  • Moderators, Home & Garden Moderators Posts: 5,126 Mod ✭✭✭✭kadman


    Jig is the blocks screwed to a panel?:)


  • Registered Users, Registered Users 2 Posts: 26 MattLV


    kadman wrote: »
    Jig is the blocks screwed to a panel?:)


    yup. It's a piece of MDF cut to the width of the top section, with blocks screwed to it.


  • Moderators, Home & Garden Moderators Posts: 5,126 Mod ✭✭✭✭kadman


    MattLV wrote: »
    yup. It's a piece of MDF cut to the width of the top section, with blocks screwed to it.

    Nice one, what adhesive are you using??


  • Moderators, Home & Garden Moderators Posts: 5,126 Mod ✭✭✭✭kadman


    I see you are clamping one at a time. You could have clamped one in the former,
    then put a brace holding the two ends together, and then released it from the clamp.

    And then clamp the next one, rinse repeat


  • Advertisement
  • Registered Users, Registered Users 2 Posts: 26 MattLV


    I'm using Everbuild 502 wood adhesive, but I think any waterproof PVA would do the trick.

    I see what you mean about clamping the ends, but as I have to wait at least 24hrs for the glue to dry on each of the panels I've got time in hand to do the beams the slower way and guarantee good adhesion.


  • Moderators, Home & Garden Moderators Posts: 5,126 Mod ✭✭✭✭kadman


    MattLV wrote: »
    I'm using Everbuild 502 wood adhesive, but I think any waterproof PVA would do the trick.

    I see what you mean about clamping the ends, but as I have to wait at least 24hrs for the glue to dry on each of the panels I've got time in hand to do the beams the slower way and guarantee good adhesion.

    It wont make any difference to the setting time, its just that the beam is removed, and ends held together at the required distance with a cross tie,

    Leaving your former free for the next beam,

    Rather like an archery bow, the bow being the beam, and the string being the tie.
    In fact you could use a piece of string:)


  • Registered Users, Registered Users 2 Posts: 851 ✭✭✭autumnalcore


    If you don't fancy waiting 24 hours you could consider a PU adhesive, sticks like **** to a blanket takes up gaps and sets in a fraction of the time. Not for visible joints though.

    Lots of builders providers have the everbuild PU adhesive in the handy mastic tube format.

    https://www.amazon.co.uk/Everbuild-5MINPU3-LumberIrwin-Polyure-Adhesive/dp/B00132EEME


  • Registered Users, Registered Users 2 Posts: 26 MattLV


    20200314-150311.jpg

    The last of the panels under construction.

    Next is painting and mounting the floor panel to the trailer....then assembly begins.


  • Registered Users, Registered Users 2 Posts: 26 MattLV


    20200319-180414.jpg

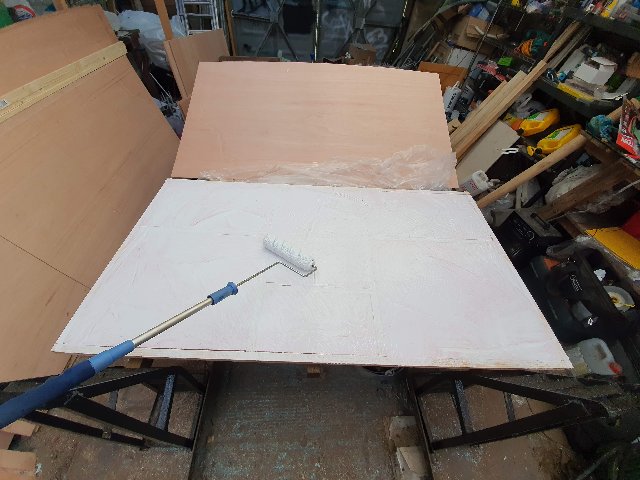
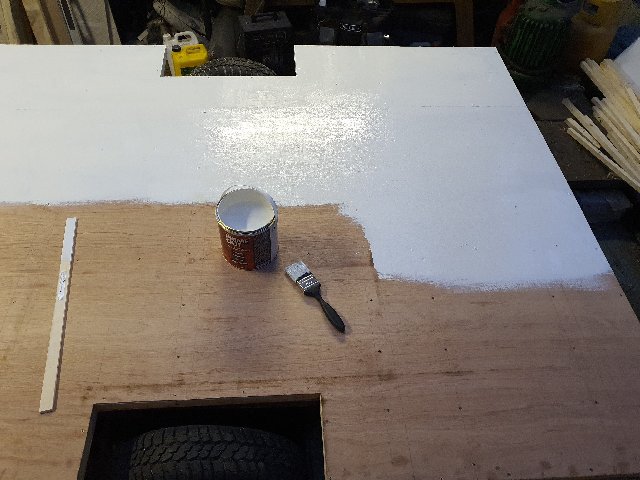
    Painting of the underside begins...


  • Advertisement
  • Registered Users, Registered Users 2 Posts: 2,937 ✭✭✭SmartinMartin


    Any particular type of paint Matt (pardon the pun)?


  • Registered Users, Registered Users 2 Posts: 26 MattLV


    :D aha ...good one.
    I took advice from Woodenwidget who recommended several coats of a good exterior oil based paint.
    After some investigation I decided to use Fossa PrimeOut Oil-based Primer Sealer first, and will follow with Sikkens Rubbol XD Gloss.


  • Registered Users, Registered Users 2 Posts: 26 MattLV


    Blimey, that paint takes a fair old while to dry at these temperatures. But now it is, it's time to think about attaching the floor panel to the trailer frame.

    First applied some neoprene tape to the top of the frame to even out irregularities and provide a bit of isolation from vibrations.

    20200328-160522.jpg

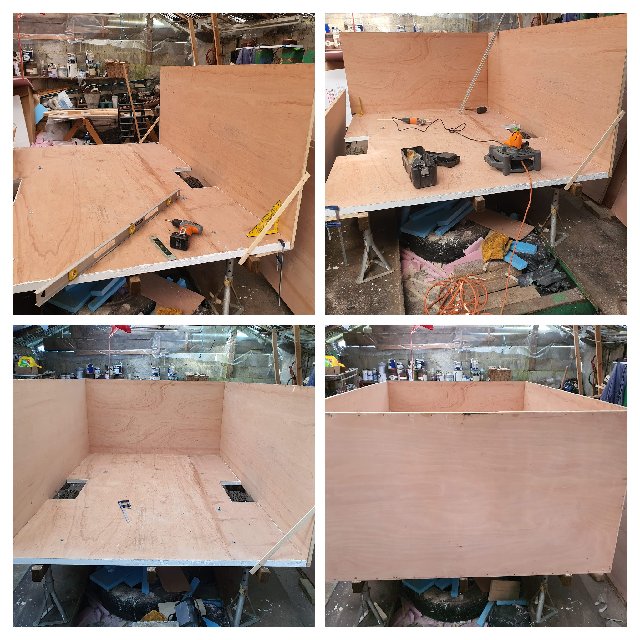
    Then got the panel on, lined it up, and drilled / bolted / screwed it down to end up with a nice level surface

    20200329-162229.jpg

    Next step will be to start attaching the sides.


  • Registered Users, Registered Users 2 Posts: 26 MattLV


    First test fit of the lower section panels

    20200330-183424-COLLAGE.jpg


  • Registered Users, Registered Users 2 Posts: 26 MattLV


    Looks like it's time to get some new wheels/tyres ordered

    20200401-191300.jpg

    I've just got to work out if theses are a 4" PCD or a 100mm PCD :confused:

    Does anyone have an opinion on the virtues of radial or crossply tyres for a trailer like this?


  • Registered Users, Registered Users 2 Posts: 26 MattLV


    MattLV wrote: »
    I've just got to work out if theses are a 4" PCD or a 100mm PCD :confused:


    I figured out these are classic Mini wheels.


  • Registered Users, Registered Users 2 Posts: 2,937 ✭✭✭SmartinMartin


    A pair of mini lites would look great.


  • Registered Users, Registered Users 2 Posts: 26 MattLV


    A pair of mini lites would look great.


    You're not wrong Martin, but I went for standard steelies this time

    20200403-121834.jpg

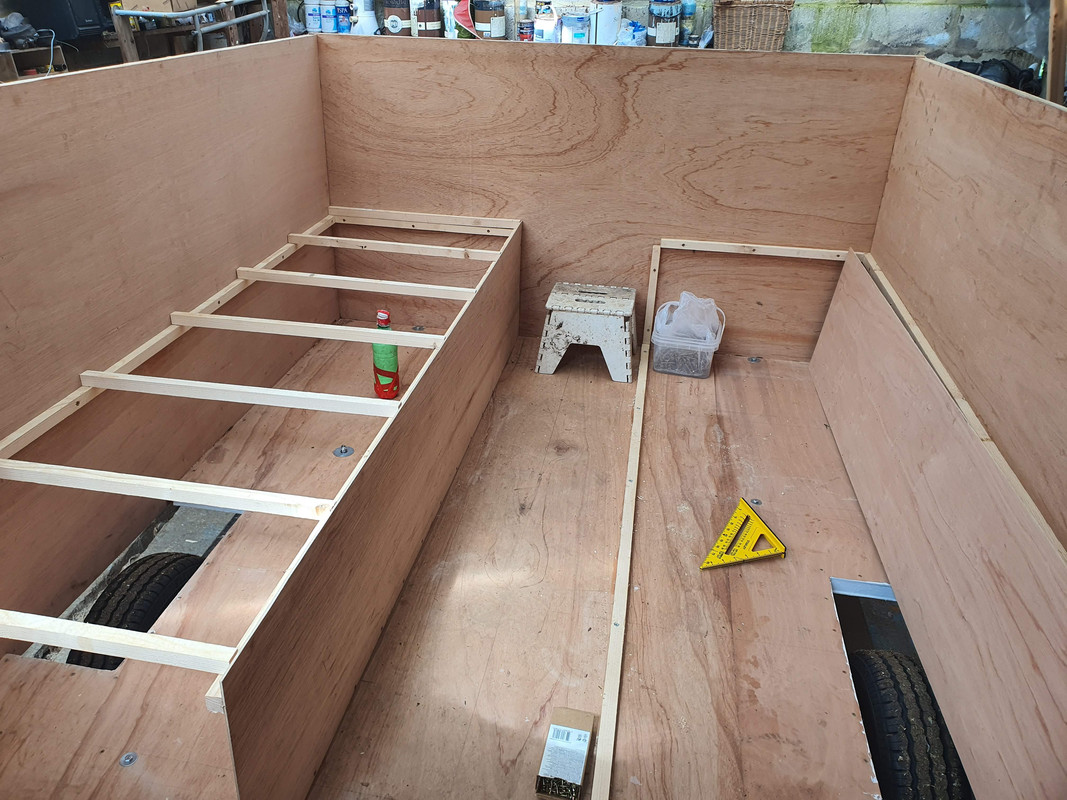
    ...and finally started the interior construction

    20200414-134555.jpg


  • Registered Users, Registered Users 2 Posts: 1,942 ✭✭✭wingnut


    MattLV wrote: »
    You're not wrong Martin, but I went for standard steelies this time

    20200403-121834.jpg

    ...and finally started the interior construction

    20200414-134555.jpg

    Did you keep going in this, love to see progress?


  • Registered Users, Registered Users 2 Posts: 1,942 ✭✭✭wingnut


    MattLV wrote: »
    You're not wrong Martin, but I went for standard steelies this time

    20200403-121834.jpg

    ...and finally started the interior construction

    20200414-134555.jpg

    Did you finish the build?


  • Advertisement
Advertisement