Advertisement
If you have a new account but are having problems posting or verifying your account, please email us on hello@boards.ie for help. Thanks :)
Hello all! Please ensure that you are posting a new thread or question in the appropriate forum. The Feedback forum is overwhelmed with questions that are having to be moved elsewhere. If you need help to verify your account contact hello@boards.ie
Hi there,
There is an issue with role permissions that is being worked on at the moment.
If you are having trouble with access or permissions on regional forums please post here to get access: https://www.boards.ie/discussion/2058365403/you-do-not-have-permission-for-that#latest

Restoring The Lady Mary

  • 07-07-2016 10:25am
    #1
    Registered Users, Registered Users 2 Posts: 206 ✭✭


    I bought my first boat this week. It's a Calypso 28, 4 berth, circa 1979 with a BMC 1.5 diesel engine. The engine and hull are sound (so I'm told!) but it simply hasn't been modernised at all since it hit the water. There is layer after layer of paint that is chipping away, the interior is very dated and the electrics need to be redone.

    I'm collecting her on Sunday, and can't wait to get started. She'll stay in the water as I plan on using her throughout the refurbishment, just doing a little bit at a time. Here's a few pics for now, and I'll post more when the work starts. I'll probably start with stripping the paint on the deck.

    Her old name is The African Queen, but I plan on renaming her The Lady Mary.

    Tips and advice are very welcome, as I've never done this before and am very much planning on learning as I go!

    IMG_8729.jpg

    NGM2_Nm_E4_Mz_Mx_Mm_Nl_Nzc3_Mj_Qy_Mz_M1_OGVl_Yz_U4_YTY0_Mj_Azr1_Zy.jpg

    IMG_8723.jpg

    IMG_8727.jpg

    IMG_8726.jpg


Comments

  • Registered Users, Registered Users 2 Posts: 1,258 ✭✭✭sogood


    You've got a lot of boat there and will no doubt find lots you want/need to do to it. It makes sense to prioritise and do the jobs that need to be done first, spending time and money where it's needed, as opposed to what you'd like to do.

    The new shiny bits are nice, but make sure the structure and integrity of the boat is sound. Otherwise, like someone once said, "You're polishing a turd".

    Make a list of all the jobs and then break in down into categories/types of work. Don't be daunted by it all, just take it one job and one step at a time. And ask as many questions as you like, you'll get plenty of help and encouragement with lots of useful advice.

    Best of luck with it.


  • Registered Users, Registered Users 2 Posts: 206 ✭✭VisionaryP


    I made a start on the interior this week. The interior was pretty much untouched since the 70s, so badly in need of some work. Here's what it looked like before the work started. These are iphone pano shots, so please forgive the distortion.

    oldpano.jpg

    oldpano2.jpg

    First job was to rip up the old lino which took a couple of minutes max. Good riddance. Next to go was the awful laminate floorboards that were used to panel the interior walls.

    laminate.jpg

    origwall.jpg

    I'm replacing them with tongue and groove wall panelling which I'll seal and paint. I know pine is not a very long term solution on a boat, but I'll be happy if I get 2 to 3 years out of them.

    panelling.jpg

    Next to come out was the kitchen.

    oldkitchen.jpg

    rip1.jpg

    rip2.jpg

    The floor and pipework behind was thankfully in great condition, so just a good scrub then we put the new units in. I just have to put the fridge unit and cutlery drawer in the space to the right.

    IMG_8839.jpg

    newkitchen.jpg

    It had a ridiculously large sink and draining board, so I put in a smaller sink and no draining board to give me a larger worktop space. The splashback slides back to the left to give access to the storage shelf behind (you can see the shelf in the first pic, before I fit the splashback). The worktop is a solid oak piece from IKEA (fantastic value) and gave me enough left over to make a new kitchen table.

    newtable.jpg

    All in all, not a bad couple of days work. Next small job is to cut and lay new carpet tiles. I picked up some nice 1m square rubber backed carpet tiles in Homebase for €13 each. 5 of them is enough for the front cabin. Next big job is the electrics which I hope to tackle in the next couple of weeks.


  • Moderators, Motoring & Transport Moderators, Sports Moderators Posts: 6,344 Mod ✭✭✭✭fergal.b


    Looking great fair play to you.


    .


  • Registered Users, Registered Users 2 Posts: 6,908 ✭✭✭Alkers


    Great work


  • Registered Users, Registered Users 2 Posts: 1,258 ✭✭✭sogood


    Well done, an encouraging start! Nice to pick up the odd bargain too! With boats, the more bargain buys, the better!

    Keep up the good work and keep the pictures coming.


  • Advertisement
  • Registered Users, Registered Users 2 Posts: 680 ✭✭✭copper12


    jasus it,s like home to home
    great bit of work looking well


  • Registered Users, Registered Users 2 Posts: 206 ✭✭VisionaryP


    Quick update with no pics, I'll add pics over the next few days.

    Kitchen is finished, although the 3 way fridge that came with the boat is completely knackered, so it's now on the scrapheap. I'll get by with a 12v cooler for now and keep an eye on adverts and donedeal for another.

    Carpet laid in the front cabin, wood panelling complete (well almost) and painting has started.

    Another part we've since discovered to be knackered is the alternator. It wasn't the right one for the boat, was spaced with washers all over the place, and badly aligned. It chewed up the belt and barely spun, so it had to go. I got another great bargain online, a brand new 70amp alternator, including delivery (thank you AnPost AddressPal) for £65. The new one was fitted today by a legend of a friend (I wouldn't have had a clue how to do it). It works brilliantly, but the belt on it is a tad too tight and giving off a smell of burning rubber, so we'll put a slightly longer belt on in the morning. It's a pain in the arse, because it involves taking off the water pump belt first, and removal of a crazy number of bolts to get to it, but it has to be done.

    Tomorrow after fitting the correct belt and a quick spin to make sure all is well, I'll finish the painting in the front cabin.

    Left to do:

    Add a fuel level sender and gauge (there is none)
    Fix/replace the engine temperature sender and gauge
    New fusebox
    New window wiper
    Rewiring, including new switches and sockets
    Replace internal lights with LED
    Fit 30w solar panel for trickle charge
    Trace a small roof leak in the back cabin and repair
    Replace gas pipes to cooker
    Paint, carpet and reupholster for back cabin
    Repair sunroof (it's cracked and taking in water)
    Replace rails for sunroof and back door
    Fit new stereo and speakers
    Fit a soundproof door between cabins to muffle engine sound
    Replace the dash (going to try and copy Fergal's amazing epoxy resin dash)
    Replace steering wheel (current one looks like a Fisher Price toy wheel)
    Sand, repair cracks & paint exterior (taking it out of the water to a shed in September for this)
    Maybe replace cleats, haven't decided yet
    Decorate bathroom (which has become the ad-hoc storage room while work is ongoing. Answer nature's call before you come aboard please!)
    Replace crazy dangerous female shore power socket with the correct male one
    Replace existing/add a few more external lights

    All that should keep me out of trouble for a while! Really enjoying it so far, and pleasantly surprised by the help and camaraderie from the boating community. Everyone is keen to help, it's great.


  • Moderators, Motoring & Transport Moderators, Sports Moderators Posts: 6,344 Mod ✭✭✭✭fergal.b


    Leave your fridge turned upside down for a few days and try it again you might get a surprise and save it from the scrap heap.


    .


  • Registered Users, Registered Users 2 Posts: 206 ✭✭VisionaryP


    fergal.b wrote: »
    Leave your fridge turned upside down for a few days and try it again you might get a surprise and save it from the scrap heap.

    .

    It's beyond that, I'm afraid. Knackered in the sense of rusted so bad it literally crumbled to pieces when moved.


  • Registered Users, Registered Users 2 Posts: 1,258 ✭✭✭sogood


    Great to see you're making progress, though looking forward to actually "seeing", some pics that is. It's always very encouraging to see what's being done and what's possible. Keep up the good work.


  • Advertisement
  • Registered Users, Registered Users 2 Posts: 206 ✭✭VisionaryP


    sogood wrote: »
    Great to see you're making progress, though looking forward to actually "seeing", some pics that is. It's always very encouraging to see what's being done and what's possible. Keep up the good work.

    Thanks for that. Yeah I keep forgetting to take pics, but I'll bring the camera down in the next couple of days. Couple of iphone pics here:


    Painting in progress. Went for Dapple Grey Satinwood, that's it here centre-left, the rest is just primer.

    IMG_8951.jpg

    My trusty sidekick, Eric.

    13731064_10154398219972188_405874027085267972_o.jpg

    Finished kitchen, minus handles on right.

    13723834_10154398220587188_4449970937949742544_o.jpg

    New alternator, bottom left, running like a dream.

    IMG_8948.jpg


  • Registered Users, Registered Users 2 Posts: 206 ✭✭VisionaryP


    I got a couple of small jobs done today and crossed off the list. The first one was to replace the engine temperature sensor. The old one had the cable stuck to it with putty (seriously, it did) and didn't work at all, so running the engine for any length of time was risky. I got a replacement online for about €15. A 5/8" thread for anyone interested, the same ones used in old Mini Coopers. It was a straightforward swap of the sender, then crimping a new connector onto the cable and job done. There's a fairly big crack on the cable, so might add a new sleeve to it tomorrow.

    Old one with the putty scraped off. Simply no way to attach the cable.

    old.jpg


    The new one.

    new.jpg


    Replaced...

    Full_Size_Render_2.jpg


    ...and working!

    gauge.jpg

    I also replaced the window wiper today, both motor and blade. I bought a 110 degree motor when I really should have got a 90, but I just about made it fit. No pics, forgot to take one!

    Finally I fit the first of the LED lights. I got the lights from WISH (the iPhone app, Chinese store), four 50cm bars for €14. I fit two of them behind the curtain pelmet at the dining table/main seats/double bed. I'm very happy with the light they give, I went for warm white instead of the typical blue-ish LED white and it works well.

    The LED light strip. They work individually or you can daisy chain them.

    lightbar.jpg


    I used this switch, also bought from WISH, for €2.

    switch.jpg


    The end result. The blue light at the top is actually the switch. I put it there to fill the hole left by the original light fitting, but I think I'll move it. The camera makes the switch extra bright, it's not that bright in reality.


    lightson.jpg


    You may notice the table is gone from the above pic. The same legend of a friend who fit the alternator has taken it away to sand it and treat it with Danish oil, and is dropping it back tomorrow.

    I'm feeling pretty proud of myself right now, I'd never done any of the above before today, but with trial and error, I figured it out. I even jump started a car for a stranded family in the car park before I went home. Tomorrow I shall rescue a kitten from a tree, and on Thursday I'll sort out Donald Trump in the morning and world hunger in the afternoon if I've time.


  • Registered Users, Registered Users 2 Posts: 1,258 ✭✭✭sogood


    Lovely job, she's looking good. You'll have a lovely boat when you're done. Do you have a deadline of any sort with regard to actually getting out on it? It's a terrible thing when the itch sets in and you're busy working while the summer slips away!

    Keep up the great work.


  • Registered Users, Registered Users 2 Posts: 206 ✭✭VisionaryP


    sogood wrote: »
    Lovely job, she's looking good. You'll have a lovely boat when you're done. Do you have a deadline of any sort with regard to actually getting out on it? It's a terrible thing when the itch sets in and you're busy working while the summer slips away!

    Keep up the great work.

    Oh I take it out 2 or 3 times a week! I'm only a few hundred yards from the mooring, so it's easy for me take it out for an hour in the evenings or a day at the weekend. We're doing our first overnighter next weekend.


  • Registered Users, Registered Users 2 Posts: 1,258 ✭✭✭sogood


    Good stuff! Happy to hear you're reaping the rewards of your efforts. Good luck with the overnighter.


  • Registered Users, Registered Users 2 Posts: 206 ✭✭VisionaryP


    So, 5 years since my last update!  Work on the boat ground to a halt, with a change in career, followed by having 3 kids in 5 years.

    antifoul.jpg

    I took the boat out of the water in a boatyard in 2018, but through a combination of being badly covered, blocked drains, broken bilge pumps and sheer neglect on my part, it took on enough rainwater to submerge the cabin and engine bay in 2 feet of water.  

    IMG-8455.jpg
    This was after the water was drained

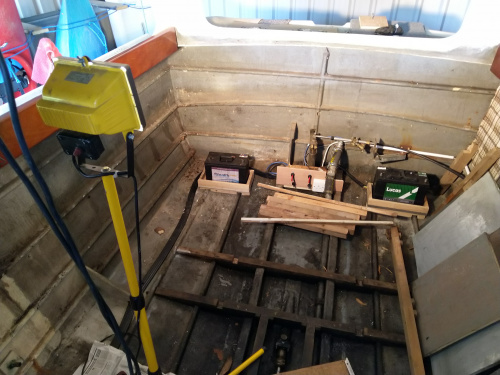
    I was devastated, I really don't want to give up on it, so I made the decision to go again.  The interior was badly assembled in parts - lots of unsealed non-marine ply, plumbing that defies logic, hundreds and hundreds of wires that went everywhere with no rhyme or reason, most of them to dead ends.

    I see this as an opportunity to do it right, or at least try to.  I have completely pulled it back to the hull, ripping out 95% of the interior.  By rebuilding, rewiring, re-plumbing, I will (for the first time) know where everything is, what every wire does, every pipe etc.

    She's back in the water now (it's just easier for me to work on it at that level) and my goal is to have it ready in time to get the 2022 season out of it.

    boat.jpg

    The first few tasks, in no particular order:

    Engine - the engine, a BMC 1.5, was submerged and took on a lot of water.  It is salvageable, but I'm having it lifted out of the boat next week to be fully serviced, and replacing the starter, alternator and belts.  I'm very excited about being able to get down into the engine bay once the engine is out, so I can put some order on the plumbing and electrics back there, tidy up some drains, and replace the sound insulation foam. Also, the engine is very difficult to work on when in the boat, so I'm going to add an access panel from inside the cabin, so I'll be able to work at eye level to change belts etc, rather than trying to do it from above.

    Electrics - at the moment, working with the electrics is pure guesswork, as they are literally all over the place.  My plan is to do a full rewire, with multiple fuse-boards in key locations, and easy access trunking along the ceiling, so I no longer have to pull out cabinets or look under floors when I need access to wiring.  Great opportunity to do this right once the engine comes out.

    Plumbing - There was a 500L water bag, which is complete overkill for my needs, and taking up enormous space, so I've replaced that with a much smaller 75L plastic tank.  We use the boat for day trips 99% of the time, so don't feel the need for a bigger tank.  Other than that, it's just a matter of tidying up some of the pipes and checking the calorifier still works.  BTW the 500L water bag is still perfect if anyone wants it - I'd hate to throw it away.

    Drains - this was a huge problem.  Deck drains were simply not draining, so now that I've pared back to the hull, I've been able to figure out why. Most of the drains were either connected to the wrong drainage hole, had the wrong type of hoses, or had looping hoses that backed up easily.  In one case, 2 drains were simply joined to each other!  I have 80% of these sorted now with new hoses, and will do the remaining when the engine is lifted.

    Fuel tank - the original 40 year old fuel tank was rusting badly, so I ripped it out and replaced it with a much smaller 75L plastic tank.  Again, smaller but absolutely fine for our needs.  I also fitted senders to both the fuel and water tanks, so we can now see our levels on each - a big luxury we didn't have before!

    IMG-8631.jpg

    Insulation - The previous insulation was polystyrene - a mish-mash of original, plus chunks from packaging, all held together with Avonmore Dairies tape!  It was SOAKING wet.  I pulled it all out and replaced with 25mm foil backed closed cell insulation board.  I'm hoping this helps with condensation.  I have the sides done, continue along back wall and get a thinner solution for ceiling.

    IMG-8687-copy.jpg

    Ceiling - the old vinyl headliner was a magnet for mould and mildew, so I pulled it out.  I'm replacing with PVC tongue and groove cladding, with a few recessed spotlights in there.

    IMG-8534.jpg

    Windows - the aluminium windows are structurally sound, just filthy, with layers and layers of sealant and paint all over them.  So we pulled the first one out to bring home and tidy it up.  I'm experimenting with sanding and polishing it.  Don't think I want a full mirror finish, but maybe a bright brushed finish.  I'll reseal and replace once ready.

    IMG-8681.jpg

    I consider the above kind of a phase 1.  Afterwards, I'll tackle a rebuild of the kitchen, add vinyl flooring, redesign the dash, sand and paint the exterior, and replace grab rails and handles. It's a slow process with just 4 or 5 hours work a week, but I'm getting there.

    This week's task is measuring for panels, cutting and sealing marine ply with epoxy, and time permitting, getting the first panels up on the walls.


  • Registered Users, Registered Users 2 Posts: 8 Bill Black


    Nice one ,

    must be hard to have to do it again but at least this time as you said you've stripped it bare and can account for every inch of it when you're done . I'm just in the process of getting an Elysian 27 back in the water where a "quick tidy up" turned into a total refurb 🙄 ....

    Regards

    Bill


  • Registered Users, Registered Users 2 Posts: 8 Bill Black


    For example ...... "tidying up" the aft cabin


  • Moderators, Motoring & Transport Moderators, Sports Moderators Posts: 6,344 Mod ✭✭✭✭fergal.b


    Looking good and will be a great escape for the new family, might be worth thinking of a diesel night heater at this stage it will be easy to get the ducting to where you want it and a happy warm family will mean you will get a lot more use of the boat. Check out Autotermireland for heating you can get cheeper Chinese but with no safety cert for here I don't think they are worth it also by the time you buy stainless steal through hull fittings for one you will end up around the same price. Great to see someone else going through the same crap I had to 😀 my engine was also under water but as long as you get it sorted before the rust sets in she should be fine.


  • Registered Users, Registered Users 2 Posts: 120 ✭✭colliemcc


    How are you getting on with this. Enjoying it on the water?


  • Advertisement
  • Registered Users, Registered Users 2 Posts: 2 fishcat


    Hi Bill.

    Looks like a great project. I have a spare BMC 1.5 if you need any parts give me a shout.


Advertisement