Advertisement
If you have a new account but are having problems posting or verifying your account, please email us on hello@boards.ie for help. Thanks :)
Hello all! Please ensure that you are posting a new thread or question in the appropriate forum. The Feedback forum is overwhelmed with questions that are having to be moved elsewhere. If you need help to verify your account contact hello@boards.ie
Hi there,
There is an issue with role permissions that is being worked on at the moment.
If you are having trouble with access or permissions on regional forums please post here to get access: https://www.boards.ie/discussion/2058365403/you-do-not-have-permission-for-that#latest

Alfa 166 revival

  • 30-03-2014 9:50pm
    #1
    Closed Accounts Posts: 12,985 ✭✭✭✭


    Hello all

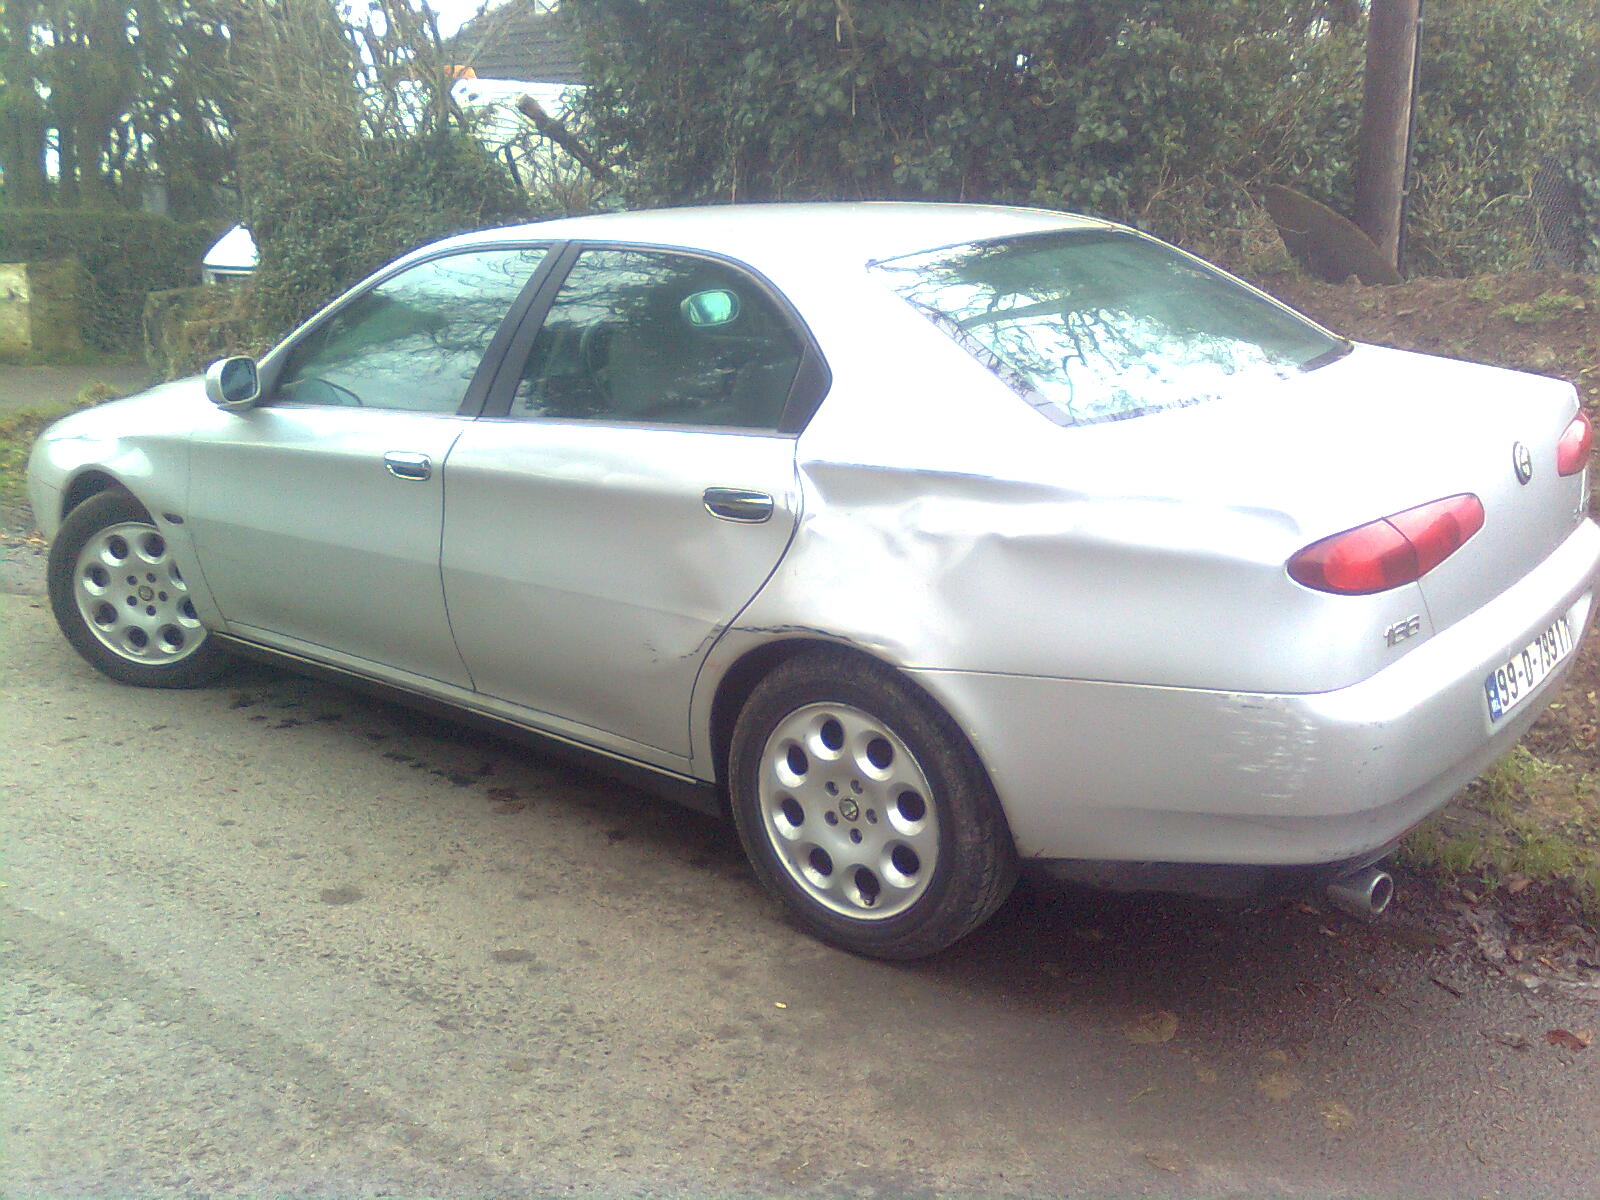
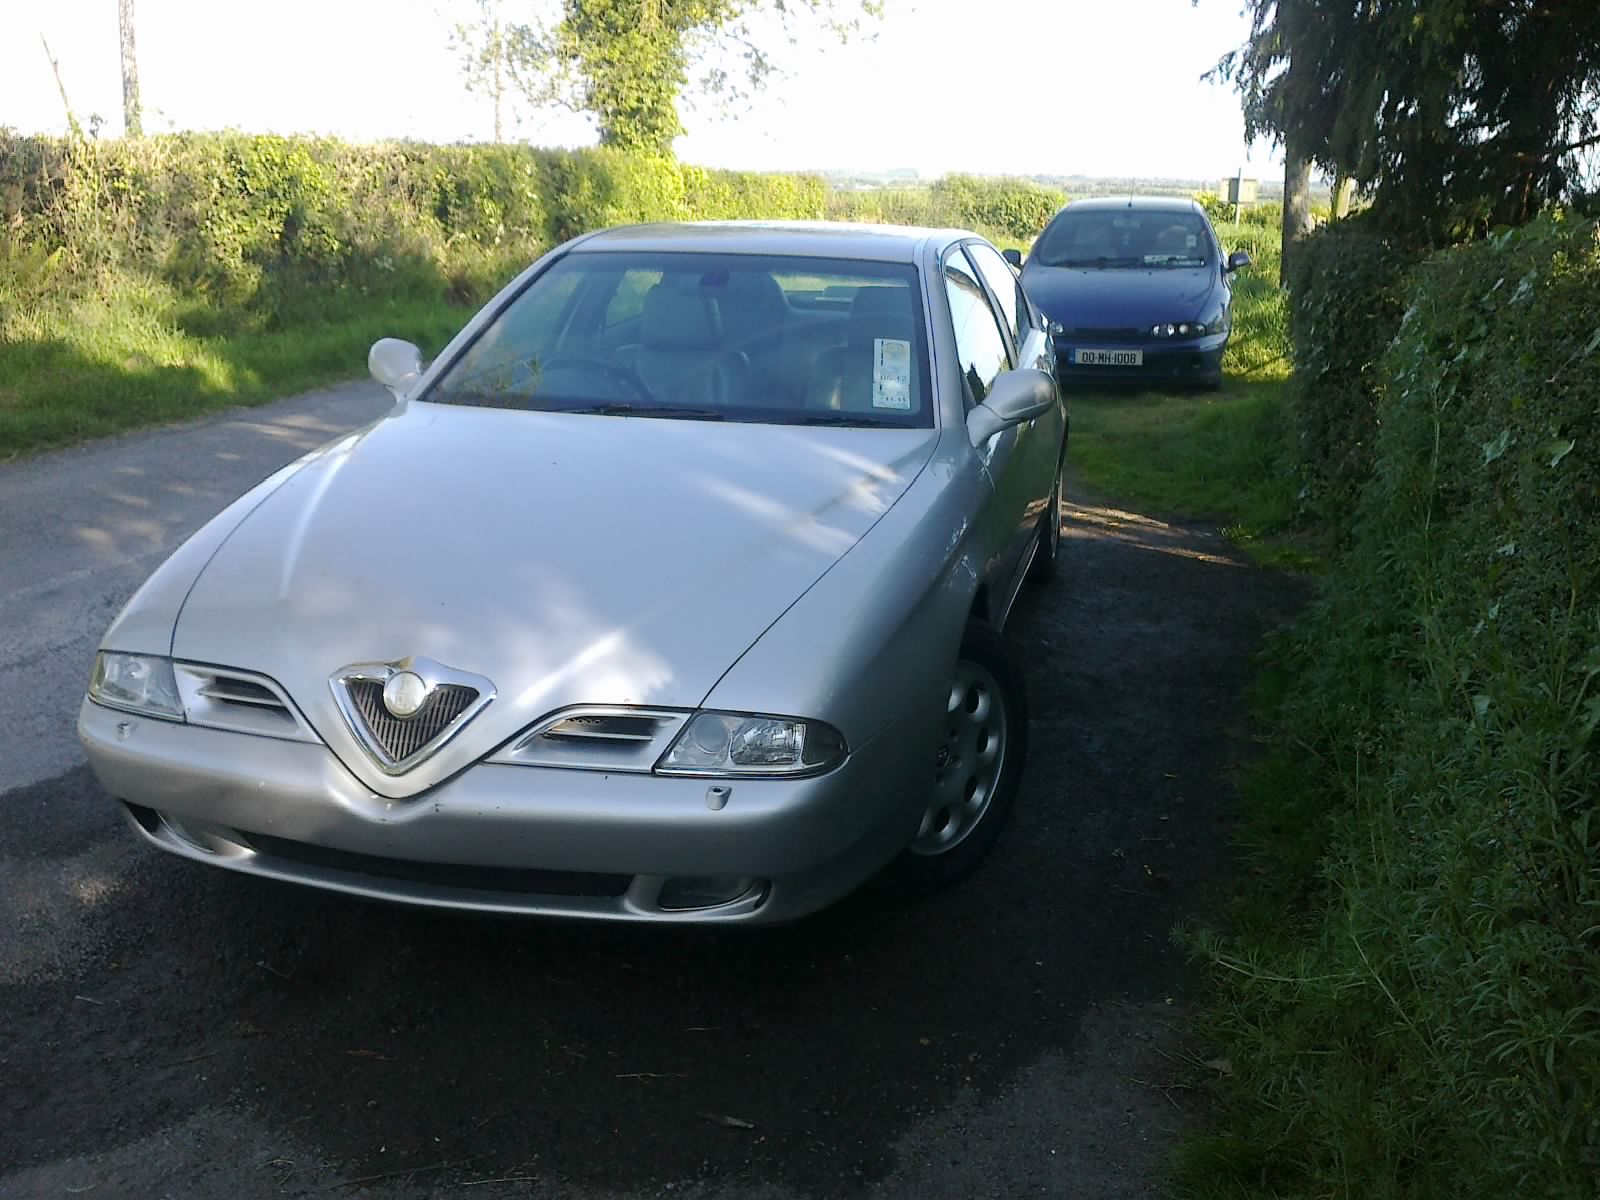
    I have a 166 this past few years. It's a 2.5 V6 and a seriously comfortable car :cool: I haven't really done much with it :(

    I got it cheap due to a bang in the rear quarter
    Image1668.jpg

    It was also a tip inside :mad:
    Image1695.jpg
    Image1669.jpg
    Image1697.jpg

    I started with an oblig service. Plugs weren't difficult, just the rear bank was fiddly to do
    Image1686.jpg
    Image1689.jpg

    I took in the rear bench and cleaned it up
    Image1732.jpg

    I also rebuilt the drivers switch (I am in my trousers paying a fortune for a 2nd hand unit let alone a new one!)
    Image1798.jpg

    Cleaned up the calipers
    Image1933.jpg
    Image1938.jpg

    And is cleaned quite regularly
    Image1607.jpg


«1

Comments

  • Closed Accounts Posts: 12,985 ✭✭✭✭dgt


    In recent times the seats were revamped
    Image876.jpg

    And a set of Sportivo/horseshoe wheels bought
    Image973.jpg

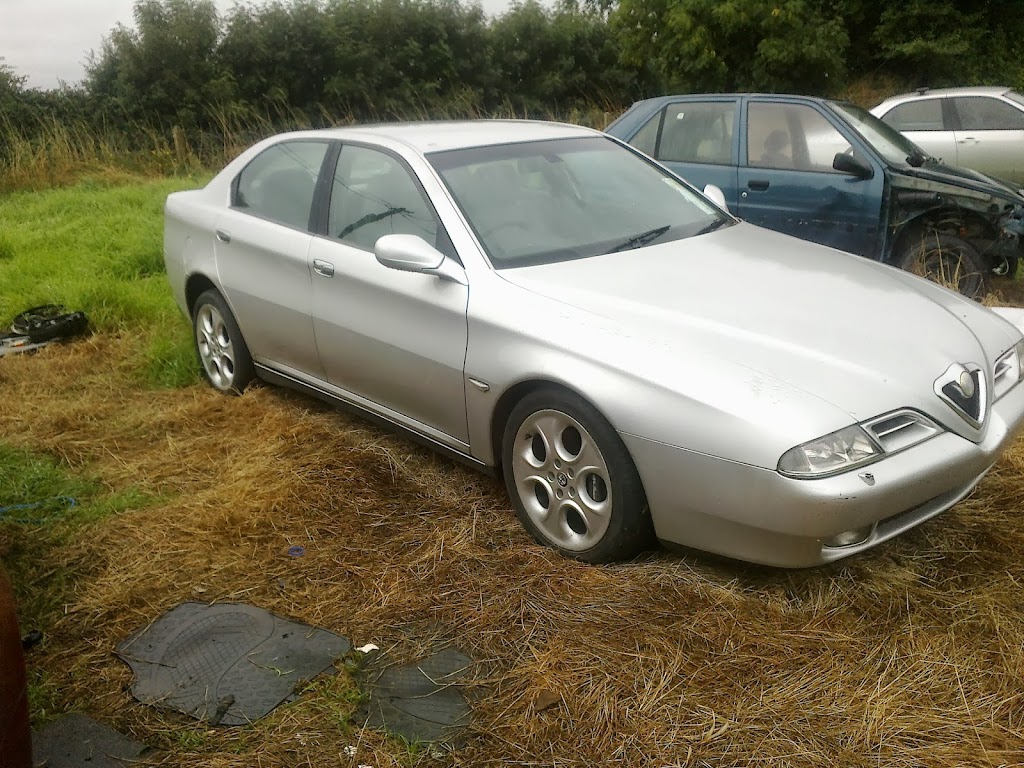
    However that wasn't good enough, so I went out and bought a donor car. This one was a Super at one stage, now it's a ball of crap!

    You can see scabs of rust already
    Image1244.jpg

    Whilst the floors aren't visible the mould is apparent the second one steps in. Leather is absolutely spotless though
    Image1245.jpg
    Image1246.jpg

    However, one of it's various rust patches
    Image1247.jpg

    I needed that tailbox. Balls! :mad:
    Image1248.jpg

    Care for a epically crap paintjob?
    Image1249.jpg

    It sounds well mind you


    Plan is to break that one and use what is savable from it on the other car :cool:


  • Registered Users, Registered Users 2 Posts: 2,846 ✭✭✭discombobulate


    Fair play. Great to see a 166 being kept on the road. Getting rare now. That paint job is woeful!

    Wasn't expecting the mask in the video!!


  • Registered Users, Registered Users 2 Posts: 65 ✭✭Coolbreeze2809


    Hmmm that super looks familiar… :rolleyes:


  • Registered Users, Registered Users 2 Posts: 23,688 ✭✭✭✭mickdw


    I remember a time I was quoted €2300 for a replacement ICS (radio) unit for my 166. I got to know the parts guy in tractamotors pretty well when I owned it as very little was available second hand for them at that time and it did tend to need a few bits regularily.


  • Registered Users, Registered Users 2 Posts: 150 ✭✭74merc


    Have you seen this one? A lot of money has been spent on it by the looks of things.

    http://www.usedcarsni.com/2005-Alfa-Romeo-166-V6-24V-Lusso-121172352


  • Advertisement
  • Registered Users, Registered Users 2 Posts: 23,688 ✭✭✭✭mickdw


    74merc wrote: »
    Have you seen this one? A lot of money has been spent on it by the looks of things.

    http://www.usedcarsni.com/2005-Alfa-Romeo-166-V6-24V-Lusso-121172352

    He will be lucky to see that kind of cash.
    I dont buy the rebuild to have it perfect crap. Sounds like a high mile car that needed every bit of it. Then the ad only gives mileage since rebuild. Whats the full mileage?


  • Closed Accounts Posts: 12,985 ✭✭✭✭dgt


    mickdw wrote: »
    I remember a time I was quoted €2300 for a replacement ICS (radio) unit for my 166. I got to know the parts guy in tractamotors pretty well when I owned it as very little was available second hand for them at that time and it did tend to need a few bits regularily.

    I always wondered how much a replacement unit would have cost from the dealers, now I know :eek:

    I used to go there a lot, I remember a 99 pearl 156 v6 in the showroom back in 1999 and sitting in it as a child. 10 years later, I saw the very same car in a scrapyard, it was a horrid sight (sad to see a piece of growing up like that :( ) I bought the seats from it
    74merc wrote: »
    Have you seen this one? A lot of money has been spent on it by the looks of things.

    http://www.usedcarsni.com/2005-Alfa-Romeo-166-V6-24V-Lusso-121172352

    No but that looks very clean, and a 3.2! There's another 166 in Down (black, 3.0, 2001) for a fraction of that asking price, not a hope that 3.2 will fetch that kind of money. Maybe half at a push....

    I've began to dismantle the super. Removing the ICS was a right pig (all that twisting and poking for 2 clips!) and over the next few days I hope to dismantle more of it, with a few pics to boot


  • Registered Users, Registered Users 2 Posts: 23,688 ✭✭✭✭mickdw


    dgt wrote: »
    I always wondered how much a replacement unit would have cost from the dealers, now I know :eek:

    I used to go there a lot, I remember a 99 pearl 156 v6 in the showroom back in 1999 and sitting in it as a child. 10 years later, I saw the very same car in a scrapyard, it was a horrid sight (sad to see a piece of growing up like that :( ) I bought the seats from it


    No but that looks very clean, and a 3.2! There's another 166 in Down (black, 3.0, 2001) for a fraction of that asking price, not a hope that 3.2 will fetch that kind of money. Maybe half at a push....

    I've began to dismantle the super. Removing the ICS was a right pig (all that twisting and poking for 2 clips!) and over the next few days I hope to dismantle more of it, with a few pics to boot

    From memory, the gear surround comes pretty much straight up. I don't remember being too much hassle to get the unit out.
    My unit sprung back into life when a new car battery was fitted so luckily didn't need to buy one.
    I bought my 166 3 years old with genuine 40k miles for 9000 back in 2002. Drove it for 3 years and basically gave it away after that.

    You were a child in 99! I thought you were about 50 for some reason.


  • Closed Accounts Posts: 12,985 ✭✭✭✭dgt


    mickdw wrote: »
    From memory, the gear surround comes pretty much straight up. I don't remember being too much hassle to get the unit out.
    My unit sprung back into life when a new car battery was fitted so luckily didn't need to buy one.
    I bought my 166 3 years old with genuine 40k miles for 9000 back in 2002. Drove it for 3 years and basically gave it away after that.

    You were a child in 99! I thought you were about 50 for some reason.

    Goodness no I'm less than half that age!


  • Registered Users, Registered Users 2 Posts: 1,331 ✭✭✭toyotaavensis


    dgt wrote: »
    Goodness no I'm less than half that age!
    you just sound old


  • Advertisement
  • Registered Users, Registered Users 2 Posts: 14,309 ✭✭✭✭wotzgoingon


    dgt wrote: »

    Is that you with the horse mask on? If so why are you wearing it?


  • Registered Users, Registered Users 2 Posts: 16,930 ✭✭✭✭challengemaster


    What do you mean mask? that's his face :pac:


  • Registered Users, Registered Users 2 Posts: 6,575 ✭✭✭166man


    Both those 166's look extremely familiar! Seats cleaned up well in the 2.5!


  • Closed Accounts Posts: 12,985 ✭✭✭✭dgt


    I have the time, let the full revival commence :cool:

    In with the donor car. Very rare I work on a car in the garage, usually I do everything outside. Take a long hard look, that's the last time it'll drive!
    14297968801_5852cea2d7_h.jpg

    Donor namely because....
    14299389242_df6d03a51b_h.jpg

    Look at what some asshat did to the left driveshaft. Inch gun was tested taking this out. Driveshaft is fit for the bin :mad::mad::mad:
    14114706920_c35a351d91_h.jpg

    Interior stripped. Exterior somewhat stripped. Engines ready to drop once I remove the downpipe. So as it stands
    14321515453_b440eb2141_h.jpg


  • Closed Accounts Posts: 12,985 ✭✭✭✭dgt


    Ever since I got this car the clutch felt terrible. Always had to put the foot under the pedal to bring it up to normal. It got worse and worse till one day last month it gave up and went to the floor. Seeing as the slave worked fine, I concluded the master had had it. Bums :mad:

    Not too long ago I did a clutch master in a GTV. I had the engine out and all. It was still a pig to change. Whilst a GTV isn't easy to work on a 166 is a different league of awkward. Naturally I wasn't looking foreward to this! :(

    So I searched round on where it was, how to do it etc. No useful guides :rolleyes:

    So I went at it myself. Here's a guide on how to change a 166 clutch master:

    Here is all too common a sight for a 166 owner. At least it wasn't the pedal box!!! :eek:
    14172992867_7c582ed3ee_h.jpg

    Remove the lower dash panel. I know there's mildew there, I'll be addressing that asap
    14172900860_23414dff60_h.jpg

    Here is the offender. Note the nice cover round the bottom of it
    14172987897_caaffd32ee_h.jpg

    Remove that cover and use a brake spanner to loosen the union. Then loosen the supply pipe. Have plenty of papers/cloths ready as there will be a lot of fluid! I forgot to take a pic so here's a pic from the other day when I was removing it from the Super....
    14336380236_1236ee34a4_h.jpg

    2 nuts. Tight on room...
    14358588574_b035d078c8_h.jpg

    One clip at the back on a pin. Remove the clip, depress the clutch and lever out the pin. Then wiggle out the whole master.

    Easy to see why this one didn't work! It was off before too, it has a jubilee clip instead of the standard Fiat clips
    14336365886_30067841fe_h.jpg

    Install is the exact reverse. Only hard part was aligning the clutch pedal with the end of the master, it kept springing to rest position. So a hunt round the garden yeilded this piece of scrap, which when inserted between the master and pedal provides enough leverage to push it back and insert the pin
    14172979817_57b7427194_h.jpg

    Bleed it, job done.

    How long did that take? 25 minutes, faffing about. I rang a few "reputable" and a few "specialist" Alfa garages, I got one quote of €400 plus vat from one place.

    Pure robbery that is, considering a new master is £31 plus vat and the job takes about 30 minutes.

    So hows the super? Um....
    14356157101_3e2a6ca023_h.jpg
    14336361066_bb83d1cbec_h.jpg

    And where's it's engine going eh.... ;)

    More Alfa stuff on the way :)


  • Closed Accounts Posts: 9,607 ✭✭✭toastedpickles


    I think the super is missing something.......

    fuse 18, yep that's it :pac:

    Looking good!


  • Closed Accounts Posts: 12,985 ✭✭✭✭dgt


    More stuff :)

    It was about time I relocated it to the yard. It wouldn't move under its own steam due to locked brakes, so out with the tractor and problem solved. Then drove it into the yard from there :D

    It's temporary new location
    14393279243_8f6a3ae894_h.jpg

    Unaware of the butchery going on inside.... :eek:

    Boooo stupid dent!
    14186487518_dc4b2062e7_h.jpg

    It is an arse to get at, we're going to have to improvise to make the clamp work....
    14186536420_3f3ca8b054_h.jpg

    New tail light
    14186651377_d75daa794f_h.jpg

    Think this needed replacing too....
    14372173524_dbd79fdee1_h.jpg
    14350004086_1df8bd9b3d_h.jpg

    And replaced a sticky caliper
    14186646357_92d836db94_h.jpg

    Not much left to do, wheel bearing, rad, headlamps, dent, t-belt, service and some new tyres to see it ready for the road :)


  • Registered Users, Registered Users 2 Posts: 6,575 ✭✭✭166man


    So cool seeing the 2.5 V6 in the yard!


  • Registered Users, Registered Users 2 Posts: 5,193 ✭✭✭Cleveland Hot Pocket


    166man wrote: »
    So cool seeing the 2.5 V6 in the yard!

    Would be cooler to see a GM diesel in it.


  • Closed Accounts Posts: 12,985 ✭✭✭✭dgt


    Would be cooler to see a GM diesel in it.

    Sure they came with the Fiat 2.4, in previous years they used Perkins and VM diesel engines (as found in some eastern block cars)


  • Advertisement
  • Registered Users, Registered Users 2 Posts: 5,193 ✭✭✭Cleveland Hot Pocket


    dgt wrote: »
    Sure they came with the Fiat 2.4, in previous years they used Perkins and VM diesel engines (as found in some eastern block cars)

    T'was more a nod to the GM v6 unit (the 3.2 - not yours..)
    Just to irk the alfa guys :P


  • Registered Users, Registered Users 2 Posts: 23,688 ✭✭✭✭mickdw


    I don't believe the 166 in right hand drive was ever offered with a diesel engine.
    It might have sold a few more if it had.


  • Closed Accounts Posts: 12,985 ✭✭✭✭dgt


    mickdw wrote: »
    I don't believe the 166 in right hand drive was ever offered with a diesel engine.
    It might have sold a few more if it had.

    Never was, LHD only, same as the 2.0 Turbo. Pity, I haven't a clue why they didn't, plenty of room and the 156 was available with the 2.4 as RHD....

    Small update, I've moved onto the dent at the back. Just took the relatively bad look off it, so we can decide where to go from here :)
    14386251735_facadb5966_h.jpg

    There is still a lot to do to get this looking right, it's a right pain to get at properly


  • Registered Users, Registered Users 2 Posts: 23,688 ✭✭✭✭mickdw


    Do you do bodywork and painting yourself or will it be off to bodyshop?

    Re the diesel, I thought there must have been a serious issue with fitting the diesel to the 166 when they didn't do it.


  • Closed Accounts Posts: 12,985 ✭✭✭✭dgt


    mickdw wrote: »
    Do you do bodywork and painting yourself or will it be off to bodyshop?

    No bodyshop is getting their hands on this, all inhouse ;)
    mickdw wrote: »
    Re the diesel, I thought there must have been a serious issue with fitting the diesel to the 166 when they didn't do it.

    Some reckon that the chassis was designed in such a way that the rack wouldn't fit properly to clear the engine. When one looks at the chassis without the engine, there is a swell on the right hand side that makes servicing the V6's a total nightmare. Plus all the foot controls are brought to the left through the cabin, such as a rod for the brake and pipework for the clutch

    Then again some people said the TB was LHD as the turbo couldn't be cleared by the rack.... The TB had the turbo beside the radiator.... Oh dear ;)

    Whatever the reason, if there was a diesel 166 in RHD it may have been a cracking company car seller in the UK. Fiat slipped up there


  • Closed Accounts Posts: 634 ✭✭✭cabb8ge


    dgt wrote: »
    No bodyshop is getting their hands on this, all inhouse ;)
    ==

    Any bodyshop worth going to would do nothing less than new quarter panel on that.


  • Closed Accounts Posts: 12,985 ✭✭✭✭dgt


    cabb8ge wrote: »
    Any bodyshop worth going to would do nothing less than new quarter panel on that.

    That's a spoiler alert right there. Straightening the side was to push the shut line closer to the door, straighten out the lines a bit to gie an idea what it should look like. There was no way that was going to be repaired due to lack of space and an absolute headache of a job due to the crinkles and emerging rust, it's much weaker now

    If it wasn't crinkled we could have got away with pushing it out, addressing the imperfections and a bit of paint.

    So it's like you read my mind, I have a quarter to go into it, that's for a future update ;)


  • Closed Accounts Posts: 12,985 ✭✭✭✭dgt


    The more I work on this car, the more I see how much attention to detail has been demonstrated on this car..... Which is naff all :rolleyes:

    Lets take the lower arms as an example. I have the hub off as it needed replacing (wheel bearing gone) and as the balljoint was flopping about, I decided to change it. I was wondering why one of the nuts was difficult to remove.....
    14413296385_699d7eb2e8_h.jpg


    Not only hammered out at some stage, but mildly cross threaded :rolleyes:

    So lets remove it. In true Alfa fashion....
    14413294445_bf879a08c9_h.jpg

    The gearbox is in the way :rolleyes: so I need to raise the engine. That's simple enough, loosen the 17mm nut on top. To avoid damage to the earth strap, it needs to be removed. So, what happened next?
    14413292575_473d784b74_h.jpg
    14226686178_7589741868_h.jpg

    Typical :rolleyes:

    I got the bolt out anyway. You can see the taper is missing off it
    14226854777_880c020b68_h.jpg

    I used the bottom fella after I cleaned it thoroughly. The whole lot is now bolted back up. So that's a 3.0 mount (naff all difference) with a 3.0 lower arm (it's bigger in places and I'll be swapping the drivers side someday soon). Now to put on a hub and happy days :)


  • Closed Accounts Posts: 12,985 ✭✭✭✭dgt


    So I was up to more shennanigans

    Here's where we start. Note the rusty lower arm, which had a fantastic balljoint (I regreased it anyway) and bushes. Much better than what came off!
    14228967287_3ed9324770_h.jpg

    I was having a bit of bother with the other hub I had lined up for the car. So I robbed this one from another convenient 166 I have lying about.

    I'd like to find the ape who did this. Seriously, an impact 12 is all it takes. What the hell went on with this :rolleyes:
    14414134672_c535e93811_h.jpg

    No choice but to leave it. But there was no choice in leaving this accordion on :eek:
    14228964287_7fdad4cf2d_h.jpg

    The trackrod was an utter arse to get off. I had to heat it up significantly to move, then the airgun to remove the locknut. Finally, off with the tired gaiter
    14228767249_a2b72b45ae_h.jpg

    A bit of consideration in the form of copper grease for the poor buffoon who has to track this beast (probably me :( )
    14414250434_ac1dc64ba4_h.jpg

    Seeing as the upper balljoint was trashed, I pulled another one out of thin air
    14412051971_c8db151fe2_h.jpg

    The job takes so long due to crap like this. This was the strut bolt. I had fun removing this :rolleyes:
    14412050071_c4d9519cac_h.jpg

    But alas, that's the left side done, bar a dose of the inch gun and the splash guards. Next will be the right, I can't wait :rolleyes:

    Best news is the ladybird on the bumper of the car is still there a week later and still alive, feeding on something on the bumper. Makes me smile everytime :)

    Edit: Said Ladybird :D
    14414392532_c00ca72228_k.jpg


  • Advertisement
  • Closed Accounts Posts: 12,985 ✭✭✭✭dgt


    It's been too long.... But I'm at this car whenever I can. For example, the back is almost finished ;)

    It hasn't moved anyway. So I decided to shove on the timing belt. This won't be a full guide, more so to compliment my other guide, as such

    The kit. Belt, tensioner, 2 rollers
    14857079197_949da3ab6d_h.jpg

    You need cam blocks, confusing tool and a cam pulley as extra special tools (yaaaaay speshul!)

    Jack up, front wheel off, splash guard off. Never mind my hub removed, that's another job
    14857078007_56617e30b2_h.jpg

    Aux/serpentine belt off. 15mm spanner and it's spring loaded. Slip it off
    14857076547_58a753f062_h.jpg

    Engine steady off. I have newish parts to put on, as the old ones were a bit past it....
    14856901789_800963252f_h.jpg

    Remove the engine covers and drain the power steering fluid. If you don't want fluid everywhere, cut up a paraflu bottle, place a funnel underneath and catch the old fluid (pasty crap in this case)
    14856967880_354beaf614_h.jpg

    Timing cover off. Now remove this bracket
    14856893329_0d9ff877c9_h.jpg

    Same as the other guide. Plug cover off, rocker cover off, plugs out. We begin to see shoddy work
    15043258232_ecdf6a86bc_h.jpg

    The plug cover serves as a handy tray for each series of bolts
    14857023688_0c9e2df5ef_h.jpg

    Same for the rear bank. Unplug the throttle and unclip the plenum clips
    15020606946_312a35865f_h.jpg

    All these hoses and fittings must be unclipped. The oil catch is held with 2 bolts, hard to get at if you have stumpy fingers (no, I don't, I have magic fingers that do magic things :pac:)
    15020605096_7b6dc365ae_h.jpg

    There we go
    15020603666_8b28eef7b5_h.jpg

    Hmmmm....
    14856951450_ce2a63bbcd_h.jpg


  • Closed Accounts Posts: 12,985 ✭✭✭✭dgt


    Next, break out an inch gun and 41mm socket for the crank pulley. Forget breaker bars, useless
    15043255852_2103e12c39_h.jpg

    Use a suitable pullers
    15040540201_b3ac19cb60_h.jpg

    Remove this guide roller beside the alternator
    14857020878_b8a2241998_h.jpg

    Oh boy....
    14856891669_f60aa6ed9b_h.jpg

    Using the old crappy belt remove the 3 10mm bolts for the water pump pulley
    15043249702_efedd104d5_h.jpg

    Rotate to TDC. Forget dial floats, 21 o clock on the crank and a wiper blade in cyl 1 will tell you where TDC is. Off with the bearing caps and lock the cams. Didn't get a pic, but the same as the other guide. However, pics later on in this update...

    Now remove the belt. 2 bolts on the tensioner. Bit past it....
    14857052747_5a1785ea89_h.jpg

    Still intact
    15040537141_62a3d1460f_h.jpg

    Then I discover this. You heartless apes :mad:
    14797808088_f10ff2065f_h.jpg

    Guide roller bolt rounded. HOW???!!!!!

    I had to buy tools to remove it
    14992608472_9755deff90_h.jpg
    14992625112_192b47b598_h.jpg

    I can't repeat my conversation but much swearing, cursing and shouting was involved, directed at the ape who did this!

    The next day, timing covers off
    14857047837_9d2cea5e92_h.jpg

    Bracket off
    15020590626_6c83634a09_h.jpg

    More chimpanzee work
    15040532521_e0ec854ef5_h.jpg

    There were gouges in my new bracket. So I smoothed it down as much as I was arsed to
    15020589756_c7a333743d_h.jpg


  • Closed Accounts Posts: 12,985 ✭✭✭✭dgt


    Water pump off next. Means drain the coolant. Which is an arse to get to so I removed the airbox for better access. Cue the surprise quality work...
    15040529491_0ed826943f_h.jpg

    16 bolts later, it's off. See anything wrong in this cosy wosy picture?
    15040528431_6ee3a1ce80_h.jpg

    These pumps FAIL. This wasn't going to last much longer!!!

    Gasket needs cleaned off. You can turn the thermo pipe housing for easier access
    15043228542_651f122271_h.jpg

    Yaaaaay!
    15020584406_643fc4f55e_h.jpg

    Best to remove the crank sprocket and clean it up while you have the chance
    15040524461_83093dacc9_h.jpg

    Clean up all round it. White mess, all round a slippery shaft.....
    14857037447_945cda761e_h.jpg

    Time to clean up the crusty covers
    14856931090_208f29fc49_h.jpg

    Clean up the rocker cover gasket faces too
    15043583005_b257822fe5_h.jpg

    Now the belt. It's very tight on room. I found that fitting the tensioner first followed by the rearmost sprocket with the belt on was the best way to start
    15043221922_63f5b7254b_h.jpg

    Next, place on the second sprocket, beside the one put on. Route the belt down to the crank, up again, round the lower guide roller. Refit the remaining sprockets and route the belt on them. Finally, guide roller in the middle, refit it and all will have sat on perfect!
    15040519231_277a5cf792_h.jpg

    Tensioner tool time! Oh look, another picture from me on how to use the busso v6 tensioning tool, how generous....
    15020576536_4c1fb71f69_h.jpg

    Tensioned correctly
    14856984078_6ea2de0382_h.jpg

    This concerned me, but was only visual and not detrimental. So on you go for now
    15043218312_acca0772d8_h.jpg

    Last of my pictures involves me refitting a shneering 4 eyed pulley, freshly greased
    14856924630_0ddbde9a72_h.jpg

    All rebuilt since

    I'll have more updates soon enough ;)


  • Registered Users, Registered Users 2 Posts: 3,670 ✭✭✭quadrifoglio verde


    That busso was lucky to last with that water pump. And after seeing the most detailed guide on the inter webs on one of these belt changed I now know why the labour is so high for the belt change.


  • Registered Users, Registered Users 2 Posts: 33 Bolomaster


    Beautiful work man, I'm sure this skill will come in handy in future, if other boardsies need it done...


  • Closed Accounts Posts: 12,985 ✭✭✭✭dgt


    More shtuff!

    First, swapping the boots and packing grease into the new old lower arms
    14871045128_5dcea08d3b_h.jpg

    The reason I'm swapping the arms


    Sounds like someone wiping their arse after a good watery shcutter :pac:

    Driveshaft renovation next. I have the other side to do still. Reason being
    15057625715_95b11f05b3_h.jpg

    It's been off before too.... :rolleyes:
    14870968300_c4190efacd_h.jpg

    The hub cv comes off with a circlip, just tap it out. Then, drift off the old boot with a suitable punch
    15034613356_5ba0f592fc_h.jpg

    Pack it all with cv grease (I use MRM-2)

    Forget cable ties, this is the only clip to use
    14870966040_8d86a48746_h.jpg

    Looking good!
    15057258622_26cee20ad5_h.jpg

    Now sitting awaiting bolting up
    15054565641_2383509f9a_h.jpg

    Lastly is my love for copper grease
    14871023438_f6effd9f4c_h.jpg

    Because the phone went dead.... However, I replaced and made a hybrid air box, connected up all the pipework, filled with coolant, power steering fluid, aux belt back on, hub nut on, check tightness of everything. Wheel on....

    I've been test driving it. Better than before, no more wheel bearing whine, less clonking at the front :cool:

    Still not done yet though!


  • Advertisement
  • Closed Accounts Posts: 12,985 ✭✭✭✭dgt


    Looking better now :)
    14879755568_3a8f1deac7_h.jpg

    Now relocated
    14879757358_0a7645703b_h.jpg

    Which meat the super (rusty ball of crap) left the garage, at bloody last. Had to shove on wheels, ever see 166 wearing dumpy looking 156 teledials? :pac:
    15065981992_2ce6478317_h.jpg


  • Registered Users, Registered Users 2 Posts: 3,670 ✭✭✭quadrifoglio verde


    How's you get them to fit? Must say they look ridiculous.


  • Closed Accounts Posts: 12,985 ✭✭✭✭dgt


    How's you get them to fit? Must say they look ridiculous.

    A bit of fiddlin but they fit like they were made for the car.... ;)


  • Closed Accounts Posts: 12,985 ✭✭✭✭dgt


    Bout time I popped in here again ;)

    First, tyres needed replacing. So off with the old
    15279552756_d03bbe7bc2_h.jpg

    On with the new
    15299455741_15854ea919_h.jpg

    And onto the car....
    15116003608_b843ed9550_h.jpg

    Dig that camber yo! :pac:

    Moving swiftly on.... Engine needed a bit of cleaning. Plenum off
    15115833729_adb97e4e51_h.jpg

    Remove a few bits on the plenum
    15302240062_256e6b4a43_h.jpg

    Off with everything else
    15302225132_777f66dbbb_h.jpg

    With some simple yet epic work, we have a sparking looking engine
    15302591905_514772a01e_h.jpg


  • Closed Accounts Posts: 12,985 ✭✭✭✭dgt


    Next batch of jobs: rad, pump, lights, boots. Rad pissing, pump groaning and there's more light from my piss than these headlights. Boots.... As before, shoddy work

    Front needs a good chunk removed to do this lot. The grilles slide to one side after the screws are removed
    15302581355_d88da7ee6a_h.jpg

    Slam panel, air box, drain coolant, disconnect air con pipes, fan, ducts at the side etc. Once that's all disassembled, rad out. It's an awkward fecker and blue with the cold....
    15302590785_99d3a4bdfb_h.jpg

    Draining the power steering fluid by cracking the unions and collecting it without spilling a drop
    15299448041_fb11b619ab_h.jpg

    Out with the old. Here's one I made earlier
    15115879120_a4eb9185a2_h.jpg

    Sitting pretty
    15116031147_7e041893ba_h.jpg

    A rad I pulled out of my rear end
    15115875620_762ceba194_h.jpg

    Changing the aircon canister
    15302214572_4f90a1495a_h.jpg


    Onto the lights. No need to remove the bumper, unbolt and just shove it to one side. 3 nuts, 1 bolt and a few plugs. Be grand
    15302585965_145152eaea_h.jpg

    A nice wiper swap to flat blades
    15299438221_fd7832bc29_h.jpg

    And another pair of CV boots. All I'll say is cable tie, universal boot, not in the recess. Quality job or what...
    15302578995_bc86e3fc5c_h.jpg

    Last pic for now!
    15299435661_13b61236b1_h.jpg

    What will it look like in the next update.... ;)


  • Advertisement
  • Registered Users, Registered Users 2 Posts: 14,309 ✭✭✭✭wotzgoingon


    dgt have you every tool going. Equipment to make custom exhausts and now I see you can change tyres.


  • Registered Users, Registered Users 2 Posts: 4,974 ✭✭✭Chris_Heilong


    Only reading this thread now.
    post-1-0-12184500-1411620851.gif


  • Closed Accounts Posts: 12,985 ✭✭✭✭dgt


    dgt have you every tool going. Equipment to make custom exhausts and now I see you can change tyres.

    I've always been able to change tyres ;)

    Small update now! I'd like to say I have more pics but I've just been pressed for time, with the time this car takes up!

    Painted now
    15332100840_af8d74e5b9_h.jpg

    And in the process of getting it's new door :D
    15332101240_0f2cf57803_h.jpg

    I'd love to see more pictures of it myself, but that's all I have for now! :(

    One could say, it needs final touches here and there, but it's there or thereabouts mechanically :)


  • Registered Users, Registered Users 2 Posts: 4,792 ✭✭✭Ded_Zebra


    Oil changed and coolant changed. No pictures of either due to doing them in the pissing rain for the most part :rolleyes:

    Hopefully I'll be able to put it inside tomorrow and change out the power steering pump. :)


  • Registered Users, Registered Users 2 Posts: 4,792 ✭✭✭Ded_Zebra


    Well what's become apparent is that I'm sh1t at remembering to take photos compared to the previous owner of this thread :p

    Today I changed the power steering pump in the car so it actually works :p It's a big heavy car with wide tyres for a weakling like me to steer without power steering working!

    The new pump is a little noisy (not as loud as the last one) but works perfectly. After a bit of reading on the internet it seems that excessive end float on the shaft makes them noisy. Apparently it can be shimmed out of them to make them tight again. I'll do a bit of experimenting on the one I took out today and see what I can do :)


  • Registered Users, Registered Users 2 Posts: 23,688 ✭✭✭✭mickdw


    What's going on with the change from dgt to dead zebra?


  • Registered Users, Registered Users 2 Posts: 4,792 ✭✭✭Ded_Zebra


    mickdw wrote: »
    What's going on with the change from dgt to dead zebra?

    One person sold a car and the other bought one :D


  • Registered Users, Registered Users 2 Posts: 23,688 ✭✭✭✭mickdw


    Ded_Zebra wrote: »
    One person sold a car and the other bought one :D

    Unusual situation to take over mid refurb and continue the thread. Was confused by that.
    Had a 166 years ago myself so good luck with it.


  • Registered Users, Registered Users 2 Posts: 4,792 ✭✭✭Ded_Zebra


    mickdw wrote: »
    Unusual situation to take over mid refurb and continue the thread. Was confused by that.
    Had a 166 years ago myself so good luck with it.

    It's a bit odd alright but it takes all sorts :D

    We've both be planing this for ages and ages, Since he started working on the car actually :)


  • Registered Users, Registered Users 2 Posts: 4,792 ✭✭✭Ded_Zebra


    Finally took pictures of something I did to the car :D

    I rented a carpet cleaner. €40 well spent :). The drivers footwell was the worst and didn't come up 100% but I think you'll agree it's a massive improvement.

    Before

    5138037152434AD08F24F7C0AABF2512-0000363222-0003685556-01024L-A630E11C454C4B2B81E5288847002FF0.jpg

    After a hoover

    AB7FA0B88E11421A9FA227183D08897E-0000363222-0003685555-01024L-B30DCC6430B7456F99BBA06A4D4E8BE0.jpg

    After cleaning

    4B4614C9ABE0453C852D82DB8F0D1788-0000363222-0003685554-01024L-EE6974C268D44A73BD7351C5B92D1460.jpg

    It still looks crap in the after picture but it's a massive improvement in real life. The rest of the carpets came up perfect.

    Just ordered a set of these for it so that will make the carpet perfect looking.

    http://www.carmats.co.uk/alfa-romeo-car-mats/166/alfa-romeo-166-saloon-2-5-3-ltr-model-mats.html


  • Advertisement
Advertisement