Advertisement
If you have a new account but are having problems posting or verifying your account, please email us on hello@boards.ie for help. Thanks :)
Hello all! Please ensure that you are posting a new thread or question in the appropriate forum. The Feedback forum is overwhelmed with questions that are having to be moved elsewhere. If you need help to verify your account contact hello@boards.ie
Hi there,
There is an issue with role permissions that is being worked on at the moment.
If you are having trouble with access or permissions on regional forums please post here to get access: https://www.boards.ie/discussion/2058365403/you-do-not-have-permission-for-that#latest

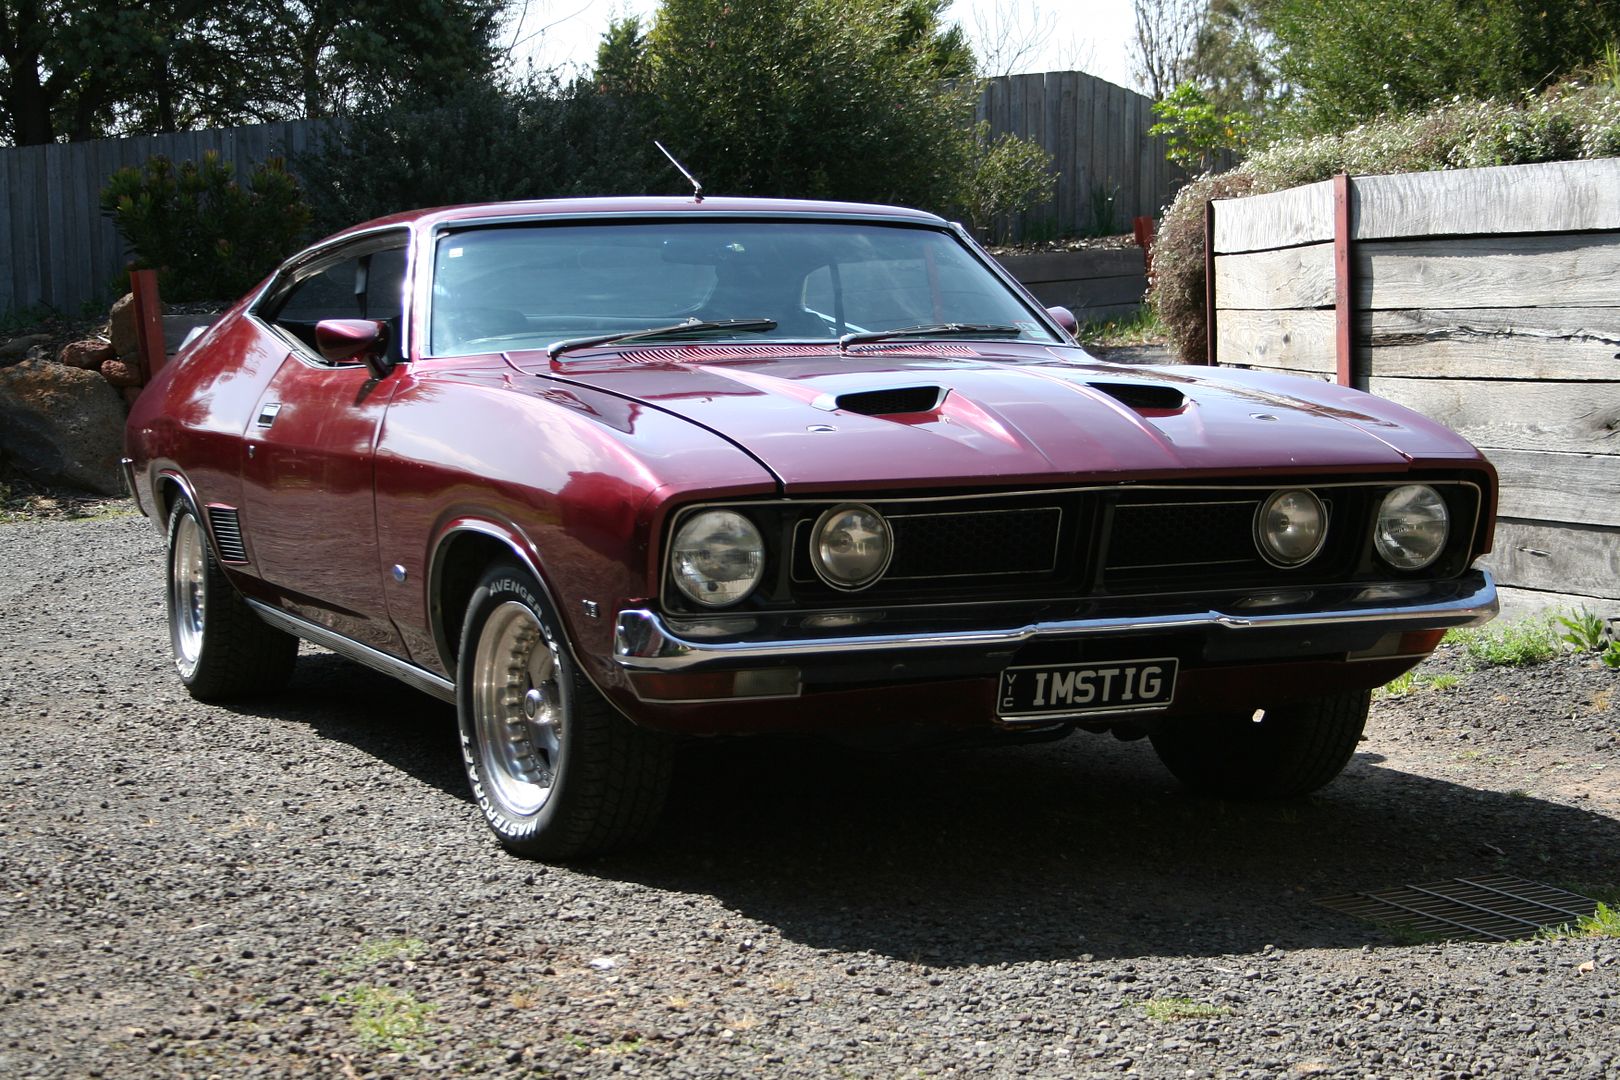
Last of the V8 Interceptors.. my XB Falcon Coupe

  • 28-03-2014 4:15am
    #1
    Registered Users, Registered Users 2 Posts: 1,303 ✭✭✭


    Following on from my Challenger Project thread, I figured I’d start one on the XB too… I’ve owned this car for so long now that I actually can’t really remember not owning it, I know there will be many people who have had cars longer but I bought this car back in the late ‘90’s when I first moved to Australia.. this was my must own car when I was growing up as a little kid, never mind Lambo’s or prancing horses the day I saw Mad Max for the first time as a 7 year old kid I was hooked on that car… I promised myself that I would own my very own last of the V8 Interceptors one day…. Only one small problem lay in my way, I had no idea what the hell it was.. I’m pretty sure that no one in Ireland in the early ‘80’s did.. the Interweb wasn’t there for me to just quickly Google what the hell it was.. as I grew up I had plans of making a replica out of a Capri (actually I know a guy in Germany doing exactly that)… anyway flash forward to ’96 & I’m now living on the other side of the world, calmly walking down the road one day when an XB Coupe drives past… you cannot picture the look on my face.. so I grab my Aussie work buddy & asked him WTF is that car.. he laughs & says that’s a ****ty old Aussie Ford.. I ask where can I get one, try the local tip is his reply.. no one wants the old Aussie ‘70’s muscle cars he assures me.. no one & clearly I must be mad to want one… yeah, mad like Max I whisper under my breath… & that was the start of the hunt.

    I spent a few months searching for one & looked at about 7…. In hindsight as they are in such demand now I wish I’d bought all 7 of the bloody things.. I could have sold 6 of them in 2007/8 when the market was just crazy & been a very rich man… but who am I kidding I wouldn’t have sold em… I still have the rolling shell that I bought for spares too & once the XB & the Chally are done I’ll be turning that into a track car..

    At first my plan was to make a Mad Max replica & I found a bunch of likeminded folk & started to help people build their replica’s, both Mad Max 1 & 2 cars… I had all the parts needed to make a MM1 replica until only 3 years ago when I decided that I couldn’t bring myself to cut up the old girl so I sold the lot to someone who was willing to do that to their coupe.

    IMG_0358-1.jpg

    Now, I used to have thousands of pics from over the years of everything that I did.. but due to some failed hard drives & being too lazy to do backups over the years I’ve lost a lot of them…. So the following is what little I have of the pictorial history I have for the old girl, I was working for IBM at the time I bought her & I was travelling all over Australia in my job, so I ended up buying the car out of a small town in the hills of Adelaide in South Australia… this is how she looked when I got her home for the first time

    XBampMe_zpscfb110dd.jpg

    Frontside2_zps2d984815.jpg

    Rearside2_zps70f3735c.jpg

    GTdash_zps857b69e9.jpg

    & the spare shell that was bought as there was nowhere to get a lot of the parts back then…. Not much has changed over the years, some bits are still made from unobtaintanium

    IMG_0062-2.jpg

    The main thing that I was looking for a high end GT spec car with all matching numbers mechanicals.. & that’s what I got.. the car had been restored in about 89 or 90 I was told & I don’t think that the engine bay had been cleaned or even looked at since that day… pulling the engine out cleaning that engine bay should have been on the top of my list of things to get done, but I just wanted to drive the car so it wasn’t that high up I must admit.

    OilyBit_zps9f0d0bc8.jpg

    One day when driving her pretty hard the engine went off note & dropped a cylinder.. dirty plug I assured myself on the drive home… nope… worn lobe off the cam it turned out to be in the end.. I had a really big car show to be at in a few months’ time then that was a massive get together of as many Coupes as possible so I was determined to get her going again for that… this meant that rebuilding the engine was out as I didn’t have that much time.. so I pulled the engine anyway & figured I’d find another cheap one somewhere, after all it only had to last a weekend.. so an engine was sourced for the pricey sum of one slab of beer… so 9l of beer for 5.8l of V8… seemed an ok deal to me

    Slab engine when I got it

    P5290003_zps7a71a062.jpg

    Slab engine after I cleaned it up a bit before fitting it to the Coupe

    rIMG_0219_zps9ad314ab.jpg


«13456710

Comments

  • Registered Users, Registered Users 2 Posts: 1,303 ✭✭✭Daved_XB


    I stripped down all the oil, grease & crap from the engine bay & gave it a few coats of new black paint to make it look half decent & cleaned up the extractors with some heat resistant paint

    RIMG_0213_zps053e41bf.jpg

    IMG_0222_zpsc89d891a.jpg

    Now when I bought the car the heater hoses on the engine where cut, so instead of heading thru the firewall into the heater core the engine inlet & outlet that feeds the heater core where just joined by a bent hose, as can be seen in the old dirty engine bay pic above… now I knew that this meant that the heater core leaked… a very common issue with these XB’s & because my car was a factory aircon car I also knew that the heater core could not be removed whilst the dash was in place… so I did the only thing I could, at the time the biggest job I’d ever attempted on a car on my own

    IMG_0232_zps8a636da7.jpg

    IMG_0231_zps42827881.jpg

    Whilst the car was clearly not going anywhere for a while I also decided to fix the leaking rear axles.. the bearings where well shot

    IMG_0425_zpsc265694f.jpg

    Then with the help of a mate we dropped the new heart in…

    IMG_0224_zps00edeb4e.jpg

    IMG_0229_zps7fddf511.jpg

    Looked a bit better that the old before shot above I’m sure you’ll agree

    IMG_0416_zps78498b19.jpg

    Then it was time for a quick cut & polish to put some shine back into the old girl

    IMG_0434_zpsae396903.jpg

    IMG_0433_zps0ed9e89c.jpg


  • Registered Users, Registered Users 2 Posts: 1,303 ✭✭✭Daved_XB


    For the next few years I simply drove her like I stole her… the club I was in did a lot of track days so the old girl saw plenty of tarmac action & some gravel trap action too…

    IMG_0060-1_zpse85fb032.jpg

    IMG_0120_zps3f3394ec.jpg

    IMG_0083-1_zpsbe132f94.jpg

    IMG_0088-1_zps321a9f18.jpg

    Over the time small issues would come up & get fixed along the way… the radiator was never set up with a proper overflow system, it just had a small hose that allowed the rad to spit hot liquid out onto the road under the car.. obviously this is a no no on race track so a collection bottle was needed & as I’m a child it had to be a chrome one.

    IMG_0043-1_zps1510e11d.jpg

    Then one day the carb started acting up badly & I’d always felt that the V8 was under carb’d anyway so rather than rebuild the old one I opted to rip it off & replace it with a shiny new Holley 750 Vacuum secondary unit

    IMG_0040-1_zpse42e4eea.jpg

    So off came the old one… I’m now 100% sure but I think it was a Holley 500cfm

    IMG_0038-1_zpsafb12582.jpg

    IMG_0044-1_zps59943a44.jpg

    An adapter plate was needed to fit this little puppy up but it was a nice simple 10 minute job that ultimately delivered more power & didn’t kill the economy too much whilst doing it

    IMG_0048-1_zpsb624fd07.jpg

    IMG_0049-1_zpse069c7c6.jpg


  • Registered Users, Registered Users 2 Posts: 1,303 ✭✭✭Daved_XB


    After one track day the car started acting up big time… the carb was running like crap.. on inspection the in line fuel filter was clogged with rust & the needles needed to flushed clean, after flushing the fuel lines the exact same thing happened again… so I figured that the tank itself must have been falling apart… luckily I had a whole spare car so a replacement tank wasn’t far away, I cleaned up the internals of the “new” tank & fitted up… job done.

    71c54ac1be776a888270f389f721b5f1_zpsde53a15e.jpg

    c4518a3fee3ea9422ae91578652de160_zps3ee89a2d.jpg

    ab7106c8e755baa1fd12b2e0e9deb5de_zps71adab81.jpg

    Now unlike my old tank this one was unmolested which meant that it had the original vent holes not welded over… this sent me on a mission to track down the very fragile venting system that these cars had to keep the fumes out of the car

    a9e6001c9b30336663edae46555d9f52_zps6c29669c.jpg

    Much to my shock I actually managed to track down the part… to say that this piece is made of unobtainium is a major understatement.. I was so happy when I found it in a pick-a-part scrap yard & was only charged 2 bucks for it.. happy days

    2cc6e625aa9f01bdf438b0e0b4001267_zpse08464df.jpg

    3d8d9e2f8ecbaef2fc2ecc4d44fe79f1_zps86466de9.jpg


  • Registered Users, Registered Users 2 Posts: 1,303 ✭✭✭Daved_XB


    Fast forward now to 2010 & I walked into the garage one day & whilst looking at the original numbers matching V8 on a stand in the corner I decided that I should strip it down & have it sonic’d & checked over for a nice big cube rebuild..

    IMG_0003.jpg

    So I made some space in the garage, broke out the tools & cued the montage music…. Set to breaking it down..

    IMG_0007.jpg

    Now if your playing along at home first start with a buggered old V8, next step should be to find someone who knows what they are doing. I skipped that step

    IMG_0006.jpg

    Drain the block of all the old crap oil

    IMG_0008.jpg

    Remove the rocker covers & discover that Australian spiders will live anywhere… remove the spiders (remembering that most of them can kill you)

    IMG_0010.jpg

    Remove the intake manifold... you can clearly see the push rods now, hence why people call them push rod engines

    IMG_0013.jpg

    IMG_0014.jpg

    You don’t have to remove the rockers from the heads obviously, but I had a whole day to kill so everything was coming apart

    IMG_0015.jpg

    IMG_0016.jpg

    IMG_0020.jpg


  • Registered Users, Registered Users 2 Posts: 1,303 ✭✭✭Daved_XB


    Undo the head bolts, this was a good excuse to break out the toys

    IMG_0021.jpg

    Lift off the head

    IMG_0022.jpg

    I assume everyone has had an engine apart or seen one apart before.. but just in case, here on the underside of the head you can see the intake & exhaust valves & the spark plug tips… I’ve taken the last one out so you can see daylight thru the hole, don’t say I never do anything for you

    IMG_0023.jpg

    Here you can see the pistons in the block, the third one along was the dead one… ignore the rust in the last one that happened when the engine sat outdoors in the rain for a brief time

    IMG_0024.jpg

    IMG_0025.jpg

    With the other head off, flip the engine upside down

    IMG_0030.jpg

    IMG_0037.jpg

    Remove the oil sump, now you can see the oil pick up pump, the crank shaft & where the rods connect the pistons to the crank

    IMG_0042.jpg


  • Advertisement
  • Registered Users, Registered Users 2 Posts: 1,303 ✭✭✭Daved_XB


    Now to extract a piston, remove the end cap being careful not to damage the cap, the bearing or the crank

    IMG_0043.jpg

    IMG_0048.jpg

    IMG_0049.jpg

    IMG_0050.jpg

    Now line the crank up so that the piston & rod are aiming straight out the cylinder… then tap the piston out being very careful not to touch the bore walls of the cylinder

    IMG_0051.jpg

    Once the Piston & the rings are past the lip of the cylinder simply pull out

    IMG_0052.jpg

    IMG_0053.jpg

    One down, 7 to go…

    IMG_0054.jpg

    All eight out

    IMG_0058.jpg

    It’s not the best pic, but you can see where the cam was so badly worn that it was no wonder she was dropping cylinders

    IMG_0062.jpg


  • Registered Users, Registered Users 2 Posts: 1,303 ✭✭✭Daved_XB


    Now undo & remove the main caps.. you’ll notice that since this is a Ford small block & not a HO block it only has two bolt mains.. the bigger Ford motors offered four bolts per main

    IMG_0066.jpg

    Next I pulled the cam timing chain & the flex plate off, the crank is now free to be lifted out

    IMG_0069.jpg

    IMG_0071.jpg

    & yes it’s bloody heavy in case your wondering

    IMG_0074.jpg

    Next was to remove the cam gears

    IMG_0075.jpg

    Almost done now…

    IMG_0076.jpg

    Gently slide the cam out being careful not to damage any of the lobes… mind you mine was stuffed to start with so no need for me to be so careful

    IMG_0077.jpg

    & now your done.. the block is ready to be acid dipped & checked over, only the frost plugs left to punch out

    IMG_0078.jpg

    IMG_0080.jpg


  • Registered Users, Registered Users 2 Posts: 1,303 ✭✭✭Daved_XB


    Decided on some artsy shots before throwing everything bar the block in the recycle bin

    IMG_0091.jpg

    IMG_0089.jpg

    IMG_0090.jpg

    IMG_0085.jpg

    Now only a matter of weeks after I’d done the above I made the decision to move back to Ireland a few years… so the XB went to a mate to baby sit & the block here went to another mates shed to sit in wait for me to return with a build plan… despite me leaving my mate the keys & giving him free reign to drive the old girl as much as he wanted she eventually ended up in storage when he moved & could no longer garage her… so this is how she sat like the ark of the covenant for over a year

    null_zpsc068c9be.png


  • Registered Users, Registered Users 2 Posts: 1,303 ✭✭✭Daved_XB


    Now that I’m back in Australia & things are going well for me in work I decided that I would go mad & build an out & out monster of a Muscle car… inspiration was borrowed from Eric Bana’s movie Love the Beast (if you haven’t seen it do yourself a favour & get a copy) So the plan for 2014 is to build up a stupid amount of HP engine… then a tuff as hell gearbox & Diff to take the abuse of the engine.. big brake set up with bigger wheels & modern suspension to make it handle better… cosmetically the car has some rust & needs a full body strip down & respray.. I also want to do a custom interior for her too…. So what I’ve done is set myself a huge task that will soak up all of my time & money for the year & probably fail somewhere along the way…. But here goes anyway…

    I took my old matching numbers engine to be checked over for a big bore & stroke high HP rebuild… but when checked it was never going to be able to give 500HP easily or reliably… so given my love for new shiny things… I opted to buy a new Dart block out of the USA… I went for a Windsor block design with a 9.2 deck height & 4.125” bore giving 427cu’ or 7Ltr’s in old money

    The new 427ci Block

    Block_zps34ae1f3f.png

    The new crank shaft

    Crank_zps472176f1.png

    The new Cam… specs as follows.. 254/260@50 650/660 lift

    Cam_zpsa5f58b37.png

    The new Cam installed..

    CamIn_zps332d602b.png

    CamRet_zps5208a91e.png

    The new gear set

    Timing_zps3bcff214.png


  • Registered Users, Registered Users 2 Posts: 1,303 ✭✭✭Daved_XB


    A little more Engine porn for ya…. The block is fully finished & all buttoned up now… painted in Ford racking Blue, there was a big push from some to paint it black, but I really like Ford blue & I’m paying so I win..

    Blockpaint_zps81ba60f9.png

    The custom carb is also finished now…

    AEDCarb_zps5d535716.png

    AEDCarbie_zps8a39b563.png

    Sadly we expected to have more done by now, but we’ve been waiting for the valves for the heads for a while, so we’ve switched options & ordered a set of 6000 series ferreras which should be in tomorrow

    More work has been done on my new engine… the heads are finished, all valves & springs set..

    head_zps56adc869.png

    We’ve bolted the heads to the block now & fitted the electric water pump… I decided that since I’ll be using a 4 core Aluminium radiator with twin electric thermo fans for this engine that there was no point in using an old style mechanical pump that would be a lot heaver & would steal HP

    Heads_zpsb71ef26c.png

    We dummied up the high rise manifold, carb & rocker covers so that I could get some measurement to work out if this will all fit under the bonnet of the XB with the stock bonnet or if I would need to fit a Cobra style bonnet scope to make this work…. We machined done the plenum, so now if I use a drop base air cleaner it will all fit under the stock bonnet….. although I’m starting to think that I’d like a glass bonnet now so I can see this thing of beauty all the time…

    dummy1_zps8338ac87.png

    dummy_zps4cb20f11.png


  • Advertisement
  • Registered Users, Registered Users 2 Posts: 1,303 ✭✭✭Daved_XB


    my engine builder was not happy with the intake manifold that we had, so he actually got the foundry to alter the internal casting to a design more to his liking… then once that was done the whole thing had to be machined to match perfect & it spent some time on a flow bench being ported & tested to match the heads as best possible..

    intake_zpsdfb2531a.png

    Once we finally got that sorted it was time to run in the cam on the dyno & set a base line… this in itself took an age.. this engine uses double valve springs due to the power but you can’t run in a cam using the stiffness that double valve springs give you…

    Spring_zps50125007.png

    So you assemble the whole thing with the double springs & you set all the lash etc & make sure the engine is 100%... then you pull the springs off & remove the inners… then you put it all back together & run it up on the dyno to bed in the cam nicely without any lobe damage…. Then once you’ve done that you then pull the springs again & check that everything looks ok… then you re-install the inners & set all the gaps & lash again & then you can fire her up & give her a run in anger..

    Here is the finished product on the dyno…

    Dyno2_zps67de2833.jpg

    Dyno1_zps854389d6.jpg

    This is a brief clip of the engine when the cam was being run in…

    http://s1005.photobucket.com/user/greencapri408/media/video-2013-11-20-19-38-58_zps15d2d739.mp4.html

    This was the first power run… due to the expletive used by the dyno guy at the end.. this one may be NSFW

    http://s1005.photobucket.com/user/greencapri408/media/video-2013-11-20-21-07-09_zpscb109b89.mp4.html

    So where did we end up on the first power pull…. 665.9HP…. oh & as the dyno room is on a hill I’m claiming the .1HP too as an atmospheric variance… so I’m calling that 666HP!!! & we had 582ftlb’s of torque… that’s 789NM in the new money… & whilst racers like big HP numbers… as we all know HP is just how fast you hit the wall, torque is how far you move it… in heavy Muscle cars a bit Torque figure is what you want…

    Dyno_zps2c7e4252.jpg

    Now my builder reckoned that there is another 20-30HP in the tune & Card changes… we managed to get max of 691HP out of it on the dyno & he reckons that if I swap the cam for something with a more aggressive lift lobe then we’ll be well into the 700HP range… I’ve told him, that if I get bored with it being 666HP+ on the mild tune… I’ll let him know… he builds a lot of drag race cars & engines & his fancy SW tells us that in my XB this engine would see a mid to low 10 second Qtr mile pass with a terminal velocity of 130MPH+ sadly as I don’t have a roll cage if I do visit a strip it will be a one shot deal as the ANDRA racing body here ban any 10 sec cars without cages from running…


  • Registered Users, Registered Users 2 Posts: 1,303 ✭✭✭Daved_XB


    I went out last weekend with a trailer & picked up my new engine & it’s now sitting in my garage as a constant reminder for me to get my finger out & get cracking on getting the XB ready for it..

    IMG_1105_zps9df600cf.jpg

    I also have the custom Carb on my bench, correctly jetted for my build now

    IMG_1108_zpsd85dace0.jpg

    IMG_1109_zps400cb0b5.jpg

    I’ll be running an ICE ignition system on this engine… no more crappy points for me…

    IMG_1114_zps761d155e.jpg

    IMG_1111_zps1c47eab0.jpg

    IMG_1112_zps0e9799fe.jpg

    You can programme in different advance curves & such on this unit

    IMG_1113_zps0fd4a3bd.jpg

    I also have a nice set of tuned length 4:1 extractors, these are the actual ones that we got the dyno results with

    IMG_1106_zps2b93597a.jpg

    These are also set up with AFR bungs welded in so I can run sensors to fully understand what happening with the air/fuel tune of this engine

    IMG_1107_zps3cc3cf6e.jpg

    This is pretty much where I’m at now with this one… over the next few weeks I’ll start buying more bits & hopefully my panel beater will find a gap in his schedule to fit me in.. I’ll keep you all updated as I go..


  • Moderators, Science, Health & Environment Moderators, Society & Culture Moderators Posts: 60,217 Mod ✭✭✭✭Wibbs


    Subscribed! :eek: Brilliant story Sir. Like you I soooo wanted Max's interceptor too. :) I'm glad you didn't cut yours up though. She's too nice as it is.

    Rejoice in the awareness of feeling stupid, for that’s how you end up learning new things. If you’re not aware you’re stupid, you probably are.


  • Registered Users, Registered Users 2 Posts: 2,547 ✭✭✭Titzon Toast


    Living the dream is what you are doing!
    More updates please.


  • Registered Users, Registered Users 2 Posts: 4,175 ✭✭✭Top Dog


    Another subbed - oh to live in a land where a V8 wasn't so socially/economically-unacceptable!


  • Registered Users, Registered Users 2 Posts: 1,303 ✭✭✭Daved_XB


    One of the lessons I learned with the Challenger project is to not just rush in & rip parts of the car before you fully understand exactly what you’re replacing & what parts you have vs need to get… so I’ve started to go through some of my boxes of bits that I have laying around… I have a heap in storage at a mates place including a 2nd XB coupe rolling shell, a spare bonnet, 3 door, a boot lid, 3 interiors & god knows what else..

    Anyway I was looking at the dash in the XB now & it’s been butchered over the years… someone has just painted the headlight & wiper switches with thick black paint & whilst they work they look crap..

    IMG_1853_zpsf0a481df.jpg

    IMG_1854_zpsfe8c9775.jpg

    The radio slot has been cut larger to allow for the poor fitment of a modern radio

    IMG_1857_zps34ba6870.jpg

    The gauge lenses are all badly smoked now..

    IMG_1861_zps3a2baf1b.jpg

    & the ashtray is fine when closed… but shouldn’t really be opened at all…

    IMG_1859_zpsce51c546.jpg

    I do have a very good condition clock that was fitted to the GT’s..

    IMG_1865_zps91dd54ff.jpg

    It’s supposed to go on the right hand side between the light switch & the vent.. but I might see if I can replace the ashtray with the clock instead..

    IMG_1855_zps5d7f56d6.jpg


  • Registered Users, Registered Users 2 Posts: 1,303 ✭✭✭Daved_XB


    I have a really nicely restored dash surround for the car now

    IMG_1863_zps20b3616b.jpg

    The lenses are all clear & the paint work is real nice & crisp

    IMG_1864_zps90c5fc92.jpg

    I also have a set of New Old Stock switches, here is the headlight switch.. couldn’t find the box with the wiper one.. but I have it somewhere..

    IMG_1866_zps6d0a14e3.jpg

    Something’s I’m not putting back to stock.. so I ordered myself a new B&M Stealth shifter for the auto box.. I saw one in a car the other week & I just had to have one..

    IMG_1867_zps3144d034.jpg

    IMG_1869_zps293f915e.jpg

    Now to start on the list of bits I don’t have… uprated gearbox, driveshaft & Diff.. new suspension, brakes & wheels… must order all the bits over the next few weeks..


  • Registered Users, Registered Users 2 Posts: 1,303 ✭✭✭Daved_XB


    Well, this project has just kicked off now as I’ve just ordered the following for the car & they should be here in a few weeks so I now need to pull my finger out & start stripping the car down to allow me to fit them…. So what goodies have I ordered, lets see…

    For the rear I’ll be ripping out the old leaf spring setup & installing:

    RRS 3 link rear end setup
    35 spline axles
    Watts linkage frame assembly
    Coil over shocks
    Trailing arms
    Torque arm
    315mm slotted rotors
    Mini 6 piston calipers

    The front end will be getting:

    Coil over struts
    RRS knuckle Spindles
    330mm slotted rotors
    6 piston calipers
    RRS reinforced lower control arms
    RRS Power rack & pinion kit to replace the crappy old steering box setup
    RRS high performance steering pump
    RRS Strut rod adjuster kit
    RRS tie rod adjuster kit
    Shock tower notching kit (will give an extra 5” space per side)
    Shock tower strut brace kit

    This should keep me busy for most of the winter in the skunk works garage, Now to go on the hunt for some 17’ wheels that I like to fit over the brakes that I have just bought…


  • Registered Users, Registered Users 2 Posts: 1,303 ✭✭✭Daved_XB


    Just thought I’d give a bit of an update for this thread… the old girl is off at the panel beaters now getting some much deserved TLC & I’m busy making lists of all the bits I need & ordering parts… hopefully when she’s painted & back in my garage I’ll have 90% of the bits needed.

    I ordered my new wheels about 2 weeks ago & there is an 8 week lead time on them plus shipping, so it will be a while before they turn up now.. they are Repo’s of the Ford GT-40 & AC Cobra wheels, I’ve always loved them & ever since I decided many many years ago not to make a Mad Max replica out of this car these have been the wheels I wanted to put on her.. I have a set of 17x8 for the fronts & 17x10.5 for the rears coming

    XBWheel_zpsd9a08f17.jpg

    Now with my Challenger getting a healthy 7mpg & having nowhere near as much HP as this build I figured that the stock fuel tank will not really be conducive to long drives.. so I bought a 36 gallon or 140 liter tank (depending where you’re from), it will bolt into the stock tank hole in the boot & drop down nicely.

    IMG_1970_zps13c4beba.jpg

    It take the standard fuel sender & has AN fittings for larger fuel lines

    IMG_1972_zpsbfc9e343.jpg

    It’s hard to get a good shot of the insides, but it has internal baffling & a swirl pot integrated also..

    IMG_1973_zps5883e553.jpg

    My car never had a center console in it when I got her, I did get one in another XB that I bought for spares, but that one was so badly damaged it wasn’t worth even trying to fix up… so a new one was bought so I’ll have somewhere to store my crap whilst driving… shame I’ll probably have to cut this one a bit to make it fit over the aftermarket shifter I’m installing

    IMG_1980_zpsda3e013a.jpg

    IMG_1981_zps510813f5.jpg

    Another thing that I’ve decided to replace are all the rear light lenses as the Aussie sun has not been kind to them..

    IMG_1975_zps3b4720ed.jpg


  • Registered Users, Registered Users 2 Posts: 1,303 ✭✭✭Daved_XB


    I’ve always known that my car has some panel issues at the rear (is there any XB that didn’t) so whilst I was shopping for bits, I figured I’d buy all the panels I might need up front & then if they where needed by the panel beater he’d have them to hand & if not needed I know for a fact that they are needed on my other Coupe.. so I go myself the rear panel that runs under the rear window, the complete rear light panel, a GT rear valance panel & the rust repair panels for both bottom corners of the boot channel & a length of straight boot channel..

    IMG_1977_zps3c9f8351.jpg

    IMG_1978_zpsf35cddf0.jpg

    IMG_1979_zps92e6148b.jpg

    IMG_1989_zps8ad3e525.jpg


  • Advertisement
  • Registered Users, Registered Users 2 Posts: 1,303 ✭✭✭Daved_XB


    Now, I’m only going to see the car once a week now… so most of the pics I have are from the panel beater & are not the best quality I’m afraid, but here is a collection of what we are finding as we dig into the cars past… So far we uncovered that the panel under the rear window was replaced at some point but rather than use another panel from another car or a replacement panel (may not have existed back then) the panel was hand made to go in… sadly it was hand made by someone whom I assume had never seen an XB Coupe before & just had its basic shape described down a bad phone line to them.. the panel was 3mm too short which explains why my boot lid never lined up & was out height wise on the driver’s side by 7mm.. a gap that was nicely covered up bog. It’s also clear that the rear passenger side is creased from a shunt she must have had some stage in the past that was badly repaired & then heavily bogged over.. the rear boot channel corners seem to be made up from Sedan parts & not Coupe parts.. but all in all I’m just happy that their seems to be little to no rust in the rear to be repaired & I have all of the repair panels needed to swap out the worst of the past repairs & my panel beater is very happy that it’s all simple fixes… some pics below…

    IMG_1966_zps75729d8d.jpg

    IMG_1964_zpsb68224e0.jpg

    photo3_zps0df23314.jpg

    photo9_zps5e8d1f94.jpg

    photo2_zpsca126731.jpg

    photo6_zps61f1e1f0.jpg

    photo7_zps8d3a34a6.jpg

    photo8_zpsbf60b798.jpg

    That’s about it till I head out sometime this week with my proper camera & get an update & some better pics..


  • Registered Users, Registered Users 2 Posts: 1,303 ✭✭✭Daved_XB


    Had a quick trip out to see the Coupe tonight… it’s a full Ute (Aussie PickUp truck) conversion now I guess… with a bit of luck we’re almost at the point of starting to weld in new steel & the new panels we have. My panel beater is also just about done making up the bracing sections & panels that will never be seen once the old girl is back together..

    photo12_zps6f4ee70b.jpg

    photo13_zps4376e683.jpg

    photo14_zps41de6d1f.jpg

    As a bit of an unplanned bonus I’ve also ended up with some parts that I will clean up, paint add some lenses & lights behind & use as some wall art in the pool room..

    photo15_zps05fc1796.jpg


  • Registered Users, Registered Users 2 Posts: 1,303 ✭✭✭Daved_XB


    I was happy to receive a txt with some pics of the new panels going on now… I’ll be heading out tomorrow to check it out in the metal & take some pics with my camera.. starting to look like a Coupe again…

    photo17_zps0a6a1090.jpg

    photo16_zps2551034b.jpg


  • Registered Users, Registered Users 2 Posts: 1,303 ✭✭✭Daved_XB


    So my goodies from RRS turned up this week… well everything except my 6 Piston Calipers for the front & the mini 6 Piston Calipers for the rear… I’ve been through the boxes & I’m happy with the contents for sure… here are some of the highlights…

    The shock tower cut down sections, the kit comes with the new tower sections, templates & all the reinforcing plates that I’ll need

    IMG_2010_zps3044e028.jpg

    IMG_2011_zps959e58a4.jpg

    The strut top bracing kit..

    IMG_2007_zpseeac592c.jpg

    The new front & rear slotted rotors..

    IMG_2006_zpsffdcc1d3.jpg

    Rears complete with handbrake drum built in..

    IMG_2004_zpsa3ba6403.jpg

    IMG_2005_zpsf22828c2.jpg

    The new coilovers for the front..

    IMG_2012_zpsf2b9dfed.jpg

    IMG_2013_zps1b37de03.jpg

    New front knuckles to tie the coilovers & brakes together..

    IMG_2008_zps3ba30670.jpg

    IMG_2009_zps23d1bab8.jpg


  • Registered Users, Registered Users 2 Posts: 1,303 ✭✭✭Daved_XB


    The new power rack & pinion steering rack..

    IMG_2015_zpse92cf338.jpg

    New race power steering pump setup..

    IMG_2014_zps8f9e41f9.jpg

    I didn’t bother pulling out all the brackets & such for the new multi link rear end that replaces the old leaf springs or the watts linkage that goes with it… but here is the very large torque arm that joins the diff housing to the gearbox mount & acts as a tailshaft loop at the same time I reckon…

    IMG_2016_zps534d717f.jpg

    IMG_2017_zpsa9a27210.jpg

    I’m told that my wheels will be here any day now… so I’m getting there with parts collection.. now to just get the old girl back from the panel beater..


  • Registered Users, Registered Users 2 Posts: 1,303 ✭✭✭Daved_XB


    The new 17” wheels for the XB turned up last week… I’m very happy with how they look… I’m glad I didn’t go for the polished rim in the end, I think that they look much better in the metal with just the polished lip..

    IMG_2024_zps8e48802a.jpg

    I also opted for the optional lug nut hide-away panel that.. well does just as it says on the tin & hides the nuts…

    IMG_2025_zps0a9a07cb.jpg

    Then the spinner is locked on to hold the hide-away panel in place & to finish off the look of the wheel..

    IMG_2026_zpsd0f0805a.jpg

    & then when all together they look like this..

    IMG_2023_zps28bb9f8d.jpg

    As I said in one of the previous posts I have now got my hands on a good dash that has the stock radio opening & hasn’t been cut up to accept a larger modern radio, so I decided to get a retro Ford radio that will fit the stock the opening & look the part..

    IMG_2022_zpsd1f30d16.jpg

    Whilst still having all the modern features like ipod connections & CD stacker inputs etc….

    IMG_2020_zps8982f94a.jpg

    My list of parts still needed for this car is getting shorter by the day now… my 6 piston calipers for the brakes just shipped out of Sydney yesterday & I should have them by the end of the week now… next step is to work out what gearbox I want I guess & get that ordered so that when the car is back from the panel shop I’m ready to go…


  • Registered Users, Registered Users 2 Posts: 1,303 ✭✭✭Daved_XB


    My RRS brake Calipers turned up today…. They are full sized 6 piston calipers for the front & mini 6 piston calipers for the rear..

    IMG_2037_zpsf92729a1.jpg

    IMG_2036_zps140898a2.jpg

    The fronts are normal full size one… the same size as the Baer ones I have now for the Dodge..

    IMG_2040_zps45815922.jpg

    IMG_2038_zps9bf0066b.jpg

    But the mini rear ones are the same size as the 4 piston one I have for the Dodge… they look really nice..

    IMG_2041_zps6ef4773f.jpg

    IMG_2039_zpsa4382d74.jpg

    So that’s all the suspension & brakes for the XB now… next job is to shop for a gearbox


  • Registered Users, Registered Users 2 Posts: 1,303 ✭✭✭Daved_XB


    Just a quick update from the panel beater…. The new section for under the rear window is in, along with all the required support underneath & the parcel shelf has been rebuilt.. the new taillight panel is in, as are all the new boot channel sections & the boot has gone back on… so it looks like a car from the rear again & all the bracing is out.. happy days

    IMG_1782_zps47c51ba8.jpeg

    Now the real fun begins, all we’ve done so far is to replace the rotten metal with shiny new stuff & nothing else.. so now we’re going to tackle the botch panel repair & shocking misalignment from the previous repairs (& I use that term loosely).. we’ve found the join where the new rear Qtr was…. Wow I almost said “fitted” then… where the new rear Qtr was thrown on..

    IMG_9593_zpsd339ce69.jpeg

    Now that we’ve taken the 3mm to in some places 7mm of bog away, you can see just how shocking the panel gaps & line ups are… my panel guy is less than impressed & I’m freaking out… but he assures me that he can actually beat panels & that as such he can work the metal & get her back to the shape she is supposed to be without the need for tons of bog…

    IMG_7684_zps44fdf17c.jpeg

    IMG_9539_zpsefc33fcf.jpeg

    IMG_7708_zpsd8c9741f.jpeg

    I’ll be heading over to see the old girl tonight for the first time in a few weeks.. I’ll get some more info & pics then…


  • Registered Users, Registered Users 2 Posts: 1,303 ✭✭✭Daved_XB


    I’ve been doing a lot of travel & never did get a chance to go & see the old girl much this last few weeks, so I’m reliant on the panel beater to take some pics for me… he’s finished stripping back the passenger side rear Qtr now to well above where the join where the past poor repair has been done, the roof is not right he tells me.. but he’s confident that he can fix that..

    IMG_5419_zps04645fae.jpeg

    He decided to move further up the front to get an idea of what sort of accident damage may be awaiting us up there that was badly repaired, with the guard off he could see that the bottom section is relatively rust free which is nice, but it is not the correct shape that she should be… again I’m told this can & will be fixed

    IMG_0666_zps29200649.jpeg

    IMG_5936_zps6bde9ce2.jpeg

    IMG_6424_zps1923eeb6.jpeg

    IMG_4352_zps9e776c0f.jpeg

    Sorry the pictures aren’t great, I’ll be getting over to see the old girl in the next few days & I’ll look to take some better shots then..


  • Advertisement
  • Registered Users, Registered Users 2 Posts: 44 Alan Ashe


    More,,,,,, I NEED MORE :D


  • Registered Users, Registered Users 2 Posts: 1,303 ✭✭✭Daved_XB


    I wish there was a real update to be made, but there isn’t really… well not just yet anyway… unlike the Challenger project, there are little to no reproduction parts being made for these old Aussie Muscle cars.. so I had just moved the car to my new house the other week & I was getting ready to move my spare shell in too so I could start cutting it up to make 1 good car from the two…..

    IMG_2647_zpsfacs4h1v.jpg

    IMG_2675_zpsgqfp6jbr.jpg

    Then just last week I was informed about a company here that have just started to make a nice selection of new repro panels for some of the rear sections of this car, so I’ve just ordered a new parcel shelf (upper & lower) & new boot floor sections, plus the bumper support brackets that are bent & stuffed on mine… so hopefully the new panels turn up in the next week or two & then this project will kick off again in a big way, as I still hope to have her ready for a big show here in September….


  • Registered Users, Registered Users 2 Posts: 44 Alan Ashe


    I love this thread, thanks for the quick update. Also, the mini trolley/cradles under the car, for moving it, is an excellent idea.


  • Registered Users, Registered Users 2 Posts: 1,303 ✭✭✭Daved_XB


    Alan Ashe wrote: »
    I love this thread, thanks for the quick update. Also, the mini trolley/cradles under the car, for moving it, is an excellent idea.


    Thanks for the feedback mate…. Yeah, the Go-Jacks are a great tool to have in the shed… it’s so easy for me now to move the car around, they are really designed for two people to move the car but I can shift it where I want it on my own with little effort


  • Registered Users, Registered Users 2 Posts: 1,303 ✭✭✭Daved_XB


    Wow… it’s been so long since I had an update for this thread…. Realistically progress stopped just before Xmas & not much really happened since… we have decided not to use my original boot as it’s too much work to get it as good as I want it, so we’ve fitted a spare one I had… my panel beater got all excited when he was stripping the boot back to bare metal as it had race car signage on it under the top coat… he didn’t take any pics, but it said Bridgestone across the back in very large letters it seems & the wing placement holes are a lot higher up the boot than they should be… so in my mind I’m now rebuilding this car with genuine race car parts…

    IMG_6445_zps54b4a36f.jpeg

    One of the issues we had was space & having to keep moving the car about to work on it…. So last month I went to collect the old girl & move her to the new Skunk Works where the project will be based… this how sad she looked when I picked her up

    IMG_2785_zps6d1ce41c.jpg

    Now she’s sitting waiting for me to finish off the Dodge so that I can concentrate 100% on her…

    IMG_2758_zpsgzciotvu.jpg

    I got a set of seats from a late model XR8 Ute for the right price, I’m still not 100% sure what I’m doing with the interior… but now I have more options than just reusing the original seats or the Landau seats that I have..

    IMG_2742_zpsj0sxbz9z.jpg

    I’ve also just picked up a load of new rust repair sections for the rear that some of which didn’t exist on the market last year.. so the timing worked out nice here… I have a set of wheel arch lips to go on, as I’m sure once I’ve removed the chrome trim & the paint there will be bugger all metal left there..

    IMG_2743_zpsp3un4xar.jpg

    I also got the rear sections of the parcel shelf, both horizontal & vertical..

    IMG_2745_zpswsmmmtur.jpg

    as you don’t ever see the metal I had just made up some flat plate steel to do the job, but much happier now that I can have it right..

    IMG_2749_zpswsoczgjl.jpg

    I also got a set of boot floor panels to go in… again both the horizontal & vertical panels… mine are badly repaired from rear end smash she must have had in her past..

    IMG_2744_zps9sa5iews.jpg

    IMG_2756_zpsmzhqfvr0.jpg

    IMG_2757_zpsqypg21gw.jpg


  • Registered Users, Registered Users 2 Posts: 1,303 ✭✭✭Daved_XB


    I also got a set of brackets & end plates..

    IMG_2748_zps5hzla4b8.jpg

    New bracket next to old…

    IMG_2752_zpsgbosx7pu.jpg

    New repair section sitting on top of what it will replace..

    IMG_2753_zpsfkwfouav.jpg

    & also got the fiddly little corner piece that ties it all together, to fill this hole…

    IMG_2754_zpsebtgf736.jpg

    IMG_2755_zpsulekptrj.jpg

    & the outside rear section behind the bumper that it totally mashed up on mine..

    IMG_2750_zpsmy65k54q.jpg

    IMG_2751_zpspmktycaw.jpg


  • Advertisement
  • Registered Users, Registered Users 2 Posts: 1,337 ✭✭✭rockatansky


    Daved_XB wrote: »
    this was my must own car when I was growing up as a little kid, never mind Lambo’s or prancing horses the day I saw Mad Max for the first time as a 7 year old kid I was hooked on that car… I promised myself that I would own my very own last of the V8 Interceptors one day…. .. as I grew up I had plans of making a replica out of a Capri

    How am I only seeing this thread now!!!!:eek::eek::eek: The above paragraph describes my life on a daily basis!! I beg of you, please keep this thread going!!!

    I've only ever sat in one Falcon XB, and it was THE XB Falcon! (thanks to the very kind people in Cars of the Stars in England), Max's Interceptor!

    Loving every post so far. I'm also a massive fan of the Falcon Sedan Yellow Pursuit specials. Ever think of going down that route?:D


  • Registered Users, Registered Users 2 Posts: 1,303 ✭✭✭Daved_XB


    Well done on getting to see the original when she was in the UK, next time I'm in the US I hope to be able to swing past & see her in her new home...

    I have often thought of building up a yellow pursuit special… but with this XB project, the Dodge project & my still as yet undecided “spare” XB shell project… I’m not looking to take anything else on….


  • Registered Users, Registered Users 2 Posts: 1,303 ✭✭✭Daved_XB


    Picked up a new Grille for this… well not new, but a reconditioned one… the quality is really very good.. it looks great..

    IMG_2824_zpsvlltlun4.jpg

    My one was badly smashed.. the spot light rings where broken

    IMG_2825_zpscr9lrdjo.jpg

    Also the upright stays that hold the honeycomb centers where broken & missing… I’m told that once these are gone the grill becomes too hard to recondition.. so I guess mine will just become wall art now..

    IMG_2826_zpsn7itkvdz.jpg

    IMG_2827_zpsqk93chci.jpg

    Now that I had a load of parts on order for the Dodge & they won’t be here for weeks.. my plan is to kick into this hard to see how much progress I can make… right now having the car done for September seems an impossible goal.. but I’ll try


  • Registered Users, Registered Users 2 Posts: 1,428 ✭✭✭quietsailor


    Daved_XB wrote: »

    Also the upright stays that hold the honeycomb centers where broken & missing… I’m told that once these are gone the grill becomes too hard to recondition.. so I guess mine will just become wall art now..

    IMG_2826_zpsn7itkvdz.jpg

    There are open access workshops springing up in Ireland that allow people to come in off the street and use 3D printers - could you fabricate a repair that way and save the grill? It might put some money back into you pocket :eek:


  • Registered Users, Registered Users 2 Posts: 1,303 ✭✭✭Daved_XB


    My understanding from those who restore them... the issue isn't making a new plastic upright stay, it's more the plastic welding of said stay in place so that it can take the stress... these grilles are designed that when the bonnet is open you can lean on them or drop tools on them... that's why a lot of them broke like this... now a complete 3D printed grille.... that might be cool


  • Advertisement
  • Registered Users, Registered Users 2 Posts: 1,428 ✭✭✭quietsailor


    :o
    Daved_XB wrote: »
    My understanding from those who restore them... the issue isn't making a new plastic upright stay, it's more the plastic welding of said stay in place so that it can take the stress... these grilles are designed that when the bonnet is open you can lean on them or drop tools on them... that's why a lot of them broke like this... now a complete 3D printed grille.... that might be cool

    I follow a lot of DIY CnC forums/threads and I am blue sky thinking of building a CnC table that would take multi heads - router, 3D scanner, plastic print head, engraver etc. If only you could find someone like that close to you :cool:

    blue sky as in pie-in-the-sky, it'll probably never happen :o

    Out of curiosity do you know what the plastic type is? I've heqard of people DIY welding plastic by getting a 2nd piece, breaking off a chunk, shaping it to look like a welding rod and then welding the first part using the "rod" and a small gas soldering iron/blowtorch.

    I'm not sure what materials it can/cannot work on though, I'll have a nose around the other forums I read and see if someone has tried it before


  • Registered Users, Registered Users 2 Posts: 1,337 ✭✭✭rockatansky


    Any update on this Dave?


  • Registered Users, Registered Users 2 Posts: 1,303 ✭✭✭Daved_XB


    Hi Mate, thanks for the interest in the project… I wish I had a nice big update for you with lots that’s been done to the old girl….. but the truth is nothing has been done at all really. I took the bonnet off the other week to allow me to pull the engine & gearbox out, but then I changed my mind as the garage is full of Dodge Challenger parts laying all around. I’ve been focusing all my time & efforts on getting the Dodge back together. Have a look in that thread on here if you haven’t already, it’s been way more work that I expected.. but I’m making progress & once I’ve got most of that car back together & have the space, then I’ll get back into this one


  • Registered Users, Registered Users 2 Posts: 1,303 ✭✭✭Daved_XB


    Right, so I finally decided to get back into doing something with the XB again… partly because I’m waiting for parts for the Dodge on back order & that project has come to a halt & mostly because.. well just because..

    The car has spent the last year almost just tucked into the back of the shed on go jacks looking all sad

    IMG_2881_zpsmwfjznfp.jpg

    So I dragged her out into the middle of the shed so that I’d have lots of space to move around her & start pulling her apart again

    IMG_3320_zpspwraj2fz.jpg

    First simple job was to remove all the lights from the front along with the radiator, uber simple job but quiet satisfying as it was just nice to be finally working on the old girl again

    IMG_3322_zpswvbnxrhh.jpg

    Next up was to remove the driver’s side guard, the more observant of you will have noticed that the passenger side was already off.. that’s because that guard had some bad rust & it’s been away getting repaired, I just haven’t gotten around to collecting it from my mates shed yet.. the guard removal is simple, apart from the bolts across the top of the engine bay, there are several at the front, one in the door jam & one under the bottom to the guard to undo… simples

    IMG_3323_zpshfggpgfp.jpg

    IMG_3326_zpsbgb3ocxk.jpg

    IMG_3328_zpsnmbbkq33.jpg

    The guard is in pretty good shape, no real rust at all to be seen on the front or back side.. I won’t know for sure till I remove the paint, but I’m optimistic..

    IMG_3330_zpsx5bso6kk.jpg

    The inner wheelarch area looks great too… again no real rust at all, I was expecting to find some nasty surprises in here but it’s starting to look like the only real body issue with this car is the very botched repair work she had in the rear all those years ago

    IMG_3334_zpshbmudffx.jpg


  • Registered Users, Registered Users 2 Posts: 1,303 ✭✭✭Daved_XB


    I was really not looking forward to removing this piece of trim from the sill… I have had many a nightmare thinking of what mass of rust & rot lives hidden behind that

    IMG_3321_zpstzno46wr.jpg

    I couldn’t believe my luck when I pulled this off… it’s perfect under there, a bit dirty but no rust at all… happy days..

    IMG_3324_zpsslphg5gq.jpg

    IMG_3325_zpstdkhzkcd.jpg

    Next up was to remove the engine & gearbox from the car, I’ve had the engine out before & indeed the box too but never both at the same time, so I decided that I’d remove them as a one unit.. first I started removing all the bits that would stop the extraction, so I removed the tail shaft, starter motor, extractors, the rear gearbox crossmember & the carb (replaced with the lifting plate).

    IMG_3333_zpsdcfklqwq.jpg

    IMG_3337_zps45up2xrz.jpg

    Like the Dodge the yoke comes out attached to the tail shaft followed by a flow of trans fluid…

    IMG_3335_zpsajthuphr.jpg

    Unlike Dodge, Ford didn’t see the point in fitting a drain plug to the bottom of the pan on the C4 transmission..

    IMG_3340_zps5epqrrnj.jpg

    As such the correct way to empty the fluid is to loosen all the bolts on the pan & pry down a corner to allow it all to run out… really Ford, how much would a drain plug have cost here…

    IMG_3341_zpstlcyweh5.jpg

    Having spoken to several people for advise it seemed that the easiest way get the engine & box out in one go was to keep the rear of the car raised to allow for a better angle

    IMG_3342_zpsrorgs9rk.jpg

    The jack is holding the back of the transmission as the crossmember is out now

    IMG_3343_zps3n6medoa.jpg


  • Registered Users, Registered Users 2 Posts: 1,303 ✭✭✭Daved_XB


    Then I attached the engine lift to the lifting plate & started lifting until the engine just raised up on the mounts by a fraction to take the weight off the bolts to make it easy to slide them out

    IMG_3344_zpsyntwcxrx.jpg

    Then you just start jacking up, puling forward & tilting the whole assembly back (having a load leveler on the engine hoist makes this a one man job)

    IMG_3345_zpsgbos7qda.jpg

    Keep repeating the whole up, forward, tilt thing until the whole lot is clear of the car

    IMG_3346_zpsvuxqyffa.jpg

    IMG_3347_zpskcnbc8ew.jpg

    Job done

    IMG_3348_zpsnuogig4p.jpg

    With that done I put the old girl back up on axle stands (guess who needs a 2nd hoist) so she was at a nice working height & I cut the back off again… what is it with me & plasma cutters & angle grinders, anyway I have a new boot floor to go in, so for easy access I removed the light panel again & the fuel tank

    IMG_3349_zpslpxdlts0.jpg

    IMG_3350_zpsfqz2i6ec.jpg


  • Registered Users, Registered Users 2 Posts: 1,303 ✭✭✭Daved_XB


    Then just for fun I decided to try my new wheels that have been sitting in boxes for what must be over two years now.. I wanted to see how the fit with the back space was to work out if I need to get my diff length changed when I send it out to be worked..

    IMG_3357_zpsurt13e40.jpg

    IMG_3352_zps7wjq7zkp.jpg

    IMG_3353_zps8odpsh48.jpg

    Pretty happy with that fit, they are 17” x 10.5” wide with a 6” backspace… there is just over an inch of room to the spring (doesn’t matter anyway as I’m putting a multilink rear end in)

    IMG_3354_zpsdy6e2wjj.jpg

    Plenty of room for the tire to fit up under the guard without having to roll them too… I’ll get a little more scientific later, I’ll have tires mounted to the rim & I’ll remove the drum brakes & fit my disk conversion kit & then take full measurements for the diff, but for now it’s all looking good..

    IMG_3356_zpscuijks8z.jpg


  • Moderators, Science, Health & Environment Moderators, Society & Culture Moderators Posts: 60,217 Mod ✭✭✭✭Wibbs


    Man you were blessed with the condition of your sills. That could have been a world of hurt lurking there. Fantastic pics. :) Though the blood pumping from your gearbox had me a bit wobbly. :D

    Rejoice in the awareness of feeling stupid, for that’s how you end up learning new things. If you’re not aware you’re stupid, you probably are.


  • Registered Users, Registered Users 2 Posts: 1,303 ✭✭✭Daved_XB


    Wibbs wrote: »
    Man you were blessed with the condition of your sills. That could have been a world of hurt lurking there. Fantastic pics. :) Though the blood pumping from your gearbox had me a bit wobbly. :D

    You're not wrong.. I was really expecting to find a lot of holes & rust back there..


  • Registered Users, Registered Users 2 Posts: 1,303 ✭✭✭Daved_XB


    I dragged the old girl out into the open & sprayed down all the suspension & underside with degreaser to clean off the years of crud before I started to unbolt everything

    image1_zpshlqq7qlf.jpeg

    After cleaning the car off, I had a bit of a look for rust at the front end & she’s actually really good… there is a bit on the passenger side behind the guard

    IMG_3825_zpspciaicxl.jpg

    But the actual lower sill looks great

    IMG_3828_zpsfchp1mrw.jpg

    On the drivers side there seems to be no rust at all really…

    IMG_3826_zpsvjo4xagk.jpg

    But the sill has been repaired before… so I’ll have to have a closer look at that later

    IMG_3827_zps7dvz096a.jpg

    I also found a rather interesting when cleaning the rear suspension…

    IMG_3845_zpsufzzhcph.jpg

    Hmmm, seems a rather important bolt had parted company some time ago… judging by the wear in the chassis it was dangling half out for a while… bugger

    IMG_3847_zps8hgucjzk.jpg


  • Advertisement
Advertisement