Advertisement
If you have a new account but are having problems posting or verifying your account, please email us on hello@boards.ie for help. Thanks :)
Hello all! Please ensure that you are posting a new thread or question in the appropriate forum. The Feedback forum is overwhelmed with questions that are having to be moved elsewhere. If you need help to verify your account contact hello@boards.ie
Please note that it is not permitted to have referral links posted in your signature. Keep these links contained in the appropriate forum. Thank you.

https://www.boards.ie/discussion/2055940817/signature-rules
Hi there,
There is an issue with role permissions that is being worked on at the moment.
If you are having trouble with access or permissions on regional forums please post here to get access: https://www.boards.ie/discussion/2058365403/you-do-not-have-permission-for-that#latest

Toyota Landcruiser Bj40 resotration

  • 09-02-2012 9:39pm
    #1
    Registered Users, Registered Users 2 Posts: 1,113 ✭✭✭


    hey guys,

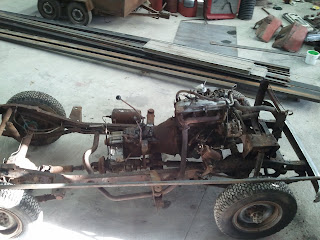
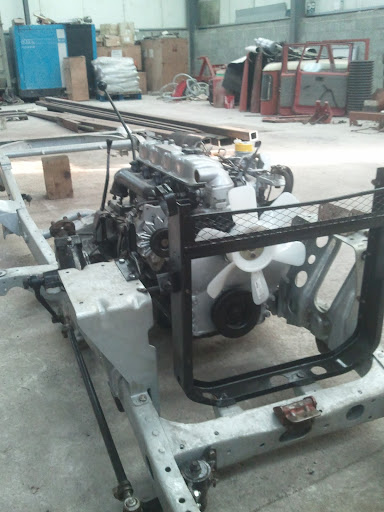
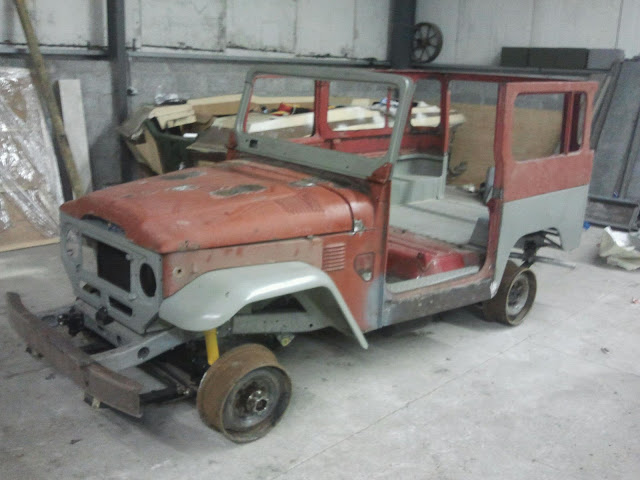
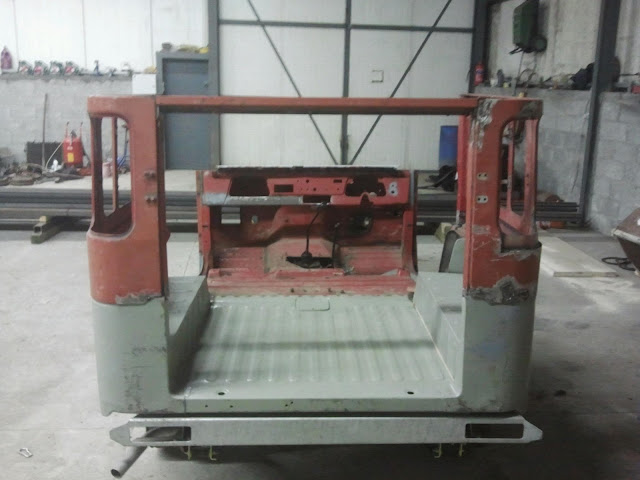
    Working on a Toyota Landcruiser BJ40 3.0 diesel restoration at the moment.

    I've a blog about it here.


    Just wondering if anyone here is working on one too?

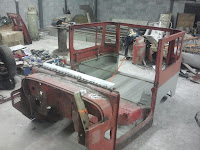
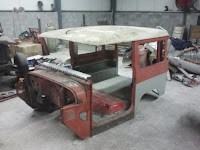
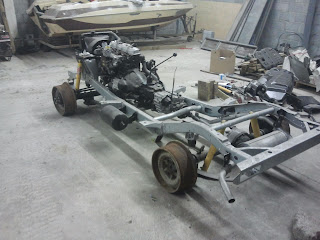
    some photos
    2011-08-28+18.11.23.jpg

    2012-01-15%25252014.45.16.jpg


Comments

  • Registered Users, Registered Users 2 Posts: 2,884 ✭✭✭101sean


    I know there was the one featured in IVS a couple years ago and there's been the odd query about people looking for them but nothing recently.

    Are you a member of http://www.lcoc.ie/ ?


  • Registered Users, Registered Users 2 Posts: 3,107 ✭✭✭hi5


    There was a craze of dragging them out of fields and DoneDealing them for big money a few years ago .

    But can you get body panels at a reasonable price?


  • Registered Users, Registered Users 2 Posts: 533 ✭✭✭blackbird98


    just noticed this is anybody is interested

    http://cars.donedeal.ie/for-sale/vintagecars/2850252

    BJ40 / FJ40 parts


  • Registered Users, Registered Users 2 Posts: 1,113 ✭✭✭corglass


    I just updated my blog if anyone's interested.
    2012-07-06+18.49.23.jpg
    2012-07-01+12.30.18.jpg

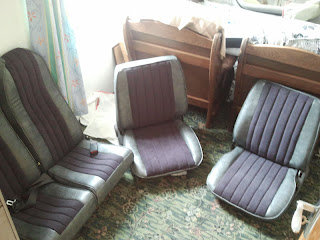
    Bodywork progressing nicely, upholstery complete. Sandblasting of body panels, powder-coating of rims and re chroming next week . . .


  • Registered Users, Registered Users 2 Posts: 4,499 ✭✭✭Capri


  • Advertisement
  • Registered Users, Registered Users 2 Posts: 1,113 ✭✭✭corglass


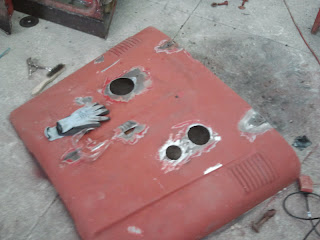
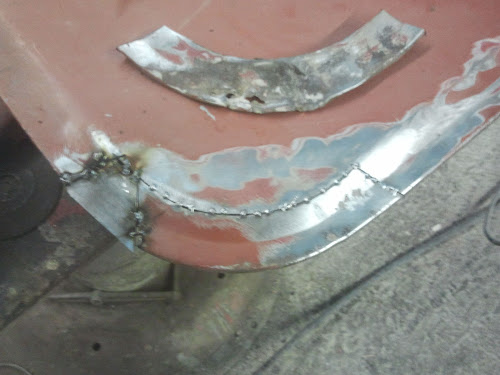
    quick question folks. Has anyone for any idea how I might tackle this compound curve patch on my BJ40?

    Or better yet, know of anyone breaking one?

    thanks

    20121103182359.jpg


  • Registered Users, Registered Users 2 Posts: 3,107 ✭✭✭hi5


    That looks like a fairly normal curve that you could run between a roller to give a curve, a compound curve would be more two dimensional like a dome.
    A metal fabrication might have a roller and do it for you?

    Can this person help?

    http://cars.donedeal.ie/for-sale/vintagecars/3927226

    View2-14370390.jpeg


  • Registered Users, Registered Users 2 Posts: 4,358 ✭✭✭kev1.3s


    there is a bj 40 restoration going on at the place where my Lancia's getting done if you're interested he has a very good blog.
    http://bj41-2b.blogspot.ie/

    No expense spared on this one but some fantastic work none the less.


  • Registered Users, Registered Users 2 Posts: 1,113 ✭✭✭corglass


    kev1.3s wrote: »
    there is a bj 40 restoration going on at the place where my Lancia's getting done if you're interested he has a very good blog.
    http://bj41-2b.blogspot.ie/

    No expense spared on this one but some fantastic work none the less.
    Cool work there!

    OK, so to update you on my restoration above, I'm just finishing off the last of the metalwork on the panels.

    I'm planning to use eco-xl (in Cork) (no connection to them etc.) for the paint work. Has anyone used them?
    The reason I chose them is they can do lead loading, blasting and most importantly thermal zinc spraying. Seems to be the business in terms of killing rust?
    I'm wondering if anyone has zinc coated their motor and how it turned out?


  • Registered Users, Registered Users 2 Posts: 1,042 ✭✭✭Grimreaper666


    Eco-xl are good enough alright, a bit pricey though for anything specialised though. If you haven't got a tig welder you should consider getting one, will make light work of your welding. Lead loading is very expensive and you should try and metal finish as much as you can, as long as filler is used sparingly it will do the job just as well as lead loading in my opinion. Zinc thermal coating is the way to go alright though. I've just finished a Lancia Intergrale for a customer and it really made a great job of it and I have a Jag XK120 for another customer ready to be coated just after Christmas. I'd still coat in in waxoil to be sure to be sure though.:)


  • Advertisement
  • Registered Users, Registered Users 2 Posts: 1,113 ✭✭✭corglass


    Eco-xl are good enough alright, a bit pricey though for anything specialised though. If you haven't got a tig welder you should consider getting one, will make light work of your welding. Lead loading is very expensive and you should try and metal finish as much as you can, as long as filler is used sparingly it will do the job just as well as lead loading in my opinion. Zinc thermal coating is the way to go alright though. I've just finished a Lancia Intergrale for a customer and it really made a great job of it and I have a Jag XK120 for another customer ready to be coated just after Christmas. I'd still coat in in waxoil to be sure to be sure though.:)


    I've done all welds with a 0.8mm mig, it has it's limits though. I couldn't justify a tig aswell!?

    Sounds like the right choice so. Where do you get your zinc coating done grimreaper666?


  • Registered Users, Registered Users 2 Posts: 1,042 ✭✭✭Grimreaper666


    corglass wrote: »
    I've done all welds with a 0.8mm mig, it has it's limits though. I couldn't justify a tig aswell!?

    Sounds like the right choice so. Where do you get your zinc coating done grimreaper666?

    Eco-XL, :).


  • Registered Users, Registered Users 2 Posts: 64 ✭✭phoenix_nights2


    Some inspiration :)

    icon_fj.jpg


  • Registered Users, Registered Users 2 Posts: 609 ✭✭✭mossfort


  • Registered Users, Registered Users 2 Posts: 1,113 ✭✭✭corglass


    mossfort wrote: »

    That's amazing work there, love it!

    I've updated my blog with some rough and ready bodywork if anyone's interested?

    2012-12-09+16.02.41.jpg
    2012-12-30+18.01.45.jpg2012-12-30+18.01.52.jpg2012-12-30+19.41.10.jpg

    2012-12-23+17.46.01.jpg


  • Registered Users, Registered Users 2 Posts: 2 bj41.2b


    Will be a milestone when you get the paint done ! .. the back is well and truly broke.
    What colour are you going for ?

    @kev1.3s .. I didnt get to see the finished Lancia before it left the workshop but the colour was cool !


  • Registered Users, Registered Users 2 Posts: 4,358 ✭✭✭kev1.3s


    bj41.2b wrote: »
    Will be a milestone when you get the paint done ! .. the back is well and truly broke.
    What colour are you going for ?

    @kev1.3s .. I didnt get to see the finished Lancia before it left the workshop but the colour was cool !
    +1 paint makes it all seem worthwhile.
    Did you take delivery of your truck yet?
    My kids think it is a monster truck, really cool project!


  • Registered Users, Registered Users 2 Posts: 2 bj41.2b


    will be finished for the weekend of the 9th Feb ! ...


  • Registered Users, Registered Users 2 Posts: 1,113 ✭✭✭corglass


    Quick question guys,
    Anyone know of a place (preferably in Dublin) that could replace a bunch of badly aged engine hoses and pipes for me?

    They're nothing to special, just things like the fuel line hoses, breather pipes and oil lines. Mainly plastic, rubber and braider rubber.

    I have originals as references.

    Thanks


  • Registered Users, Registered Users 2 Posts: 150 ✭✭landcrzr


    Hi Corglas,
    Fellow member of lcoc here. Been following your blog for a while now, very impressed. I'm also working on a BJ41, very slowly mind. Keep up the good work.
    J


  • Advertisement
  • Registered Users, Registered Users 2 Posts: 2,884 ✭✭✭101sean


  • Registered Users, Registered Users 2 Posts: 1,113 ✭✭✭corglass


    101sean wrote: »


    Lovely looking truck, but I wouldn't under estimate the amount of work involved. The paint job will have hidden plenty of bits. There's also a surprising amount of rust post paint job considering it's been 'barn' stored.

    Add to that that the original mirrors changed and it's petrol.

    Interesting purchase for whoever buys but worth £4k max i'd say!


  • Registered Users, Registered Users 2 Posts: 1,113 ✭✭✭corglass


    I already asked this in the main motors section but not getting much response.


    I've got a Toyota 3.0 3b 4cyl engine in my old land cruiser that needs some more grunt!
    Reading online, it's possible to turbo them but the kits are ££££!
    Some have successfully DIY installed turbos from other cars etc. but you need to pick a suitably sized one.

    Does anyone know someone in Ireland that's experienced in aftermarket turbo upgrades?

    Thanks


  • Registered Users, Registered Users 2 Posts: 1,113 ✭✭✭corglass


    Another questions guys, anyone know where I'd get reasonably prices 2mm ish foil backed sound deadening material?

    thanks

    images?q=tbn:ANd9GcS9H_tZCe_lgLsYGRW3J1CoJkJ7yrtikSMSPoHLICZudGvV4Q1BjQ


  • Registered Users, Registered Users 2 Posts: 1,113 ✭✭✭corglass


    Another update to my blog folks if you fancy a look?

    P1010001.JPGP1010006.JPGP1010007.JPG
    2013-01-06%25252017.07.34.jpg
    2013-01-06%25252016.45.48.jpg


  • Registered Users, Registered Users 2 Posts: 578 ✭✭✭kuro2k


    corglass wrote: »
    Another questions guys, anyone know where I'd get reasonably prices 2mm ish foil backed sound deadening material?

    thanks

    images?q=tbn:ANd9GcS9H_tZCe_lgLsYGRW3J1CoJkJ7yrtikSMSPoHLICZudGvV4Q1BjQ

    afaik dynamat is considered the best, you can get it on amazon/ebay
    I hope to use it in my hilux surf this summer.... expensive stuff!


  • Registered Users, Registered Users 2 Posts: 92 ✭✭123 man


    hiya were did you buy the no back half tub


  • Registered Users, Registered Users 2 Posts: 1,113 ✭✭✭corglass


    123 man wrote: »
    hiya were did you buy the no back half tub
    I imported in myself from the USA. PM me for details.


  • Registered Users, Registered Users 2 Posts: 1,113 ✭✭✭corglass


    Being somewhat of a glut for punishment, I've decided to build my own turbo manifold. To do this, I created something similar to a design from IH8MUD in CAD (Rhino3D). (dwg available here.)

    I also drew a T25/GT20 flange for a GT2052 turbo. Hopefully this is of some use to someone else. I got the Schedule 40 CAD from here.

    turboml.png


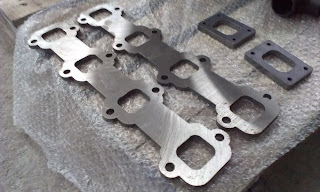
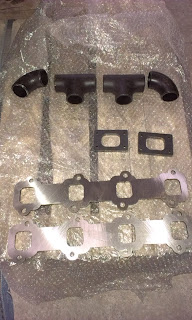
    I then got the parts cut out using a plasma cutter in 10mm plate steel. Half way through the order I decided that 10mm would be too think for the exhaust manifold connection and I should reorder it in 8mm. When I rang the machine shop guy he said that the piece was already cut out and he'd shave 1mm off each side on the surface grinder free of charge.

    I got two manifolds connections and two GT20 flanges cut out. I then assembled everything as per the CAD drawing above, keeping we weld heat as low as possible to avoid warping. It actually held it's shape very well, even if the faces do look a little burnt.


    Copy+of+2013-03-23+15.12.03.jpg
    Plasma cut to perfection! The manifolds bits are surface ground on both sides to 8mm, the flange connector is 10mm

    Copy+of+2013-03-23+15.11.51.jpg
    Ready for welding!
    2013-03-23+20.38.47.jpg
    Some welding underway.
    2013-03-23+21.35.53.jpg
    Finito!
    Copy+of+2013-03-23+21.35.35.jpg
    Happy days!


    Anyway all I need to do now is
    - sand the manifold to a clean finish
    - find a GT2052 turbo
    - mount the turbo
    - run the oil lines
    - run the boost gauge wiring

    :-)


    Link to full blog: -> http://bj40restoration.blogspot.ie


  • Advertisement
  • Registered Users, Registered Users 2 Posts: 1,241 ✭✭✭stackerman


    corglass wrote: »
    Another questions guys, anyone know where I'd get reasonably prices 2mm ish foil backed sound deadening material?

    thanks

    images?q=tbn:ANd9GcS9H_tZCe_lgLsYGRW3J1CoJkJ7yrtikSMSPoHLICZudGvV4Q1BjQ

    I used "Fat Mat" see eBay, last year. Just as good and cheeper (or at least it was then).


  • Registered Users, Registered Users 2 Posts: 2,348 ✭✭✭w124man


    corglass wrote: »
    Being somewhat of a glut for punishment, I've decided to build my own turbo manifold. To do this, I created something similar to a design from IH8MUD in CAD (Rhino3D). (dwg available here.)

    I also drew a T25/GT20 flange for a GT2052 turbo. Hopefully this is of some use to someone else. I got the Schedule 40 CAD from here.

    turboml.png


    I then got the parts cut out using a plasma cutter in 10mm plate steel. Half way through the order I decided that 10mm would be too think for the exhaust manifold connection and I should reorder it in 8mm. When I rang the machine shop guy he said that the piece was already cut out and he'd shave 1mm off each side on the surface grinder free of charge.

    I got two manifolds connections and two GT20 flanges cut out. I then assembled everything as per the CAD drawing above, keeping we weld heat as low as possible to avoid warping. It actually held it's shape very well, even if the faces do look a little burnt.


    Copy+of+2013-03-23+15.12.03.jpg
    Plasma cut to perfection! The manifolds bits are surface ground on both sides to 8mm, the flange connector is 10mm

    Copy+of+2013-03-23+15.11.51.jpg
    Ready for welding!
    2013-03-23+20.38.47.jpg
    Some welding underway.
    2013-03-23+21.35.53.jpg
    Finito!
    Copy+of+2013-03-23+21.35.35.jpg
    Happy days!


    Anyway all I need to do now is
    - sand the manifold to a clean finish
    - find a GT2052 turbo
    - mount the turbo
    - run the oil lines
    - run the boost gauge wiring

    :-)


    Link to full blog: -> http://bj40restoration.blogspot.ie

    Thats a very cool piece of work!


  • Registered Users, Registered Users 2 Posts: 1,113 ✭✭✭corglass


    Just though I'd share another update on my Landcruiser restoration journey.

    The truck now has paint and is slowly coming back to life. I changed from red to dine beige as I think they look best that way. More to come shortly....

    The paint process was as follows:
    - Sandblast back to bare metal
    - Thermal zinc coating (applied hot - sprayed on)
    - Etch primer
    - Undercoat
    - Rhino liner (mixed with 10% top coat) on all hardwearing surfaces
    - Top coat of 2PAC Toyota Dune Beige
    IMG_1515.JPG
    IMG_1514.JPG
    IMG_1513.JPG

    Link to the blog here.


  • Registered Users, Registered Users 2 Posts: 4,033 ✭✭✭Silvera


    Great resto!
    Keep up the good work!!


  • Registered Users, Registered Users 2 Posts: 1,113 ✭✭✭corglass


    thanks Silvera. I'm missing a windscreen at the moment if anyone knows where I might find one?


  • Registered Users, Registered Users 2 Posts: 4,358 ✭✭✭kev1.3s


    corglass wrote: »
    thanks Silvera. I'm missing a windscreen at the moment if anyone knows where I might find one?

    There is a couple in a yard in enniscorthy.


  • Advertisement
  • Registered Users, Registered Users 2 Posts: 4,033 ✭✭✭Silvera


    corglass wrote: »
    thanks Silvera. I'm missing a windscreen at the moment if anyone knows where I might find one?

    Are you in the 'Toyota Enthusiasts Club'? ...They may be able to help.
    (I dont have contact details for them though).


  • Registered Users, Registered Users 2 Posts: 1,113 ✭✭✭corglass


    Hey guys,

    I thought I'd post an update on how my restoration on the BJ40 was going.

    OK, so things have progressed slowly since the last update but I can finally begin to see the finish line.

    The truck now resembles a truck in a garage for repair as opposed to a rebuild!

    As before, I'm going to let the pictures do most of the talking.

    Additions since the last update:
    - The turbo has arrived and has been test fitted.
    - All the lights are installed
    - Most of the badges / decals are on.
    - Back seats and carpet is in.
    - All glass and door seals are on.
    - The doors are complete, all glass, locks and door skins are on.
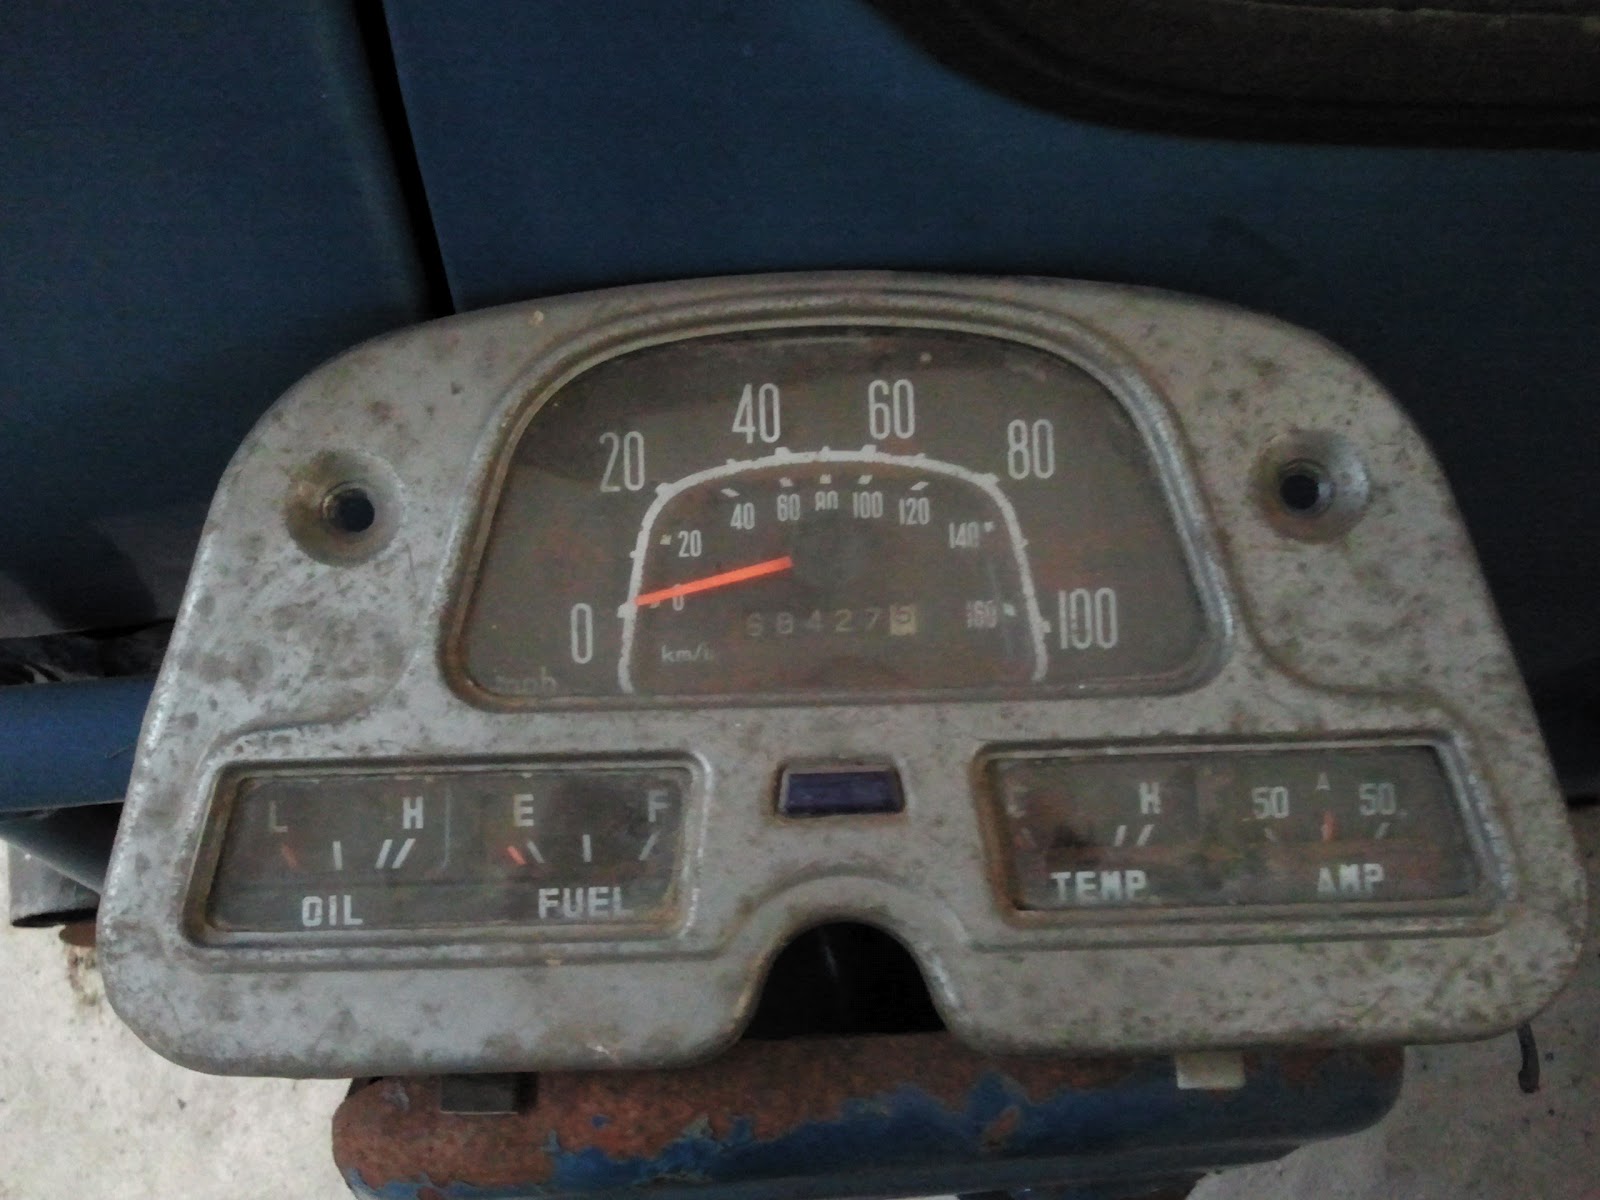
    - The odometer is rebuilt with white dials are ready to go in.
    - The wiring loom has been stripped, checked and re installed. All wiring tape has been replaced.
    - The clutch master cylinder is in.
    - The brake master cylinder is in.
    - The pedal box is in.
    - The bonnet hold arm is on.
    - The steering wheel has been rebuilt.
    - Most of the switches on the dash are in.
    - The handbrake is all in and working!

    Things left to do:
    - Plumb the brakes
    - Wire the rear wiring loom to the rear lights
    - Install the headlining
    - Install the odometer
    - Find a replacement steering wheel switch and install it.
    - Install the steering wheel.
    - Finish the front locking hubs.
    - Finish wiring the dash
    - Install the front seat.
    - Install the rear door locking mechanism.
    - Track the steering
    - Get an NCT
    - Tax and insurance - DRIVE!
    20130825_131443.jpg
    20130825_131349.jpg
    20130825_131419.jpg
    20130825_131310.jpg
    2012-02-18+16.22.42.jpg
    20130826_090823%255B1%255D.jpg
    20130826_110135%255B1%255D.jpg


  • Registered Users, Registered Users 2 Posts: 1,437 ✭✭✭kasper


    nice work and don't forget the number plates


  • Registered Users, Registered Users 2 Posts: 186 ✭✭The Big Red Fella


    I love the clocks great work!


  • Registered Users, Registered Users 2 Posts: 233 ✭✭txpjl


    Love your truck. Any updates? The link to the blog isn't working.

    Thanks
    T


  • Advertisement
Advertisement