Advertisement
If you have a new account but are having problems posting or verifying your account, please email us on hello@boards.ie for help. Thanks :)
Hello all! Please ensure that you are posting a new thread or question in the appropriate forum. The Feedback forum is overwhelmed with questions that are having to be moved elsewhere. If you need help to verify your account contact hello@boards.ie
Help Keep Boards Alive. Support us by going ad free today. See here: https://subscriptions.boards.ie/.
If we do not hit our goal we will be forced to close the site.

Current status: https://keepboardsalive.com/

Annual subs are best for most impact. If you are still undecided on going Ad Free - you can also donate using the Paypal Donate option. All contribution helps. Thank you.

Battltech, Any Players out there?

13»

Comments

  • Registered Users, Registered Users 2 Posts: 1,144 ✭✭✭MarkHall


    Late last wednesday evening Some Liao Scouts managed to Snap some pictures of Prince Victor Steiner Davion working out.
    midget.jpg
    Forces where sent to retire the Data.

    The Liao Extraction force.
    Infantry: They were based on the Lyran heavy infantry and the Comstar comm specialists in TRO:3085 But Lorcan gave them a more Liao Feel.
    The comm Specialist where the Objectives.

    Goblin Upgrade X 4
    Scherk PPC Carrier
    Scherk AC Carrier
    LRM Carrier WOB

    SaracenX 2
    ScimitarX2

    Mission: To extract 2 squads of Scouts from Davion occupied territory


    The Davion Pursuit forces consisted of
    Shadow Hawk -5M 4/5
    Enforcer -5D 4/5
    Hellspawn -8E 4/5
    Wolfhound -3S 4/5

    4 IS BA with LRR 3x 4/5, 1X 3/4

    4 Heavy Tracked APC 4/5

    2 LRM carrier 4/5

    Mission: Capture or prevent escape of Scout troopers/


    Turn 1
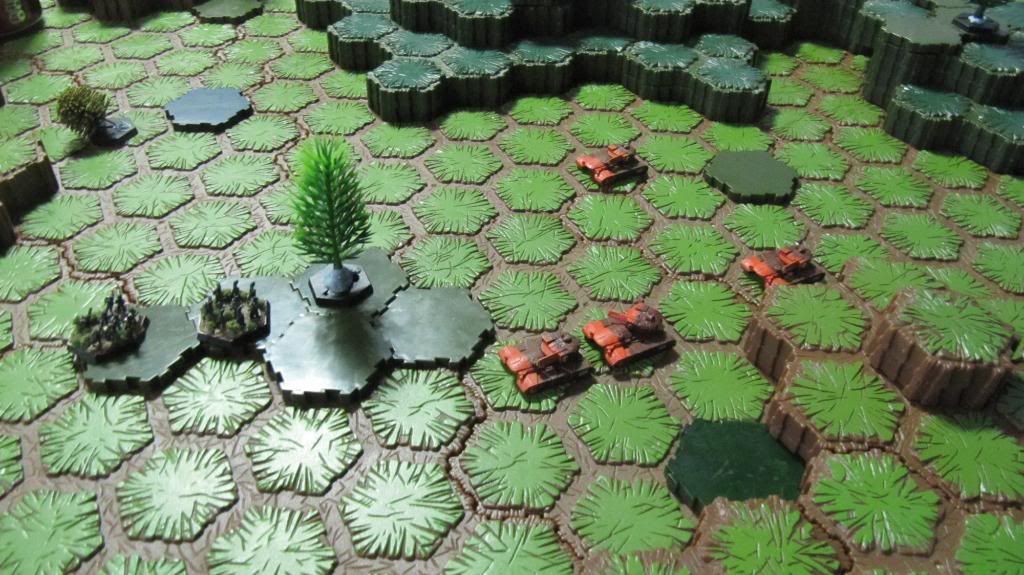
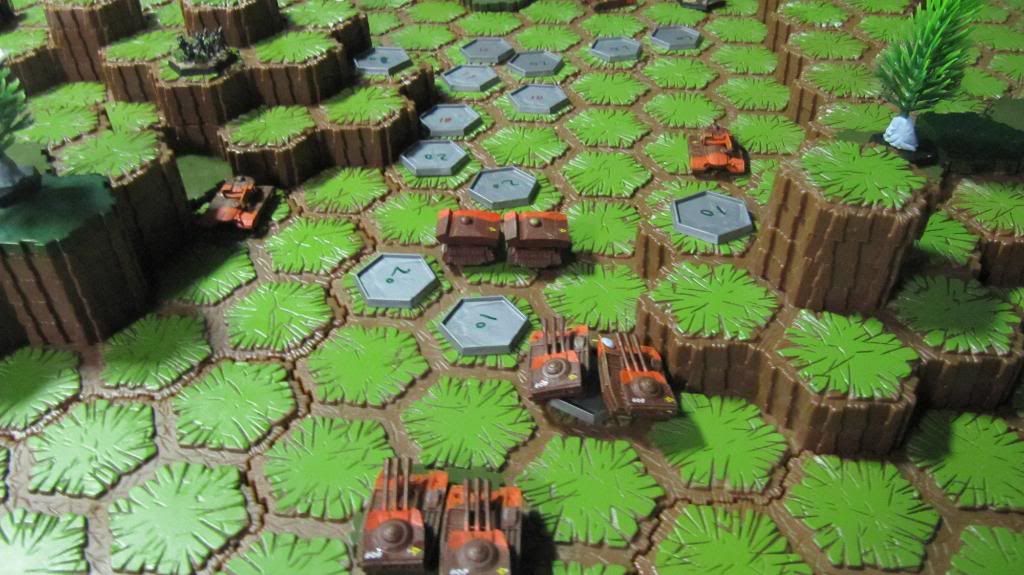
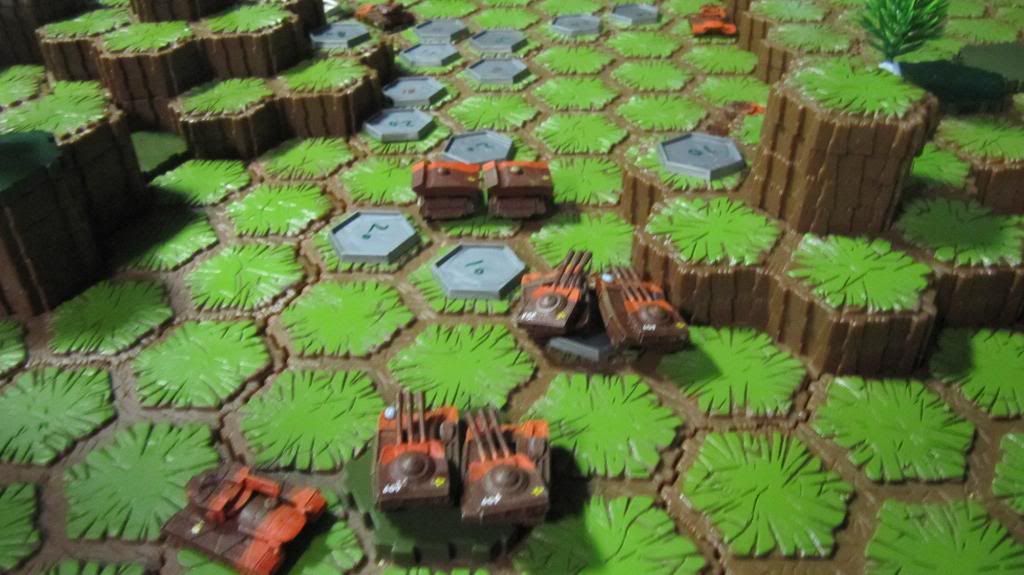
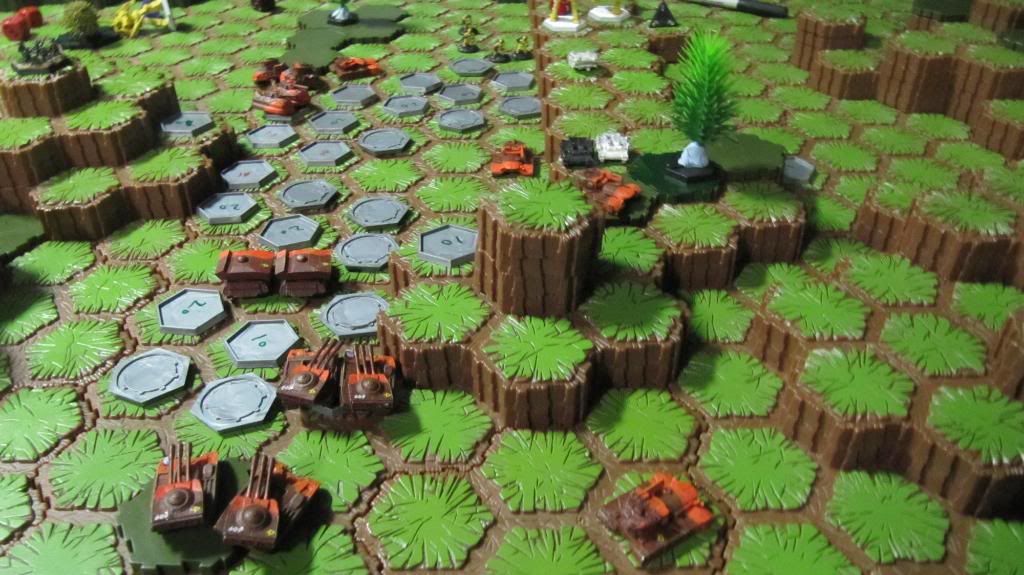
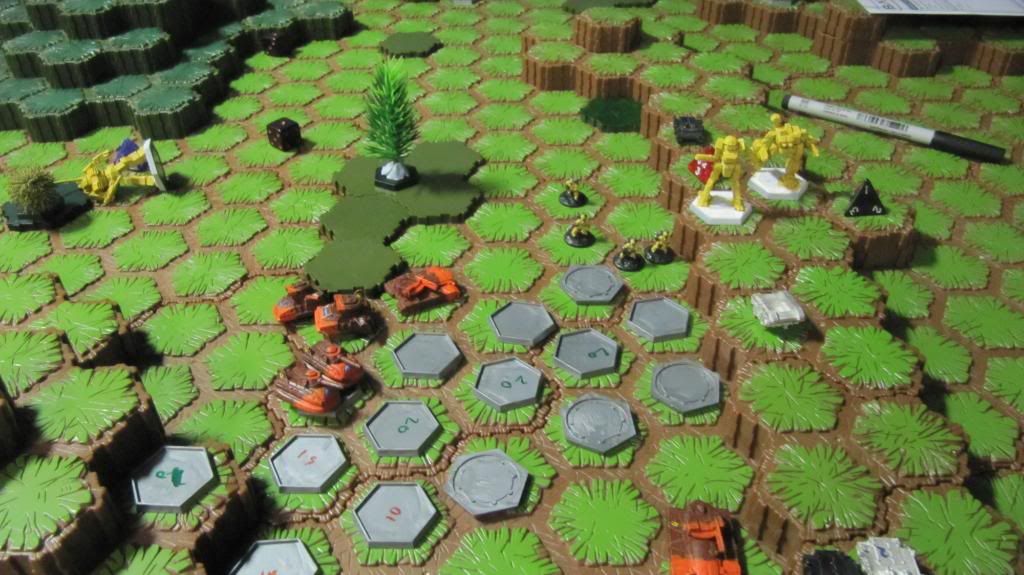
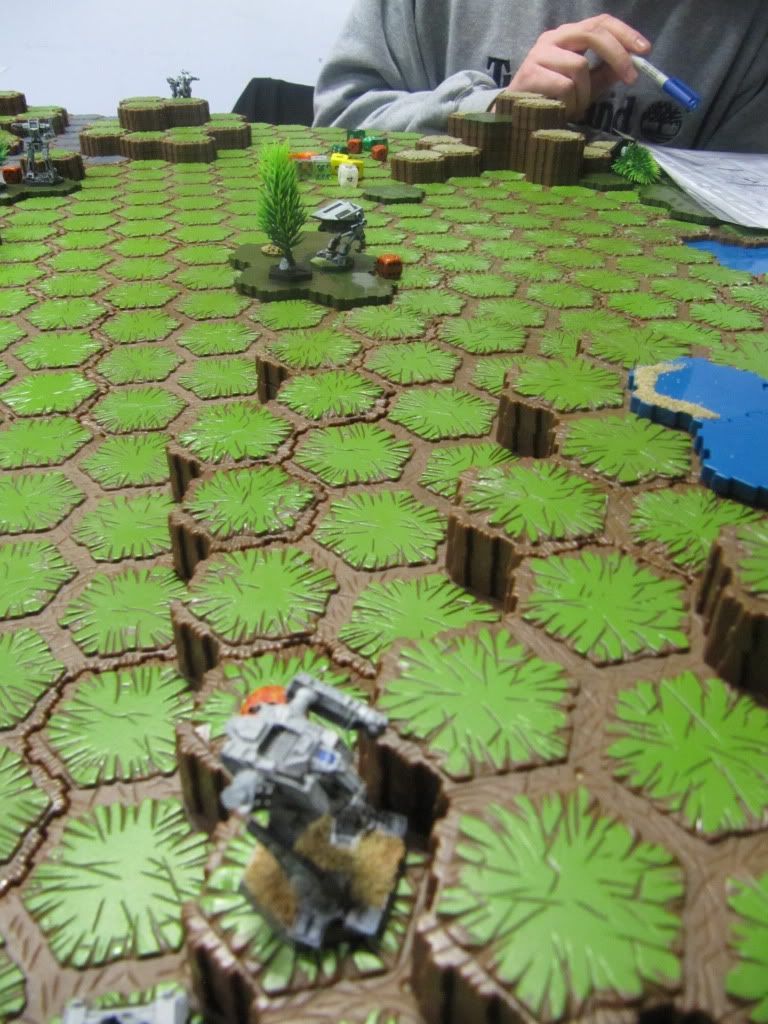
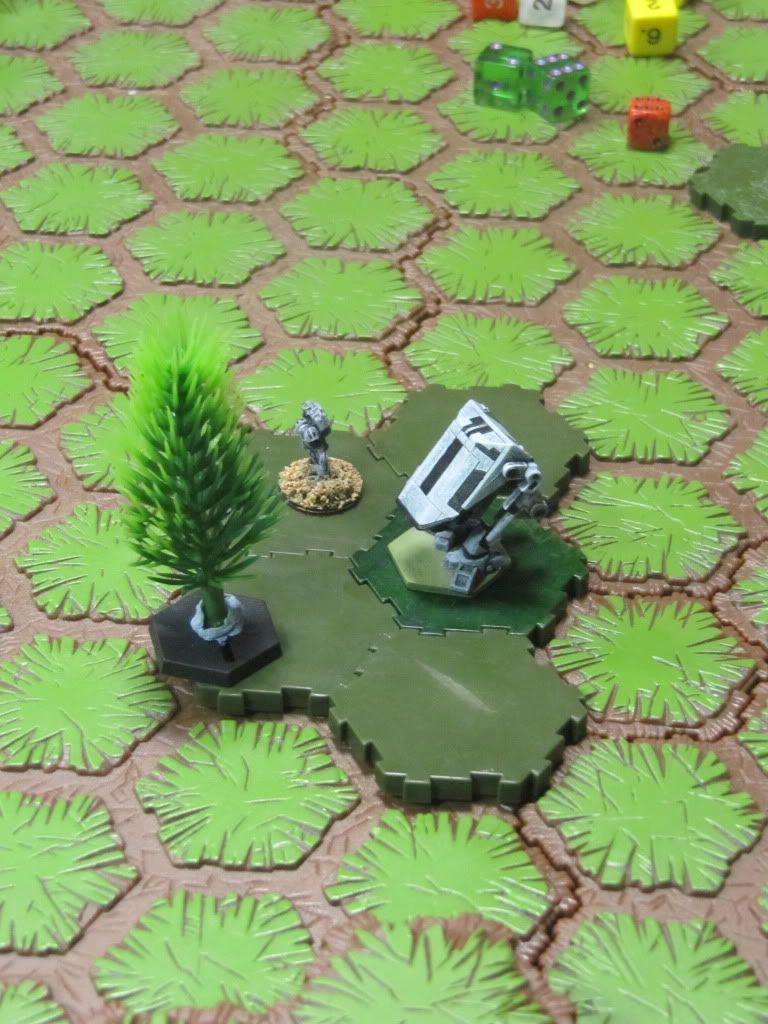
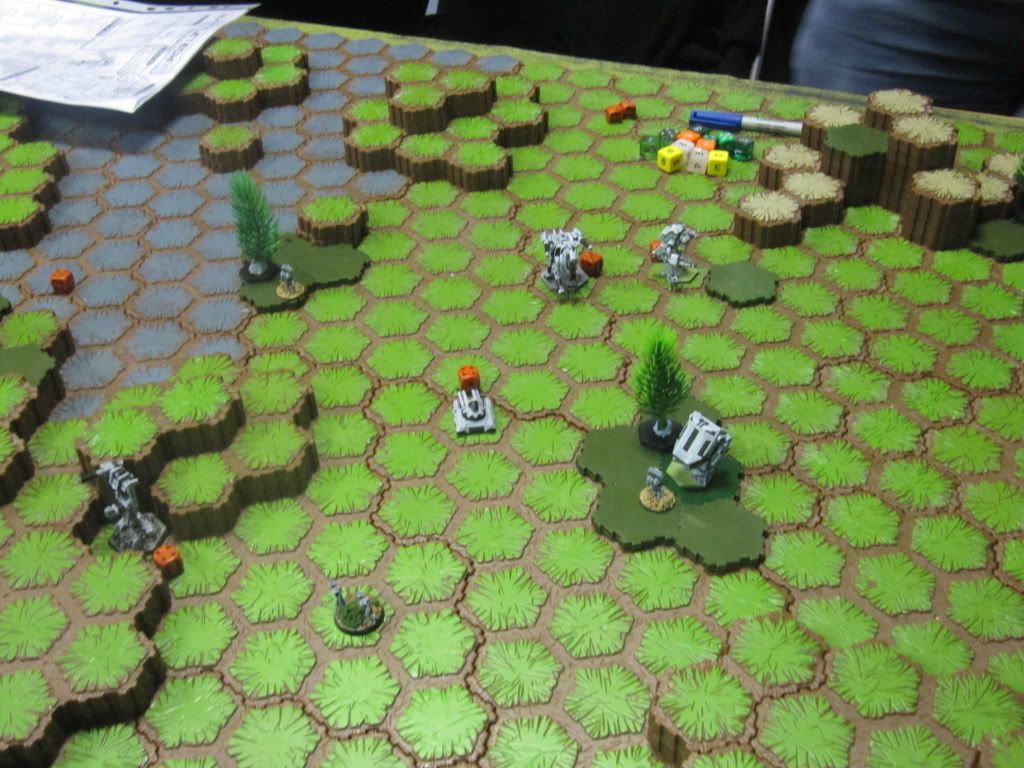
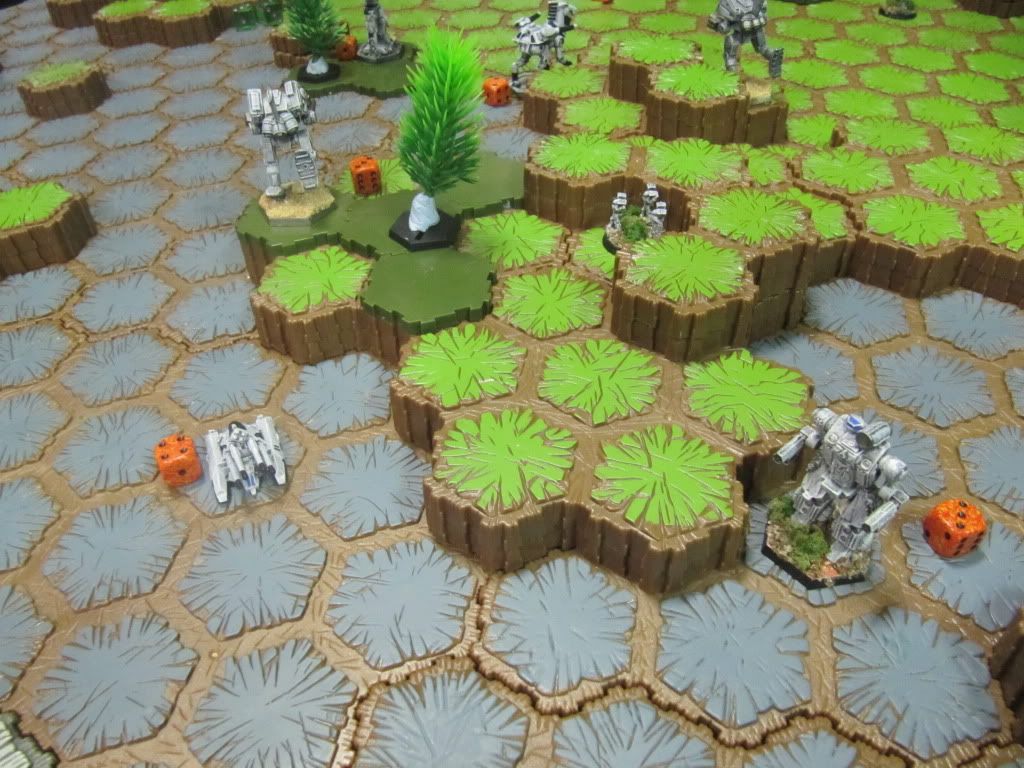
    The goblins Make it to the infantry just as the Davions bring their guns to range.
    The Rest of the Liao tanks move up for provide cover for the Goblins.
    Both sides Lrm carriers are carrying augmented Thunder and a Blanket of mines goes down on front of the Goblins.
    And on Front of the incoming Apcs.
    Some shots go wide in the woods in an attempt to cower the infantry.
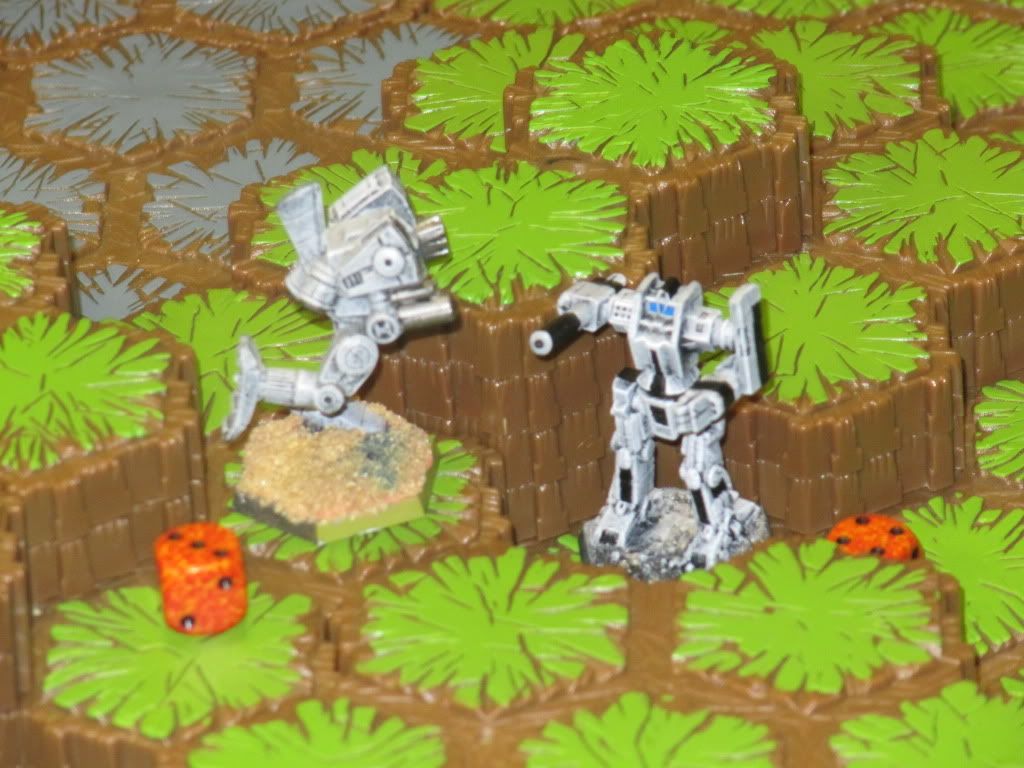
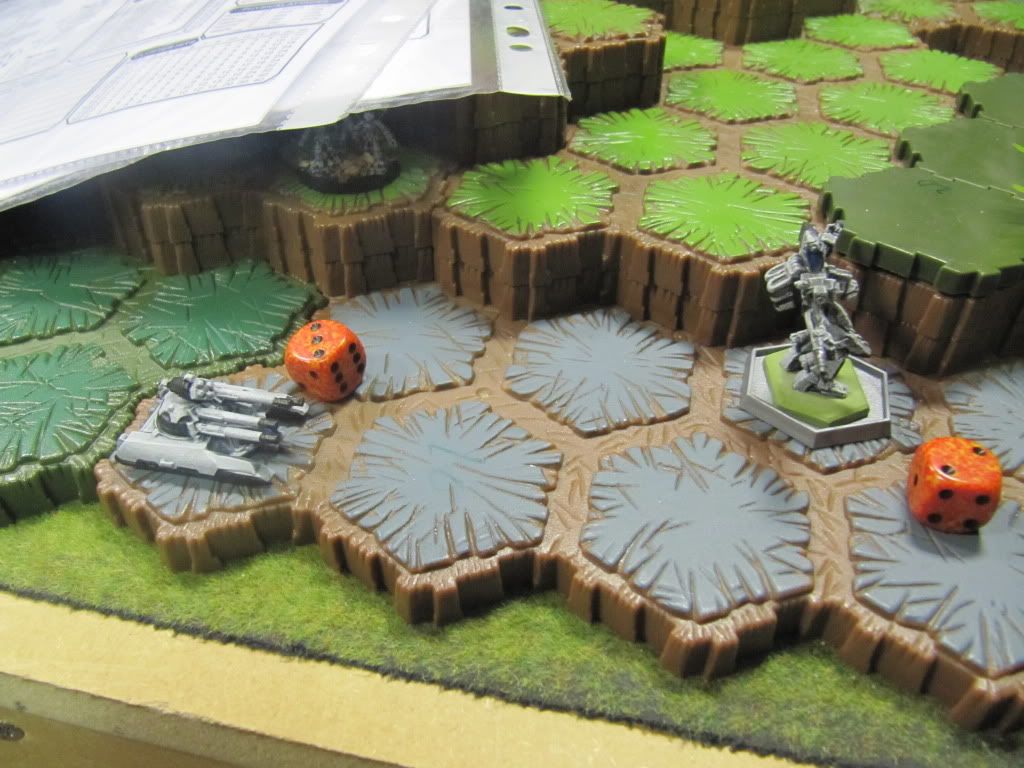
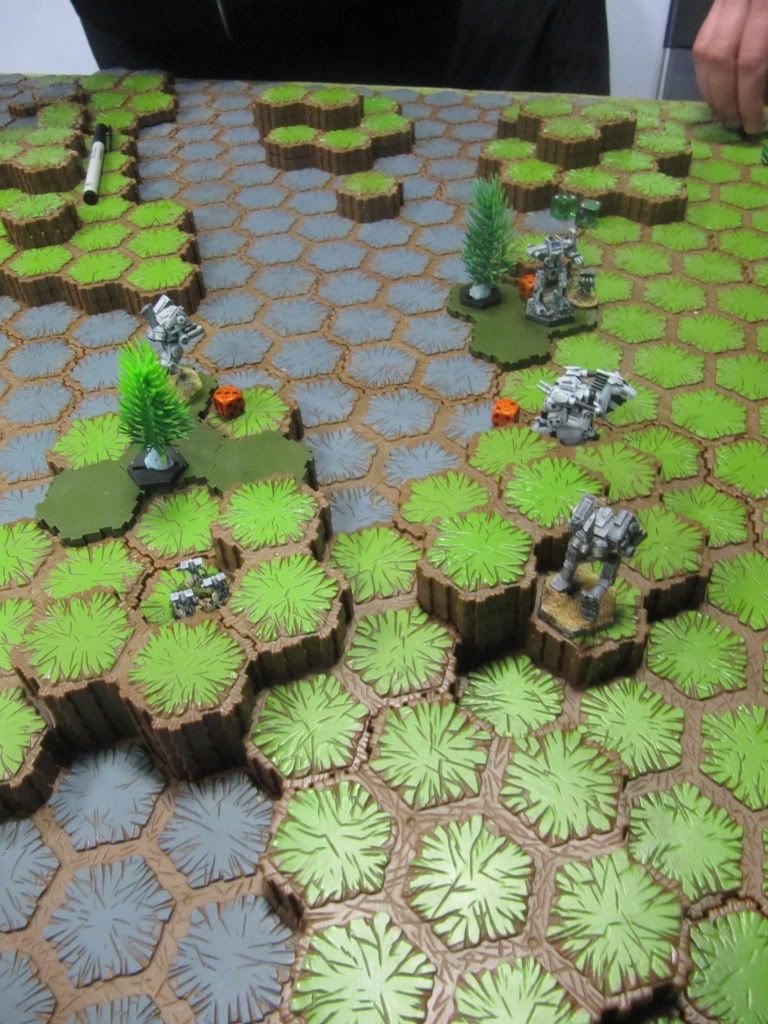
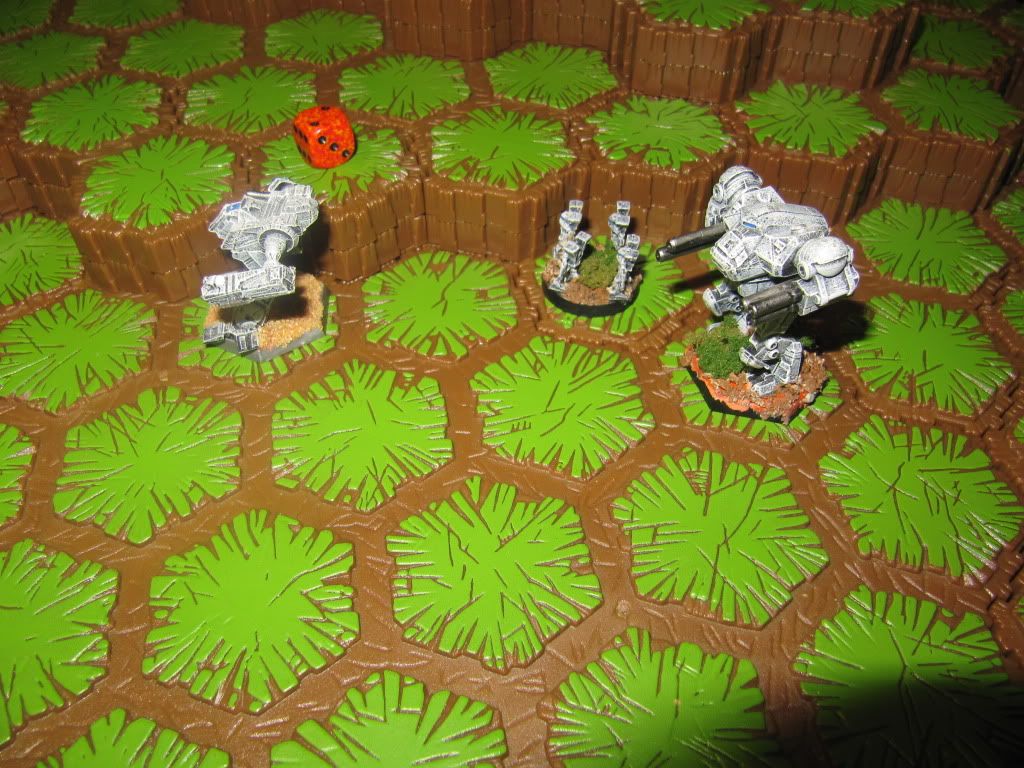
    IMG_2650.jpg
    IMG_2651.jpg
    IMG_2652.jpg

    Turn 2
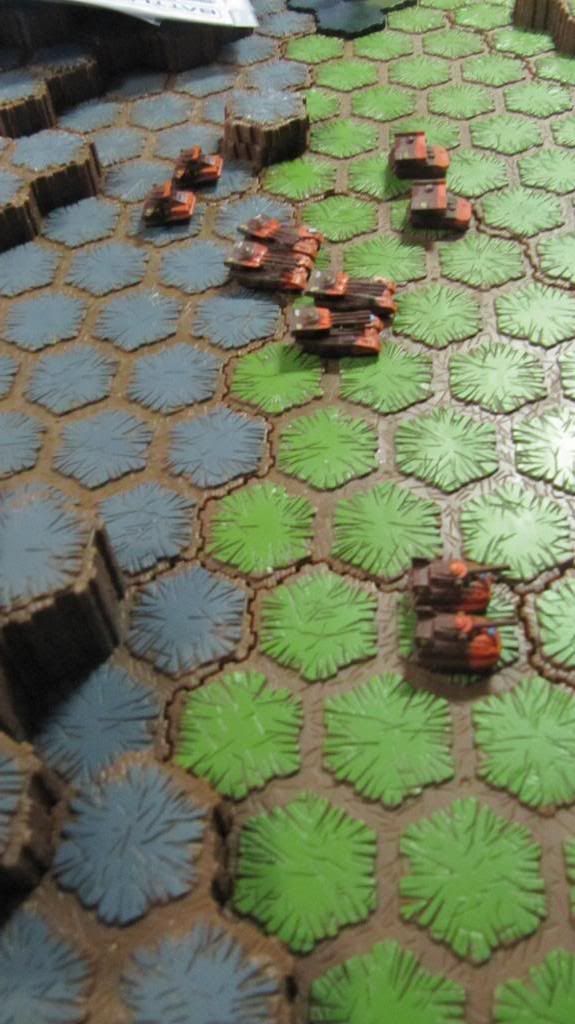
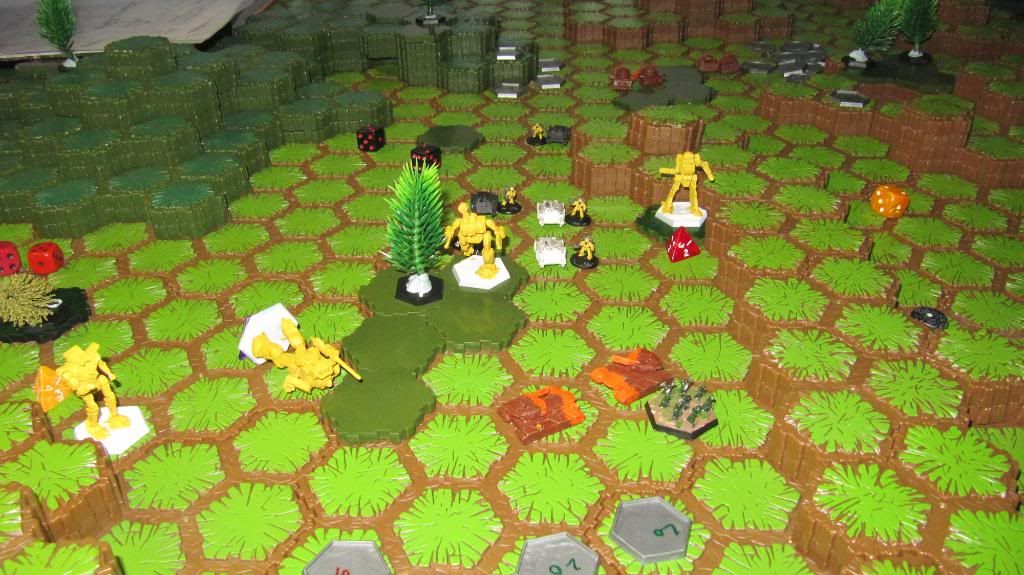
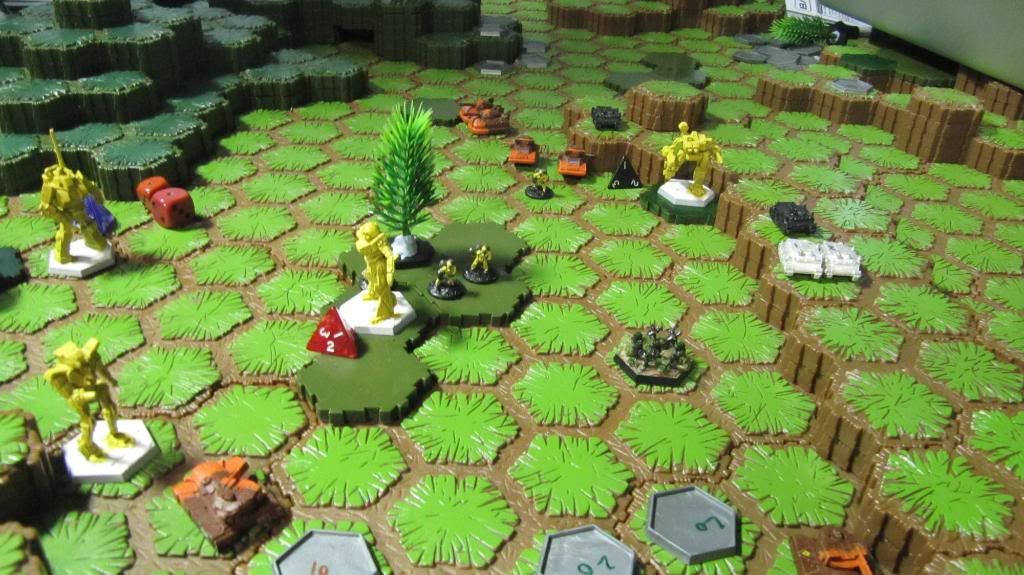
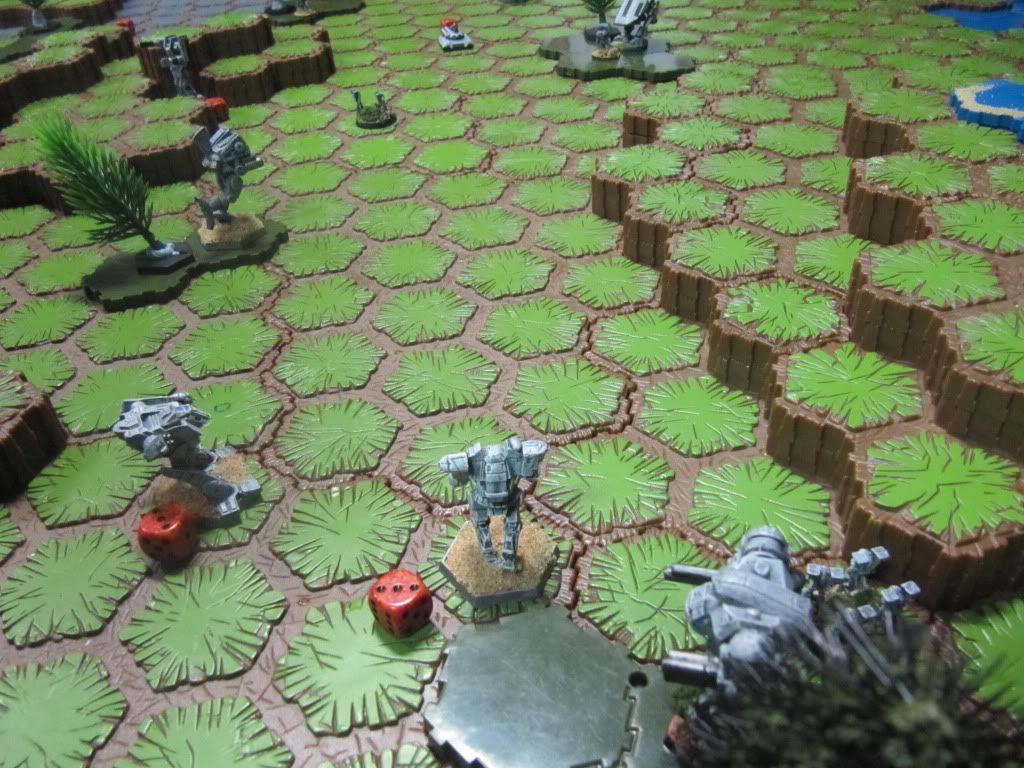
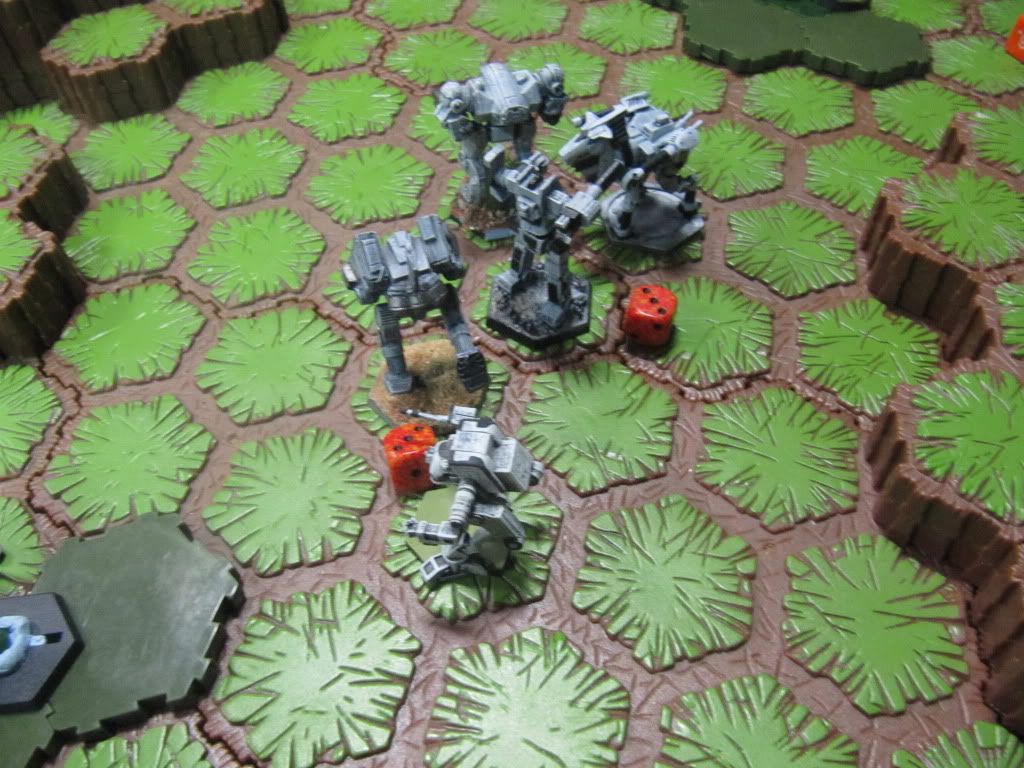
    The Infantry are loaded but the mines leave the chariots little room to safely maneuver.
    The Hovertanks attempt to hold up the mechs in transit. doing some minor Damage to the hellspawn and Wolfhound.
    The apc take minor damage due to mines.
    While the Liao LRM Carriers batter the Davion ones whose response in anther blanketing of Mines.
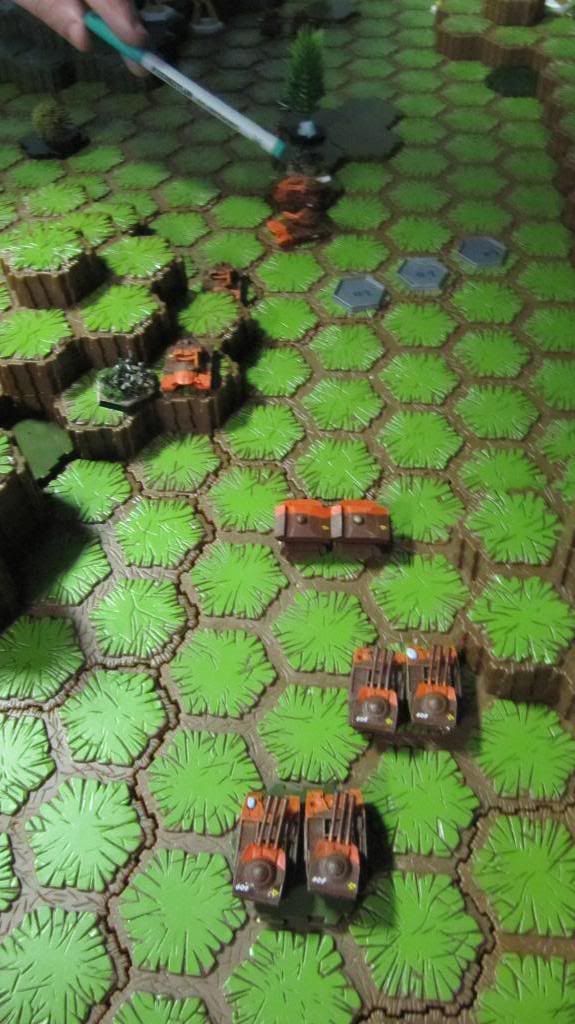
    A crew of INFANTRY bail out on the hill to provide cover fire if needed. The Goblins use their Large pulses to attempt to warn off the approaching mechs.
    They take a smattering of damage back. The important ones suffer some drive issues from the fire.
    IMG_2653.jpg
    IMG_2654.jpg

    Turn3
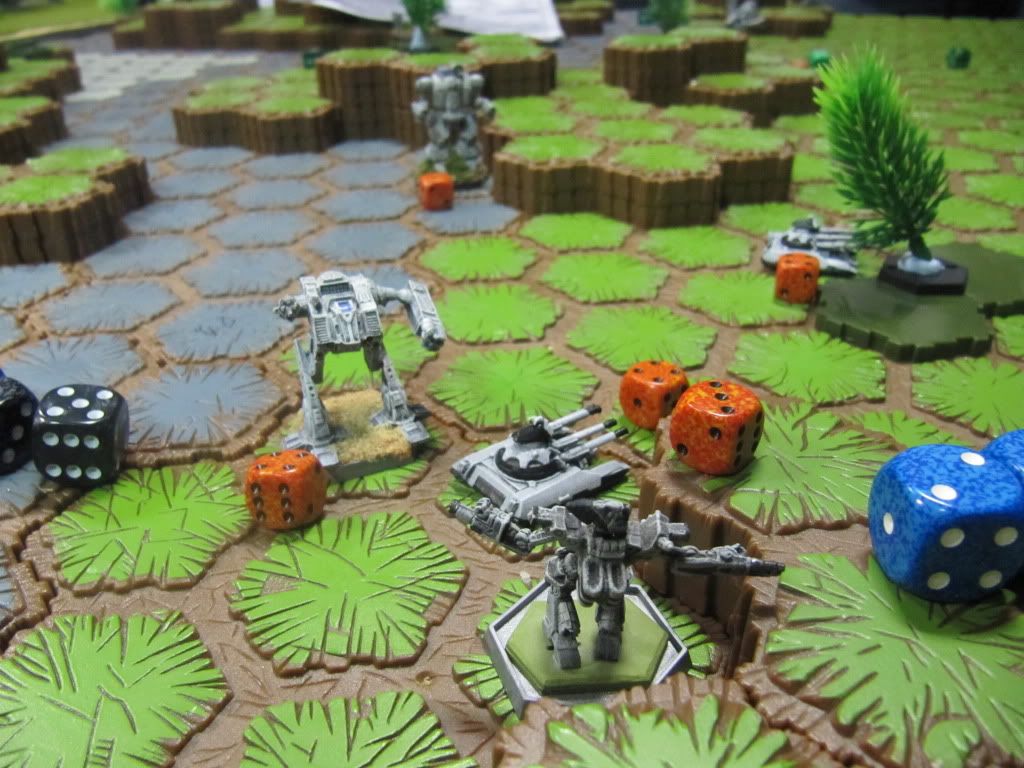
    The hovertanks in a joint effort finish off the damaged LRM carriers. Preventing the arrival of any more mine fields.
    But with most of the Liao forces sitting in minefields the commander feels they've done their job today.
    The Assault tanks fire on the mechs. Causing some armour concerns on the Shadowhawk.
    Seeing the Battle armor disembark the apcs. The other Liao combat group get out to try and counter them.
    The Goblins manage to strip one of the legs on the Hellspawn.
    But again the fire on the tank causes all sorts of issues. They decide to make a break for it next turn.
    IMG_2655.jpg


    Turn 4
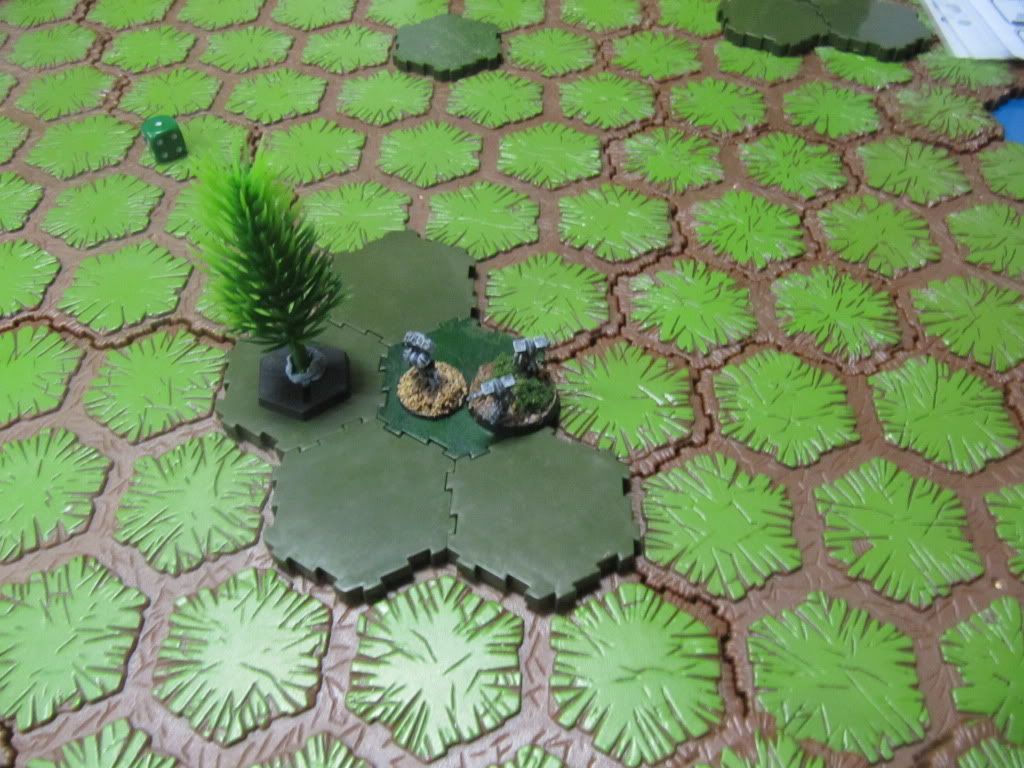
    Having finished off the Carriers the Hovertanks spin around and over the mines to come back and peck at the damaged mechs.
    The Hellspawn looses more armor as it fails to hurt the Goblins.
    The Battle armour and APC MG's make short work of the Liao Infantry. Their deaths buying the Goblins seconds to get away. As the drivers push the battered machines for an ounce more speed.
    The Shadowhawk backs off after the pasting last turn.
    While the Wolfhound makes a rookie mistake and slowly walks into short range of the Liao LRM Carriers. His reasoning being the kick was too tempting. A Volley of PPC Blasts and missiles make short work of the Light mech. And lets the Goblin off relatively scott Free.
    IMG_2656.jpg
    IMG_2658.jpg


    Turn 5

    Seeing the other Goblins taking a battering and knowing those infantry inside must make it out. The Goblin that made it through the minefields attempts to rendezvous with his lance mates. Who are struggling to keep moving under their own power.
    The Hoverlance risk the mines and take out a couple of the Armor troops who are catching up on the goblins.
    The APCs having done their job see an oppertunity and gun for the lead Goblin. It pays off and they manage to cripple its engine leaving it stranded.
    The Mechs regroup and fire on the other Goblin with a horrendous CRANK! its Drive system give up.

    Two of the apcs pay for their efforts while the Mechs take heavy fire from the fire support elements of Liao.

    IMG_2659.jpg
    IMG_2660.jpg

    Turn 6
    Sees the The infantry bailout of the Goblins. Leaving them easy targets for the mechs who concentrate on taking them down Before they die to the Liao guns.
    A techical victory for the Davions as they prevent the Scout troops intel from getting out. But at the cost of a companies worth of equipment.
    Liao has other issues. With the better part of a company of tanks needing to be Dug out of the Minefields they had dropped upon them.


    Aftermath.
    A very fun game. Myself and Lorcan both had the same Genius Idea for the LRM carriers. Althou his side may have used it better. The mine where bad but once we attempted to push through them it wasn't too scary. Its the fact we where afraid to go into the hexes that made them so effective.
    But when the Fudge it call was made. They didn't do a lot in terms of damage. One Goblin passed through 3 hexes and only took 15 pionts of damage.
    Next time I may stick a ton of Mine Clearance ammo into the Carriers or Possibly the Saracens. They do have a ton to spare.

    The loss of the wolfhound was an unfortunate moment and completely due to player error. But its one he won't soon repeat.
    It also didn't really fit the rest of the lance. Brians looking into swapping it out.

    I was quite pleased with how my tank unit preformed. The combo of regular PPC carriers and the AC varient gives good oppertunity for choice. With the AP Rounds having great effect on the Enforcer in the last rounds.

    I think this is the kind of game that puts paid to complaints that vehicles are underpowered in TW. The davion side couldn't put any down at all - They crippled all the Goblins' motive systems, but decent crits or even armour penetration evaded Them. That was partially down to the Goblins' heavy armour for their size, but also the lack of hole punchers on the FedSuns side.


  • Registered Users, Registered Users 2 Posts: 1,144 ✭✭✭MarkHall


    Kempten, Ghost Bear Dominion
    3080
    As the Jihad dies down, the Clans have returned to their normal cycle trials and internecine combat. Looking to Bolster their breeding stock, The Hell's Horse have raided a Ghost Bear world for the genetic material of Chris Hall. While the Bears have put up a strong resistance, the Horses have punched a hole in the line and are attempting to deliver a coup de grace against the trial's target and win Immediately.

    Horses Objectives
    Identify the GhostBear Commander and disable his 'mech.
    -The commander can be Identified by a mech with an active probe ending the movement phase in range of him.
    -A mech without an active probe can identify the commander by ending its movement adjacent and not firing its weapons for a turn.
    -A vehicle can Identify the commander by ending its movement adjacent for 2 consecutive turns. It may fire weapons.
    -An infantry unit can identify the commander by successfukky swarming the unit.
    The commanders mech will be considered crippled under the following conditions
    Destruction of two limbs, 2 gyro hits, 2 engine and gyro hit. 2 hip hits.

    Points scored
    Per GB mech destroyed +4
    Crippling the commander +8
    Destroying the Commanders mech - 6
    Identifying the Commander +2
    Per horse mech destroyed -3
    Per HH Vehicle destroyed -2
    Per HH infantry point destroyed -1

    Ghost Bears
    Huntsman O
    Huntsman A
    Hankyu O
    Nova Cat B
    Summoner G
    Salamanders X5


    Hells Horses
    Balius
    Uller Pr
    Adder pr
    Hellion Pr
    Grendal Pr
    Epona B X 2
    Gnomes LRM X2

    Salamanders X2


    Turn 1
    IMG_4779.jpg
    IMG_4780.jpg
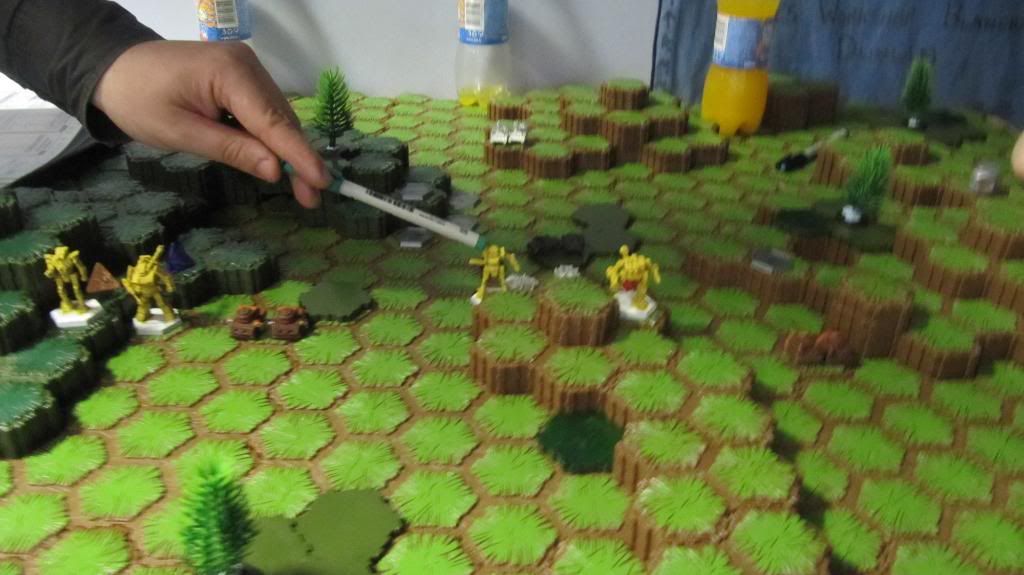
    Both sides move to range as best as they can. With the Horses using the dip in the hill to draw a bead on the Huntsman at the back. Lining up 3 of thier units for shots on it. The shadowcat goes in to assist.
    The Horses shots miss. While the Shadowcat starts the game with a direct strike with the arrow IV onto the Uller. Taking out a point of Salamanders and hurting a piont of Gnome with the Blast. And causing some actuator damage to the Ullers LB arm.
    The Adder and Huntsman exchange fire for some armor damage.

    Turn 2
    IMG_4783.jpg
    IMG_4784.jpg
    The Bears push on the right flank with most of thier shots going wide on thier targets. In return they get a spattering of long range shoots scratching thier armor. And in spite of his run accross the table the ShadowCat lines up a shot on the Adder. And Scores a direct hit again. Taking the second Piont of Salamanders before they managed to disembark. And The adder ends up loosing the a side torso causing its heat to spike after firing both its guns. Causing it to shutdown at the end of the turn. The Horse commander is not happy with this turn of events.

    Turn 3
    IMG_4785.jpg
    IMG_4786-1.jpg
    IMG_4787.jpg
    The Horses push closer with the BALIUS which takes minor damage as it presents itself. The Grendel and Summoner Exchange fire and the Grendal ends up on 14 heat due to it efforts. The Huntsman lands a kick on it just to show it how the Warriors of Omega Roll. The Shadowcat misses this turn. But you can't have a great time every time.
    The Adder starts back up. With no other damage as the Bears did not focus on it at all this turn.

    Turn 4
    IMG_4788.jpg
    IMG_4790.jpg
    IMG_4791.jpg
    IMG_4792.jpg
    The Adder begins to withdraw providing fire support as it goes.
    The Hankyu chases down the Hellion and Epona who are skirting the rear lines. It proves a fatal move as the Epona takes the head off it with a PPC. The Shadow Cat shots just glance the Grendal.
    The Huntsmen hit the Balius. The Shadowcat looses the Mighty Arrow IV to the Gnomes in a spot of revenge.The Nova Cat throws down a few mine fields


    Turn 5
    IMG_4793.jpg
    IMG_4794.jpg
    IMG_4795.jpg
    The Novacat advances for better shots. A foolish mistake that proves costly for the bears, the Grendal risks 2 minefields and gets into the behind it and sets off the ammo in the left side. The Huntsman attempts to back it up. But only does minor damage to the Grendal and misses the Kick.
    Gnomes and Elemental go head to head resulting in some mutual deaths.
    The Uller takes a hit to the foot while assisting in the savaging of the Novacat. The Novacat warrior manages to stay awake and on its feet for a few seconds before a series of kicks sends it to the deck.
    The Hellion and Summoner exchange fire while the Eponas move for better shots.

    Turn 6

    IMG_4797.jpg
    The Novacat stands and attempts to withdraw.
    While the Huntsmen attempt to harass the Balius which shruggs off the combined fire.
    The Nova cats attempts are cut shot as it other side is cleaved off leaving it a smoking ruin.
    The Shadowcat receives more fire and makes the call to withdraw now that it only had 1 Med laser left.
    And the Summoner continues to blast the Hellion and Epona until its head get slagged by a PPC Blast.

    Seeing his forces rapidly dwindling. The Ghost Bear commander in one of the Huntsmen offer Surrender. Rather than see his forces picked apart any more.


    Aftermath.
    The game started well for the bears. With the Shadowcat having a great time to begin with. Very happy with its infantry splattering, and messing up the Adder.
    In spite of a bad start Pete kept his head and managed to turn it back for the Horses with the two head hits and taking the Cats arm. And Savaging the Novacat. But that was my own fault for being too cocky.

    I did enjoy using the Arrow IV for hunting Battle armor. And it was interesting to see What the Balius could do.It's tough enough for a 65 tonner.

    Pete deciding to ignore his primary object served him well. Althou the way he was taking heads off it could have turned out badly for him had he focused on the Huntsman O which contained the commander.


  • Registered Users, Registered Users 2 Posts: 1,144 ✭✭✭MarkHall


    Brother

    The Frails believe that they have defeated us, that their pathetic coalition has triumphed and that their new messiah, Stone will lead them to salvation.

    The Fools.

    It is time to remind them of how fragile their lives truly are, how pathetic and helpless their so-called leaders are, that they will only lead them back into the endless cycle of pointless conflict over the table scraps that was the glorious Star League.

    Now, on this great anniversary, when our Founder the Sainted Jerome Blake rose to his place of leadership shall we remind that of the chaos that comes from trusting in false prophets. Your target is known to you, below is a list of facilities that are to be considered priorities, some are obvious, others will serve to reinforce the fear and sense of helplessness the Frails with experience. Beyond these you may engage targets of opportunity at your discretion.

    Blake’s Will be Done.[/font][/i]


    Targets

    Planetary Administration Building (Skyscraper Map, Hex 0804) 200pts
    Hospital (Skyscraper Map, Hex 1309) 150pts
    Military C3 Center (Military Base, Hex 0112) 150pts
    Communications Relay (Military Base, Hex 1010) 50pts
    HPG (Military Base, Hex 1110) 100pts
    Fire Station (Downtown Map, Hex 1201) 20pts
    Fuel Tanks (Seaport Map, Hex 0409) 20pts
    Power Station (Downtown Map, Hex 1516) 60pts
    Air Traffic Control Tower (Dropport Map 1, Hex1115) 50pts
    Borderless Hope Offices (Downtown Map, Hex 0605) 75pts
    Civil Defence Base (Seaport Map, Hex 1109) 75pts.

    We decided to make it a Lyran city as we had a good selection of painted minis for that.

    CityMap.jpg

    This was the arrangement, in addition we had in place the Dusk/Dawn rules for lighting to reflect the city lights, if and when the WoB's took out the generators the rules would revert to Full Moon night except for any hexes that were on fire or adjacent to a fire.

    Some of the Lyran units were deployed on-board, we used a few Steel Warrior plastics to represent a lance of Sarissa Securitymechs and a lance of Arbiters as well (aka the ritual sacrifice)

    DefendersintheBase.jpg
    andinthecity.jpg

    Meanwhile in a Union class dropship were two Level II's of cyber-ed up Manei Domini fanatics.

    TheWordofBlake.jpg

    For the opening round the WoB's got the drop on the defenders and were given one free round of movement and fire, though with only 4 mechs out it wasn't too devastating.

    OntheGroundandfanningout.jpg

    The defenders had opted to put four full squads of Fenrir Battlearmour in the building next to the dropship and they immediately started a murderous barrage of lasers and SRM's but unfortunately for them, the attackers had the new model Union from Hex Pack Supplemental. MML bays are very nasty.

    Fenrirvdropship.jpg

    As well as making a concerted effort to collapse the building on the Battle Armour the Union also started shooting up the civilian Leopard that was on the field, meanwhile the second unit of Mechs started to emerge and went hunting for targets. A single Arbiter Securitymech made a valiant stand in front of an oncoming Vanquisher.

    It was a short stand.

    TheVanquisherencountersaspeedbump.jpg

    A barrage of fire also destroyed the first of the WoB's targets, a reinforced fuel storage depot.

    Firstofmanyfires.jpg

    As they started to make there way further into the city the defenders started to react and it wasn't long before things got scrappy.
    TheWoBspressforward.jpg
    TheSecuritymechsstepup.jpg

    With the local Fire Station smashed and the first hit on the Power Generator building it was starting to look like a bit of a steamroller for the Word but much of the important and high value building where still further back and safe, all the same a lance of Steiner Mediums showed up and started to get into the action.

    Reinforcementsstarttoarrive.jpg

    By now half the Securitymechs have dropped but they have bought precious time as the first of the heavy hitters gets in, sadly by now the Leopard has succumbed and only a single squad of Fenrir are left though the Union has been savaged and an Avionics hit has endangered the WoB's chances of an escape.

    Thelightsgoout.jpg
    ThebattlearmourpaydearlyforthepoundingoftheDropship.jpg
    TheLeopardsuccumbs.jpg

    At this point the WoB commander makes what could be a critical error, he blows the power generators plunging the whole city into darkness, not realising the effect it will have to his speed and manouverability.

    http://i23.photobucket.com/albums/b370/Brian_Freak/Bloody%20Tricentennial/Thelightsgoout.jpg


  • Registered Users, Registered Users 2 Posts: 1,144 ✭✭✭MarkHall


    At the same time more Lyran reinforcements show up and the Lyran commander, outraged at the attack decides the Blakists aren't getting away and finishes their Dropship off, at the same time, the WoB's start shooting up the regional offices of Borderless Hope.

    Evenmorereinforcements.jpg
    Stranded.jpg
    BorderlessHopebombed.jpg

    With nothing to lose the Word push forward and really start to unleash hell, with multiple Inferno Arrow IV rounds being fired from the units Anvil mech, touching off a huge conflagration in the Base when it clips a Tank Farm.

    Letitburn.jpg

    It even tries to take out a pair of closing Demolisher IIs with a round but luckily it goes wide and added to the firestorm in the base.

    LuckyescapefortheDemolisherIIs.jpg
    Nothingtolose.jpg
    Everythingtoburn.jpg

    We had to call it soon after this but it was a lot of fun. By the end the juicy targets such as the Military C3 in the base and the Planetary Admin building and Hospital were probably going to survive, the darkness was really slowing the WoB advance and the Anvil was running out of Inferno ammo. I think the fact that we were lacking our normal WoB commander was the reason the real destruction was slow in coming, Lorcan Nagle knows how to do atrocities. ;D


  • Registered Users, Registered Users 2 Posts: 1,144 ✭✭✭MarkHall


    So last week our group decided that they couldn't wait any longer and wanted to Dive into The Wars of Reaving. So armed with the recently released

    Supplemental mini-campaign the forces of Clan Blood Spirit were dispatched to investigate the movement of an unknown force on Strana Mechty.

    [size=10pt]
    Clan Blood Spirit Binary
    [/size]

    Blood Kite
    Rifleman IIC
    Black Knight (Royal)
    Crab (Royal)
    Crimson Hawk

    Crimson Langur Prime
    Crimson Langur A
    Wyvern (Royal)
    Clint IIC
    Hellhound

    [size=10pt]Society Forces[/size]

    Savage coyote Z 3/4
    Viper Z 3/5
    Flashman Flas 8K 4/5
    Rhino royal 4/5
    Rhino royal 4/5
    Ishtar original 3/4
    Ishtar original 5/6
    Clan motorized point LRM 5/6
    Clan motorized point LRM 4/5
    Clan motorized point rifle 3/4
    Clan motorized point rifle 4/5
    Clan motorized point mg 5/6
    Clan motorized point mg 4/5
    Clan mechanized hover laser 3/4 (subbed by two Savannah Masters)
    Clan mechanized hover laser 3/4

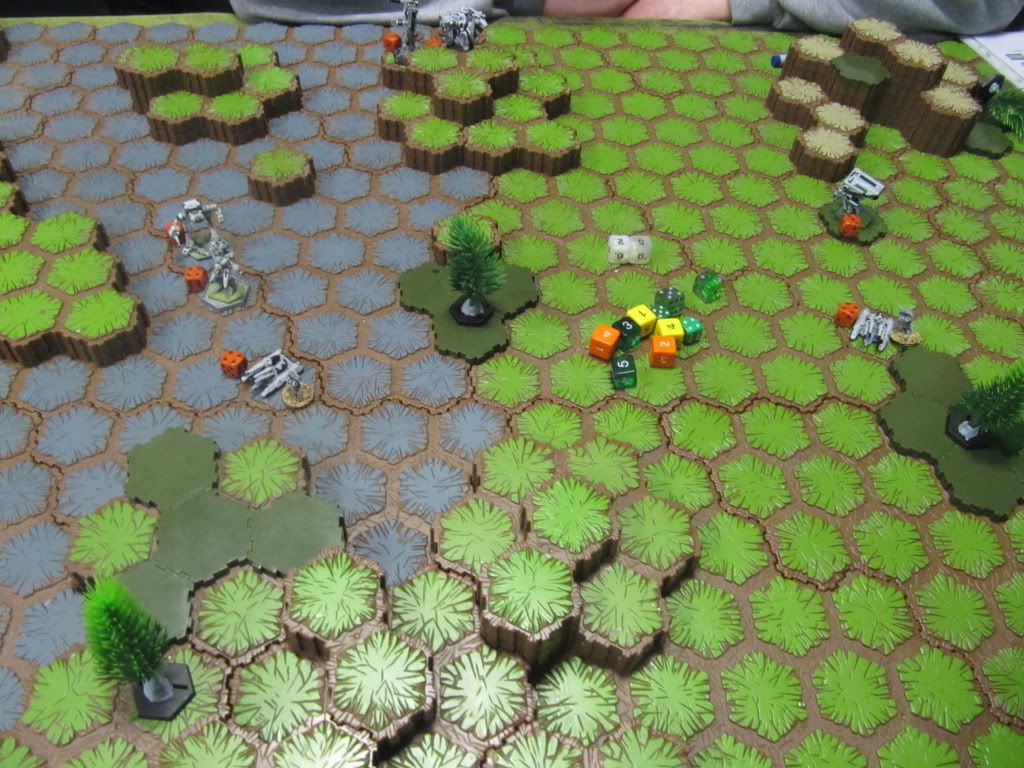
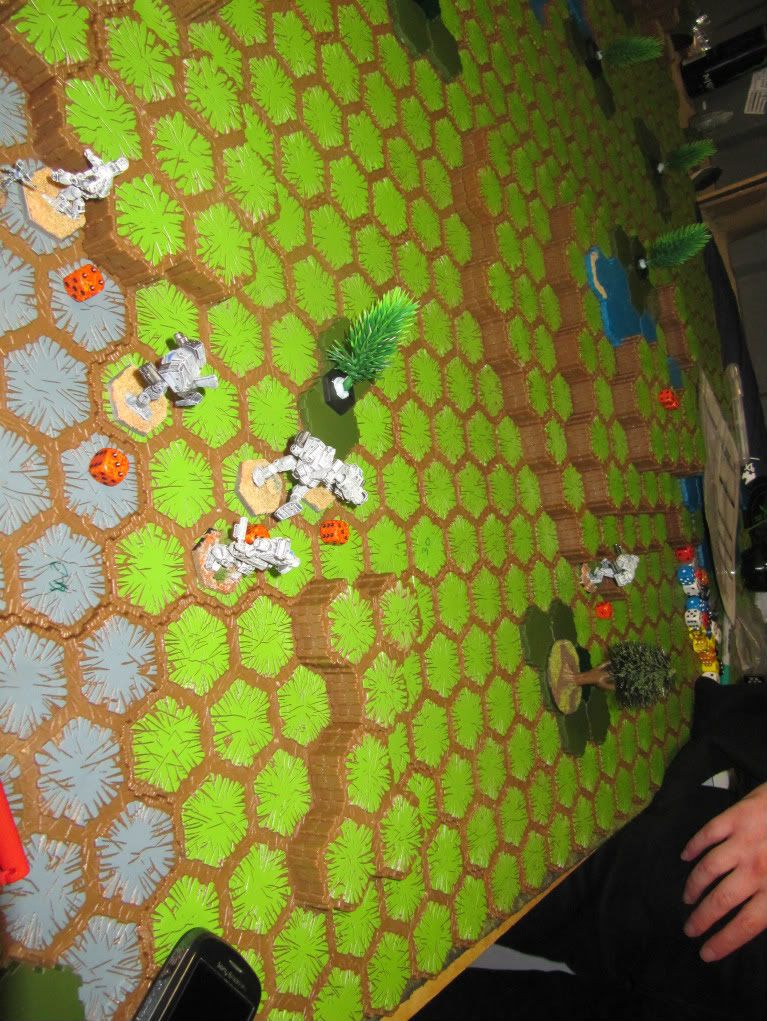
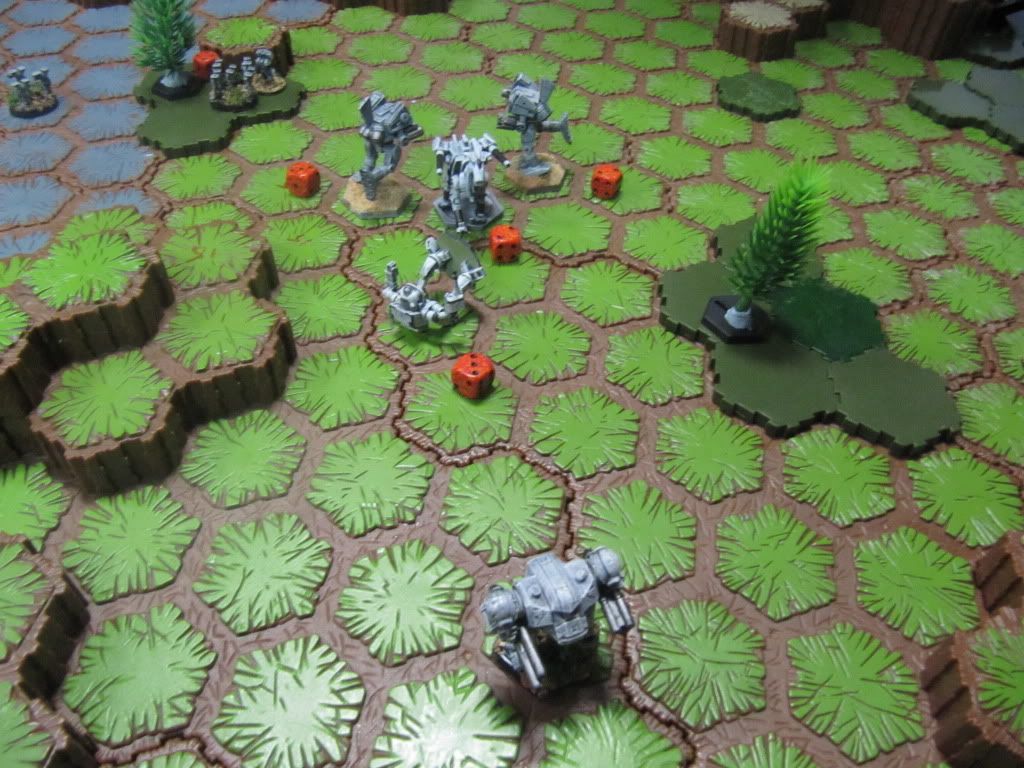
    For terrain one of the lads decided to set up a map using Heroscape terrain so things were pretty open. Per the scenario rules I through in my 2 cents with a 1.1 G rating for Strana Mechty, was going to make it a Dusk game too but several of the players objected as they hadn't given themselves very good gunners so I dropped that one.

    Blood Spirits initial advance
    DSCF0155.jpg

    The Society Forces started on-board
    DSCF0158.jpg

    The first turn saw the usual ranging shots that really hadn't a hope in hell of hitting, though the pair of Rhino's controlled by some Bandit Cast crews managed to put a full 30 Long Range Missiles into one of the Crimson Langurs in a display of gunnery that made us wonder why they washed out exactly. The only damage in return coming from a single ER Large Laser from the Blood Kite that hit the turret of one of the tanks.

    DSCF0168.jpg

    Turn two saw the damaged Crimson Langur pulling back to do some damage assessment while the Society Savage Coyote advanced on the Blood

    Spirits left flank targeting the significantly lighter Crimson Hawk and tearing open its left torso though failing to inflict a critical. The Blood Kite continued to attack the Rhinos on the hill this time landing several volley's of LRM's and combined with stray shots from the Rifleman IIC, with which it had set up an overwatch position, left one Rhino with a battered nose and a locked turret, though still intact. The Clint IIC and remaining Crimson Langur focused on the other Rhino but only scored scattered hits.

    DSCF0161.jpg

    DSCF0156.jpg

    While the tanks on the hill drew the bulk of the fire the large amount of Dark Caste infantry made a beeline for the hills in the center of the map, a few Packrat minis subbing in for the Flatbed trucks deployed by the Dark Caste as transports. With the Spirits only dedicated Anti-Infantry Mech, the Wyvern, on a distant flank, this would prove nasty later. The Black Knight and Crab set themselves the task of securing the right flank and when the Crab poked it's nose out found that the Rhinos had decided it was an easier target this round, the massed missile strike tumbling the gyros and sending it crashing to the dirt.

    DSCF0167.jpg

    DSCF0160.jpg

    Turn three had the poor Crab pilot in a bad situation, having obviously been rattled by the extra hard jolt from the slightly higher gravity, the pilot needed 3 attempts to stand and when he finally made it back up, didn't have much left for a movement mode. The Black Knight moved up to support it but the Society seemed to sense the opportunity as both Rhinos again picked it as their target, hitting with over 40 missiles, as well as two platoons of Mechanised Hover Infantry that darted around the hill to engage at close range. The massed weapons fire ripped away the entire right torso and smashed armour all over the mech but miraculously this time it stayed upright.

    DSCF0165.jpg

    Meanwhile on the other flank the Society's Nova CEWS finally came into play as the Dragonfly moved in close to the Star of Spirits that had been advancing towards it, allowing the Savage Coyote to take full advantage of the range reduction, putting it's HAG and an iATM volley into the Hellhound's right torso and right leg. The return fire from the forces on the left flank mostly missed but the Rifleman and Blood Kite finally finish off the badly damaged Rhino on the hill, only one more to go.

    DSCF0163.jpg

    DSCF0164.jpg

    Turn 4 and the Crab started to move back off the board, it's savaged torso meaning that under the Forced Withdrawal rules it had to leave, despite the protestations of several Blood Spirit players it decided NOT to play fast and loose with rules interpretations and simply left at full speed in a direct line for it's home edge. Meanwhile the Black Knight pressed on in the hopes of getting in a sneaky flank strike but the infantry and the Ishtar on the flank weren't about to let it get through easy, an exchange of fire left a PPC sized hole in the tanks turret while the infantry took a number of small chunks out of the Knight.

    DSCF0170.jpg

    DSCF0169.jpg


  • Advertisement
  • Registered Users, Registered Users 2 Posts: 1,144 ✭✭✭MarkHall


    The Blood Kite, Crimson Langur and Rifleman IIC switch to the remaining Rhino, savaging it but failing to knock it out. The Savage Coyote switched targets again, this time taking shots at the Wyvern and hitting with it's iATM's and its HAG leaving it staggered, the Bandit caste seemed to have finally realised that if their infantry was to have a chance the Wyvern needed to die.

    DSCF0178.jpg

    The Dragonfly was concentrating on manouvering so as to provide it's friends with targeting data and the Flashman was now moving into the fight.

    DSCF0173.jpg

    After losing initiative every turn so far the Blood Spirits were delighted to finally catch a break and win one, not that it took the pressure off, the Crab continued it's withdrawal while the knight continued its advance and the furball that was the left flank continued. The remaining Dark Cast Rhino got cute and turned it's damaged front away from its antagonists, depriving it of the forward mounted LRM launcher but giving it fresh armour. The Wyvern meanwhile moved into the center and engaged the pair of infantry platoons that had been advancing slowly towards the Blood Kite and Rifleman IIC's position, immolating the lead platoon with a volley of Inferno SRM's and wiping them out in grisly fashion.

    DSCF0176.jpg

    DSCF0182.jpg
    Meanwhile the Black Knight continued it's solo run on the left, hounded by the infantry and frustrated by the Ishtar. The combined fire of the Infantry and tank have stripped it of rear armour and it has started to lose front armour to the tank.

    DSCF0174.jpg

    The Flashman with the aid of its Nova CEWS tore into the already Damaged Crimson Langur A and stripped the remaining armour from the left torso leaving it with a very exposed and still very full ammo bin, though it fortunately managed to stay up despite a head hit and suffered no criticals. The Savage Coyote finally received a solid volley to its left torso from the Hellhound with a wonderful display of gunnery that put the Large Pulse, ER Medium and all the SRMs into the torso, stripping it and taking out the iATM in that torso, the return volley was definitely a case of giving better then it got though as the HAG and iATM's ripped away the left arm, the right arm and right torso as well as a head hit. The Hellhound was now subject to forced withdrawal.

    DSCF0180.jpg

    DSCF0181.jpg

    DSCF0183.jpg

    The final rounds of the fight finally saw the Society forces taking some serious loses as the second Rhino finally died and the Black Knight was able to kick the Ishtar to death but it was by no means a one sided affair as the infantry that had been persecuting the Knight finally ate through to the Gyro and dropped the mech. The Dragonfly was continuing to be far more a strategic asset then a tactical one as it's own weaponry wasn't doing much but the Nova it carried was definitely letting the Flashman and Savage Coyote punch above their weight, blood Spirit attempts to stop the small mech simply went wide. The staggering amount of damage taken by the Spirits forced the Rifleman IIC and Blood Kite to advance from their position but not before the Rifleman put 3 of it's Large Pulse lasers into the front of the second Ishtar and finished it off, though not before it blew the right arm off the Wyvern while the Wyvern had another barbecue with the second infantry platoon before going unconscious and falling over. The Flashman fires two large lasers into the head of the Crimson Langur Prime killing it instantly but fails its own PSR and is looking hurt.

    DSCF0186.jpg

    Proof that Combat Vehicles can die hard.

    DSCF0185.jpg

    Overall the game was enjoyed by all, the lack of anti-infantry elements really hurt the Blood Spirits and it was obvious they took disproportionate casualties because of it. The Spirits would carry they day but it had cost them dearly.


  • Registered Users, Registered Users 2 Posts: 1,144 ✭✭✭MarkHall


    One of the lads have finished off one of their units this week.

    So, without further ado, for those who might be interested I present my interpretation of [size=14pt]Comstar's 77th Division, Bright Horizon III Theta Level III[/size]

    FullLvlIII.jpg

    This time around it was the turn of my Winter/Arctic Camouflage scheme. This is something I came up with a few years ago and found has worked really well, not so much at hiding the units (lets face it, 40 ton, 10 meter tall walking tank, not stealthy) but more for making it harder to visually identify and pick out individuals in a group.

    Example.
    WinterCamo.jpg

    As you can see, unless you really concentrate it's not easy to pick out individual designs in the mass of White and Stripes and lining up shots on individual targets is even harder.

    The Units: Command Level II

    CommandLvlII.jpg

    This time the Command Elements are a little lighter but consist of a full C3i Level II of fast heavy and medium designs, liberally sprinkled with iNarc launchers, you'll see why shortly

    Regular C3 team

    C3LvlII.jpg

    For the second Level II I went for a bit of a hodge-podge including a bit of Clan Tech salvage and a single Level I of Kobold Battlesuits which made sense as the write-up in TRO 3075 states that the Comguard usually deployed them in scattered Level I's initially. The Shugenja, Marauder (-5R), Grand Dragon and Strider share a standard C3 net, the Strider is often customised but usually is a D config.

    WarhammerwCinematics.jpg

    I also took the opportunity to try out more of my Armorcast Cinematics, sadly the Energy Blasts I got were a bit too small for the Warhammer so I used a Laser Blast instead.

    The Heavy Hitters

    HeavyHitters.jpg

    This bunch is the muscle of the unit and is usually used as two short lances, the two Viking's and the Nightstar slowly advancing while the jumpers, Guillotine, Marauder-5M and Avatar-F close in.

    Viking-GVariant.jpg

    I modded a Viking to the -G variant awhile back as I think it is a really good design, left off the arm missile pods and replaced tehm with some guns from a pack of Babylon 5 Wars EA turrets I picked up years ago, little bit of slicing and dicing turned them into a single Large Pulse and 3 Med. Pulse. I filed down the holes for the torso launchers a bit and used a spare cannon arm from a Weapons Pack for the LB-X and the front from a Warzone 28mm rifle for the Gauss barrel, finally I filled in the various holes in the legs and torso for the MG,s/SL's.

    Fire Support


    FireSupportLvlII.jpg

    First thing you'll notice is that this Level II is understrength, that's to reflect the Division's 95% listed strength circa 3067. The standard units are an Upgrade's Von Luckner, 3025 tech Ontos and a Heavy LRM Carrier (now you see why I have the iNarcs in the Command unit).
    The other two tanks for those who are curious and confused are my take on the Demolisher Arrow IV variant.

    ArrowIVDemolishers.jpg

    I had intended doing a hatchet job on some other missile racks but then, just before I was about to start cutting, Ironwind Metals released their new Turrets for the Bunkers they do and one look at the Large Missile Turret and I realised that it would be perfect for the Arrow IV variant (Not to mention it would make more sense, even modern day Tanks will often just build a whole new turret for a variant rather then try to use something that isn't fit for purpose).

    DemolisherOptions2.jpg

    DemolisherOptions.jpg

    Also, I decided to keep the original turrets as at some point I intend to do the Pre-Tukkayid incarnation of the unit and that way all I have to do is swap them around to get regular Demolishers.

    Cinematics1.jpg

    Lastly I just couldn't resist trying out more of the Cinematics on these big boys. A couple of pins means they can be taken out and put in easily.

    Infantry Support Level II

    InfantryLvlII.jpg

    I have to admit the fact that Comstar uses so much Infantry can be a real pain, having said that it's not something a lot of people work on so I suppose it's good to have. The Scimitar is a the new Narc variant from Upgrades and the Maxim is the Infantry Variant so it carries all three oversized platoons. The reason you see 6 stands of infantry is again, comstar uses 36 troopers in their standard Foot Platoons and under TW rules, that means I have to deploy them as 2x18 trooper sub Platoons, hence the colour coding and numbering.

    Air Support Level II

    AeroLvlII.jpg

    The Air support for the unit is thin to say the least for two reasons 1) It is actually understrength by two fighters again to represent the 95% listing and 2) Because I still am waiting for Ironwind to release a Mech Scale model of the Centurion of which I need 4 in total (hint hint guys).

    AeroTopBottom.jpg

    Because I use the fighters for ground support a lot I also adopted a camo scheme I had heard was used in WW2, the upper body of the fighter is the appropriate camo while the underside is sky blue.

    So that's the fourth of the six Level II's in the Division, I'm going to take a break for a couple of weeks to get some buildings and emplacements ready for Gaelcon in October but I hope to be back to do the next Level III (The Stonecutters III iota) soon.


  • Registered Users, Registered Users 2 Posts: 1,144 ✭✭✭MarkHall


    This is a big job as I plan on doing an entire Division, the 77th Division from the 2nd Army. As most Comstar units are usually scattered across several planets the plan is to paint each of the six Level III's a separate colour scheme, may usual preference is for camouflage so I intend to do the following schemes so far.

    Desert
    Badlands/Scrubland
    Urban
    Arctic
    Woodland

    Haven't worked out what to do with the last Level III so I'd appreciate any suggestions as well as any comments on the units and work. Hopefully as I get a Level III finished it will go up here. Anyway, presenting for your perusal, my idea of the first of the units,

    The Gunslingers III Theta (circa 3067)

    77thDiv.jpg

    The Command Level II, all C3i Variants

    Command.jpg

    The Muscle of the unit, a mixed Level II of Assault machines and Standard I.S. Battle Armour, normally equipped with recoilless rifles.

    TheHeavies.jpg

    The Highlander IIC was done with a variant of my Desert Camo, I was aiming for a Leopard Print effect, not sure it works, what do you think?

    HighlanderIIC.jpg

    Recon Level II, three mechs with Beagles and three more for escort, these guys don't get to kill much but then, they're not supposed to.

    ReconLevelII.jpg

    Loving my transfers, best buy I've made in years, heartily recommend them.

    LocustIIC.jpg

    Mustn't forget the Tread Heads. :)

    VehicleLevelII.jpg

    Another unit to hold the ground the others take, I've had to modify the Goblins to take the larger Comstar Platoons, after much debate I simply reduced the SRM-6 Launcher on the 3058 model to an SRM-4 to gain the extra 1 ton for the troopers.

    MixedConventionalLevelII.jpg

    The only part of the unit that is incomplete, the aerospace contingent, purely because the Huscarl mini isn't out yet. (Take the hint guys I want my Huscarls) The Fighters are all done in a scheme I heard about once, camo on top and sky blue underneath.

    AerospaceLevelII.jpg

    I usually use the Royal Version of the Rapier, personal preference.

    Rapier.jpg

    That big tailplane makes it really easy to put on the decals.

    Slayer.jpg

    Hope you like them


  • Registered Users, Registered Users 2 Posts: 39 Onanon


    Are there still Battletech games being played on a Wednesday in Gamer's World?

    We had a nostalgia session over the cartoon after several pints.


  • Registered Users, Registered Users 2 Posts: 39 Onanon


    I picked up the Intro Set as a con for cheap.
    Is there still a gaming scene for 3025/ Introtech?


  • Advertisement
Advertisement