Advertisement
If you have a new account but are having problems posting or verifying your account, please email us on hello@boards.ie for help. Thanks :)
Hello all! Please ensure that you are posting a new thread or question in the appropriate forum. The Feedback forum is overwhelmed with questions that are having to be moved elsewhere. If you need help to verify your account contact hello@boards.ie
Hi all! We have been experiencing an issue on site where threads have been missing the latest postings. The platform host Vanilla are working on this issue. A workaround that has been used by some is to navigate back from 1 to 10+ pages to re-sync the thread and this will then show the latest posts. Thanks, Mike.
Hi there,
There is an issue with role permissions that is being worked on at the moment.
If you are having trouble with access or permissions on regional forums please post here to get access: https://www.boards.ie/discussion/2058365403/you-do-not-have-permission-for-that#latest

What are you working on currently?

1356723

Comments

  • Registered Users, Registered Users 2 Posts: 431 ✭✭delaney001


    Dave! wrote: »
    What kind of wood is that delaney001? And where'd you get it? :)

    I still only get timber from Woodie's/B&Q :-/ I don't really know where to get it (in Dublin) other than that!

    Friend is a woodwork teacher, gets his timber from Strahans. Told me about these off cut bundles they have sometimes. About 2' x 2' square bundle made up of 4' lengths. Every kind of hardwood in them. Ranging from 2x1to 8x1.
    Really lovely stuff, just short and all rough cut. Great for little projects tho. Think I got 6 for €160

    Edit. Legs are mahogany. Top is ask I think. Cross members are Oak


  • Registered Users, Registered Users 2 Posts: 431 ✭✭delaney001


    Wossack wrote: »
    looks well! That from Nick Offermans book? He's got something similar in it (Jupiter table)

    Ya the very one. Got the book for Xmas. Just saw it and thought it was nice, and a simple enough project to bang out. You could literally make it without ever knowing a dimension and just eye the whole thing proportion wise. Only dimension that really matters is the height to match the seat it'll accompany.


  • Registered Users, Registered Users 2 Posts: 431 ✭✭delaney001


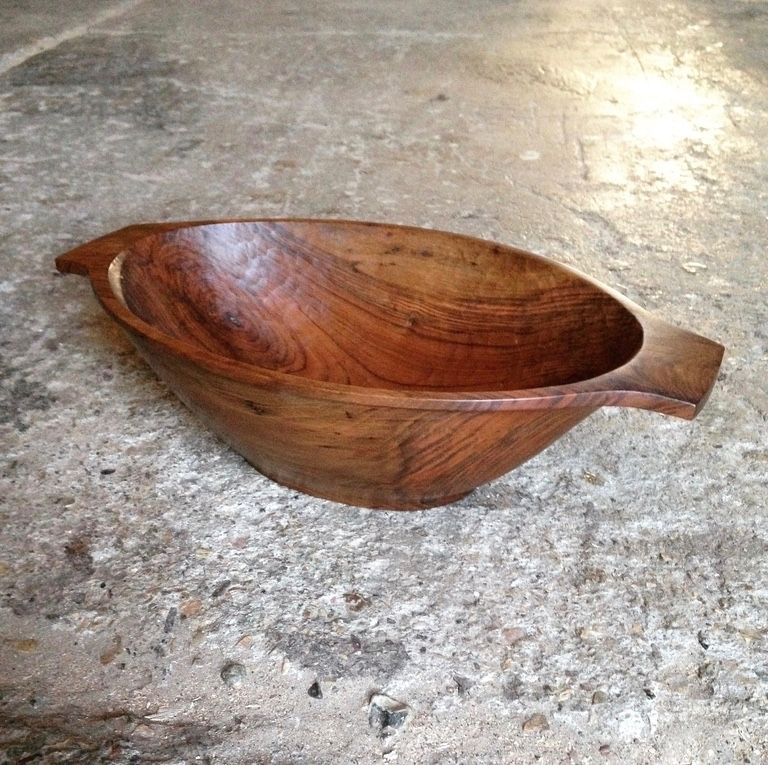
    Oiled and ready to hold its maiden cup of scald.


  • Closed Accounts Posts: 27,857 ✭✭✭✭Dave!


    Built my first chair from hazel and maple! I love it!

    C30oj6cWAAIZ-sI.jpg

    C30oj6dWAAAGmDc.jpg

    C30oj6bXAAEi_7X.jpg


  • Registered Users, Registered Users 2 Posts: 40,038 ✭✭✭✭Sparks


    IMG_0529a.jpg

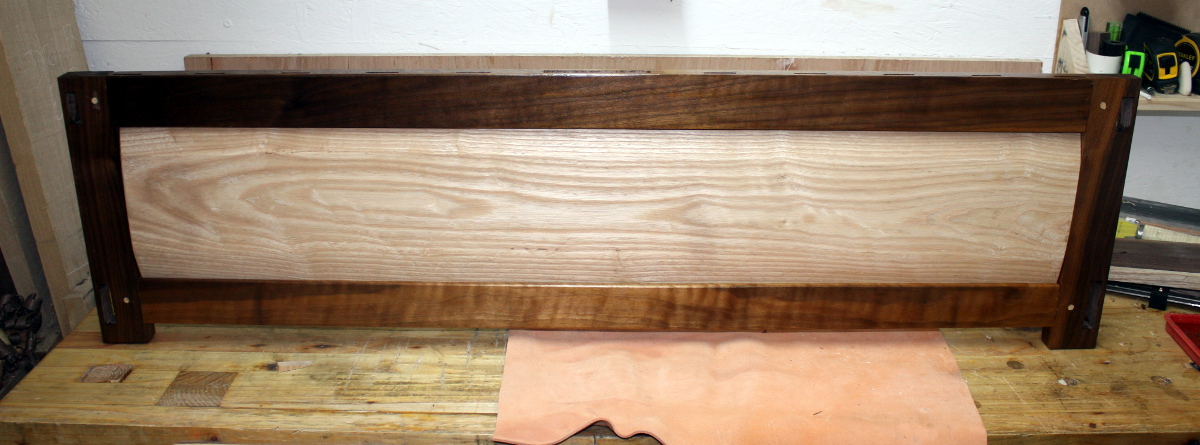
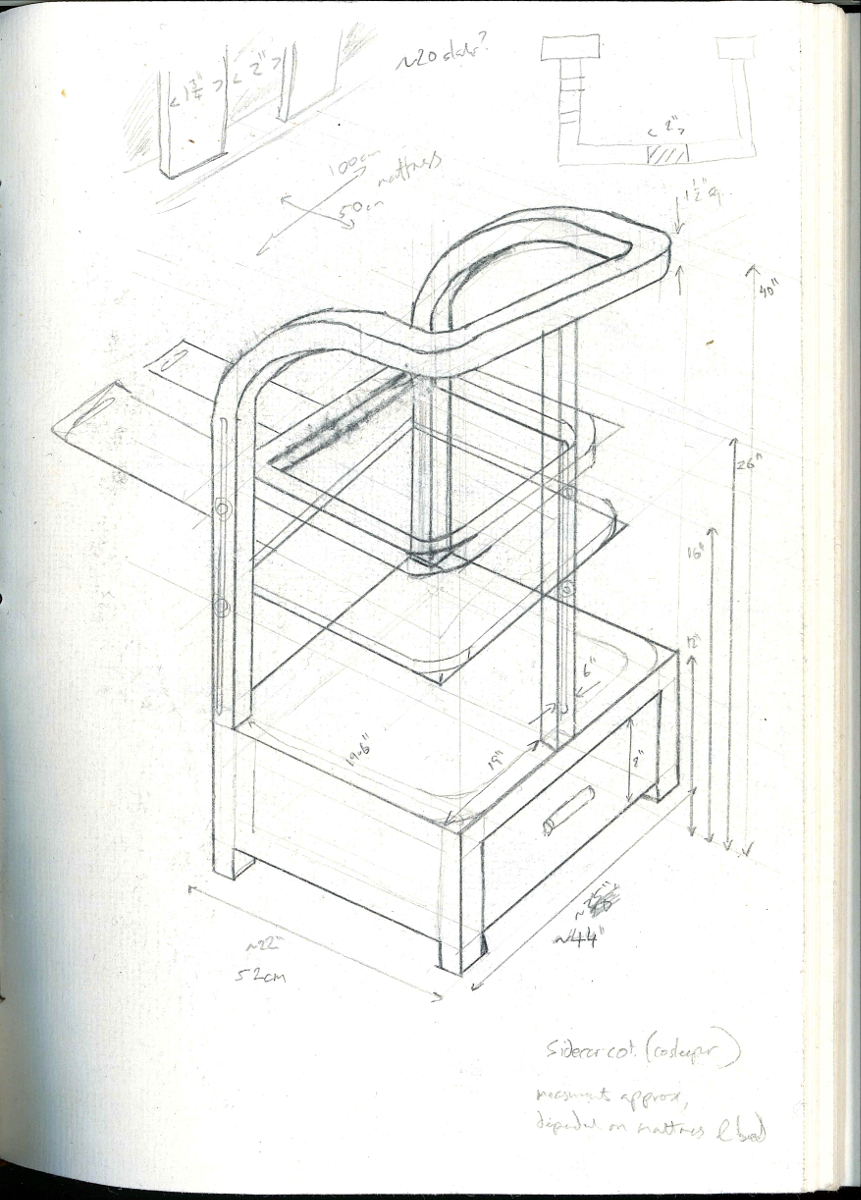
    Back panel for the cot all shellac'd, glued up and drawbored (still needs a few coats of osmo but I'll do that after the entire thing is assembled).

    Walnut really does pop when you put some shellac on it...


  • Registered Users, Registered Users 2 Posts: 40,038 ✭✭✭✭Sparks


    IMG_0711a.jpg

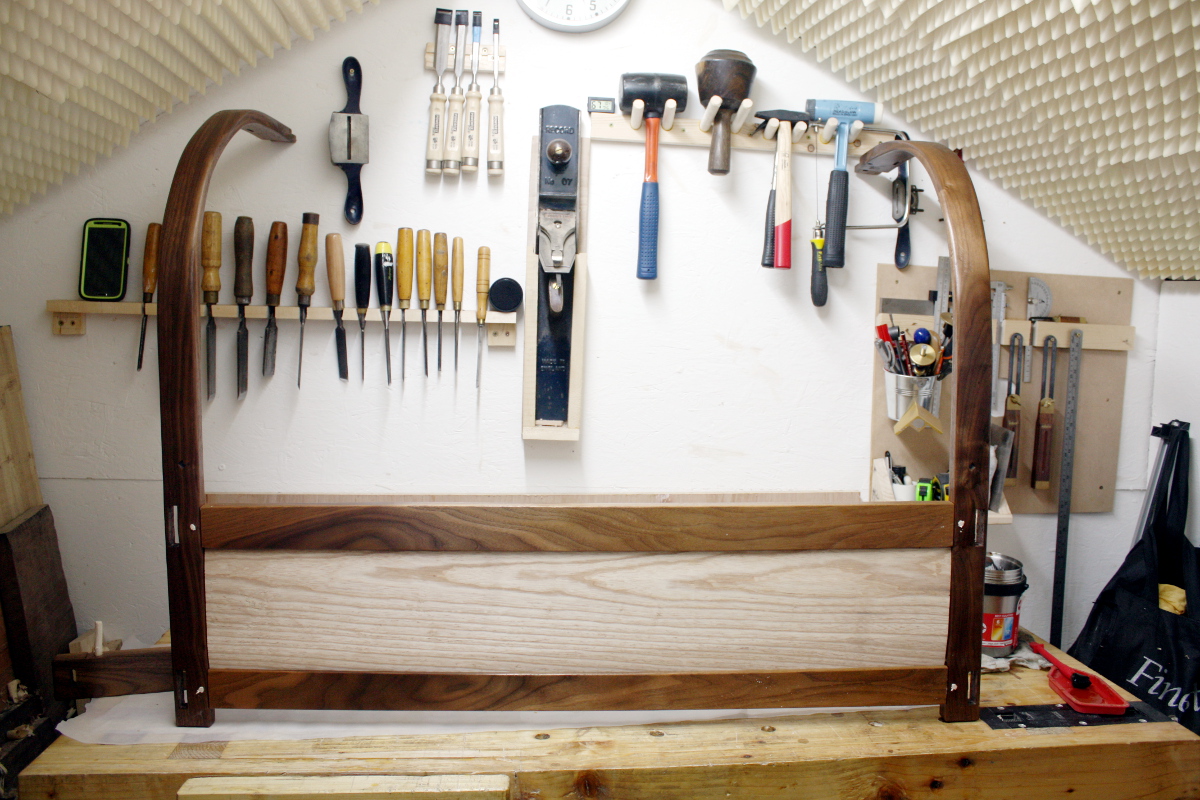
    Front panel for the cot all shellac'd, glued and drawbored.

    IMG_0717a.jpg

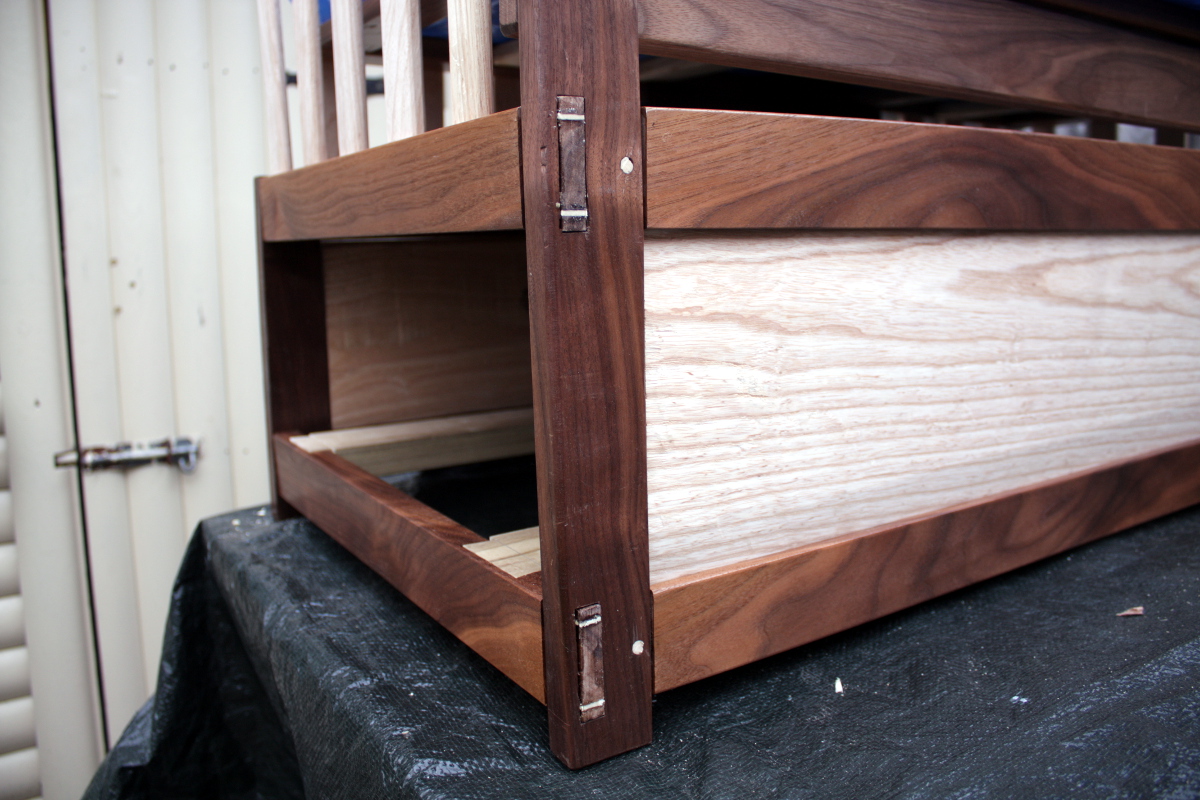
    And the mattress platform and its front support glued up and shellac'd and held together with wooden nails (there's a gap in there so the platform has some spring to it when you put a load on it).

    IMG_0738a.jpg

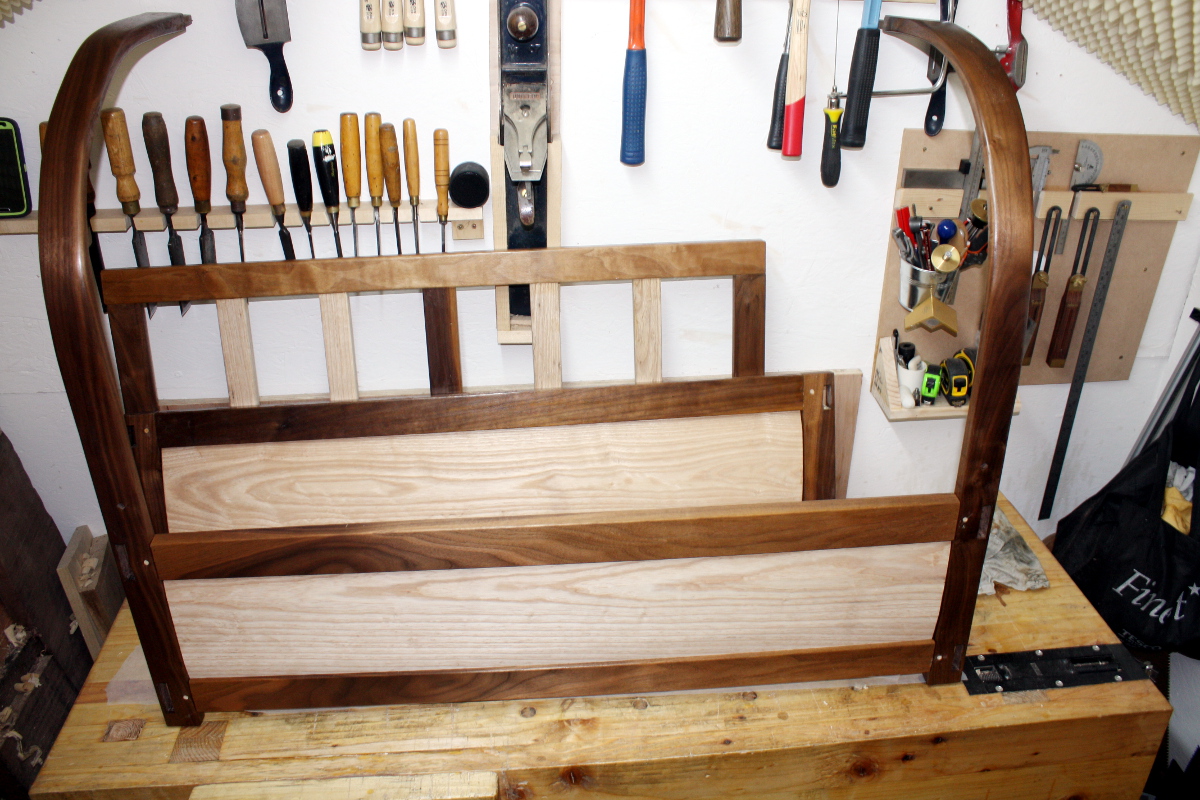
    That's the front, the back, the mattress platform...

    IMG_0689a.jpg

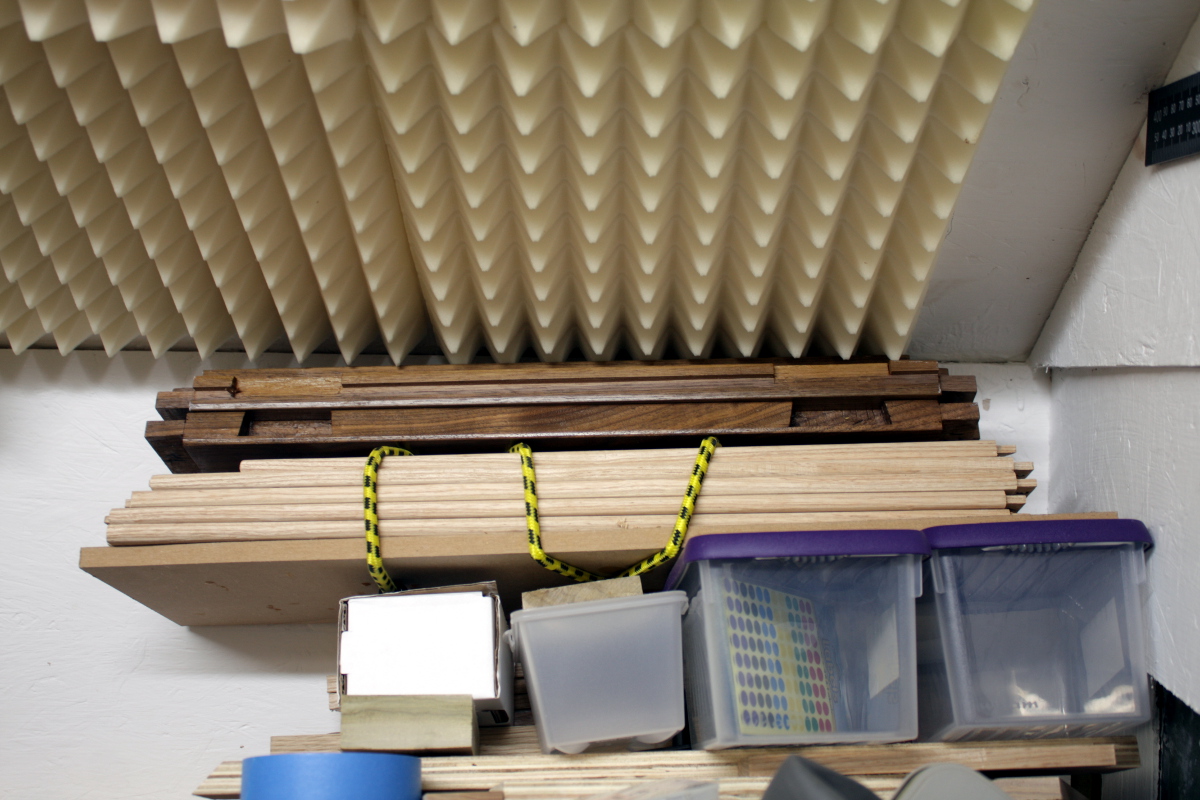
    ...the cross rails and the slats, all done.

    Next up is a final dry fit to get the position of the rear support for the platform, cutting the slot and drilling the mounting holes for that, then shellacing the last two parts of the frame, final assembly, making a drawer, and final finishing with osmo.

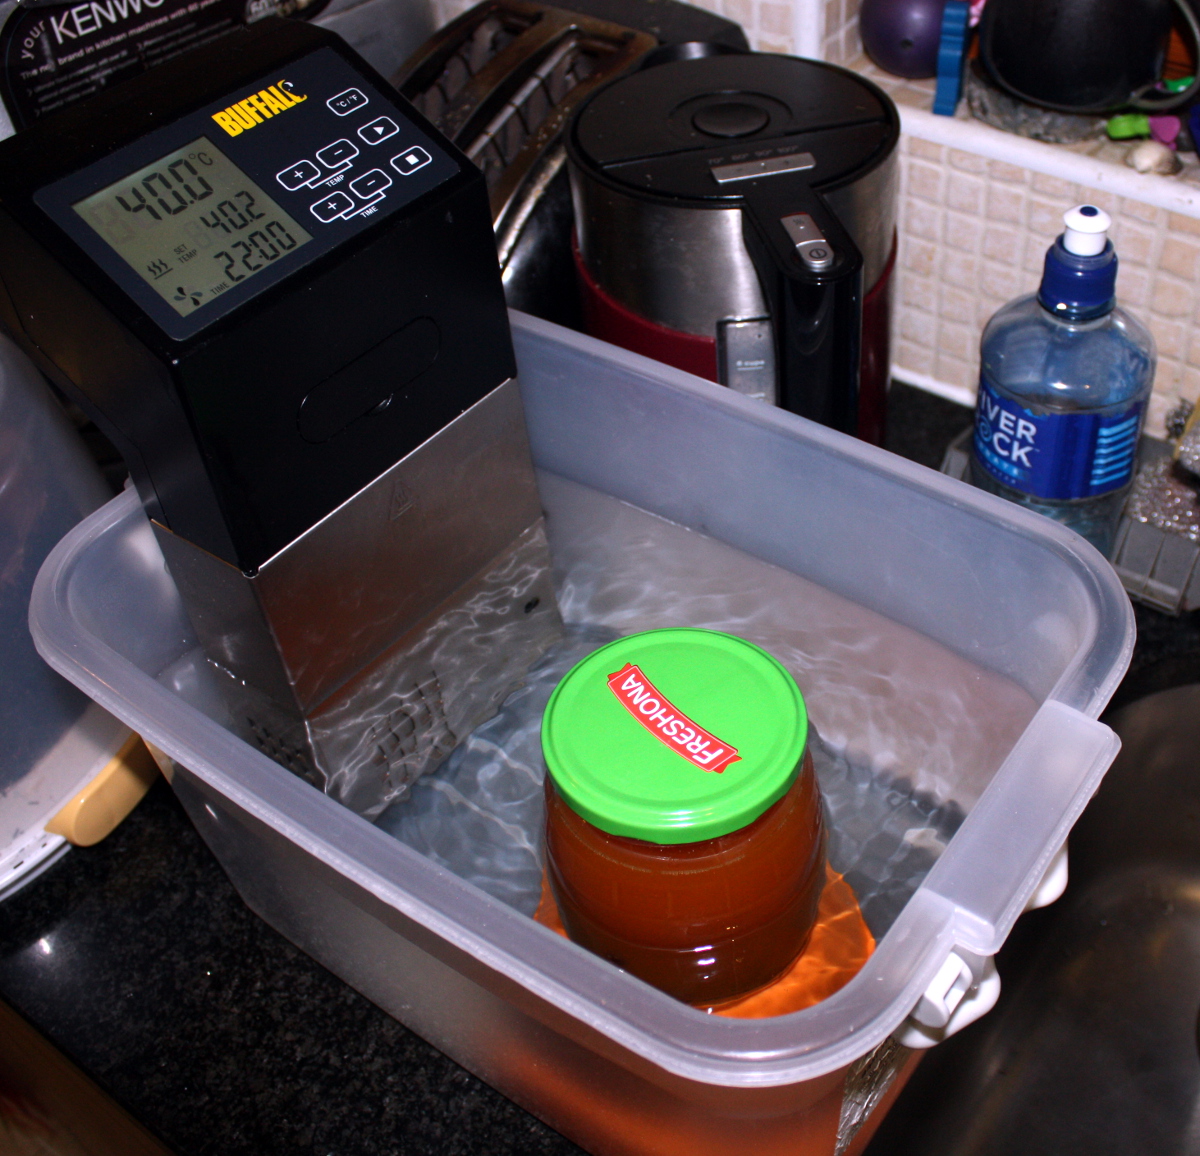
    In the meantime, I ran out of shellac on saturday night and didn't want to wait a week for the next batch (waiting for buttons to dissolve in isopropanol took a week during the summer, at -1C I figure I'd be waiting longer). Leaving it in a warm place would speed this up, but you're warned not to try to dissolve it faster by direct heating because the gas on the hob would leave you holding a pot full of burning alcohol and resin in the kitchen while your wife looked on. However, we have more ways to heat things these days.

    Ladies and gentlemen, I present....

    IMG_0676a.jpg

    Sous-vide shellac! :D

    (And it worked, the shellac buttons dissolved almost completely overnight with only around a teaspoon left in the bottom of the jar).


  • Registered Users, Registered Users 2 Posts: 809 ✭✭✭raspberrypi67


    Dave! wrote: »
    What kind of wood is that delaney001? And where'd you get it? :)

    I still only get timber from Woodie's/B&Q :-/ I don't really know where to get it (in Dublin) other than that!

    Morgans timber just off the n7 luas depot, left.
    Strahan timber Newcastle
    Abbey woods


  • Registered Users, Registered Users 2 Posts: 40,038 ✭✭✭✭Sparks


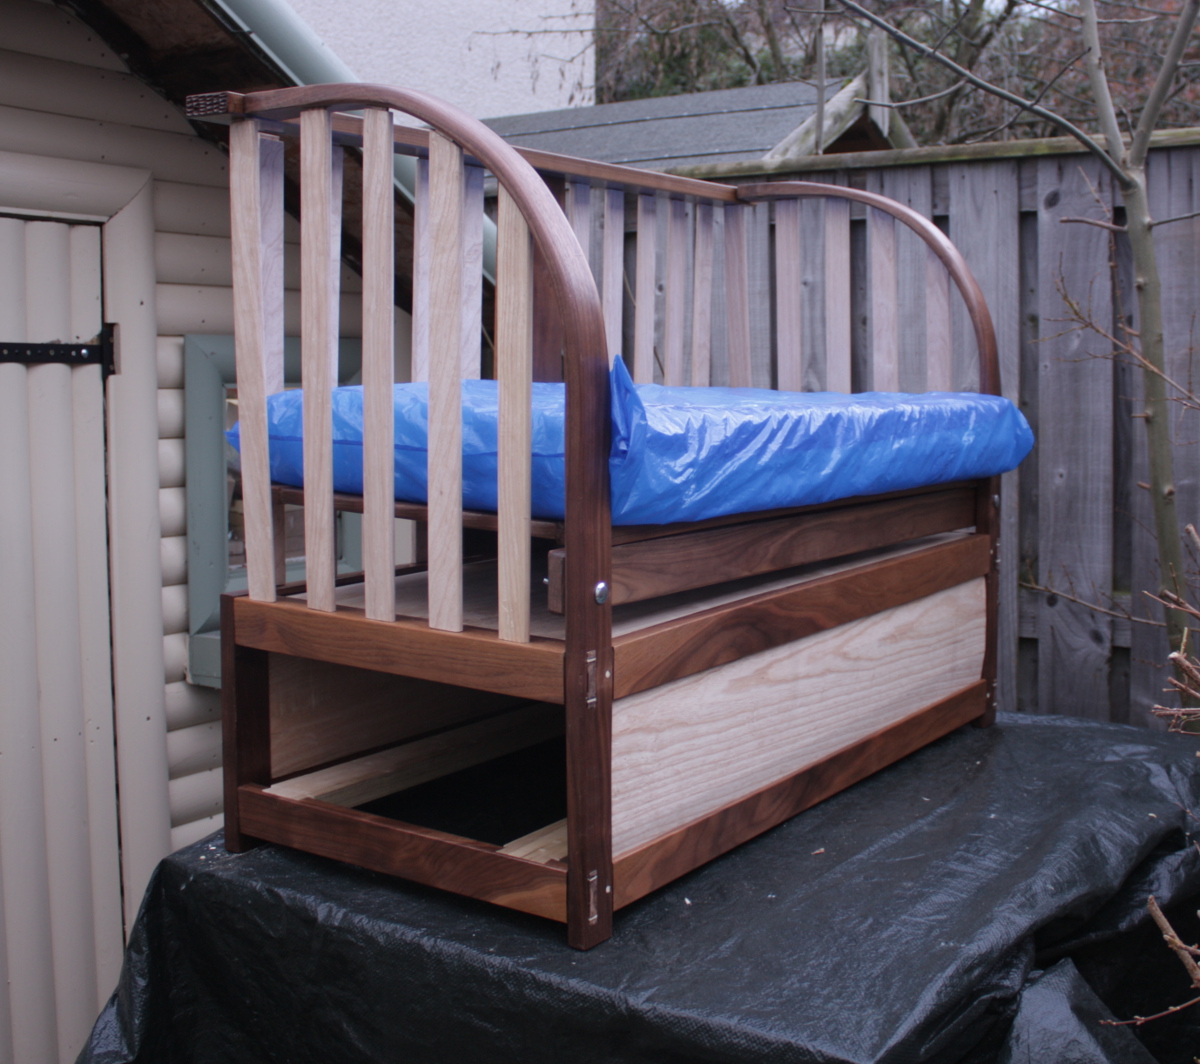
    Not done yet...

    IMG_0813a.jpg

    ...but getting closer.

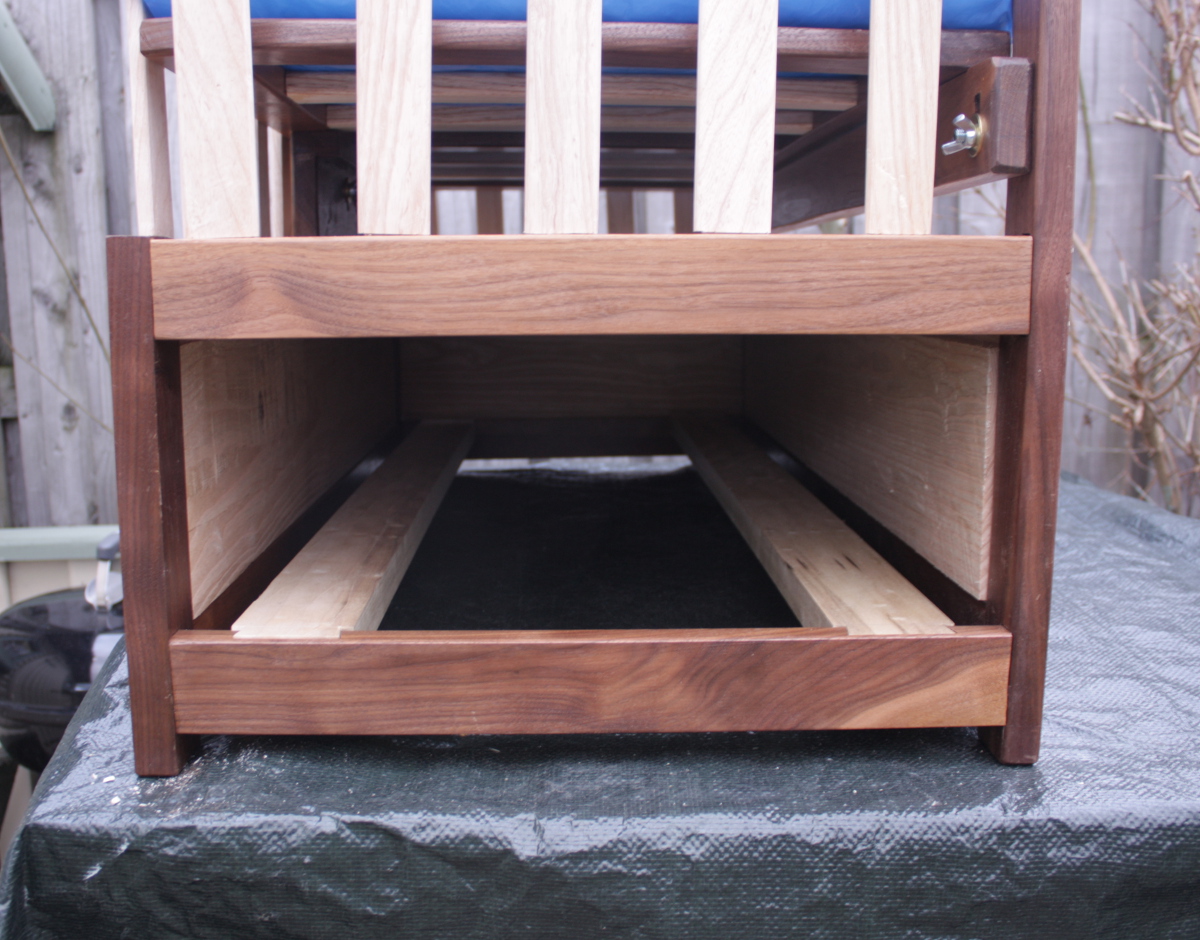
    Still need to make a drawer.

    IMG_0808a.jpg

    IMG_0815a.jpg


  • Registered Users, Registered Users 2 Posts: 379 ✭✭mobfromcork


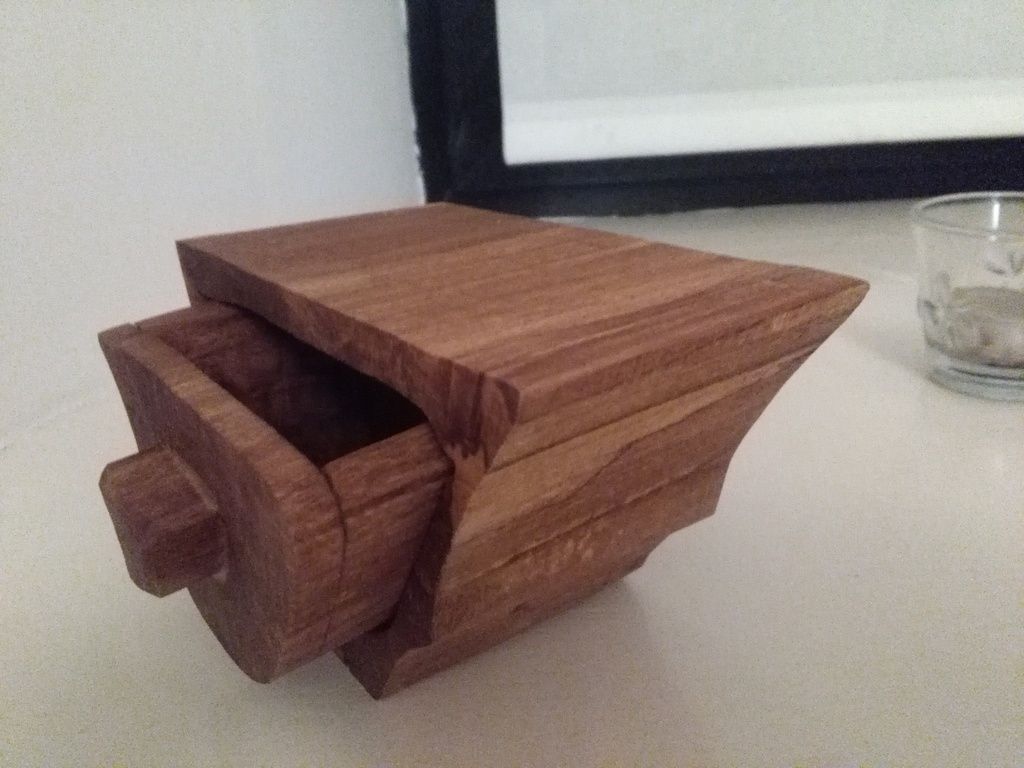
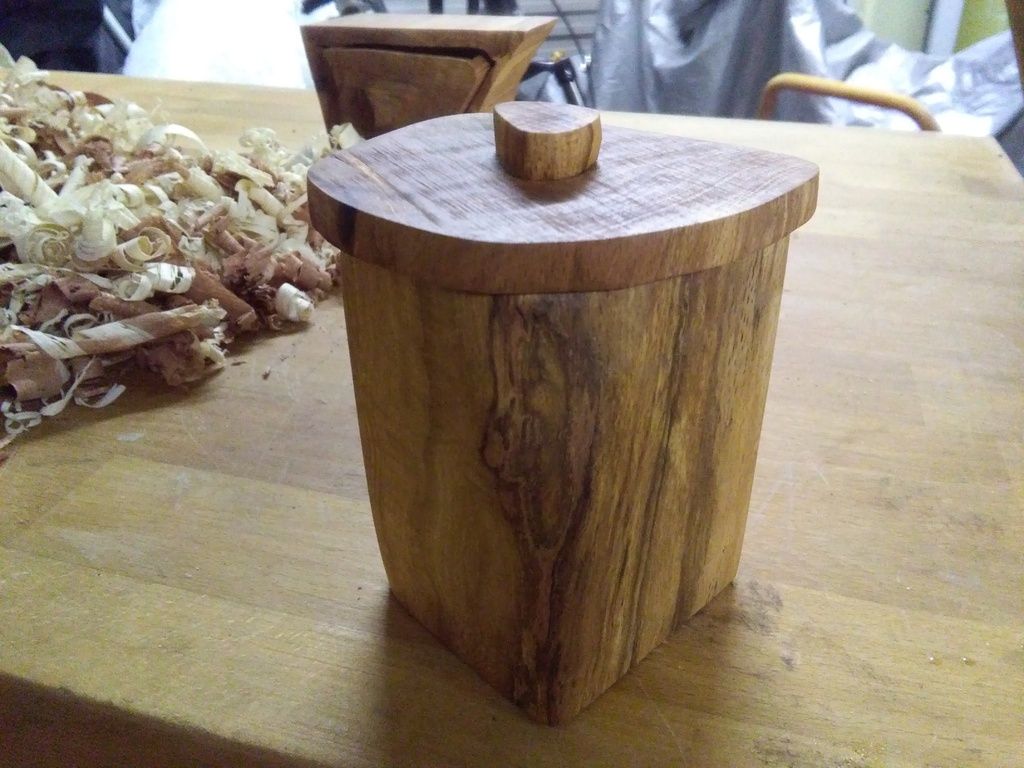
    Doing a few bits over the last week. Picked up a small Inca bandsaw last weekend and tried making a few small bits. I used dried beech logs that I had chopped and squared them off a bit using a mitre saw before shaping them on the bandsaw to make trinket boxes for my daughter.

    [IMG][/img]Beech%20drawer_zpsnf196w7t.jpg

    [IMG][/img]Small%20beech%20box_zpstpdoq0al.jpg


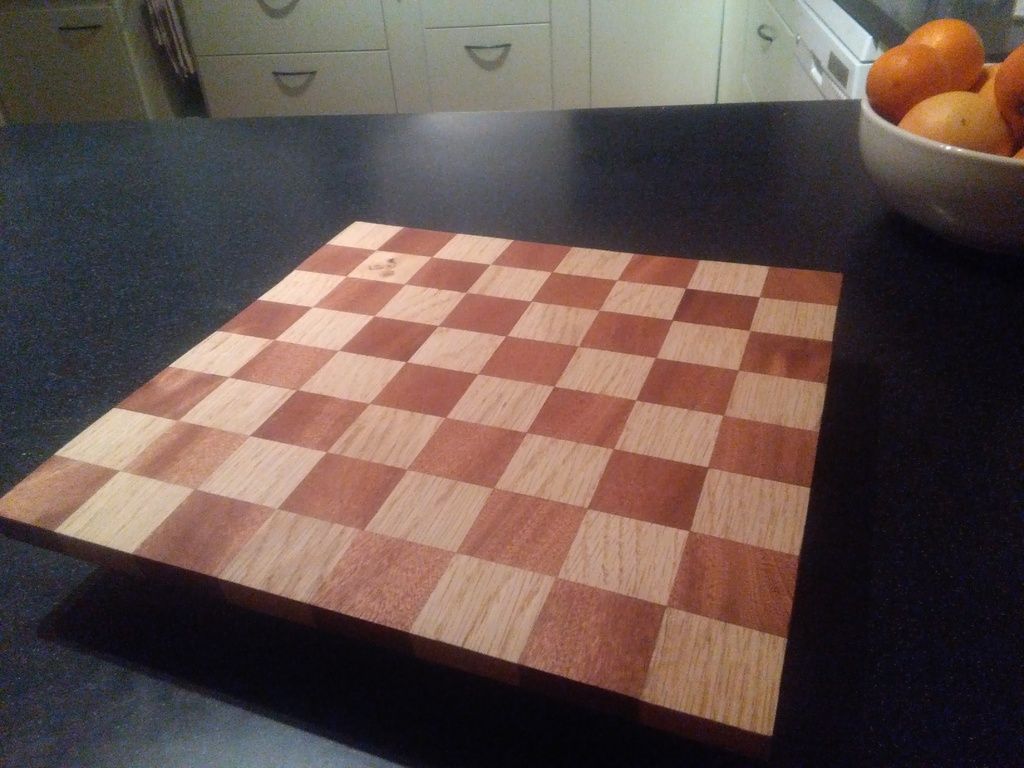
    Also made a chessboard using light oak and mahogany. Might frame it off using some maple that I have in the garage

    [IMG][/img]Chess%20board_zpsy64arejo.jpg


  • Registered Users, Registered Users 2 Posts: 5,259 ✭✭✭Grueller


    Love those trinket boxes mob


  • Advertisement
  • Registered Users, Registered Users 2 Posts: 1,371 ✭✭✭MickeyShtyles


    Getting to end of fitting out this yoke.
    Slow enough process!!


  • Registered Users, Registered Users 2 Posts: 446 ✭✭Ranjo


    Doing a few bits over the last week. Picked up a small Inca bandsaw last weekend and tried making a few small bits. I used dried beech logs that I had chopped and squared them off a bit using a mitre saw before shaping them on the bandsaw to make trinket boxes for my daughter.


    Also made a chessboard using light oak and mahogany. Might frame it off using some maple that I have in the garage

    Can you give a bit of a walkthrough how you made the cheeseboard? interested in how you got the pieces sized & cut so well for it to fit together without gaps, also how you clamped/pressed it & what glue you used.


  • Registered Users, Registered Users 2 Posts: 379 ✭✭mobfromcork


    Ranjo wrote: »
    Can you give a bit of a walkthrough how you made the cheeseboard? interested in how you got the pieces sized & cut so well for it to fit together without gaps, also how you clamped/pressed it & what glue you used.

    Used strips of mahogany and light oak which I bought in 8ft lengths and cut into smaller bits. You alternate 8 strips of wood - 4 light and 4 dark and glue them (I just used evo-stik wood adhesive) along the edges and clamp overnight. I then hand planed the wood as the mahogany was slighter thicker than the oak so it was all reasonably flat on both sides.
    Then I used a mitre saw to cut it into 8 strips. I have an 80 tooth blade on the mitre saw so cuts are quite precise leaving no gaps. You turn over every second strip to give the alternating black and white squares. Glued up again and clamped with 4 sash clamps. When that was dry I planed any raised spots and used a belt sander to level off some other bits. I then used a random orbital sander with 120 and then 240 grit, wiped down with white spirits and gave it a coat of danish oil.

    There are a few tutorials on youtube that I've seen - something like this one here https://www.youtube.com/watch?v=knpes6fKhpQ except with slightly smaller pieces of wood.

    I was going to make a surround for the board but kind of like the bare look of it so going to leave it as it is. Started making the pieces from Maple this evening. I don't have a lathe (yet!) so am making them with the bandsaw and some carved bits I think. Hope to get a lathe soon if I can pick up a good one at a reasonable price to learn on.


  • Registered Users, Registered Users 2 Posts: 40,038 ✭✭✭✭Sparks


    IMG_0899a.jpg

    Oh, so that's how you clamp glue blocks.

    IMG_0909a.jpg

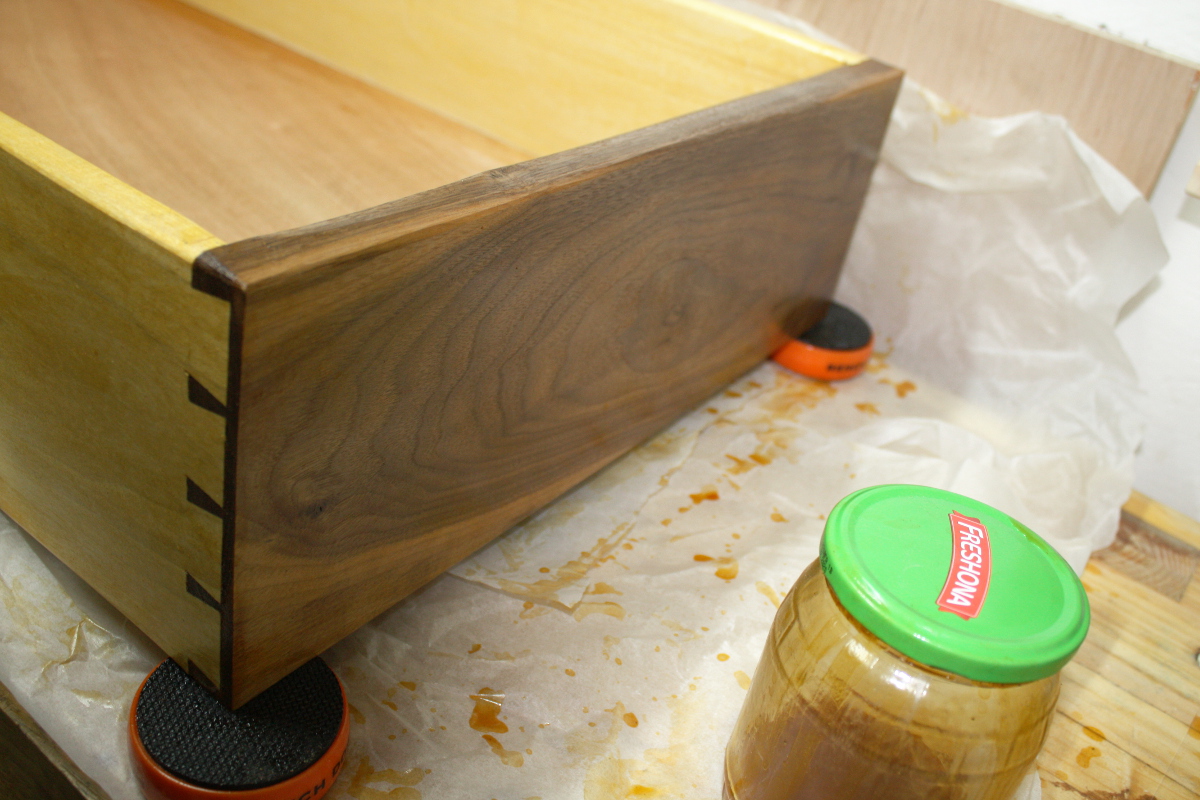
    And fettling and finishing a drawer. Almost done now. Just last minute fettling and it'll be done...


  • Registered Users, Registered Users 2 Posts: 40,038 ✭✭✭✭Sparks


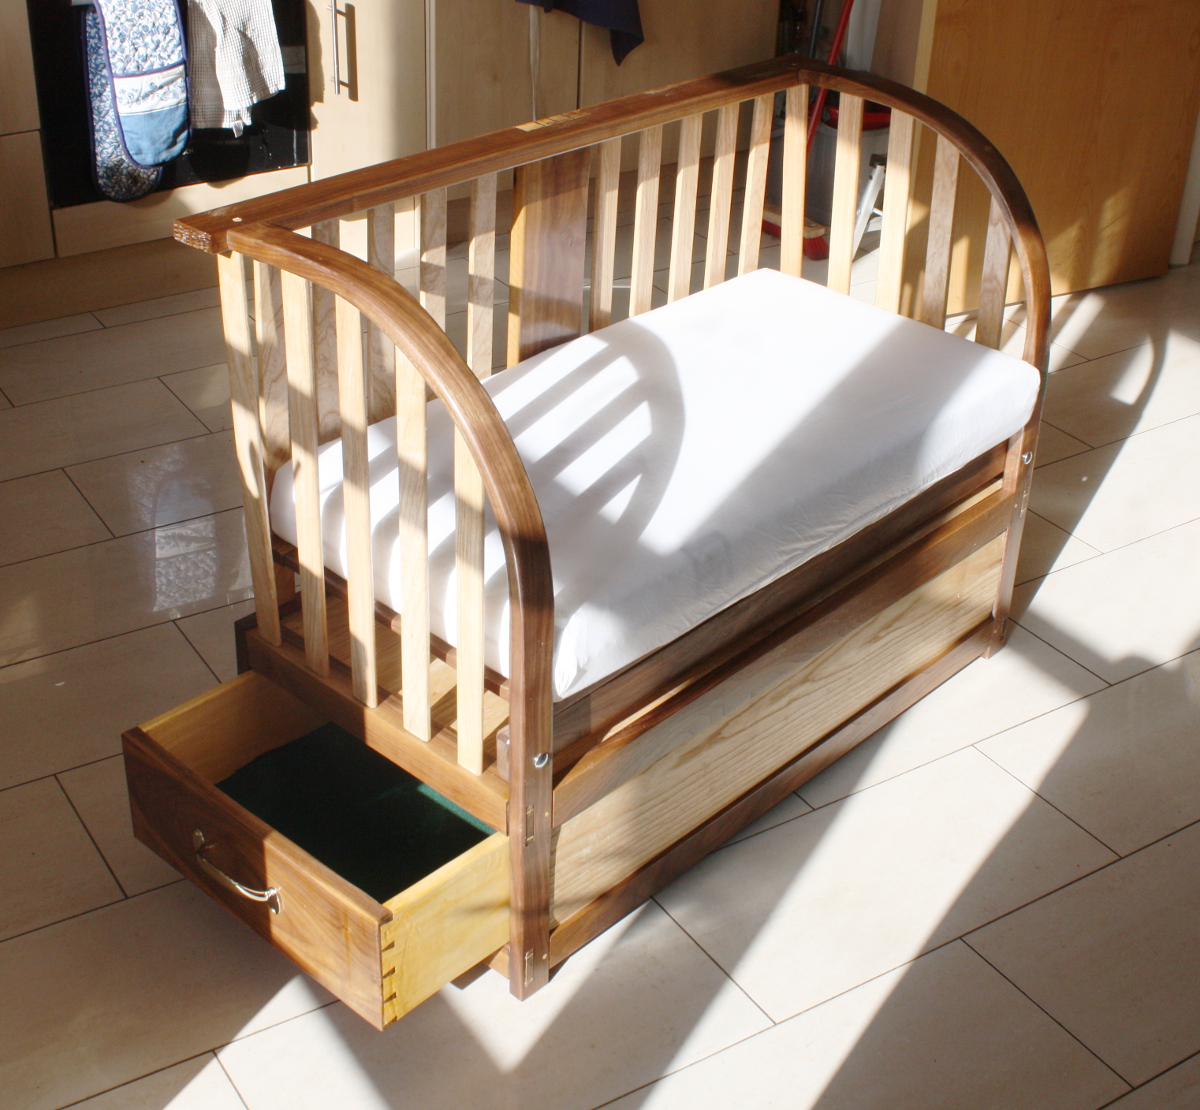
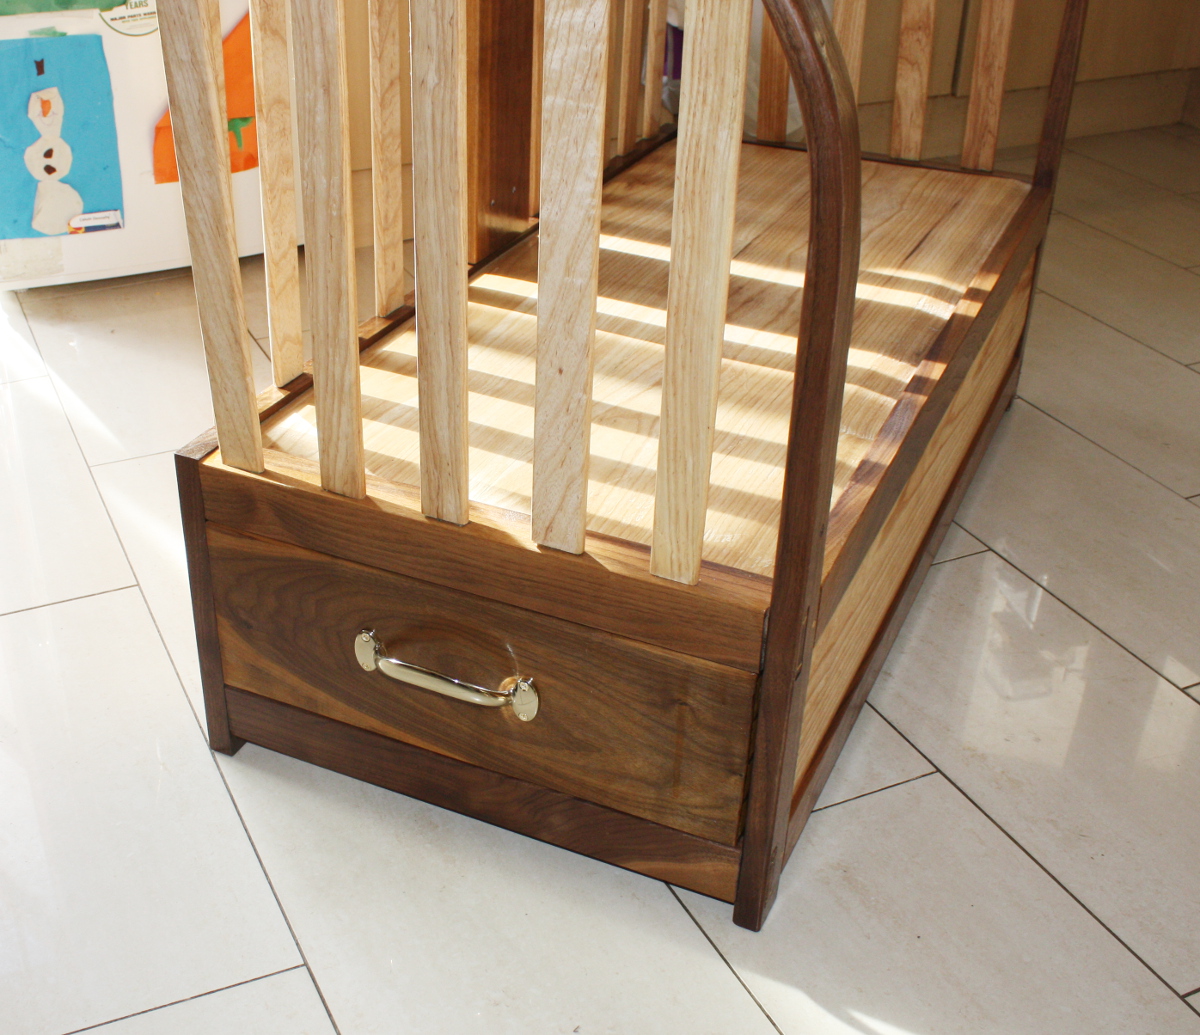
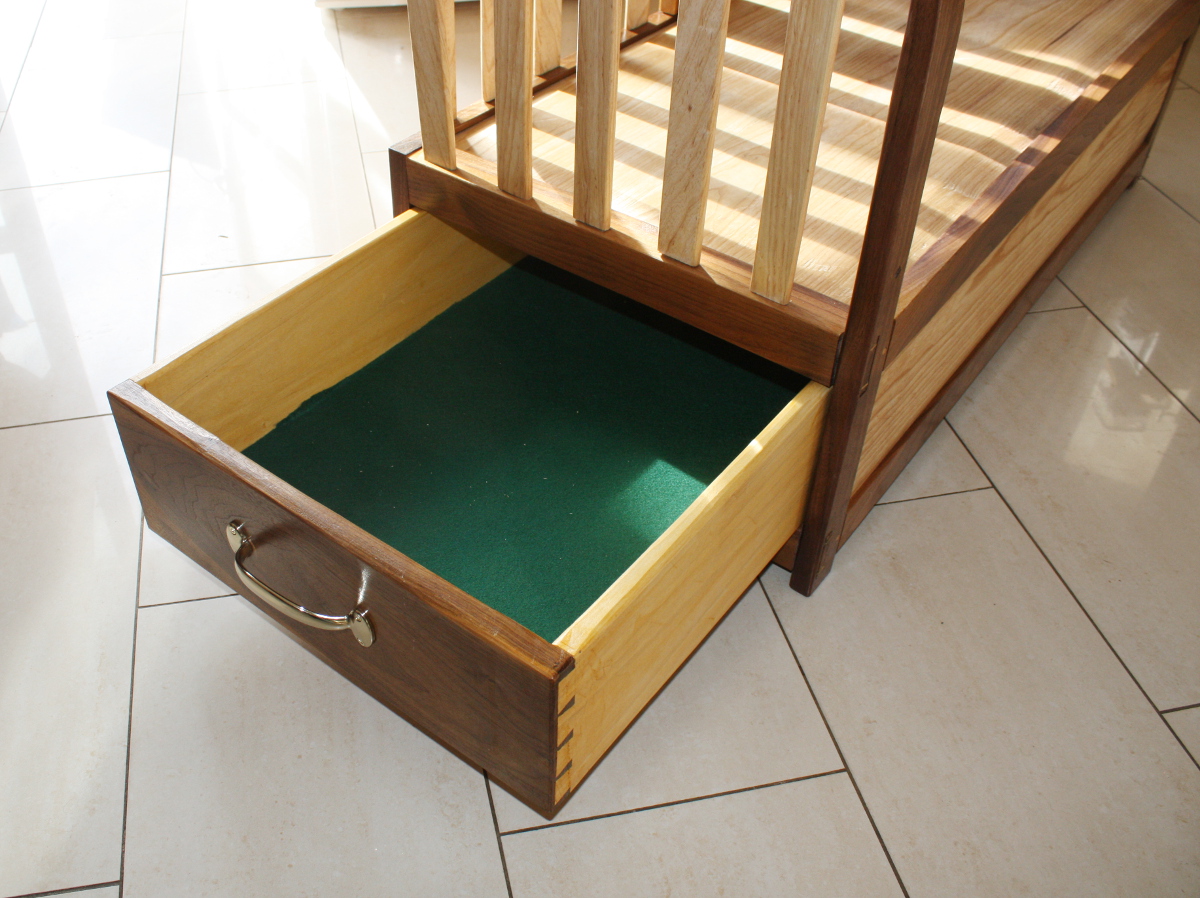
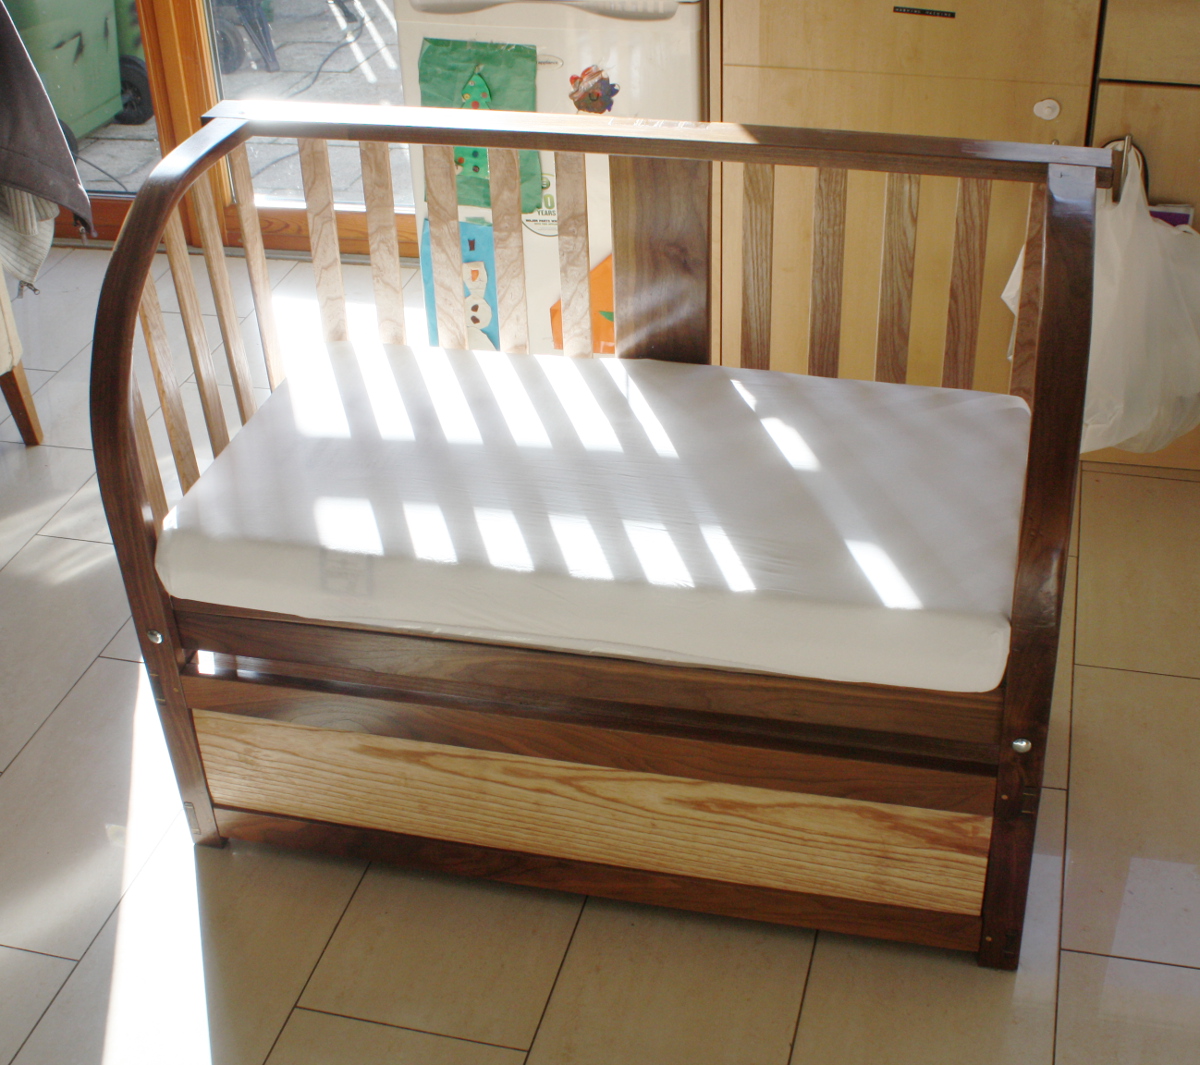
    Finally, done...

    IMG_0919a.jpg

    IMG_0916a.jpg

    IMG_0915a.jpg

    IMG_0917a.jpg

    I mean, it's no Chippendale (it's not even Chip'n'Dale really), but I'm happy with it given that it's a first piece. And it's fun to see where it got to given how it started out :D

    201609261603.7a1.jpg

    2016-09-21-12.58.18a.jpg


  • Registered Users, Registered Users 2 Posts: 1,464 ✭✭✭Double Barrel


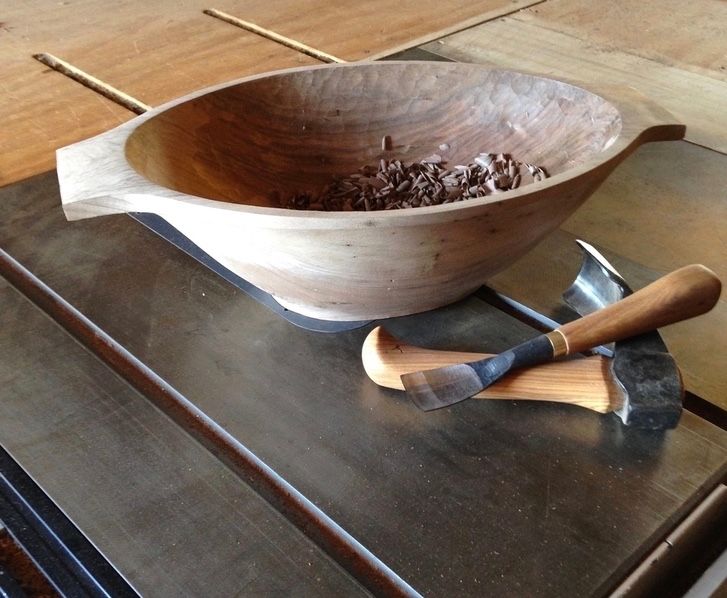
    A chunk of walnut and a few new tools were given a test run. Chip, chip, chip.:)

    51366_800x600.jpg


    51473_768x768.jpg

    51474_768x768.jpg


  • Moderators, Category Moderators, Music Moderators Posts: 14,320 CMod ✭✭✭✭The Master


    Working on 2 new guitars at the moment.
    A mini mustang for my nieces.
    Sapele body and neck and a rosewood fretboard.
    And a full sized mustang. Poplar body with a maple neck and rosewood fretboard.
    410522.jpg


  • Registered Users, Registered Users 2 Posts: 809 ✭✭✭raspberrypi67


    Doing a few bits over the last week. Picked up a small Inca bandsaw last weekend and tried making a few small bits. I used dried beech logs that I had chopped and squared them off a bit using a mitre saw before shaping them on the bandsaw to make trinket boxes for my daughter.

    [IMG][/img]Beech%20drawer_zpsnf196w7t.jpg

    [IMG][URL=http://s269.photobucket.com/user/mobfromcork/media /Small%20beech%20box_zpstpdoq0al.jpg.html][/img]Small%20beech%20box_zpstpdoq0al.jpg[/URL]


    Also made a chessboard using light oak and mahogany. Might frame it off using some maple that I have in the garage

    [IMG][/img]Chess%20board_zpsy64arejo.jpg

    Nice work. Love the little drawer, artistic 😉


  • Registered Users, Registered Users 2 Posts: 809 ✭✭✭raspberrypi67


    The Master wrote: »
    Working on 2 new guitars at the moment.
    A mini mustang for my nieces.
    Sapele body and neck and a rosewood fretboard.
    And a full sized mustang. Poplar body with a maple neck and rosewood fretboard.
    410522.jpg

    NICE. I made a stratocaster for my son. I'll have to post a finished pic.


  • Advertisement
  • Registered Users, Registered Users 2 Posts: 809 ✭✭✭raspberrypi67


    NICE. I made a stratocaster for my son. I'll have to post a finished pic.

    Here's a picture


  • Registered Users, Registered Users 2 Posts: 1,577 ✭✭✭Bonzo Delaney


    Here's a picture

    Thasty piece of work there
    Reminds me of the washburn n4 series guitars
    That came out early 90s minus the floyd rose tremlo system
    Good sthuff.


  • Registered Users, Registered Users 2 Posts: 517 ✭✭✭rich.d.berry


    I'm in the final stages of completing my workbench started in November last. The entire bench is made by laminating planed 2 x 4 and 2 x 6 white deal. Cost so far is about €250. Here are a few pictures:

    The base is draw bored but not glued so that I can remove the dowels and disassemble if I ever want to remove it from the attic.
    16807357_1696961443936637_2052372423654896392_n.jpg?oh=9c2bfe0531416f8ff1b63d3aef61635c&oe=5968CDA2

    The top is fastened with wedged tenons. It is as solid as a rock with no movement.
    16729491_1696943190605129_3816093758982560721_n.jpg?oh=8bcedf5e2e08a8561d69163e891a86e2&oe=592D4E01

    My bench dogs have the springs in the middle so that they are reversible. They are white oak I believe. The spring is re-purposed from a wooden venetian blind that I found in our communal trash shed. One is protruding slightly, another is flush with the bench top (though slightly out of focus) and the last one is free standing on the bench top to show construction.
    16807443_1696944477271667_4674117477392997995_n.jpg?oh=1125124b2280bbf381e85d4d47435237&oe=5932F277

    The central tool tray can also be used as a bench stop when flipped over.
    16649319_1696947587271356_7582715832584291517_n.jpg?oh=9b8400e2186685768820c2a76a9dfc36&oe=5962E70F

    I'm currently working on the tail vise and leg vise. I turned the 1 1/4 inch screws out of hard maple on my Lidl lathe and cut the thread using a Korean made thread cutter. I'm very pleased with the results despite the cheap and cheerful tools.
    16996411_1704304419869006_2076808780111976836_n.jpg?oh=c55f0f4a805a9c000e94627a34bb5cf9&oe=595D2933


  • Registered Users, Registered Users 2 Posts: 40,038 ✭✭✭✭Sparks


    Very nice Rich. I'm jealous of the 2x6s, I only had 2x4s for mine :D


  • Registered Users, Registered Users 2 Posts: 2,466 ✭✭✭mayo.mick


    That's a nice job, well done!


  • Registered Users, Registered Users 2 Posts: 431 ✭✭delaney001


    Brilliant work there


  • Advertisement
  • Registered Users, Registered Users 2 Posts: 517 ✭✭✭rich.d.berry


    Sparks wrote: »
    Very nice Rich. I'm jealous of the 2x6s, I only had 2x4s for mine :D

    The 2x6s caused me a few headaches. They were 3mm thicker than the 2x4s so it took a lot of planing, by hand, to get them all to a consistent thickness.


  • Registered Users, Registered Users 2 Posts: 1,464 ✭✭✭Double Barrel


    Well done.
    It is white oak.:)


  • Registered Users, Registered Users 2 Posts: 431 ✭✭delaney001


    SVF4KJQ.jpg

    Had a go at a seat/stool over the last few weekends.


  • Registered Users, Registered Users 2 Posts: 1,371 ✭✭✭MickeyShtyles


    Got Nick Offermans 'Good Clean Fun' few weeks ago.
    Thought I'd make a go at the canoe paddle.
    Pardon the pun but it's a bit of a learning curve. I haven't used chisels/planes/spokeshaves since I was in school.
    But sure it'll keep me in craic for a few nights. It currently looks like a large wooden spade.....


  • Registered Users, Registered Users 2 Posts: 40,038 ✭✭✭✭Sparks


    I've been reading that for the last few days. I'm sure there are projects in there, but I'm too busy laughing at most of it to get to them yet :D Well worth buying, for anyone who hasn't yet.


  • Advertisement
  • Registered Users, Registered Users 2 Posts: 3,387 ✭✭✭glynf


    Woodworking noob here, this is my first attempt; had a go at making a floating bed. the design is a mish-mash of various designs found online.
    I’m currently organising some mahogany or possibly walnut to put around the visible parts, not sure what to do about the base. I bolted the two sections together as the carpet is being changed-forget about lifting this in one piece :)


    Few images here:

    http://imgur.com/a/imimU


  • Moderators, Category Moderators, Music Moderators Posts: 14,320 CMod ✭✭✭✭The Master


    Finished this mini Mustang for my nieces today.
    Neck and body are sapele with a rosewood fretboard
    Cherry red with gold sparkles on top.

    Making a matching one in different colours next weekend.

    Designed with child destruction in mind :P


    414184.jpg


  • Registered Users, Registered Users 2 Posts: 1,715 ✭✭✭Gryzor


    Most of the time these days I get a chance to work on anything it's dark. Been struggling with lighting, ending up wearing a headtorch to make measurements or anything detailed.

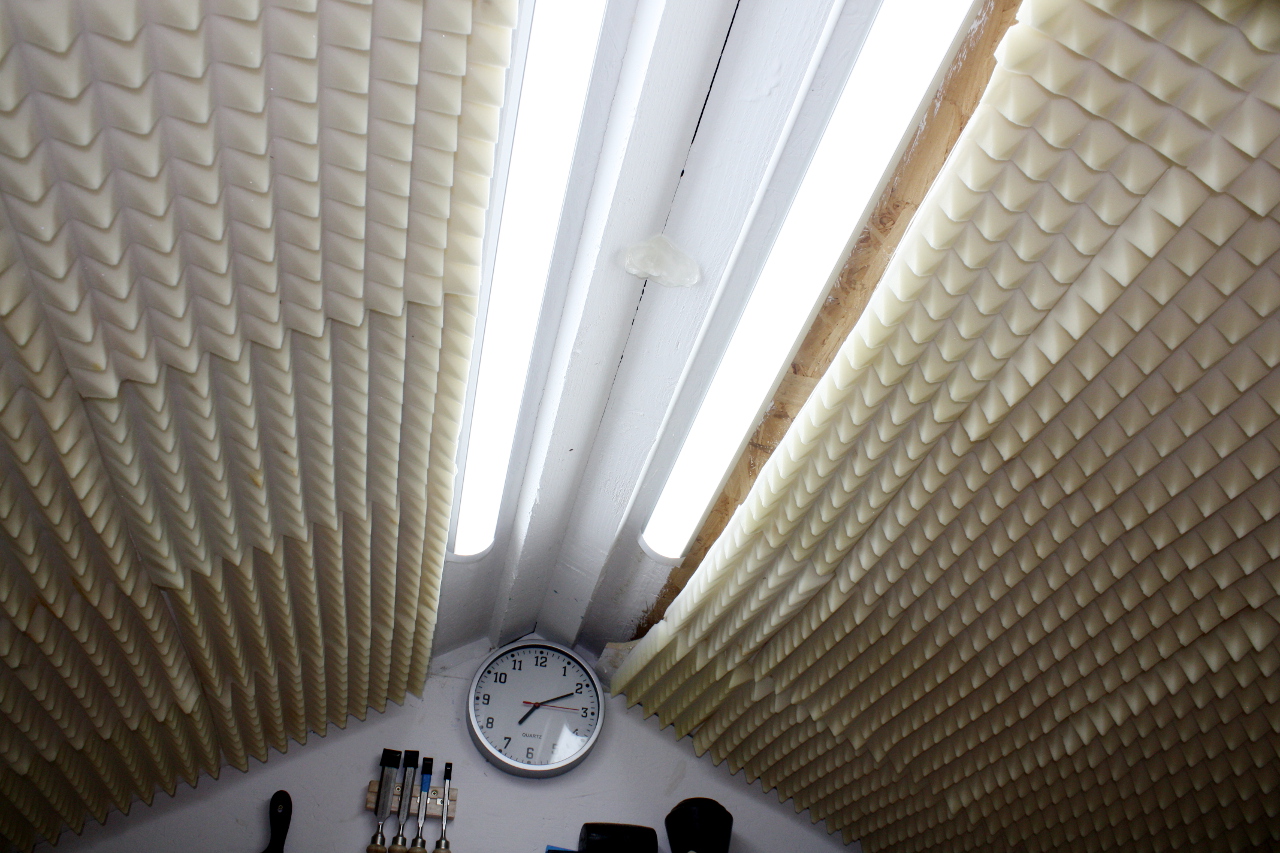
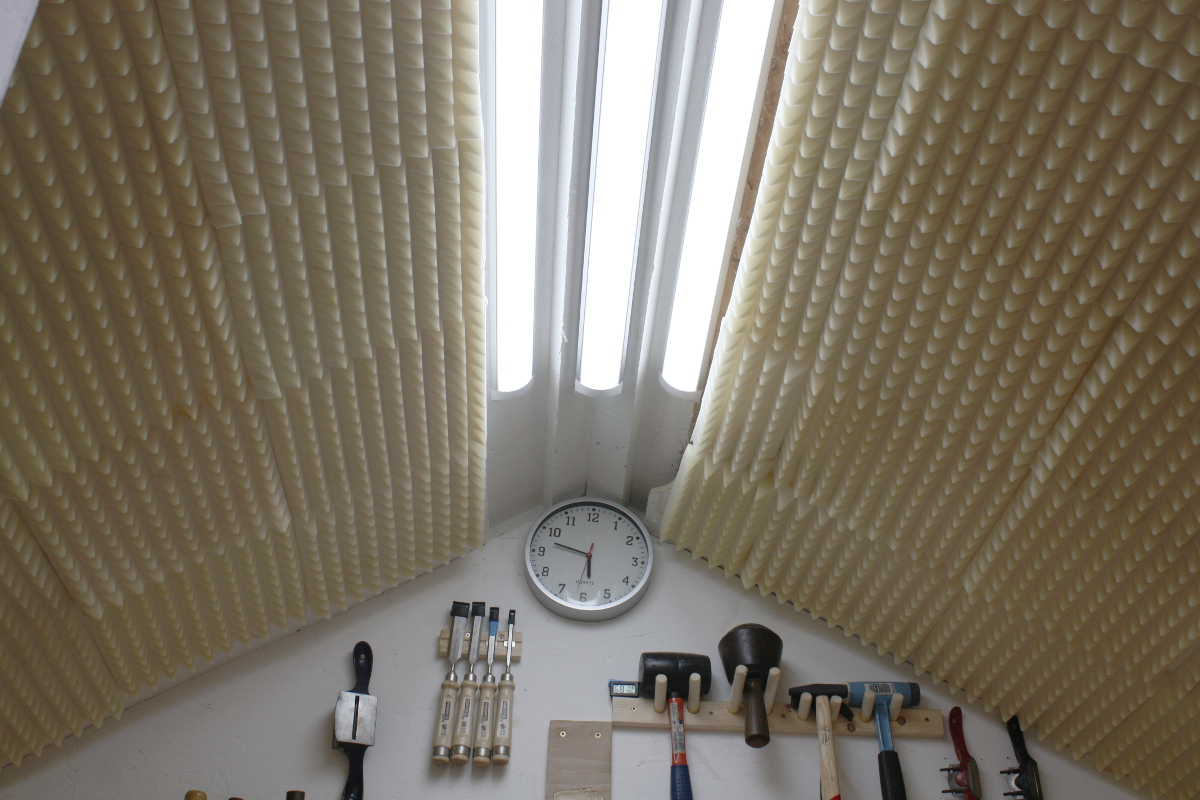
    Got one of these panels last week and made a frame that slots into the shed structure just over my bench. Light quality is brilliant, no glare, just a nice defused bright light. Little or no shadows either, well impressed. Attached image doesn't really do it justice.


  • Registered Users, Registered Users 2 Posts: 40,038 ✭✭✭✭Sparks


    I use the LED T8 style battens myself, just fitted a second one there last weekend and have a third lined up to go in between them this weekend:

    IMG_1067a.jpg

    Low power, nice and bright, cheap enough (about €30 each), and granted that's the cool white colour but you do get a choice.
    They're just temporarily fitted there, I still have some wiring to do for the shed, but even so they're working out very well.


  • Registered Users, Registered Users 2 Posts: 1,715 ✭✭✭Gryzor


    Made a box joint jig the other day just to try one out, ended up with 4 sides of a box. Had to put a top and bottom on then! Few gaps as joints were a hair tight and hard to get together with glue applied. Came out well though

    414518.jpg

    414519.jpg


  • Registered Users, Registered Users 2 Posts: 2,804 ✭✭✭recipio


    Well done. Finger joints are great but need to be tight otherwise you get hairline gaps. Nice box.


  • Registered Users, Registered Users 2 Posts: 40,038 ✭✭✭✭Sparks


    IMG_1098a.jpg

    Wired in the third T8.

    It's now brighter inside the shed (2400 lux) than outside the shed (2000 lux) at noon on most days in Ireland :D

    (And that's at the workbench, at eye level it's closer to 5500 lux)


  • Registered Users, Registered Users 2 Posts: 2,466 ✭✭✭mayo.mick


    Sparks wrote: »
    IMG_1098a.jpg

    Wired in the third T8.

    It's now brighter inside the shed (2400 lux) than outside the shed (2000 lux) at noon on most days in Ireland :D

    (And that's at the workbench, at eye level it's closer to 5500 lux)

    I'd say the lads on the ISS will be able to tell when your're working in your workshop :D


  • Registered Users, Registered Users 2 Posts: 1,265 ✭✭✭..Brian..


    Where are you getting the lights sparks? I was looking for for them in town recently and they were coming in at €60 each and I need 5 of them.


  • Registered Users, Registered Users 2 Posts: 40,038 ✭✭✭✭Sparks


    Ebay, here to be exact. The first time I was able to find someone selling them individually but now it all seems to be in pairs. You might as well have them shipped directly to you by the way, they're so long that they count as an oversize package if you use addresspal and that'll set you back 25 quid :( (Actually, that might have gone up this week along with their usual packet fee which went from 3 to 3.50).


  • Advertisement
  • Registered Users, Registered Users 2 Posts: 40,038 ✭✭✭✭Sparks


    IMG_1102a.jpg

    The old ones are the best ones :D


  • Registered Users, Registered Users 2 Posts: 6,251 ✭✭✭bonzodog2


    Sparks wrote: »
    Ebay, here to be exact. The first time I was able to find someone selling them individually but now it all seems to be in pairs. You might as well have them shipped directly to you by the way, they're so long that they count as an oversize package if you use addresspal and that'll set you back 25 quid :( (Actually, that might have gone up this week along with their usual packet fee which went from 3 to 3.50).

    Parcel Motel have a new 'XL' service for bigger items that won't fit in a locker, collect from local depot, from eur7
    https://my.parcelmotel.com/Member/PriceCalculator


  • Registered Users, Registered Users 2 Posts: 40,038 ✭✭✭✭Sparks


    That'd be handy, but some of the small ebay sellers I was buying tools off (shed finds and the like rather than commercial sellers) won't ship to non-mainland hubs and last I checked parcel motel didn't have one of those. Still though, for the larger stuff, that'd be dead handy...


  • Registered Users, Registered Users 2 Posts: 2,466 ✭✭✭mayo.mick


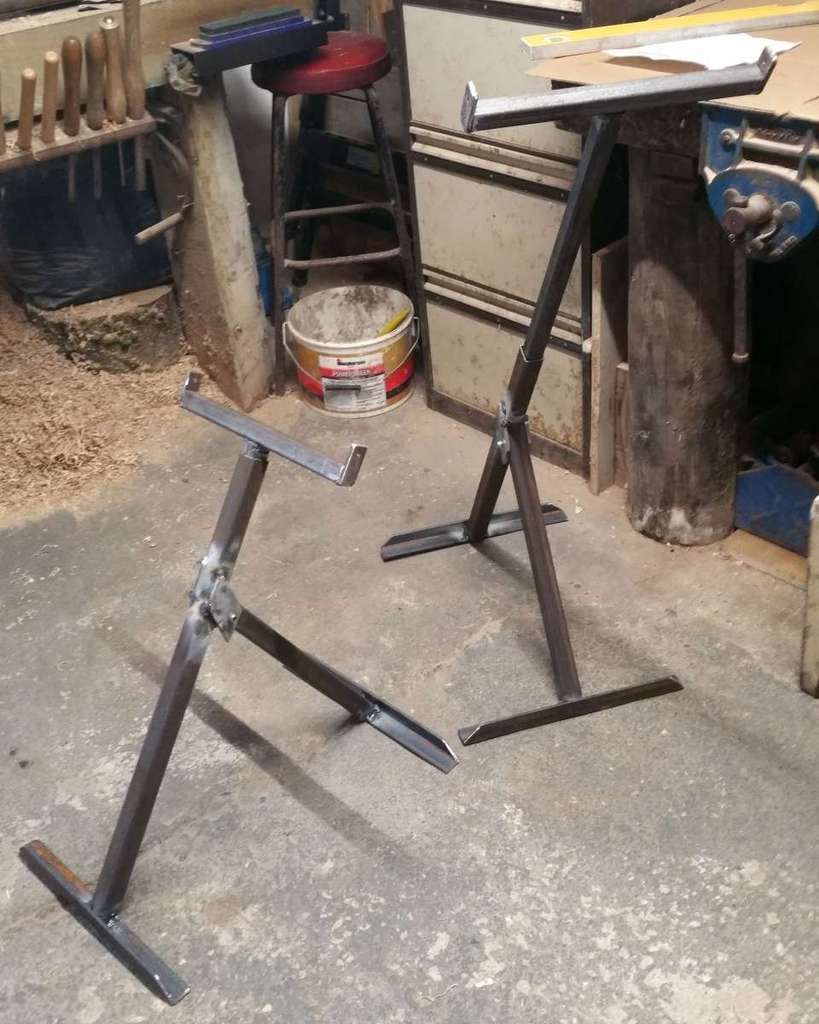
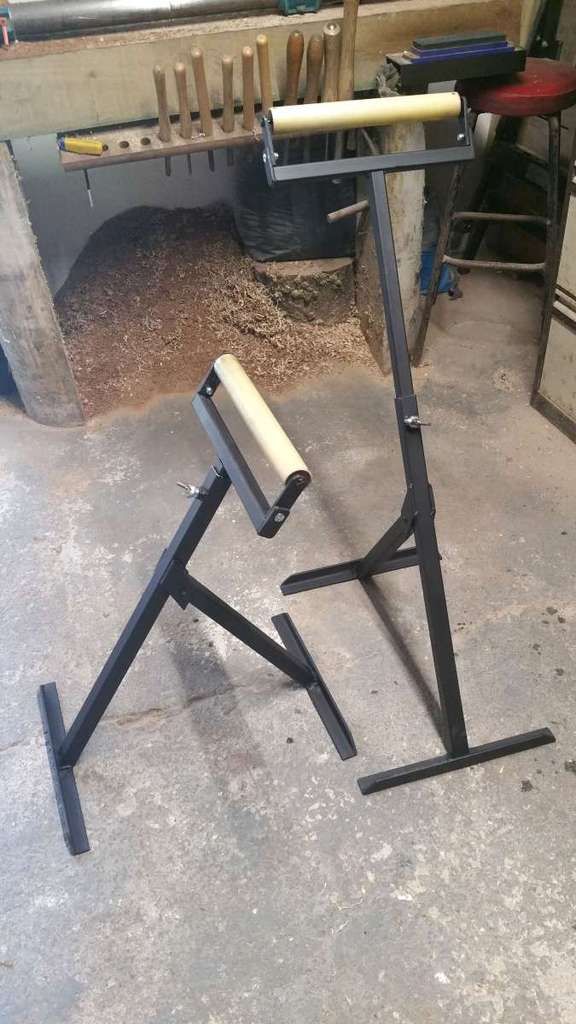
    Made 2 adjustable trestles with rollers on top for supporting long lengths of timber will cutting on the saw. Made from 30mm and 25mm light gague steel box, some leftover steel from another project, 12mm threaded bar with wingnuts welded at end to make the locking bolts. Bit rough and ready, ready for polishing nd spraying in the morning.

    trestles_zpstujtduee.jpg


  • Registered Users, Registered Users 2 Posts: 2,466 ✭✭✭mayo.mick


    Polished and sprayed this morning. Not too bad, came out OK I think.

    trestles%20finished_zpss2j8dhn0.jpg


  • Registered Users, Registered Users 2 Posts: 40,038 ✭✭✭✭Sparks


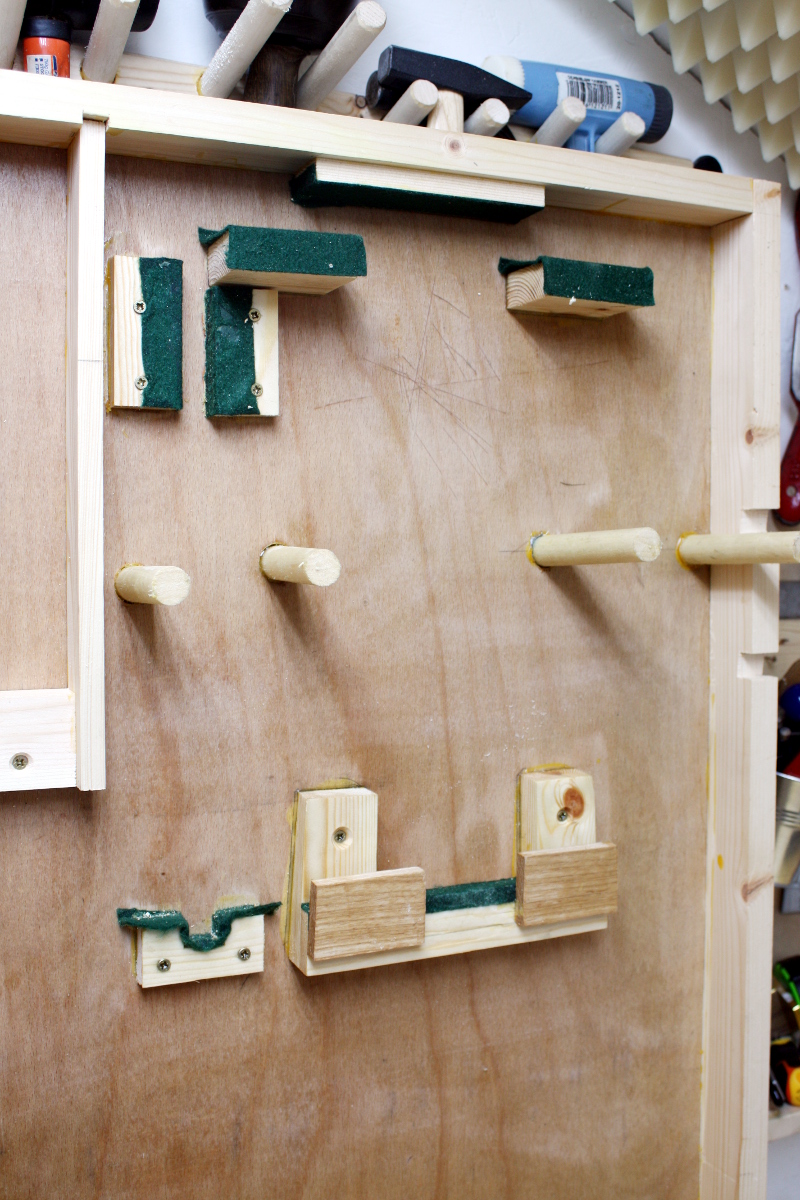
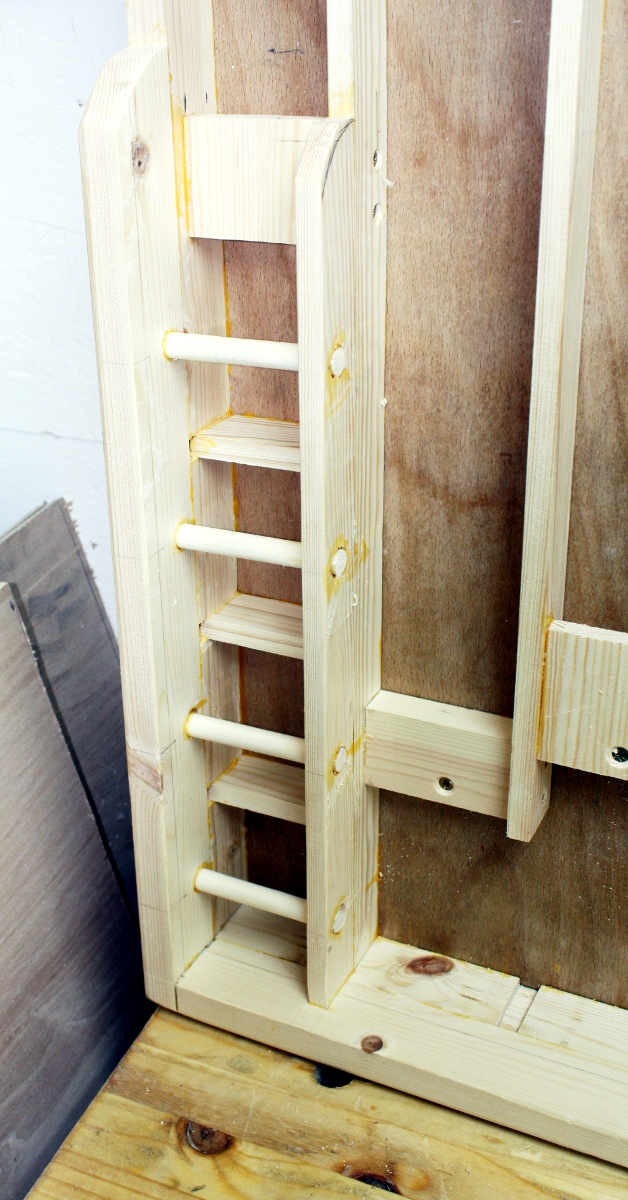
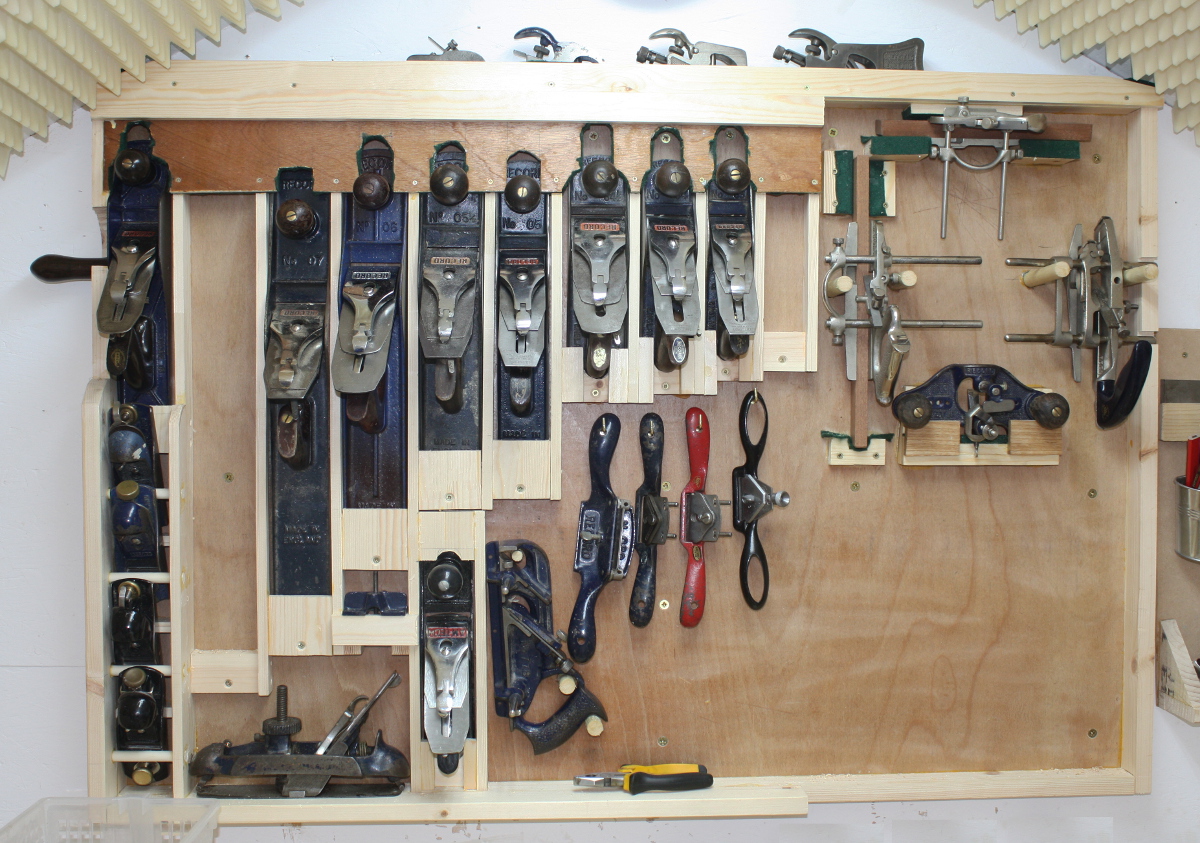
    Made progress on my plane rack.

    IMG_1122a.jpg
    Plough and router plane slots.

    IMG_1120a.jpg
    Block plane cubbies. These and the 722's cubby are the only part of the design I thought up myself instead of nicking them from somewhere else.

    IMG_1117b.jpg
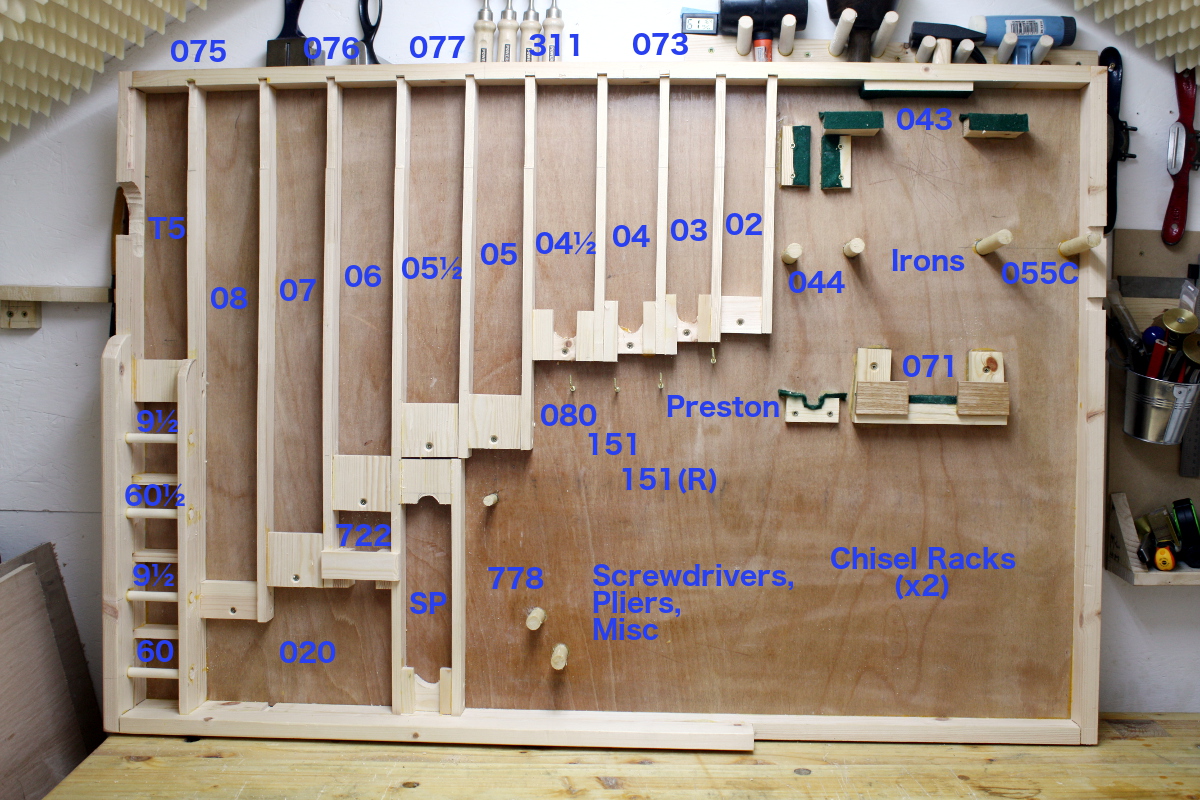
    A map, in case I get lost :D

    IMG_1136a.jpg
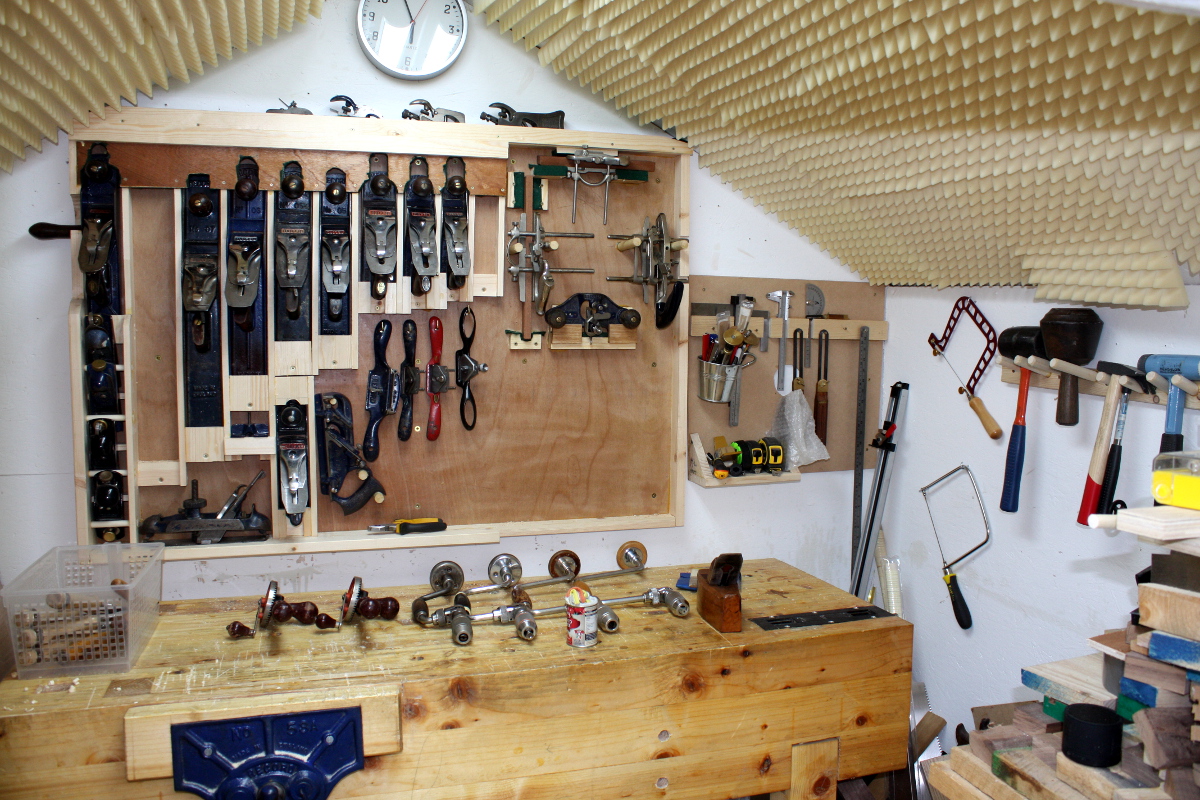
    Finished, mounted and filled.

    IMG_1134a-1.jpg
    Finally starting to look tidy.
    Need to build the chisel racks for the lower left corner of the plane till, then get a saw till going and a rack for the drills. And the clamps. And I think that's it for the immediate shed furniture to-do list then.


  • Registered Users, Registered Users 2 Posts: 2,466 ✭✭✭mayo.mick


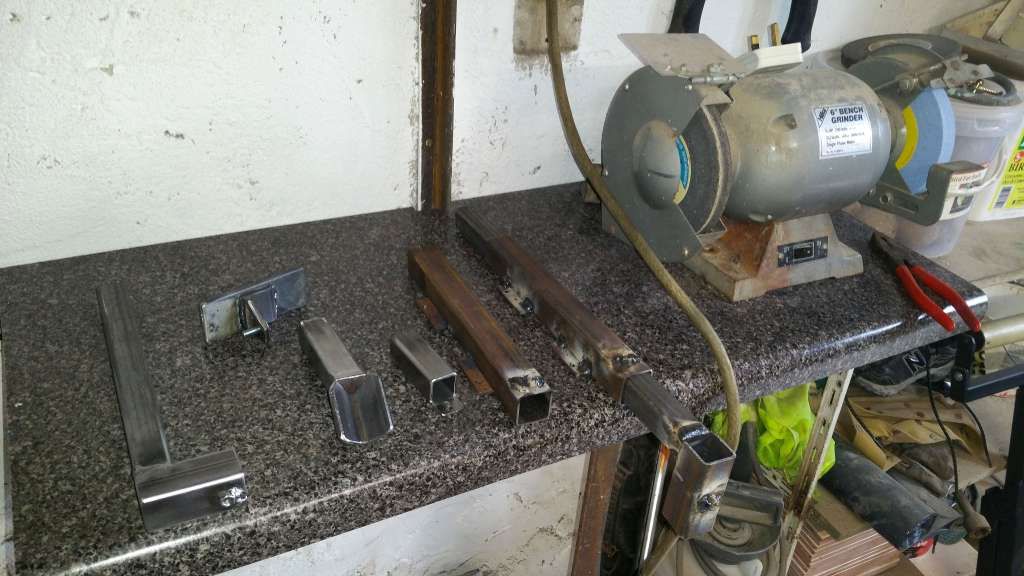
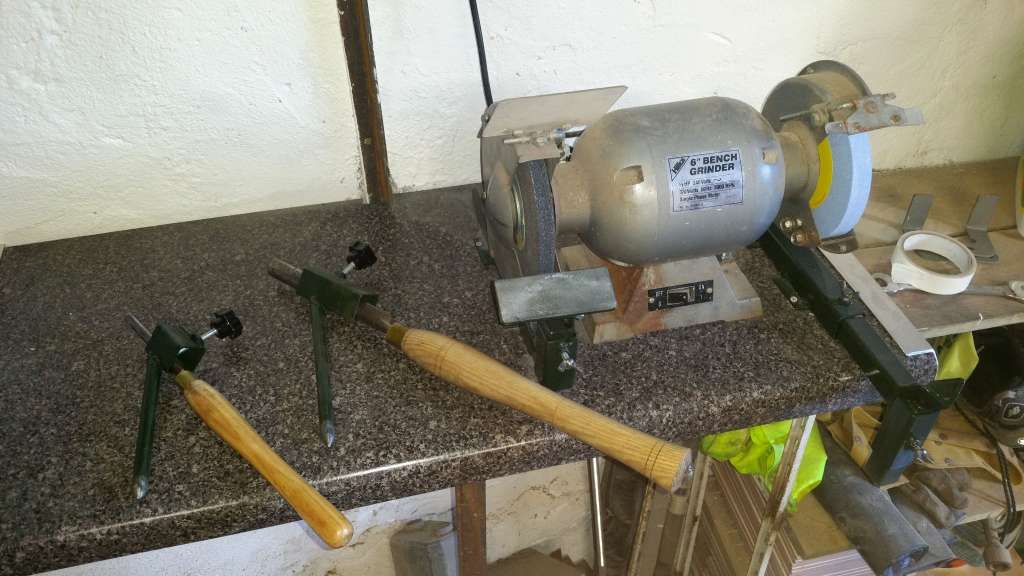
    Having some steel box left over from the previous project this week, used it up making a jig for sharpening my gouges.

    After looking at a few youtube vids of homemade Ellsworth jigs, I decided to have a go at making one for myself. Only cost a few bob on materials, surplus steel from a previous project. Spent more time than money on this project, getting measurements right and cuts square (ish) but hopefully will pay off!

    Made from 30mm & 25mm light gauge steel box, 1 1/4" angle, M 8 gutter bolts and nuts. Still have to cut the holder for the gouges. All the parts welded up ready for polishing and then spraying. Will post again when I've sprayed and then assembled.

    Ellsworth%20Jig_zpsgisjtkzk.jpg


  • Registered Users, Registered Users 2 Posts: 2,466 ✭✭✭mayo.mick


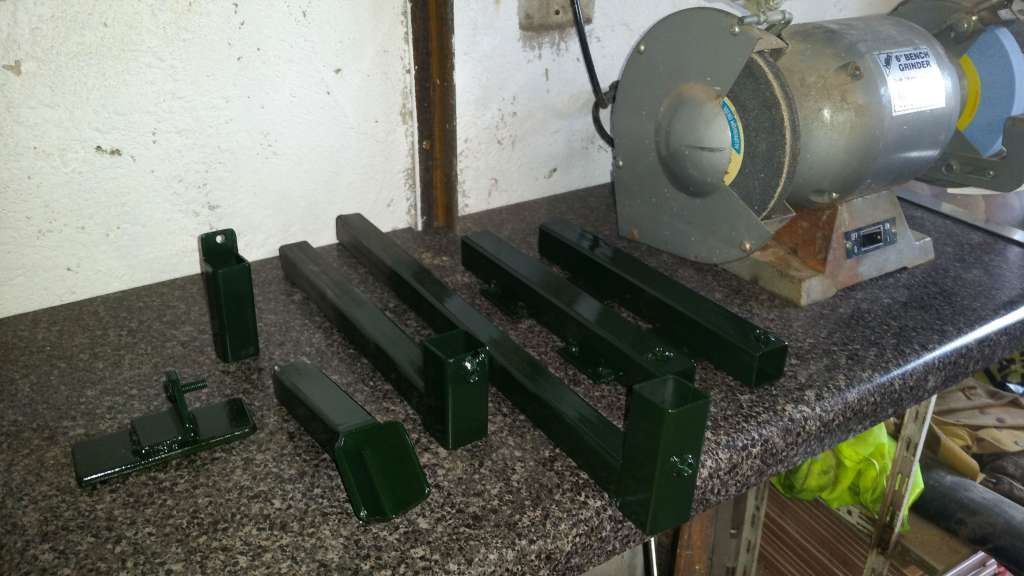
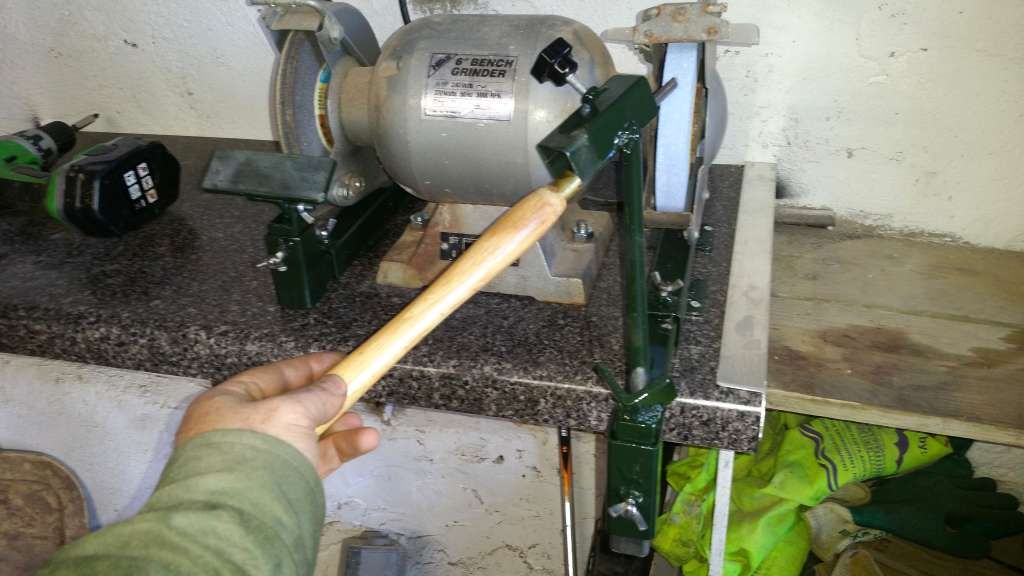
    Polished and sprayed this morning. Gave it 3 coats of spray. Gouge holder yet to cut, weld and spray. Think I'll leave that till tomorrow

    Ellsworth%20jig-sprayed_zpsbbejc8qg.jpg


  • Registered Users, Registered Users 2 Posts: 2,466 ✭✭✭mayo.mick


    Finally got my jig finished today. Made the gouge holder at 45* though when welded its a bit more like 43*. Made a second holder and that's at roughly 60* I think. I've yet to try out the new grinds, will make templates for the various grinds to make setting up quick and repeatable. Happy enough the way they turned out, all from off cuts from a previous project.

    [IMG][/img]Elsworth%20jig-finished-20170502_183649_zpszpj5odtc.jpg

    Elsworth%20jig-finished-20170502_143104_zpsqvlhvt2g.jpg


  • Advertisement
  • Registered Users, Registered Users 2 Posts: 212 ✭✭Magic ]=)


    Hi,
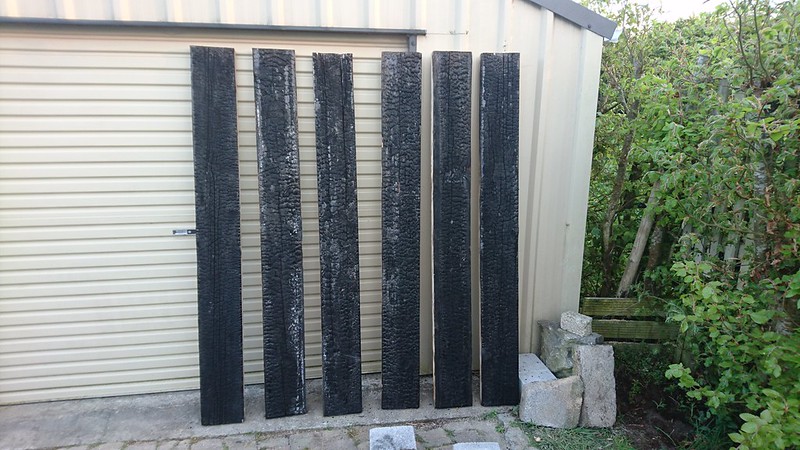
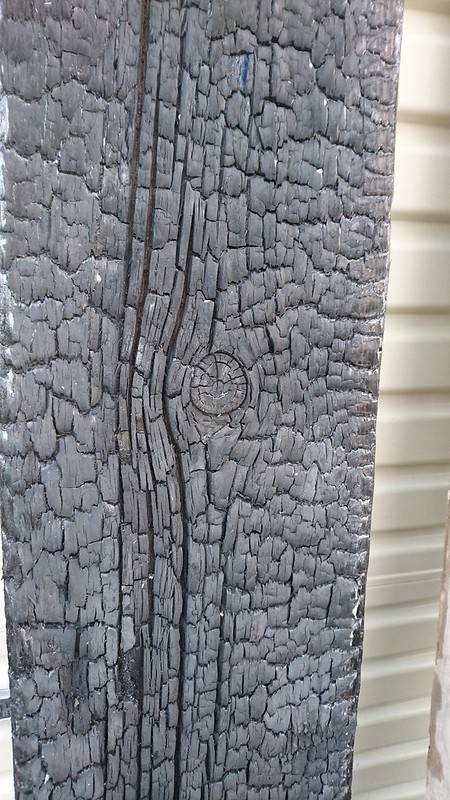
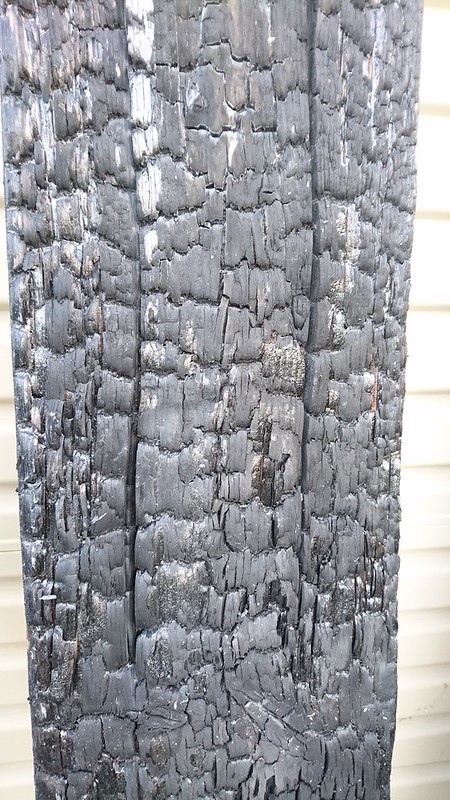
    inspired by a Shou Sugi Ban - Japanese charred cedar.
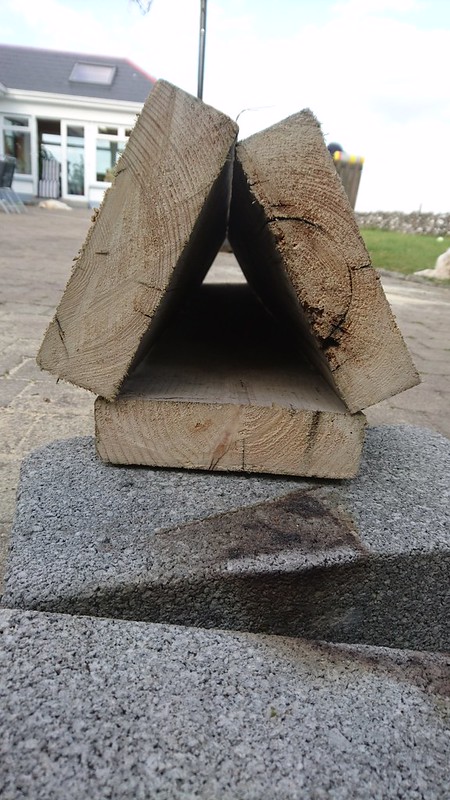
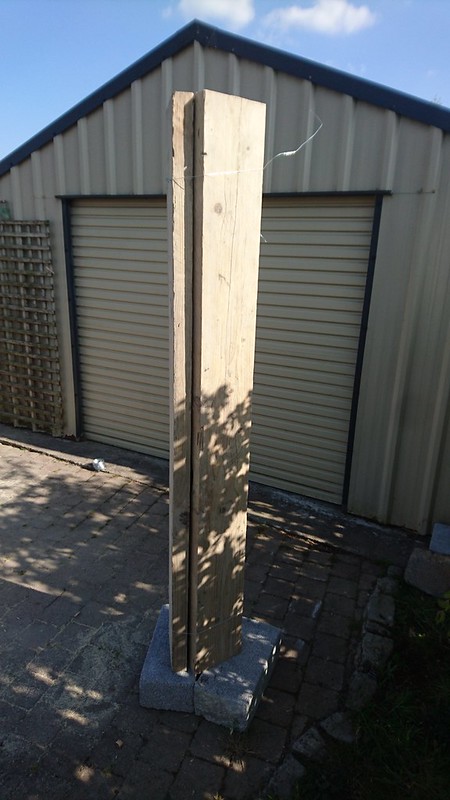
    I'm planning on making a planter from old scaffolding planks.
    Timber will be also covered with decking oil for a better/ nicer finish. Here's progress so far:

    34401562622_a8b1ff33ac_c.jpg
    34401562142_2759750b52_c.jpg34401561132_83756984f6_c.jpg


    And it was done without the torch - traditional way:
    www.youtube.com/watch?v=3W4ic52Pai8

    www.youtube.com/watch?v=agxKECGE_sk

    34563146155_ba50740397_c.jpg34401450402_3a87e1c579_c.jpg


Advertisement