Advertisement
If you have a new account but are having problems posting or verifying your account, please email us on hello@boards.ie for help. Thanks :)
Hello all! Please ensure that you are posting a new thread or question in the appropriate forum. The Feedback forum is overwhelmed with questions that are having to be moved elsewhere. If you need help to verify your account contact hello@boards.ie
Hi all! We have been experiencing an issue on site where threads have been missing the latest postings. The platform host Vanilla are working on this issue. A workaround that has been used by some is to navigate back from 1 to 10+ pages to re-sync the thread and this will then show the latest posts. Thanks, Mike.
Hi there,
There is an issue with role permissions that is being worked on at the moment.
If you are having trouble with access or permissions on regional forums please post here to get access: https://www.boards.ie/discussion/2058365403/you-do-not-have-permission-for-that#latest

Build The Millennium Falcon

1235

Comments

  • Moderators, Computer Games Moderators Posts: 5,390 Mod ✭✭✭✭Optimus Prime


    Mods could i get this thread moved to the "Models" forum please? I think it might be better suited over there and i can get some advice off the guys with more experience than me!

    Thanks a lot


    ++++++++++++++++++++++++++++++++++++++++++++++++++++++++

    EDIT by Mod:
    Thread moved to Models as requested.


  • Moderators, Computer Games Moderators Posts: 5,390 Mod ✭✭✭✭Optimus Prime


    Thanks a lot!


  • Moderators, Computer Games Moderators Posts: 5,390 Mod ✭✭✭✭Optimus Prime


    Last few days i sprayed a base coat of Vallejo German Grey. So far so good, ill let that dry then start adding some more bits to it.

    closetbase.jpeg

    I also got the Tamiya AS20 i ordered to try sort out the falcon base coat debacle. the water paints just didnt want to work. it was decent out yesterday with no wind out the back so i brought some pieces out and sprayed them. you can see the panel lines showing through the coat of AS20 here, i might leave them like this now or maybe give them another light coat.

    The two main pieces had been sprayed with a white tamiya rattle can base coat then panel lined with german grey, but the back section with the vents i had sprayed with that DOA falcon paint, so i might panel line that again and give another coat of the AS20 just to try match the colours, because they look a bit different at the minute, that part and the main sections, you can see that in the last image, panel lines not as prominent and a slight different colour..

    But i think the AS20 turned out great, very easy to spray from the can and went on flat.

    Something i learned too building this model that is vital and never really mentioned, is get a dust brush and dust off the model before you spray anything on it. seems obvious but i didnt on a couple of parts and the paint seals the dust and it looks bad.

    falconbase1.jpeg

    falconbase2.jpeg

    falconbase3.jpeg


  • Moderators, Computer Games Moderators Posts: 5,390 Mod ✭✭✭✭Optimus Prime


    A couple of small bits done this week, first up I added some wires,the cover and padding to the archway on the far wall. I also added the door frame of the small "closet" room and i used some "starship filth oil paint" on it to dirty it up a bit. you can see the difference in the before and after image below. ive used it before you basically smear it on with a brush then rub it back off with a cloth and some ear buds.

    holdwalldoors.jpeg

    While i had the oil out i also put some on the parts i made for the other cut out and the wall greebly. It takes ages for stuff to dry.

    wallparts2.jpeg

    Continuing on the hold, the wall that the couch\bed is on is just a blank piece of plastic. I found 1 image online of it and it has a large pipe on it that isnt included in the kit. So i decided to make one. i had a piece of plastic pipe from a broken stool\seat one of my kids had so i used that. You can see the progress below. i cut it in half so it will appear to be in the wall when completed. When the paint is dried ill give it a coat of starship filth as well to dirty it up a bit. There are two pipes on the far wall that came with the kit too, so while i had the oil out i put a coat of it on these as well (not pictured.)

    custompipe.jpeg

    Screw up of the week happened when i went to varnish some of the hold pieces. I did it out the back because i was using a rattle can and didnt want it going everywhere. big mistake, it looks like there was too much moisture in the air and it caused a clouding effect on some of the pieces. i got away with it for the most part but lesson learned here. I might buy one of those small pop up greenhouses to spray this indoors in future.

    varnish.jpeg

    Ive lots of other bits and pieces in various states at the minute. here is a pic with a few shots of them.

    lotsofpieces.jpeg

    and finally i gave the back top piece of the hull another panel line with german grey then another coat with the tamiya AS20 and it now (almost) matches the rest of the hull. yay.

    For the first time i have that back piece on here and the front nose. My plan next is to put on all the greeblys and additional little bits and pieces, then give the whole thing another coat of the AS20 to dull down the panels lines a bit and to bring the back piece fully in line colour wise with the rest of it. Then ill start adding the colour panels to the various places, then weather it.

    falconhulltogether.jpeg

    Thats all for now!


  • Moderators, Computer Games Moderators Posts: 5,390 Mod ✭✭✭✭Optimus Prime


    Not much of an update this week, but got a few bits done.

    First up i put an coat of "Starship filth" Oil on the pipe i made last week after the airbrushed coat and stripes dried. I rubbed this back off after a few seconds. I forgot to take an after photo though. doh.

    pipeoilcoat.jpeg

    Next up i added some spare bits i had to the back wall and then added some oil paint, rust and starship filth to parts of it. Made a bit of a screw up when i went to add one of the parts i made from styrene. It just didnt want to glue on and the glue clouded the paint, you can see it above the cut out wall in one of the images below. I managed to fix it though by adding the two skinny grey pipes to hide the messed up glue and using some oil paint to dirty up that part above the cut out section.

    backwallparts1.jpeg

    backwallparts2.jpeg

    I then made a box to go behind the cutout parts of the wall, which i will add some spare parts and wiring etc to.

    backwallbox.jpeg

    and on the side wall, beside the Nav console i added in the pipes and some of the columns in front of them. In the kit thats basically it for that section, the columns just free stand there with nothing on top. but i decided to make a top for that, im going for a vent look on the front of it. The first flat piece of styrene i will be cutting a long hole in it too and putting an LED strip in there to shine light downwards onto the pipes.

    You can see in the images a bit better what im going for.

    sidewallvent.jpeg

    These will all be sprayed etc for the next update. that back wall looks a bit rough at the minute, but with weathering etc i think it will be fine. There will also be a lot of barrels and cargo in front of it so i think it will be grand.


  • Moderators, Computer Games Moderators Posts: 5,390 Mod ✭✭✭✭Optimus Prime


    This update is mostly small stuff that takes ages. First up i glued together the Vent\Grill\Wall thing i built to go over the pipes on one of the hold walls. I cut a hole in it too so i can have a light shining down on the pipes and built a light box to stop light bleed ill be spraying black, you can see that in the second image its not sprayed yet.

    holdpipegrill.jpg

    walltoplightbox.jpg

    Next i finished up painting the small room area i scratch built, added a wire and dry brushed it a bit. added some rust in places and a couple of coloured dots to represent lights. not much of it will be seen so its grand as is. it will have a light in it too when completed.

    holdroompainted.jpg

    Also finished off the small compartment on the opposite side of that wall as well.

    wallboxfancy.jpg

    I then used a hand drill and drilled holes for lights in the chair and the back part of the chair. they look a bit rough in places here but will be fine once i add the Decals over the holes. Also cut out some holes to run the wire from the lights through.

    seatarealights.jpg

    seatlightsdrilled.jpg

    Here is back wall with the room lined up behind it, the compartment glued on and a couple of wires i added. bit of weathering too. Photo doesnt look great for some reason, paint looks weird on the wall. its not like that in person.

    backwall21.jpg


  • Registered Users, Registered Users 2 Posts: 1,679 ✭✭✭MAJJ


    Great work, Optimus, thanks for sharing


  • Moderators, Computer Games Moderators Posts: 5,390 Mod ✭✭✭✭Optimus Prime


    A quick follow up-update for those still interested. I got some time to look at the lighting and how im going to do it, i was hoping to avoid fibres in some places by sticking lights underneath drilled holes, but its just not effective and if im going to do it i may as well do it right, so ive to wire up a few hundred fibres to various spots.

    Today i drilled some holes in the nav console, you can see that below, I havent even started painting this yet.

    navconsole.JPG

    I made another pipe from styrene tube, sprayed it and placed it over the pipe i added yesterday, this hides the part where the bigger pipe is glued to the wall. I also added some rust and a bit of weathering to these.

    pipeonpipe.JPG

    And finally a look at the hold so far from both sides, still no lighting or anything added, but to be honest im happy enough with it. It looks better than i thought it would, i made a few mistakes on it but its coming together ok i think. Its a hundred times better than just building it stock.

    navconsolewall.JPG

    closetroomwall.JPG


  • Registered Users, Registered Users 2 Posts: 1,451 ✭✭✭ZV Yoda


    Just happened across this thread... wow! Your attention to detail is astounding.

    Thread followed


  • Advertisement
  • Moderators, Computer Games Moderators Posts: 5,390 Mod ✭✭✭✭Optimus Prime


    ZV Yoda wrote: »
    Just happened across this thread... wow! Your attention to detail is astounding.

    Thread followed


    Thanks a lot, i must post another update, im hoping to get some done over the christmas break.


  • Registered Users, Registered Users 2 Posts: 22,584 ✭✭✭✭Steve


    Can I ask if the Tamiya primer you are using gives good adhesion on metal? Are you using an acrylic top coat?

    Looking forward to the next update!!


  • Moderators, Computer Games Moderators Posts: 5,390 Mod ✭✭✭✭Optimus Prime


    I havent sprayed much metal with it to be honest, just a couple of small bits and it was fine. the cans of Tamiya AS20 are great. not sure what you mean by Acrylic top coat, if you mean the paints im using on top of the Tamiya then its mostly Vallejo Air and Oil paints. I have used Tamiyas paints as well.


  • Registered Users, Registered Users 2 Posts: 1,451 ✭✭✭ZV Yoda


    Any more progress?


  • Registered Users, Registered Users 2 Posts: 17,964 ✭✭✭✭Thargor


    Totally forgot about this.


  • Moderators, Computer Games Moderators Posts: 5,390 Mod ✭✭✭✭Optimus Prime


    Unfortunately not, its been a while since i had a chance to do anything with it. I dont want to force myself to do it either because i wont do it right that way, so havent really pushed myself at it, ill only end up doing it quickly and not correctly and wont be happy with it when its finished. I will get back to it though and will update when i do!


  • Advertisement
  • Registered Users, Registered Users 2 Posts: 6,144 ✭✭✭TheIrishGrover


    Unfortunately not, its been a while since i had a chance to do anything with it. I dont want to force myself to do it either because i wont do it right that way, so havent really pushed myself at it, ill only end up doing it quickly and not correctly and wont be happy with it when its finished. I will get back to it though and will update when i do!

    Not good enough dammit!!!!
    :D


  • Closed Accounts Posts: 9,764 ✭✭✭my3cents


    ... I dont want to force myself ...

    "May the force be with you"


  • Registered Users, Registered Users 2 Posts: 6,144 ✭✭✭TheIrishGrover


    I'm expectin' some serious updates, Optimus :D


  • Moderators, Computer Games Moderators Posts: 5,390 Mod ✭✭✭✭Optimus Prime


    I should actually get back into this. Most of it is still boxed away. Now is the perfect time to get some done.


  • Moderators, Computer Games Moderators Posts: 5,390 Mod ✭✭✭✭Optimus Prime


    FALCON UPDATE!

    Ok so i decided i would actually take it back out and get going, it took me 3 days to unpack it all and figure out where i left it and where to start off from again!

    I decided to continue working on the hold section, specifically the Pit in the hold, i guess thats what its called, not sure, Han and Chewie are in there trying to fix the hyperdrive in Empire and in the Force Awakens Rey and Finn try to hide in it.

    han-in-pit.jpg

    Anyways, in the kit, the floor is just flat, there is no pit. So since i already added a different floor that looked a lot better than the kit and it had the option to leave the grates open, which id done, i had to make my own pit. So here is a few images of that process.. the one in the film is deeper, but because of the lack of space between the hull of the falcon model and the floor of the hold, i wasnt able to go any deeper.

    Cut out the pit from some styrene, doesn't have to be perfect as it wont really be seen.


    pit1.JPG


    pit2.JPG

    pit4.JPG

    Added some bits and pieces in, Lego harry potter wand, and a small lego brick ;) few nuts, some spare sprue as pipes.

    pit5.JPG

    Test placement

    pit6.JPG

    Coat of Vallejo german grey

    pit7.JPG

    and when finished with some wearing, rust, oil etc

    pit9.JPG

    waiting for that to dry..

    Im also adding a bit of light around the inside of that pit, im using a length of neon blue lighting i had. It was a pain to get this on as you can see, im using PVA glue to hold it in place (hopefully it works) as im afraid the other glues i have might break the light. So holding it in place until the PVA drys, we will see what happens tomorrow. ive to do the other pit (which has a closed grill over it on the floor side) tomorrow when this one drys.

    Hopefully it will give a nice subtle blue glow in the pit area when done. hopefully....!

    pitlight1.JPG

    pitlight2.JPG

    I should be updating regularly as, lets be honest, there isnt much else to do right now! Stay safe! Open to comments etc!


  • Advertisement
  • Registered Users Posts: 1,038 ✭✭✭rapul


    Awesome, would have loved to have done this myself so will be watching this thread for sure, the pit looks great finished


  • Registered Users, Registered Users 2 Posts: 1,451 ✭✭✭ZV Yoda


    Fantastic. Your attention to detail is amazing.


  • Registered Users, Registered Users 2 Posts: 6,144 ✭✭✭TheIrishGrover


    source.gif


  • Moderators, Computer Games Moderators Posts: 5,390 Mod ✭✭✭✭Optimus Prime


    Quick update today as it was all about waiting for PVA glue to dry.

    I wrapped the neon light around the 2nd pit area, which is covered on the floor side anyways (you can see it in the bottom image) but will glow through the grates a bit. Waiting for that to dry now.

    I also put a coat of varnish on the pit i made yesterday and then stuck it to the bottom of the hull floor, waiting for the PVA glue to dry there too. its a bit messy but it drys clear and you wont see it anyways so i wasnt too careful with it.

    Had to cut a bit of the bottom to make room for the light to go through as well.

    chop1.jpg

    pitb3.jpg

    and here is a look at the pit installed and lit! (second "pit" not lit in this image)

    pitatest.jpg


  • Moderators, Computer Games Moderators Posts: 5,390 Mod ✭✭✭✭Optimus Prime


    Got a bit more done, its a slow process waiting for stuff to dry.

    First up i added some fibres to the hold bench. pain in the *$&£*

    I got them in anyways, waiting for glue to dry, I used a soldering iron to bend the fibres to a 90 degree angle, had to use a blade to shave off plastic so i could get them to fit in the groove in the bottom of the bench. fingers crossed it works out. we will see.


    seat1.jpg

    Next up , i wasnt happy with the extra hold piece i built previously to go above the pipes so I made a new piece from styrene and am waiting for it dry after spraying it.

    holdextra1.jpg

    There is a light in the falcon beside this door, the kit provides a piece of plastic crap to go there but i wanted it to light up. I previously had made this light from some spare white spru and copper wire i had. I drilled a bigger hole in the wall and glued the light i made over it. then i put a light in the back and glued it place. images below.

    holdlight1.jpg

    Finally for today The Nav computer. I was dreading this because before i packed it up last year i drilled it for loads of fibres, i found them very hard to work with in the small size required here, so i kinda got lazy and cheated a bit. First i just used some dry brushing to add dept t the console itself.

    I had "glass paint" that is basically transparent when dried. So i painted some red blue and yellow colours on the back of the nav console and im just using led strips im making at the minute to illuminate them from behind. you can see the effect below, using a torch here. Good enough! To put it in scale this isnt much bigger than a 50 cent piece,theres actually a decal for the bottom left panel in the image there im debating about putting on or not.

    nav1.jpg


    Thats it for now!!


  • Registered Users, Registered Users 2 Posts: 1,561 ✭✭✭Umaro


    Stumbled across this topic from the homepage as the most recent post is one of the most thanked posts in the past 24 hours.

    I don't know much about models but have read the entire thread from start to finish now as its fascinating stuff and your attention to detail is remarkable. Looking forward to checking in every so often now that you seem to have some more free time on your hands (as we all do I think).

    I had a question about all the internal work you're doing. Once the model is complete is there a hinge or access points where it can be opened up? I see you putting in so much thought and care into internal areas that I can't help but wonder how much of them one will be able to see once the Falcon is complete.


  • Moderators, Computer Games Moderators Posts: 5,390 Mod ✭✭✭✭Optimus Prime


    Thanks a lot appreciate the comments. With regards the insides, when the model is completed you can take the top off in 2 places, the main hold and one of the corridors, the hull pieces are held in place with magnets. you can see them off in the image below.

    Falcon-top-open.jpg


  • Closed Accounts Posts: 1,049 ✭✭✭GinSoaked


    I wonder if there is anyway you could film a walk through with some sort of mini camera?


  • Registered Users, Registered Users 2 Posts: 22,584 ✭✭✭✭Steve


    Looks awesome OP :cool:


  • Registered Users, Registered Users 2 Posts: 1,451 ✭✭✭ZV Yoda


    GinSoaked wrote: »
    I wonder if there is anyway you could film a walk through with some sort of mini camera?

    I’d love to see that!


  • Advertisement
  • Moderators, Computer Games Moderators Posts: 5,390 Mod ✭✭✭✭Optimus Prime


    GinSoaked wrote: »
    I wonder if there is anyway you could film a walk through with some sort of mini camera?

    I’m sure there is something that could do it.


  • Closed Accounts Posts: 1,049 ✭✭✭GinSoaked


    I’m sure there is something that could do it.

    I liked the idea because I suspect due to the quality of your work it would look like a walk through of a movie set.


  • Registered Users, Registered Users 2 Posts: 17,964 ✭✭✭✭Thargor


    Yeah projects like this can rack up millions of views on Youtube, might pay for the whole thing if you document it properly.


  • Moderators, Computer Games Moderators Posts: 5,390 Mod ✭✭✭✭Optimus Prime


    I wish I was good at that but I’m not one for filming myself talking or putting stuff on YouTube. I’m happy just to post here. Plus to be honest I’m amateur at this stuff. This is literally the 3rd model I’ve made, ever , the other two being the at-st and the Viper. Everything Im doing here is just stuff I’ve learned or looked up on the internet how to do it first. I’ve been lucky so far I haven’t made a complete balls of it ! Ok I get ideas in my head about modding stuff or adding pieces. But without watching people on the internet building other models I wouldn’t know how to do it.

    I’m a big believer in you can do anything if you put your mind to it - George McFly. But you really can these days if you just put the effort in and look at YouTube etc for guides.


  • Moderators, Computer Games Moderators Posts: 5,390 Mod ✭✭✭✭Optimus Prime


    Last update for this week.

    First up I put the piece i sprayed in the last update in place over the pipes in the hold. Looks ok there i think, i also put a black wash over the white light beside the door as it was a bit too clean i think and i did a but of dry brushing in the pit, the doorway and some other small places just to add some debt. ill do more later.

    I also soldered two led strips together to go behind the nav console eventually to light the buttons.

    hold1.jpg

    Then my least favorite thing to do , applied some decals to the bench\bunk area and the Dejarik table top. it worked out ok for the most part! was worried id mess that up.

    decals1.jpg


    While doing the decals i noticed that the side of the bunk wall is a bit blank looking, so i decided i would add some spare parts to it to make it look interesting, ill add some wires etc too later as there is a few wires coming out of it in the actual films. In the final image below you can see them added, these are the pieces i chose to cut up and add, i sprayed them german grey too.

    parts1.jpg

    The bunk behind the bench needs a light on it so looking at the one from the films, i had previously half made it by joining two lights together and filling down the top of each bulb flat as its like that in the film. So now i sprayed them white, masked them off and sprayed the two flat ends black. i also cut up a straw and sprayed that black, this will go over the middle part of it, where the wires are joined. so it should look like the one from the films. You can see what im mean below before i sprayed it.

    bunklight1.jpg

    and finally, the Nav computer in the kit doesnt come with the Nav chair for some strange reason, Han sits in this while talking to Ben and Luke in a new hope about how he doesnt believe in the force.. anyways! Lucky for me, when i first signed up to this , so did my brother, but he only lasted about 15 issues and gave up!

    I got all his spare parts though! which includes two Chairs from the cockpit which are almost the same as the nav chair from the hold. the difference is the ones from the cockpit are hollow at the back, and dont have the same kind of stand as the Nav one, also they have some greeblies on the back ill have to add.

    First thing i did was cut the bottom off it and then fill the back. when that dried i sanded it down flat. I then create the film style stand for the chair from some spru and styrene pipe. Then i sprayed it silver. because when i spray it grey, im going to use a sharp blade to chip some of that grey off to reveal the silver underneath to make it look like metal with the paint worn off. here is some photos.

    navchair1.jpg

    Finally as a test i just put the bunk, bench and table in place beside the back wall and tested the fibres with the decals on, you can see the bits i added to the side\end of the bench here too. more to add, wires etc. ill probably use a couple of flashing colour bulbs in the final build so those fibres flash on and off different colours.

    thats all for now!

    testbench.jpg


  • Registered Users, Registered Users 2 Posts: 1,451 ✭✭✭ZV Yoda


    Sweet baby Jesus... these are Walter White levels of detail. Amazing!

    This project is the one good thing to come out of this lockdown.


  • Moderators, Computer Games Moderators Posts: 5,390 Mod ✭✭✭✭Optimus Prime


    This one is mostly Barrels and the Nav Chair. I found these spare barrels i had so decided to spray them to see if they go in the hold to add something to it, i seen a few images of barrels in the film reference photos.

    I sprayed them first with silver, then varnish, so i could try the scraping off thing again with them. Then i painted 2 white and 2 black. I probably wont use them all but just did them anyways.

    barrels1.jpg

    Next up the Nav chair. I sprayed it black, then scraped off some of that to reveal the silver underneath. I then masked it up and sprayed the cushion parts a tan colour then dry brushed the edges and where you would sit\have your back with a flesh colour to give it a bit of a worn look. Finally i used a black wash just around the edges of the cushions to make them blend a bit better with the chair. (aka hide my sloppy painting) i still have a few bits of greeblies to add to the back of the chair, im waiting for their paint to dry.

    navchair2.jpg

    and 1 more thing, i finished the bunk light i made, painted each end of it black, put the piece of straw in the middle i sprayed black. and here is it is lit up.

    I took the tape off the bunk too from when i sprayed it finally, and you can also see in this image the wires and spare bits i added to the end of the bunk section to make it look better, i dry brushed these silver after painting grey and gave the wires a black wash.

    bunklight2.jpg

    Thats all for now!


  • Registered Users, Registered Users 2 Posts: 1,451 ✭✭✭ZV Yoda


    Superb!


  • Registered Users, Registered Users 2 Posts: 3,439 ✭✭✭davetherave


    I must have just gone on to the homepage at the right time to see this thread hop up in recent posts, and have flicked through the progress from last five years.

    I've done some airfix and warhammer in my time but this is unbelievable amounts of detail. Amazing, absolutely amazing work.


  • Advertisement
  • Moderators, Computer Games Moderators Posts: 5,390 Mod ✭✭✭✭Optimus Prime


    Thanks a lot guys. I’m happy enough with it so far. Dreading the day something I try doesn’t work out. I’ve had a few close calls where I made mistakes but manage to fix them for the most part !


  • Registered Users, Registered Users 2 Posts: 6,144 ✭✭✭TheIrishGrover


    I'd love to see a completed base model versus something insane like this and see how they compare. I'd say it would be chalk and cheese.


  • Moderators, Computer Games Moderators Posts: 5,390 Mod ✭✭✭✭Optimus Prime


    I finished off the barrels the last couple of days, to give them some age and wear i covered them in oil paint, then wiped it off. the white ones i used "starship filth" oil paint, i loves this paint it makes everything look a hundred times better. I used a light rust oil paint on one black barrel and a dark rust one on the other. You basically plaster them with the stuff then used a cloth to rub it back off. it leaves it nice and weathered looking, i also scratched them in a few small places to reveal the silver underneath. i didnt do much of this though because i thought they looked well as is.

    barrels3.jpg

    The only other thing i did was get impatient, I finally put together a lot of the parts of the hold. Screwed the back wall in places, the bunk, the bench, the table. i placed the barrels in there, the removed grates, the Nav computer and chair. Temp hooked up most of the lights, i can defo get more light on the Nav computer i havent hooked up the led strips correctly in these photos.. and there is still a lot more i want to do with it.

    For comparison, here is the default Kit hold, with minor painting i think, some dry brushing here and there and a wash on the floor.

    stockhold1.jpg

    and here is some photos of mine together at last.. five years later..

    holdtest1.jpg

    holdtest2.jpg

    holdtest3.jpg


  • Registered Users, Registered Users 2 Posts: 1,451 ✭✭✭ZV Yoda


    Incredible!


  • Moderators, Computer Games Moderators Posts: 5,390 Mod ✭✭✭✭Optimus Prime


    Not a very exciting update this week, but a lot of waiting for paint to dry essentially. Next part of the build i want to get done is the corridors, so made a start on them this week. They involve a LOT of cushion pieces for the walls archways etc. so a couple of hours was taken cutting some of them from the sprews and sanding where they where cut off. You can see some of them below.I still have loads more to do, these ones where just the arches for 1 corridor, side walls next.

    arch1.jpg

    After that I started on the floors. The ones in the kit are just solid plastic, but obviously thats not good enough! in the film there is light running up through grills along the side, so i picked up this PhotoEtch floor to use. It involves cutting the sides off the kit floors with a dremel, then sanding back and gluing the photoetch floor to the kit ones.

    You can see below using the curved floor as an example where i cut back the sides then glued the photoetch floor on top.

    The straight piece of floor in the last image below has a step in it, and the PhotoEtch included a small grill that goes on there, so i dremeled out a gap there too so light will come through the grill on the step when the floor is lit from underneath with a led strip.

    floors1.jpg

    After that i just sprayed them german grey, the cushions on the wall are going to cover most of this anyways, ill add some highlighting to the floors later.

    floors2.jpg

    Finally this week, these two pieces that lead to the gunner ports i think (ill have to check the book again). These two pieces again are just blank grey walls in the original kit, but the photoetch has three control panels and decals to go on there. So i want these to light up as usual, so i dremeled out holes here so i can light them from the back later, glued on the control panels, sprayed them german grey (also took the time here to spray a lot of the other corridor parts the same while i had the colour in the airbrush) i then used some clear paint on the back of the control panels so they light up colours later, red, blue, yellow just for some of the buttons etc. The decals went on finally and thats where i finished up today.

    Next week ill be adding all the cushions etc to the corridor walls and doing some extra details there. Stay safe!

    corridorpanels.jpg


  • Registered Users, Registered Users 2 Posts: 1,451 ✭✭✭ZV Yoda


    After that I started on the floors. The ones in the kit are just solid plastic, but obviously thats not good enough! in the film there is light running up through grills along the side, so i picked up this PhotoEtch floor to use. It involves cutting the sides off the kit floors with a dremel, then sanding back and gluing the photoetch floor to the kit ones.
    [/img]

    This paragraph sums up your approach perfectly.

    I think I’m in awe of you, while also being slightly scared of you in equal measures. Anybody with this single mindedness could be either an excellent surgeon... or a clinical assassin!

    Either way, thanks for the update! Please keep them coming.


  • Advertisement
  • Registered Users, Registered Users 2 Posts: 6,144 ✭✭✭TheIrishGrover


    Yeah, I have 10 thumbs and they are all broken.

    That was very interesting comparing the base central area with your own custom job. I mean at first glance it looks pretty decent. Especially since it's an inside section. But compared with the custom version it looks cheap and flat. Looks like a knock off of your custom one.

    But the patience involved? I only wish to apologise to your partner for my part in bumping this thread :D


  • Moderators, Computer Games Moderators Posts: 5,390 Mod ✭✭✭✭Optimus Prime


    Back again.. with more corridors !

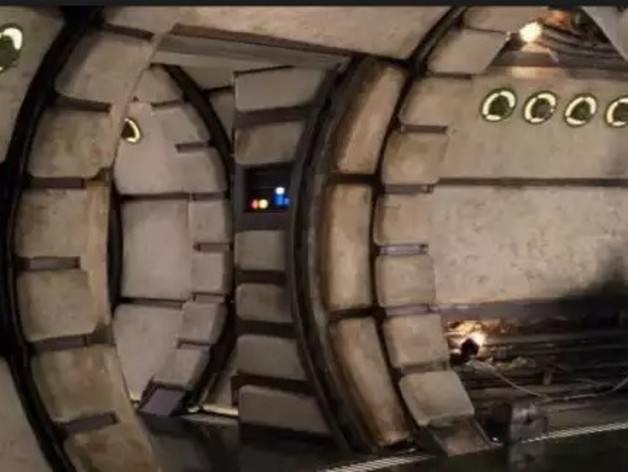
    So after last week I finished off the corridor ends by adding the cushions. I used some Tamiya weathering kits to add some soot, rust and oil stain to the cushions as they where too clean. all the cushions for the corridors will be getting this on them to make them look worn etc. Here they are finished.

    coridorend.jpg

    Next I put a coat of flat white on the underneath of each floor piece and the corridor itself, this is because im going to put light strips underneath to light up the sides of the floor grates and it will help the light bounce around better. especially as the led strips will be on the bottom of the floor pieces.

    Also the corridors in the Falcon in the films is missing a couple of cushions in certain parts, id imagine due to some "upgrades" or repairs Han and Chewie did. The kit doesnt account for these missing cushions, but I am going to. So i drilled out the Tube where these cushions are missing in screenshots from the films i checked out online, i painted the cut out parts white, then dry brushed with some flesh to make it look cut away.

    I then cut some styrene squares to cover the cut out holes, and sprayed them German grey. I glued these to backs of the tubes. Once in place i put some different colour wires etc in there and gave them a quick black wash to make them look dirty. They look out of place now but when that corridor piece has the cushions on it will make more sense.

    coridor1.jpg

    After this i concentrated on the straight piece of corridor first. I dont currently have enough LED strips to do the 3 Corridor pieces so ill have to wait for more to arrive.

    I started by soldering two of the Warm White LED strips together, then i stuck these to the underside of the floor piece.

    floorlights1.jpg

    Then i also ran two warm white normal lights up the middle of this. These are to light up the control panels i added last week to the two end corridor pieces. I have green arrows pointing to these in the first image below.

    I then slapped some white paint on the wires just to help the light bounce around a bit.

    A quick test of the lights to make sure they work in the second image below with the corridors added.

    and then you can see how the two bulbs light up the control panels and the LED strips light up the sides of the floors. I could probably due with adding some paper backing to the control panel there to difuse the light a bit, i also need to do some light blocking at the side of the corridors as there is some light leak currently. I also added all the wall cushions in that straight corridor after weathering again with Tamiya weather kits soot, rust and oil stain.

    coridor2.jpg

    Finally this week i needed to figure out what to do about the corridor lights. You can see them below on the right (You can also see one of the exposed sections in this image where a corridor cushion is missing).

    e343759c5f395f4a748cdc44923e7b31_preview_featured.jpg

    These dont come in the Kit at all, just blank cushions on the walls. You can buy 3D printed ones but the price is ridiculous i think for them, 40 quid delivered was the cheapest i could find and they dont arrive until mid June. So i decided to try make them myself. It will involve some drilling and lighting, but first i needed to figure out how to make the lights!

    The Paragrafix corridor photo-etch comes with these flat discs that make up the back part of each light, but they are not really right, so i had a black tube i found in one of the kids lego (shhhhh!) that i took and cut into tiny tube pieces. i then shoved these on the end of cocktail sticks, loads of em, and glued them.

    Once they dried I cut them all off and put them on some tape then sprayed them. Now, while i think they turned out OK, i wasn't fully happy with them, the tops could do with sanding flatter and i wasn't happy with the colour i sprayed them. So i sand the tops down more on all of them and re-sprayed them a Gun Metal colour. but i forgot to take a photo!

    coridorlights1.jpg

    Thats all for now, stay safe!


  • Registered Users, Registered Users 2 Posts: 1,451 ✭✭✭ZV Yoda


    Amazing. Just amazing. The photos look like stills from the movie set.

    Thanks for keeping us all updated!


  • Moderators, Computer Games Moderators Posts: 5,390 Mod ✭✭✭✭Optimus Prime


    Quick update this week, took a while to figure out how to do this.

    Working on the corridor lights for the 1st corridor. First i used a spare corridor cushion from the box of parts i got off my brother when he gave up on it, i used this to make a template for where the light holes need to be drilled on the ones on my corridor. Once i was happy enough with the position of the small holes, i held this piece over the ones on my corridor and marked through this with a hand drill onto my own corridor cushions.

    Once i had the small holes drilled, i used a bigger drill piece to increase the size and ended up with the ones below.

    I have a bunch of warm white lights that come with these clip holders for the bulbs, so i removed the black bulb holders and glued them onto the back of the corridor where i drilled the holes. You can see that in the last image here.

    corridorlights3.jpg

    While the glue was drying there, i wired up all the bulbs for this corridor as best i could, im no expert at this stuff, i had these handy wire clip things you can see in the image that helped save time, you just clip the wires into them. handy.

    Once that was made, i stuck the bulbs back into their clips that i had glued to the corridor.

    corridorlights4.jpg

    Then i tested the lights.. I have included an image of what the stock corridor looks like first, just to compare to. The reason this corridor is "open" on one side is because a part of the hull of the falcon when complete will be removable to you can have a look in at this corridor.

    corridorlights5.jpg

    and finally i wasnt 100% happy with the underfloor lighting on the corridor, so i decided to try something different while i can. On the next two corridors instead of just painting the bottom white, i used some PVC glue and tin foil, and just stuck that down.

    I havent tried it yet but id imagine it will reflect the light better. I have since taken apart the corridor above and tin foiled the bottom of that one too.

    corridorlights6.jpg

    Thats all for now, thanks!


  • Registered Users, Registered Users 2 Posts: 2,146 ✭✭✭dudeeile


    Truly amazing attention to detail, it will be specatacular once complete. What's your percentage complete on the build?


  • Advertisement
Advertisement