Advertisement
If you have a new account but are having problems posting or verifying your account, please email us on hello@boards.ie for help. Thanks :)
Hello all! Please ensure that you are posting a new thread or question in the appropriate forum. The Feedback forum is overwhelmed with questions that are having to be moved elsewhere. If you need help to verify your account contact hello@boards.ie
Hi all,
Vanilla are planning an update to the site on April 24th (next Wednesday). It is a major PHP8 update which is expected to boost performance across the site. The site will be down from 7pm and it is expected to take about an hour to complete. We appreciate your patience during the update.
Thanks all.

Project noraut !

Options
2

Comments

  • Posts: 7,499 ✭✭✭ [Deleted User]


    ****e.
    The 3/4 tmould is 18mm and the cab is 20mm.
    It's gonna be poxy.
    Looks like it's 18mm partial with 1mm laminate each side.
    Going to have to think about this one 😯


  • Registered Users Posts: 677 ✭✭✭Mitchomagic


    If you are getting full side art on it get it made larger than what's needed. Then fold it over the sides and under the tmolding .... sorted


  • Posts: 7,499 ✭✭✭ [Deleted User]


    If you are getting full side art on it get it made larger than what's needed. Then fold it over the sides and under the tmolding .... sorted

    TBH I couldnt live with that.
    found a tmould from tmolding.com that should suit.

    I got the remote for the 20" monitor.
    cant get into the engineer's mode on it and I cant control the brightness :confused: and its too high by loads.

    I can control everthing else,sharpness,contrast colour but the slider for brightness just does not move.
    Very anoying.
    might be able to do something with the screen pot on the flyback tho but I havent decased it yet.


  • Registered Users Posts: 30,123 ✭✭✭✭Star Lord


    Could there be some kind of picture mode setting that's enabled that could prevent you from changing the brightness?


  • Posts: 7,499 ✭✭✭ [Deleted User]


    Star Lord wrote: »
    Could there be some kind of picture mode setting that's enabled that could prevent you from changing the brightness?

    good thinking,I didnt see anything to suggest there is video modes.
    the options are very basic .


  • Advertisement
  • Registered Users Posts: 3,717 ✭✭✭The Last Bandit


    TBH I couldnt live with that.
    found a tmould from tmolding.com that should suit.

    I got the remote for the 20" monitor.
    cant get into the engineer's mode on it and I cant control the brightness :confused: and its too high by loads.

    I can control everthing else,sharpness,contrast colour but the slider for brightness just does not move.
    Very anoying.
    might be able to do something with the screen pot on the flyback tho but I havent decased it yet.

    Brightness adjust not working with the remote ? Did you try stripping it down and cleaning the contacts on it?


  • Posts: 7,499 ✭✭✭ [Deleted User]


    The tvs responding allright.
    its just the volume up down that does it.a load of me hole.
    it just seems to be locked!
    might have another monitor coming my way in the next day or 2 so We'll see what happens.
    no rush now anyway as I've loads to be getting on with .


  • Registered Users Posts: 3,717 ✭✭✭The Last Bandit


    Can you just wear sunglasses ?


  • Posts: 7,499 ✭✭✭ [Deleted User]


    Can you just wear sunglasses ?

    I could tint the glass :cool:


  • Registered Users Posts: 4,146 ✭✭✭CathalDublin


    Usually you can adjust the brightness from the flyback anyway.
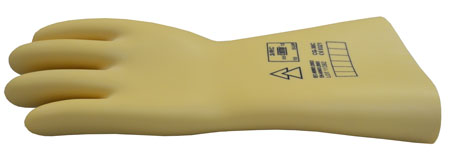
    Break out the 1387377403_CATU-Rubber-Latex-Insulating-Gloves.jpg


  • Advertisement
  • Registered Users Posts: 9,196 ✭✭✭MrVestek


    Brownfinger I'm looking to declutter (and will be selling off the majority of my collection soon enough).

    I have a Beko TV that I got for free from adverts a while ago, you could have that if you want?


  • Posts: 7,499 ✭✭✭ [Deleted User]


    So turns out you can only adjust the brighness when the TVs on AV


  • Registered Users Posts: 5,780 ✭✭✭eddhorse


    So turns out you can only adjust the brighness when the TVs on AV

    So its working?
    For the Philips tv i have, its 0 6 2 5 9 6 followed by the i button.


  • Registered Users Posts: 195 ✭✭Damien King


    Hi, I had a similar issue on a build last year, cabinet was built in 18mm sheet material with vinyl artwork mounted on 2mm foamex leaving me with a 20mm to trim.

    Was originally going to get wider T molding but then figured I'd try it with a flat chrome trim first.

    I removed the 3M tape from the back as its ****e, then applied contact adhesive to both surfaces. While waiting 20 mins or so for it to cure I got loads of strips of masking tape sorted out.

    I stuck the trim on, taping it in place as I went. after a few hours the adhesive had completely bonded the chrome to the edge so I removed the masking tape and peeled back the chrome trims protective layer. The results were great. I was chatting to the customer recently and its still looking good as new almost a year later.

    Could be worth a try, just make sure its good contact adhesive and not the bargain shop rubbish. If you don't start hallucinating while using it indoors then it's no good.

    Get a LOT of masking tape strips ready, theres time to do this while waiting for the contact adhesive on both surfaces to be ready, you'll be taping every couple of inches on straight sections and pretty much covering it on the curves. If the cabinet edges are porus then apply a layer of adhesive first, let that completely dry to seal it and then carry out above steps (including re applying contact adhesive to cabinet.

    Heres a few pics of the end result, you can see how well it went round corners.

    6034073

    6034073

    Attachment not found.

    Attachment not found.


  • Posts: 7,499 ✭✭✭ [Deleted User]


    Thanks but I'll be using a slot cutter.
    20.6mm tmould ordered


  • Posts: 7,499 ✭✭✭ [Deleted User]


    Finally got around to the metal work.
    After lashing them with a rough wire wheel on a pillar drill I decided to give the sandblaster another go.
    Took a while but very pleased with the results!
    2015-04-30%2B10.28.28.jpg

    now to get some paint on them!


  • Posts: 7,499 ✭✭✭ [Deleted User]


    So it turns out you can fit a 20" tube in a poker cab!
    Had to drop the monitor angle a bit .
    Because of this I'll have to drop the glass too
    2015-05-07%2B20.34.57.jpg

    One thing I've discovered is the angle of the CP is insanely uncomfortable :(
    You could probably play for 20 seconds before requiring wrist surgery.
    So Im going to have to flatten the CP.
    Something like this I'd say

    2015-05-07%2B20.59.22.jpg

    A bit ugly but whats the point in building a machine that cant be played!
    Hoping to get in into the workshop tomorrow and get all the woodwork done.


  • Registered Users Posts: 5,772 ✭✭✭Jack burton


    Get a load of car filler and flush the cp with cab, proper 90's spec!

    Looking forward to seeing how this turns out!


  • Registered Users Posts: 4,146 ✭✭✭CathalDublin


    Come on, wheres the update?


  • Posts: 7,499 ✭✭✭ [Deleted User]


    Actually just ordered the last bit I needed this morning!
    Well I gotta get paint too but thats no biggy.
    Anybody going between cork and Dublin?
    I need something collected from another member here and dont know when I'll be down next


  • Advertisement
  • Registered Users Posts: 4,146 ✭✭✭CathalDublin


    Actually just ordered the last bit I needed this morning!
    Well I gotta get paint too but thats no biggy.
    Anybody going between cork and Dublin?
    I need something collected from another member here and dont know when I'll be down next

    I was only down there last Monday.
    Did you get the coindoor?


  • Posts: 7,499 ✭✭✭ [Deleted User]


    Ah crap!
    I didnt get the one off mitch but ended up getting another


  • Registered Users Posts: 5,780 ✭✭✭eddhorse


    Ah crap!
    I didnt get the one off mitch but ended up getting another

    I might be down in Cork this week, will keep you updated.


  • Posts: 7,499 ✭✭✭ [Deleted User]


    Few big gets for the project!
    Absolutely massive thanks to P_Horgan on this one.
    You sir are a legend !


    A proper arcade monitor !
    2015-06-12%2B19.22.07.jpg

    Believe it or not it came from that silverline cab in the mame of shame.so at least something good came of it !

    Coin door.Its actually chrome !
    2015-05-28%2B07.22.16.jpg

    Cleaned up the wheels.Before and after.manky
    2015-06-02%2B15.26.17.jpg

    And the handles before and after.
    2015-06-02%2B15.39.03.jpg

    Also got the coin door frame sandblasted.
    Monitor clearly needs a cap kit as some of the caps are about to pop and a serious clean and paint job.


  • Posts: 7,499 ✭✭✭ [Deleted User]


    Finally got a chance to look at the monitor this evening.
    Its a Kortek chassis whit a nice burn free samsung tube!
    good score .

    Its in good shape considering its been living outside in a plastic bag for a few months!

    Stright away I can see it needs a cap kit badly.
    Fired it up,literally fired it up....!
    The magic the makes it work was leaking out of the anode cap.
    Quick clean sorted that out.but you can see the damage.crazy noise/smell
    2015-06-21%25252018.37.21.jpg

    Next up the remote board.
    Needed 4 new pots.simple job but made a massive difference.
    2015-06-21%25252022.28.15.jpg

    Got it dialed in then!
    great pic considering the state of the caps.
    2015-06-21%25252021.31.50.jpg

    I've taken it all apart for cleaning and paining.
    going to be clean.Not as clean as my Donkey Kong one but still nice!

    Hoping to get started on the wood work next weekend.
    Just need paint!


  • Registered Users Posts: 2,067 ✭✭✭safetyboy


    If you are ever in Dublin could you give me a hand with taking the chassis off the E2 or any tips how to do it safely :)


  • Posts: 7,499 ✭✭✭ [Deleted User]


    safetyboy wrote: »
    If you are ever in Dublin could you give me a hand with taking the chassis off the E2 or any tips how to do it safely :)

    yea no probs,
    Its actually overhyped.I think the E2 chassis is easy to get out because it not fixed to the tube?
    I cant remember.
    I just use a bit of wire wrapped around a screwdriver.
    I usually undo a screw on the frame and put the other end of the wire under that for a good ground.:cool:

    Poke the driver under the cap a few times then carefully remove the cap.
    Then i always ground the cap to the frame just to be sure.


  • Registered Users Posts: 34,426 ✭✭✭✭o1s1n
    Master of the Universe


    Feel free to borrow my magic wand if you need it :pac:


  • Registered Users Posts: 3,717 ✭✭✭The Last Bandit


    o1s1n wrote: »
    Feel free to borrow my magic wand if you need it :pac:

    I really hope that's not a euphemism for something else :D


  • Advertisement
  • Registered Users Posts: 9,196 ✭✭✭MrVestek


    I really hope that's not a euphemism for something else :D

    I've seen his magic wand. It's lovely so it is... works really well too. Great range.


Advertisement