Advertisement
If you have a new account but are having problems posting or verifying your account, please email us on hello@boards.ie for help. Thanks :)
Hello all! Please ensure that you are posting a new thread or question in the appropriate forum. The Feedback forum is overwhelmed with questions that are having to be moved elsewhere. If you need help to verify your account contact hello@boards.ie
Hi all! We have been experiencing an issue on site where threads have been missing the latest postings. The platform host Vanilla are working on this issue. A workaround that has been used by some is to navigate back from 1 to 10+ pages to re-sync the thread and this will then show the latest posts. Thanks, Mike.
Hi there,
There is an issue with role permissions that is being worked on at the moment.
If you are having trouble with access or permissions on regional forums please post here to get access: https://www.boards.ie/discussion/2058365403/you-do-not-have-permission-for-that#latest

What are you working on currently?

1246723

Comments

  • Moderators, Category Moderators, Arts Moderators, Sports Moderators Posts: 50,167 CMod ✭✭✭✭magicbastarder


    what method did you use to char it?


  • Registered Users, Registered Users 2 Posts: 212 ✭✭Magic ]=)


    what method did you use to char it?

    Traditional way. Three boards tied with wire and fire started inside with just newspapers. See the videos it's all there.
    Link to youtube below first three photos


  • Registered Users, Registered Users 2 Posts: 40,038 ✭✭✭✭Sparks


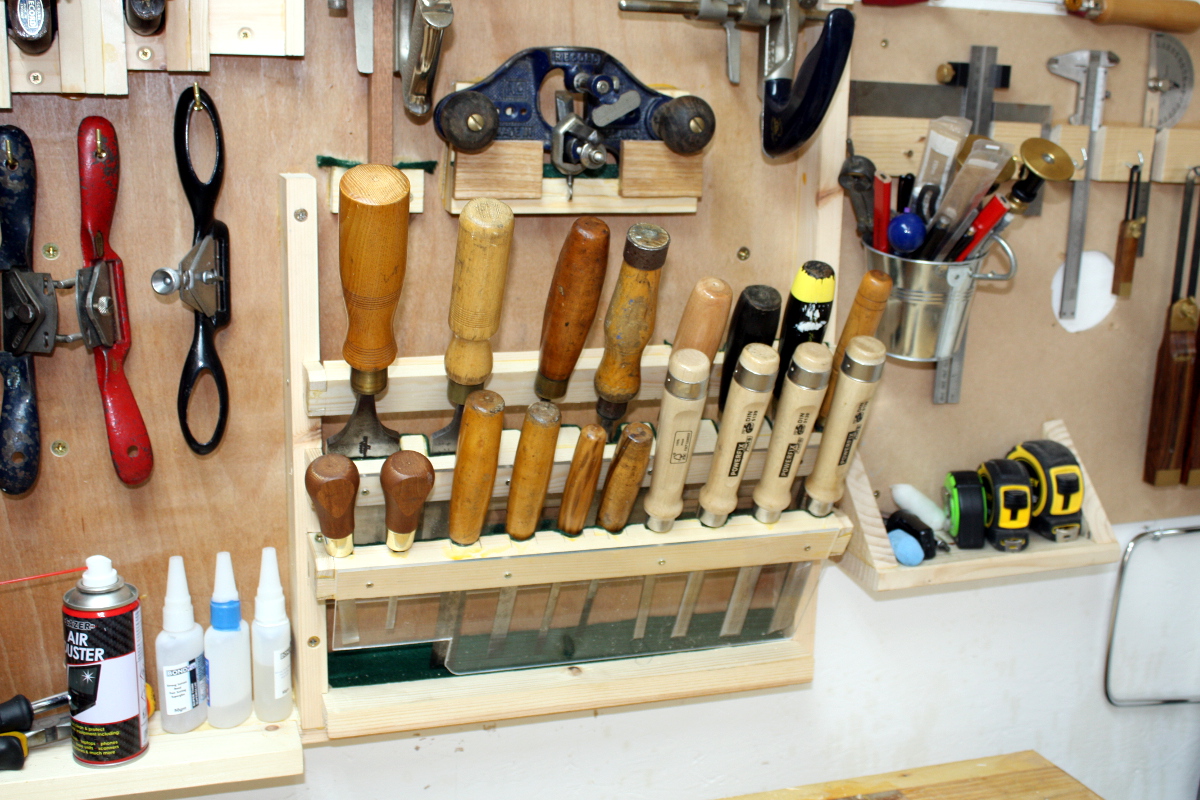
    Finally got my chisel rack done. Slightly different design to the normal one of a series of holes and slots cut to the holes from the edge of the board. This way, I can get a lot more into a smaller space without coming too far out from the wall, and I don't have the short-grain problem you get between the holes in the normal design.

    IMG_1194a.jpg


  • Registered Users, Registered Users 2 Posts: 1,265 ✭✭✭..Brian..


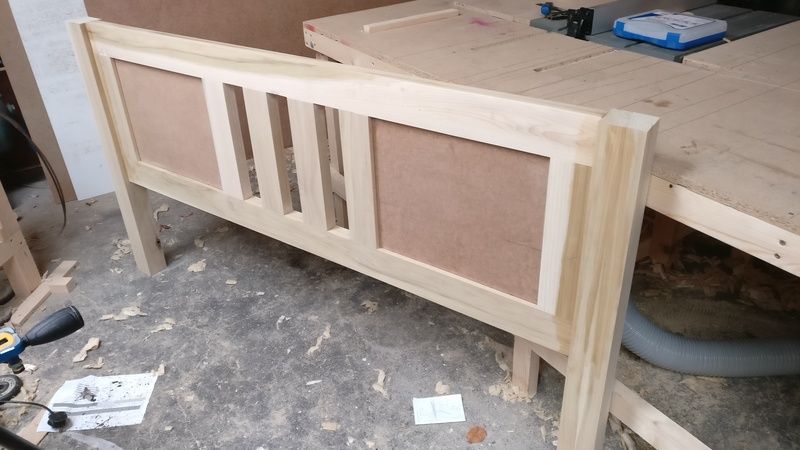
    The headboard of a super king size bed I'm making. Going to trim out the panels with some cove molding and paint it all dark grey. Then I need to find a nice piece of spalted sycamore or beech with a live edge for the top.

    IMG_20170515_112638.jpg


  • Moderators, Category Moderators, Music Moderators Posts: 14,320 CMod ✭✭✭✭The Master


    Got myself a new band saw the other day, so working on more guitar bodies

    417581.jpg


  • Advertisement
  • Registered Users, Registered Users 2 Posts: 1,715 ✭✭✭Gryzor


    Just finished this walnut headboard for a 6 foot bed. Headboard panel is floating in 20mm housings routed in the legs and top rail. Glued up the panel in three sections and then glued the three sections. still struggle a bit trying to keep the panel sections flush when gluing up...worked out well in the end.

    Finished headboard
    420065.jpg

    Miter glue up
    420066.jpg

    Raw Material
    420067.jpg


  • Registered Users, Registered Users 2 Posts: 450 ✭✭Zebbedee


    Gryzor wrote: »
    Just finished this walnut headboard for a 6 foot bed. Headboard panel is floating in 20mm housings routed in the legs and top rail. Glued up the panel in three sections and then glued the three sections. still struggle a bit trying to keep the panel sections flush when gluing up...worked out well in the end.

    Superb. How did you get it looking so smooth?
    How did you get that finish on it?


  • Registered Users, Registered Users 2 Posts: 1,715 ✭✭✭Gryzor


    Zebbedee wrote: »
    Superb. How did you get it looking so smooth?
    How did you get that finish on it?

    Used a planer\thicknesser, and sanded to 120. Finished with 3 coats of a clear satin varnish, sanding lightly with 240 between each coat....


  • Registered Users, Registered Users 2 Posts: 40,038 ✭✭✭✭Sparks


    http://www.stochasticgeometry.ie/2017/06/18/off-the-shelf/

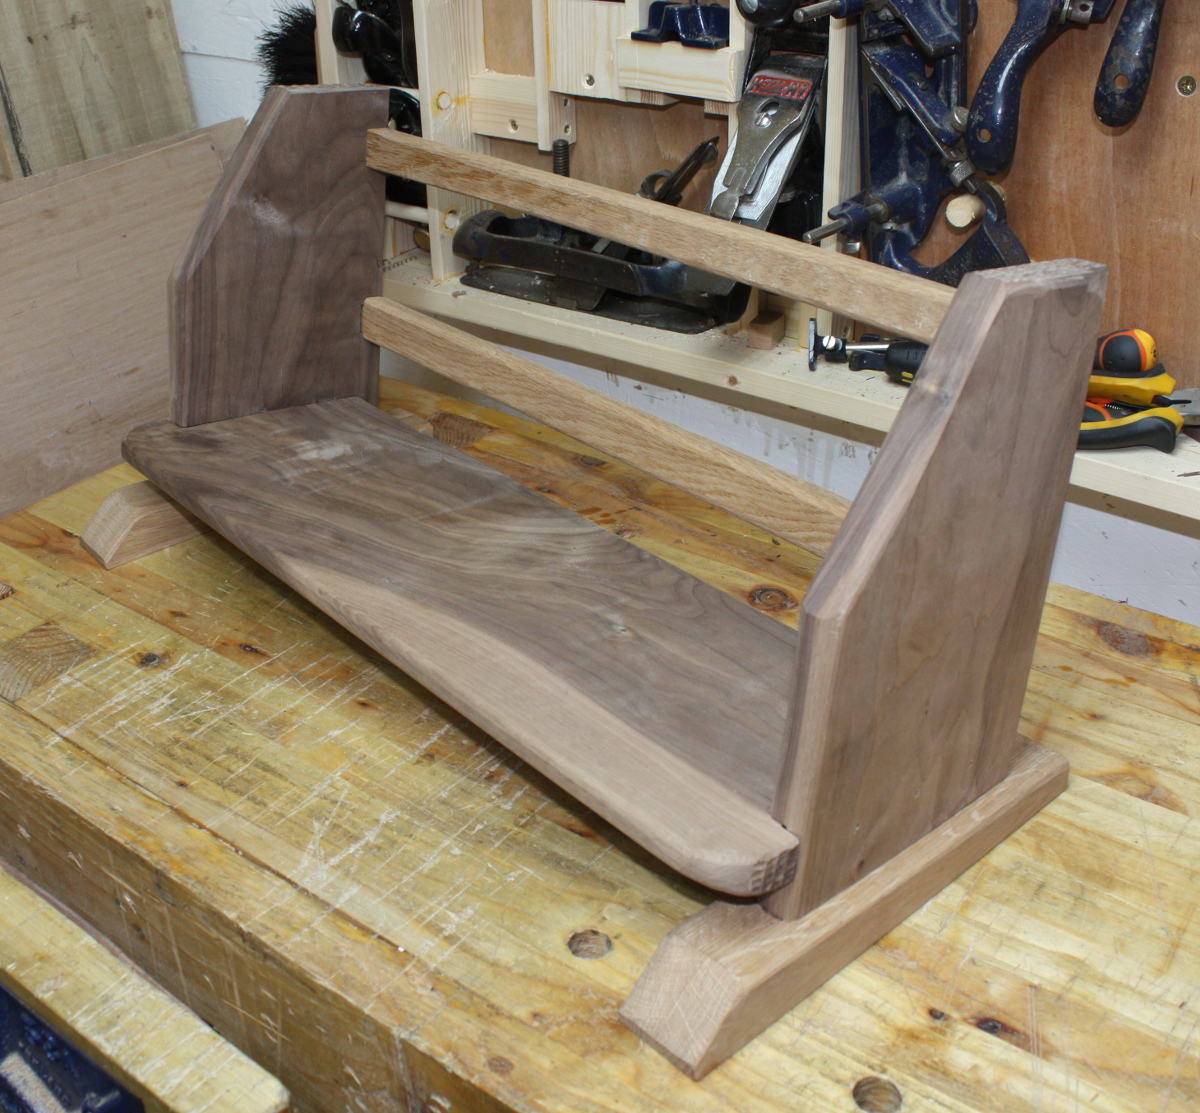
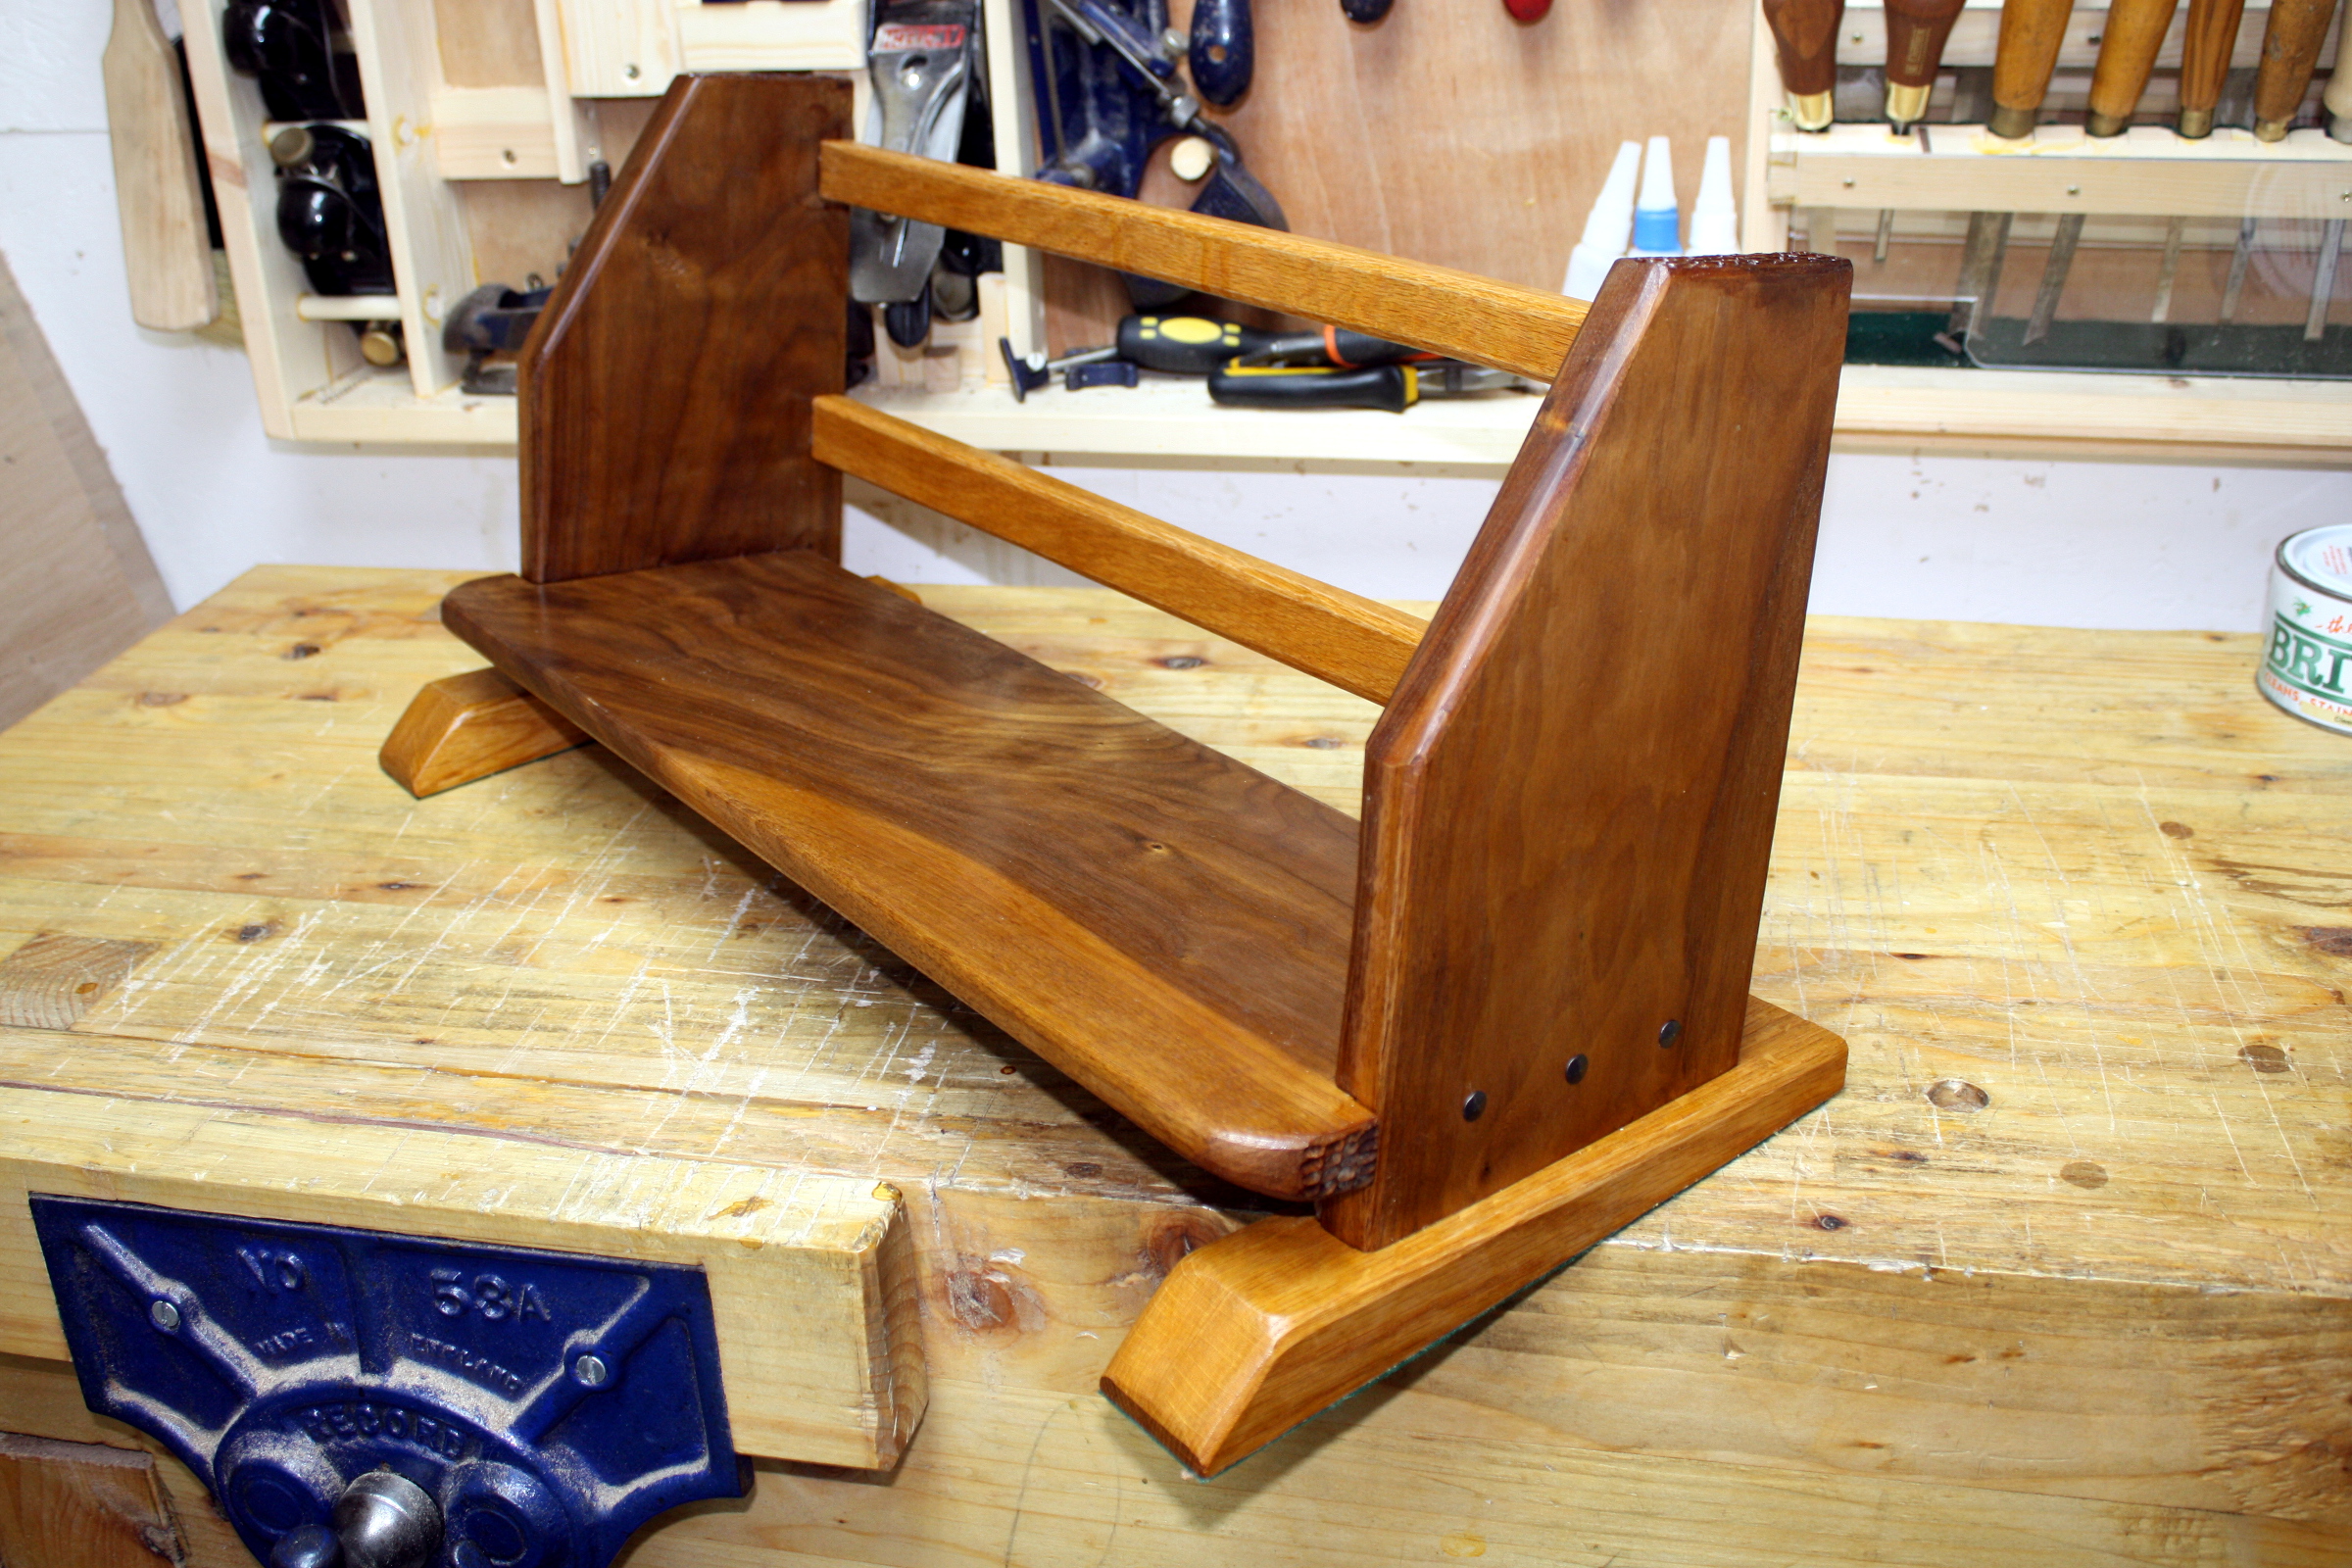
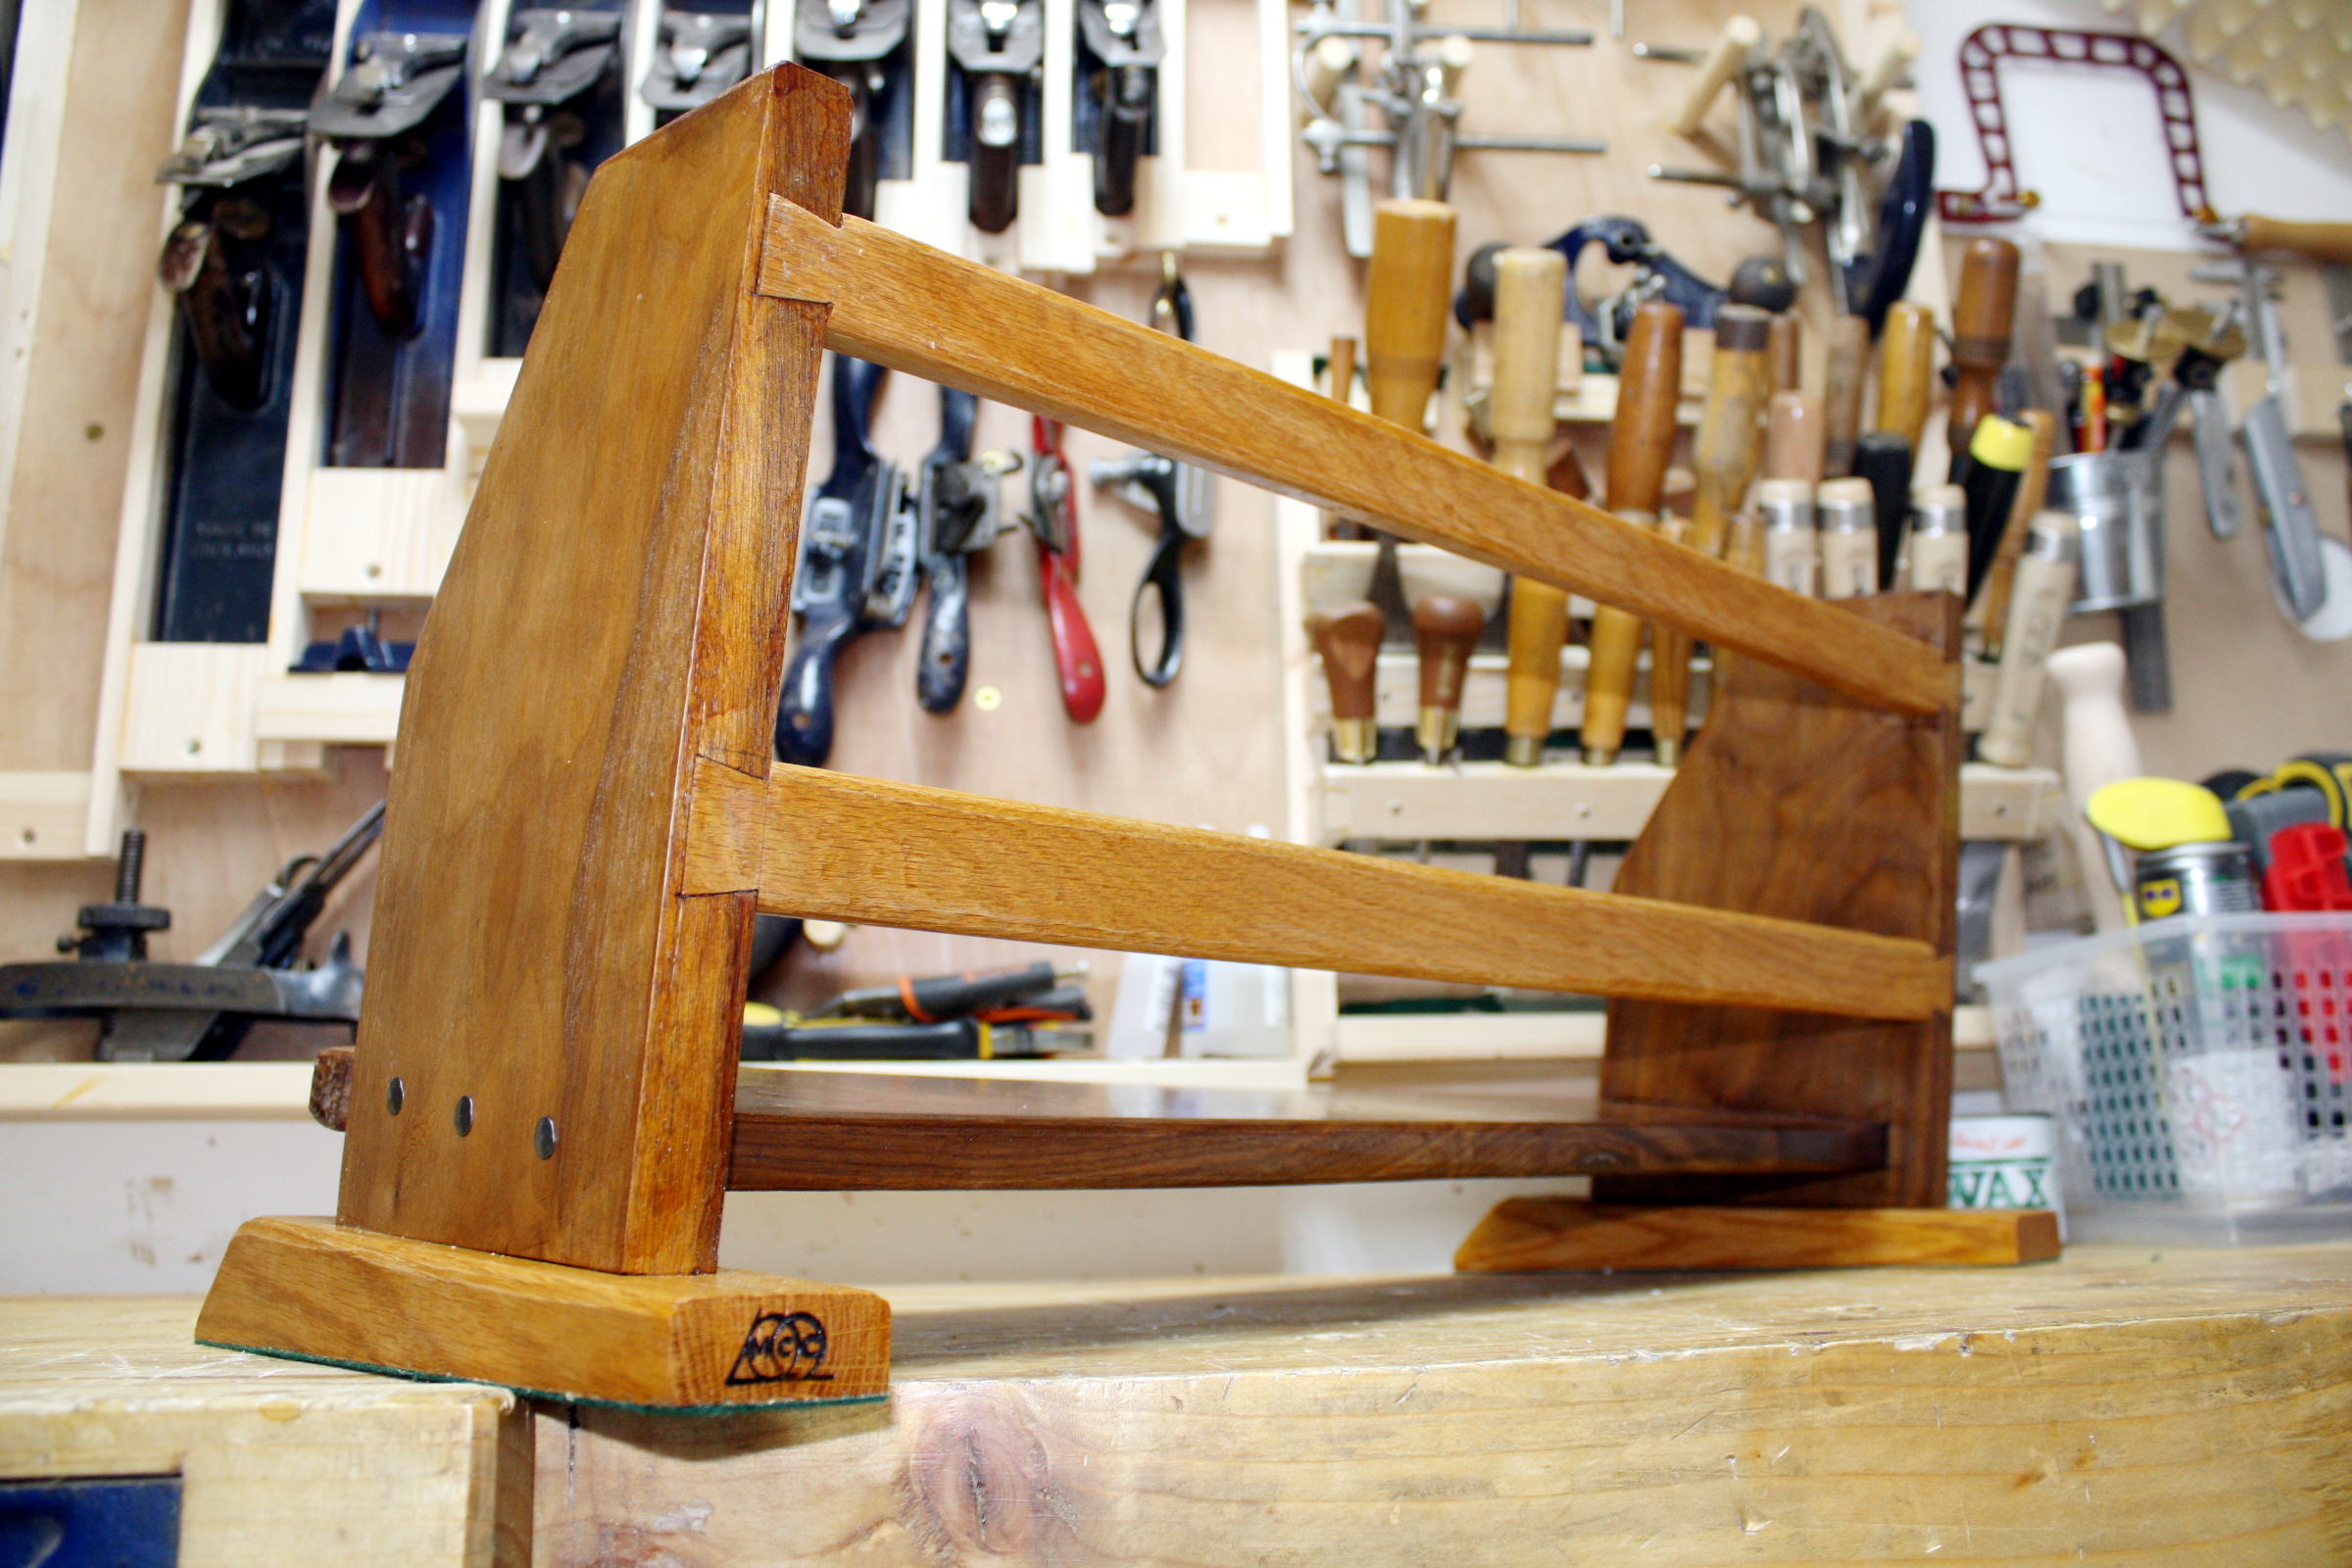
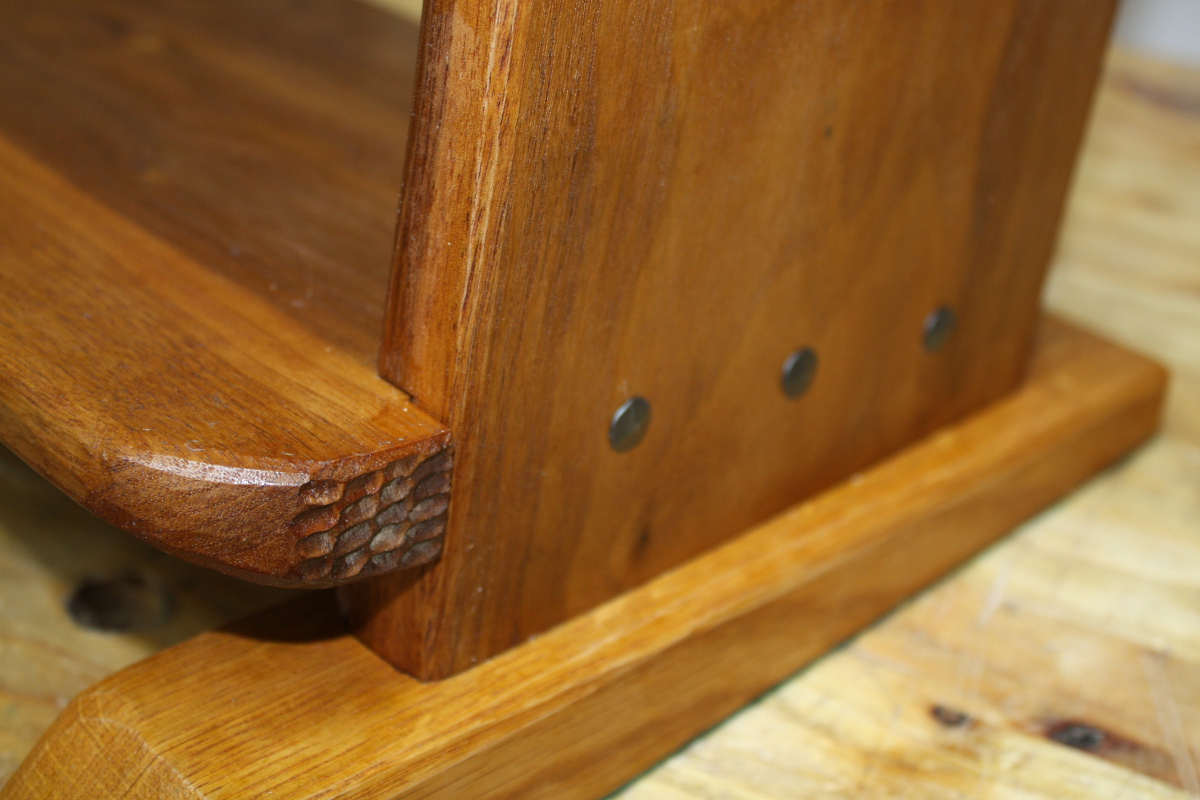
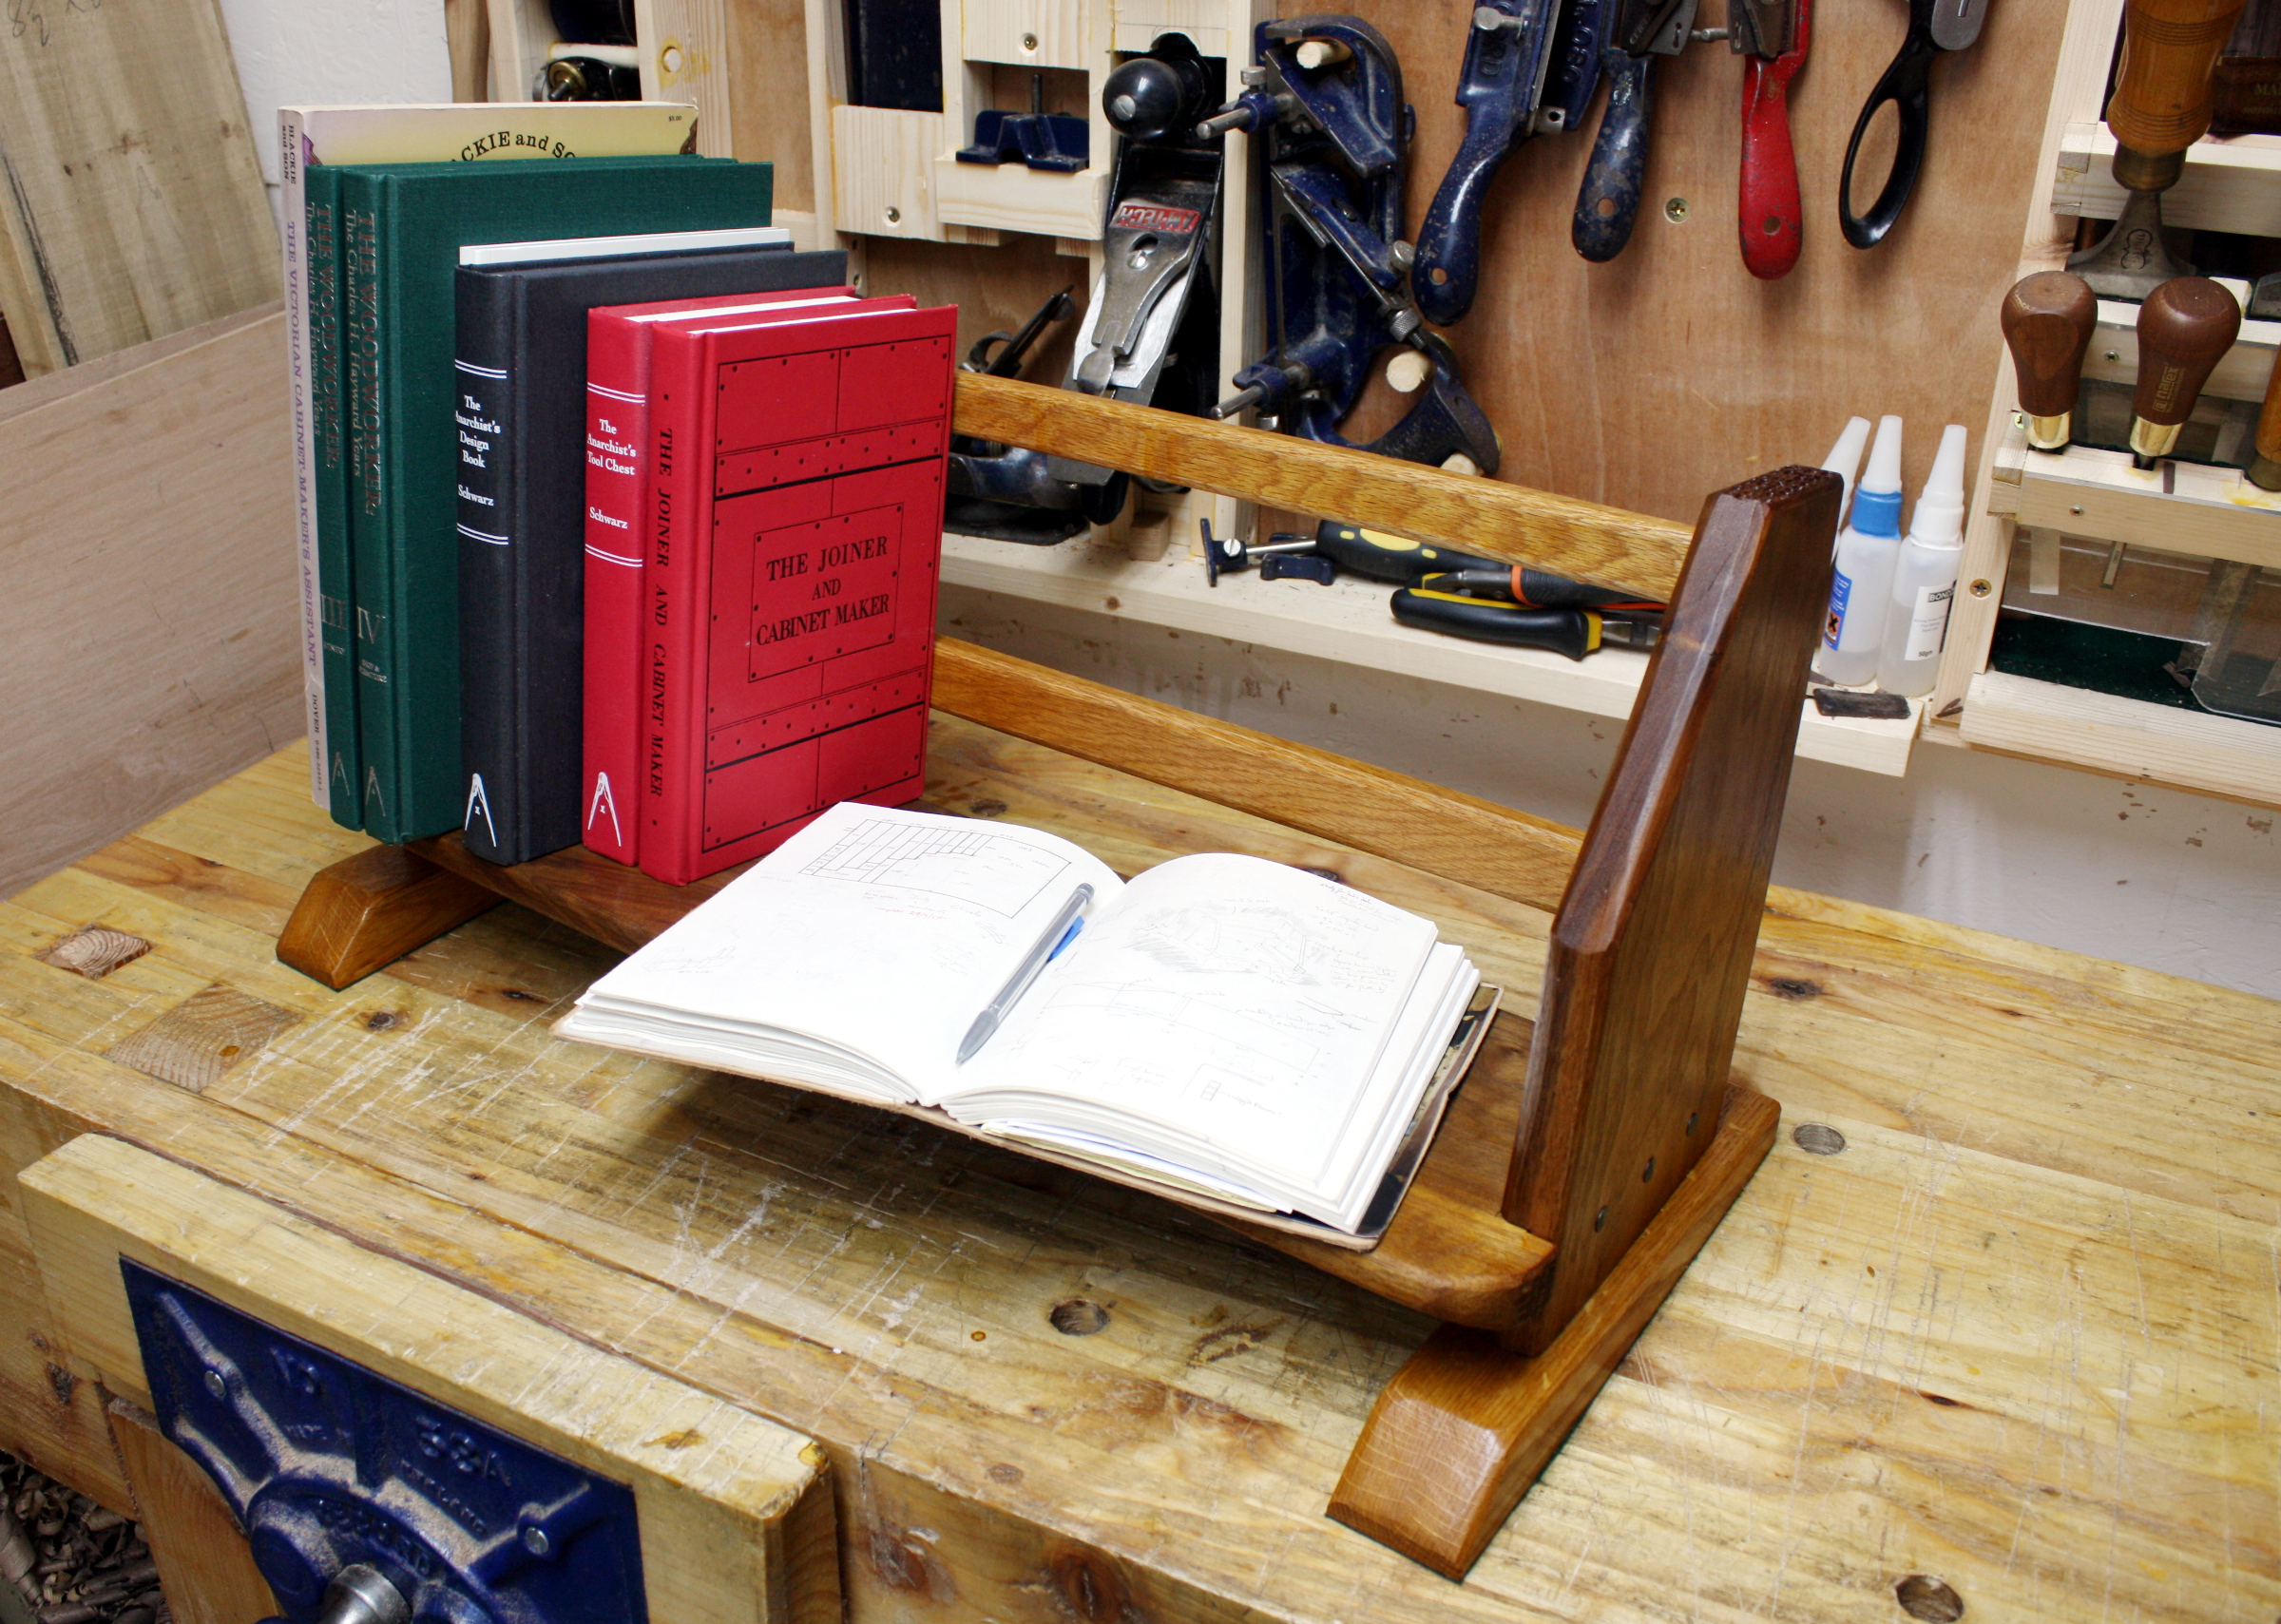
    Father's day gift (dad's been doing a law course so there's a lot of books scattered on his desk).
    Walnut and oak (after the sapele-and-oak idea fell victim to my discovery that sapele is a bastard to plane without a toothed iron). Some detail carving and some cut nails to go with the whole "ancient legal library" sort of vibe. Garnet shellac on the walnut and lemon shellac on the oak to finish.

    IMG_1262a.jpg

    IMG_1297a.jpg

    IMG_1299a.jpg

    IMG_1305a.jpg

    IMG_1284a.jpg


  • Registered Users, Registered Users 2 Posts: 1,715 ✭✭✭Gryzor


    Looks the business, well done.

    Never heard of a toothed iron before. Have the same woes with sapele. Where did you pick your up from?


  • Advertisement
  • Registered Users, Registered Users 2 Posts: 40,038 ✭✭✭✭Sparks


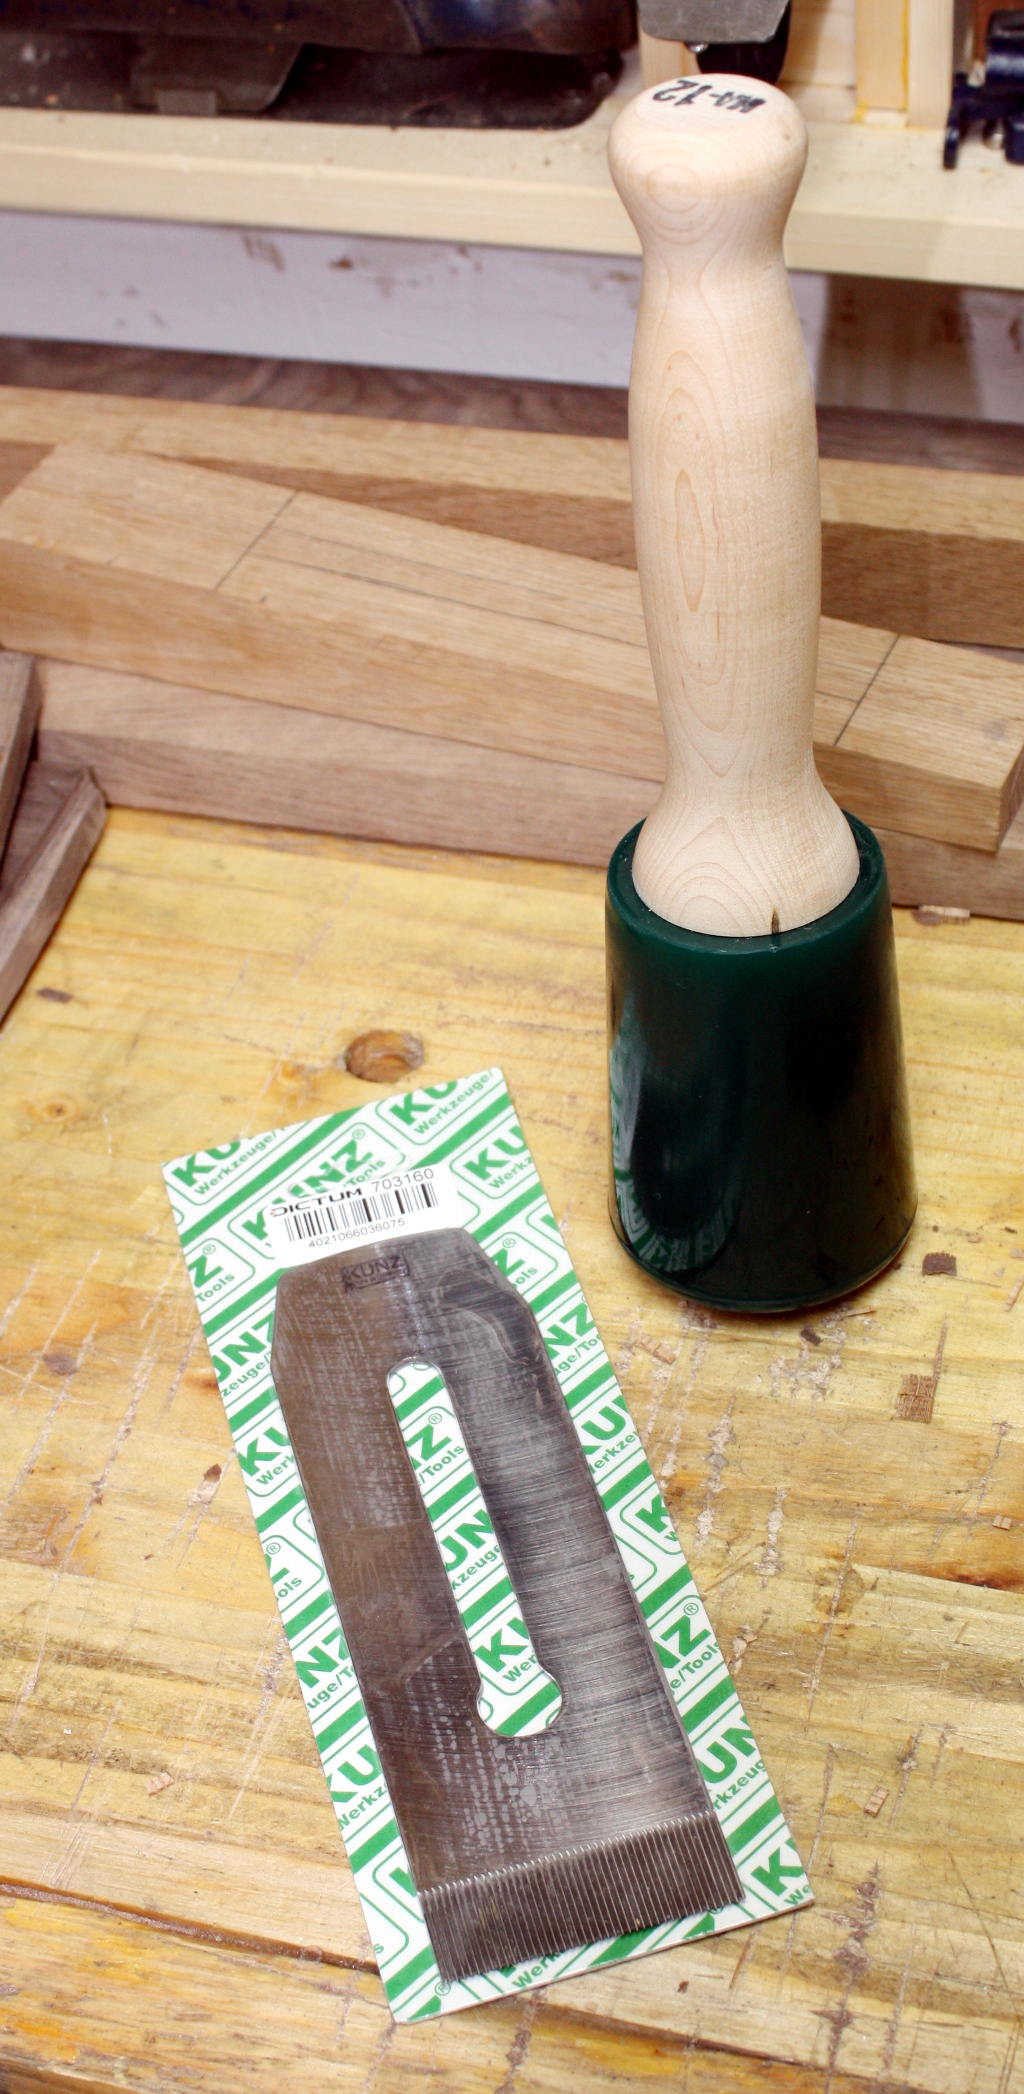
    From Dictum : https://www.dictum.com/en/tools/woodworking-metalworking/planes/plane-blades/703160/toothed-blade-for-kunz-fore-plane-no-6

    IMG_1238a.jpg

    It's a drop-in replacement for any #7, #6, #5 1/2 or #4 1/2 and they also do blades for the #5/#4 and various block planes.


  • Registered Users, Registered Users 2 Posts: 809 ✭✭✭raspberrypi67


    Very nice, love walnut myself, easy to work with unlike Oak!!
    Gryzor wrote: »
    Just finished this walnut headboard for a 6 foot bed. Headboard panel is floating in 20mm housings routed in the legs and top rail. Glued up the panel in three sections and then glued the three sections. still struggle a bit trying to keep the panel sections flush when gluing up...worked out well in the end.

    Finished headboard
    420065.jpg

    Miter glue up
    420066.jpg

    Raw Material
    420067.jpg


  • Registered Users, Registered Users 2 Posts: 450 ✭✭Zebbedee


    Sparks wrote: »

    It's a drop-in replacement for any #7, #6, #5 1/2 or #4 1/2 and they also do blades for the #5/#4 and various block planes.

    What's that green club like tool with the wooden No.12 handle beside the blade?


  • Registered Users, Registered Users 2 Posts: 40,038 ✭✭✭✭Sparks


    Zebbedee wrote: »
    What's that green club like tool with the wooden No.12 handle beside the blade?

    It's a carver's mallet. I have a heavier one with a lignum vitae head, but it's a bit heavy for lighter work, so I got this one. The green is polyurethane, so it's pretty robust.


  • Closed Accounts Posts: 27,857 ✭✭✭✭Dave!


    Finished building this bench over the weekend - oiling it up currently!

    420956.JPG

    420957.JPG


  • Registered Users, Registered Users 2 Posts: 1,715 ✭✭✭Gryzor


    ...well, first successful one! Tight curves on the bandsaw take some practice..
    Anyway, well happy with this one...walnut and oak, and flocked inside.

    421799.jpg

    421800.jpg


  • Registered Users, Registered Users 2 Posts: 1,715 ✭✭✭Gryzor


    Making two of these nightstands out of walnut to match the headboard I posted earlier...well happy with the first one.

    422922.jpg

    422923.jpg


  • Registered Users, Registered Users 2 Posts: 456 ✭✭peter bermingham


    Nice job that turned out really good


  • Registered Users, Registered Users 2 Posts: 40,038 ✭✭✭✭Sparks


    Nice clean lines there Gryzor.


  • Moderators, Home & Garden Moderators Posts: 5,124 Mod ✭✭✭✭kadman


    Revved up the chainsaw for a bit.......and made a start on this..

    422930.jpg

    422931.jpg


  • Advertisement
  • Registered Users, Registered Users 2 Posts: 1,371 ✭✭✭MickeyShtyles


    Just finished this. Started the 28th of June. A nice learning curve to it. Very happy with it.


  • Registered Users, Registered Users 2 Posts: 431 ✭✭delaney001


    Just finished this. Started the 28th of June. A nice learning curve to it. Very happy with it.

    Very nice. How did you flatten the top?


  • Registered Users, Registered Users 2 Posts: 1,371 ✭✭✭MickeyShtyles


    delaney001 wrote: »
    Very nice. How did you flatten the top?

    Router with a flattening/planing jig.


  • Registered Users, Registered Users 2 Posts: 456 ✭✭peter bermingham


    Router with a flattening/planing jig.
    That's a handy way off doing it, i done the same with a work bench i made saves a hell of a lot of planing by hand. Oh nice little table looks good


  • Registered Users, Registered Users 2 Posts: 7,026 ✭✭✭Wossack


    I shudder at the thought of trying to hand plane all that end grain - def the way to do it


  • Registered Users, Registered Users 2 Posts: 1,265 ✭✭✭..Brian..


    Spent some time knocking up a jig to sharpen turning chisels so I can finally mess around on the lathe. Jig turned out well, just need to cut a channel and get a few bolts and wing nuts to replace the clamps, but it works well. Turned a little person and tried some spindle work. All that tear out on the spindle, are my chisels not sharp enough or is pine just a bitch to turn?

    IMG_20170731_224621.jpg

    IMG_20170801_201726.jpg

    IMG_20170801_210824.jpg


  • Moderators, Category Moderators, Arts Moderators, Sports Moderators Posts: 50,167 CMod ✭✭✭✭magicbastarder


    the growth rings on that pine at the end are very far apart - it's probably ludicrously fast grown and not very dense at all.


  • Registered Users, Registered Users 2 Posts: 1,265 ✭✭✭..Brian..


    It's just a cheap bit of pine from the builders merchants. Think it's was originally a 3 x 7 I got off a site. Is that why it's tearing? I was hoping to practice on pine before butchering any nicer wood!


  • Moderators, Category Moderators, Arts Moderators, Sports Moderators Posts: 50,167 CMod ✭✭✭✭magicbastarder


    i had the same experience when i took up turning - i bought wood like that and it was so soft i could tear it with a fingernail.
    you can see the photo above that, the growth rings are probably a quarter as thick.


  • Advertisement
  • Moderators, Home & Garden Moderators Posts: 5,124 Mod ✭✭✭✭kadman


    Are you using the right chisels.

    Most of the turning there would get a good result from a skew.

    But the most difficult chisel to use in such a case. A wide skew of course.

    But as has been pointed out, timber choice is not great, last piece looks like

    white deal, which is a bitch anyway to get a good finish on.

    Try some fresh cut beech, ash, sycamore small logs if you can get some, would make things easy to

    sharpen your skills on, excuse the pun.

    tim


  • Moderators, Category Moderators, Music Moderators Posts: 14,320 CMod ✭✭✭✭The Master


    Laser engraved some wooden plectrums I made for a friend earlier today

    424093.jpg


  • Registered Users, Registered Users 2 Posts: 1,265 ✭✭✭..Brian..


    kadman wrote: »
    Are you using the right chisels.

    Most of the turning there would get a good result from a skew.

    But the most difficult chisel to use in such a case. A wide skew of course.

    But as has been pointed out, timber choice is not great, last piece looks like

    white deal, which is a bitch anyway to get a good finish on.

    Try some fresh cut beech, ash, sycamore small logs if you can get some, would make things easy to

    sharpen your skills on, excuse the pun.

    tim

    Yea I was using a skew but probably too small, it's only 5/8. Must pick up another one. Yea the timber is just white deal off cuts I have lying around the shed, didn't want to waste any good hardwood until I was somewhat more proficient at it!


  • Moderators, Home & Garden Moderators Posts: 5,124 Mod ✭✭✭✭kadman


    Fresh cut holly is an excellent timber for the novice turner learning his craft.

    It turns like butter, and is very forgiving.

    White deal wont do your confidence any good, because its difficult to finish.

    Skew of 1 1/4" or bigger would be an easier choice, than trying to wrestle

    with a narrow skew. And practice, practice, practice.


  • Registered Users Posts: 5 mrmurphster


    Just finished my first woodwork project. 2 planters made from old shelving units that were salvaged.

    Tools used:
    Skill Saw and a drill

    Finished with some wood preservative.

    Happy with them but with some practice I can definitely do better as I had no idea what kerf was until after I'd cut a few boards slightly longer than others


  • Registered Users, Registered Users 2 Posts: 809 ✭✭✭raspberrypi67


    Mind me asking how you engrave them? I'm in the middle of making my own cnc unit with laser to engrave my pens I make ...
    The Master wrote: »
    Laser engraved some wooden plectrums I made for a friend earlier today

    424093.jpg


  • Advertisement
  • Registered Users, Registered Users 2 Posts: 431 ✭✭delaney001


    Anyone ever build a kiln? After getting 15 sheets of top quality insulation from work. 10'x4'. Just wondering would a couple of lamps, small dehumidifier and a fan be enough to have it working?


  • Registered Users, Registered Users 2 Posts: 1,371 ✭✭✭MickeyShtyles


    delaney001 wrote: »
    Anyone ever build a kiln? After getting 15 sheets of top quality insulation from work. 10'x4'. Just wondering would a couple of lamps, small dehumidifier and a fan be enough to have it working?

    I've seen videos on youtube of solar kilns. I'd be fairly tempted to try out a small one. Woodworkers Guild of America did a section on it.

    Forgot the link!
    https://youtu.be/cTsDhCrE56U


  • Registered Users, Registered Users 2 Posts: 1,265 ✭✭✭..Brian..


    Finally made some more progress one the bed! Only thing left now is to find a nice piece of spalted beech or sycamore or something with a live edge to cap the head and foot boards.

    IMG_20170724_174412.jpg

    IMG_20170825_202357.jpg


  • Moderators, Category Moderators, Music Moderators Posts: 14,320 CMod ✭✭✭✭The Master


    Mind me asking how you engrave them? I'm in the middle of making my own cnc unit with laser to engrave my pens I make ...

    Just using a cheap ~€80 Chinese laser engraver bought from AliExpress.
    Only has a work area of about 2" x 2" so couldn't really recommend it


  • Registered Users, Registered Users 2 Posts: 212 ✭✭Magic ]=)


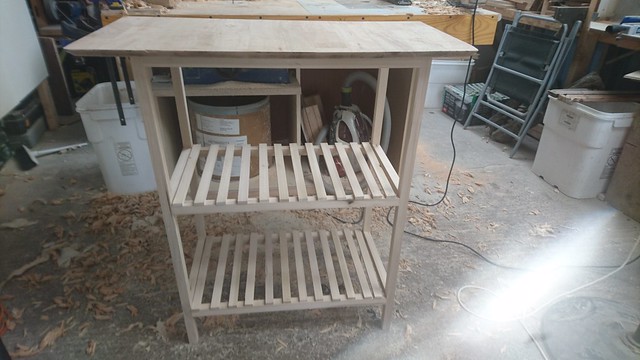
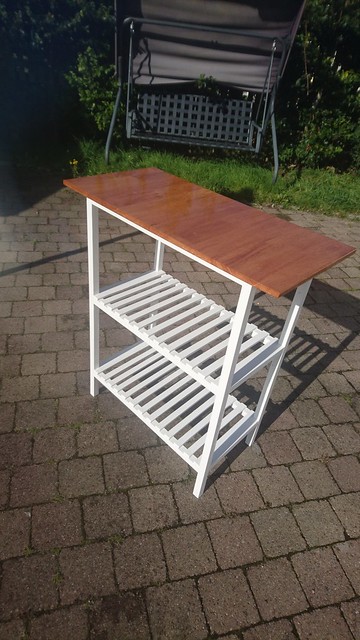
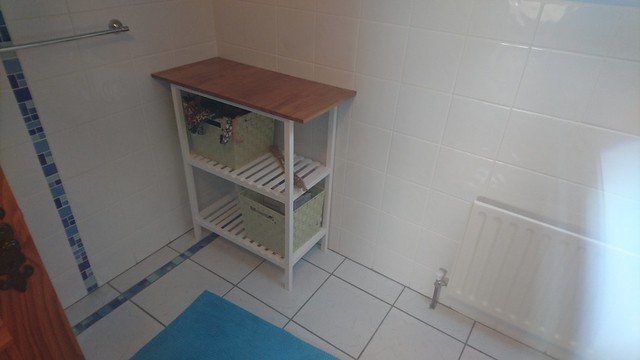
    Quick project from last week. Finished painting and staining this week.
    First time painting with paint on wood using brushes. Will have to learn more about this technique. I need to invest in better brushes.
    Legs and shelves made from Poplar and top not sure, could be oak or ash. Have an old dining table in not usable condition so just cut off piece and made a top from it.

    36417264103_2d5ab0cd68_z.jpg

    36417265523_89da34f55a_z.jpg

    37232284435_f0d3bc4ab9_z.jpg


  • Advertisement
  • Registered Users, Registered Users 2 Posts: 1,715 ✭✭✭Gryzor


    Made this as part of an anniversary gift for my parents, turned out great. Made it from jaybates plans. Walnut and sepele.

    427928.jpg

    427929.jpg

    427930.jpg


  • Registered Users, Registered Users 2 Posts: 1,265 ✭✭✭..Brian..


    Been making a wardrobe and bedside table for our guest room. Just doors and drawers to make tomorrow, then fill sand prime and paint. The mother in law is coming to stay next Wednesday for a while so under pressure to get it finished!

    IMG_20171021_165255.jpg

    IMG_20171021_213425.jpg


  • Registered Users Posts: 208 ✭✭Poloman


    Thanks Gryzor you have shown me an easy way to use clamps on corners with extra 2x2's and stuff good man! Some really nice stuff in there well done all.


  • Registered Users, Registered Users 2 Posts: 1,595 ✭✭✭MathsManiac


    Coffee table - ash and walnut.
    Had this waney-edged leftover from another project for ages. Finally got around to using it.

    20170914_193709_resized.jpg

    20170914_193926_resized.jpg

    20170915_123044_resized.jpg


  • Moderators, Category Moderators, Arts Moderators, Sports Moderators Posts: 50,167 CMod ✭✭✭✭magicbastarder


    nice - any shots of how the underneath is put together?


  • Registered Users, Registered Users 2 Posts: 1,595 ✭✭✭MathsManiac


    nice - any shots of how the underneath is put together?

    The top is so thick that it made it easy - the legs are just housed about 40mm deep in the top and don't need any other support. Likewise, the walnut strip is housed about 35mm deep in each of the two side pieces.


  • Registered Users, Registered Users 2 Posts: 1,139 ✭✭✭rob w


    Coffee table - ash and walnut.
    Had this waney-edged leftover from another project for ages. Finally got around to using it.

    20170914_193709_resized.jpg

    20170914_193926_resized.jpg

    20170915_123044_resized.jpg

    Nice job, I have been thinking about doing a project like this for a while.
    Don't want to drag the thread off topic but do you know where to go about sourcing pieces of timber like these? I've started looking into it but finding it difficult to come across!

    Thanks!


  • Registered Users, Registered Users 2 Posts: 1,595 ✭✭✭MathsManiac


    rob w wrote: »
    Nice job, I have been thinking about doing a project like this for a while.
    Don't want to drag the thread off topic but do you know where to go about sourcing pieces of timber like these? I've started looking into it but finding it difficult to come across!

    Thanks!

    I got two large through-and-through slabs (one ash and one sycamore) a few years ago from Lisnavagh timber project to make worktops for bathrooms, like this:
    20171031_132022-1_resized.jpg

    The off-cut from the back of the worktop, cut in half, made the two sides of the table, and there was enough in the off-cut from the end to make the legs.

    The original slabs cost me about €300 each, kiln-dried, planed and sanded.


  • Registered Users, Registered Users 2 Posts: 1,139 ✭✭✭rob w


    I got two large through-and-through slabs (one ash and one sycamore) a few years ago from Lisnavagh timber project to make worktops for bathrooms, like this:
    20171031_132022-1_resized.jpg

    The off-cut from the back of the worktop, cut in half, made the two sides of the table, and there was enough in the off-cut from the end to make the legs.

    The original slabs cost me about €300 each, kiln-dried, planed and sanded.

    Great stuff, just had a look at their website there.
    Very interesting, will have to pay them a visit someday when I am in that neck of the woods to see their stock!

    Thanks!


  • Registered Users, Registered Users 2 Posts: 809 ✭✭✭raspberrypi67


    How do I post pictures etc here as a new post, god i most be dense but do I just do a reply to the last post


  • Advertisement
Advertisement