Advertisement
If you have a new account but are having problems posting or verifying your account, please email us on hello@boards.ie for help. Thanks :)
Hello all! Please ensure that you are posting a new thread or question in the appropriate forum. The Feedback forum is overwhelmed with questions that are having to be moved elsewhere. If you need help to verify your account contact hello@boards.ie
Please note that it is not permitted to have referral links posted in your signature. Keep these links contained in the appropriate forum. Thank you.

https://www.boards.ie/discussion/2055940817/signature-rules

Today I did some detailing...

14445474950203

Comments

  • Registered Users, Registered Users 2 Posts: 4,377 ✭✭✭Curran


    Colash wrote: »
    Got a decent enough finish today on the passat with some Auto Glym super resin polish but I'm still not happy as up close some imperfections are still visible . Any suggestions ???

    First suggestion is that you should seal it with Autoglym Extra Gloss Protection or else it will wash out.

    Imperfections will always be there...the only way to remove them is machine polishing. The AG SRP is hiding defects but more will return as it wears away.


  • Registered Users, Registered Users 2 Posts: 1,377 ✭✭✭Colash


    Curran wrote: »
    First suggestion is that you should seal it with Autoglym Extra Gloss Protection or else it will wash out.

    Imperfections will always be there...the only way to remove them is machine polishing. The AG SRP is hiding defects but more will return as it wears away.
    The AG SRP washes out very easily . I must pick up some extra gloss protection


  • Registered Users, Registered Users 2 Posts: 6,845 ✭✭✭Noccy_Mondy


    Haven't been on this thread in a few days, McLove, the chrome on the Mondy is only plastic dipped. Reading on the Ford forums, they suggest WD40 of all things, to spruce up the chrome!


  • Registered Users, Registered Users 2 Posts: 2,089 ✭✭✭JAMES VTI S


    WD40 how would that remove the etching, id say it would only make it shiny for a very short while.


  • Registered Users, Registered Users 2 Posts: 19,920 ✭✭✭✭MetzgerMeister


    WD40 how would that remove the etching, id say it would only make it shiny for a very short while.

    When these type of trims are dry, they show the oxidation at its worst. I'd say the WD40 keeps it lubricated for a while and this removes the oxidation look but after a while it will just come back. Quite like putting SRP on a car covered in swirls, it's a temporary fix to a permanent problem whereas polishing with a dremel is in my experience, the actual fix.


  • Advertisement
  • Registered Users, Registered Users 2 Posts: 1,055 ✭✭✭IK09


    Just finished my efforts now. Lost the light. Went nearly the whole 9 yards on my car. After day 1 the missus calls me to tell me she has put 3 scratches in her new focus. Nightmare. Had to put my car on the sideline while I tried to correct the scratches on hers. Queue a first attempt at wet sanding. Il post pics tomorrow. Turned out well. Happy enough with it. even though as i applied the touch up paint it started to rain, had to sit out in the pissing rain with an umbrella to protect the freshly applied paint.


  • Registered Users, Registered Users 2 Posts: 326 ✭✭mfergus


    Colash wrote: »
    Got a decent enough finish today on the passat with some Auto Glym super resin polish but I'm still not happy as up close some imperfections are still visible . Any suggestions ???

    That's a fine shine you got there.

    No suggestions. From that angle it looks impressive


  • Posts: 14,266 ✭✭✭✭ [Deleted User]


    Gave the tyres a good hiding today with Chemical Guy's APC (Apple something-or-other i think it's called) and a rough upholstery brush. Scrubbed them. The amount of dirt and muck that came off was a real eye-opener. Applied some glitz afterwards and (finally!) seem to be getting shiny tyres. At long last.


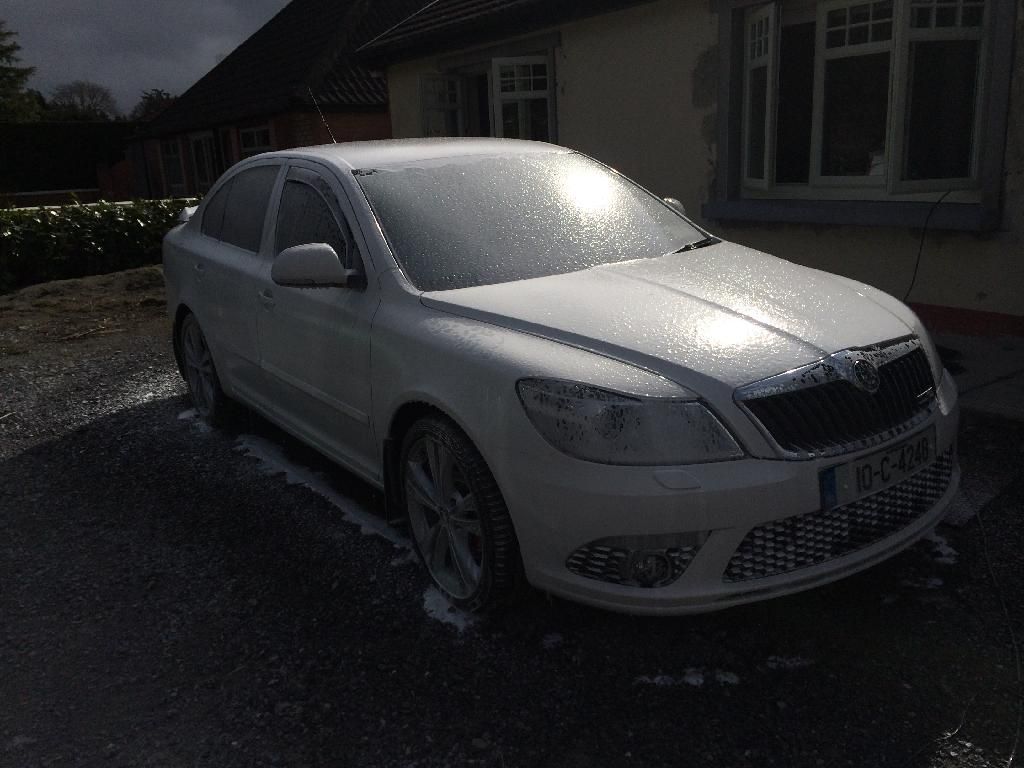
    I also 2BM'ed the car after a decent snow foaming. I went a bit overboard with the snow foam and put foam in the lance to near the halfway mark on the bottle. Aiming for the 'shaving foam' thickness that has evaded me for so long. I got close to it but not quite as much as I would have liked. I now no longer believe any video that's getting 'shaving foam' thickness without using a near-full lance bottle just full of snow foam solution (which i actually want to try out sometime, but I'm worried I might block up the lance by not diluting the foam at all?)


    EE6536DC87364D279E3AB2307839F147-0000333410-0003520633-01024L-E3750E8590A54DBE9209156EBD5D3348.jpg

    4C50E8C392574751A5694C517EA10BAC-0000333410-0003520634-00800L-B081AFF322F243F3906C0729CF3F96FC.jpg


  • Registered Users, Registered Users 2 Posts: 752 ✭✭✭TheBigGreen


    Didn't get the mixture right! Too much uisce:)

    75DABA77-0808-42D3-B800-9B9107E9EEF7_zps4pbb7a05.jpg


  • Advertisement
  • Registered Users, Registered Users 2 Posts: 1,604 ✭✭✭thecomedian


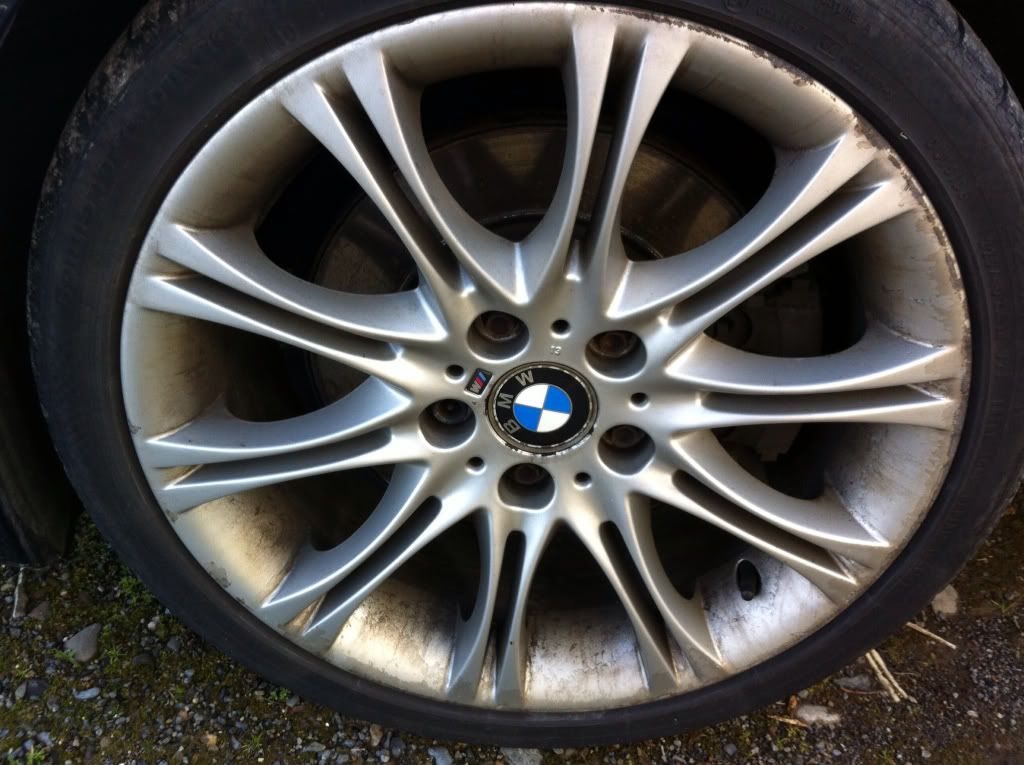
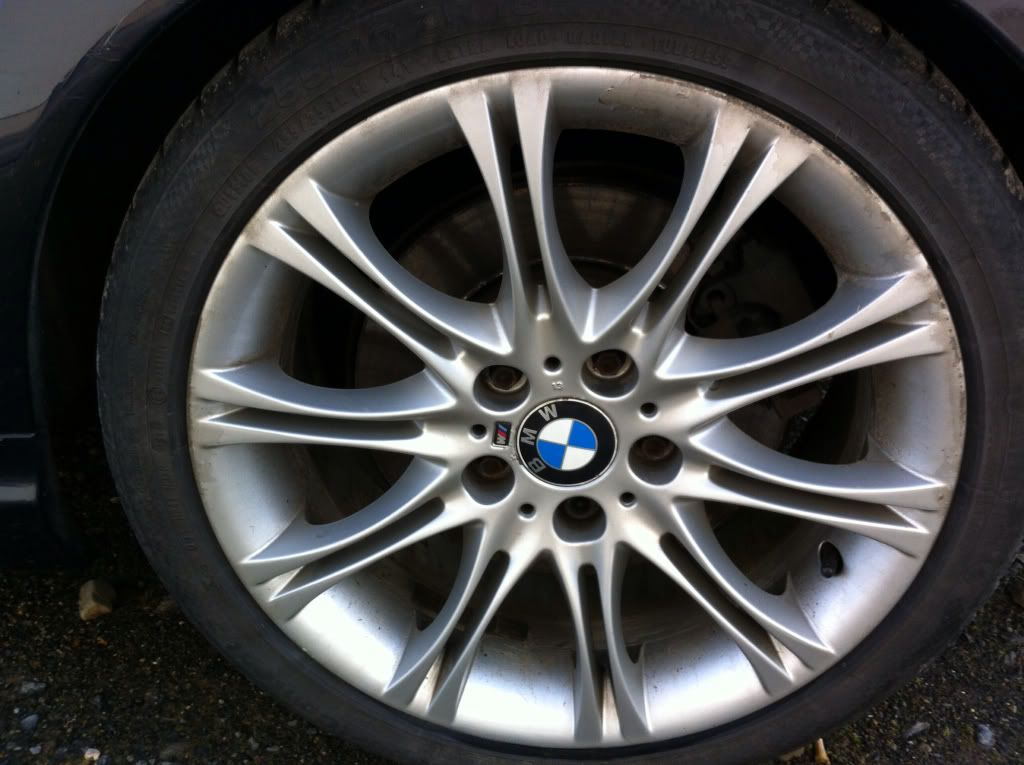
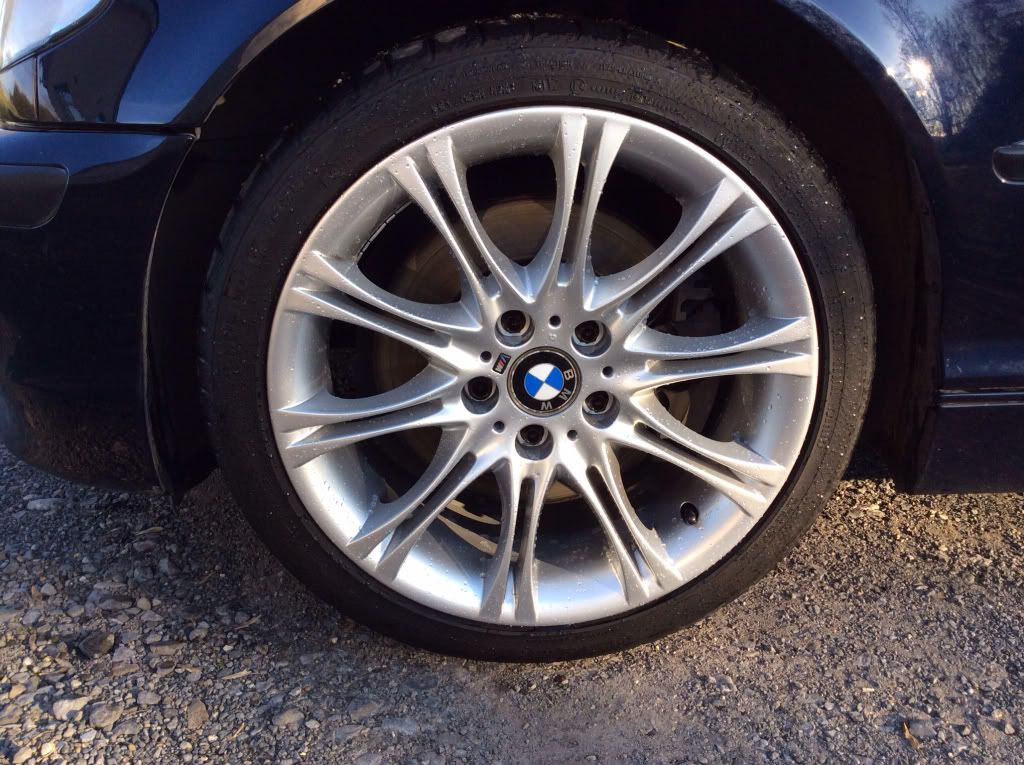
    Not done by me but by Wheel Wizards. I just sealed them with some GTechniq C5.

    Before
    967ffadd174c44da5b2d3481283c5593_zpsbaf9d939.jpg
    95a2ffd95fe5a0523b52e378f548230b_zps2bb60bc7.jpg

    And After.
    9c48a2b6ec784a74543981b4c4ea9aac_zpsacf7001d.jpg
    5d2eae2784554ebcf4d9636d682f16ce_zps8798c012.jpg
    7155df2573691699e9225207dab9b013_zps44c8d78c.jpg


  • Registered Users, Registered Users 2 Posts: 1,055 ✭✭✭IK09


    By the time I had finished up on my car, i was really just worried about getting my fiancees car sorted so her is the single pic i took of my car and the process of cleaning.

    Sprayed with TFR.
    Powerhosed.
    Snowfoamed. (Demonfoam...useless)
    Washed with mitt.
    Powerhosed.
    Dried.
    De Tarred. AG Tar Remover
    Powerhosed.
    Drip Dried.
    Clayed. Turtle Wax Clay
    Snowfoamed.
    Powerhosed.
    Dried.
    Masked.
    Polished. AG SRP
    2 Coats of AG EGP

    The Alloys were done with Wonder wheels and tyres dressed with Meguires Endurance. Getting a new front bumper next month so didnt bother touching it up...which was my original plan.


  • Registered Users, Registered Users 2 Posts: 19,920 ✭✭✭✭MetzgerMeister


    They look superb!! Can't wait to get my own done now :D


  • Registered Users, Registered Users 2 Posts: 1,055 ✭✭✭IK09


    3 Scratches in 1 weekend. She will never live this down.

    Il try do this before after for each one. From front to back. And a little bonus pic of me protecting the paint from the rain with an umbrella.


  • Registered Users, Registered Users 2 Posts: 1,055 ✭✭✭IK09


    Im happy with how they turned out. Il have to go at the front one again next week. Could be a lot better but didnt have the time.


  • Registered Users, Registered Users 2 Posts: 19,920 ✭✭✭✭MetzgerMeister


    Sorry, I was talking to thecomedian about his alloy refurb :o


  • Registered Users, Registered Users 2 Posts: 1,667 ✭✭✭wersal gummage


    Curran wrote: »
    That looks like the Lake Country Pads

    lakecoutnryccs600.jpg

    Obviously with the colour it is now in the picture, its hard to say if you've got a Jeweling Pad or a Light Cutting Pad.

    On another note, I dont know if the prep work you did is bad, and that is dirt transfer to the pad or colour transfer from the paint. Did you try to wash them out?


    That's very helpful, thanks.

    I suspect it was a light cutting pad that I had.

    The prep work I did was good. Good wash (not the foam stuff you guys use, but good wash), de tar etc, clay the car.

    The reason the pad is blue, I'm embarrassed to say, is that I tried to use the polishing machine down low to wax the car. That blue is one of the dodo hard waxes. Obviously a cutting pad wouldn't be ideal for applying a way! You live and learn. I soaked the pads and washed them in the washing machine but the blue never came out.

    Thanks again.


  • Registered Users, Registered Users 2 Posts: 1,935 ✭✭✭randy hickey


    IK09 wrote: »
    3 Scratches in 1 weekend. She will never live this down.

    Il try do this before after for each one. From front to back. And a little bonus pic of me protecting the paint from the rain with an umbrella.

    Good work there IK09!

    What brand was the touch up kit that you used?


  • Registered Users, Registered Users 2 Posts: 1,055 ✭✭✭IK09


    Good work there IK09!

    What brand was the touch up kit that you used?

    I kinda went through the full motions with the back and middle scratches. First I just used some t-cut for Black paint, just to see if it would make a difference. It did. It removed a lot of the white around the scratches. After that I washed the areas and used rubbing alcohol to clean the area.

    Then I used the Halfords paint touch up kit.

    http://www.halfords.ie/webapp/wcs/stores/servlet/product_storeId_11101_catalogId_15551_productId_201037_langId_-1_categoryId_212418

    I used a tooth pick to apply it. After I had applied it it started to rain, so out with the umbrella. Once it stopped, i got the heat gun out to try and force it to dry. That worked really well, just used it at a distance and in maybe 30 second blasts.

    Once the paint had dried, i wet sanded paint with 2500 grit halfords brand sandpaper. I then re-appied a small amount of t-cut, to try get the wetsanding marks out. I used polish after that (AG SRP).


  • Registered Users, Registered Users 2 Posts: 1,604 ✭✭✭thecomedian


    They look superb!! Can't wait to get my own done now :D
    Thanks Dave.
    I dropped them in on the Tuesday and got them back Friday afternoon. I was advised just to wash them with soapy water.
    I really happy with the colour also.


  • Advertisement
  • Posts: 14,266 ✭✭✭✭ [Deleted User]


    Not really detailing as such, but I attempted some bumper scrape-removal today.

    The whole corner of my bumper was pretty badly scratched and scuffed. So I gave it a small bit of a sanding to try and smooth the area out a bit (didn't make much of a difference, as a panel beater already sanded it down for me before, anyway).

    So it's a bit rough looking:

    6BA69A41D900477BBE7281626AF1F889-0000333410-0003522813-01024L-4AB890D02B44452381FF8AFA8F70E85B.jpg


    So I stuck my head out to the local Motor Factors and got them to mix me up an aerosol of paint, and they gave me a lacquer aerosol, too.

    So I taped up the area using last weeks Drogheda Independent and left only that corner of the bumper exposed:


    99B36BC2DDA04EA79D7AA9C8CD9DE2C8-0000333410-0003522812-01024L-3FAAB02EFCCA48EAA90FB9B3E9890CF7.jpg


    I then applied a coat of paint, and waited 10-15 minutes (placed a heater near it, though not sure if it really did anything or not). After 10-15 minutes passed it was dry and I applied another coating of the black stuff.


    87CFBCB3103142318F3A721A1EDB3963-0000333410-0003522811-01024L-FC93801A9E974CCA949F74275F93DA7F.jpg


    At this point I was actually beginning to like the matte look of the paint on the car and was thinking it was actually nice, but ultimately decided that a gloss finish is a million miles nicer.

    After this it came time to apply the lacquer. Unfortunately my camera died off at that point, so I have no photos.. so, I know you're all thinking "sure it's fairly easy, there's no way anyone could ever make a massive jock of such a simple job"...


    So... tune in tomorrow to see how I did just that very thing! :p


  • Closed Accounts Posts: 9,606 ✭✭✭toastedpickles


    Did you clean the surface with surface cleaner? and diiiid you apply adhesion promoter before spraying the bumper? :) otherwise it'l flake terrible in a few months


  • Posts: 14,266 ✭✭✭✭ [Deleted User]


    Did you clean the surface with surface cleaner? and diiiid you apply adhesion promoter before spraying the bumper? :) otherwise it'l flake terrible in a few months


    I did clean the surface. but not with surface cleaner. I washed with washing up liquid (fairy) and clayed.

    And no, didn't apply any adhesion promoter (never heard of it). Hadn't appeared in any tutorials i watched and wasn't mentioned by the lad at motor factors who looked at the bumper for me, so I just fired ahead.


    Sure, as Ivan Drago would say; 'If it flakes, it flakes'. :D


  • Registered Users, Registered Users 2 Posts: 15,690 ✭✭✭✭vectra


    diiiid you apply adhesion promoter before spraying the bumper? :) otherwise it'l flake terrible in a few months

    Shouldn't that only be necessary on a new bumper as it is only paint over paint here.


  • Closed Accounts Posts: 9,606 ✭✭✭toastedpickles


    vectra wrote: »
    Shouldn't that only be necessary on a new bumper as it is only paint over paint here.

    To be honest i'm not too sure, but you could be right


  • Posts: 14,266 ✭✭✭✭ [Deleted User]


    I feel like im in that episode of Father Ted where they destroy the entire car trying to take out a small chip. :o


    But anyway..

    So I applied the lacquer last night (it's not as glossy as I feel it should be though? It says 'extremely glossy' but it's still very much a matte finish in comparison to the rest of the car?

    Anyway, I put too much on and it started running and dripping, so being the clever clogs that I am, I... gave it a wipe with a cloth! :o And I destroyed it.

    I left big horrible swipe marks the whole way through the top of the bumper. And all at the last minute.


    8E1DDB0068A246FB9A3ED0E049847741-0000333410-0003523203-01024L-7516CBB70E844B179FF60367185954D4.jpg


    06E2F7EB185A4FEAA5EA4CFD99BAD7C9-0000333410-0003523204-01024L-99DEBC397D594BF4ABEABB574145A802.jpg


    So I whipped out my 1600 grit sandpaper and my block and I went at it.. and at it.. and at it. And I got nowhere. So I went mooching to see if my brother had any sandpaper left in the remains of what used to be his workshop and I came across a 150 grit sandpaper.

    And boy did I use it! :P I was at it for a lot longer than I thought (I think people overestimate the damage that low-grit sandpapers can actually do). So after a while I began to smoothen out some of the roughness of it all, and then I went over it all again with my 1600 grit paper a few times to soften it up again.


    I applied a coat of black paint (aerosol again) and waited 15 minutes til it was touch-dry. Then I went again with a second coat.


    A29C94A2F5204E6583678B26B4F283B0-0000333410-0003523201-01024L-ED306D93E4604DE89678E60C86790B61.jpg


    I also repeated these same steps with my lacquer until i had three coats on there.

    This time I moved my newspaper back a bit and I tried to make the finish a tad more gradual (as the hard edge took a bit more work to get rid of with sandpaper than I'd thought it would). It's still visible, though, but can't really be felt as much.


    This is my end result for the moment.


    809B0DD47425427E8B3895E786F63D5B-0000333410-0003523200-01024L-59527B69399D4B908CC5CAB7D3497DB0.jpg


    I took the paper off and there's a very slight 'border' where the paper was placed, but it's not really noticeable. However, it's still all pretty 'matte' looking (it has a shine, but not as good as the rest of the car) so I reckon I'll attempt a good machine polishing over it tomorrow to try and finish it off properly.

    If I can't get it right, i'll probably try once more before calling in the ould panel beater (and I'll observe how he does it).


  • Registered Users, Registered Users 2 Posts: 635 ✭✭✭BillJ


    Your ballsy I'll give you that!

    I'd say it will always be hard to not get an edge when painting a section like that


  • Posts: 14,266 ✭✭✭✭ [Deleted User]


    BillJ wrote: »
    Your ballsy I'll give you that!

    Ah sure, you'll learn nothing from not trying it. Worst possible outcome is I damage the bumper beyond repair and I'm off looking in scrapyards for one to replace it with.

    Not exactly the end of the world and I doubt a bumper for a Rav4 would break the bank. :)

    I'd say it will always be hard to not get an edge when painting a section like that


    My theory is that, because it's all quite smooth to touch, a lengthy machine polishing session should bring it back up to a glossy, black finish. But, I've never done anything like this before, so time will tell (unless anyone here has done this before.. then they can also tell.. haha). :)


  • Registered Users, Registered Users 2 Posts: 15,690 ✭✭✭✭vectra


    Just paint the whole bloody bumper and be done with it :D


  • Advertisement
  • Registered Users, Registered Users 2 Posts: 635 ✭✭✭BillJ


    Painting the whole thing is probably your best bet as vectra said alright!


Advertisement