Advertisement
If you have a new account but are having problems posting or verifying your account, please email us on hello@boards.ie for help. Thanks :)
Hello all! Please ensure that you are posting a new thread or question in the appropriate forum. The Feedback forum is overwhelmed with questions that are having to be moved elsewhere. If you need help to verify your account contact hello@boards.ie
Please note that it is not permitted to have referral links posted in your signature. Keep these links contained in the appropriate forum. Thank you.

https://www.boards.ie/discussion/2055940817/signature-rules

Today I did some detailing...

13334363839203

Comments

  • Registered Users, Registered Users 2 Posts: 7,864 ✭✭✭stimpson


    :confused: Why oh why would you use anything other the a microfiber cloth to rub clean 476 ....

    Is someone taking the p!$$ :pac:

    Sure you need to be built like Arnie to buff that off.


  • Registered Users, Registered Users 2 Posts: 336 ✭✭bazery


    :confused: Why oh why would you use anything other the a microfiber cloth to rub clean 476 ....

    Is someone taking the p!$$ :pac:

    Nope not taking the p!$$. Just curious as I have one and don't really use it. It came with applicator pads too but I've heard bad things about them


  • Registered Users, Registered Users 2 Posts: 1,900 ✭✭✭Paddy@CIRL


    Speaking of big wheels and low cars...

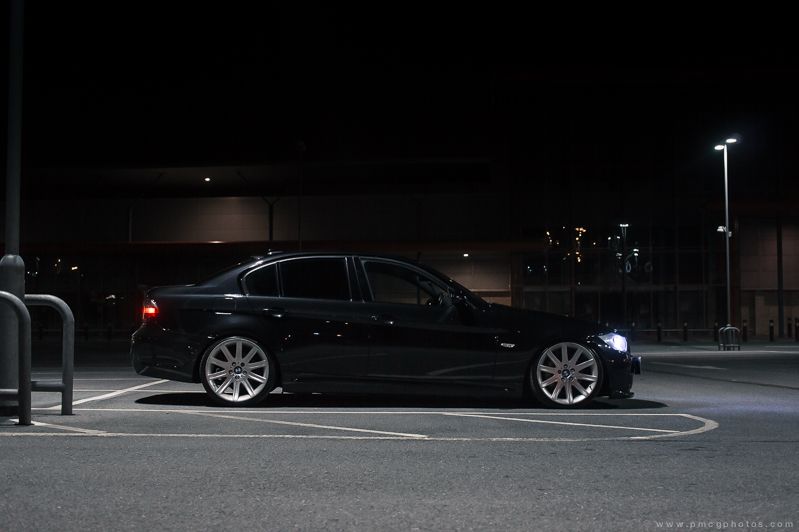
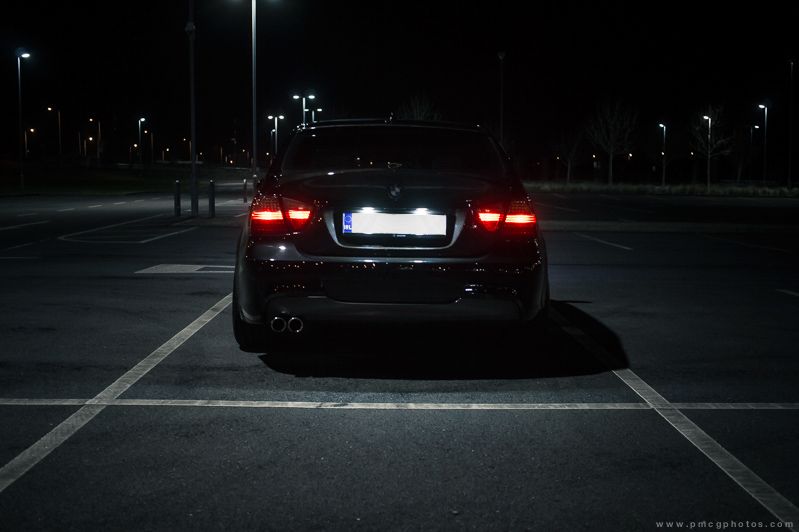
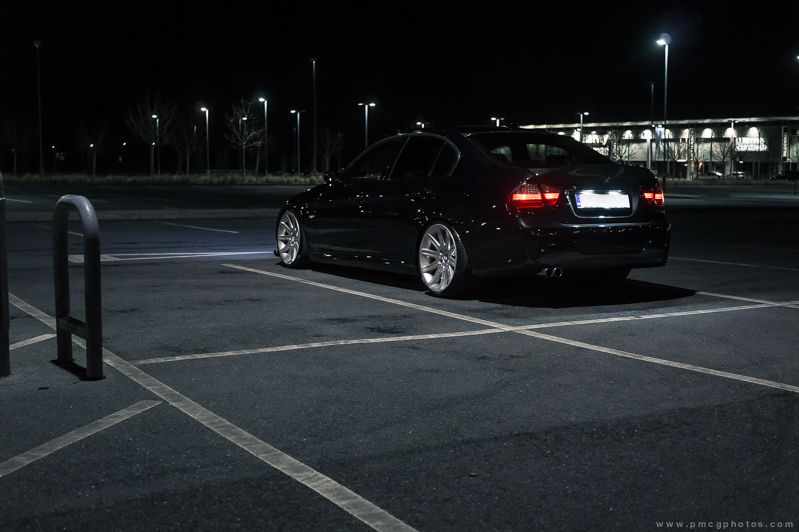
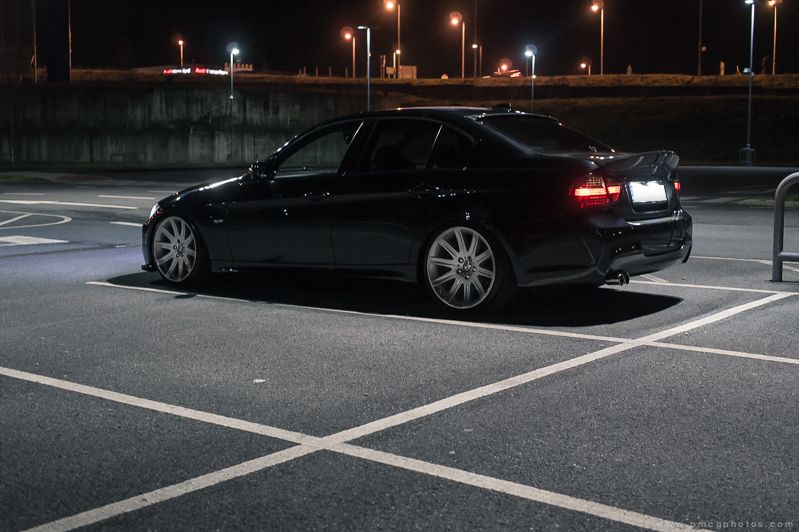
    I got the car back from CleanCar today after a quick spruce up after the winter. Rather embarrassingly, it's the first time the car was washed since mid-November. It was foamed, 2BM washed, de-tarred and given two coats of CG Blacklight and two coats of AG HD Wax at my request. I'm planning on getting a few bits painted over the next while, so the HD Wax will suffice for the time being. Plus, there's a tub of it sitting in my garage for I don't know how long. Whilst the car was there, I had the rear three windows tinted with 35% tint which is just right IMO for a factory look. The inside was valeted and Larry dyed my driver's mat as it was starting to fade a little. I'm not sure what products were used inside, but I can definitely smell Gliptone :)

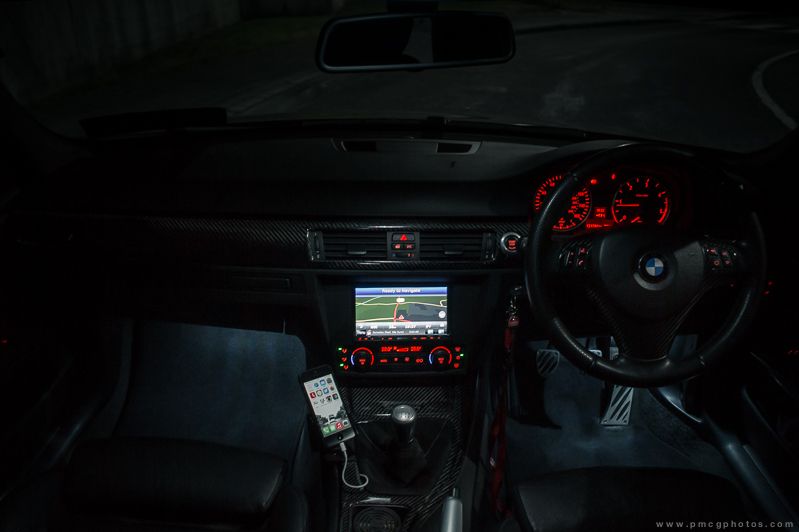
    Some pictures earlier tonight taken on a P&S:

    PMcGE90January2014-3_zps368b4d85.jpg

    PMcG-E90-January-2014-2_zps29d2ef5f.jpg

    PMcG-E90-January-2014-1_zpsbfe1097f.jpg

    PMcG-E90-January-2014-4_zps32105dc7.jpg

    PMcGE90January2014-6_zps55ede477.jpg

    PMcG-E90-January-2014-5_zps9215b696.jpg

    PMcGE90January2014-7_zps88c65cbf.jpg


  • Registered Users, Registered Users 2 Posts: 4,377 ✭✭✭Curran


    Looks extremely well Paddy!!

    Love those 7er wheels on it. Has to be the nicest E90 in the country!


  • Registered Users, Registered Users 2 Posts: 1,900 ✭✭✭Paddy@CIRL


    Curran wrote: »
    Looks extremely well Paddy!!

    Love those 7er wheels on it. Has to be the nicest E90 in the country!

    Cheers Dave, getting them refurbished again shortly so can then move onto the next bits and pieces.


  • Advertisement
  • Registered Users, Registered Users 2 Posts: 19,920 ✭✭✭✭MetzgerMeister


    Paddy@CIRL wrote: »
    Cheers Dave, getting them refurbished again shortly so can then move onto the next bits and pieces.

    By any chance are you going to get Wheel Wizards to do them? I want to get mine refurbed soon and they're at the top of my list.

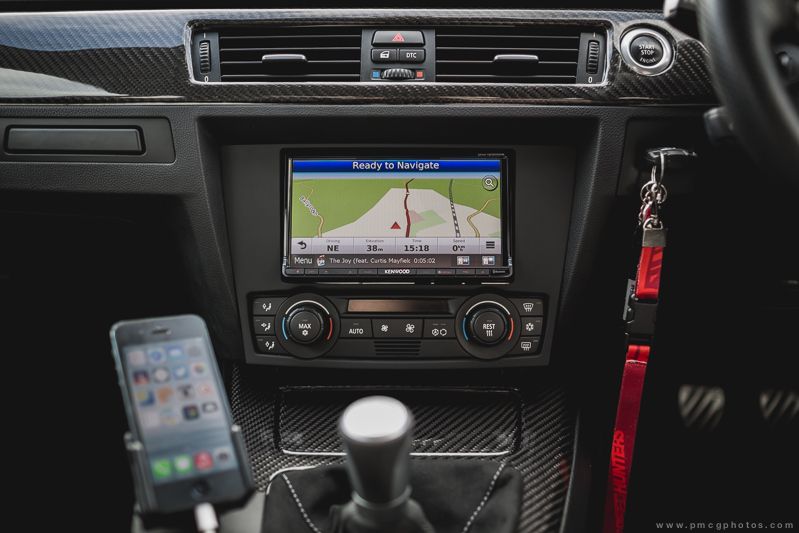
    Also, where'd you get that screen above the heater controls and wie viel?


  • Registered Users, Registered Users 2 Posts: 1,900 ✭✭✭Paddy@CIRL


    By any chance are you going to get Wheel Wizards to do them? I want to get mine refurbed soon and they're at the top of my list.

    Also, where'd you get that screen above the heater controls and wie viel?


    Not Wheel Wizards but the company I bought them from. I'm having issues with the lacquer but to their credit they agreed with zero arguments to take them back, strip them back to the bare aluminium and re-do all four wheels. They're also giving me loan wheels to get me about for the week so can't complain.

    It's a double-din Kenwood GPS unit and I've no idea what a wie viel is :)


  • Registered Users, Registered Users 2 Posts: 1,113 ✭✭✭Gavman84


    Lovely car Paddy. I think he wants to know the price from my bit of German!!


  • Registered Users, Registered Users 2 Posts: 1,900 ✭✭✭Paddy@CIRL


    Gavman84 wrote: »
    Lovely car Paddy. I think he wants to know the price from my bit of German!!

    I thought he had an autocorrect moment :o

    KenwoodE90-1_zpsb5d18a4b.jpg

    It's a Kenwood DNX7230DAB which I got in the UK. 7" touchscreen, Garmin GPS, Bluetooth (HF & A2DP), iPod in the glovebox, SD Card, CD / DVD and a lot of other functions I can't recall at the moment. It's pretty much plug & play and you retain steering wheels controls although you have to use the (supplied) Kenwood microphone. The angle of the screen can be adjusted and you can set an on and off position and best of all, you can adjust the buttons' backlight to match the colour of the interior lights.

    You can pick one up online, including the fitting kit for around €1,300.


  • Registered Users, Registered Users 2 Posts: 19,920 ✭✭✭✭MetzgerMeister


    The heater panel, is that lower down than normal? That's a juicy price but it's something I'll be looking into after getting the wheels done so by then they may be a bit cheaper :P


  • Advertisement
  • Registered Users, Registered Users 2 Posts: 1,900 ✭✭✭Paddy@CIRL


    Yeah, the whole fascia is different. It's actually trimmed in the same material as used in the rest of the interior which I thought was pretty neat. Expensive, but it's cheaper than an iDrive retrofit.


  • Posts: 14,266 ✭✭✭✭ [Deleted User]


    Howdy chaps,

    I'll be detailing my brothers car this week. His car is scraped to ****e along one side of it (from bangs of car seats, etc.).

    Can I spray some touch up paint onto this, and then do a few coats (until it builds up slightly above the paint already on the car) and then machine polish it down to a smoother 'correct' level with the paint already on the car?

    I don't know anything about touching up cars except what I've learned on here so far, but would like to give scratch repair a shot if i can (my brother's not overly fussed about his car, so I can play a game of 'trial and error' and hope for the best, but i dont want to do something if I know that it outright will not work.


    And if that won't work, can anyone give any basic advice on what might work?


  • Registered Users, Registered Users 2 Posts: 1,652 ✭✭✭Chimaera


    Rattle cans are hard work, and a dead loss in the weather we're getting at the moment. If you really want to have a go, find a heated garage, or at least wait until summer.


  • Posts: 14,266 ✭✭✭✭ [Deleted User]


    Hmm. Maybe not an ideal solution then. :/


    I called out to Dave of DetalingShed today. Idea was to collect a few bits and get him to take a look at my AD Snow Foam Lance to see if there were any issues with it, or if indeed, I was just using it wrongly.

    I collected the group buy bits and pieces off him (and also picked up some Tar Cleanse, Wheel Cleanse and Iron Cleanse as part of the Combo offer he's doing, and some CG's Fabric Clean and some CG's 'Green Clean' APC). Looking forward to using some of these to see how I get on (starting on my brothers car tomorrow to detail it - My second time doing any detailing (the first time being my own Rav, where I had no machine polisher or such)).


    But the more important aspect of the meeting was the lance (to me, anyway, as I've been finding it very frustrating as of late).

    He filled up the bottle with water and snowfoam solution and put my lance on and.. well.. the same as ever. The 'foam' spurted out onto the ground in front of him and the milky water rolled off into the street.

    He then swapped the lance with another one he had with him, and he was in business straight away! So I can finally relax a bit and know that, as frustrating as it was, the snow foam issue wasn't my own fault all along! The lance, unlikely as it is, actually was the problem, and not I.

    So I'm looking forward to getting stuck in with it now in the morning (he swapped them over immediately). He also, as a gesture of goodwill that was very much appreciated (and not at all expected) have me a new bottle of OAC Cotton Candy (as he knew from reading my moaning on here that I went through the other bottle fairly quickly in my milky endeavours).

    So to say I'm a happy chappy is an understatement. I really am looking forward to getting stuck in tomorrow now!

    So that's a big thumbs up to DetailingShed from me, anyway!

    blondes%20women%20jordan%20carver%20thumbs%20up%201920x1200%20wallpaper_www.wallpaperfo.com_6.jpg


  • Registered Users, Registered Users 2 Posts: 4,377 ✭✭✭Curran


    So that's a big thumbs up to DetailingShed from me, anyway!

    blondes%20women%20jordan%20carver%20thumbs%20up%201920x1200%20wallpaper_www.wallpaperfo.com_6.jpg

    Her thumbs dont look too big to me....although, her ti.... :D


  • Registered Users, Registered Users 2 Posts: 96 ✭✭west cork lad


    blondes%20women%20jordan%20carver%20thumbs%20up%201920x1200%20wallpaper_www.wallpaperfo.com_6.jpg[/quote]

    Did you say something. Sorry I was not listening. ;-)


  • Posts: 14,266 ✭✭✭✭ [Deleted User]


    8 thanks on that post.. i wonder if they're for the heart warming story of the detailer who sets things right and gives complimentary snow foam solution to make the customer happy and works hard to ensure a good business model and high reputation..

    Or for the big tits. :P (they are very, very nice though, in fairness!)


    So tomorrow I do my brother's car. A Renault Megane, 3 door hatchback that has been the victim of baby's car seats banging off it, a tight drive way meaning one door forever getting banged off the wall (I don't think I can do anything to fix that) and a generally apathetic owner whose interest in the car is more a practical one (it goes from A to B, so it's grand!).


    9C19E80DA8194515B48893524227941A-0000333410-0003487753-01200L-3456ABC56CC844D2847C726B227D337A.jpg


    And the close ups...


    E8524F356D04433C945CE66E02635FC0-0000333410-0003487650-00800L-78D37E87E8AF4A06BFEB7BCC4042248C.jpg

    7927E051F68040BDB7C51DC07EE13C77-0000333410-0003487649-00800L-5B6CCDFC6CA2444DA5A91939BC01176B.jpg

    1F79F6ED0880478C9ABEC786B4C0593B-0000333410-0003487648-00800L-A0EDF449A1E7448392A0276C92D2855A.jpg

    88681425B9CC4D4CB98FEBF49730186B-0000333410-0003487642-00800L-32AF739E2DE14A5489CDD7D906727A8D.jpg

    3272E21765704984A558AEE54F01278B-0000333410-0003487640-00800L-5A557BE54C674EABA708ADE269C45FD6.jpg


    Now I don't actually think I can fix all of that. Certainly not the door that's had too many close encounters of the wall kind (unless I use touch up paint, and polish it down? but I'm not sure that'll even work?)


    The idea here is for me, as a learner, to be able to get a good, realistic, idea, of what can and cannot be expected of polishing when it comes to dealing with scratches of varying severity.


    So here's my simple 32 step guide to cleaning the car:


    (1) Snow Foam (pre-wash) (let sit).
    (2) Rinse.
    (3) Interior – Fabrics and Plastics.
    (4) Interior – Hoover and Rubber mats.
    (5) Glass - interior and exterior.
    (6) Wheels and Tyres (Iron cleanse, wheel cleanse, agitate tyres with brush).
    (7) Wash - two bucket method.
    (8) Rinse and dry.
    (9) De-Tar (let sit).
    (10) Exhaust and stainless steel – Autosol and steel wool
    (11) Rinse.
    (12) Iron-cleanse (body and wheels) (let sit).
    (13) Rinse and dry.
    (14) Clay bar.
    (15) Rinse.
    (16) Tape up car using 3m tape (cover all awkward openings, shuts, jambs, sunroof edges, etc.).
    (17) Polish (Machine).
    (18) Rinse and Dry.
    (19) Glaze (Machine).
    (20) Rinse and Dry.
    (21) Trim And Plastics.
    (22) Rinse and Dry.
    (23) Tyre dressing application.
    (24) Wax (Machine).
    (25) Rinse and Dry.
    (26) Let Sit Overnight.
    (27) Hand wax (for extra bit of shine - may be a futile effort?).
    (28) Interior – Quick wipe down and Hoover – Use a scent.
    (29) Tyre Dressing touch up.
    (30) Wash – Two bucket method.
    (31) Rinse and dry.
    (32) Glass interior and exterior.


    ... And I'm allowing myself 3-4 days to do it (optimism!). Seems to be everything covered? A lot of new ground covering here though. Looking forward to trying to clean the fabric seats and stuff (to see how i get on).


  • Registered Users, Registered Users 2 Posts: 8,719 ✭✭✭Hal1


    Ah no. :eek:


  • Posts: 14,266 ✭✭✭✭ [Deleted User]


    Hal1 wrote: »
    Ah no. :eek:


    That directed at anything in particular? :p


  • Registered Users, Registered Users 2 Posts: 635 ✭✭✭BillJ


    I think you could save yourself time by cutting out some of the rinsing and drying steps. Not that there is anything wrong with it but if it was me I wouldn't have the patience for it.

    For example you could cut out the rinsing and drying after the glazing, waxing and plastics and trim stages(in my opinion) open to correction here.

    Also I think waxing with machine and then by hand is overkill. I would just wax by hand, same for glaze if you are doing it.

    Might be worth doing the 2bm after machine polishing instead of just rinsing incase there is residue left over and the was doesn't bond properly.

    just my 2c. Fair play to you, you're very dedicated!


  • Advertisement
  • Registered Users, Registered Users 2 Posts: 4,377 ✭✭✭Curran


    Definitely a comprehensive plan...a few Rinse & Dry towards the end might be a bit overkill, but wont be any harm!

    3-4 days is very realistic too without having to kill yourself. Enjoy it...working through it will be a slog, but stepping back and admiring your hard work at the end, is when it will all feel worth while!

    Looking forward to the results!!


  • Posts: 14,266 ✭✭✭✭ [Deleted User]


    Well the rinse and drys at the ends were more aimed at getting excess polish/glaze/etc. off the car, but if they're a bit overkill I may well take them out (and replace the post-polish rinse with a 2BM instead).


    The idea behind the rinsing and drying is also a lot to do with, as I've no idea how long it'll take to machine polish anything, assuming that each stage of machining (polish, glaze, wax) will take me up to the end of each day, so the following day would be best to start with a rinse off and dry down?

    Also, im not sure if machine glazing and waxing is overkill (VS. doing it by hand), but i picked up a couple of different hex logic pads (have 6 of the 7 ones.. missing the blue one) which all have varying degrees of intensity for different things. So i was gonna polish with a rough compounding pad and use a finishing pad for glazing etc. (havent figured out which i'll actually use for which just yet).

    The hand waxing was to add extra shine (if any) after the machine waxing... Is this overkill?


    I might call up my motor factors and get some touch up paint in the morning before I do much. Just to see if i can do anything with the door edge thats been battered. (even if i dont do anything, or make it worse, brother doesn't really care about the car's paintwork, so he wont mind me fecking it up a bit). So I figure maybe I should try it?


  • Posts: 14,266 ✭✭✭✭ [Deleted User]


    Ok, quick question - is wet sanding literally just wetting the area (spraying water?) and then sanding it with a fine sandpaper (and then applying touch up paint and maching polishing?).

    If so, what grit of sandpaper should i use? and where would I buy it? (homebase?)


  • Registered Users, Registered Users 2 Posts: 635 ✭✭✭BillJ


    Ok, quick question - is wet sanding literally just wetting the area (spraying water?) and then sanding it with a fine sandpaper (and then applying touch up paint and maching polishing?).

    If so, what grit of sandpaper should i use? and where would I buy it? (homebase?)

    Wet sanding is when you use wet and dry sand paper(thats what its actually called) that has been soaked in water to sand down an area. It would be recommended to keep the surface wet also. You would do this after applying the paint and after the paint has dried. After sanding you would machine polish.

    Two good "how to's" here that could be helpful to you.

    I plan on following the bonnet chip repair guide myself next week after I get the repair kit delivered.:)

    http://www.detailingworld.co.uk/forum/showthread.php?t=153965

    http://www.detailingworld.co.uk/forum/showthread.php?t=251392


  • Posts: 14,266 ✭✭✭✭ [Deleted User]


    BillJ wrote: »
    Wet sanding is when you use wet and dry sand paper(thats what its actually called) that has been soaked in water to sand down an area. It would be recommended to keep the surface wet also. You would do this after applying the paint and after the paint has dried. After sanding you would machine polish.

    Two good "how to's" here that could be helpful to you.

    I plan on following the bonnet chip repair guide myself next week after I get the repair kit delivered.:)

    http://www.detailingworld.co.uk/forum/showthread.php?t=153965

    http://www.detailingworld.co.uk/forum/showthread.php?t=251392


    See, this is going to make me sound like an idiot, but.. what you wrote yourself there is like plain perfect english. Almost a dummies guide, and it makes sense.

    But the links to the threads may aswell be written in Hindu for all the good they are to me :o Even though they have pictures and such I can't quite absorb the information required in them.


    From reading your post (without the links) it seems fairly straight-forward, though.

    1) Apply paint
    2) use wet and dry sandpaper (wet it first and wet area being sanded) to sand to suitable level
    3) machine polish to smoothen and 'merge' with existing paint?

    (or am I after making a jock of that straight away?! :o)

    Is there a particular advised grit number to use? For some reason 1500 is in my head?


  • Registered Users, Registered Users 2 Posts: 635 ✭✭✭BillJ


    See, this is going to make me sound like an idiot, but.. what you wrote yourself there is like plain perfect english. Almost a dummies guide, and it makes sense.

    But the links to the threads may aswell be written in Hindu for all the good they are to me :o Even though they have pictures and such I can't quite absorb the information required in them.


    From reading your post (without the links) it seems fairly straight-forward, though.

    1) Apply paint
    2) use wet and dry sandpaper (wet it first and wet area being sanded) to sand to suitable level
    3) machine polish to smoothen and 'merge' with existing paint?

    (or am I after making a jock of that straight away?! :o)

    Is there a particular advised grit number to use? For some reason 1500 is in my head?

    You seem to have it fairly spot on. Just to clarify a bit more (i am talking about stone chips here and not so much door edges but it's fairly similar):

    1. Fill paint up in layers to slightly just above the current level of paint.
    2. Leave dry for about 24hours.
    3. Wet sand with 2000 grit w&d paper and a sanding block so that the filled in chip is level with surrounding paint. Very little pressure and sanding is needed to do this apparently so dont go overboard or you will strip the clearcoat of surrounding paint.
    4. The sanding leaves scartching on the paint so this is where the machine polishing comes in to polish out the scratches.


    NNB. I have not done this myself I have only researched it and the above is a very rough guide.

    I have ordered a kit and plan on doing it myself shortly so will do a write up of how i go.

    Also those threads above might seem like hindu but the more you read them the more sense they begin to make sense:)

    Maybe wait until you are confident in your knowledge before you try paint chip repair


  • Posts: 14,266 ✭✭✭✭ [Deleted User]


    BillJ wrote: »
    You seem to have it fairly spot on. Just to clarify a bit more (i am talking about stone chips here and not so much door edges but it's fairly similar):

    1. Fill paint up in layers to slightly just above the current level of paint.
    2. Leave dry for about 24hours.
    3. Wet sand with 2000 grit w&d paper and a sanding block so that the filled in chip is level with surrounding paint. Very little pressure and sanding is needed to do this apparently so dont go overboard or you will strip the clearcoat of surrounding paint.
    4. The sanding leaves scartching on the paint so this is where the machine polishing comes in to polish out the scratches.


    NNB. I have not done this myself I have only researched it and the above is a very rough guide.

    I have ordered a kit and plan on doing it myself shortly so will do a write up of how i go.

    Also those threads above might seem like hindu but the more you read them the more sense they begin to make sense:)

    Maybe wait until you are confident in your knowledge before you try paint chip repair


    Confident in my knowledge? Pfft! It's not my car I'm doing it on! :pac:


    Ah no, on a serious note, I will probably give that a shot over the course of my detailing days, then. Just to see how I get on (i'll also aim to photograph it for the thread here, so others can laugh hysterically at my efforts).

    I can get touch up paint in my local motor factors I believe, so it's just getting the specific level of grit in wet and dry sandpaper that'll be the issue. I'll try Homebase and Woodies (but want to try to avoid eating up too much time dealing with finding sandpaper, or I won't anything done tomorrow).


  • Registered Users, Registered Users 2 Posts: 14,015 ✭✭✭✭Mc Love


    Tell us will be be keeping the car like that or will be let it go the way it is now? Only asking as I have done a detail before but i might as well have thrown muck on it for the person as they just see cars as a way of getting you from a to b!


  • Registered Users, Registered Users 2 Posts: 16,930 ✭✭✭✭challengemaster


    I can't see the paint on that car doing anything except getting worse... There are literally a few millimeters shaved off that door. That said, you may as well crack on and experiment - anything you do will probably improve how it looks - unless you cover it in petrol and set it alight.... even that would be debatable if it's an improvement :pac:

    Personally I wouldn't be able to bring myself to put that much effort into a car in that state, where the owner isn't going to know or care if you put horse****e or jetseal on it. You've far more willpower than me!

    If you are doing anything with paint - make sure the entire surface is as clean as can be. Wash with washing up liquid, rinse the hell out of it, dry it, then go over any area you're putting paint with IPA using a lint free cloth.


  • Advertisement
  • Registered Users, Registered Users 2 Posts: 4,377 ✭✭✭Curran


    He's using it as a practice car...so in that sense, he's getting as much out of it as he's putting into it. He knows full well that it wont be appreciated...probably best to put something like Turtle Wax on it, and save your good wax for your own car! :)


Advertisement