Advertisement
If you have a new account but are having problems posting or verifying your account, please email us on hello@boards.ie for help. Thanks :)
Hello all! Please ensure that you are posting a new thread or question in the appropriate forum. The Feedback forum is overwhelmed with questions that are having to be moved elsewhere. If you need help to verify your account contact hello@boards.ie

the 'there's no such thing as a stupid question' bike maintenance thread

Options
16566687071210

Comments

  • Registered Users Posts: 12,863 ✭✭✭✭crosstownk


    Perhaps the cable may be damaged/frayed up near the lever. If you have the cable released at the caliper, 'push' the cable back and inspect the end at the lever to see if it's in good nick.


  • Registered Users Posts: 191 ✭✭rayman1


    crosstownk wrote: »
    Perhaps the cable may be damaged/frayed up near the lever. If you have the cable released at the caliper, 'push' the cable back and inspect the end at the lever to see if it's in good nick.

    Thanks, I will try that.


  • Registered Users Posts: 2,730 ✭✭✭Type 17


    rayman1 wrote: »
    ...I already took off the short piece of outer near the caliper, sprayed WD40 into it and greased the cable, but not much improvement.

    Problem is definitely the cable if the calliper works smoothly and strongly in the hand when the cable is disconnected.

    The rear is the more likely section of cable to be bad, but the other piece of outer housing under the bar tape can possibly be bad too.

    If you don't want to disturb the bar tape, and the old inner wire isn't too bad looking (white oxidisation/light rust, rather than heavy, dark rust) try a new inner wire, and drop a bit of oil into the rear of the front outer cable, and use the new cable to clean it out by shoving it backwards and forwards to clean things up and then withdraw the inner wire and wipe it down to remove the dirt-oil mix. Repeat once more and then reassemble it and try the brake action. If it still doesn't work well, you'll have to disturb the bar tape.


  • Registered Users Posts: 191 ✭✭rayman1


    Looks like it was the short piece of outer near the rear caliper after all even though it seems fairly smooth.
    I connected the cable without the outer and the brake worked perfectly. I have some new outer which I will fit tomorrow. Thanks again.


  • Registered Users Posts: 615 ✭✭✭mirrormatrix


    Hi. I've a kids bike that seems to have a through axle that is also the cranks, so both cranks and axle are one continuous piece (if you get me!). I'd not seen something like this before. Anyways, there was a bit of play in the bottom bracket and it seems as though the locknut had come loose.

    On these sorts of systems, do you just tighten the bottom bracket (as it were) finger tight and then use a spanner to tighten the locknut as much as possible?

    Cheers
    MM


  • Advertisement
  • Registered Users Posts: 7,905 ✭✭✭cletus


    Hi. I've a kids bike that seems to have a through axle that is also the cranks, so both cranks and axle are one continuous piece (if you get me!). I'd not seen something like this before. Anyways, there was a bit of play in the bottom bracket and it seems as though the locknut had come loose.

    On these sorts of systems, do you just tighten the bottom bracket (as it were) finger tight and then use a spanner to tighten the locknut as much as possible?

    Cheers
    MM

    Pictures?


  • Registered Users Posts: 615 ✭✭✭mirrormatrix


    ONE_PIECE_CRANK_CHROME_21329.jpg


    Will try to get some later. It's basically like this photo though.


  • Moderators, Sports Moderators Posts: 24,550 Mod ✭✭✭✭CramCycle


    Will try to get some later. It's basically like this photo though.
    Is it like a Shimano Hollowtech crankset then? Is there a shell for the through axle bit to rest against? Is that loose or disintegrating. If it is not, then yes, simply tightening it up should do the job but I'd prefer to see pictures fo the specific set up before putting any money down on it.


  • Registered Users Posts: 2,730 ✭✭✭Type 17


    Yes, it's a Thomson BB, AKA Ashtabula). Common on older BMXs and cheaper American bikes

    You can tighten it and lock the locknut against it like an older, threaded headset, but note that it is a left hand thread


  • Registered Users Posts: 366 ✭✭Roger the cabin boy


    Hi. I've a kids bike that seems to have a through axle that is also the cranks, so both cranks and axle are one continuous piece (if you get me!). I'd not seen something like this before. Anyways, there was a bit of play in the bottom bracket and it seems as though the locknut had come loose.

    On these sorts of systems, do you just tighten the bottom bracket (as it were) finger tight and then use a spanner to tighten the locknut as much as possible?

    Cheers
    MM

    BMX's have these.

    Its the same principle as any cup/cone bearing. Clean them, make sure the balls and races are in good order and then reassemble

    However, there is a knack to tightening them.
    Too loose is better than too tight, but neither is great.

    My advice is to tighten everything up finger tight, then, back of the locking cone a 1/4 turn, then, tighten the lock ring. As the lock ring tightens,it will affect the tightness of the locking cone (due to play etc,) and you may find that tightening the lockring, tightens the lockcone too much.

    Just keep adjusting it until the crank run smooth. A trick here is to tighten the lockring somewhat and then back off the lockcone a small bit whilst still holding the lockring.

    Its a trial/error thing really. Easy but takes a few goes...


  • Advertisement
  • Registered Users Posts: 615 ✭✭✭mirrormatrix


    Type 17 wrote: »
    Yes, it's a Thomson BB, AKA Ashtabula). Common on older BMXs and cheaper American bikes

    You can tighten it and lock the locknut against it like an older, threaded headset, but note that it is a left hand thread

    That's it exactly, thanks!! Yes, it's also left hand thread. Was just unsure whether I needed to hold the cone in place while tightening the locknut to prevent overtightening, but i'll just play around with it a bit and see what works on that front. I might as well regrease the bearings while i'm at it.


  • Registered Users Posts: 334 ✭✭Gasco


    So, replaced the freehub body on Pave 28 wheel, easy job. But there is a lot of freehub drag, as in it takes effort to get the freehub moving. Took off the new one and reinstalled the old, same thing. Have not used the wheels in a while so cannot remember if this was the case when they were on the bike.

    Scratching my head on this - before I tighten the hub cap it spins fine but once these are tightened up then not much moving. Am I over tightening these? they were pretty tight prior to removal.

    Did I lose a spacer between the freehub body and hub shell? Looking at the novotec manual, there only appears to be the large metal spacer that fits over the axle - which is in place.

    Are the hub bearings the problem? They are cartridge but I presume once the end caps are tightened there is some compression.

    Or is this a thing with these hubs / wheels???

    Lockdown is causing me to obsess about these things...


  • Registered Users Posts: 646 ✭✭✭Tony04


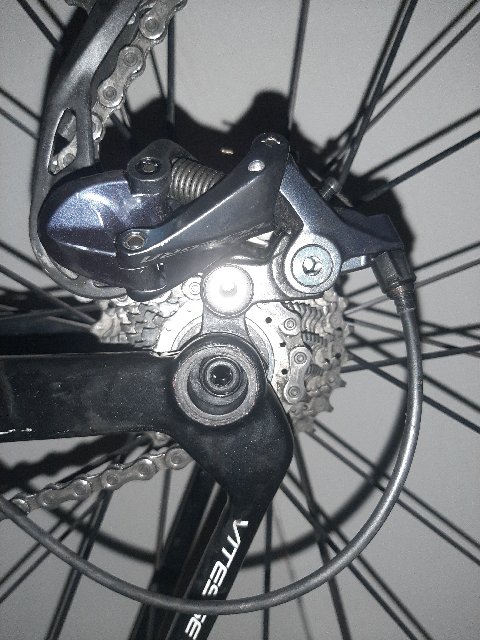
    On my ride this evening the bolt holding in the mech hanger seems to have fallen off.
    20200509-223314.jpg
    Is my only option buying a new hanger? Or is there any other cheaper options or even temporary bodges?
    Cheers in advance


  • Registered Users Posts: 7,905 ✭✭✭cletus


    Is the bolt on the right in the chainreactioncycles link? If so, I think you're going to struggle to find a generic replacement. Have you any idea of size or thread pitch


  • Registered Users Posts: 173 ✭✭CormacH94


    Do internally routed cables usually have a thinner piece of outer for the section of cable inside the frame?

    I've seen carbon builds where the bare frame usually comes with these pieces already installed and the ends are taped to the frame to serve as guides but how would one go about replacing these, as I imagine they also wear.

    Would trimming an outer section down to the center piece of sheath work for this?

    Any tips for routing internal cables without the specific kit would be greatly appreciated!


  • Registered Users Posts: 1,594 ✭✭✭Deano12345


    CormacH94 wrote: »
    Do internally routed cables usually have a thinner piece of outer for the section of cable inside the frame?

    I've seen carbon builds where the bare frame usually comes with these pieces already installed and the ends are taped to the frame to serve as guides but how would one go about replacing these, as I imagine they also wear.

    Would trimming an outer section down to the center piece of sheath work for this?

    Any tips for routing internal cables without the specific kit would be greatly appreciated!

    I use this stuff from eBay.

    https://www.ebay.co.uk/itm/401630605331

    Personally I don’t leave them on the cable when I’m done, but no reason you couldn’t. Generally I just feed them through the internal routing holes, tape them to either side, then feed the cable through and all sorted!


  • Registered Users Posts: 173 ✭✭CormacH94


    Deano12345 wrote: »
    I use this stuff from eBay.

    https://www.ebay.co.uk/itm/401630605331

    Personally I don’t leave them on the cable when I’m done, but no reason you couldn’t. Generally I just feed them through the internal routing holes, tape them to either side, then feed the cable through and all sorted!


    Yeah, changed it out today, thought it might be covered the whole way through the frame, was just where it came out at the bottom bracket.


    Troubleshooting chain drop when back pedaling at the minute, figure it could be due to the grease on the new chain gunking it up a bit? Any other reason why a new chain might drop when backpedaling? 99% sure I sized it correclt against the old chain


  • Registered Users Posts: 2,730 ✭✭✭Type 17


    Usual reasons for slack chain when back-pedalling are stiff freewheel or stiff jockey wheel in the rear derailleur.

    The new chain would want to have very thick grease on it for that to be an issue.


  • Registered Users Posts: 173 ✭✭CormacH94


    Type 17 wrote: »
    Usual reasons for slack chain when back-pedalling are stiff freewheel or stiff jockey wheel in the rear derailleur.

    The new chain would want to have very thick grease on it for that to be an issue.


    Pretty much stripped the bike down to clean/degrease, would a bit of lubricant on the jockey wheels make much of difference? Or back off how tight the bolts are?


    Should probably say it's only happening when the bike is in largest rear cog and smallest front, every other combination is fine for backpedaling


  • Registered Users Posts: 2,730 ✭✭✭Type 17


    CormacH94 wrote: »
    Pretty much stripped the bike down to clean/degrease, would a bit of lubricant on the jockey wheels make much of difference? Or back off how tight the bolts are?


    Should probably say it's only happening when the bike is in largest rear cog and smallest front, every other combination is fine for backpedaling

    If it's only in top gear, then that's probably fine...

    For the record, jockey wheels can get gummed up with crud, but it's relatively unusual. Check it by holding the swing-cage forward to let the chain slacken and see if you can move the jockey wheel with your finger.

    PS: Keep the bolts tight, if you loosen them, you'll lose a jockey wheel on the road.


  • Advertisement
  • Registered Users Posts: 173 ✭✭CormacH94


    Type 17 wrote: »
    If it's only in top gear, then that's probably fine...

    For the record, jockey wheels can get gummed up with crud, but it's relatively unusual. Check it by holding the swing-cage forward to let the chain slacken and see if you can move the jockey wheel with your finger.

    PS: Keep the bolts tight, if you loosen them, you'll lose a jockey wheel on the road.


    Yeah quite a bit of play when I move it with my hand, probably would have been an idea to replace them with the chain...


    Any tips for checking the wear of jockey wheels or do they usually wear with the chain


  • Registered Users Posts: 2,730 ✭✭✭Type 17


    Jockey wheels should last through a good few chains, but not forever.

    Check for sideways wobble and if it’s more than a few mm, they’re toast. Note that the top pulley on most Shimano derailleurs are designed to have a few mm of lateral movement across their pivot (straight, lateral movement, not wobble).


  • Registered Users Posts: 12,863 ✭✭✭✭crosstownk


    Type 17 wrote: »
    Jockey wheels should last through a good few chains, but not forever.

    Check for sideways wobble and if it’s more than a few mm, they’re toast.

    My 105 5800 RD lasted over 20,000km (probably 4 or 5 chains) before the jockey wheels went exactly as you describe. The easiest solution was to just order a new derailleur rather than faffing around for the correct jockey wheels which would have been almost half the price of a new mech.


  • Registered Users Posts: 2,730 ✭✭✭Type 17


    True, high-mileage derailleurs get sloppy around the parallelogram pins, so the swing cage goes out of alignment and the indexing goes wonky - new jockey wheels aren't going to help.

    Edit: I found a vid I did a while ago: https://youtu.be/ARPDaWjU3j4


  • Registered Users Posts: 173 ✭✭CormacH94


    Type 17 wrote: »
    True, high-mileage derailleurs get sloppy around the parallelogram pins, so the swing cage goes out of alignment and the indexing goes wonky - new jockey wheels aren't going to help.

    Edit: I found a vid I did a while ago: https://youtu.be/ARPDaWjU3j4


    Jesus your bottom bracket video is horrific, what did the customer say when they brought it in?


  • Registered Users Posts: 2,730 ✭✭✭Type 17


    CormacH94 wrote: »
    Jesus your bottom bracket video is horrific, what did the customer say when they brought it in?

    Something along the lines of: it's got worse recently, maybe time to get it looked at... :)

    Stuff that bad is not uncommon, but the auto-shifting 'feature' made it extra special.


  • Registered Users Posts: 12,235 ✭✭✭✭Cee-Jay-Cee


    CormacH94 wrote: »
    Yeah, changed it out today, thought it might be covered the whole way through the frame, was just where it came out at the bottom bracket.


    Troubleshooting chain drop when back pedaling at the minute, figure it could be due to the grease on the new chain gunking it up a bit? Any other reason why a new chain might drop when backpedaling? 99% sure I sized it correclt against the old chain

    I had the same problem with a new chain a few years ago and couldn’t figure it out so left it into LBS to sort. They told me my chain was one link too short (even though I sized it off the old chain) anyway they fitted a new chain and problem solved.


  • Registered Users Posts: 646 ✭✭✭Tony04


    Was out cleaning the drivetrain on my road bike today and am just wondering... Should you/do you grease thru axles? Is there any need to spray lube pivot points and pedals in the summer?


  • Moderators, Sports Moderators Posts: 19,973 Mod ✭✭✭✭Weepsie


    My genesis frame has an unbranded headset.

    I've no idea which cup goes is for the top and which one is the bottom cup.

    I presumed the one with the longer lip/insert part for want of a better word, is the bottom one but not sure.

    It's a fairly big standard headset anyway, so if I wreck it it's not the end of the world but still.

    Any idea?

    I'll attach pics later


  • Advertisement
  • Registered Users Posts: 7,905 ✭✭✭cletus


    Weepsie wrote: »
    My genesis frame has an unbranded headset.

    I've no idea which cup goes is for the top and which one is the bottom cup.

    I presumed the one with the longer lip/insert part for want of a better word, is the bottom one but not sure.

    It's a fairly big standard headset anyway, so if I wreck it it's not the end of the world but still.

    Any idea?

    I'll attach pics later

    Are you replacing a set, or reinstalling the same set?


Advertisement