Advertisement
If you have a new account but are having problems posting or verifying your account, please email us on hello@boards.ie for help. Thanks :)
Hello all! Please ensure that you are posting a new thread or question in the appropriate forum. The Feedback forum is overwhelmed with questions that are having to be moved elsewhere. If you need help to verify your account contact hello@boards.ie
Please note that it is not permitted to have referral links posted in your signature. Keep these links contained in the appropriate forum. Thank you.

https://www.boards.ie/discussion/2055940817/signature-rules
Hi there,
There is an issue with role permissions that is being worked on at the moment.
If you are having trouble with access or permissions on regional forums please post here to get access: https://www.boards.ie/discussion/2058365403/you-do-not-have-permission-for-that#latest

Painting over exixting paint/clearcoat

  • 20-03-2021 8:31pm
    #1
    Registered Users, Registered Users 2 Posts: 1,287 ✭✭✭


    Hi, I started to tackle some chips on the edge of the bonnet today. It was starting to rust but as I sanded them down I quickly got to very good metal. So I masked up, cleaned the area with methylated spirits and applied two coats of zinc primer. Hope to get the top coat on tomorrow weather permitting.

    Previously, I tackled small chips around the sunroof with a paint brush, but due to the close clustering this time I soon realised this won't do for the bonnet.

    Apart from a repair around the roof gutter, which is obscured by the gutter and I was able to paint and mask, I have not painted before by blending in. So I'm really scared and nervous I'll screw it up.

    I plan to remove the masking and sand down with very fine paper. The area is less than 1cm by about 10cm. I'd like to paint as little as possible. I will be using a rattle can. You are supposed to hold it 25cm away. Could I go closer to minimise the sprayed area?

    Car is 83 Merc with light blue metallic and I assume it has a clear coat. Do I just spray over that?

    Do I need to blend the clear coat too?

    Sorry for all the newbie questions, any tips would be appreciated!


Comments

  • Moderators, Home & Garden Moderators Posts: 5,126 Mod ✭✭✭✭kadman


    Youtube is your friend, plenty of advise and videos there.
    This was the first I picked out, not viewed tho.

    https://www.youtube.com/watch?v=MtRV8TcezC0


  • Registered Users, Registered Users 2 Posts: 1,287 ✭✭✭MrCostington


    Thanks kadman, but given what I sanded and primed, I've already committed to spraying I think (the video features an interesting pen/tool I have not seen before)..


  • Moderators, Home & Garden Moderators Posts: 5,126 Mod ✭✭✭✭kadman


    Thanks kadman, but given what I sanded and primed, I've already committed to spraying I think (the video features an interesting pen/tool I have not seen before)..

    True enough, but after your prep work you dont need to mask up close to where your are spraying. Otherwise you will have ahard ridge finish where your tape is.

    On colour I would mask further away from the damaged area, and flick off the gun off the panel approaching the tape, to try and blend in a mist of spray here, instead of a full on coat. Of course with metallics it may be different.

    THis is what I do on full colour celly .


  • Registered Users, Registered Users 2 Posts: 4,946 ✭✭✭Bigus


    Thanks kadman, but given what I sanded and primed, I've already committed to spraying I think (the video features an interesting pen/tool I have not seen before)..

    I’ve huge experience with rattle cans and blending, it’s easy to get away with murder on the likes of rear wheel arches, corners or stuff, like you say is hidden behind gutters etc.
    It’s a lot to do with the way light is reflected and the flatter the surface and the more it’s exposed to good light , the more difficult it is to get away with, and big flat surface areas will very much expose(literally) any flaws.

    For this reason no matter how good the paint match , preparation, feathering , blending cutting back , I’m afraid to say from experience you will get away with nothing less than a full respray on a bonnet a roof or top of a boot lid.

    Unless there’s distinct lines and different levels in the bonnet to work to alter the light.

    So I’d say treat the rust and book in for a professional blow over of the bonnet.

    If you southside Dublin I can recommend two lads.


  • Registered Users, Registered Users 2 Posts: 4,946 ✭✭✭Bigus


    Having Re-read you original post , the fact that it’s only 1cmx 10 cm , it might live with a mix match, but once you accept this it’ll make life easier.

    Sand back the primer wet, to as close as possible to the repair with 600 or 400 grit, this greatly lessens the area that needs paint .... areas that go white from sanding will return to color once Re lacquered, so no need to paint here.

    Mask mask mask with old blankets etc , this allows you to hold the can further away. Spray light coats and force yourself to walk away for at least 3 mins , between applications, however it is sometimes necessary to get a heavy coat on to get the paint to flow ,but the trick is not to get runs either.
    If you make a balls of it , rattle can paint can easily be undone with lots of thinners on a cloth and you can start again without damaging factory paint.

    Make sure you have the can spraying before it goes near the surface to be painted and lead in from a piece of card held in your other hand to help until you get the feel of the spray pattern , sometimes you may need to turn the can through 90 def etc or go back or closer or fast or slower or up and down rather than side to side depending on how the paint lands.

    Once your happy the primer is well hidden let the paint flash off and lacquer a much bigger area , and 24 hrs later sand and cut (compound) this back a lot .


  • Advertisement
  • Registered Users, Registered Users 2 Posts: 1,287 ✭✭✭MrCostington


    Bigus wrote: »
    .... areas that go white from sanding will return to color once Re lacquered, so no need to paint here..

    Thanks for the advice! Especially the bit above and about starting to spray off the area. I'm about to go out now to start. I'll leave lots of time between coats and found an old biscuit tin, I'll practice on the lid first.

    If I screw it up I guess I'll have to go to a pro. I'm in the northside, I think I saw a recommendation here for someone near my office.

    Thanks!


  • Registered Users, Registered Users 2 Posts: 1,287 ✭✭✭MrCostington


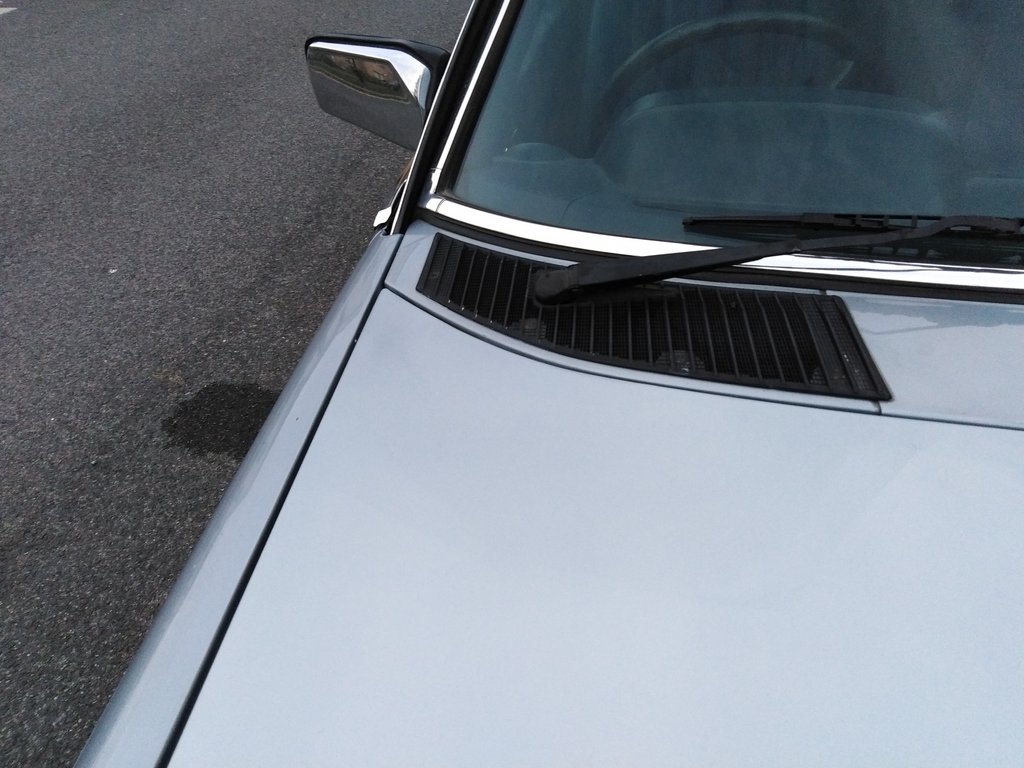
    Just did first light coat, here's a pic before I started.

    paint.jpg


  • Moderators, Home & Garden Moderators Posts: 5,126 Mod ✭✭✭✭kadman


    Many light coats instead of heavy coats is the order of the day:)


  • Registered Users, Registered Users 2 Posts: 1,287 ✭✭✭MrCostington


    I've finished for the day. Ended up doing a much bigger area than intended as the blending always ended up hitting the masking, so I had to peel it back and go again ...

    This pic was taken at 6.38 so light fading, not happy with the corner. The area done is around the black grill. It was just about 10 min old at that time, maybe it will look better tomorrow I hope. I'll come back to it next weekend if it's nice out.


    paintdone.jpg


  • Registered Users, Registered Users 2 Posts: 4,946 ✭✭✭Bigus


    Looks great from here !


  • Advertisement
  • Registered Users, Registered Users 2 Posts: 1,287 ✭✭✭MrCostington


    Thank you! I took a few pics but the issue with the corner didn't show up on any of them. Like I said it was starting to get dark. I'll maybe try some cutting compound next week and see it that improves it.


  • Registered Users, Registered Users 2 Posts: 1,287 ✭✭✭MrCostington


    An update on this. As I said 2 weeks ago (I could have sworn I did this last weekend!) I was not happy with the results, the area kept growing as I tried to bend it in and the colour was off (but did not show up on pic)

    In the meantime I got another paint can made up, this time I left in the petrol door to match it, and did a test on a bit of tin (primer, colour, clear) - itis a good match to the petrol door but still too dark for the bonnet. I'm assuming the flat surface of the bonnet faded more over 38 years than the side of the car (does metallic paint fade???). Or maybe the bonnet or side was painted before.

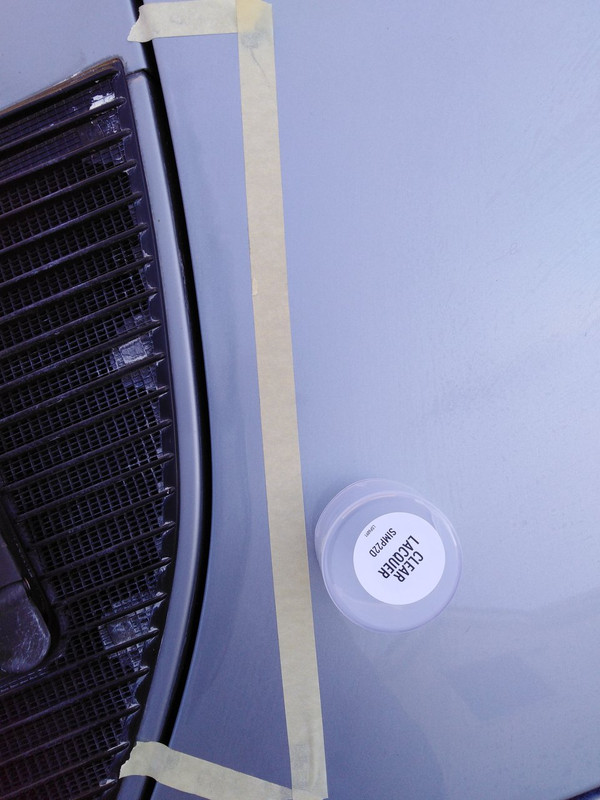
    Anyway, I decided to rub back the new paint to the original area I wanted to repair (just a few small chips at the edge). I had not applied a clearcoat yet. Just finished and took a pic which I think shows the problem much better. The masking tape is just to show you where to look.

    So, here's what I'm thinking now. It's too windy to try the clearcoat, and too dark in the underground carpark. So I will have to leave it for a while. I'm actually toying with the idea of leaving it for a few months without the clearcoar in the hope the new paint may fade a bit and blend in better.

    Brilliant idea, or terrible idea?

    goodfriday.jpg


  • Moderators, Home & Garden Moderators Posts: 5,126 Mod ✭✭✭✭kadman


    If you were blending with your spray patterns, then you should not have a definitive pattern,
    like you clearly have.

    Any harm in asking what colour primer you used. If its darker than your finish colour, it takes more colour finish to cover it.
    And how did you apply the primer.


  • Registered Users, Registered Users 2 Posts: 1,287 ✭✭✭MrCostington


    Thanks. I did try to blend and the repair area just got bigger and bigger, to about 30 x 30 cm. I rubbed it back with rubbing compound to what you see above. As I said above, the paint is joust not the same colour, a good bit darker. I'm not sure if any blending would overcome this? Clearly, I am not very skilled at this, and also it was windy every day I was working on it (I ended up with paint on the roof! Luckily a quick rub removed it).

    Re the primer, good point! It's a medium gray. If you look at pic 8 you can see it, the thin line at the edge. I applied it with a rattle can, this one


  • Moderators, Home & Garden Moderators Posts: 5,126 Mod ✭✭✭✭kadman


    Medium grey primer on a car with a light looking colour as you have
    may have made things a bit more difficult for you.

    A lighter colour primer may have helped a bit. But thats academic now.

    If the slight difference bothers you that much, I dont know anyway to lighten part of a
    panel and leave another part untouched, other than repainting with a lighter shade colour.


  • Registered Users, Registered Users 2 Posts: 699 ✭✭✭Zebrano


    kadman wrote: »
    Medium grey primer on a car with a light looking colour as you have
    may have made things a bit more difficult for you.

    A lighter colour primer may have helped a bit. But thats academic now.

    If the slight difference bothers you that much, I dont know anyway to lighten part of a
    panel and leave another part untouched, other than repainting with a lighter shade colour.

    If you hold the petrol flap to the bonnet how close a match is it.


  • Registered Users, Registered Users 2 Posts: 1,287 ✭✭✭MrCostington


    Zebrano wrote: »
    If you hold the petrol flap to the bonnet how close a match is it.


    Never thought of that, may do during the week.


  • Registered Users, Registered Users 2 Posts: 42 120Filmshooter


    One tip on the masking tape. Roll the edge on the side you are painting upwards so it is not stuck down. This will give a softer line where the paint lands on it or close to it.


  • Registered Users, Registered Users 2 Posts: 1,261 ✭✭✭TigerTim


    One tip on the masking tape. Roll the edge on the side you are painting upwards so it is not stuck down. This will give a softer line where the paint lands on it or close to it.

    Been doing that for the past 10 years on anything I paint. Great idea. Gets rid of the hard straight line. Easier to blend it in.

    T.


Advertisement