Advertisement
If you have a new account but are having problems posting or verifying your account, please email us on hello@boards.ie for help. Thanks :)
Hello all! Please ensure that you are posting a new thread or question in the appropriate forum. The Feedback forum is overwhelmed with questions that are having to be moved elsewhere. If you need help to verify your account contact hello@boards.ie

Advice on painting floor tiles

Options
  • 16-10-2016 6:42pm
    #1
    Registered Users Posts: 26


    Anybody tried this paint and does it work? Or is it best to just take them up and re-tile. I am good at painting walls with matt, but completely useless with gloss and satin.


Comments

  • Registered Users Posts: 2,510 ✭✭✭Ceepo


    c0deblu2th wrote: »
    Anybody tried this paint and does it work? Or is it best to just take them up and re-tile. I am good at painting walls with matt, but completely useless with gloss and satin.

    I wouldn't recommend painting floor tiles tbh, as the paint will wear off quite quickly in the areas that are most used


  • Registered Users Posts: 26 c0deblu2th


    Ceepo wrote: »
    I wouldn't recommend painting floor tiles tbh, as the paint will wear off quite quickly in the areas that are most used


    Thanks for tip. Paint bit expensive for trial and error. Will put aside few Bob for re-tiling


  • Registered Users Posts: 2,659 ✭✭✭Darwin


    OP I'm thinking of doing the exact same thing, our kitchen floor tiles are natural stone (limestone I think) and from everything I've read they can be painted if you follow a specific procedure. The general steps are described here, although I'm not sure about applying a sealer before painting, for example will the paint bond properly to the sealer?. Our floor tiles were never sealed so they are quite dirty. I'll preface my remarks by saying that I am no expert on this, but I think the procedure below will work:

    1. Clean the tiles with a specific degreaser like this one.
    2. Sand each tile with an aluminum-oxide sandpaper to create surface that will absorb the paint.
    3. Apply a thin coat of primer and let it dry overnight.
    4. Apply the top coat - use a hard wearing floor paint designed for concrete floors. Little Greene floor paint has a good range of colours and should do the job.
    5. Apply two coats of sealer appropriate to the type of tile stone you have (Smart Seal have a good range here)

    As you can see there is a lot of work involved and in your case may be easier/cheaper to remove the original tiles.


  • Registered Users Posts: 26 c0deblu2th


    Wow that is a lot of work and impossible living in open plan with my dog. My fear is as floor is first thing you see be afraid if it went wrong would look even worse. Not sealed so they look like they were laid fifty not four years ago.

    Make it look so easy and lovely on tin. Thanks again


  • Registered Users Posts: 2,510 ✭✭✭Ceepo


    Darwin wrote: »
    OP I'm thinking of doing the exact same thing, our kitchen floor tiles are natural stone (limestone I think) and from everything I've read they can be painted if you follow a specific procedure. The general steps are described here, although I'm not sure about applying a sealer before painting, for example will the paint bond properly to the sealer?. Our floor tiles were never sealed so they are quite dirty. I'll preface my remarks by saying that I am no expert on this, but I think the procedure below will work:

    1. Clean the tiles with a specific degreaser like this one.
    2. Sand each tile with an aluminum-oxide sandpaper to create surface that will absorb the paint.
    3. Apply a thin coat of primer and let it dry overnight.
    4. Apply the top coat - use a hard wearing floor paint designed for concrete floors. Little Greene floor paint has a good range of colours and should do the job.
    5. Apply two coats of sealer appropriate to the type of tile stone you have (Smart Seal have a good range here)

    As you can see there is a lot of work involved and in your case may be easier/cheaper to remove the original tiles.

    Re sealer for natural stone tiles. The sealer works by absorbing into the stone. You will need to make sure it will adhere to the paint. Just double check before you do it..;)


  • Advertisement
  • Registered Users Posts: 2,659 ✭✭✭Darwin


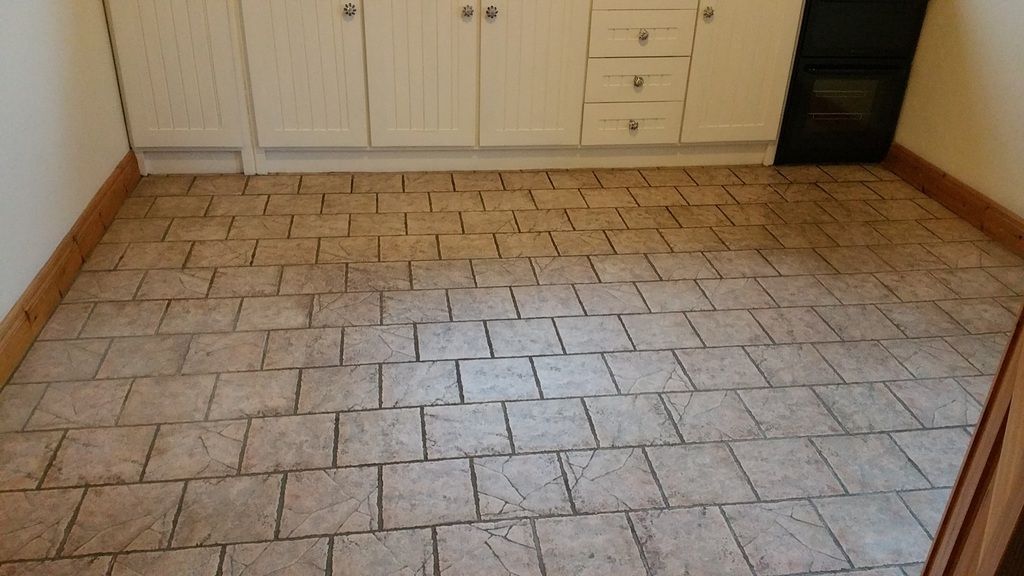
    Well, in case anyone is interested, our tiled floor is now painted but with some changes to the above. I tried to clean the tiles first, but it didn't work out too well, here's what they looked like after cleaning:

    20161128_084047.jpg

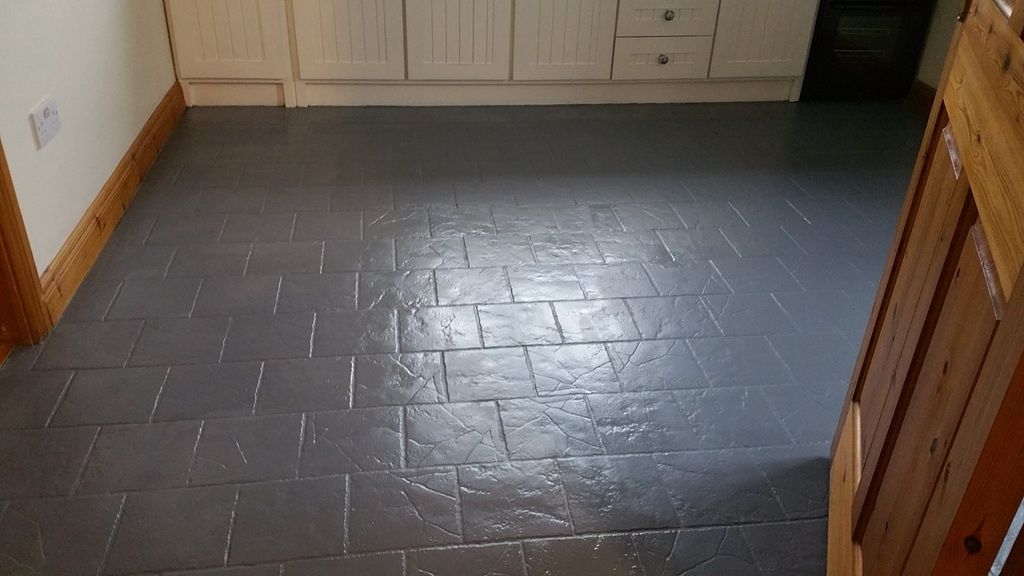
    The sanding stage was skipped altogether and I managed to find a really good primer by Zinsser called Bulls Eye 1-2-3 which bonds to most surfaces without sanding and dries within an hour. The primer is white in colour, so I had the local hardware shop add black dye to it in order that it would be a closer match to the final coat. Here's the floor with primer applied:

    Primer.jpg

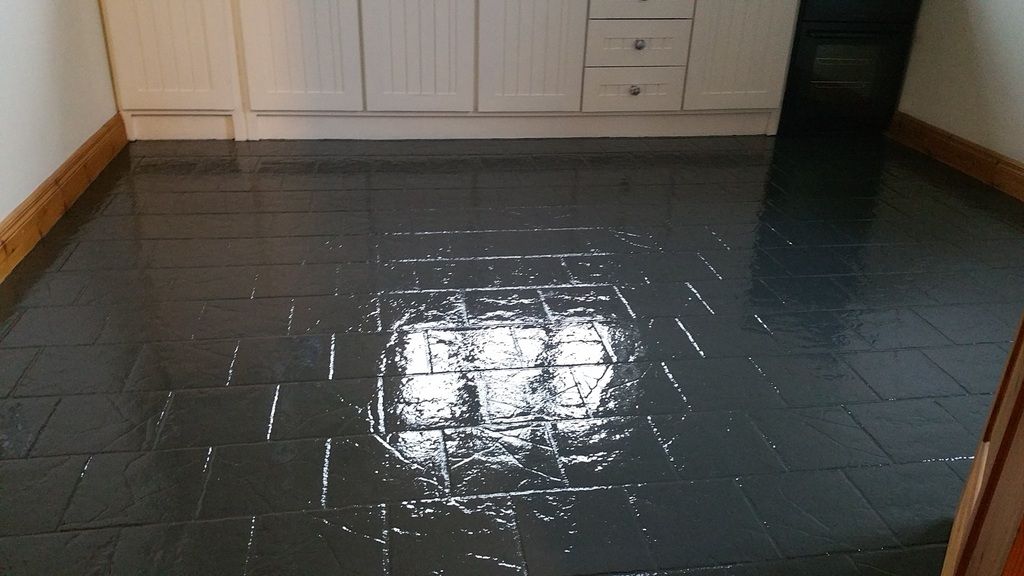
    Lastly two coats of Little Green floor paint. First coat which was still wet:

    First%20Coat.jpg

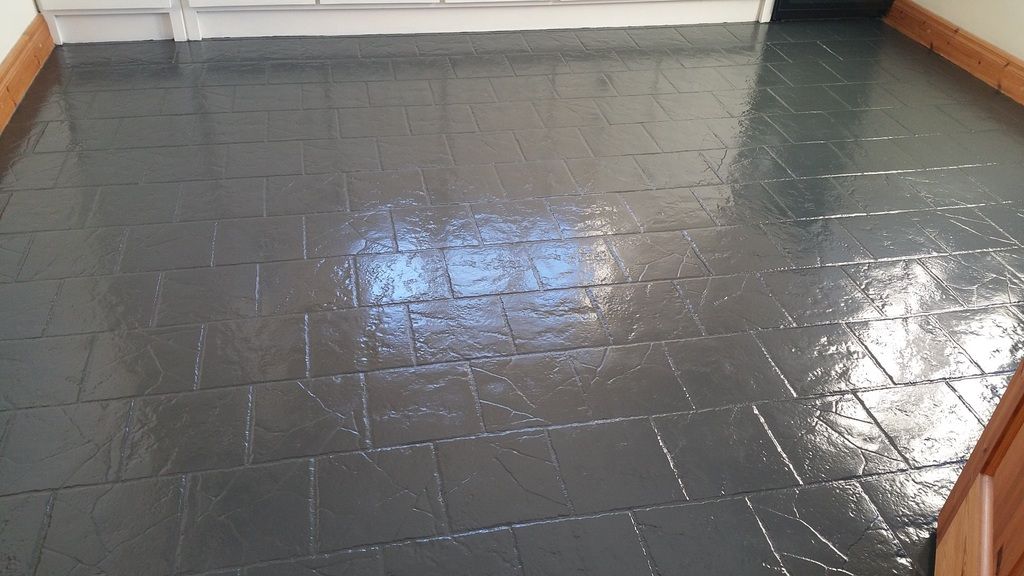
    Next morning, second coat applied and 24 hours later is fully dry and can be walked on (full cure will take a few days):

    Final%20Coat.jpg

    I delegated the work to a local handyman and I'm well pleased with the result so far. Hopefully the finish will stand up normal levels of kitchen traffic!


  • Registered Users Posts: 880 ✭✭✭celticbhoy27


    Darwin wrote: »
    Well, in case anyone is interested, our tiled floor is now painted but with some changes to the above. I tried to clean the tiles first, but it didn't work out too well, here's what they looked like after cleaning:

    20161128_084047.jpg

    The sanding stage was skipped altogether and I managed to find a really good primer by Zinsser called Bulls Eye 1-2-3 which bonds to most surfaces without sanding and dries within an hour. The primer is white in colour, so I had the local hardware shop add black dye to it in order that it would be a closer match to the final coat. Here's the floor with primer applied:

    Primer.jpg

    Lastly two coats of Little Green floor paint. First coat which was still wet:

    First%20Coat.jpg

    Next morning, second coat applied and 24 hours later is fully dry and can be walked on (full cure will take a few days):

    Final%20Coat.jpg

    I delegated the work to a local handyman and I'm well pleased with the result so far. Hopefully the finish will stand up normal levels of kitchen traffic!

    Hi Darwin, howd the tiles hold up afterwards? Thinking of doing the same


  • Registered Users Posts: 2,659 ✭✭✭Darwin


    Great very pleased with the job over 1 year later, there are one or two places where the finish got scuffed, but I was able to touch it up ok. I don’t wear outdoor shoes in the kitchen so that probably helps. Black does show up the dirt though so it needs to be cleaned regularly.


  • Registered Users Posts: 880 ✭✭✭celticbhoy27


    Darwin wrote: »
    Great very pleased with the job over 1 year later, there are one or two places where the finish got scuffed, but I was able to touch it up ok. I don’t wear outdoor shoes in the kitchen so that probably helps. Black does show up the dirt though so it needs to be cleaned regularly.

    Thanks a mill for the quick reply. I'll take the plunge :)


  • Registered Users Posts: 3,162 ✭✭✭KaneToad


  • Advertisement
  • Registered Users Posts: 2,659 ✭✭✭Darwin


    Not too bad, some scratches here and there, unfortunately the floor paint has long gone off in the tin so I would need to get another pot for touching up.

    I've no regrets on doing it, taking up the existing tiles would have been a headache.


  • Registered Users Posts: 4,095 ✭✭✭johndaman66


    Nice work OP, seems to be holding up well too. Apologies for hijacking the thread.

    Has anyone repaired a crack in a tile with a moderate degree of success? There are a few cracked tiles in the outer kitchen of my mothers house which is used for cooking (1970's built bungalow with after thought extension). They are old quarry tiles. Badly need to be re-grouted anyway.

    I seen a few videos on Youtube where they toy around with mixing epoxy filler and different combinations of paint until the closest shade is achieved. The paint is actually mixed in with the epoxy filler before applying. The finished article tends to look good insofar as you can tell on these sort of videos but curious about the longevity of it all. It would be a high traffic area, albeit pedestrian traffic apart from the odd fridge or cooker being dragged across the floor.


Advertisement