Advertisement
If you have a new account but are having problems posting or verifying your account, please email us on hello@boards.ie for help. Thanks :)
Hello all! Please ensure that you are posting a new thread or question in the appropriate forum. The Feedback forum is overwhelmed with questions that are having to be moved elsewhere. If you need help to verify your account contact hello@boards.ie
Please note that it is not permitted to have referral links posted in your signature. Keep these links contained in the appropriate forum. Thank you.

https://www.boards.ie/discussion/2055940817/signature-rules
Hi there,
There is an issue with role permissions that is being worked on at the moment.
If you are having trouble with access or permissions on regional forums please post here to get access: https://www.boards.ie/discussion/2058365403/you-do-not-have-permission-for-that#latest

Noob wanting to start detailing...

  • 01-10-2015 2:16am
    #1
    Registered Users, Registered Users 2 Posts: 5,119 ✭✭✭


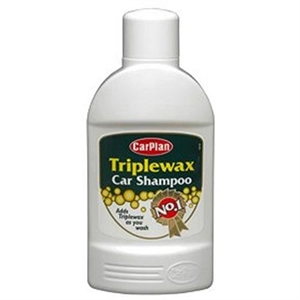
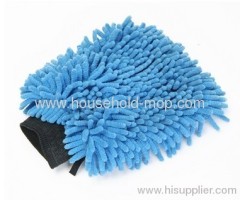
    So this is my detailing equipment.

    0000102_carplan_triplewax_car_shampoo_500ml_300.jpeg

    and

    142054598_Microfiber_Car_Washing_Cleaning_Glove_Wash_Mitt_240.jpg

    Is there any thing else I can use, like black shoe polish to shine the tyres etc.

    Thanks in advance..


Comments

  • Registered Users, Registered Users 2 Posts: 5,875 ✭✭✭Foxhole Norman


    Prepare your wallet, once you start you won't stop! If you're not planning anything major I found the Farcela, AutoGlym and Meguiars products that Halfords stock do the job perfectly!

    Basics I would get:

    Car Shampoo, PH Neutral - Something like AutoGlym or Meguiars Gold Class
    Wheel Cleaner, AutoGlym's Custom Wheels is good and comes with brushes
    Clay Bar
    Drying Microfibres
    Buffing Microfibres
    AutoGlym's Super Resin Polish
    Some form of wax, Meguiars Liquid Wax maybe
    Tyre Shine, I found the AutoGlym Spray on stuff quite good.

    This can all be gotten in Halfords, if you want to up the level look at DetailingShed/D&DDetailing for higher end products for some better results!


  • Registered Users, Registered Users 2 Posts: 853 ✭✭✭edburg


    PMSL @ shoe polish

    As above in Foxhole post. Might be an idea looking at detailing suppliers websites as a lot will have starter kits with all kinds of products or contact couple irish suppliers.


    Irish supplier

    http://www.detailingshed.com/
    http://dnddetailing.ie/shop/
    http://www.halfords.ie/motoring-travel/cleaning-body-repair/cleaning-kits

    Pretty sure Halfords still do a Autoglym kit that comes a few handy products for cleaning, you just need to source extra detailing bits like claybar, brushes etc seperatly.

    Detail kits UK suppliers, couple from UK sure you find more via Google search

    http://www.cleanyourcar.co.uk/complete-detailing-kits/cat_22.html
    http://www.polishedbliss.co.uk/acatalog/car-care-kits-and-gift-ideas.html
    http://www.chemicalguysuk.com/Detailing_Kits_s/27.htm
    http://www.autobritedirect.co.uk/index.php/valeting-detailing-kits-gifts.html


    Amazon
    http://www.amazon.co.uk/s/?ie=UTF8&keywords=car+detailing+kit&tag=googhydr-21&index=aps&hvadid=28662453300&hvpos=1t1&hvexid=&hvnetw=g&hvrand=1435823782883834716&hvpone=&hvptwo=&hvqmt=b&hvdev=c&ref=pd_sl_78xp8dwqkj_b


    Basically you can spend an almighty fortune on detailing products, but at end of day it's your state of mind, wallet and what it is your trying to achieve.


  • Registered Users, Registered Users 2 Posts: 4,377 ✭✭✭Curran


    As said, you will be able to pick up some reasonable products in places like your local motor factors or Halfords, etc.

    The detailing suppliers will obviously have superior products, but as you will see that they are usually a bit more pricey for similar products on the shelves of Halfords for example, but it would be in mismatch in terms of quality and economy.
    Take a Wheel Cleaner for example; say its 10 Euro in Halfords, and 14 from a Detailing Supplier. The bottle in Halfords will have instructions to spray on rinse off. The bottle from the Detailing Supplier will most likely be a concentrated product and can be diluted down to suit your needs. So 1:1 for heavy soiling, 1 product : 5 water for lightly soiled wheels and if you were washing very regularly, 1:10. So you can see that you are getting possibly up to 10 times the amount for a few extra Euro.
    You'll often find that paying the few extra euro will benefit in the long run, and some difference might be:
    - how far they go, due to diution
    - how easy they are to work with, application and buffing on waxes for example
    - how they look, waxes for example
    - how long the last, waxes / sealants / tyre dressing
    - how good a job they do, wheel cleaner, glass cleaner, trim dressing, etc

    The shampoo and wash mitt you have, will do a job, but are not the best quality. And as for shoe polish to shine tyres, for example, might work, but may have some negative results. Take faded plastic trim on bumpers for example, peanut butter helps darken them for a while due to the oils in it, but do you want peanut butter streaks down the side of your car after it rains, or perhaps a dog licking your plastics if he likes the smell :P If you search, there are plenty of 'life hacks' for doing jobs around the car, but not all of them are the best. No harm in trying them, or if you are on an extremely tight budget.


  • Registered Users, Registered Users 2 Posts: 5,119 ✭✭✭job seeker


    Hi all,

    Thanks to the three of ye for all that advice.

    Money is tight enough, Id be the person looking at lower range products than AutoGlym or Meguiars products. As at the end of the day I'd be really inclined try and put money towards basic car maintenance rather than detailing products, but still interested in detailing. So I'd really be only looking to have the car clean and a slight shine, as it's a 16 y.o. car at the end of the day.

    Also what order do the different products go on the paint work?

    Clay bar, polish, wa, car shampoo, etc.?


  • Registered Users, Registered Users 2 Posts: 4,034 ✭✭✭Theboinkmaster


    I emailed this awhile ago to a mate of mine to help him, just what I do and products I use:

    Step 1

    OK so you want to start cleaning the car with a mit and 2 buckets (one for the soap, other for rinsing)

    Mitt:

    http://www.detailingshed.com/washing/36-microfiber-madness-incredimitt.html

    Wash:

    http://www.halfords.ie/motoring-travel/cleaning-body-repair/shampoo-polish-wax/meguiars-nxt-generation-car-wash-1-89-litre

    Use grit guards at bottom of both buckets:

    http://www.detailingshed.com/washing/105-scratch-shield-grit-guard.html

    Step 2:

    Now you need to wash off stuff that can’t wash off in normal soap:

    Tar:

    http://www.detailingshed.com/wheels-tyres/120-orchard-autocare-tar-cleanse.html

    Iron:

    http://www.detailingshed.com/wheels-tyres/10-orchard-autocare-iron-cleanse.html

    Clay bar:

    http://www.halfords.ie/motoring-travel/cleaning-body-repair/detailing-products/meguiars-quik-clay-starter-kit

    Step 3:

    Repeat step 1

    Step 4:

    Dry car – do not use chamois or any of that sh!t it scratches paintwork need proper towel:

    http://www.detailingshed.com/drying-towels-microfibres/14-microfiber-madness-dry-me-crazy.html

    Step 5:

    Polish paintwork:

    Halfords site down – but get “Autoglym super resin polish”

    Step 6:

    Seal paintwork (same as wax – protective layer):

    Halfords site down – but get “Autoglym extra gloss protection”

    For better protection apply 1 layer and wait an hour then apply a second layer

    Step 7:

    Polish glass inside and out:

    Halfords site down – but get “Autoglym glass polish”

    Obviously you need to do the inside of the car and forgot about wheels, this is what you need:

    Around step 1 above clean with above soap but after spray this stuff on for 5mins:

    http://www.detailingshed.com/wheels-tyres/9-bilt-hamber-auto-wheel.html

    and then rinse and clean again, using wheel woollies if you can:

    http://www.detailingshed.com/wheels-tyres/187-wheel-woolies.html

    and to finish them off in halford get “autoglym quick shine tyre gel” (it’s purple) and dress the side walls. I also apply Autoglym extra gloss protection to the alloys.

    For cleaning footwell and bottom half of interior use APC (all purpose cleaner) mixed into water (get spray bottle):

    http://www.detailingshed.com/pre-wash/125-orchard-autocare-all-purpose-cleaner.html

    think that’s about it!! For inside of car get a nice leather treatment and rub it into leather seats. For dash I use armorall wipes (matt finish – Halfords) and then for clear parts/mental polish with a microfiber cloth.

    You can get pack of 15 microfibre cloths in home store and more which is handy

    And don’t forget to use some APC and cloth on engine bay.


  • Advertisement
  • Registered Users, Registered Users 2 Posts: 4,377 ✭✭✭Curran


    The process goes something along the lines of....

    Pre Wash/Snow Foam /De-grease (if doing a claying job)
    Wash
    Rinse
    De-Tar
    Rinse
    De-Ironise
    Rinse
    Clay
    Polish
    Protect

    Pre-Clean / Snow Foam

    The Aim
    To safely remove heavy dirt and grit, which ultimately reduces the chance of swirling. Very effective way of limiting / preventing the possible damage to the cars paintwork, by suspending dirt and grit in a lubricated solution that is easy to wash away. Also to soften any dirt that will not wash away when rinse step is complete.

    Products / Accessories
    Power Washer
    Snowfoam Lance / Pressurised Sprayer
    Snowfoam Solution
    Pre Clean
    APC
    De-greaser
    Detailing Brushes

    Methods
    1: Snowfoaming with Lance
    2: Pre Clean solution with Pressurised Sprayer

    How To
    1: Snowfoam Lance
    Add snowfoam solution to the lance bottle, topping up with warm water. See note #1
    Adjust the air mixture knob and the spray adjust knob to achieve a suitable spray to apply the snowfoam.
    Generally, starting at the highest point, spray on a reasonable thick solution of snowfoam, covering the entire car.
    Allow to dwell (see section Trims / Shuts / Door Jambs), until the solution has dripped away or it starts showing signs of drying out
    Rinse away with pressure washer, avoid direct contact with the paint, until initial heavy dirt is removed.
    Give the wheels / arches a gentle blast to remove heavy soiling.

    Note #1: If planning to strip back old LSP’s or claying, its no harm to add a moderate mixture or APC to help removal

    2. Pre Clean with Pressurised Sprayer
    Add Pre Clean solution to bottle and top up with water. Note #1 above applies here also.
    Pressurise the bottle and apply to car, concentrating on the lower half of the car where the dirt is heaviest.
    Allow to dwell (see section Trims / Shuts / Door Jambs), until the solution has dripped away or it starts showing signs of drying out.
    Rinse away with pressure washer, avoid direct contact with the paint, until initial heavy dirt is removed.
    Give the wheels / arches a gentle blast to remove heavy soiling.


    Wheels & Tyres / Arches

    The Aim
    To safely remove heavy dirt, grit, tar, iron particles from wheels.
    To ensure all surfaces are clean, to give a good surface for any protection to bond, ensuring the product will achieve its full potential.

    Products / Accessories
    Power Washer
    Wheel Cleaner w/ foam head trigger
    APC w/ foam head trigger
    Tar Remover
    De-Ironiser
    Wheel Brush
    Detailing Brushes
    Wheel Brace and Jack required if doing a full-on job! J
    Clay (optional)

    How To
    Give the wheel a gentle blast with the PW to remove the heavy dirt.
    Apply wheel cleaner through a foam head trigger (dilution ratio will depend on how heavily soiled the wheels are) and allow to dwell for a few seconds…rinsing with PW and wheel cleaner re-applied, may be necessary.
    Apply APC solution to the tyres and arches and allow to dwell.
    Using a combination of the wheel brush and detailing brushes, agitate the solution, trying to ensure the brushes get into all the nook and crannies.
    Agitate the APC solution on the tyres and arches with a detailing brushes.
    Rinse off with PW.
    Apply tar remover and allow to dwell – dwell time will vary from product to product.
    Rinse off with PW.
    Apply de-ironiser and allow to dwell – dwell time will vary from product to product.
    Rinse off with PW.
    The tar removing and de-ironising steps may need to be repeated.
    Using an old piece of clay is an optional step to give the wheels the best clean and surface for any LSPs to bond to.


    Trim / Shuts / Door Jambs

    The Aim
    To remove any dirt that has gathered in the nook and crannies from behind and around; trim, the shuts of the bonnet and boot lid, the door jambs, windows, badges, headlights, tail lights, side indicators, mirrors, vents and grilles, etc
    To ensure all surfaces are clean, as it’s the small details that make the difference between a detail and a valet / car wash

    Products / Accessories
    Power Washer
    APC w/ foam head trigger
    Detailing Brushes
    Microfiber Work Cloths

    How To
    Spray APC solution onto the affected area and agitate with various sized detailing brushes.
    Rinse away with PW.
    Open doors, bonnet and boot lid – get into all the tight spaces.
    Wipe away excess with Microfiber Cloths or if you are brave, rinse with the PW.
    This step can be completed during the Pre-Clean stage. While the snowfoam or pre-cleaner is dwelling on the car, proceed to clean the areas mentioned above. If this step has been completed before, often the snowfoam solution will be enough lubrication needed to gentle agitate the areas.


    Washing – The Two Bucket Method (2BM)

    The Aim
    To clean the paint work of general dirt and grime that is accumulated from day to day driving, including flies and bird etchings.
    To limit the potential damage (swirling) to the paint work

    Products / Accessories
    Two Buckets
    Grit Guard
    High quality Wash Mitt (Lambswool or Microfiber) – ideally two
    Well lubricated Shampoo

    How To
    Ensure that your Wash Mitt is thoroughly rinsed out and that the buckets are clean and free of any dirt or grit.
    Fill two large buckets with fresh water.
    At a grit guard to at least one of the buckets, ideally both.
    Add shampoo to one of the buckets (if using one grit guard, add it to the bucket without a GG).
    One bucket is now your “Rinse Bucket” (fresh water and GG) and the other is the “Wash Bucket” (shampoo and GG).
    Dip your Wash Mitt into the Wash Bucket and starting at the roof, wash one half of the roof (a section)
    Once you have finished a section, rinse out your Wash Mitt in the Rinse Bucket. Then dip it into the Wash Bucket, collecting clean water and shampoo. This ensures that any potentially harmful grit that has been picked up by the wash mitt, is now in the Rinse Bucket. The Girt Guard, ensures that each time you rinse your wash mitt, you don’t pick up harmful grit that you have previously wash out. This is down to two reasons. Firstly the GG prevents you dipping the wash mitt to the bottom of the bucket where the grit is, and re-contaminating your wash mitt. Secondly as the GG is sectioned, it prevents grit being lifted from the bottom of the bucket by the whirlpool that is created when you rinse out your wash mitt.
    Continue this process of washing one section (a panel) from highest to lowest, rinsing the mitt in the rinse bucket, then dipping it into the wash bucket, and washing a section. It is advisable to use one mitt for the top of half of the car (least dirty and most obvious place to notice swirls) and a second for the lower half (below the rub trim level).
    Once all panels have been clean, give the whole car a good rinse down with the PW, ensure that all the trim and shuts are free from shampoo and perhaps snowfoam also.


    Paint Prep including De-Tarring, De-Ironising and Claying

    The Aim
    To decontaminate the paint work of bonded contaminants (microscopic), accumulated from subjected to many miles of driving and general environmental surroundings that regular washing wont remove; including tar, iron particles, over-spray, tree spa, light paint or rubber/plastic transfer, etc
    To give the best surface for LSP to bond to, ensuring good appearance and durability of the product.

    Products / Accessories
    Power Washer
    Tar Remover
    De-Ironiser
    Clay & Lubricant

    How To
    Apply tar remover to affected areas, being careful around plastic / rubber trim.
    Allow to dwell and rinse off with PW. Repeat if necessary. Ideally you should not have to touch the tar, but sometimes a light wipe may be necessary.
    Apply the de-ironiser.
    Allow to dwell. Shortly after application the solution, in places, will turn purple and begin to bleed; these areas are affected by iron particles. Spreading with a sponge or clean microfiber is OK as the paintwork should be free of any dirt or grit that could be dragged across the paint resulting in damage.
    Allow to dwell and rinse off with PW. Repeat if necessary.
    At this point the paint work should be free of any potentially damaging contamination resulting from claying.
    Knead the clay into a manageable flat section
    Starting at the roof, spray on a generous amount of lubricant to an approximate 1ft * 1ft section. Gently rub the clay back and forth on the paint work. At first the clay will not slide smoothly over the paint work (as its contaminated). Continued moving the clay back and forth and after a few seconds the clay will slide much freer, more like its on ice. At this point that section of paintwork has been de-contaminated and another section can be started, not forgetting to use plenty of lubricant. If you come across a section that the clay is very grabby on, be sure to use more lubricant and less pressure on the clay, and eventually it will slide freely.
    Once all the paintwork has been clayed, the whole car should be re-washed and dried. NOW, your paintwork is clean!!

    Up to this point is considered “preparation”; and the paintwork is prepared for any or all of the following steps…
    Polishing (hand or machine)
    Glazing
    LSP


    Polishing (by hand)

    The Aim

    To remove oxidisation
    Add depth to the paint and gloss to the paint
    Remove / hide light swirling

    Products / Accessories
    Polish
    Applicator Pad
    High quality Buffing Microfiber Cloth

    How To
    Prime the applicator with a generous amount of polish.
    Apply to the paintwork with reasonable pressure, working it in various directions, try to apply it evenly.
    When the spread of the product appears to be diminishing, apply a small amount to the applicator and continue.
    Allow the polish to dry to a haze and buff of with a high quality buffing microfiber cloth. Depending on the polish, it may be best to apply one or two panels at a time and then buffing off, before continuing with other panels.
    Depending on the desired finish, multiple stages may be required

    Glazing

    The Aim

    To add a glossy wet look to the paint
    To hide light swirling

    Products / Accessories
    Glaze
    Applicator Pad
    High quality Buffing Microfiber Cloth

    How To
    Same as hand polishing...
    Prime the applicator with a generous amount of glaze.
    Apply to the paintwork with reasonable pressure, working it in various directions, try to apply it evenly.
    When the spread of the product appears to be diminishing, apply a small amount to the applicator and continue.
    Allow the glaze to dry to a haze and buff of with a high quality buffing microfiber cloth. Depending on the glaze, it may be best to apply one or two panels at a time and then buffing off, before continuing with other panels.
    Usually one coat of glaze is enough...maximum two!
    Glazing usually diminishes the effectiveness of the LSP... you will probably find that you are very disappointed in the performance of the LSP, this is down to the fact that the glaze is preventing a good bond. Durability suffers for the wet look.

    LSP (Last Stage Protection) – Wax / Sealant / Nano Technology

    The Aim

    To protect the paint work.
    To add a glossy wet look to the paint
    Beading J

    Products / Accessories
    LSP of choice
    Applicator Pad / Applicator Microfiber Cloth
    High quality Buffing Microfiber Cloth

    How To
    Much the same as hand polishing and glazing...
    Prime the applicator with a generous amount of LSP.
    Apply to the paintwork with reasonable pressure, working it in various directions, try to apply it evenly. The secret to easy applying and removal of LSP is to keep to applying thin coats, but multiple times – its much better for durability and easy on / easy off than applying one very thick coat.
    When the spread of the product appears to be diminishing, apply a small amount to the applicator and continue.
    Allow the LSP to dry to a haze and buff of with a high quality buffing microfiber cloth. Depending on the LSP, it may be best to apply one or two panels at a time and then buffing off, before continuing with other panels.
    The more coats applied the better...minimum two, too ensure full coverage and durability. Applying more coats usually results in a deeper and glossier shine, so advantages are twofold with durability.


  • Registered Users, Registered Users 2 Posts: 853 ✭✭✭edburg


    Curran wrote: »
    The process goes something along the lines of....

    Pre Wash/Snow Foam /De-grease (if doing a claying job)
    Wash
    Rinse
    De-Tar
    Rinse
    De-Ironise
    Rinse
    Clay
    Polish
    Protect

    Pre-Clean / Snow Foam

    The Aim
    To safely remove heavy dirt and grit, which ultimately reduces the chance of swirling. Very effective way of limiting / preventing the possible damage to the cars paintwork, by suspending dirt and grit in a lubricated solution that is easy to wash away. Also to soften any dirt that will not wash away when rinse step is complete.

    Products / Accessories
    Power Washer
    Snowfoam Lance / Pressurised Sprayer
    Snowfoam Solution
    Pre Clean
    APC
    De-greaser
    Detailing Brushes

    Methods
    1: Snowfoaming with Lance
    2: Pre Clean solution with Pressurised Sprayer

    How To
    1: Snowfoam Lance
    Add snowfoam solution to the lance bottle, topping up with warm water. See note #1
    Adjust the air mixture knob and the spray adjust knob to achieve a suitable spray to apply the snowfoam.
    Generally, starting at the highest point, spray on a reasonable thick solution of snowfoam, covering the entire car.
    Allow to dwell (see section Trims / Shuts / Door Jambs), until the solution has dripped away or it starts showing signs of drying out
    Rinse away with pressure washer, avoid direct contact with the paint, until initial heavy dirt is removed.
    Give the wheels / arches a gentle blast to remove heavy soiling.

    Note #1: If planning to strip back old LSP’s or claying, its no harm to add a moderate mixture or APC to help removal

    2. Pre Clean with Pressurised Sprayer
    Add Pre Clean solution to bottle and top up with water. Note #1 above applies here also.
    Pressurise the bottle and apply to car, concentrating on the lower half of the car where the dirt is heaviest.
    Allow to dwell (see section Trims / Shuts / Door Jambs), until the solution has dripped away or it starts showing signs of drying out.
    Rinse away with pressure washer, avoid direct contact with the paint, until initial heavy dirt is removed.
    Give the wheels / arches a gentle blast to remove heavy soiling.


    Wheels & Tyres / Arches

    The Aim
    To safely remove heavy dirt, grit, tar, iron particles from wheels.
    To ensure all surfaces are clean, to give a good surface for any protection to bond, ensuring the product will achieve its full potential.

    Products / Accessories
    Power Washer
    Wheel Cleaner w/ foam head trigger
    APC w/ foam head trigger
    Tar Remover
    De-Ironiser
    Wheel Brush
    Detailing Brushes
    Wheel Brace and Jack required if doing a full-on job! J
    Clay (optional)

    How To
    Give the wheel a gentle blast with the PW to remove the heavy dirt.
    Apply wheel cleaner through a foam head trigger (dilution ratio will depend on how heavily soiled the wheels are) and allow to dwell for a few seconds…rinsing with PW and wheel cleaner re-applied, may be necessary.
    Apply APC solution to the tyres and arches and allow to dwell.
    Using a combination of the wheel brush and detailing brushes, agitate the solution, trying to ensure the brushes get into all the nook and crannies.
    Agitate the APC solution on the tyres and arches with a detailing brushes.
    Rinse off with PW.
    Apply tar remover and allow to dwell – dwell time will vary from product to product.
    Rinse off with PW.
    Apply de-ironiser and allow to dwell – dwell time will vary from product to product.
    Rinse off with PW.
    The tar removing and de-ironising steps may need to be repeated.
    Using an old piece of clay is an optional step to give the wheels the best clean and surface for any LSPs to bond to.


    Trim / Shuts / Door Jambs

    The Aim
    To remove any dirt that has gathered in the nook and crannies from behind and around; trim, the shuts of the bonnet and boot lid, the door jambs, windows, badges, headlights, tail lights, side indicators, mirrors, vents and grilles, etc
    To ensure all surfaces are clean, as it’s the small details that make the difference between a detail and a valet / car wash

    Products / Accessories
    Power Washer
    APC w/ foam head trigger
    Detailing Brushes
    Microfiber Work Cloths

    How To
    Spray APC solution onto the affected area and agitate with various sized detailing brushes.
    Rinse away with PW.
    Open doors, bonnet and boot lid – get into all the tight spaces.
    Wipe away excess with Microfiber Cloths or if you are brave, rinse with the PW.
    This step can be completed during the Pre-Clean stage. While the snowfoam or pre-cleaner is dwelling on the car, proceed to clean the areas mentioned above. If this step has been completed before, often the snowfoam solution will be enough lubrication needed to gentle agitate the areas.


    Washing – The Two Bucket Method (2BM)

    The Aim
    To clean the paint work of general dirt and grime that is accumulated from day to day driving, including flies and bird etchings.
    To limit the potential damage (swirling) to the paint work

    Products / Accessories
    Two Buckets
    Grit Guard
    High quality Wash Mitt (Lambswool or Microfiber) – ideally two
    Well lubricated Shampoo

    How To
    Ensure that your Wash Mitt is thoroughly rinsed out and that the buckets are clean and free of any dirt or grit.
    Fill two large buckets with fresh water.
    At a grit guard to at least one of the buckets, ideally both.
    Add shampoo to one of the buckets (if using one grit guard, add it to the bucket without a GG).
    One bucket is now your “Rinse Bucket” (fresh water and GG) and the other is the “Wash Bucket” (shampoo and GG).
    Dip your Wash Mitt into the Wash Bucket and starting at the roof, wash one half of the roof (a section)
    Once you have finished a section, rinse out your Wash Mitt in the Rinse Bucket. Then dip it into the Wash Bucket, collecting clean water and shampoo. This ensures that any potentially harmful grit that has been picked up by the wash mitt, is now in the Rinse Bucket. The Girt Guard, ensures that each time you rinse your wash mitt, you don’t pick up harmful grit that you have previously wash out. This is down to two reasons. Firstly the GG prevents you dipping the wash mitt to the bottom of the bucket where the grit is, and re-contaminating your wash mitt. Secondly as the GG is sectioned, it prevents grit being lifted from the bottom of the bucket by the whirlpool that is created when you rinse out your wash mitt.
    Continue this process of washing one section (a panel) from highest to lowest, rinsing the mitt in the rinse bucket, then dipping it into the wash bucket, and washing a section. It is advisable to use one mitt for the top of half of the car (least dirty and most obvious place to notice swirls) and a second for the lower half (below the rub trim level).
    Once all panels have been clean, give the whole car a good rinse down with the PW, ensure that all the trim and shuts are free from shampoo and perhaps snowfoam also.


    Paint Prep including De-Tarring, De-Ironising and Claying

    The Aim
    To decontaminate the paint work of bonded contaminants (microscopic), accumulated from subjected to many miles of driving and general environmental surroundings that regular washing wont remove; including tar, iron particles, over-spray, tree spa, light paint or rubber/plastic transfer, etc
    To give the best surface for LSP to bond to, ensuring good appearance and durability of the product.

    Products / Accessories
    Power Washer
    Tar Remover
    De-Ironiser
    Clay & Lubricant

    How To
    Apply tar remover to affected areas, being careful around plastic / rubber trim.
    Allow to dwell and rinse off with PW. Repeat if necessary. Ideally you should not have to touch the tar, but sometimes a light wipe may be necessary.
    Apply the de-ironiser.
    Allow to dwell. Shortly after application the solution, in places, will turn purple and begin to bleed; these areas are affected by iron particles. Spreading with a sponge or clean microfiber is OK as the paintwork should be free of any dirt or grit that could be dragged across the paint resulting in damage.
    Allow to dwell and rinse off with PW. Repeat if necessary.
    At this point the paint work should be free of any potentially damaging contamination resulting from claying.
    Knead the clay into a manageable flat section
    Starting at the roof, spray on a generous amount of lubricant to an approximate 1ft * 1ft section. Gently rub the clay back and forth on the paint work. At first the clay will not slide smoothly over the paint work (as its contaminated). Continued moving the clay back and forth and after a few seconds the clay will slide much freer, more like its on ice. At this point that section of paintwork has been de-contaminated and another section can be started, not forgetting to use plenty of lubricant. If you come across a section that the clay is very grabby on, be sure to use more lubricant and less pressure on the clay, and eventually it will slide freely.
    Once all the paintwork has been clayed, the whole car should be re-washed and dried. NOW, your paintwork is clean!!

    Up to this point is considered “preparation”; and the paintwork is prepared for any or all of the following steps…
    Polishing (hand or machine)
    Glazing
    LSP


    Polishing (by hand)

    The Aim

    To remove oxidisation
    Add depth to the paint and gloss to the paint
    Remove / hide light swirling

    Products / Accessories
    Polish
    Applicator Pad
    High quality Buffing Microfiber Cloth

    How To
    Prime the applicator with a generous amount of polish.
    Apply to the paintwork with reasonable pressure, working it in various directions, try to apply it evenly.
    When the spread of the product appears to be diminishing, apply a small amount to the applicator and continue.
    Allow the polish to dry to a haze and buff of with a high quality buffing microfiber cloth. Depending on the polish, it may be best to apply one or two panels at a time and then buffing off, before continuing with other panels.
    Depending on the desired finish, multiple stages may be required

    Glazing

    The Aim

    To add a glossy wet look to the paint
    To hide light swirling

    Products / Accessories
    Glaze
    Applicator Pad
    High quality Buffing Microfiber Cloth

    How To
    Same as hand polishing...
    Prime the applicator with a generous amount of glaze.
    Apply to the paintwork with reasonable pressure, working it in various directions, try to apply it evenly.
    When the spread of the product appears to be diminishing, apply a small amount to the applicator and continue.
    Allow the glaze to dry to a haze and buff of with a high quality buffing microfiber cloth. Depending on the glaze, it may be best to apply one or two panels at a time and then buffing off, before continuing with other panels.
    Usually one coat of glaze is enough...maximum two!
    Glazing usually diminishes the effectiveness of the LSP... you will probably find that you are very disappointed in the performance of the LSP, this is down to the fact that the glaze is preventing a good bond. Durability suffers for the wet look.

    LSP (Last Stage Protection) – Wax / Sealant / Nano Technology

    The Aim

    To protect the paint work.
    To add a glossy wet look to the paint
    Beading J

    Products / Accessories
    LSP of choice
    Applicator Pad / Applicator Microfiber Cloth
    High quality Buffing Microfiber Cloth

    How To
    Much the same as hand polishing and glazing...
    Prime the applicator with a generous amount of LSP.
    Apply to the paintwork with reasonable pressure, working it in various directions, try to apply it evenly. The secret to easy applying and removal of LSP is to keep to applying thin coats, but multiple times – its much better for durability and easy on / easy off than applying one very thick coat.
    When the spread of the product appears to be diminishing, apply a small amount to the applicator and continue.
    Allow the LSP to dry to a haze and buff of with a high quality buffing microfiber cloth. Depending on the LSP, it may be best to apply one or two panels at a time and then buffing off, before continuing with other panels.
    The more coats applied the better...minimum two, too ensure full coverage and durability. Applying more coats usually results in a deeper and glossier shine, so advantages are twofold with durability.


    Hope you have that saved in word document as that's alot of typing Curran.

    OP I think the autoglym starter kit will be perfect for you. Halfords should be still selling it, probably cost about 80-100 at a rough guess. It will contain most of products you will ever need with a bag to keep it in to boot.

    You would need then maybe a couple buckets, claybar, a wheel brush, wash mitt and a spray bottle for claying.

    If you have time go on to YouTube and look up AmmoNYC, the chap has some great videos covering almost everything in how 2's with explanations.


  • Registered Users, Registered Users 2 Posts: 436 ✭✭leupold90


    I got this sample kit from 50cal. It's good stuff and there's enough to easily do a complete car, maybe two. Great way of trying out products for a reasonable cost. Detailing shed do the range.

    http://www.50caldetailing.co.uk/products/paint-maintenance-care-package/p41nt-k1t


  • Registered Users, Registered Users 2 Posts: 14,015 ✭✭✭✭Mc Love


    Curran's post should be stickied in a new thread with other advice from users! Think it would be very beneficial to any newcomers and cough cough posters that sometimes forget


Advertisement