Advertisement
If you have a new account but are having problems posting or verifying your account, please email us on hello@boards.ie for help. Thanks :)
Hello all! Please ensure that you are posting a new thread or question in the appropriate forum. The Feedback forum is overwhelmed with questions that are having to be moved elsewhere. If you need help to verify your account contact hello@boards.ie
Please note that it is not permitted to have referral links posted in your signature. Keep these links contained in the appropriate forum. Thank you.

https://www.boards.ie/discussion/2055940817/signature-rules
Hi there,
There is an issue with role permissions that is being worked on at the moment.
If you are having trouble with access or permissions on regional forums please post here to get access: https://www.boards.ie/discussion/2058365403/you-do-not-have-permission-for-that#latest

VW reversing camera retrofit

  • 21-04-2014 1:16am
    #1
    Moderators Posts: 12,397 ✭✭✭✭


    So I finally set about installing my badge reversing camera to my VW Passat CC. Its actually alot easier than you'd think, but certainly need to do your homework before hand.

    Parts:
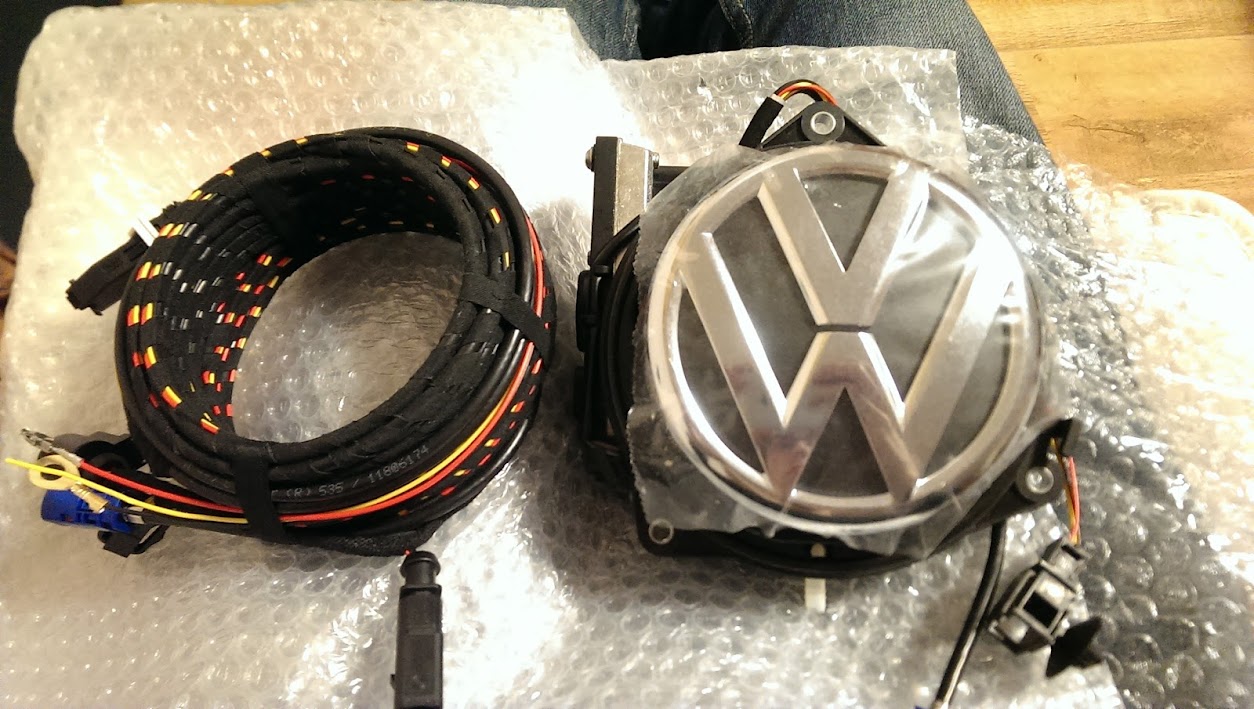
    1 X Reversing camera kit (Badge/camera and loom)
    1 X add-a-fuse adapter (or else wire it into the back of the fusebox)
    1 X 15 amp fuse
    And of course, a head unit that can support reversing cameras. RNS 510 & RNS 310 both can from what I know.
    IMAG1020.jpg

    Tools:
    Wire strippers
    T25 torx screwdriver
    T20 torx screwdriver
    10mm spanner
    Soldering iron
    Shrink tubing
    Heat gun/hairdryer
    VCDS

    Most these pics aren't mine btw.

    To start you'll need to remove lots of trim.

    Cabin removal
    -Remove the back seat base. There are 2 clips in the middle of each seat where your knees would be. Just the base and pull up. Both will pop pretty easily. There are 2 other clips under the base near the doors. The best way to remove these is to pull the seat horizontally towards the boot (an inch maybe) and then up. Repeat for the other side.
    p1438994910-3.jpg
    -Remove the side skirt on the drivers side. There are a few clips holding it down, but a bit of force and it'll start to lift. Pull this up all the way back to the back seats. I actually removed this part for the install.
    -Remove the plastic cover that goes around the bonnet release. Its tricky, but it comes off.
    p1438995036-3.jpg
    After removing the trim in the back, you can also remove the metal shield pictured below.
    p1438995004-3.jpg
    There's one nut holding the bolster arm in place. Remove that. There's a second clip about half way up the bolster arm. The guide im following managed to break it, and so did I.
    Nut:
    p1438994918-3.jpg
    p1438994938-3.jpg

    From here, drop down the back seat and you be able to peal back the boot wall carpeting a bit. Remove the latch harness at the bottom, and from the boot remove 3 screws. One at the boot arm, one at the top of the boot near the drivers side, and the final one requires you to pull out the boot carpet.
    From the back seat, peal back the boot wall carpeting and peer through. If you can get someone to lower the boot while you do this, you should see the boot arm opening. There is where you will fed the wires through.
    Boot removal
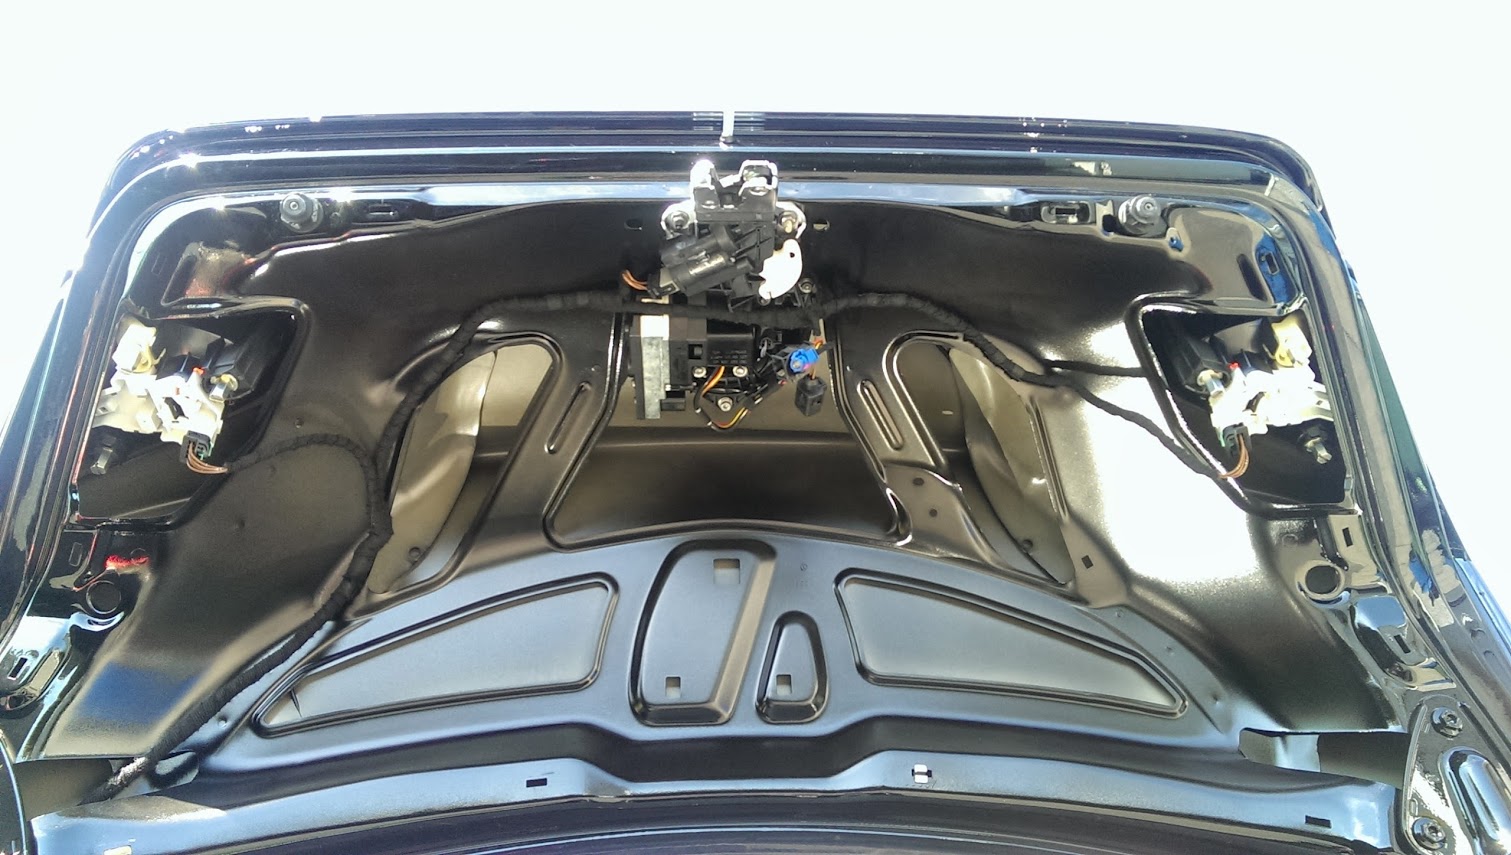
    Open your boot and in the lining you'll see a few rubbers and stoppers. Dont lose these.
    -Remove the stopper thats underneath the VW badge.
    -Remove the 2 rubbers under the boot lid lip (pictured)
    -I also advise removing the 4 upholstered buttons (one pictured bottom right)
    -Remove the plastic cover for the boot latch
    p1438994800-3.jpg

    NOTE! If you have a warning triangle, take that out first, a remove the warning triangle holder also. I didnt, and slightly broke it.
    -Start removing the boot cover. I started beside the rubbers I removed, and worked my way around, popping it off as I went. there are 2 clips on the top, 2 on both sides, and 2 on the bottom.
    -American sites mention an emergency boot release, but mine didnt have it. Europeans must be smart enough to not lock themselves in the boot.

    You should be able to see the existing badge boot release now, just behind the boot latch. Disconnect the cable attached, a little pry of the clip pops it open. If you're trying too hard, you're doing it wrong. There are 3 T25 screws holding it in place. Remove them, and remove your old VW badge.

    Resist the urge to close your boot, though your drivers door boot release and keys boot release should still work. You can test this at any stage you'd like

    Install the new RVC badge
    Attach the drain pipe included to your new badge, this pipe will come out the small hole we opened up when we started removing the boot covers.
    You may need to loosen up the boot latch to fit the new badge in. I loosed up the 2 nuts holding the boot latch in, and was able to squeeze the badge in, albeit about 5 degrees anti clockwise, but once in you can line it up. The 3 Torx screws will ensure it goes in straight.

    Wiring:
    Lots say to cut cut cut the wires before chasing them through the car, but this isnt necessary for the most part. I did however wrap up the loose ends in medical bandage to tidy them up. Starting from the drivers seat where we removed the trim around the bonnet release, feed the loom into the hole down through the door sill, following the existing wires. Once you get to the back of the car there are some clips to tidy it all up, but dont do that yet. We need to get the loom into the boot.

    This is where I cut. The biggest of the 4 connectors wont fit through the boot arm, and so must be cut. Helpfully, there are 2 red wires :mad:
    I cut them at different lengths to distinguish them. I wrapped the remaining wires up again and fed them though the boot arm. These will appear down the very bottom right of the next picture:
    IMAG1100.jpg
    -Pull the loom though the hole at the light cluster, enough to reach the camera. From here we will unwrap the loom from its packaged tape, and cut the yellow wire long enough to reach from the camera to the light cluster (about 2 foot). The remaining yellow wire runs to the front of the car, and is not needed. The reversing light will act as a trigger to start the camera.
    Wrap up the other wires (excluding the yellow wire) and feel them to the reversing camera.
    -Strip and solder up the previously cut wires.
    -Connect the yellow wire to pin 2 of the light cluster (Reverse light power). I just stripped the brown wire to pin 2 enough to wrap and solder the yellow wire.
    -Connect up the 4 plugs. (Boot release, camera power, reversing trigger, video)

    Disconnect your battery for the next bit (Not 100% sure on this, but leaving the battery disconnected for too long might require your radio code. Mine was disconnected for maybe 5-10 minutes and my radio was unaffected. The only time ive ever needed a radio code is when I changed my radio).
    -In the drivers seat, there should be a ground terminal near the bonnet release. Connect the black ground ring to this.
    -Connect up your red power cable, to your add-a-fuse connector, add a 15amp fuse and plug in to your fuse board.
    p1438995176-3.jpg
    Connect up your battery.
    Notice how your windows have dropped down, and wont go back up. This happens when the battery is disconnected and the doors are open (and thus dropped down half an inch). To fix this, sit in the car with the ignition on 2. Close the door the needs fixing and hold the window up button. When the window is fully up, put the ignition to 1. Exit the car. Repeat for all windows.

    -Remove the plastic above your pedals, there are 3 screws holding it in place, and run the video cable towards your center console.
    -Remove the cover around your Radio, it pops over pretty easily, using either a pry tool, or an old credit card. Debit cards work just as well.
    -There are 4 screws holding your radio in place, remove them and slide your radio out. you should be able to see daylight in your drivers side footwell. Feed that video cable up, and plug it into your Head unit.

    If everything has gone well, you should be nearly there, though at this stage my RVC badge didnt even open my boot. You can check this with the boot open. I ended up taking mine back out, poking about and refitting. It magically worked then.
    I also wanted to see did my reversing lights work during this process. NOTE, reversing lights dont work while the boot is opened. you need to close the boot.

    Coding:
    Now you need to use VCDS to A tell the Car you have a camera system, and B tell the head unit that it has a camera system.
    When I had problems with my camera not working, I went ahead with the coding, thinking perhaps this was the issue but could only tell the car I had a camera, but couldnt actually activate the camera (it couldnt be found, probably because it wasnt working at the time). Eventually when I did get it working and went to code it, my VCDS wasnt working.
    Non-highline version:
    -Load up VCDS
    -Go to your modules and select navigation -37
    -Coding
    -Long Coding helper
    -Byte 3, bit 6 should mention the reversing camera. Tick that, close the long coding helper and "do it".
    -Remove the key from ignition, reinsert and try reverse gear.
    -If you dont see any image, try resetting your head unit
    (pressing both arrow buttons on the top left, and the Star or I button on the top right. Hold all 3 down until the radio resets, 5-10 seconds or so). Once reset has finished, try out reverse gear. The camera should be working now.

    For highline versions there is some more VCDS coding. You would need to enable the camera in the CAN gateway module (byte 5, bit 6), then assuming you have the module that tracks steering wheel movement you'd need to make sure the navigation - 37, byte 3 bit 6 is unticked. Then open up the camera module, 6C and enter software coding 0000021, and aparently if you dont see any digits in the workshop code, enter in any 5 digits.

    Once everything is working, reassemble your car.

    IMAG1109.jpg
    IMAG1113.jpg

    Total time - 6 hours
    Total teas - 3
    Total biscuits - 3


Comments

  • Registered Users, Registered Users 2 Posts: 1,310 ✭✭✭Harcrid


    A lot of work involved there. Hopefully once you get the coding sorted it will all work fine.


  • Moderators Posts: 12,397 ✭✭✭✭Black_Knight


    Updated with the VCDS coding, and some pics. Massive thanks to Neilw for coming to the rescue with the VCDS.


  • Registered Users, Registered Users 2 Posts: 1,310 ✭✭✭Harcrid


    Nice job. Briefly considered doing this on my car but can't justify spending that much when I already have front and rear sensors.


  • Moderators Posts: 12,397 ✭✭✭✭Black_Knight


    Yeah. €400 isnt too cheap, but then again, ive no front or rear sensors on mine so I wanted something, and I dont like actually seeing the sensor "buttons" on the bumpers so that ruled them out.

    I did see the camera for cheaper on cars-equipment.com:
    http://www.cars-equipment.com/www/en/shop/rvc-kits/oem-5k0827469as-ulm-vw-rear-view/
    €350 delivered, but I had already ordered off car-systems.pl. Oh well.


  • Registered Users, Registered Users 2 Posts: 60 ✭✭scano.ie


    Sweet job have been wanting this for my golf for sometime


  • Advertisement
  • Moderators Posts: 12,397 ✭✭✭✭Black_Knight


    scano.ie wrote: »
    Sweet job have been wanting this for my golf for sometime

    Shout if you've any questions if ever you take the plunge.


  • Registered Users, Registered Users 2 Posts: 60 ✭✭scano.ie


    Shout if you've any questions if ever you take the plunge.

    cheers mate thinking of getting the oem bluetooth first though from the same crowd. How quick did the camera get to you after you ordered it


  • Moderators Posts: 12,397 ✭✭✭✭Black_Knight


    scano.ie wrote: »
    cheers mate thinking of getting the oem bluetooth first though from the same crowd. How quick did the camera get to you after you ordered it

    1 week. Ordered on the 14th Feb, delivered by UPS on the 21st to Parcel motel.

    Was interested in the bluetooth myself, but just too costly for something I wouldnt really use that much.
    Speedway installed it in his Seat Leon. Seemed straight forward enough, though I think he had issues with playing music over bluetooth. Not totally sure, but I think he may have eventually upgrade to an RCD 510.

    What radio have you got?


  • Registered Users, Registered Users 2 Posts: 60 ✭✭scano.ie


    Ive the rns 510 at the moment. Had a bury kit in the last car but just want it nice and tidy so thats why i'm going with the oem kit


  • Registered Users, Registered Users 2 Posts: 1,310 ✭✭✭Harcrid


    I had an OEM Bluetooth kit installed along with the RNS510. It works great and I prefer the OEM solution to phone kits like parrot etc.. Better to have the steering wheel controls and maxidot all working with it and have it all integrated.


  • Advertisement
  • Moderators Posts: 12,397 ✭✭✭✭Black_Knight


    Harcrid wrote: »
    I had an OEM Bluetooth kit installed along with the RNS510. It works great and I prefer the OEM solution to phone kits like parrot etc.. Better to have the steering wheel controls and maxidot all working with it and have it all integrated.

    I wonder how long until they start throwing around penalty points for using steering wheel controls to answer calls.

    I just dont use the phone in the car enough to warrant spending ~€200 on a BT kit. Id like to think that although the mods ive installed are not going to pay off when I sell the car, im not wasting money on things I dont want/use. ie. I didnt bother with the highline RVC because I didnt see the value in it compared to the standard one.


Advertisement