Advertisement
If you have a new account but are having problems posting or verifying your account, please email us on hello@boards.ie for help. Thanks :)
Hello all! Please ensure that you are posting a new thread or question in the appropriate forum. The Feedback forum is overwhelmed with questions that are having to be moved elsewhere. If you need help to verify your account contact hello@boards.ie
Hi there,
There is an issue with role permissions that is being worked on at the moment.
If you are having trouble with access or permissions on regional forums please post here to get access: https://www.boards.ie/discussion/2058365403/you-do-not-have-permission-for-that#latest

Painting new exterior plaster/render??

  • 27-03-2012 7:31pm
    #1
    Banned (with Prison Access) Posts: 15,858 ✭✭✭✭


    I know this is for interior design threads,but seen as theres a few painters in this forum,I thought I might get an answer to this here..........

    Can I ask what is the best way to paint a newly plastered/rendered exterior wall?

    The external walls are all smooth plastered/rendered (no pebble dash).

    Does the new render need with any type of solution to prime or seal it,or can the Dulux Weathershield just be painted staright on??
    Also,how many coats of Dulux Weathershield should the external wall and render be given?

    Thanks.:)


Comments

  • Registered Users, Registered Users 2 Posts: 272 ✭✭byrybak


    Paddy exterior not really diffrent than interior give it a coat of dilluted paint first and then 2 coats of pure stuff.


  • Banned (with Prison Access) Posts: 15,858 ✭✭✭✭paddy147


    byrybak wrote: »
    Paddy exterior not really diffrent than interior give it a coat of dilluted paint first and then 2 coats of pure stuff.


    Thanks for the reply.:)

    How much should the Dulux Weathershield be diluted then,is it 20%?

    Thanks.


  • Registered Users, Registered Users 2 Posts: 272 ✭✭byrybak


    i personally would not add more than 20%, good think about weathershield is that it last forever!!!!


  • Banned (with Prison Access) Posts: 15,858 ✭✭✭✭paddy147


    byrybak wrote: »
    i personally would not add more than 20%, good think about weathershield is that it last forever!!!!


    Just wanted to say thanks for the help and advice.

    It worked out a treat.:)


  • Registered Users, Registered Users 2 Posts: 88 ✭✭duffman21


    Hi Paddy,

    just wondering how the painting went? i've to do my external walls and like yours they are smooth plastered/rendered (no pebble dash). How much paint did you use, how many coats did you give the walls etc, any tips?

    also unlike you not to post a picture of the finished masterpiece :D


  • Advertisement
  • Banned (with Prison Access) Posts: 15,858 ✭✭✭✭paddy147


    duffman21 wrote: »
    Hi Paddy,

    just wondering how the painting went? i've to do my external walls and like yours they are smooth plastered/rendered (no pebble dash). How much paint did you use, how many coats did you give the walls etc, any tips?

    also unlike you not to post a picture of the finished masterpiece :D


    Went very well indeed.

    1st coat of Dulux Weathershield was diluted by around 20% and it flew onto the new.bare rendered walls.

    Then the next day 2 coats of Weathershield were applied with a long pile roller.

    End result was and is very nice indeed.:)

    Also used a 7 inch wallpaper pasting brush was awkward little areas and that worked an absolute treat too.:)


    Girlfriend then stained the pressure treated trellis frames and drilled them into the walls.

    Now have some lovely clematis armandii climbers growing at a fast rate up the trellis frames and painted walls.


    Happy days.:D


  • Registered Users, Registered Users 2 Posts: 221 ✭✭DublinDIYguy


    byrybak wrote: »
    Paddy exterior not really diffrent than interior give it a coat of dilluted paint first and then 2 coats of pure stuff.

    Agree with this. I'd dilute the first coat more than 20% though as its function is to soak in as much as possible so the thinner it is the better. Weathershield is so thick I'd suggest about 40% for the 1st coat and 10% for the 2nd and 3rd as it makes it way easier to get a sharp line at the top and bottom, and paint behind pipes etc when the paint has been slightly thinned. I know you've already done your job but for any others doing the same job, santex and fleetwood weather clad are both good products too so depending on where you shop and what colour you want it's worth keeping in mind.
    Did you have any problems painting behind the pipes??
    Oh also for anyone doing the same job I'd also brush the wall with a soft sweeping brush first to brush off the loose grit.. As it sprays everywhere


  • Banned (with Prison Access) Posts: 15,858 ✭✭✭✭paddy147


    No problem with painting behind the wavin pipe.

    The pipe was simply wrapped up in a few large black bin liners that were cut open.

    Just to prevent any paint splashes getting on the wavin pipe.

    A plastering freind of mine also removed that overhead cladding ( I never really liked it).He 1st installed a special galvanized mesh,then he applied the 1st dash coat,and then he applied a waterproofing coat over that.It turned out very well.Upstairs and inside that overhang we had Bio Foam 800 Open cell spray foam insulation sprayed in aswell....Insulation company that spray foamed both attics came back and did this as a Saturday morning nixer for us)

    The 4 downlights were also removed and replaced with 2 outdoor bulkhead lights (1 at each end) that are wired through 360 degree external PIR that is also installed on that overhang.


  • Registered Users, Registered Users 2 Posts: 221 ✭✭DublinDIYguy


    paddy147 wrote: »
    No problem with painting behind the wavin pipe.

    The pipe was simply wrapped up in a few large black bin liners that were cut open.

    Just to prevent any paint splashes getting on the wavin pipe.

    A plastering freind of mine also removed that overhead cladding ( I never really liked it).He 1st installed a special galvanized mesh,then he applied the 1st dash coat,and then he applied a waterproofing coat over that.It turned out very well.Upstairs and inside that overhang we had Bio Foam 800 Open cell spray foam insulation sprayed in aswell....Insulation company that spray foamed both attics came back and did this as a Saturday morning nixer for us)

    The 4 downlights were also removed and replaced with 2 outdoor bulkhead lights (1 at each end) that are wired through 360 degree external PIR that is also installed on that overhang.

    Ah now your just bragging :)..
    Sounds like a good job done all in all.. Doesn't look like you'll have any problems with these walls. For anyone that does there's 2 good products for problematic exterior walls. stabilising solution is great for sealing a wall where the paint is pealing or going chalky, and the other is santex rough(i think its called) which is a paint that is so thick its like applying a coat of plaster and paint at the same time and works great for walls with loads of cracks etc..


  • Banned (with Prison Access) Posts: 15,858 ✭✭✭✭paddy147


    Ah now your just bragging ..:)
    Sounds like a good job done all in all.. Doesn't look like you'll have any problems with these walls. For anyone that does there's 2 good products for problematic exterior walls. stabilising solution is great for sealing a wall where the paint is pealing or going chalky, and the other is santex rough(i think its called) which is a paint that is so thick its like applying a coat of plaster and paint at the same time and works great for walls with loads of cracks etc..


    Ah I just thought while there was some plastering work was being done..fcuk it,lets redo the lot while the plasterer is here rendering the garden boundary walls.

    I never really liked that pvc cladding,so it was a good excuse for it to be taken down and get that area plastered/rendered properly.:)


    Regards.


  • Advertisement
  • Banned (with Prison Access) Posts: 15,858 ✭✭✭✭paddy147


    duffman21 wrote: »
    Hi Paddy,

    just wondering how the painting went? i've to do my external walls and like yours they are smooth plastered/rendered (no pebble dash). How much paint did you use, how many coats did you give the walls etc, any tips?

    also unlike you not to post a picture of the finished masterpiece :D


    I,ll whip a few pics later on..when I get some energy to move.:)

    Struugling with manflu at the moment,so just about keeping my breakfast down here at the moment.:(:(:pac:


  • Banned (with Prison Access) Posts: 15,858 ✭✭✭✭paddy147


    duffman21 wrote: »
    Hi Paddy,

    just wondering how the painting went? i've to do my external walls and like yours they are smooth plastered/rendered (no pebble dash). How much paint did you use, how many coats did you give the walls etc, any tips?

    also unlike you not to post a picture of the finished masterpiece :D


    Heres your pics.:P:D

    I had actually taken pics of the work being done at the time,but forget all about them.


    We waited around 6 months until painting the external render,so that it settled in and cured propperly


  • Banned (with Prison Access) Posts: 15,858 ✭✭✭✭paddy147


    Last few.

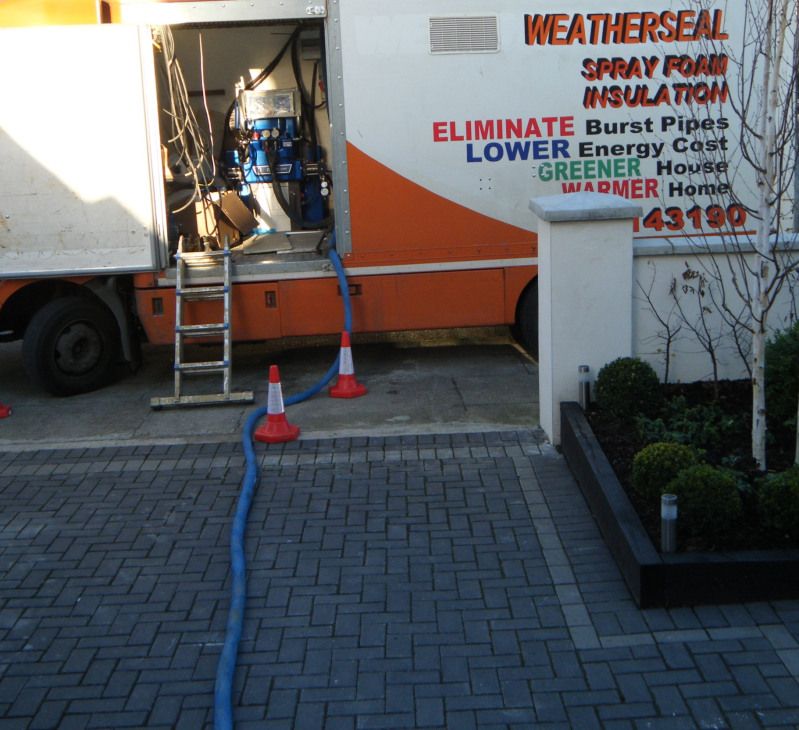
    Spray foam insulation being pumped in,new floors put down,garage and exterior walls painted.

    Oh and black trellis frames on wall and clematis armandii gowing pretty fast.

    Thats about it:)


    DSCF9833.jpg


Advertisement