Advertisement
If you have a new account but are having problems posting or verifying your account, please email us on hello@boards.ie for help. Thanks :)
Hello all! Please ensure that you are posting a new thread or question in the appropriate forum. The Feedback forum is overwhelmed with questions that are having to be moved elsewhere. If you need help to verify your account contact hello@boards.ie
Hi there,
There is an issue with role permissions that is being worked on at the moment.
If you are having trouble with access or permissions on regional forums please post here to get access: https://www.boards.ie/discussion/2058365403/you-do-not-have-permission-for-that#latest

Mapping Issue - can you re-skim wall?

  • 27-11-2011 11:01pm
    #1
    Registered Users, Registered Users 2 Posts: 1,026 ✭✭✭


    TL/DR: Can I skim over existing paint/skim?

    We had a massive mapping problem that just seemed to go from bad to worse.

    This was the first time we had ever seen this weird drying pattern, we didn't know about mapping or that we had a problem at the time. We kept going even after the first wall displayed the drying/not drying areas thinking it all dry OK eventually.

    We tried a base coat product from a well known filler/adhesive manufacturer. It is a thick gluey product that is supposed to even out old/bad walls, but this only exacerbated the problem. It didn't fill the hollows that the first coat had left, in fact the hollows got deeper as the base coat was so thick.

    I also tried painting a thick coat of emulsion over the hollows in the base coat, deliberately leaving ridges so that it would build up, but that didn't work either.

    We also tried an oil based alkali primer and that didn't work because of the base coat. In the next room, we only used the oil based primer and that worked. In the the third and subsequent rooms we thinned the oil primer and that worked brilliant, even though it was extra work.

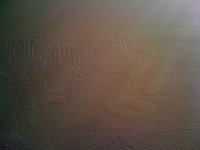
    The result is that we are now left with this in the first room:

    Photo002_thumb.jpeg

    Photo003_thumb.jpeg

    We tried sanding the base coat off with an orbital sander and went through sheets and sheets of paper of various grades without making much of a mark. Tried a heat gun and a paint stripper gel and that didn't work either.

    I guess my question is how do I rectify this now? The walls are in a disgraceful state for a new house. Can I get the walls re-skimmed over existing paint/skim if they were scored for grip? Would I need to slab the walls?

    Background:
    The walls are block and sand/cement. We suspect the mapping was caused by the plasterer using a water bucket that previously contained PVA, as he had been painting bonding on the window heads with PVA just before. Of course the plasterer denies all culpability.

    The mapping pattern looks like the splashes you get when you flick water at drying skim. Here's the only photo I could find after the first coat of emulsion but before the thick base coat went on:
    MappingBeforeBaseCoat_thumb.jpg

    Any ideas or suggestions would be welcome, thanks.


Comments

  • Registered Users, Registered Users 2 Posts: 648 ✭✭✭PeteHeat


    Hi,

    I wouldn't try to skim over the problem because the skim coat is unlikely to bond properly and eventually fall of the wall.

    Short of hacking off the existing plaster which would probably mean going back into the sand / cement coat and maybe using bonding to level everything again slabbing over the existing is the option I would choose.

    You can use plastic mushroom fixings to fix the plaster board to the wall and have the new surface skimmed.
    .


  • Registered Users, Registered Users 2 Posts: 477 ✭✭plasteritup


    outside of the hollows and marks in the walls are they level and plum.ie would a properly troweld skim fix the wall.3 to 5mm thick?

    if so there is a product called THISTLEBOND,apply this everywhere with a roller or brush,leave for 24 hours and then reskim walls.


  • Registered Users, Registered Users 2 Posts: 477 ✭✭plasteritup


    just a quick question,are the first two pics walls finished by a plasterer employed by you?


  • Closed Accounts Posts: 3,167 ✭✭✭gsxr1


    That happened to loads of houses around here. Including my own.

    It was discovered that plasterer was polishing of the wall with his trowel to much . When the paint went on, Some parts of the wall soaked in the paint differently than others causing mapping.

    We could not fix it.


  • Registered Users, Registered Users 2 Posts: 1,026 ✭✭✭Gulliver


    outside of the hollows and marks in the walls are they level and plum.ie would a properly troweld skim fix the wall.3 to 5mm thick?

    if so there is a product called THISTLEBOND,apply this everywhere with a roller or brush,leave for 24 hours and then reskim walls.

    The walls are plumb most places except for a few corners where they seem to curve towards each other ever so slightly :rolleyes:

    I will look into the thistlebond, I fear it'll be a board job, though.


  • Advertisement
  • Registered Users, Registered Users 2 Posts: 1,026 ✭✭✭Gulliver


    just a quick question,are the first two pics walls finished by a plasterer employed by you?

    Yes, he was employed direct labour. He was paid long before we started painting unfortunately. The first two pictures were taken after the base coat stuff went on.


  • Registered Users, Registered Users 2 Posts: 1,026 ✭✭✭Gulliver


    PeteHeat wrote: »
    Hi,

    I wouldn't try to skim over the problem because the skim coat is unlikely to bond properly and eventually fall of the wall.

    Short of hacking off the existing plaster which would probably mean going back into the sand / cement coat and maybe using bonding to level everything again slabbing over the existing is the option I would choose.

    You can use plastic mushroom fixings to fix the plaster board to the wall and have the new surface skimmed.
    .
    This is what I was afraid of. Trying to get the paint off was difficult enough! Boarding would probably be easier.


  • Registered Users, Registered Users 2 Posts: 1,026 ✭✭✭Gulliver


    gsxr1 wrote: »
    That happened to loads of houses around here. Including my own.

    It was discovered that plasterer was polishing of the wall with his trowel to much . When the paint went on, Some parts of the wall soaked in the paint differently than others causing mapping.

    We could not fix it.

    My dad thought it was too polished as well, but up close it's not as flat as you would expect from over polishing.

    The only way we could fix it was with thinned down alkali resisting primer.


  • Registered Users, Registered Users 2 Posts: 159 ✭✭breffni666


    Thistle Bond-It and skim should do the trick. Otherwise moisture resistant board and skim.


  • Registered Users, Registered Users 2 Posts: 2,257 ✭✭✭deandean


    Just a thought: what if you were to paint using ragging, sponging or similar, maybe you wouldn't notice the mapping then?


  • Advertisement
  • Registered Users, Registered Users 2 Posts: 477 ✭✭plasteritup


    Gulliver wrote: »
    This is what I was afraid of. Trying to get the paint off was difficult enough! Boarding would probably be easier.


    thistlebond is a glue and aggregate type liquid,67 euro for a tub big enuf to roll onto a couple of decent sized rooms,you could do this prep work for another plasterer to come and skim over,would be more cost effective than re boarding,plus you are only losing bout 5mm of room,30 mm with board and skim.
    imo,i do not think it is over polishing has caused this problem,if base coat is sand and cement i would think the problem lies there,possibly a blast of lime in the mix,but i would very much doubt it is over polishing,he would want to have been troweling off the walls for a fortnight.
    either way it really does make me mad when seeing work like that left,if i did that to someones home i would be back to fix asap and full of apologys,would not leave that work after me for the record!


  • Closed Accounts Posts: 11,909 ✭✭✭✭Wertz


    An old timer plasterer told me "mapping" was down to one of two things: either dirty water that was contaminated with older skim being used for brushing before the skim was rubbed up and/or skimcoat that was applied thinly across a cement scratchcoat... the lime was doing something to the surface that was making it shiny and more water repellant.

    I've seen people here criticising painters that paint over it...thing is that you can't really tell from looking at the raw skim, it's only when paint is applied that it becomes apparent and by then it can be too late to take preventitive measures.
    Over the years I've noticed that it's a lot more prevalent in pink skim than the grey skim, for some reason, but that could be just coincidence.

    The thistlebond and re-skim is a good suggestion now... using the polyfilla stuff after it initially went wrong wasn't such a good idea. If you see it happening on first coat: stop painting! If possible wipe off the paint with a wet rag and allow the skim to dry thoroughly, then use the oil base primer and again allow to fully cure before applying emulsion.

    [edit] After looking at those pics, the pollyfilla coating has made the whole thing worse than the mapping and flakiness would have been in the finish up, it's almost like artex...it would have been a lot handier to sand back the problme area, feather off the edges and spot prime with the oil.


  • Registered Users, Registered Users 2 Posts: 1,026 ✭✭✭Gulliver


    Wertz wrote: »
    An old timer plasterer told me "mapping" was down to one of two things: either dirty water that was contaminated with older skim being used for brushing before the skim was rubbed up and/or skimcoat that was applied thinly across a cement scratchcoat... the lime was doing something to the surface that was making it shiny and more water repellant.

    I've seen people here criticising painters that paint over it...thing is that you can't really tell from looking at the raw skim, it's only when paint is applied that it becomes apparent and by then it can be too late to take preventitive measures.
    Over the years I've noticed that it's a lot more prevalent in pink skim than the grey skim, for some reason, but that could be just coincidence.

    The thistlebond and re-skim is a good suggestion now... using the polyfilla stuff after it initially went wrong wasn't such a good idea. If you see it happening on first coat: stop painting! If possible wipe off the paint with a wet rag and allow the skim to dry thoroughly, then use the oil base primer and again allow to fully cure before applying emulsion.

    [edit] After looking at those pics, the pollyfilla coating has made the whole thing worse than the mapping and flakiness would have been in the finish up, it's almost like artex...it would have been a lot handier to sand back the problme area, feather off the edges and spot prime with the oil.
    The thing is I didn't even know what mapping was when doing the first coat. I thought these shiny spots would dry eventually and kept going. I asked around and was pointed in the Polyfilla direction. Wnhen that didnt work, I did a bit of online research and hit on the term mapping and saw that this would be a major problem. Tried to sand it back but that polyfilla stuff was too tough.

    Thanks for the Thistlebond suggestion, plasteritup. I also agree that there was no pride in the work. He made out it was my fault for painting it wrong or "using a dirty bucket for paint " (I used a new paint tub and a new tray:rolleyes:)


  • Closed Accounts Posts: 11,909 ✭✭✭✭Wertz


    There's why you should always hire a professional decorator :D
    Can't believe he tried to fob you off though... by the time I get to the work the plasterer is long since paid and gone and you're left to fix things up.

    That polyfilla stuff is good for really old problem celiings with lots of hairline cracks and uneveness, but should never need to be used on new surfaces.


  • Banned (with Prison Access) Posts: 15,858 ✭✭✭✭paddy147


    Gulliver wrote: »
    TL/DR: Can I skim over existing paint/skim?

    We had a massive mapping problem that just seemed to go from bad to worse.

    This was the first time we had ever seen this weird drying pattern, we didn't know about mapping or that we had a problem at the time. We kept going even after the first wall displayed the drying/not drying areas thinking it all dry OK eventually.

    We tried a base coat product from a well known filler/adhesive manufacturer. It is a thick gluey product that is supposed to even out old/bad walls, but this only exacerbated the problem. It didn't fill the hollows that the first coat had left, in fact the hollows got deeper as the base coat was so thick.

    I also tried painting a thick coat of emulsion over the hollows in the base coat, deliberately leaving ridges so that it would build up, but that didn't work either.

    We also tried an oil based alkali primer and that didn't work because of the base coat. In the next room, we only used the oil based primer and that worked. In the the third and subsequent rooms we thinned the oil primer and that worked brilliant, even though it was extra work.

    The result is that we are now left with this in the first room:

    Photo002_thumb.jpeg

    Photo003_thumb.jpeg

    We tried sanding the base coat off with an orbital sander and went through sheets and sheets of paper of various grades without making much of a mark. Tried a heat gun and a paint stripper gel and that didn't work either.

    I guess my question is how do I rectify this now? The walls are in a disgraceful state for a new house. Can I get the walls re-skimmed over existing paint/skim if they were scored for grip? Would I need to slab the walls?

    Background:
    The walls are block and sand/cement. We suspect the mapping was caused by the plasterer using a water bucket that previously contained PVA, as he had been painting bonding on the window heads with PVA just before. Of course the plasterer denies all culpability.

    The mapping pattern looks like the splashes you get when you flick water at drying skim. Here's the only photo I could find after the first coat of emulsion but before the thick base coat went on:
    MappingBeforeBaseCoat_thumb.jpg

    Any ideas or suggestions would be welcome, thanks.


    Simple answer.....YES YOU CAN.


    Thistlebond or Febond the walls (blue gritty solution)

    leave to dry for 24 hours.

    Then simply reskim.

    Job done.


  • Registered Users, Registered Users 2 Posts: 760 ✭✭✭Corkey123


    If you do decide to put up plasterboard with insulation fitted do use the plastic mushroom fitting - they are rubbish. Get the aluminium one.. That said Thistlebond as suggested is the way to go


  • Banned (with Prison Access) Posts: 15,858 ✭✭✭✭paddy147


    Febond looks like this and is the mutts nutts,trust me.


  • Registered Users, Registered Users 2 Posts: 477 ✭✭plasteritup


    paddy147 wrote: »
    Febond looks like this and is the mutts nutts,trust me.


    whats the money on the feb bond paddy,never used it only bettokontack and thistlebond.

    for the record,a garage of a friend of mine we done this. wallpapered a wall thistlebonded it and skimmed the wall,done two years ago now and no probs.
    was just an experiment!!!:)


  • Banned (with Prison Access) Posts: 15,858 ✭✭✭✭paddy147


    whats the money on the feb bond paddy,never used it only bettokontack and thistlebond.

    for the record,a garage of a friend of mine we done this. wallpapered a wall thistlebonded it and skimmed the wall,done two years ago now and no probs.
    was just an experiment!!!:)


    The Febond does work really well indeed.:)


  • Registered Users, Registered Users 2 Posts: 477 ✭✭plasteritup


    paddy147 wrote: »
    The Febond does work really well indeed.:)

    how much is it?


  • Advertisement
  • Banned (with Prison Access) Posts: 15,858 ✭✭✭✭paddy147


    how much is it?


    Cant remember as it was bought with a whole heap of other materials from a well known builders providers in North Dublin.

    I,ll dig out the invoice and check later on.:)


  • Closed Accounts Posts: 2,876 ✭✭✭Spread


    Febond has been around a long time. It's just a PVA. Should be the same price as other PVAs. 4:1 painted on to stop suction and then 3:1 for adhesion. Plaster must be applied while adhesive is still tacky.


  • Registered Users, Registered Users 2 Posts: 159 ✭✭breffni666


    Thistle Bond-it would be better as it has an aggregate sand type mix in it which will give good key for plaster.


  • Registered Users, Registered Users 2 Posts: 477 ✭✭plasteritup


    pva is rubbish for use as primer for skimming.once u use a glue and aggregate bonding agent you will not use pva again.:)


  • Registered Users, Registered Users 2 Posts: 1,026 ✭✭✭Gulliver


    Thanks for all the suggestions, guys. I think I'll go with the Thistlebond/reskim method. Don't fancy losing any space to boarding if I can help it.


  • Closed Accounts Posts: 2,876 ✭✭✭Spread


    pva is rubbish for use as primer for skimming.once u use a glue and aggregate bonding agent you will not use pva again.:)

    Really? You should inform the manufacturers. Thistlebond has it's limitations. How do you get a neat joint if you are running into already skimmed work? If you have a leak later on the thistlebond will come away from a ceiling - like a gourd.

    How do i know this? After working in Germany and France (where a similiar product was being used) for about 15 years, you find out these things.

    You immediately turn a one day job into a two day job etc., so calling it rubbish is a little immature.


  • Registered Users, Registered Users 2 Posts: 477 ✭✭plasteritup


    pva works the same on every backround that its applied to does it?
    quality of finish can be greatly sacrificed when using pva as a bonding agent for skim.
    trust me mate if there is a leak in a ceiling that cause thistlebond to give,that ceiling is not being saved by a coat of pva,its coming down nyway.think about it,what does the water have to devour before it reaches the thistle.
    regarding patching into skimmed work with thistlebond,if you cant work that out,you wouldnt be doing any jobs with me,and im not telling ya.:)


  • Closed Accounts Posts: 2,876 ✭✭✭Spread


    pva works the same on every backround that its applied to does it?
    quality of finish can be greatly sacrificed when using pva as a bonding agent for skim.
    trust me mate if there is a leak in a ceiling that cause thistlebond to give,that ceiling is not being saved by a coat of pva,its coming down nyway.think about it,what does the water have to devour before it reaches the thistle.
    regarding patching into skimmed work with thistlebond,if you cant work that out,you wouldnt be doing any jobs with me,and im not telling ya.:)

    Yes. The first diluted coat stops suction and stabilises the background. The second coat gives the adhesion.
    quality of finish can be greatly sacrificed when using pva as a bonding agent for skim.
    Where are you getting this from? I haven't heard of them being sued for misadvertising.


    But you've got to follow the manufacturer's instructions. I've seen lots of plasterers just add water without measuring it out.


  • Registered Users, Registered Users 2 Posts: 477 ✭✭plasteritup


    pva/polybond is rubbish. and yes i am very immature,sometimes i run around the house naked cause my dog chases me to get at my bits,she loves them,its great fun.im nearly 30.:D:D:D:D


  • Advertisement
Advertisement