Advertisement
If you have a new account but are having problems posting or verifying your account, please email us on hello@boards.ie for help. Thanks :)
Hello all! Please ensure that you are posting a new thread or question in the appropriate forum. The Feedback forum is overwhelmed with questions that are having to be moved elsewhere. If you need help to verify your account contact hello@boards.ie

My lwb high roof transit camper van conversion

Options
  • 14-10-2010 12:39am
    #1
    Registered Users Posts: 105 ✭✭


    I bought my van in may or april can't remeber :) after driving it around all summer i decide i wanted a campervan
    The van i have is a Ford Transit lwb high roof 2.5di (it not a jumbo) in red well fade red. The van as 150,000 miles on the clock and the engine is 100% shame the same counld be said about the body
    What i have done to the van so far i have added side maker lights about 5 on each side extra brake and indicator lights above the back door work light on the roof a flashing beackon on the roof i have count a total of 16 lights that come on when i turn my lights i have an extra 6 lights to go on the front high beam and park in the spot all i need is a roof light bar extra a 7inch screen hooked up to a camera above the back doors the list goes on but here the van
    DSCF0001.jpg
    DSCF0002.jpg
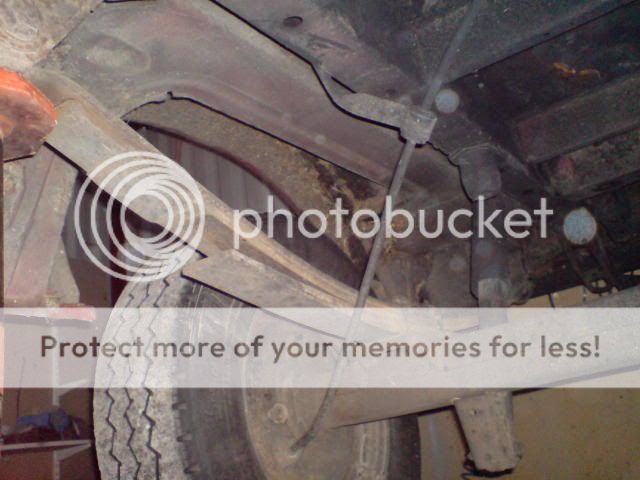
    My home made wheel arch :eek: i have a new one to go on but haven't got around to doing it yet
    DSCF0003.jpg
    DSCF0004.jpg
    My van from the back at night on the right
    DSC01681.jpg


Comments

  • Registered Users Posts: 105 ✭✭redcube


    This is what i have done so far i cut a hole in the roof for my skylight which i got for free i think it came of a bus or something
    you can see in the picture the wheel arch for the van
    DSC01719.jpg
    Me checking to make sure it fitted
    DSC01718.jpg
    From the inside looking nice so far
    DSC01720.jpg
    So far thats all i have done as i'm looking for two side windows if any one as windows for a transit van PM me thanks i after one for the sliding door and one for the back right and maybe one for the back doors


  • Registered Users Posts: 6,250 ✭✭✭Buford T Justice


    If you fancy the trip out of it, Call Dempseys in Ballina. They have a broken minibus, and they have (had when I was there) the full set of windows for the van. Minus the one I bought of course for behind the drivers door. If no-one else has taken them, then you should get both windows to suit both sides.

    The only difference between your van and mine really is that I have the extra couple of feet at the back of it with the extended body. You're roof should be the same height. In fairness, it really doesn't look too bad for its age considering the abuse that vans get. T-cut and elbow grease will sort that faded red right out

    What did you use to bond / seal the skylight?


  • Registered Users Posts: 105 ✭✭redcube


    I'm resparying the van as i don't like the red

    I used windscreen bonding adhesive on the sky light and then i put some self tapper in to the frame to hold it down and give it a better seal so far it as not leaked

    I'll ring that place in the morning and see what they have


  • Registered Users Posts: 105 ✭✭redcube


    This is my skylight from above i like the colour because when its raining outside it seem to be sunny inside
    DSC01732.jpg


  • Closed Accounts Posts: 1,927 ✭✭✭paddyp


    If you fancy the trip out of it, Call Dempseys in Ballina. They have a broken minibus, and they have (had when I was there) the full set of windows for the van. Minus the one I bought of course for behind the drivers door. If no-one else has taken them, then you should get both windows to suit both sides.


    Everytime I call dempseys I say WHAT? YOU WANT HOW MUCH? and then get it from germany for 1/4 of that price including delivery. Windows can be a pain with couriers though.


  • Advertisement
  • Registered Users Posts: 6,250 ✭✭✭Buford T Justice


    paddyp wrote: »
    Everytime I call dempseys I say WHAT? YOU WANT HOW MUCH? and then get it from germany for 1/4 of that price including delivery. Windows can be a pain with couriers though.

    Yeah, they wouldn't be the cheapest, but they always seem to have stuff. Bulky stuff like this is all I would get from a breakers. Can't remember how much they charged me for it now. Somewhere between €20 & €40 i think.


  • Registered Users Posts: 105 ✭✭redcube


    will caravan windows fit as i can get some with fly screen bulit in for free i started again to day and my first job was to weld the load area floor i have a few holes to patch but my welder stop working so i had to stop again


  • Closed Accounts Posts: 1,927 ✭✭✭paddyp


    redcube wrote: »
    will caravan windows fit as i can get some with fly screen bulit in for free i started again to day and my first job was to weld the load area floor i have a few holes to patch but my welder stop working so i had to stop again

    Part of the test for motorhomes thats being ironed out by the rsa will require the windows to have a mark on them just like car glass that indicated that in the event of breakages that they don't break into pieces lightly to cause harm.

    Caravans were never meant to carry passengers indeed its illegal to carry passengers in them so the glass will more than lightly not be suitable. There are exception some of the more expensive models use standard seitz windows. Most caravan windows I've seen break into nice sharp pieces that would have you in two in a crash.

    Check the windows for markings and theres another thread on here iwth some of the markings explained.


  • Registered Users Posts: 105 ✭✭redcube


    Ok so carvan windows are a no no or a yes if i can get the right ones the ones i am getting are out of a caravan from the 80s


  • Registered Users Posts: 6,250 ✭✭✭Buford T Justice


    redcube wrote: »
    Ok so carvan windows are a no no or a yes if i can get the right ones the ones i am getting are out of a caravan from the 80s

    They should be provided they have the required marks on them. Some older german ones have a roxio symbol, whereas the newer ones now have the current standard E mark on them, same as automotive glass.

    Check out this thread & this one for more info


  • Advertisement
  • Registered Users Posts: 105 ✭✭redcube


    Work on camper on hold i lost all my breaks again so i have oder alot of new parts from ebay for it all in at E100 alot cheaper then the scrap yard


  • Closed Accounts Posts: 1,927 ✭✭✭paddyp


    redcube wrote: »
    Work on camper on hold i lost all my breaks again so i have oder alot of new parts from ebay for it all in at E100 alot cheaper then the scrap yard

    Thank god for ebay, I still find I have to ring around before saying 'yeah right' and hanging up.


  • Registered Users Posts: 105 ✭✭redcube


    Well this are some of the bits I'm keeping from the caravan that me and a mate smashed up last Saturday
    DSC01759.jpg

    Well at long last the body work starts well one wheel arch as started with the help of my dad will get around to the other side and some point

    The home made wheel arch is going i will miss it anyone want to by it :lol:
    DSC01765.jpg
    DSC01763.jpg
    What it was like behind the home made wheel arch
    DSC01769.jpg
    DSC01771.jpg
    I got to play with the air chisel :twisted:
    DSC01776.jpg
    After a few seconds with the air chisel i had this
    DSC01779.jpg
    Cat making a break for it before the sparks start :lol:
    DSC01780.jpg
    Had to cut the wheel arch to fit
    DSC01775.jpg
    And more cutting
    DSC01785.jpg
    Wheel arch all weld up
    DSC01787.jpg
    Here my dad working on a merc 8) had to do some welding to the front his using a grinder and having a fag at the same time :roll:
    DSC01773.jpg
    My dads cortina his been rebuilding for years now :lol: on the right in gray
    DSC01761.jpg
    Its sitting this low :shock:
    DSC01762.jpg


  • Registered Users Posts: 105 ✭✭redcube


    A lot as happen since my last post and i mean a lot so sit back and enjoy
    My poor little van
    DSC01789.jpg
    Driver side filler mess
    DSC01788.jpg
    DSC01792.jpg
    Bad boy bonnet
    DSC01796.jpg
    Sheet metal cut and clamped in place for welding
    DSC01798.jpg
    All weld and filled with filler
    DSC01800.jpg
    Boat sides done grill back on
    DSC01808.jpg
    My dad doing the welding the mask is for show his the man who shuts his eyes and hopes he hits the spot
    DSC01803.jpg


  • Registered Users Posts: 105 ✭✭redcube


    Sliding door sill on and passage door sill done at long last just need a skim of filler and a lick of paint
    Ah my missing bolt
    DSC01820.jpg
    Safety man is on the job the mask is for show his a close the eyes type
    DSC01825.jpg
    a lick of paint to stop rust
    DSC01827.jpg
    And the passage sill welding or the a star being formed
    DSC01836.jpg
    Fix the air box good buy rope and now my power steering is not leaking any more and Put in the second battery tray
    DSC01826.jpg
    Had a pock around under neat and I'm shocked to say it was solid as a rock under there so stone chip it Wednesday
    Only picture i could get photobucket won't upload the any more can you spot something missing in the photo
    DSC01830.jpg


  • Registered Users Posts: 105 ✭✭redcube


    I put this back on today had it in the van hanging around so i put it back where it belongs makes the van cleaner looking
    DSC01844.jpg
    Started the camper van parts today as my dad said i had the BEEP of welding and bang the van
    So did this well empty this first
    DSC01840.jpg
    I did this a while back wasn't happy with it so is came down sorry to my mate who helped me put it up
    DSC01847.jpg
    Made a frame to go around the sky light
    DSC01848.jpg
    and then started to make a frame on the side got this far and my dad had to go fix his car so that ended the days work well evening as he spent all day fixing the welder and starting into space
    DSC01849.jpg
    Cat found some where to sleep lazy cat still there
    DSC01845.jpg[/quote]


  • Registered Users Posts: 105 ✭✭redcube


    Made up all my sides and there well stuck on went though 2 tubes of a thing that's like tiger seal :shock: my dad said better to over do it then have it fall upon you in your sleep
    DSC01851.jpg
    DSC01852.jpg
    Two parts of the roof done this stands are handy there for holding up plaster bored
    DSC01854.jpg
    Making the frames
    DSC01853.jpg
    This was a hard bit to make as its at the back of the van by the doors note the extra two bits in the middle there for the air vent I'm making to go on the right
    DSC01855-1.jpg
    This is where it sits
    DSC01857.jpg
    All up and waiting for the glue to set
    DSC01856.jpg


  • Registered Users Posts: 105 ✭✭redcube


    i ran most of my 240V and 12V wiring the blue wiring is 240v fire proof wiring The black is 12V
    The two plugs wiring on show here
    DSC01865.jpg
    a big ball of wiring for the fuse box's
    DSC01872.jpg
    the 240V lights wiring
    DSC01873.jpg
    My new bulk head
    DSC01870.jpg
    This is a part of the caravan that me and mate smashed to bits it my vent at the back to allow fresh air into the van parts of the caravan will live on :
    DSC01867.jpg


  • Registered Users Posts: 105 ✭✭redcube


    The hole of no return
    DSC01875.jpg
    Which turned into this
    DSC01876.jpg
    Inside all boxed in i have no pictures of the power point outside I'll take in in the morning :?
    DSC01879.jpg
    By by old floor
    DSC01877.jpg
    Drying started or a lager room for getting rid of things :lol:
    DSC01880.jpg
    Insulation need some of that
    DSC01883.jpg
    In the walls
    DSC01884.jpg
    One working and are health and safe officer keeping an eye on the drills
    DSC01885.jpg
    Sliding door step
    DSC01887.jpg
    Keeping the insulation in place with a gas bottle almost drill a hole in that
    DSC01888.jpg
    Roof up was a right pain in the back side
    DSC01893.jpg
    Watch out below
    DSC01892.jpg
    Frame work up and all done
    DSC01895.jpg
    DSC01894.jpg
    My cooker i think i may have over made the frame
    DSC01896.jpg


  • Registered Users Posts: 105 ✭✭redcube


    i did this and then it clicked i forgot the doors
    DSC01910.jpg
    Now this is a drill had to buy it to put holes into my mums house the house is an old irish cottage with the stone walls
    DSC01911.jpg
    I feel like a mad man with this screws i have tons of them in the car i use the car as a shed
    DSC01912.jpg
    Made my 3rd bed no pictures of it fold up out of the way but you get the idea
    DSC01916.jpg
    Back up battery going to use this as my second battery till i can find a cheap one
    DSC01913.jpg

    And that's as far as i have got


  • Advertisement
  • Registered Users Posts: 20 hardibuck


    Savage job you're doin there Redcube!! Was thinking about doin the same myself but have concerns about the campervan classification. What do you reckon your VRT costs will be? Keep the updates posted, looking forward to seeing the project progress!


  • Registered Users Posts: 105 ✭✭redcube


    hardibuck wrote: »
    Savage job you're doin there Redcube!! Was thinking about doin the same myself but have concerns about the campervan classification. What do you reckon your VRT costs will be? Keep the updates posted, looking forward to seeing the project progress!

    I have no clue about the VRT cost as i can't find any info on it but i did this for the fun of it in the middle of winter :rolleyes: won't do that again

    Right time for an update i have the bluck of the camper done just gas water and electrics to do and then get it cleared but for now i have been using went to Co. Kerry before Christmas in the snow and ice
    A few from the front
    DSC01952.jpg
    And then the back
    DSC01973.jpg
    The table
    DSC01957.jpg
    The beds made
    DSC01965.jpg
    The free worktops
    DSC01990.jpg
    Me thinking
    DSC01961.jpg

    Camping in Co. Kerry
    DSC01977.jpg

    Making the camper look eviler
    DSC02024.jpg

    My new rims 16" and there wide they fill the rear arch's nicely
    DSC02036.jpg

    I also add electric windows to the van

    Here my van at night the lights are on dip and the beacon is on but with high beam on and the beacon of there is 23 lights on the van and no i'm not afried of the dark the dark is afried of me
    DSC02041.jpg


  • Closed Accounts Posts: 1,927 ✭✭✭paddyp


    redcube wrote: »
    DSC02041.jpg

    Breaker breaker Red Rider you'd be needin' a CB to go with them thar lights 10-4


  • Registered Users Posts: 105 ✭✭redcube


    I had a CB but i forgot about the arile and took it clean of must fix that going to get 6 more lights for the front 4 spot on the roof and 2 on the A bar and i will move the yellow fog lights to the edge of the bumper and i have 3 red or yellow lights still so i may add them to the back under the bumper oh and before i forget i'm making up a set of rock sliders for the van and will be adding 6 more light so that should give me 38 light on high beam :D at some point i will stop with all the lights


Advertisement