Advertisement
If you have a new account but are having problems posting or verifying your account, please email us on hello@boards.ie for help. Thanks :)
Hello all! Please ensure that you are posting a new thread or question in the appropriate forum. The Feedback forum is overwhelmed with questions that are having to be moved elsewhere. If you need help to verify your account contact hello@boards.ie
Hi there,
There is an issue with role permissions that is being worked on at the moment.
If you are having trouble with access or permissions on regional forums please post here to get access: https://www.boards.ie/discussion/2058365403/you-do-not-have-permission-for-that#latest

Creating a Copyright Watermark

  • 25-08-2010 1:43pm
    #1
    Closed Accounts Posts: 2,131 ✭✭✭


    In the spirit of giving back to the community. Since every now and again we get people coming on here asking how to completely ruin an image by putting a watermark on it. Especially useful for preventing a third party from using it without permission, Ie printing it or using it on the web claiming it to be their own etc.....

    I've put together a step by step and screen shots for anyone who is interested.

    Step 1.
    Create a new file, make it as big or as small as you like. Doesn't really matter. If in doubt go large. Copy the settings you see below.

    125457.jpg

    Step 2.
    You can skip to Step 4 if you like. This is just to show how the watermark will work just as well on bright or dark images.

    Create 3 layers. Press shift+f5 to fill one with black, another with white and the the other with 50% gray.

    125458.jpg

    Step 3.
    Mask out each layer as shown below.
    125459.jpg

    Step 4.
    Create a new text layer on top and add your watermark logo. The text should be white.
    125460.jpg

    Step 5.
    Open up the FX panel of the text layer and set the Blend if/This layer to anything below 250.
    125461.jpg


Comments

  • Closed Accounts Posts: 2,131 ✭✭✭oshead


    Step 6.
    Then choose bevel and embose and copy the settings shown below.
    125463.jpg

    Step 7.
    Duplicate the top text layer and open up the FX panel for that. Change the options in the shading to the settings below.
    125464.jpg

    Step 8.
    The result is an embossed watermark logo that can be seen in bright or dark images.
    125465.jpg

    Step 9.
    Hide the bottom three layers and save off the file with a .png extension.
    125466.jpg

    Step 10.
    All thats need now is to add it to the image you want to protect/ruin. :) You could download Adobe Watermark to automate this process.
    125467.jpg

    No doubt someone will come on here declaring how all this could be done using some free app from the interweb. But sure isn't that the case for everything these days. :)


  • Registered Users, Registered Users 2 Posts: 716 ✭✭✭squareballoon


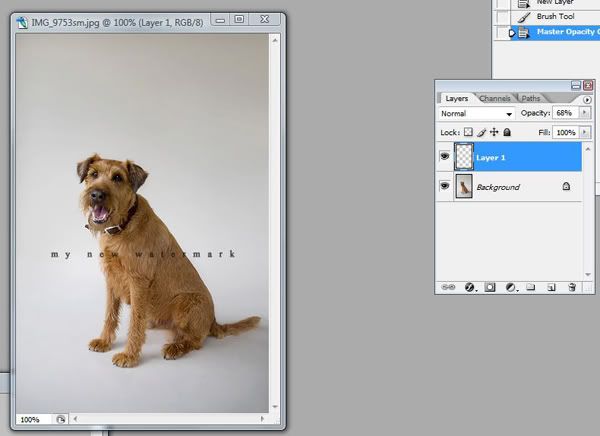
    OR If you wanted one as a brush that you can then put on as any colour or transparency.....
    make it in photoshop in the size you want it to appear in your usual web size images. crop it
    Capture-3.jpg
    go to Edit/Define Brush Preset and save it with the name you want. It then appears immediately as the last brush in your brush set and you can place it anywhere on your image. Usually I put mine over the face if I'm putting up proofs before they're bought or just somewhere awkward.
    Capture2-1.jpg


Advertisement