Advertisement
If you have a new account but are having problems posting or verifying your account, please email us on hello@boards.ie for help. Thanks :)
Hello all! Please ensure that you are posting a new thread or question in the appropriate forum. The Feedback forum is overwhelmed with questions that are having to be moved elsewhere. If you need help to verify your account contact hello@boards.ie
Please note that it is not permitted to have referral links posted in your signature. Keep these links contained in the appropriate forum. Thank you.

https://www.boards.ie/discussion/2055940817/signature-rules
Hi there,
There is an issue with role permissions that is being worked on at the moment.
If you are having trouble with access or permissions on regional forums please post here to get access: https://www.boards.ie/discussion/2058365403/you-do-not-have-permission-for-that#latest

Flaking alloy paint

  • 19-03-2010 6:06pm
    #1
    Registered Users, Registered Users 2 Posts: 4,565 ✭✭✭


    Hi, have had my car about a year now and just noticed some of the paint fromt front drivers alloy has starting flaking/peeling off. It gets worse with every car wash now.

    The other alloys are not as bad but i fear it may start on those too. This must be some sort of corrosion or something. Don't have a picture at the moment but its a much lighter silver underneath, im guessing its another layer.

    I was wondering if there's anyway i can try and touch this up myself. I suppose i would need to do some sanding and respraying. Want to be pretty preparted before attempting it. Do you have any suggestions about what products i would need to go about this.

    Time for a trip to halfords i guess. Don't want to get them done professionally as would cost way too much and the car wouldn't be worth it.

    Will try post a picture later.

    Appreciate any advise:)


Comments

  • Registered Users, Registered Users 2 Posts: 12,683 ✭✭✭✭Owen


    Alloys are easy enough to paint, but it's all the nooks and crannies that'll drive you insane. The steps you need really are as follows :

    Use 180 grit paper to remove all the existing paint on the surface.
    Then 400 to smooth all that out.
    If you've kerbing, use filler to replace the missing material, then sand to shape.
    Use a high build etch primer on the metal surface.
    Let it dry, then more primer.
    Then sand the primer to a smooth finish with 800 wet&dry and plenty of water.
    Then paint (Not sure how you're doing this, rattle can, or spray gun).
    After the paint has dried, or you've dried it (Depending on the above), apply the first coat of lacquer.
    Take the time it needs to dry, get 2/3 of that, and when that time approaches, apply the next coat.
    Repeat the step above a few times.
    Leave to stand overnight so the lacquer can fully harden.


  • Registered Users, Registered Users 2 Posts: 4,565 ✭✭✭jaffa20


    Brill, that's for that paintdoctor. I was thinking of just buying the spray cans in halfords. Hoping these will be ok unless you have any other suggestions. It "sounds" simple. Just a lot of waiting around and layers to go on.


  • Registered Users, Registered Users 2 Posts: 12,683 ✭✭✭✭Owen


    The only problem with the spray can in Halfords is that they make them themselves. Which means no two are the same, because of the half trained klutz behind the mixing. So if you're doing more than one wheel, they may not end up the same colour.


  • Registered Users, Registered Users 2 Posts: 4,565 ✭✭✭jaffa20


    The only problem with the spray can in Halfords is that they make them themselves. Which means no two are the same, because of the half trained klutz behind the mixing. So if you're doing more than one wheel, they may not end up the same colour.

    Damn, that's a problem. I was thinking of doing it on one alloy for now to see how it would turn out. If they weren't too far off, i wouldn't be too bothered but if it's really obvious, i would need to do all 4. Anywhere i would be able to get a close match to my own coloured alloy?


  • Registered Users, Registered Users 2 Posts: 12,683 ✭✭✭✭Owen


    What type of car do you have, and are the alloys original manufacturers equipment?

    A good motor factors will be able to mix a batch of paint in one go and put it in aerosol form. That way you're guaranteed a match between cans at least.


  • Advertisement
  • Registered Users, Registered Users 2 Posts: 4,565 ✭✭✭jaffa20


    What type of car do you have, and are the alloys original manufacturers equipment?

    A good motor factors will be able to mix a batch of paint in one go and put it in aerosol form. That way you're guaranteed a match between cans at least.

    It's an audi a3. Doesn't seem to be any colour code for alloys in manual. Just the colour code lz5l for the paint on car. Can't believe there isn't event a colour match between the same cans for sale in halfords. Maybe i could use another brand other than halfords so at least i'd be sure it would match on each alloy after i apply it.


  • Registered Users, Registered Users 2 Posts: 12,683 ✭✭✭✭Owen


    Audi has 3 wheel colours.

    LZ17 Avis Silver
    L8Z8 Brilliant Silver
    LZ7J Grey

    Hope that helps, but if you go to a good motor factors with those colours instead of Halfords, they'll be able to bring out colour flecks (Pieces of paper with the paint on them) to identify which one of the three you have, and mix the paint accordingly.


  • Registered Users, Registered Users 2 Posts: 4,565 ✭✭✭jaffa20


    Audi has 3 wheel colours.

    LZ17 Avis Silver
    L8Z8 Brilliant Silver
    LZ7J Grey

    Hope that helps, but if you go to a good motor factors with those colours instead of Halfords, they'll be able to bring out colour flecks (Pieces of paper with the paint on them) to identify which one of the three you have, and mix the paint accordingly.

    Brilliant, that's great. I'll deffo go get it mixed as wouldn't be that much more expensive i'd say and it avoids having to give halfords money for dodgy mixes:) Thanks for all your help.


  • Registered Users, Registered Users 2 Posts: 12,683 ✭✭✭✭Owen


    No prob. Better to get the right paint than sit there looking at a wheel painted half and half. Let us know how you get on!


  • Registered Users, Registered Users 2 Posts: 12,683 ✭✭✭✭Owen


    FAO Gunth - you PM'd me with wheel questions, but I can't reply as you have PMs disabled


  • Advertisement
  • Registered Users, Registered Users 2 Posts: 173 ✭✭Gunth


    FAO Gunth - you PM'd me with wheel questions, but I can't reply as you have PMs disabled

    Hi PaintDoctor, sorry about that, you should be able to PM me now.


  • Registered Users, Registered Users 2 Posts: 19,885 ✭✭✭✭MetzgerMeister


    OP - some great points from Paint Doctor. I will however add a few more since I've done the same thing to 2 sets of alloys:

    If you're using aerosol paint, you might have to use a tack cloth after the paint has dried. I found the after painting, for some reason a lot of air bubbles appeared giving the paint a rough texture. I used a tack cloth to smoothen the paint. Only do this when the paint has completely dried and do it between coats.

    These air bubbles also give lacquer a very dull and useless looking/feeling finish. make sure you get the paint as smooth and shiny as possible.

    If you're only doing the face of the alloys, mask of the inner as best you can. There's nothing worse than overspray. I washed the shtie out of the alloys after sanding so the primer and paint would adhere and also so masking tape would stick well.

    You should use paint which is specifically designed for alloy wheels as it is tougher and less likely to chip after the job is done. It also holds up better when being washed and against brake dust etc.

    A bit of heat wouldn't hurt either in order to help the paint cure.

    Best of luck!

    Paint Doctor - Is it possible to add a chemical to the paint while mixing and before it's put into the aerosol can so it hardens and is tougher when dried?


  • Registered Users, Registered Users 2 Posts: 12,683 ✭✭✭✭Owen


    Paint Doctor - Is it possible to add a chemical to the paint while mixing and before it's put into the aerosol can so it hardens and is tougher when dried?

    Not in the paint itself, but certainly in the lacquer. HB Body 495 lacquer and 727 hardener are a great combination.


  • Registered Users, Registered Users 2 Posts: 19,885 ✭✭✭✭MetzgerMeister


    Ah right. Cheers!


  • Registered Users, Registered Users 2 Posts: 4,565 ✭✭✭jaffa20


    Ok, so i bought some sandpaper at the weekend and got started. The sandpaper was not working out too well and my arm is in agony as i type. lol

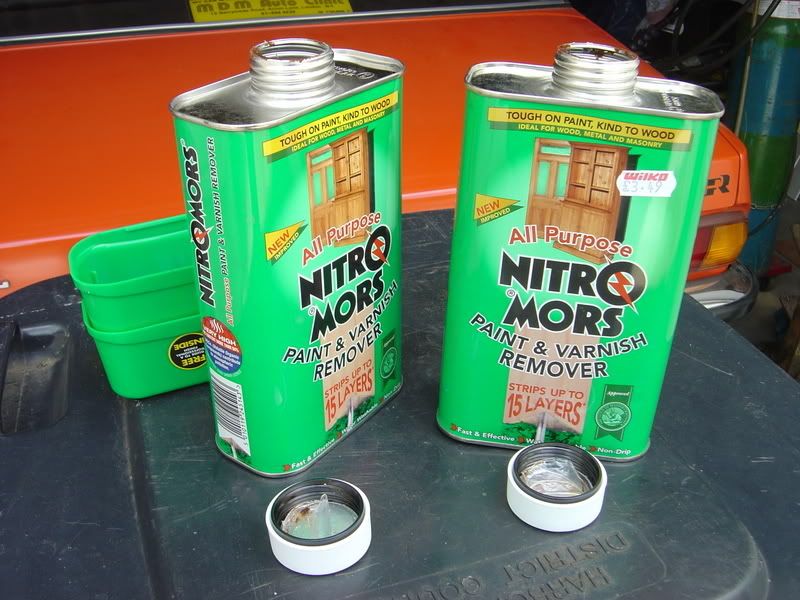
    So today i picked up some nitromors and gave it ago on the parts where the paint remained. It easily removed everything in an hour. I was amazed and relieved. Now i'm down to the bare aluminimum and i must say it looks really well as it is. My spare alloy which is on the car atm is the same.

    I'm wondering is there actually any need to spray primer, paint, lacquer on them at all if they will look as well like this. Is it possible to simply spray with a coat of lacquer and leave as is or will they deteriorate much more quickly if i don't paint them?

    Any advise much appreciated.:)


  • Registered Users, Registered Users 2 Posts: 19,885 ✭✭✭✭MetzgerMeister


    jaffa - lacquer itself chips very easily. If the bare metal is left open to the elements, it will either cause very bad corrosion or rust. Although I don't think aluminium rusts. I am open to correction on that.

    You'd be much better off to spray them.


  • Registered Users, Registered Users 2 Posts: 4,565 ✭✭✭jaffa20


    Thanks, i ended up going for all the Simoniz products just out of laziness of trying to get a paint match. I'm going to be doing them all eventually anyway.

    I've done one now already and i'm really happy with the results. The shade of silver is slightly darker than i had hoped it would be but i'm glad that i've gotten rid of all the flaking.

    I'll post a picture of before and after tomorrow. Just have to get some dust caps now and start on the other three :)


  • Registered Users, Registered Users 2 Posts: 19,885 ✭✭✭✭MetzgerMeister


    I hope the other 3 turn out as good! Best of luck :D


  • Registered Users, Registered Users 2 Posts: 1,048 ✭✭✭deaglan169


    id be interested to see the results as my own alloys need the same doing but i have small chrome nuts embeded into the design of the alloys which are flacking off i think i would probably just paint these by hands to black perhaps


  • Registered Users, Registered Users 2 Posts: 4,565 ✭✭✭jaffa20


    Okay, don't have it outside yet cos alloying the paint to fully harden before i put it on the car. Here is my first attempt with before and after pictures.

    Not perfect as there are a few bits uneven but hopefully will do better next time:)


  • Advertisement
  • Registered Users, Registered Users 2 Posts: 4,565 ✭✭✭jaffa20


    And more...


  • Registered Users, Registered Users 2 Posts: 8,720 ✭✭✭Hal1


    Good job on those wheels Jaffa20. I'd say your arms were sore after all that or did you cheat? :D


  • Registered Users, Registered Users 2 Posts: 4,565 ✭✭✭jaffa20


    Hal1 wrote: »
    Good job on those wheels Jaffa20. I'd say your arms were sore after all that or did you cheat? :D

    My new best friend :D

    twotoplessstrippers1.jpg


  • Registered Users, Registered Users 2 Posts: 8,720 ✭✭✭Hal1


    Nice :D.


  • Registered Users, Registered Users 2 Posts: 1,048 ✭✭✭deaglan169


    wow great work nice job


  • Registered Users, Registered Users 2 Posts: 19,885 ✭✭✭✭MetzgerMeister


    Excellent job jaffa. One thing though, IMO I think you should have sanded them better around the nut holes. As far as I can see there's lines from the old chipped paint. This can lead to it chipping in that area very easily!

    Sorry to be negative but it does happen :(


  • Registered Users, Registered Users 2 Posts: 4,565 ✭✭✭jaffa20


    Hi guys, just thought i'd update you with a few pics of my alloys now they are done. I actually ended up using wurth silver alloy paint in the end on all four and it was great stuff. Nice and bright. The simoniz stuff was horrible and dull in the daylight. Decided to strip the paint of the centre caps and leave them with the chrome shine and got some nut caps to match them.

    Here is some of the results. I got better at it as i went along and i'd say if i was to do all four again now, it would be a lot better. A lot of patience involved and can be time consuming but worth it considering how the looked beforehand. Thanks for all the advise.

    http://yfrog.com/fv05052010143j


  • Registered Users, Registered Users 2 Posts: 1,258 ✭✭✭sogood


    jaffa20 wrote: »
    Hi, have had my car about a year now and just noticed some of the paint fromt front drivers alloy has starting flaking/peeling off. It gets worse with every car wash now.

    The other alloys are not as bad but i fear it may start on those too. This must be some sort of corrosion or something. Don't have a picture at the moment but its a much lighter silver underneath, im guessing its another layer.

    I was wondering if there's anyway i can try and touch this up myself. I suppose i would need to do some sanding and respraying. Want to be pretty preparted before attempting it. Do you have any suggestions about what products i would need to go about this.

    Time for a trip to halfords i guess. Don't want to get them done professionally as would cost way too much and the car wouldn't be worth it.

    Will try post a picture later.

    Appreciate any advise:)

    I'm in the process of refurbing my alloys and preety much as suggested by another poster, it takes time and patience, but worth it for the satisfaction and savings. Some pics show the results and since applying laquer, the end result is so much better.


  • Registered Users, Registered Users 2 Posts: 1,258 ✭✭✭sogood


    Another pic, with the first coat of paint applied. No pics yet of finished product, complete with several coats of laquer, but looking pretty good. long live DIY !!


  • Advertisement
Advertisement