Advertisement
If you have a new account but are having problems posting or verifying your account, please email us on hello@boards.ie for help. Thanks :)
Hello all! Please ensure that you are posting a new thread or question in the appropriate forum. The Feedback forum is overwhelmed with questions that are having to be moved elsewhere. If you need help to verify your account contact hello@boards.ie
Please note that it is not permitted to have referral links posted in your signature. Keep these links contained in the appropriate forum. Thank you.

https://www.boards.ie/discussion/2055940817/signature-rules
Hi there,
There is an issue with role permissions that is being worked on at the moment.
If you are having trouble with access or permissions on regional forums please post here to get access: https://www.boards.ie/discussion/2058365403/you-do-not-have-permission-for-that#latest

How To Replace Anti-Roll Bar Links

  • 23-12-2009 7:34pm
    #1
    Closed Accounts Posts: 2,479 ✭✭✭


    Last Friday night i've been hearing knocking from the back of the car, so it was about time to replace the drop links on the roll bar, i did the front ones about 30,000 miles ago so i went and got the complete four corners came to€60.

    You will need:

    A Jack
    A Stand
    Torx Set
    Spanners 10mm-21mm (Recomended)
    Angle Grinder (I did anyway)
    Pry Bar

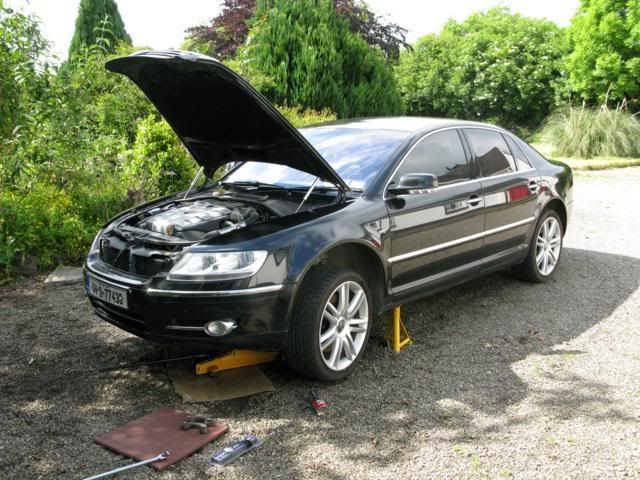
    Step 1 Jack up the car and support it with the jack and the stand
    DSC00625.jpg
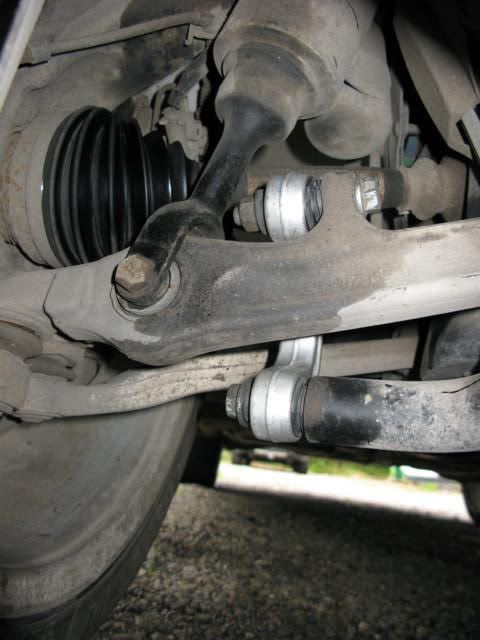
    Hub and rear suspension assembly
    DSC00626.jpg
    Anti roll bar drop link
    DSC00627.jpg

    Step 2 Loosen off the droplink, insert the torx into the eye of the thread and loosen off the 14mm nut with a spanner

    DSC00629.jpg
    Old drop link vs the new one
    DSC00631-1.jpg
    This is the 1st one i took off, as ya can see the gaiter is burst and weaping grease.
    DSC00632-1.jpg

    Step 3 Refitting the drop link, screw the bottom of the wishbone in hand tight, then with the pry bar jemmy the roll bar to meet the top of the anti roll bar link, and then once its hand tight on both ends tighten upDSC00633.jpg
    Best place to pry off, the subframe dont try and pry off sumps or petrol tanks!
    DSC00634.jpg

    Tighten up and put the wheel back on and your done!

    However in my case its the actuall bushings on the roll bar, didnt need to test that they were past it visualls alone tell me the've had it.

    DSC00636.jpg
    Shall be done before the NCT test in April.


Comments

  • Registered Users, Registered Users 2 Posts: 73,520 ✭✭✭✭colm_mcm


    here are my pics of doing the the front ones (on an FTO)


    Jacked up the front of the car and sat it on axle stands.

    Removed the front wheel

    Sprayed the droplink and bolts on bottom of the suspension strut with WD40

    Removing the droplinks

    Type 1, allen key & spanner
    removedroplink.jpg
    once WD40 has soaked in, hold the threaded section still with the allen key, and turn the nut counter-clockwise to remove the droplink. supporting and adjusting the wishbone with a jack will make your life easier.

    Type 2, 2 spanners
    droplink.jpg
    Using as thick a spanner as possible, hold the threaded section in place using a 14mm spanner near the joint, use another 14mm spanner to remove the nut and then the droplink.
    droplinkoff.jpg


    Cutting off the old droplinks is probably quicker if they're old and rusted.

    PS love the Celica wheels on the Carina E


  • Closed Accounts Posts: 2,479 ✭✭✭Volvoboy


    Hmm does look a bit rusty on that FTO, one of the bars on the front was rung, so out with Mr Angle Grinder, bit ropey taking them off with CV joints and Brake lines within milimeters.


  • Registered Users, Registered Users 2 Posts: 73,520 ✭✭✭✭colm_mcm


    Cos I fitted lowering springs.


    Full guide here:
    http://www.fto-ireland.com/forum/viewtopic.php?f=11&t=9819


  • Registered Users, Registered Users 2 Posts: 8,718 ✭✭✭Matt Simis


    Its amazing how much of effect on handling and noise these little guys have. Here is a guide I made ages back on replacing the Phaeton Drop Links (aka Sway Bar end links):
    http://forums.vwvortex.com/zerothread?id=4431966&postid=62432693

    Should be suitable as a guide for its sister cars, the A8 and Bentley Flying Spur.. :cool:

    IMG_0502_640x480.jpgIMG_0499_640x480.jpg
    th_IMG_0497_640x480.jpg


  • Registered Users, Registered Users 2 Posts: 6,352 ✭✭✭alias no.9


    Volvoboy wrote: »
    Step 3 Refitting the drop link, screw the bottom of the wishbone in hand tight, then with the pry bar jemmy the roll bar to meet the top of the anti roll bar link, and then once its hand tight on both ends tighten up.

    It's not clear from your post but any time I've had to undo and refit drop links I find that having both sides on axel stands makes refitting much easier. When you have one side of the axel on the ground and the other on an axel stand, there's a torque on the anti-roll bar which makes it a b!tch to get the bolts to line up.


  • Advertisement
  • Registered Users, Registered Users 2 Posts: 1,380 ✭✭✭O.A.P


    Thanks for that Volvoboy I'v been putting off replacing the drop links but there in trouble now :D


  • Registered Users, Registered Users 2 Posts: 3,423 ✭✭✭Avns1s


    Volvoboy, I would have said that your rattle was coming from the bushings rather than the droplinks. In my experience, the droplinks on toyotas generally outlive the bushings by a fair margin and your bushing in the pic is well gone. They are cheap, last ones I replaces were something like €6 each trade price.

    A great informative post though, well done.


  • Closed Accounts Posts: 7,686 ✭✭✭JHMEG


    Good post, well done. Altho your bushes aren't worn, they're gone.:eek:

    A couple of things worth noting is a lot of cars don't have rear ARBs, and therefore won't ever have this problem (some don't even have front ARBs!)... and also that Toyotas are known for having worn drop links/bushes.


  • Registered Users, Registered Users 2 Posts: 2,025 ✭✭✭Row


    Great How to Guides lads...:)


  • Registered Users, Registered Users 2 Posts: 2,567 ✭✭✭daveharnett


    Fair play lads. Love to see useful threads like this on motors.

    Wonder if the admins would consider a sticky with links to the various DIY how-to threads? Mind you, moving this stuff to the proposed motors technical advice forum might make more sense.


  • Advertisement
  • Registered Users, Registered Users 2 Posts: 1,048 ✭✭✭deaglan169


    great guide have this job to do on my leon shortly but as JHMEG said its my bushings that are gone not the arbs gonna be a total pain as subframe needs dropping i think rear are gone also but i havent even looked how to do them:confused:


  • Registered Users, Registered Users 2 Posts: 2,115 ✭✭✭Pdfile


    colm_mcm wrote: »
    long post


    i pay a polish lad 10 euro an hour to do whatever i need...


    why would i bother doing it myself at them rates ?


  • Registered Users, Registered Users 2 Posts: 73,520 ✭✭✭✭colm_mcm


    Because you'll never learn anything if you get Polish people to do everything for you.


  • Registered Users, Registered Users 2 Posts: 51 ✭✭GubMan


    I've a rear link gone on a mazda 626, went before xmas, meant to get to it but didn't get around to it. When the frost and ice was bad it made a real banging noise if I as much as went over a slight bump. Now its milder, its back to just a knocking sound. Have i done damage? Its only gone maybe 10 miles since xmas.....


  • Closed Accounts Posts: 752 ✭✭✭JimmyCrackCorn!


    Thanks the kind of thread that should be in a motors section.


Advertisement